
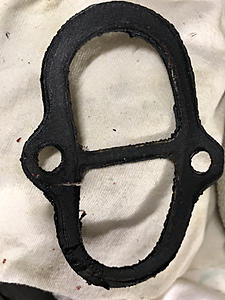
Water pump housing seal failed


Water pump housing seal failed
Not sure what I did wrong here.


I've put about 3,500 miles on the new build. When I assembled the water pump housing and water pump I coated the seals with RTV to make sure they'd seal up tight. I remembered the two washers that go on the other studs. I torqued everything to spec. There were no leaks until the 3rd session of my 2nd track day, probably the fastest session thus far, but it wasn't the session that caused the seal to blow out, it occurred during the cool down lap at some point and as soon as I pulled into the pits the low coolant alarm went off. Temps were at the usual spot on the gauge the entire afternoon.
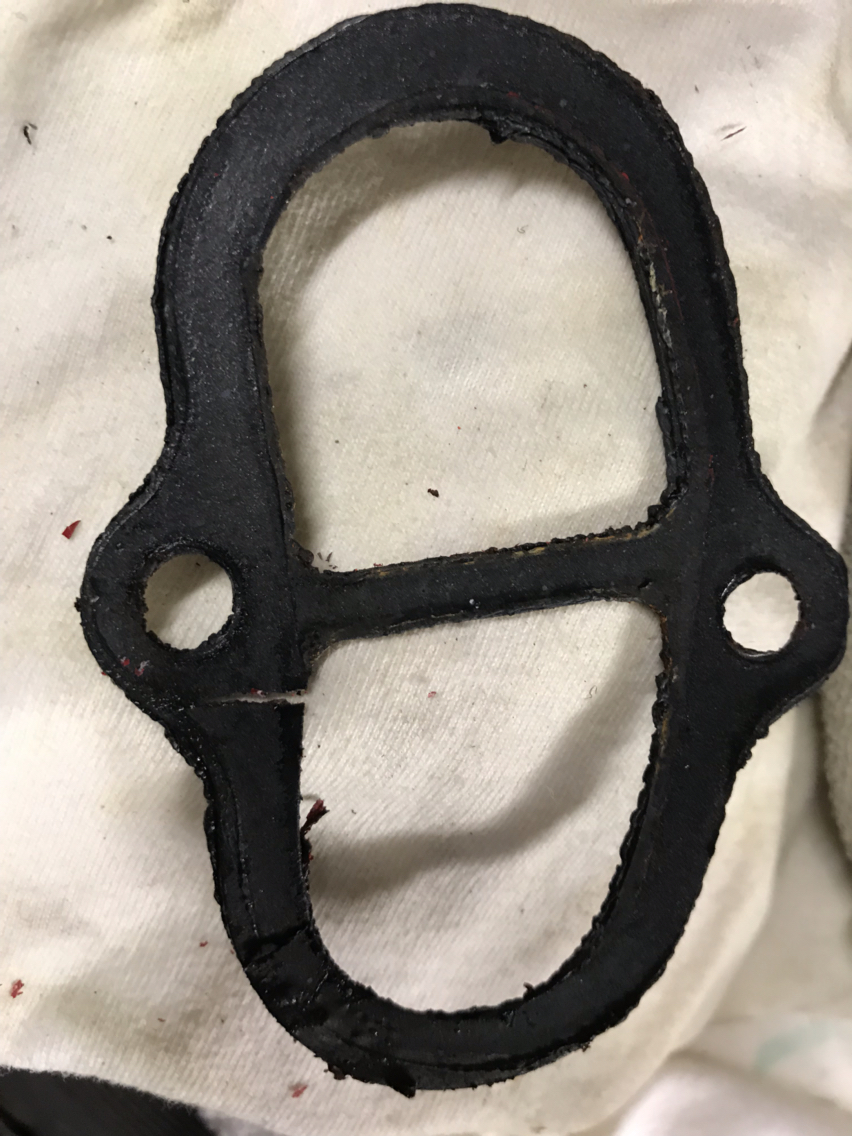
I just ordered a new seal but I want to know whether I should skip the RTV or whether I might have over/under torqued the bolts or something.
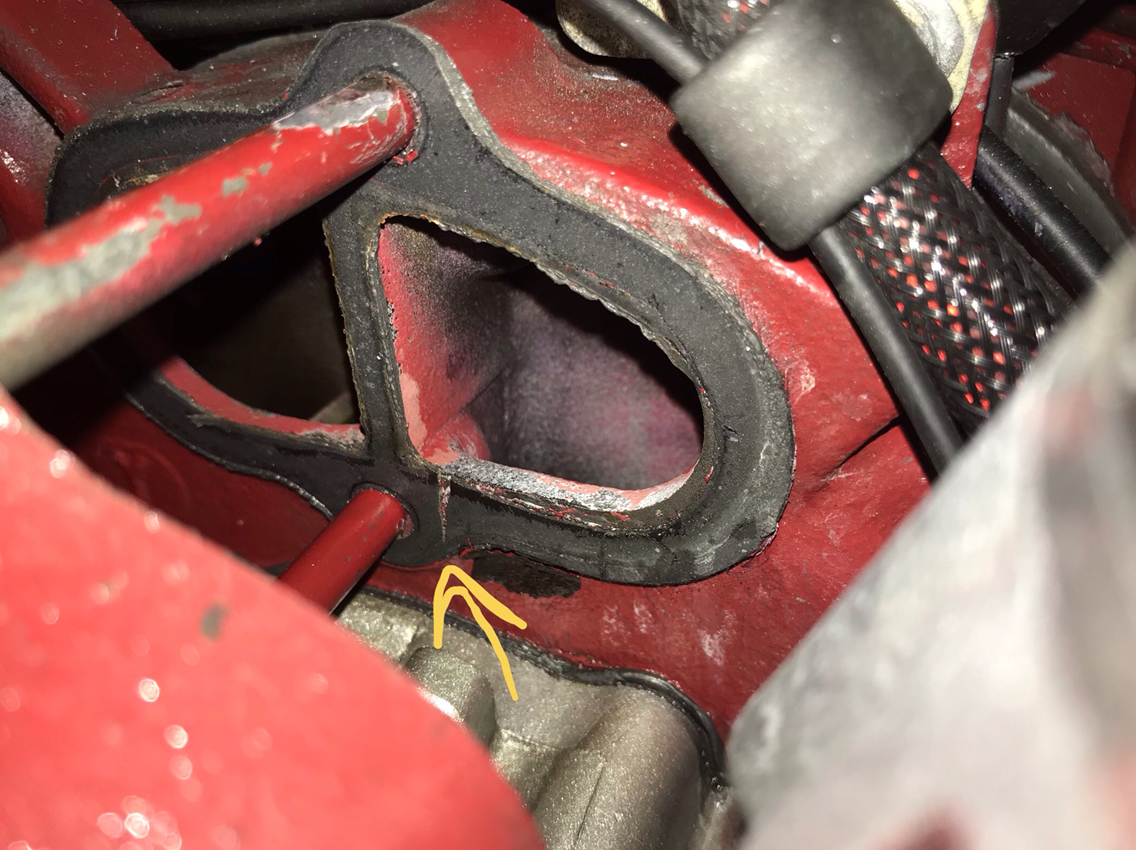
I've put about 3,500 miles on the new build. When I assembled the water pump housing and water pump I coated the seals with RTV to make sure they'd seal up tight. I remembered the two washers that go on the other studs. I torqued everything to spec. There were no leaks until the 3rd session of my 2nd track day, probably the fastest session thus far, but it wasn't the session that caused the seal to blow out, it occurred during the cool down lap at some point and as soon as I pulled into the pits the low coolant alarm went off. Temps were at the usual spot on the gauge the entire afternoon.
I just ordered a new seal but I want to know whether I should skip the RTV or whether I might have over/under torqued the bolts or something.

ancient wizard...
Joined: Sep 2014
Posts: 2,335
Likes: 262
From: Maryland
Skip the RTV,what are you torquing fasteners to? Try 3M weatherstrip adhesive,aka "Gorilla Snot". A little harder to clean up than RTV,nothing a single edge razor blade can't deal with. Apply in a zig zag pattern across sealing surface,just enough to show some yellow color.
You will find as you zig zag the opening of the tube touching sealing surface at a slight angle,the snottiness will cause the sealant to fill in between zigs/zags like a membrane that covers entire sealing surface. Less is more here,more just makes a mess.
Maybe practice on something not important to get a feel for it. Use acetone or carb cleaner on a rag to remove all traces of silicone to allow adhesive to take hold. May be easier for you to apply to gasket 1st then place gasket onto front housing and press in place to hold it there and repeat process for front side of gasket before sliding water pump housing in place.
I would replace both water pump gaskets even though only one failed.

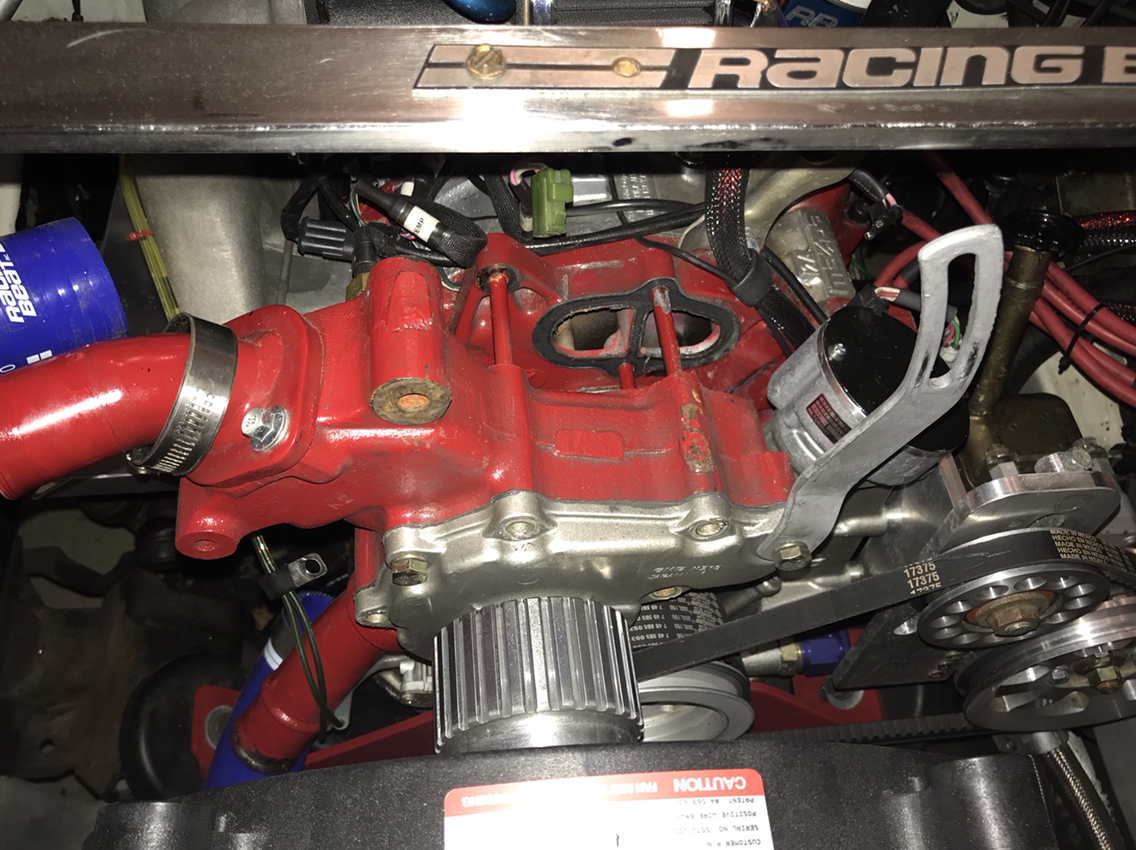
That cogged belt ( I see the cog on the waterpump there in the pic) can put a lot of stress on the housing if its too tight. Do you have a supercharger? Why have a cogged belt?


Joined: Mar 2001
Posts: 31,857
Likes: 3,243
From: https://www2.mazda.com/en/100th/
also make sure the little washers are in place over the other 2 studs, N326-15-168 is the part number, or you can use old gasket.
i use a little silicon on that gasket, and then i do torque it to spec. i use the tight end of spec, and then round down, just because i'm not sure how accurate the torque wrench is, and Mazda is converting nm to lbs/ft and its approximate
i use a little silicon on that gasket, and then i do torque it to spec. i use the tight end of spec, and then round down, just because i'm not sure how accurate the torque wrench is, and Mazda is converting nm to lbs/ft and its approximate
You might also try making the stud holes a little bigger upward in the gasket. I find these are a little tight and get stressed. I like making my own out of a little thicker material.

Thread
Thread Starter
Forum
Replies
Last Post
alwayssideways
2nd Generation Specific (1986-1992)
4
Jan 29, 2005 10:55 PM