
TII swap, 3rd buildup; ENDGAME - Part one, engine bay and front suspension

Thread Starter
Joined: Jan 2002
Posts: 2,397
Likes: 1
From: Mound, MN
TII swap, 3rd buildup; ENDGAME - Part one, engine bay and front suspension
My previous thread; fabbing the V-mount and other minor things before paint.
https://www.rx7club.com/1st-generation-specific-1979-1985-18/v-mount-other-stuff-pictures-958862/
So, big progress on the Turbo first gen in the last couple of weeks. Part of the problem living in Minnesota is that its -50 for 4 1/2 months and 100 degrees for another 4 1/2. leaving me with about 6 weeks in the spring and fall that have great conditions for working out in my garage; and boy have I been taking advantage of it.
I have been away from the forums, mainly due to my life being crazy, graduating college and selling then buying another home, getting married, etc. But now things are moving forward a bit. After finishing my V-mount setup, I planned out some other minor things and decided I was ready for paint.
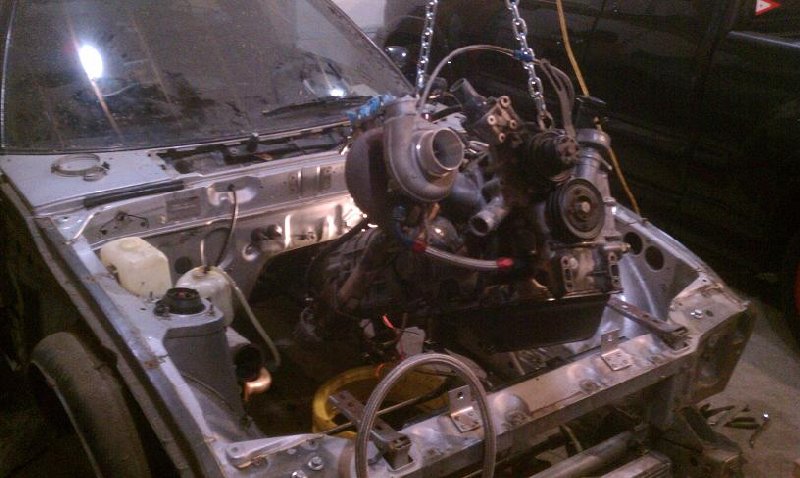
Everything came out, starting with all the remaining electrical, the susp/steering, the motor, everything that wasn't welded on, and a few that were.
Pulled the motor with a lift I borrowed from work, pretty cake compared to pulling a 5.3 v8 out of a suburban or something at work.
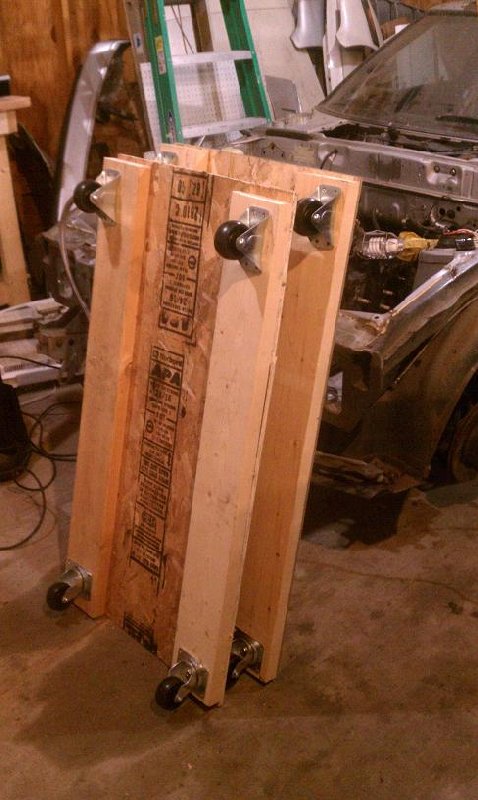
I already had a 13bEGI laying around, so I decided to build some carts with crap I had laying around, that way I can wheel them around the garage when I need the space.
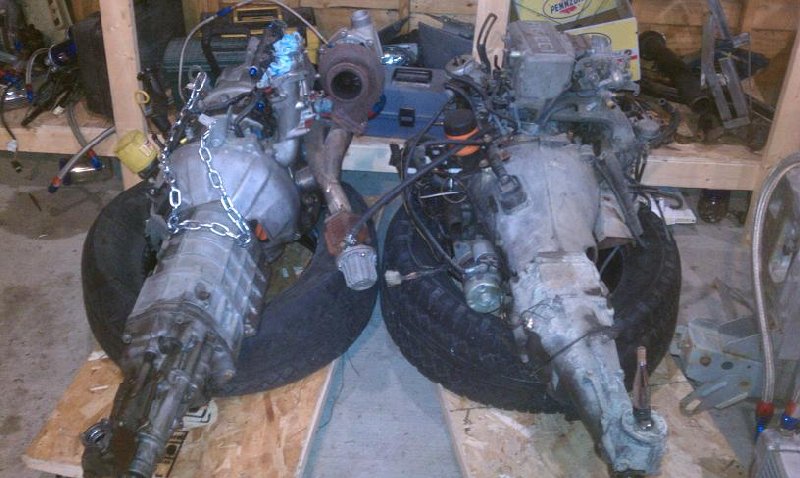
The difference in the size of the transmissions is amazing. Considering the turbo only makes about 90 more hp from the factory.
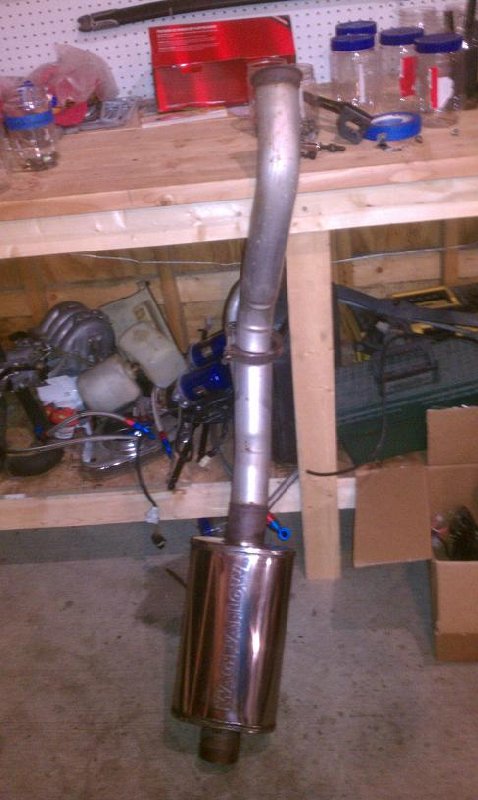
Downpipe, 3in with magnaflow race muffler
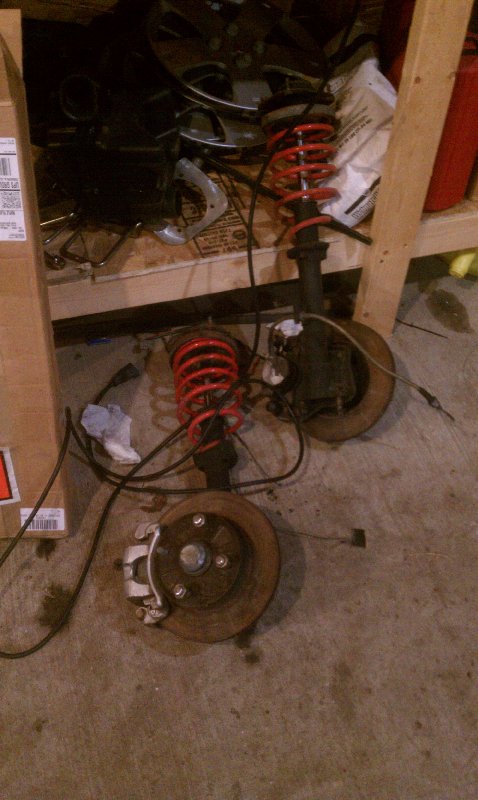
current struts, SE with BG springs and Illuminas. These will work fine for now, but Im planning on full Re-Speed bits here when things are rolling again.
https://www.rx7club.com/1st-generation-specific-1979-1985-18/v-mount-other-stuff-pictures-958862/
So, big progress on the Turbo first gen in the last couple of weeks. Part of the problem living in Minnesota is that its -50 for 4 1/2 months and 100 degrees for another 4 1/2. leaving me with about 6 weeks in the spring and fall that have great conditions for working out in my garage; and boy have I been taking advantage of it.
I have been away from the forums, mainly due to my life being crazy, graduating college and selling then buying another home, getting married, etc. But now things are moving forward a bit. After finishing my V-mount setup, I planned out some other minor things and decided I was ready for paint.
Everything came out, starting with all the remaining electrical, the susp/steering, the motor, everything that wasn't welded on, and a few that were.
Pulled the motor with a lift I borrowed from work, pretty cake compared to pulling a 5.3 v8 out of a suburban or something at work.
I already had a 13bEGI laying around, so I decided to build some carts with crap I had laying around, that way I can wheel them around the garage when I need the space.
The difference in the size of the transmissions is amazing. Considering the turbo only makes about 90 more hp from the factory.
Downpipe, 3in with magnaflow race muffler
current struts, SE with BG springs and Illuminas. These will work fine for now, but Im planning on full Re-Speed bits here when things are rolling again.
Thread Starter
Joined: Jan 2002
Posts: 2,397
Likes: 1
From: Mound, MN
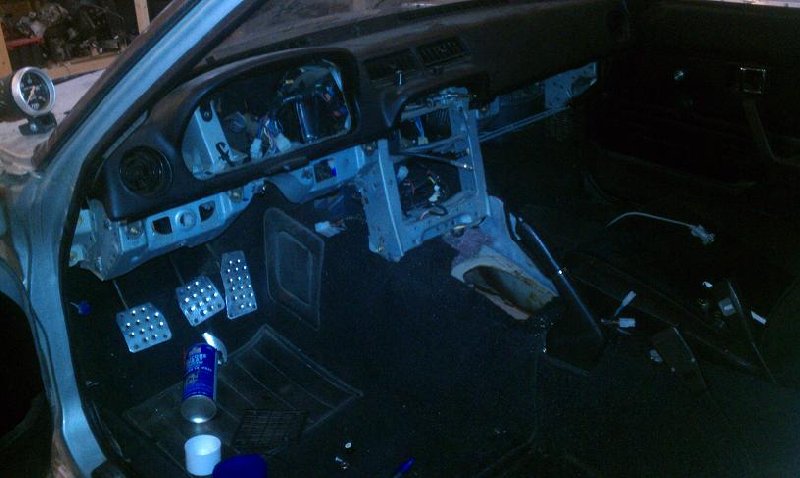
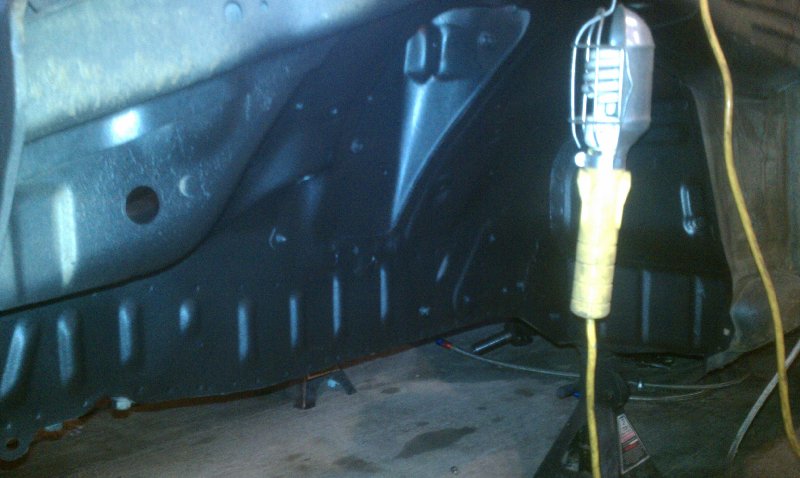
Once most of the engine bay stuff was out, I got some work on the dash, mostly to free the shifter and get the rest of the wiring and cables and whatnot off the firewall.
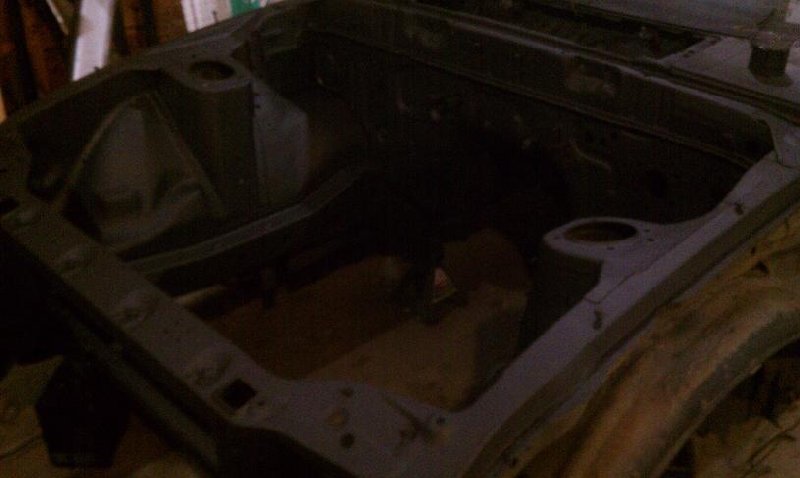
Got the engine bay scrubbed down. Hit everything with straight simple green and let it soak while I ran down to the local True-Value to grab supplies.
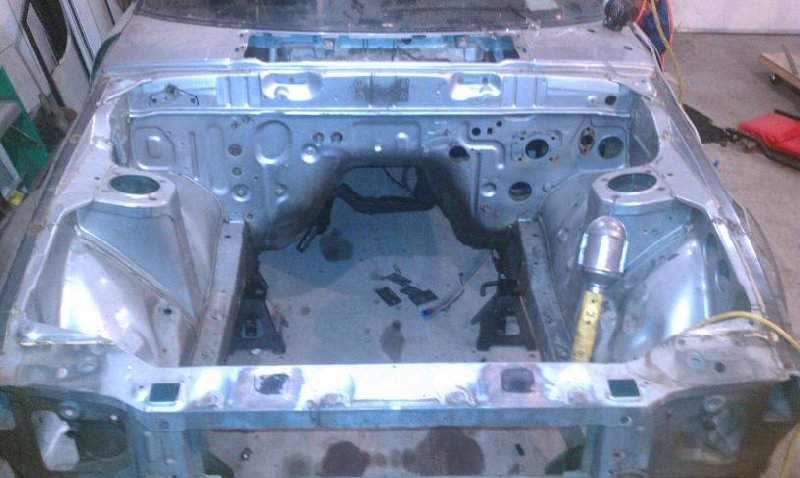
Scrubbed the hell out of everything with scotch-bright and rinsed thoroughly. I ground/cut off various brackets and welded in a few holes I wouldn't be using. I also wire-cupped off all the excess seam sealant, which really smoothed things out. And after everything was good and clean and ready, I shot the paint. Rustoleum Auto primer; 2 coats, and Professional Enamal Flat Black; 3 coats.
Pictures do not do it justice (taken with my phone too). But it looks amazing. The plan is to do everything in flat black and stainless/aluminum/nickel. All visible hardware with be stainless. Lines, hoses and intercooler tubing will be stainless. Brake lines will be stainless. etc, etc,
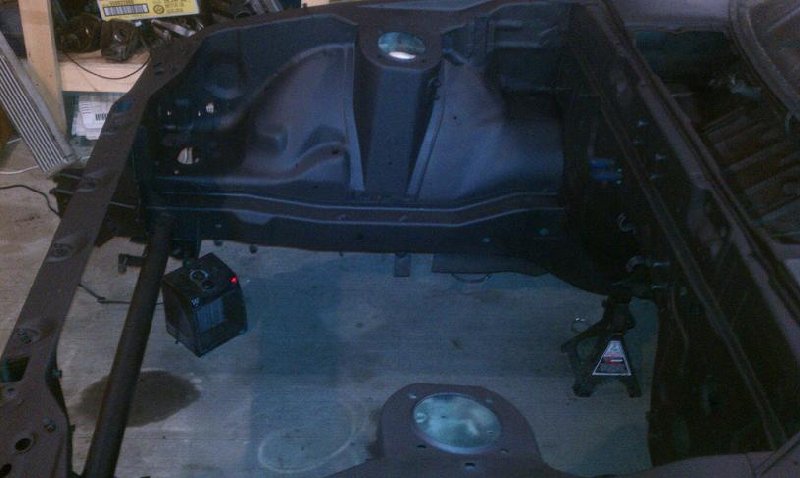
Many more updates to come. Next step, powdercoating and plating front suspension parts and start reassembly.
Got the engine bay scrubbed down. Hit everything with straight simple green and let it soak while I ran down to the local True-Value to grab supplies.
Scrubbed the hell out of everything with scotch-bright and rinsed thoroughly. I ground/cut off various brackets and welded in a few holes I wouldn't be using. I also wire-cupped off all the excess seam sealant, which really smoothed things out. And after everything was good and clean and ready, I shot the paint. Rustoleum Auto primer; 2 coats, and Professional Enamal Flat Black; 3 coats.
Pictures do not do it justice (taken with my phone too). But it looks amazing. The plan is to do everything in flat black and stainless/aluminum/nickel. All visible hardware with be stainless. Lines, hoses and intercooler tubing will be stainless. Brake lines will be stainless. etc, etc,
Many more updates to come. Next step, powdercoating and plating front suspension parts and start reassembly.
Thread Starter
Joined: Jan 2002
Posts: 2,397
Likes: 1
From: Mound, MN
Just some random other shots:
My Mancave is really starting to come together, Got 5.1 surround sound on this bitch, 800 watts.
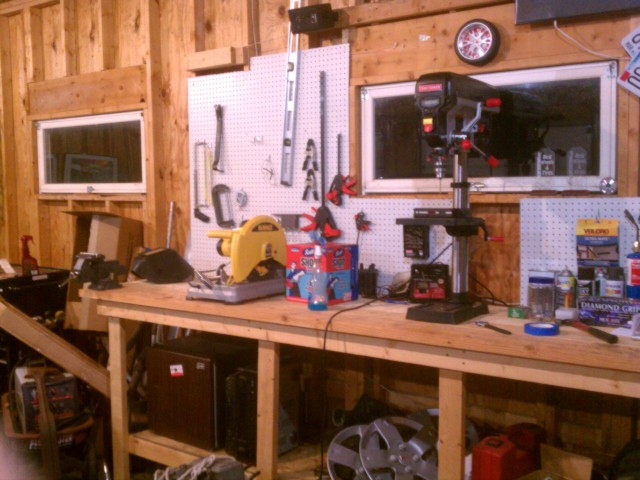
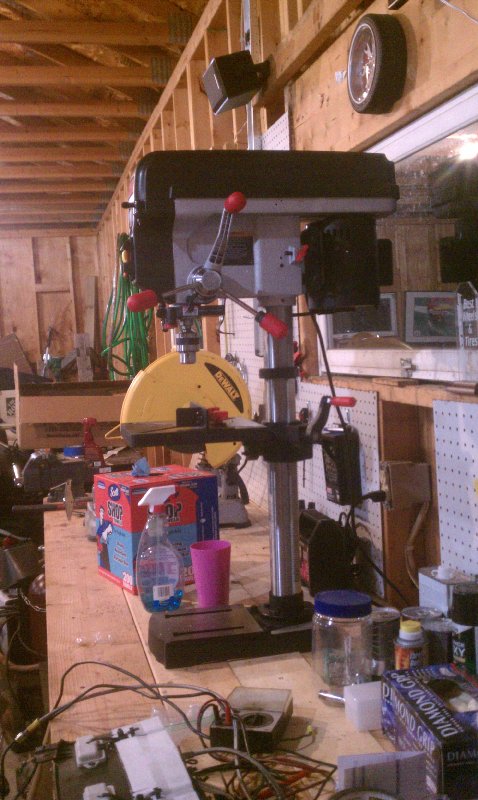
And check out the new toy, 12in drill press.
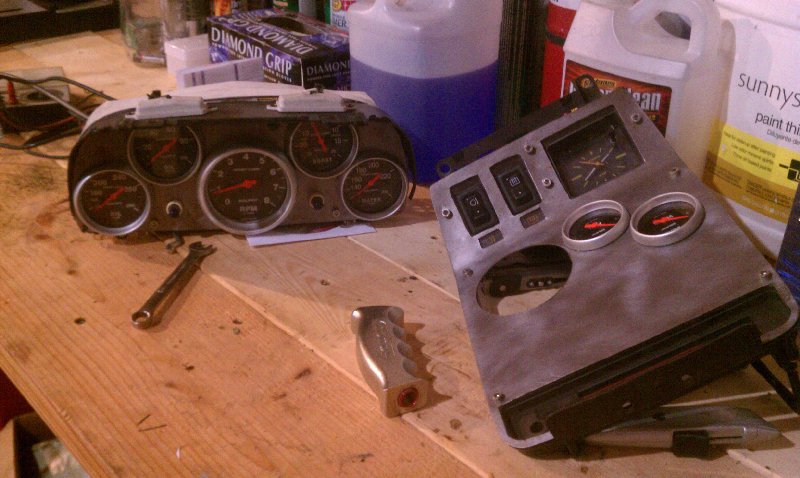
And some shots of the gauges that I took out, these will get redone in stainless, and I'm probably going to change the arrangement a bit/

My Mancave is really starting to come together, Got 5.1 surround sound on this bitch, 800 watts.
And check out the new toy, 12in drill press.
And some shots of the gauges that I took out, these will get redone in stainless, and I'm probably going to change the arrangement a bit/
Love the direction you're heading.. ,
If I were to do my fuel system over, I would use
Black Hoses, with Nickel Hose Ends.

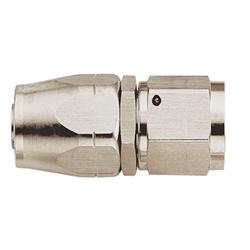
The other way, - Stainless with black fittings, looks ugly

As far as your gauges go... Check out THIS THREAD
Yours is a perfect candidate for something like it.
If I were to do my fuel system over, I would use
Black Hoses, with Nickel Hose Ends.
The other way, - Stainless with black fittings, looks ugly
As far as your gauges go... Check out THIS THREAD
Yours is a perfect candidate for something like it.
Last edited by Directfreak; Sep 29, 2011 at 12:10 AM.
Thread Starter
Joined: Jan 2002
Posts: 2,397
Likes: 1
From: Mound, MN
i saw your thread, looks very interesting.
only issue I have is that it looks Exactly like the Guage cluster on the new Chevy Sonic, which I will be picking up in the spring. I definately cant have the same guages in my Rex, that will be in my Chevy/Daewoo.
only issue I have is that it looks Exactly like the Guage cluster on the new Chevy Sonic, which I will be picking up in the spring. I definately cant have the same guages in my Rex, that will be in my Chevy/Daewoo.

Trending Topics
Thread Starter
Joined: Jan 2002
Posts: 2,397
Likes: 1
From: Mound, MN
I think that looks cool, but too modern for the look I'm going for here. I honestly am looking at what people are doing with bikes. Specifically Hardcore Choppers of Germany has caught my eye more than once. A very mechanical look, but very clean and flowing at the same time
Thread Starter
Joined: Jan 2002
Posts: 2,397
Likes: 1
From: Mound, MN
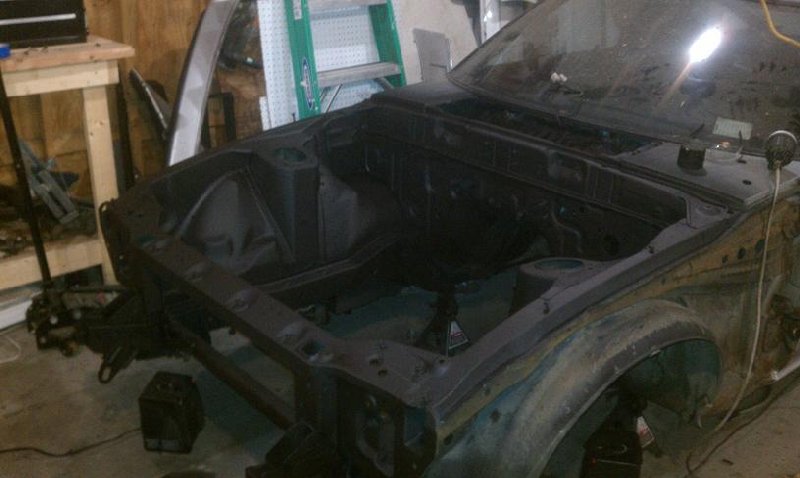
Small update, got the fender liners areas cleaned out, primed and shot two coats of duplicolor truck bed liner. **** is expensive!!, but it turned out great.
Suspension parts are going out next week. black powercoat on the heavy parts and various joints, nickle plating on all the bolts and hardware. Once I get that back, I can start rebuilding the engine bay.
Suspension parts are going out next week. black powercoat on the heavy parts and various joints, nickle plating on all the bolts and hardware. Once I get that back, I can start rebuilding the engine bay.
Thread Starter
Joined: Jan 2002
Posts: 2,397
Likes: 1
From: Mound, MN
Shed? No, full 3 car garage. I can actually fit 4 cars in it, in the winter I put my Toyota X-runner in the back and park my commuter inside. It's about 1 and 3/4 deep, and 3 wide. One of the reasons I bought the house. You can never have enough garage space.


Thread Starter
Joined: Jan 2002
Posts: 2,397
Likes: 1
From: Mound, MN
Love the direction you're heading.. ,
If I were to do my fuel system over, I would use
Black Hoses, with Nickel Hose Ends.
The other way, - Stainless with black fittings, looks ugly
As far as your gauges go... Check out THIS THREAD
Yours is a perfect candidate for something like it.
If I were to do my fuel system over, I would use
Black Hoses, with Nickel Hose Ends.
The other way, - Stainless with black fittings, looks ugly
As far as your gauges go... Check out THIS THREAD
Yours is a perfect candidate for something like it.
I was originally thinking stainless lines with nickel ends, but now Im thinking the
black nylon braid will look way cooler. but just another thing to buy. once again, a simple fix of the intercooler mount has turned into a major rebuild.
still waiting on my suspension stuff. hard parts are powdercoated, just waiting on the nickel plating. guy said he would just throw it in with a bigger order he had coming in and it would save me a bunch, so I have to wait for that.
Thread Starter
Joined: Jan 2002
Posts: 2,397
Likes: 1
From: Mound, MN
not really, the only camera i have is the 8mp on my HTC evo2 phone.
I also reduced them in size, as I live where there is no wired internet available, I use a
wireless broadband card, which is expensive and has data limits.
was there something in particular you wanted to see?
I also reduced them in size, as I live where there is no wired internet available, I use a
wireless broadband card, which is expensive and has data limits.
was there something in particular you wanted to see?
Joined: Aug 2010
Posts: 1,416
Likes: 5
From: East Palestine, Oh
No, but i just welded all the holes in my bay shut and an smoothing everything out with plastic. I just wanted to see better how yours turned out. No worries 
Thread Starter
Joined: Jan 2002
Posts: 2,397
Likes: 1
From: Mound, MN
I welded up a few holes and ground them smooth, but no real smoothing or body filler. I'm not doing a tuck (although, wiring will be minimal and hidden the best I can). The times that this car has been driving, it got driven A lot, and I plan to drive it alot again. It's not a show car. The exterior will be the same rattlecan flatblack, just want it to match
