
Rebuilds are sketchy.


Rebuilds are sketchy.
Just like babies. Keep that in mind.
Also...56K beware
So I finally decided it's time to rebuild the 12a, and figured I'd make a build thread about it.
Backstory, you say? I can provide.
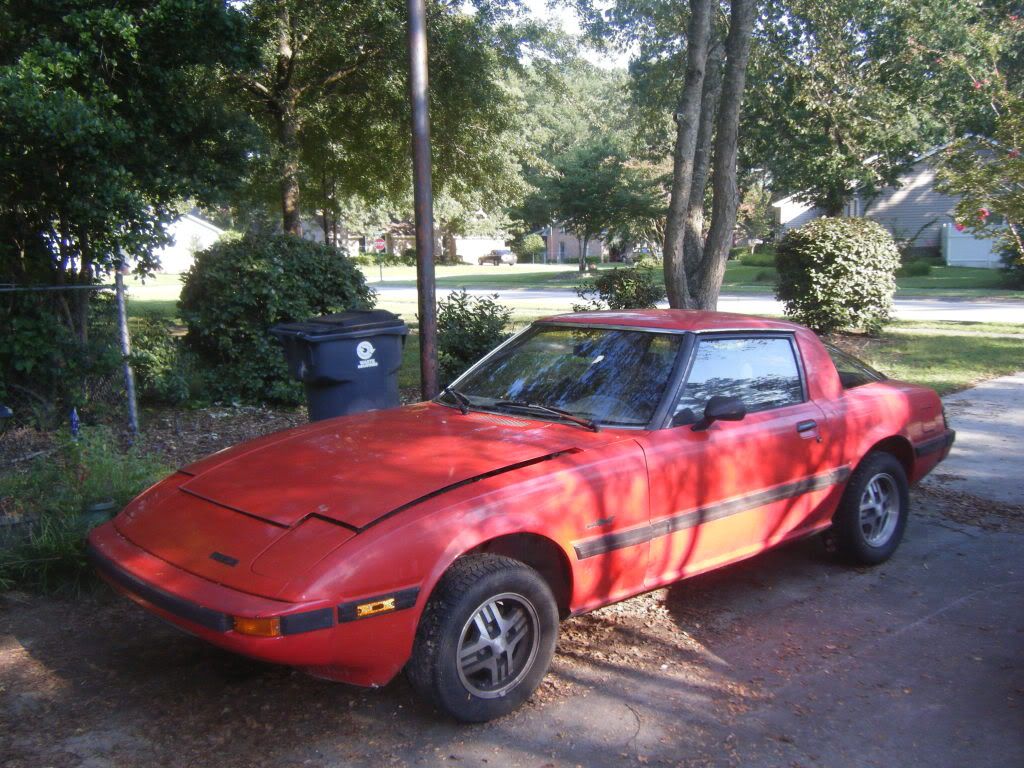
I bought the car about a year ago for 1300 from a guy here in town, with a dowel pin o-ring leak. I tried a few stop-leak products, but never had the ***** to drill into the rotor housing for the supposed end-all to the leak. Over time, the leak got worse, etc until the car was changing its own oil every two weeks-ish; so I figured it's due for a rebuild.
What are my goals, you ask?
Rebuild 12a, maybe a streetport.
Rebuilt/stripped nikki carb (to be replaced by a sterling or weber down the line, I'm undecided).
Proper fuel system, as opposed to the crappy pump and regulatorless-ness I've got now.
Eliminate all the random unnecessary wires in the engine bay (live in SC, emissions are nonexistent).
Sounds boring, right? It will be, for you guys, at least. But it will keep me occupied, and the car will come out better than it was, which is what I care about.
Now onto the fun part...pictures!

And any work aside from the actual assembly will be done here. On a ping-pong table.

Also...56K beware
So I finally decided it's time to rebuild the 12a, and figured I'd make a build thread about it.
Backstory, you say? I can provide.
I bought the car about a year ago for 1300 from a guy here in town, with a dowel pin o-ring leak. I tried a few stop-leak products, but never had the ***** to drill into the rotor housing for the supposed end-all to the leak. Over time, the leak got worse, etc until the car was changing its own oil every two weeks-ish; so I figured it's due for a rebuild.
What are my goals, you ask?
Rebuild 12a, maybe a streetport.
Rebuilt/stripped nikki carb (to be replaced by a sterling or weber down the line, I'm undecided).
Proper fuel system, as opposed to the crappy pump and regulatorless-ness I've got now.
Eliminate all the random unnecessary wires in the engine bay (live in SC, emissions are nonexistent).
Sounds boring, right? It will be, for you guys, at least. But it will keep me occupied, and the car will come out better than it was, which is what I care about.
Now onto the fun part...pictures!
And any work aside from the actual assembly will be done here. On a ping-pong table.
One other thing to decide on doing while you're there - Buy 2 (two) 20mm freeze plugs and tap them into your coolant passages (passages on your engine) that run into the intake manifold. The main idea behind this is to NOT heat up your intake (which does help with colder weather BTW) and also for the "just in case" you need to remove your intake manifold for whatever reason you wont spill coolant everywhere. Also you wont have to worry about the stupid O-rings going out and then your engine ingesting it.
I did this and am glad I did.
I did this and am glad I did.
Actually, that's on the list of things to do, I just didn't mention it. I replaced them a few months ago, and one of them was already cut when I pulled the intake off today(fortunately it was still chillin in it's spot)
Another thing I would suggest is a lighter flywheel. It makes a huge difference. No, it doesnt add HP (many threads on this, dont want to get into it here). I bought the RB light steel flywheel - love it. Worth the money easy.
Might I recommend the 85psi rear oil pressure regulator while you're in there?
I bought a 10gallon parts washer from Harbor Freight for $49. Invaluable for cleaning. Left parts in there with 1 gallon of Castrol purple power (or equivalent 'industrial strength purple' cleaner from Home Depot) and 8 gallons of water overnight. Scrub with green Scotch Brite and brass brushes and you're golden. Don't use Purple or Simple Green with aluminum rotor housings, it'll eat them. Simple Green does make a product that works with aluminum though, in a blue bottle. Purple eats bearings but they should be replaced anyways esp. since your motor had an oil leak.
Impact wrench works great for disassembly too.

Be very careful with the side seals...they need to be spec'd just right if you replace them. I threw away a couple because I shaved off a little too much...
Good call on the freeze plugs on the intake...I did not do this and had to remove the intake...it was a pain to deal with draining the coolant and then filling it back up.
With a new motor and paint, it'll be a quick little sportster for a cheap price. Enjoy the process!
Good call on the freeze plugs on the intake...I did not do this and had to remove the intake...it was a pain to deal with draining the coolant and then filling it back up.
With a new motor and paint, it'll be a quick little sportster for a cheap price. Enjoy the process!
Fill the ACV port with quicksteel or equivilant putty if blocking the coolant ports with 20mm freeze plugs. The goal is to keep the manifold cool, right? Not to heat it up? This should always be mentioned along with advice about freeze plugs. Always on FB engines with active ACV ports '81-'85.
Trending Topics
ACV port is the small horizontal port in the middle of the intake, correct?
Edit: Thanks for all the support as well; hopefully I won't muck this up too bad.
Edit: Thanks for all the support as well; hopefully I won't muck this up too bad.
Last edited by Deblin; Sep 1, 2010 at 02:38 PM.
Might I recommend the 85psi rear oil pressure regulator while you're in there?
I bought a 10gallon parts washer from Harbor Freight for $49. Invaluable for cleaning. Left parts in there with 1 gallon of Castrol purple power (or equivalent 'industrial strength purple' cleaner from Home Depot) and 8 gallons of water overnight. Scrub with green Scotch Brite and brass brushes and you're golden. Don't use Purple or Simple Green with aluminum rotor housings, it'll eat them. Simple Green does make a product that works with aluminum though, in a blue bottle. Purple eats bearings but they should be replaced anyways esp. since your motor had an oil leak.
Impact wrench works great for disassembly too.
I bought a 10gallon parts washer from Harbor Freight for $49. Invaluable for cleaning. Left parts in there with 1 gallon of Castrol purple power (or equivalent 'industrial strength purple' cleaner from Home Depot) and 8 gallons of water overnight. Scrub with green Scotch Brite and brass brushes and you're golden. Don't use Purple or Simple Green with aluminum rotor housings, it'll eat them. Simple Green does make a product that works with aluminum though, in a blue bottle. Purple eats bearings but they should be replaced anyways esp. since your motor had an oil leak.
Impact wrench works great for disassembly too.
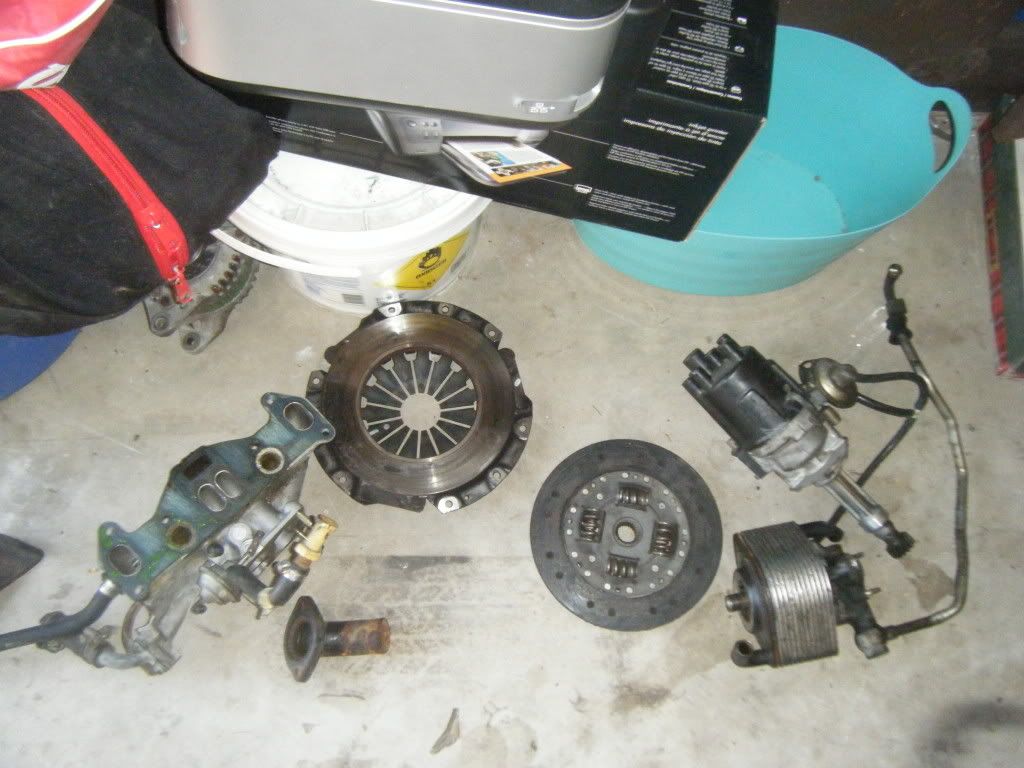
Anyway, didn't get much work done today, removed spark plugs and the oil pan/pump pickup, as well as finally made a detailed list of everything I want to get done on the car. Camera batteries are dead, so I'll upload some pictures in the next few days.
http://racingbeat.com
Oil Pressure Regulator - Street 80-85 PSI
Part Number: 11810
Retail Price: $99.00
Qty:
The Mazda Competition Department Street High Performance Rear Oil Pressure Regulator interchanges exactly with the stock rear oil pressure regulator on all 1971-2010 12A, 13B, and 20B engines. It is designed to bypass at 80-85 PSI, making it well suited to street high performance use. With later engines--the 1993-95 13B Twin Turbo, for example--the factory rear oil pressure regluator bypasses at a higher pressure level than the 80-85 psi rating. Bear this in mind when selecting the appropriate rear oil pressure regulator for your configuration
Full Member
Joined: Jul 2005
Posts: 133
Likes: 0
From: South Bend, Indiana
Awesome thread and glad you are documenting your fun. I too will be doing this in a few months. My engine is good though, I just want to port it and do all of these little mods that everyone speaks of to make the factory engine that much more awesome.
2 questions I was going to post on no-pistons. I have never cracked into an engine on my own, so these questions might sound stupid but I am going to ask anyways...
1) I have read that people clean up the coolant area...debur it per-sa. Basically it allows cooloant to flow more easy. Not port it, just clean it up. Thoughts?
2) Port (as in remove material) in the oil pump area to increase flow. Thoughts? http://www.nopistons.com/forums/topi...oil-pump-mods/
Also, here are some good tips
http://www.nopistons.com/forums/topi...or-rebuilding/
Dam. actually, just look through the engine building section of np website. Grab some nice beers and flip through all 86 pages. I suggest starting at page 86 and work your way back. Ive drank several and I am only on page 72. Sure the pictures arent there but the reading is good. Its from the days when the internet was for information and not post whoring and/or killing time at work.
Just to walk the walk, and talk about it, I installed a set of 20mm freeze plugs from Mazdatrix (the $3.50 each ones) today in my fresh rebuild. I took a 12mm deep well socket, and a 2lbs hammer/mini sledge (same used for hitting flywheels, but if you prefer a lighter hammer, go ahead). I first applied some RTV around the inside of the coolant holes. Then tapped them in. They went it much better than the ones I installed dry in a couple other engines, which wound up dripping slightly while the manifold was off. So far on some other engines where I gooped a small amount of RTV in the holes prior to hammering them in, they never leaked. So use RTV silicone if you're adding freeze plugs. It acts like a low speed lubricant, and we can all feel good about that.
Alright, so some progress got made today, until we got stuck :/.
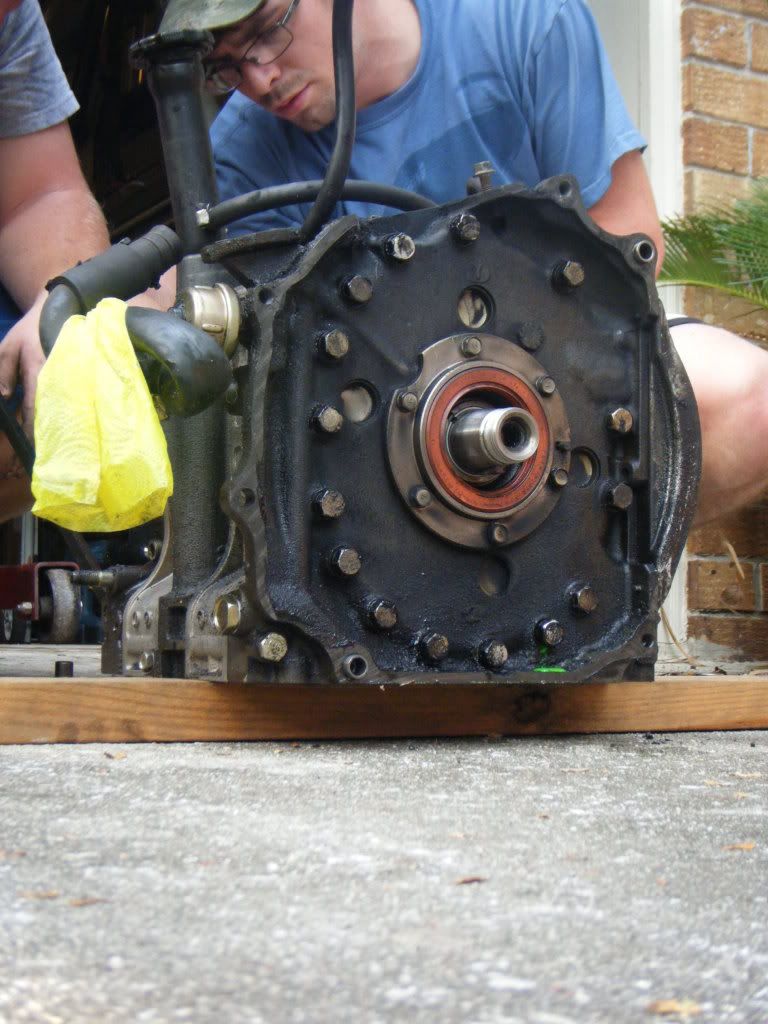
Got the flywheel off as well as the water pump and front cover (covers the oil pump, name escapes me); and the oil pump itself. Flipped the engine up, pulled out the tension bolts, and that's where it sits as of now.
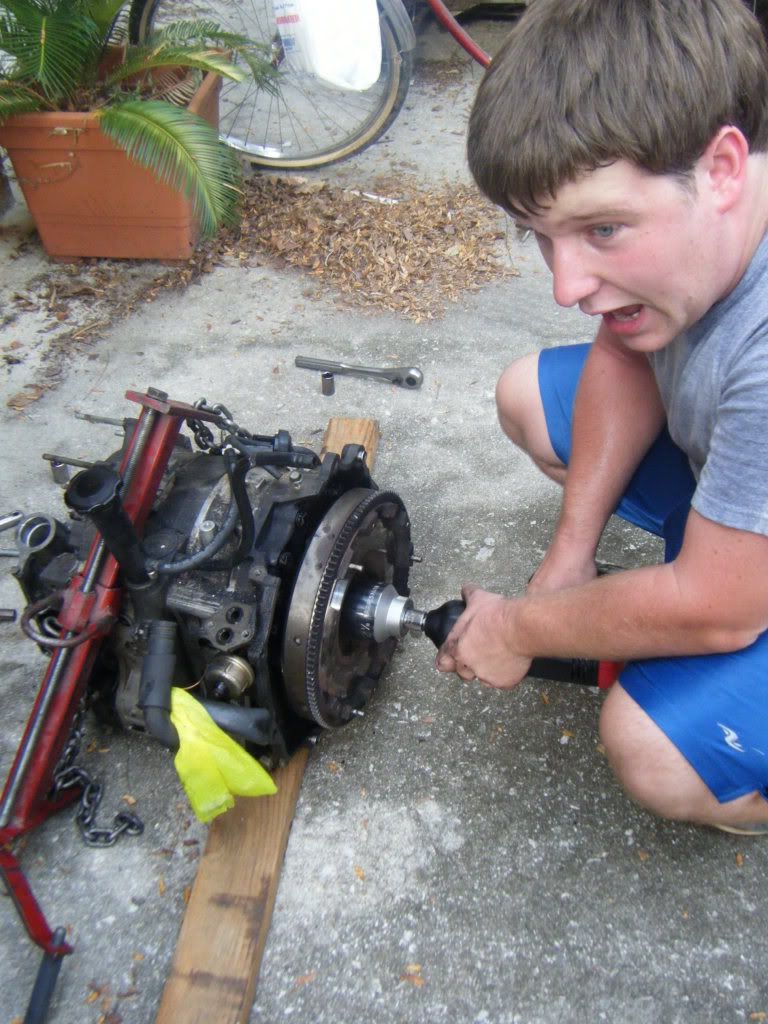
Don't ask what I'm doing with my face, but we somehow managed to get the flywheel nut off with an electric impact gun.
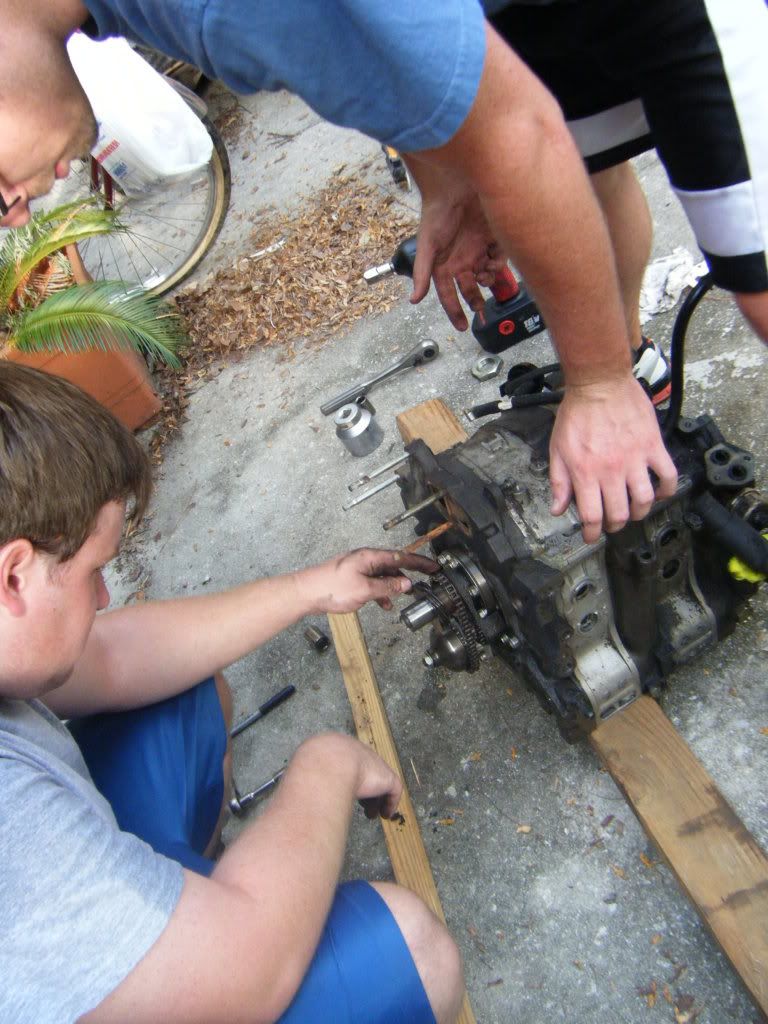
And we then proceeded to start taking random things off in an order that seemed like a good idea.
For some reason, my sister(who took all the pictures) decided she'd take a few from the ground, showing off the awesome wood boards we set the engine on, before it was moved to....
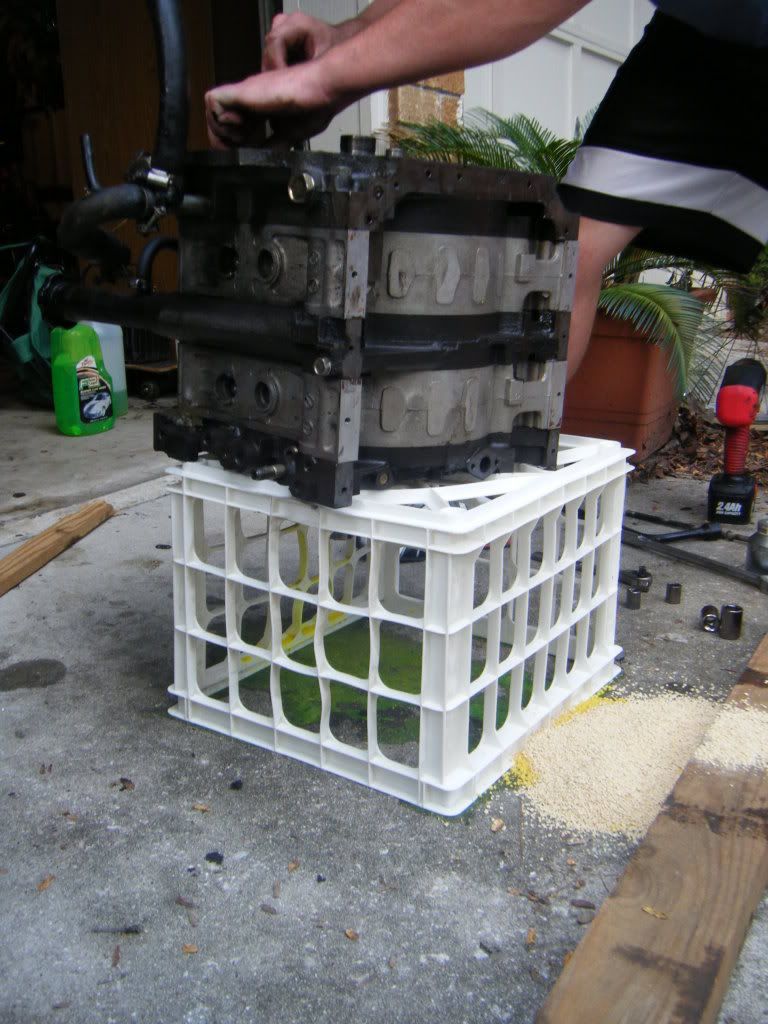
A milk crate! Blame me being poor, or something.
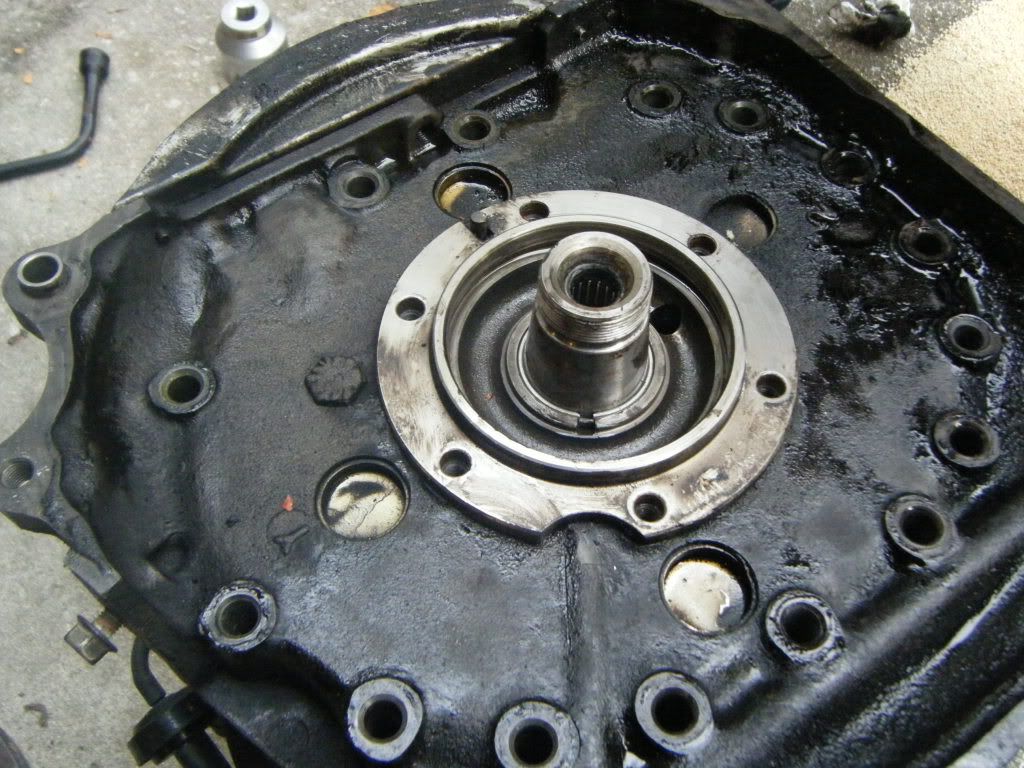
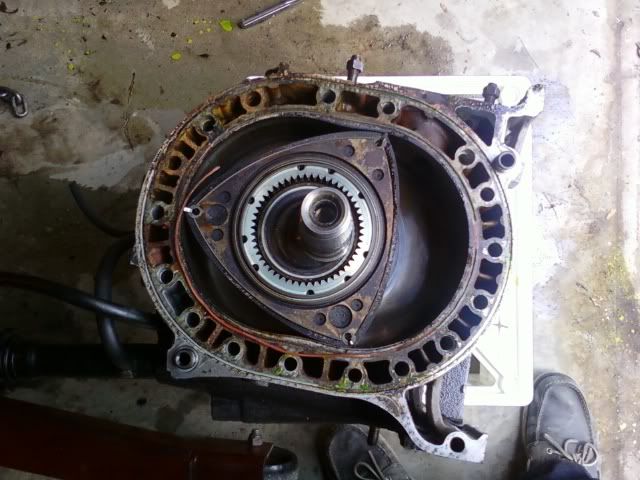
This is what I'm left with, at the end of the day.
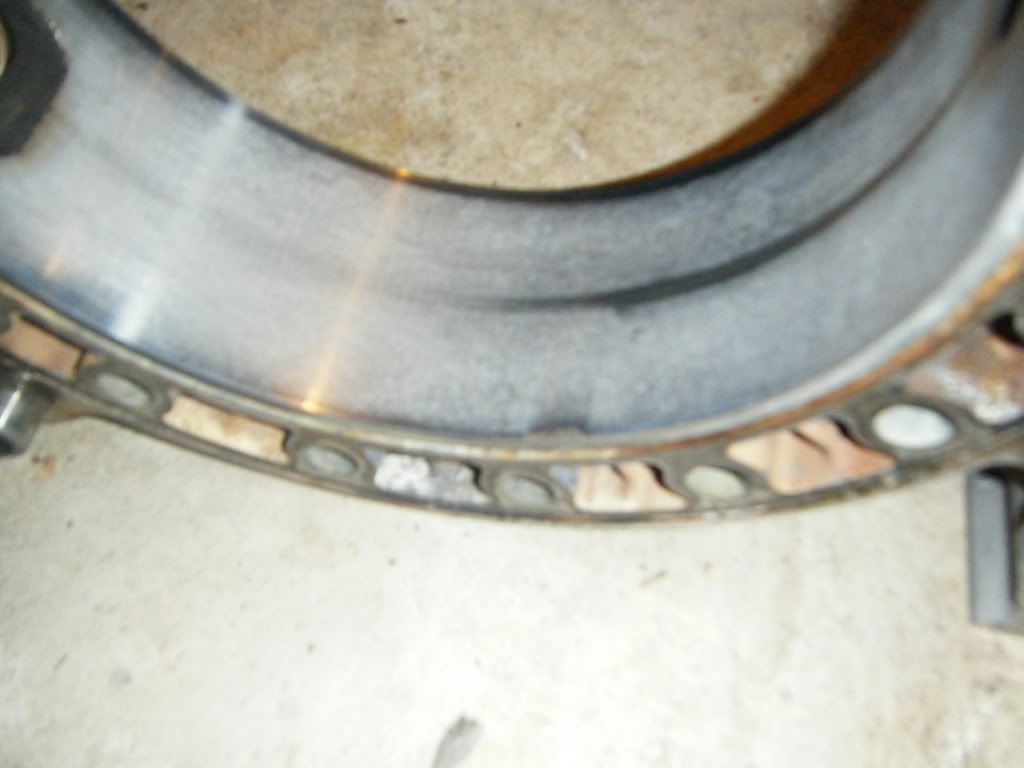
This ring on the inside, with the tab, how does one get that out, and where do I proceed from there? I've been trying to download the FSM from foxed.ca, but it keeps timing out on me, and I've yet to come across another copy anywhere.
~Devon
Got the flywheel off as well as the water pump and front cover (covers the oil pump, name escapes me); and the oil pump itself. Flipped the engine up, pulled out the tension bolts, and that's where it sits as of now.
Don't ask what I'm doing with my face, but we somehow managed to get the flywheel nut off with an electric impact gun.
And we then proceeded to start taking random things off in an order that seemed like a good idea.
For some reason, my sister(who took all the pictures) decided she'd take a few from the ground, showing off the awesome wood boards we set the engine on, before it was moved to....
A milk crate! Blame me being poor, or something.
This is what I'm left with, at the end of the day.
This ring on the inside, with the tab, how does one get that out, and where do I proceed from there? I've been trying to download the FSM from foxed.ca, but it keeps timing out on me, and I've yet to come across another copy anywhere.
~Devon
talking head
Joined: Apr 2008
Posts: 2,775
Likes: 15
From: Perth, WA, OZ
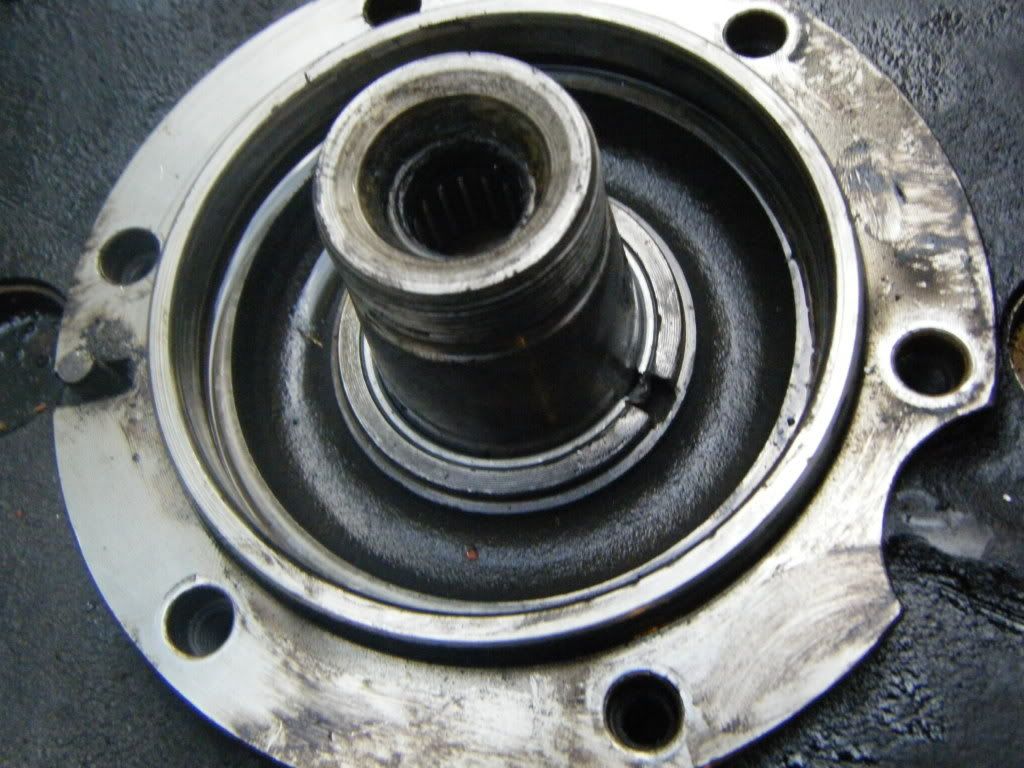
the folded tab is actually the rear of the stat bearing
you need to make sure all the thru bolts are out
( including the two outside the bell housing pattern )
take note one is marked with a mazda symbol and is longer than the rest
from there you can lift out the undone rear stat bearing by sticking a screwdriver under the flange and lifting it up
after that,, the rear plate,, rotor , then lift the crank slightly to remove the centre plate etc
hit the rear plate with a dead blow hammer. the sand filled orange ones. you don't have to take the rear stationary gear out first. I usually take that off once the rear plate is off. easier to tap the front of the gear with aforementioned dead blow hammer.
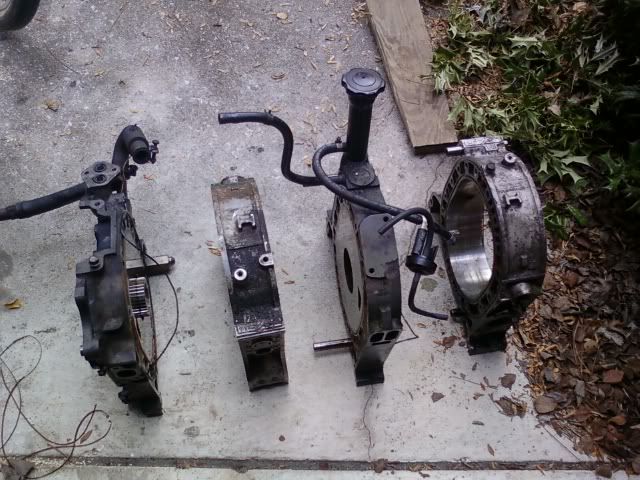
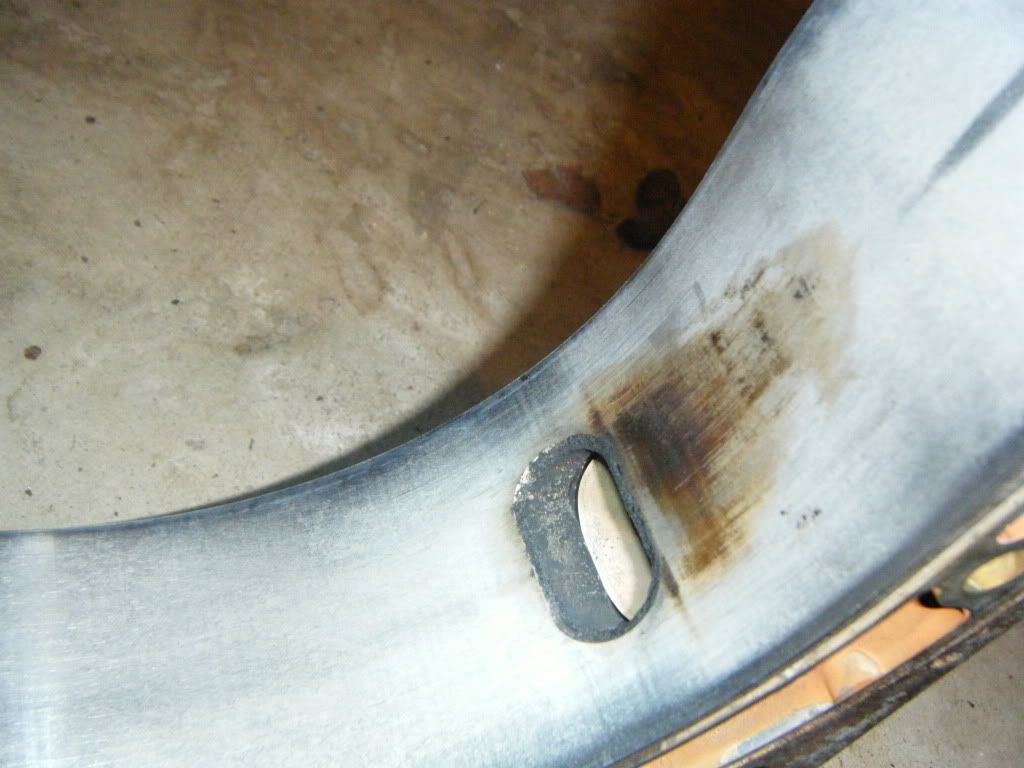
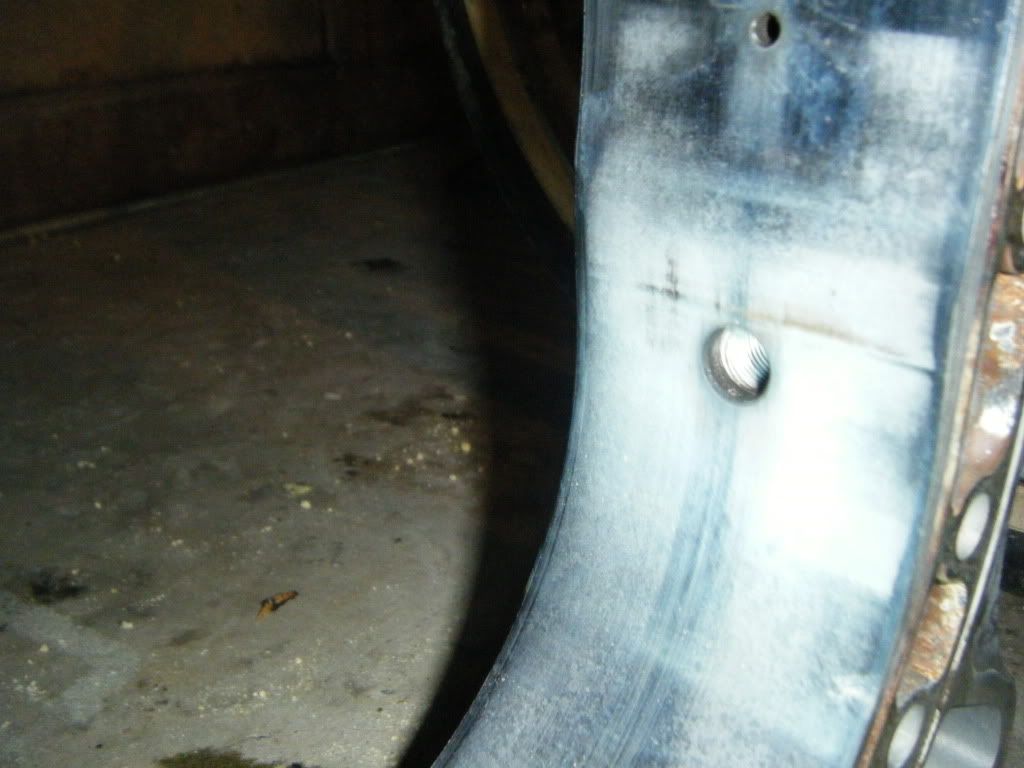
So...the engine is apart. And scattered across my garage. But I'm pretty sure I didn't screw anything up too bad(or at all) and the housings don't look too terrible. I apologize for the awful pictures, all I had was my cameraphone. I'll put up decent ones once I get everything cleaned up, will probably take a few days.
Here's my ingenious idea for holding the through bolts in order; I can almost guarantee they'll end up getting knocked onto the garage floor within a week.
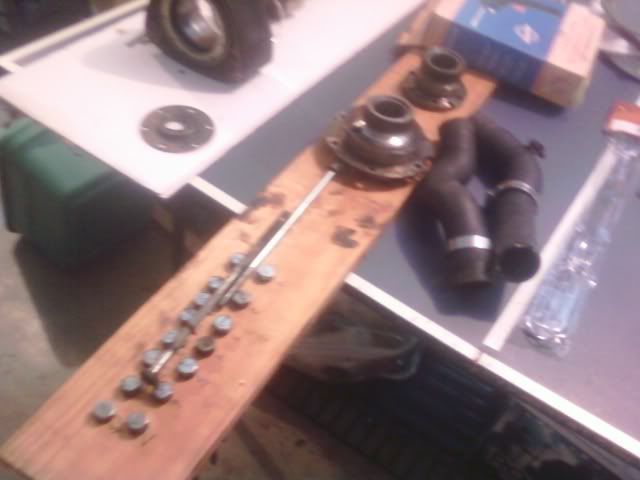
Here's my ingenious idea for holding the through bolts in order; I can almost guarantee they'll end up getting knocked onto the garage floor within a week.
Alright, so some minor progress was made over the last week, I suppose. I took the irons and housings up to my old job last Thursday (auto shop at the local tech college) to throw in their chemical cleaner. Parts cleaned up pretty good, I've still gotta take the rotors and eccentric shaft up there, as well as the front cover and intake. Then the measuring begins....oh joy.
Anyway, here's some pictures; seeing as this is the first time I've actually pulled one apart, I've got no idea if the housings are actually any good. Input is very much appreciated.
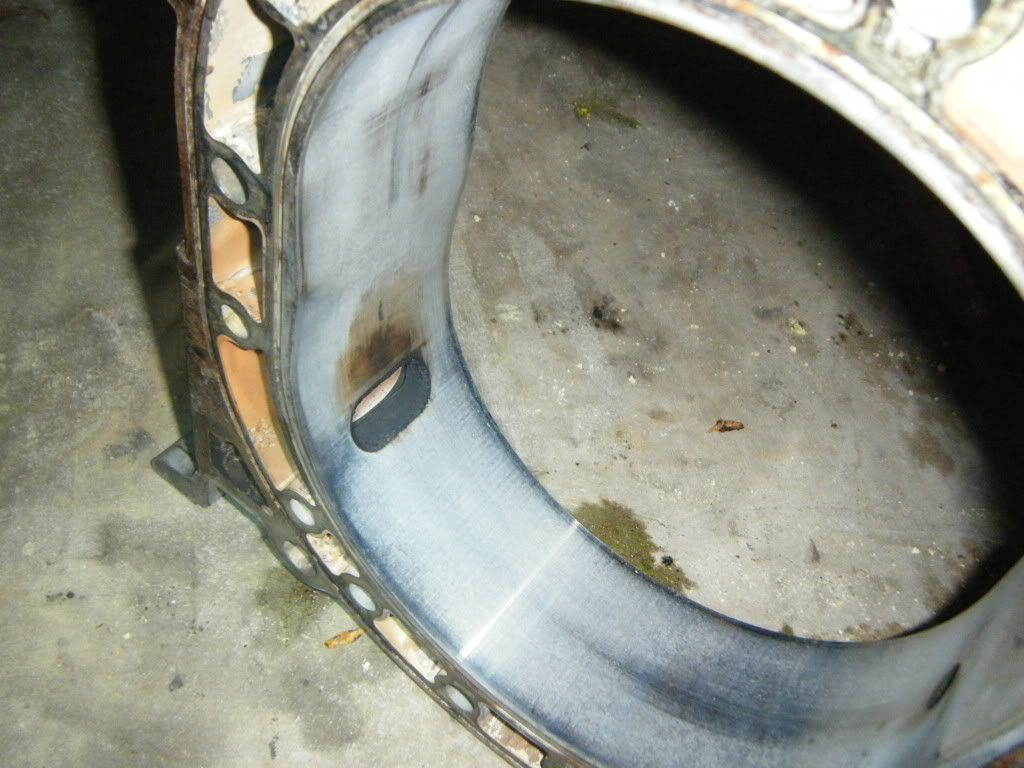
This is the only example of any such chipping on either housing
And then, since I'm cool (read: lamesauce) I decided to sticker the car a bit.

And finally, I decided that the irons will be painted grabber green, so I guess I'll be painting the bay as well; probably battleship gray or some such. I'm not sure, any suggestions?
~Devon
Anyway, here's some pictures; seeing as this is the first time I've actually pulled one apart, I've got no idea if the housings are actually any good. Input is very much appreciated.
This is the only example of any such chipping on either housing
And then, since I'm cool (read: lamesauce) I decided to sticker the car a bit.
And finally, I decided that the irons will be painted grabber green, so I guess I'll be painting the bay as well; probably battleship gray or some such. I'm not sure, any suggestions?
~Devon