
Progress on gathering/painting parts

Thread Starter
Joined: Aug 2007
Posts: 273
Likes: 0
From: Muskegon, MI
Progress on gathering/painting parts
So, I'm still pretty new to this forum, but I thought I'd share what I've been up to on my car. It's an '84 GS (maybe). I say maybe because I've never been really sure of what trim line it is. It doesn't really matter. The big details are that it is a 12a with open diff . When I first got it, I did the basic tune up and removed the rats nest , via rx7carl's tutorial. Last summer I swapped a GSL rear end in. Recently I came into a Series 5 NA engine I have been working on.
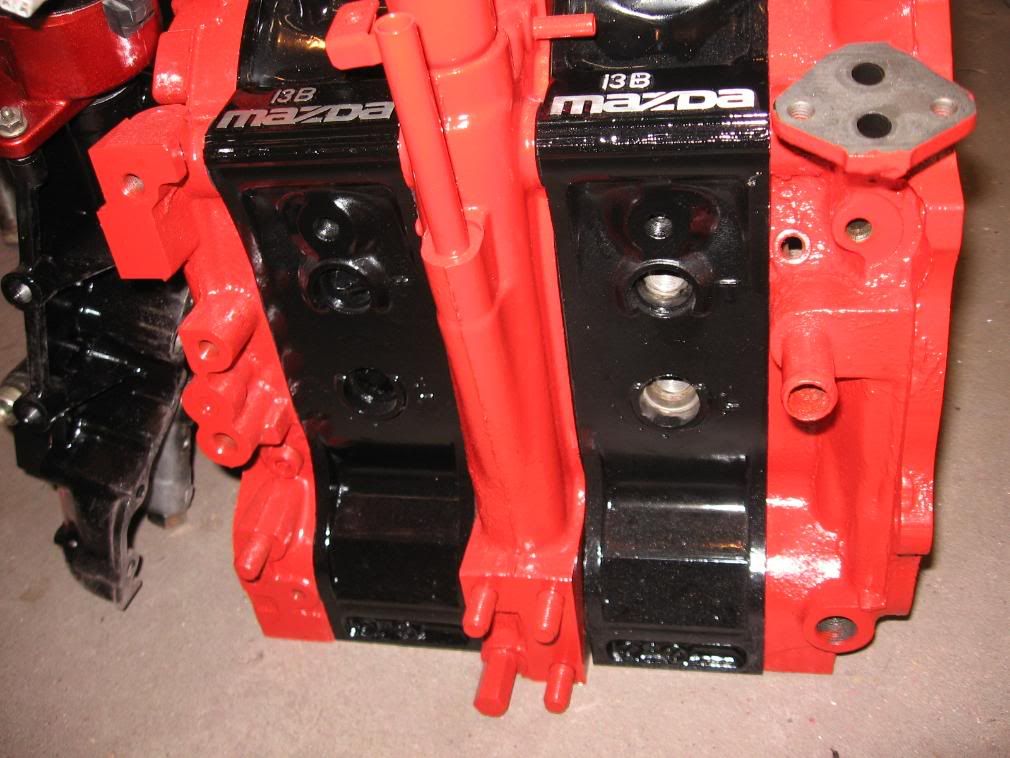
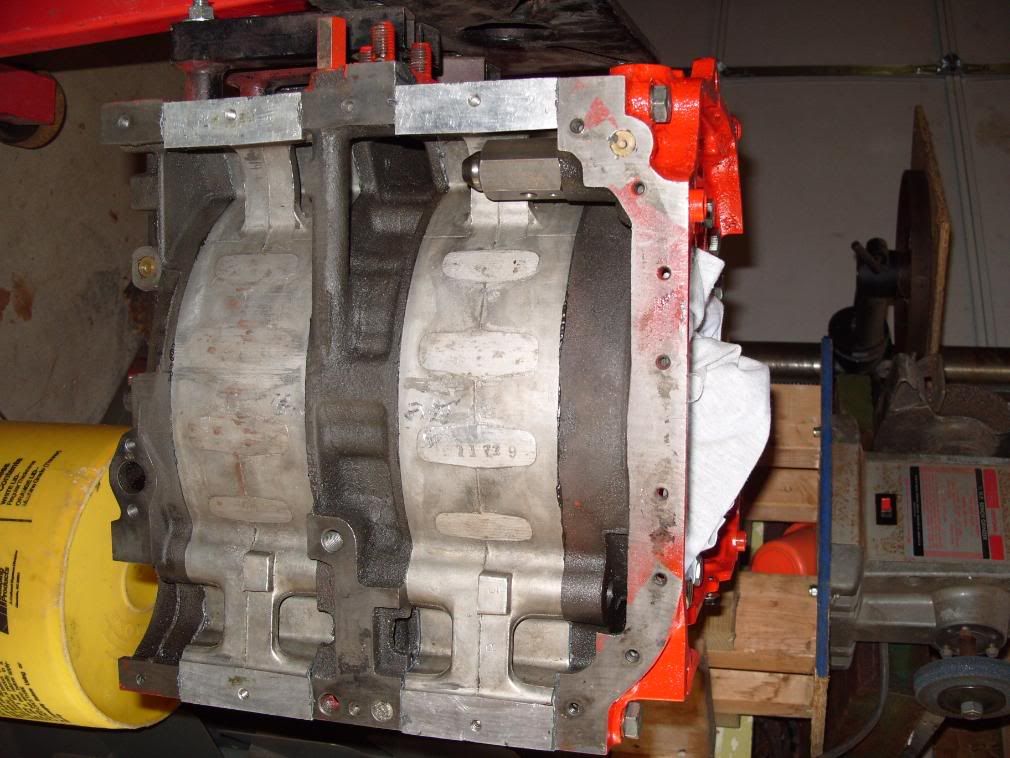
Cleaned ported and painted engine parts:
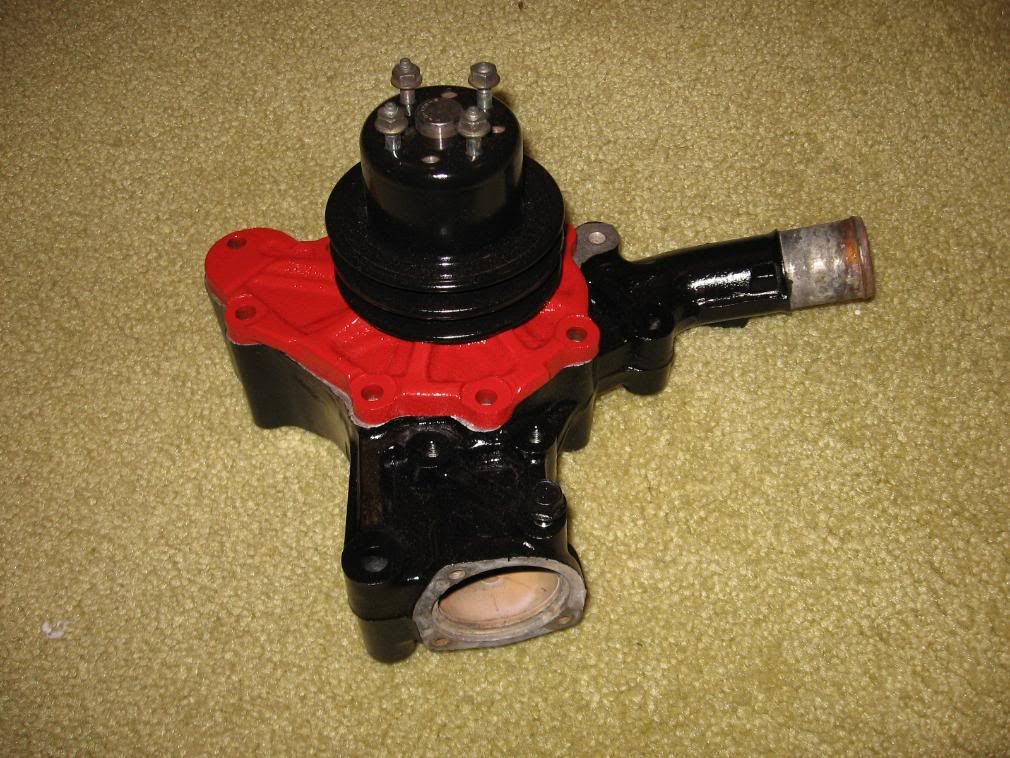
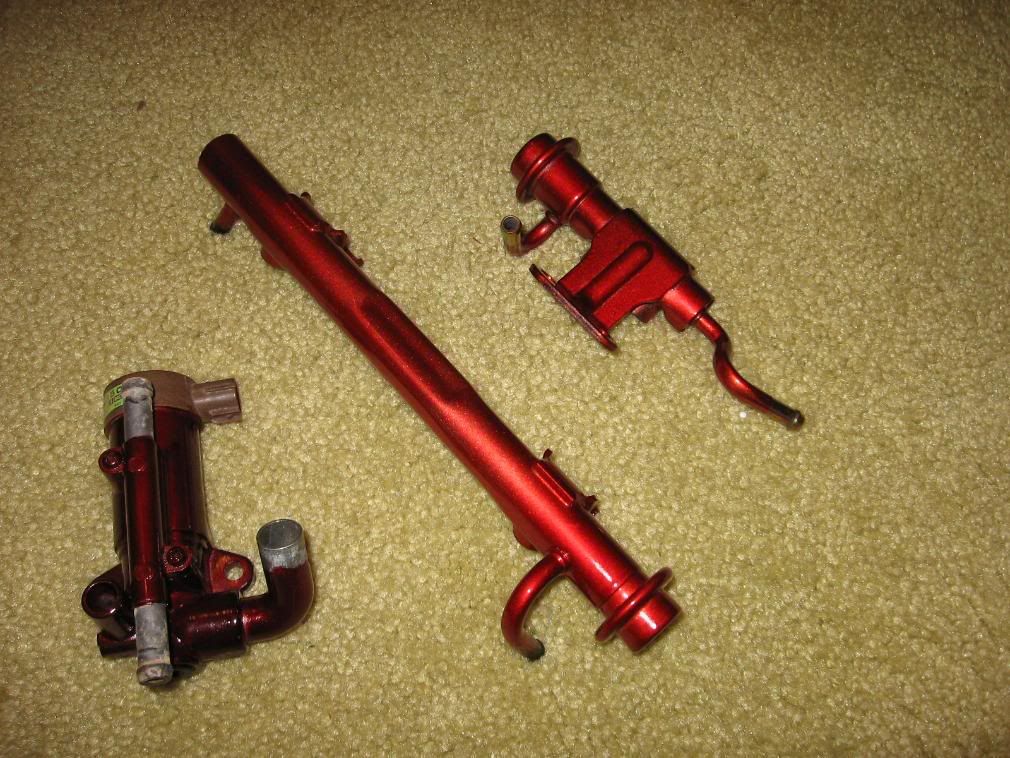
This is the Metalcast paint I think it looks pretty good but don't remember who makes it.


Cleaned ported and painted engine parts:
This is the Metalcast paint I think it looks pretty good but don't remember who makes it.
Thread Starter
Joined: Aug 2007
Posts: 273
Likes: 0
From: Muskegon, MI
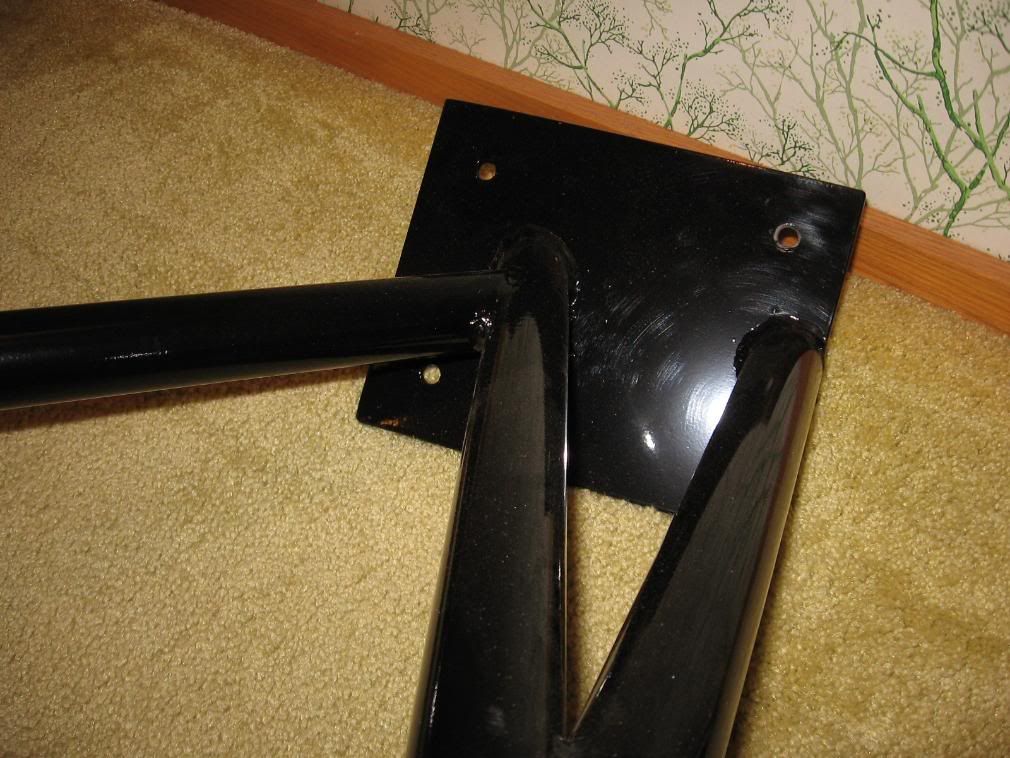
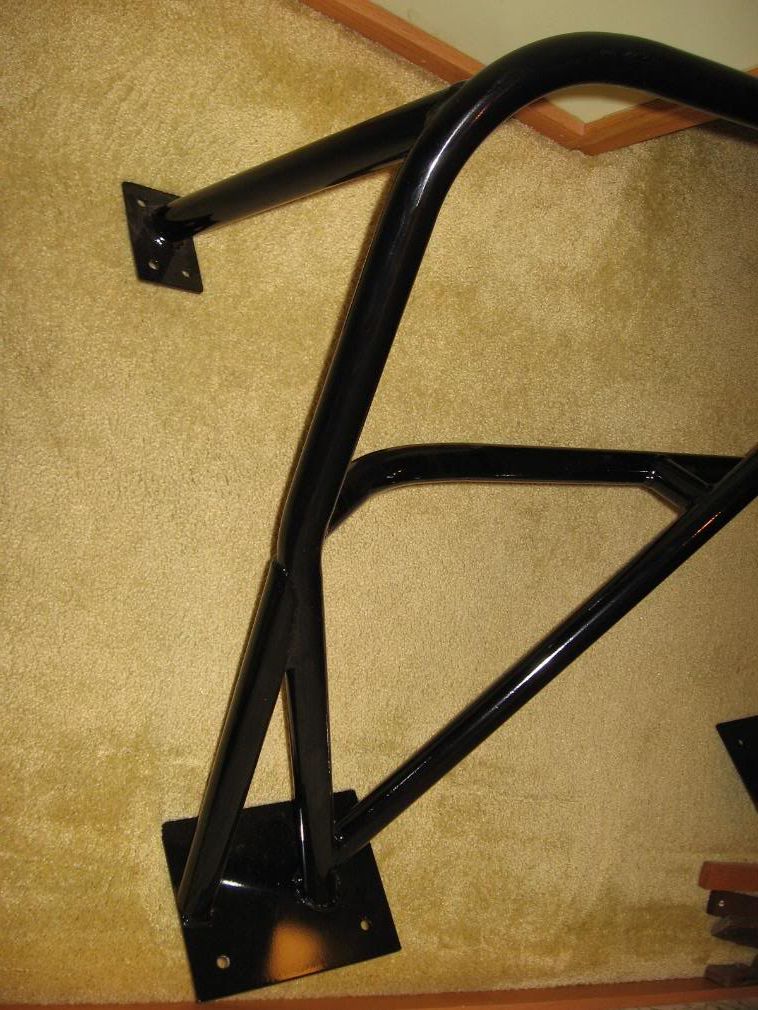
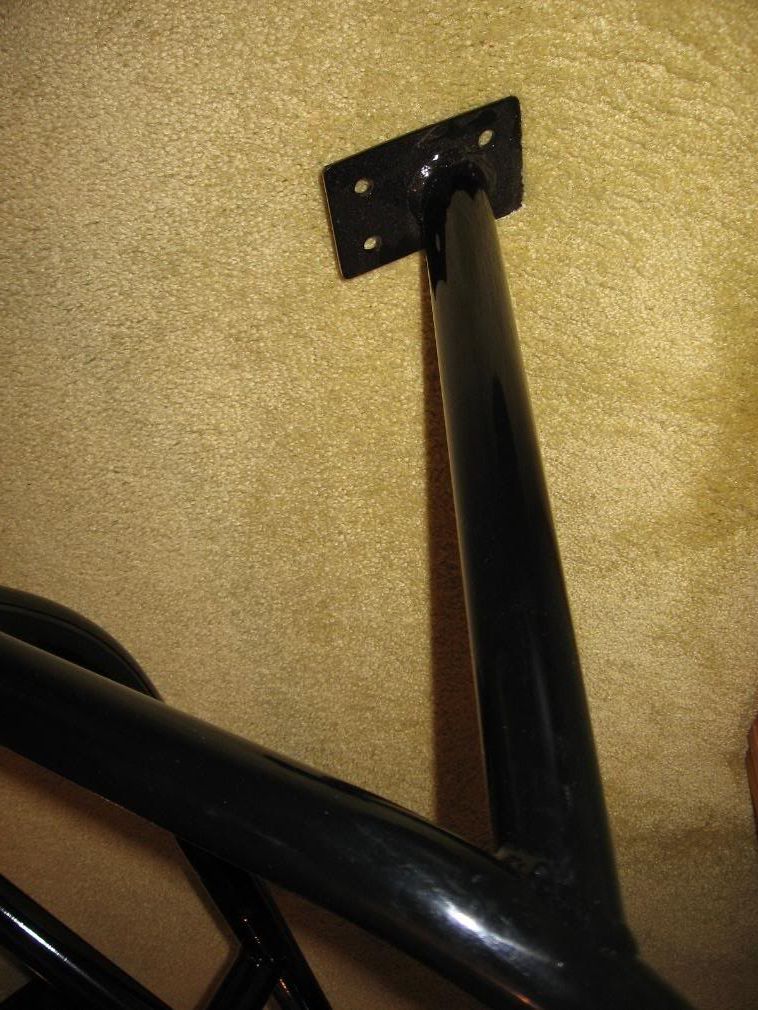
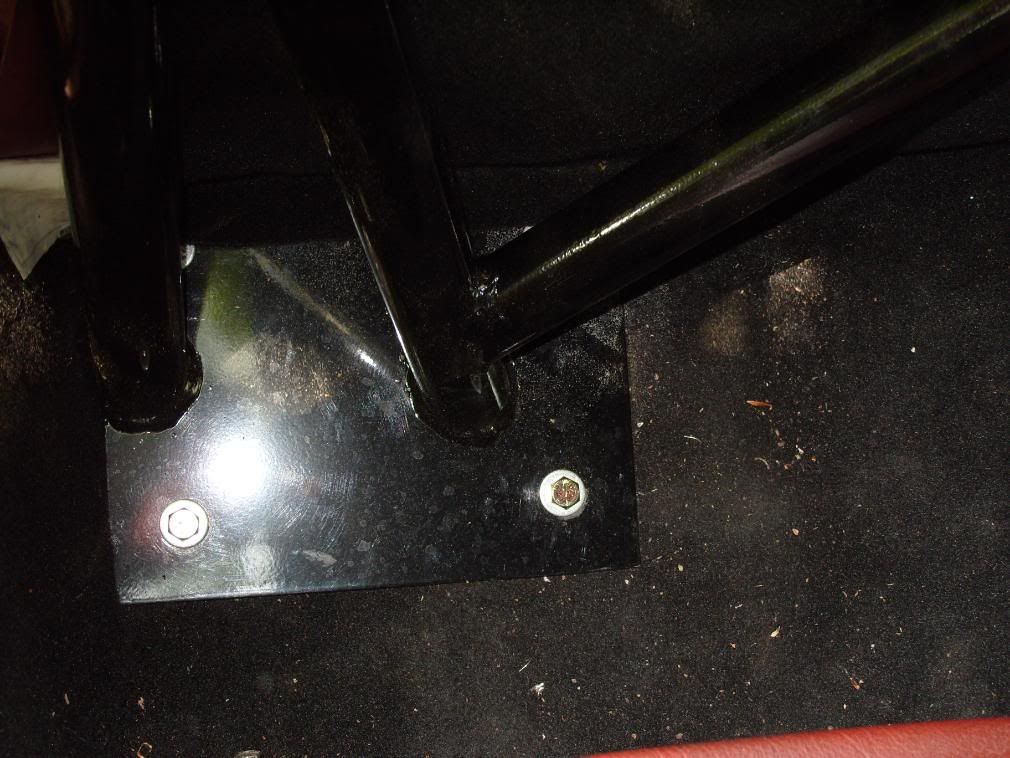
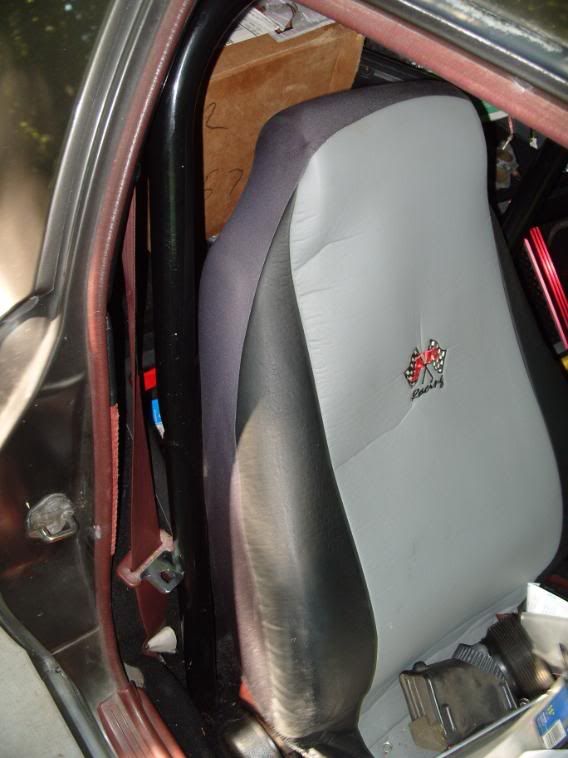
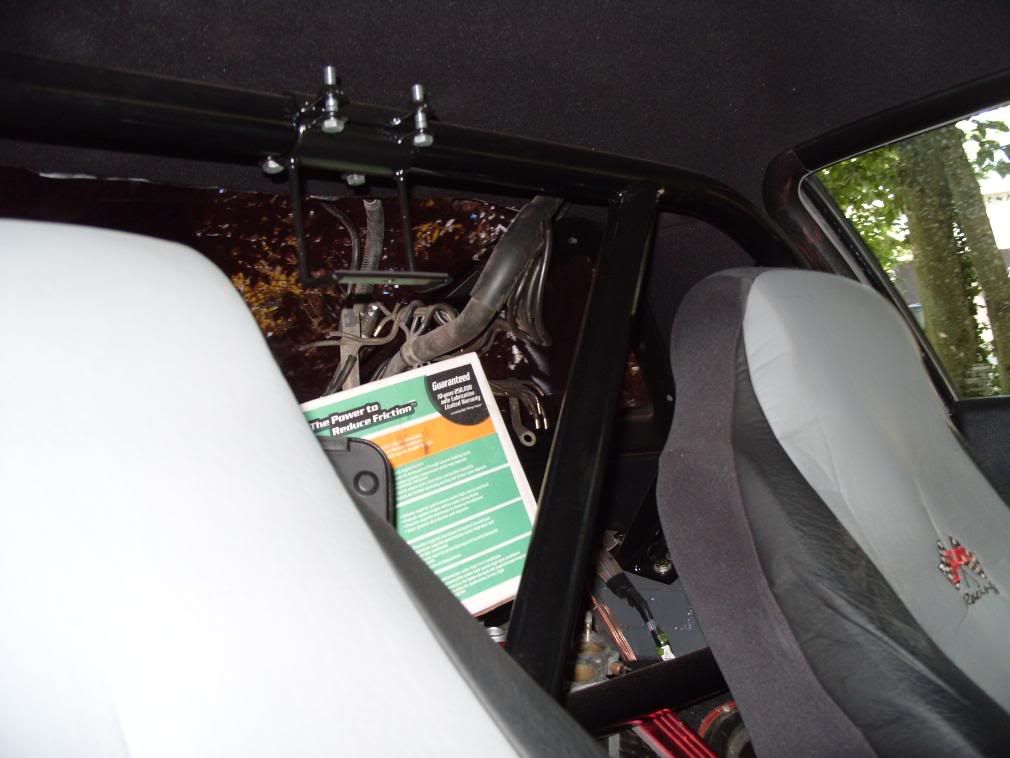
At the same time, I fabricated a roll bar for my car. It is a bolt in affair. I know, I know....bolt in doesn't give me as much of the chassis stiffening, but I'm sure it will help and gives me a place to mount my camera. Not to mention looking sweet.
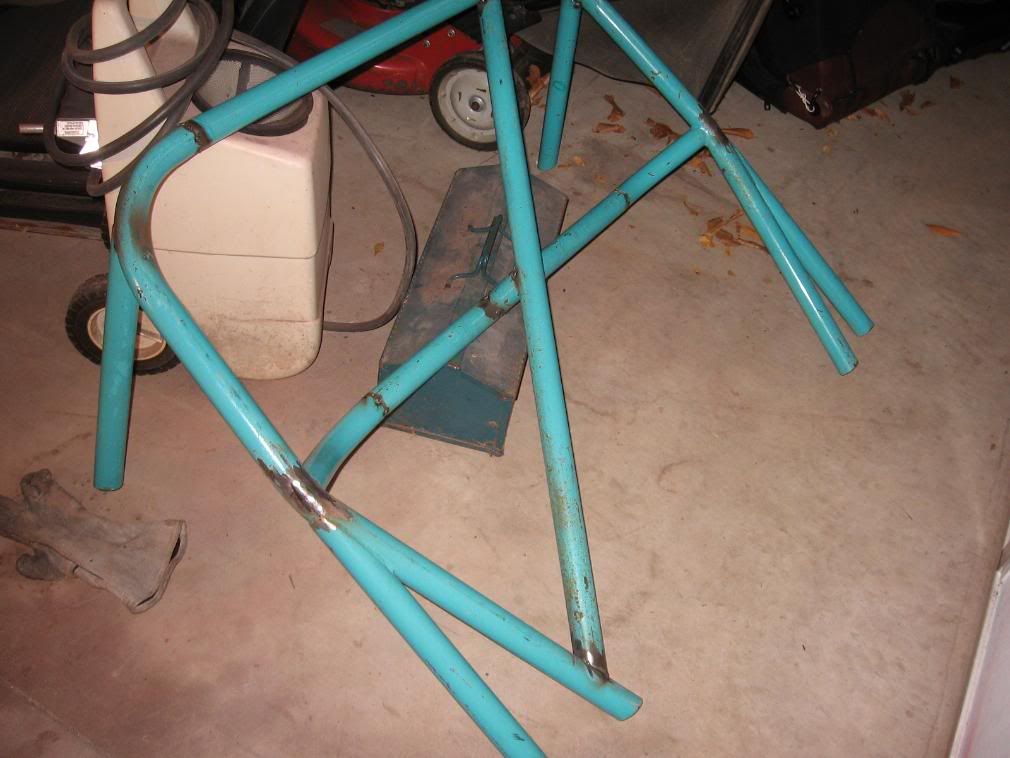
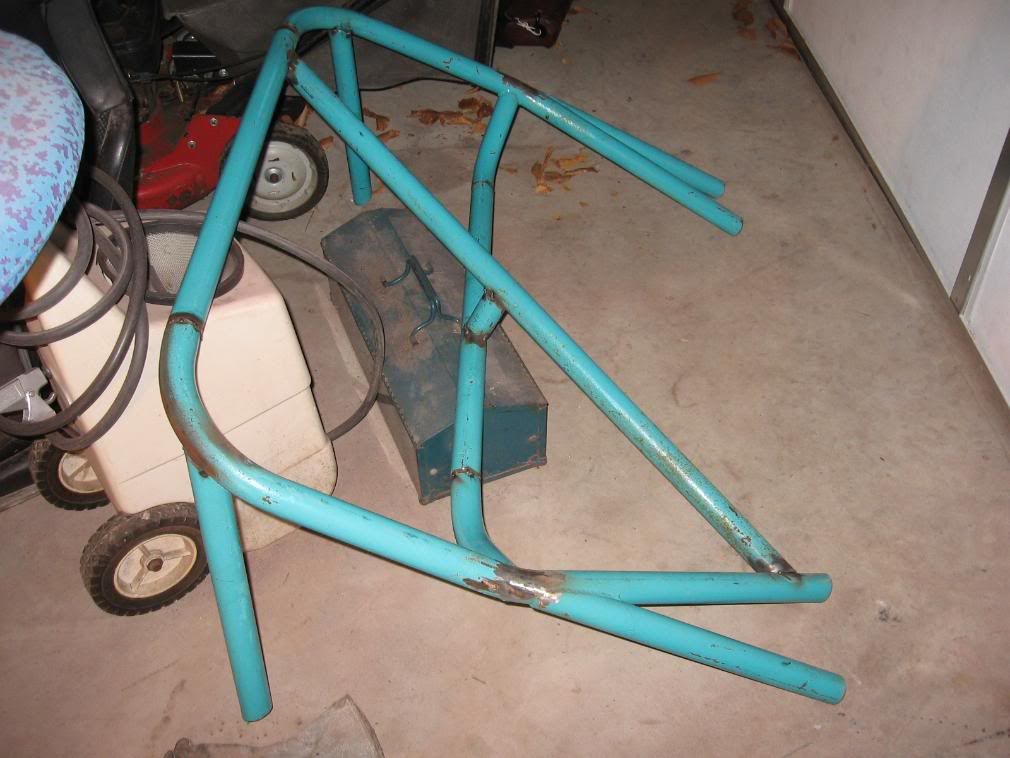
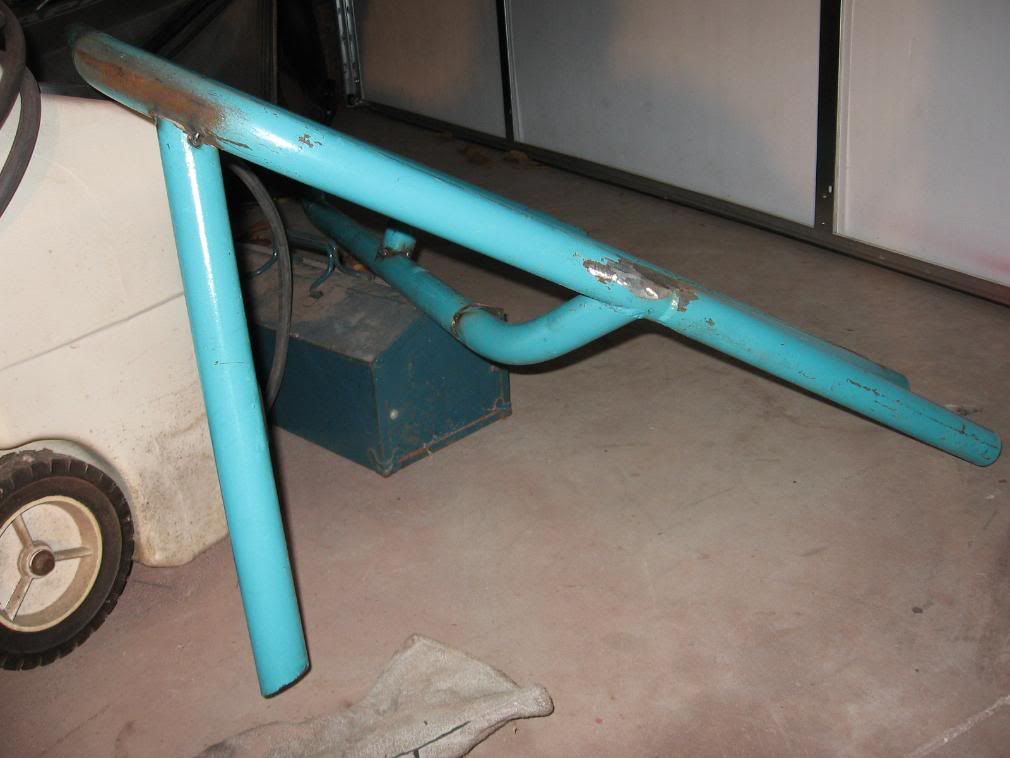
Sorry no in car pics. Plates were welded to the ends of the bars with holes for bolts. For Christmas my parents had the bar tig welded and powder coated black for me.
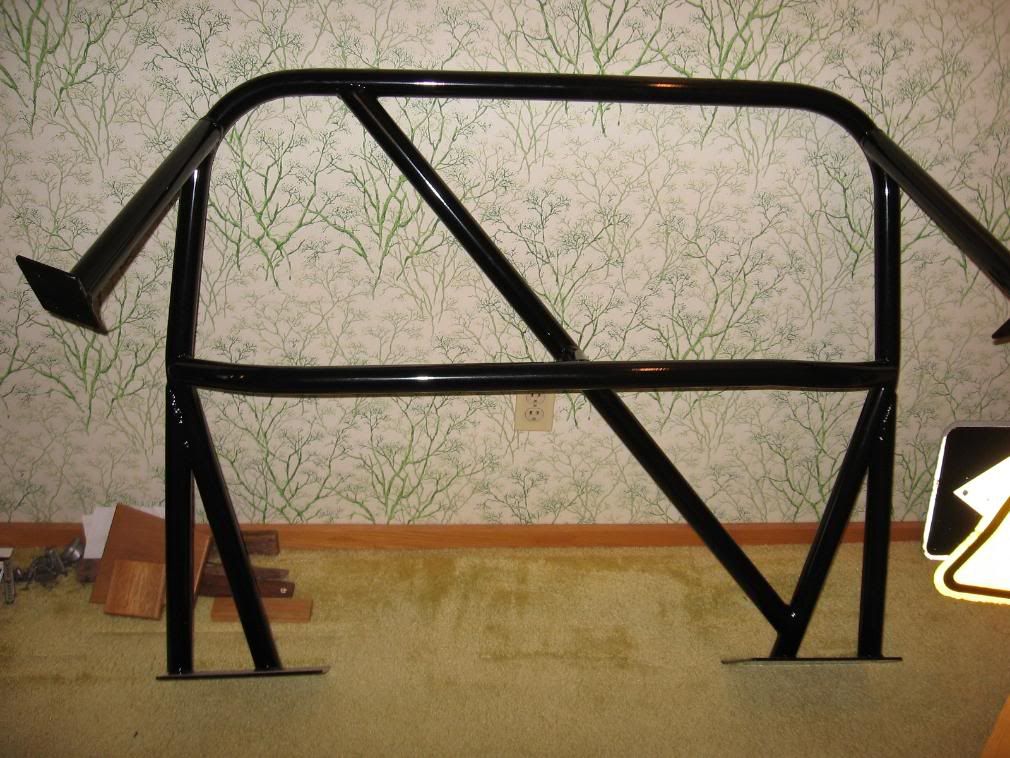
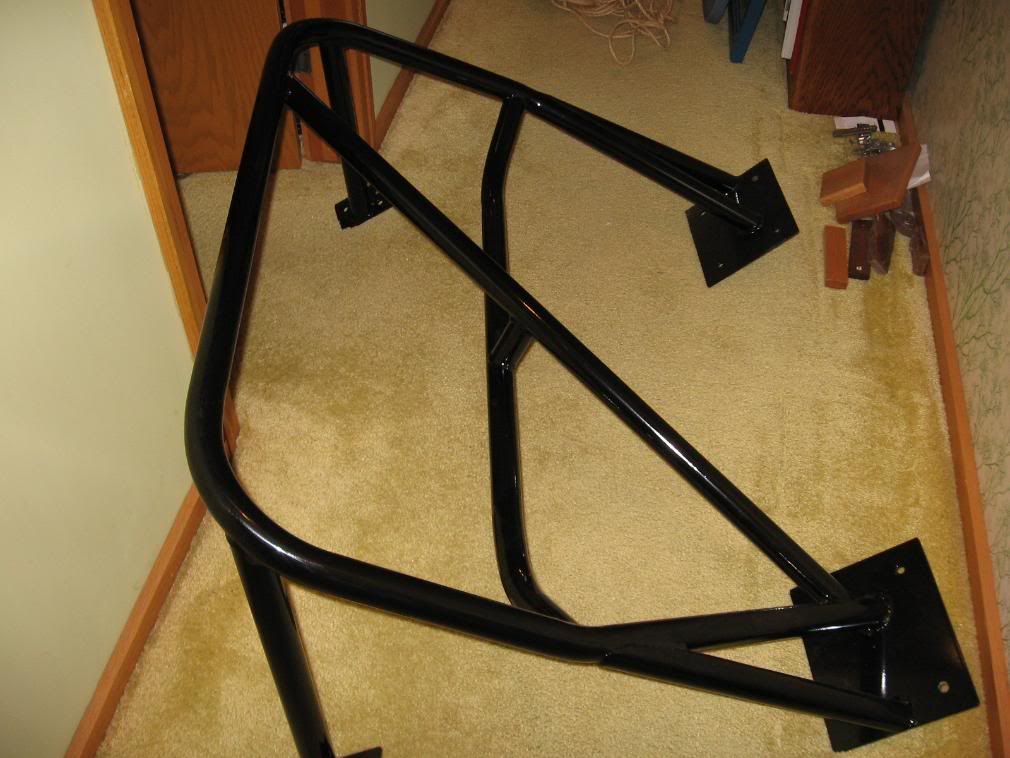

I won't be able to get pics of it installed until I get back for summer break.
Sorry no in car pics. Plates were welded to the ends of the bars with holes for bolts. For Christmas my parents had the bar tig welded and powder coated black for me.
I won't be able to get pics of it installed until I get back for summer break.
Thread Starter
Joined: Aug 2007
Posts: 273
Likes: 0
From: Muskegon, MI
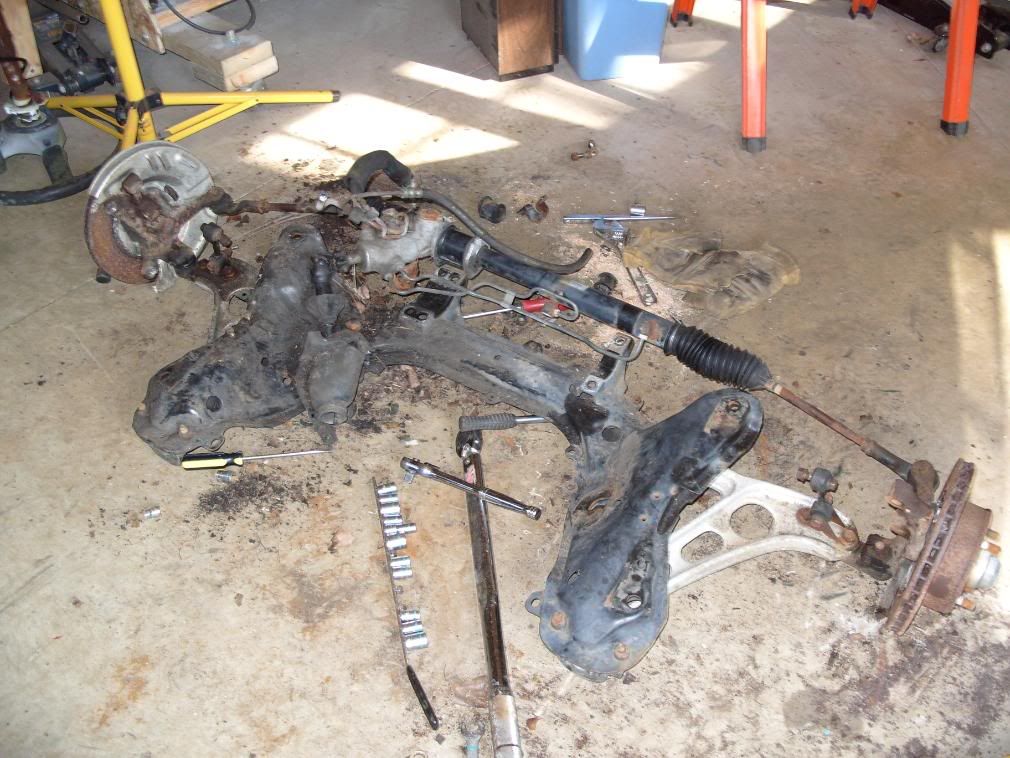
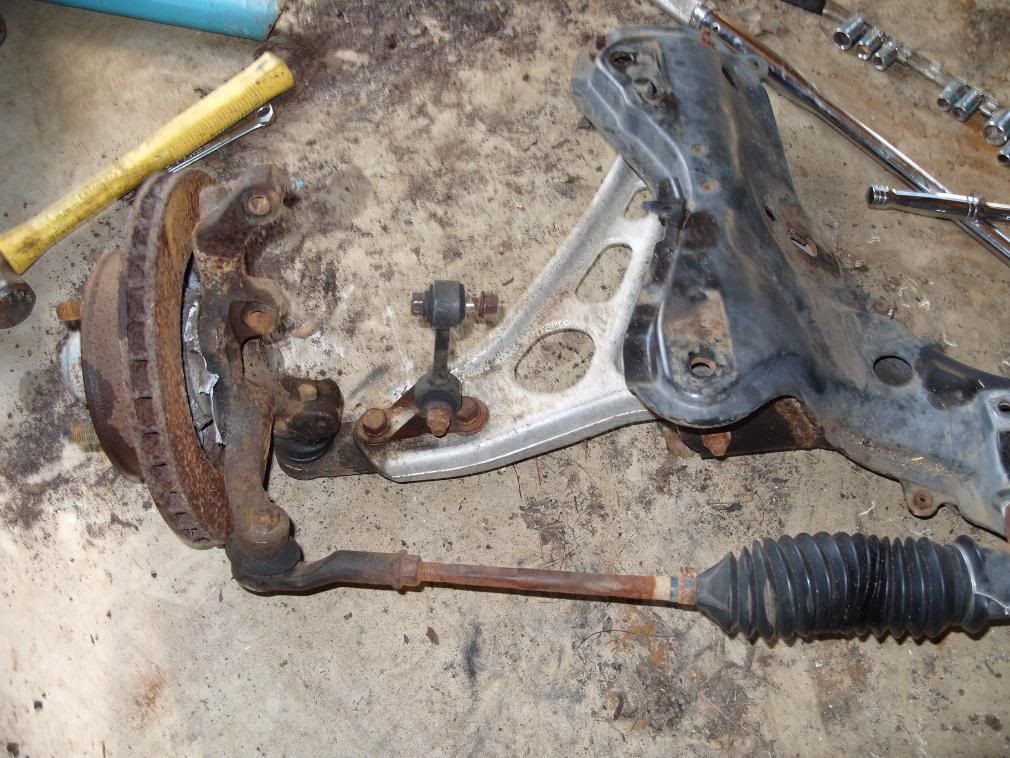
To install the S5 in the fb I decided not to go the route of sapping the front cover and oil pan because I wanted to use the electric MOP. Instead I did a lot of research thanks to this forum and picked up a subframe from a 88 at the local junkyard for $150 pretty good price considering it included the brakes, steering, column, and struts. I'll try to document the installation as best as possible so that I can build a tutorial when finished for others who want to attempt this.

I think that's about it for now. I hope to have more pics and details in a few weeks.
I think that's about it for now. I hope to have more pics and details in a few weeks.
Thread Starter
Joined: Aug 2007
Posts: 273
Likes: 0
From: Muskegon, MI
update
So it's been a while since I updated this thread. A lot has happened.
First off, my roll bar is finished and mounted. I have not taken any pictures of it with the completed interior but you get the idea.
Next time I'm in the garage I'll have to snap a few with the seats in place. I'm really proud of how it turned out. I also made a camera mount that attaches to the bar. It works great at the weekend autocrosses. The roll bar really helped me in two ways. I believe it really stiffened up the chassis, but it also forced me to deal with the rust forming in the wheel wells.
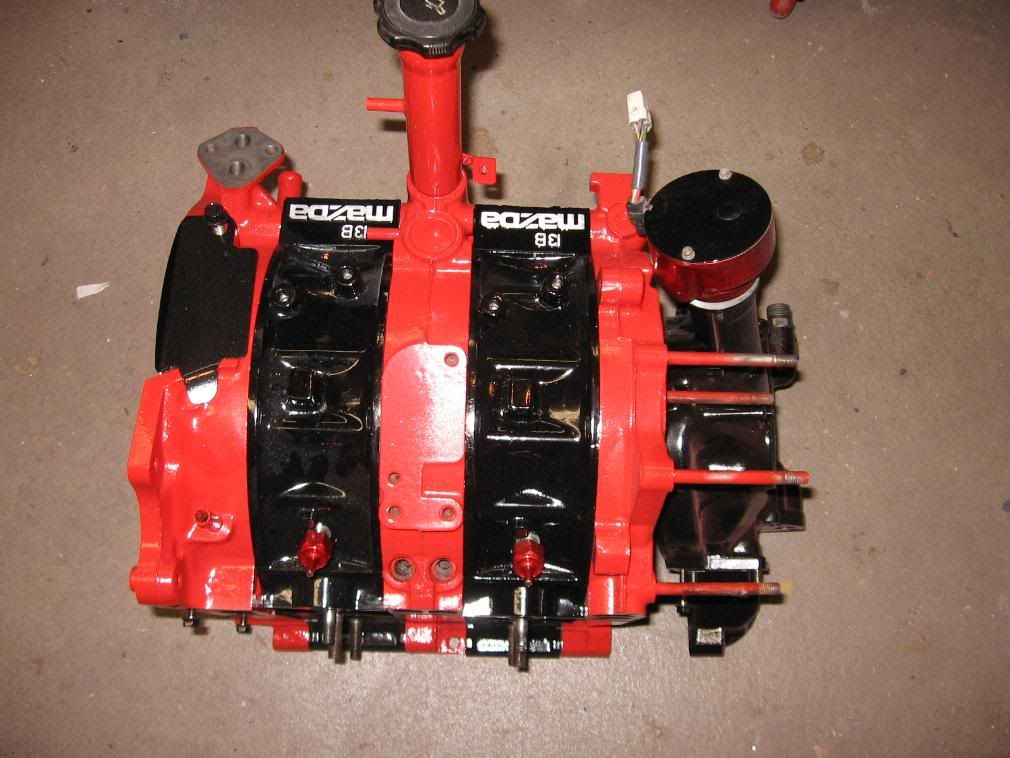
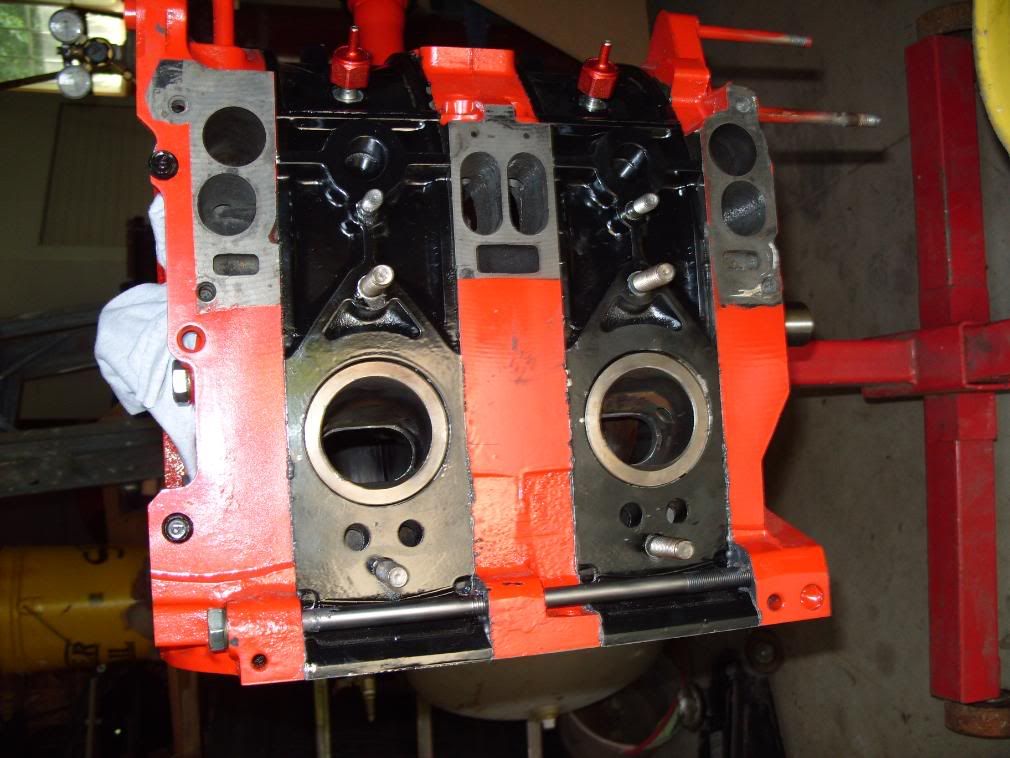
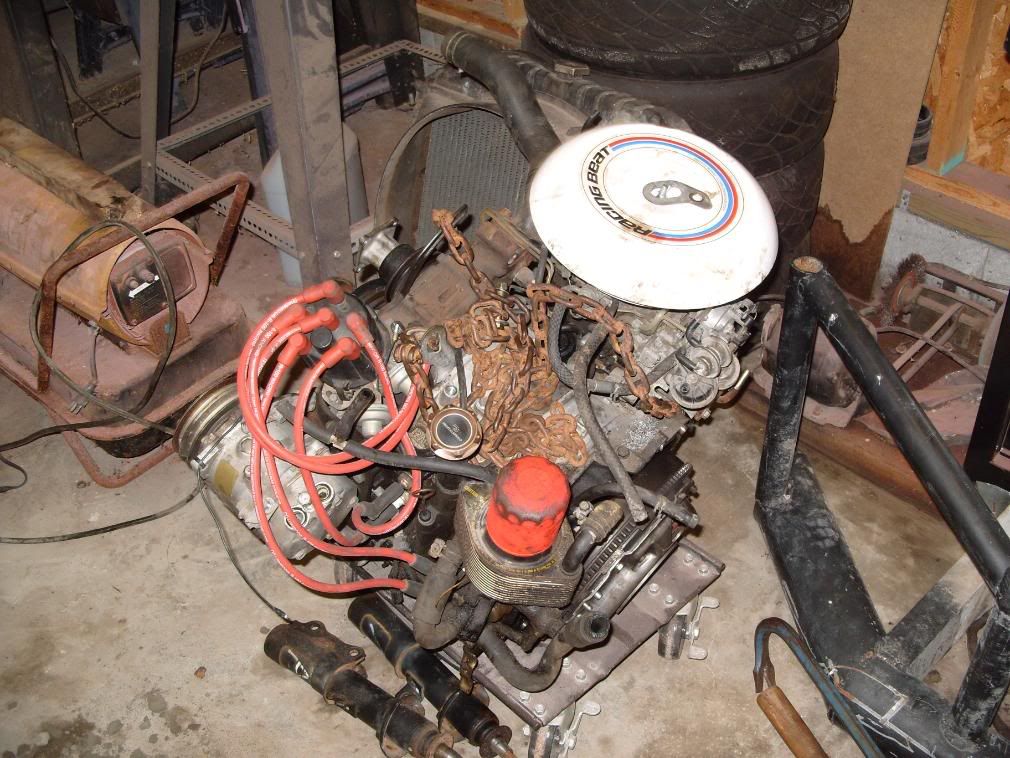
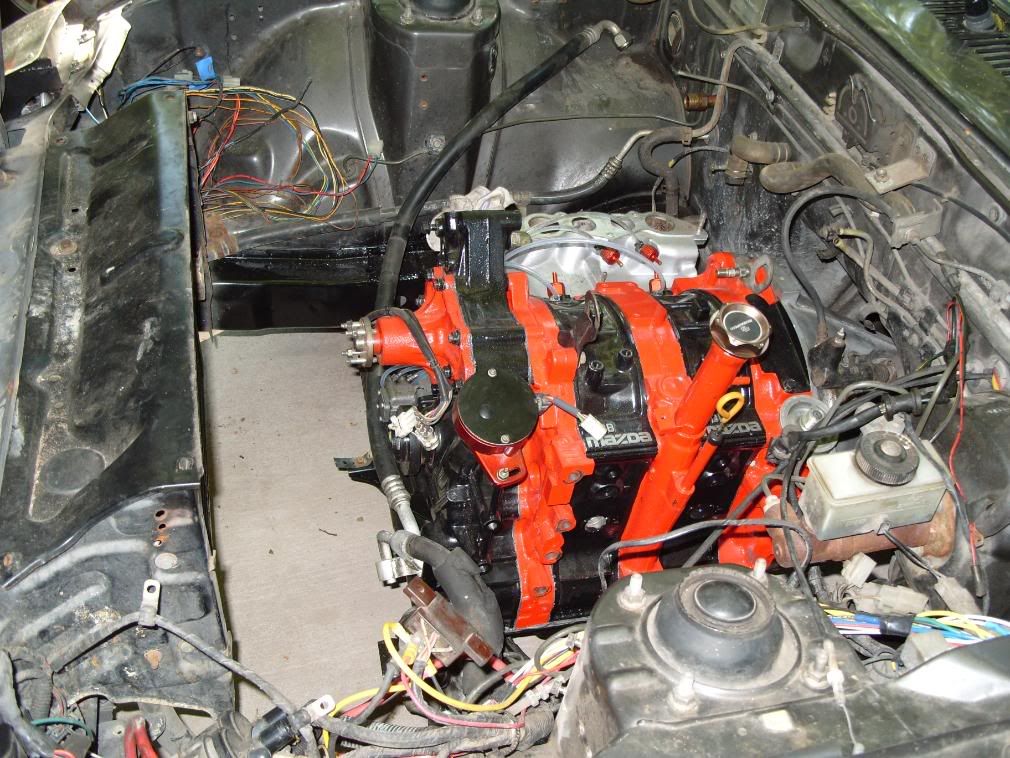
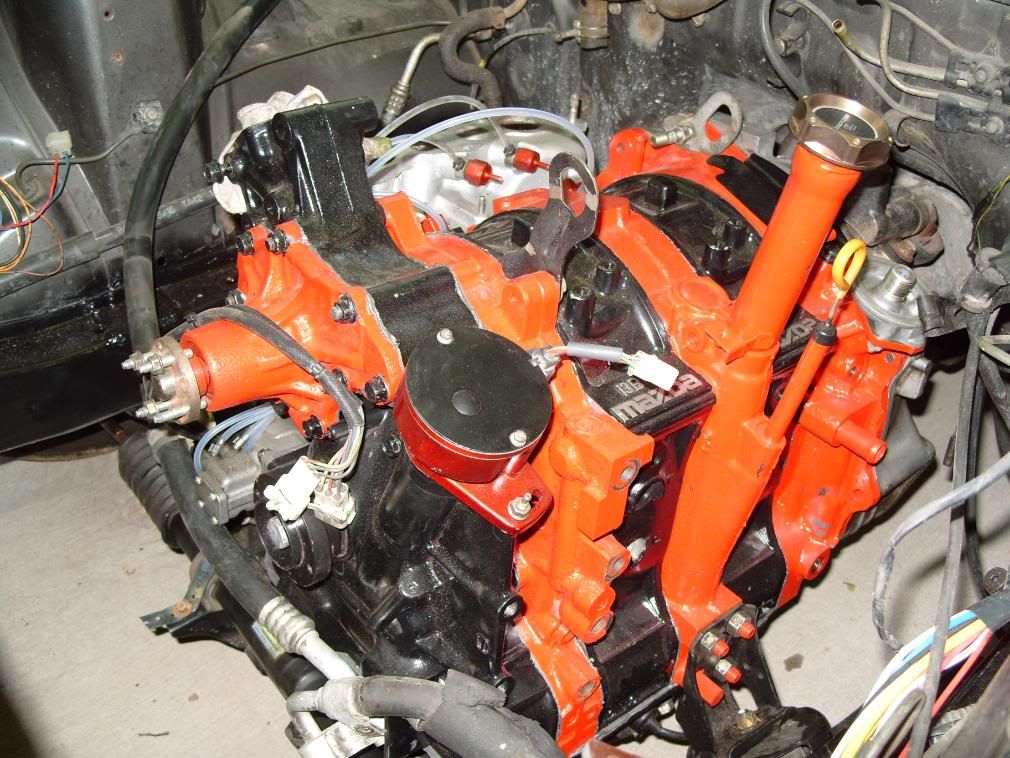
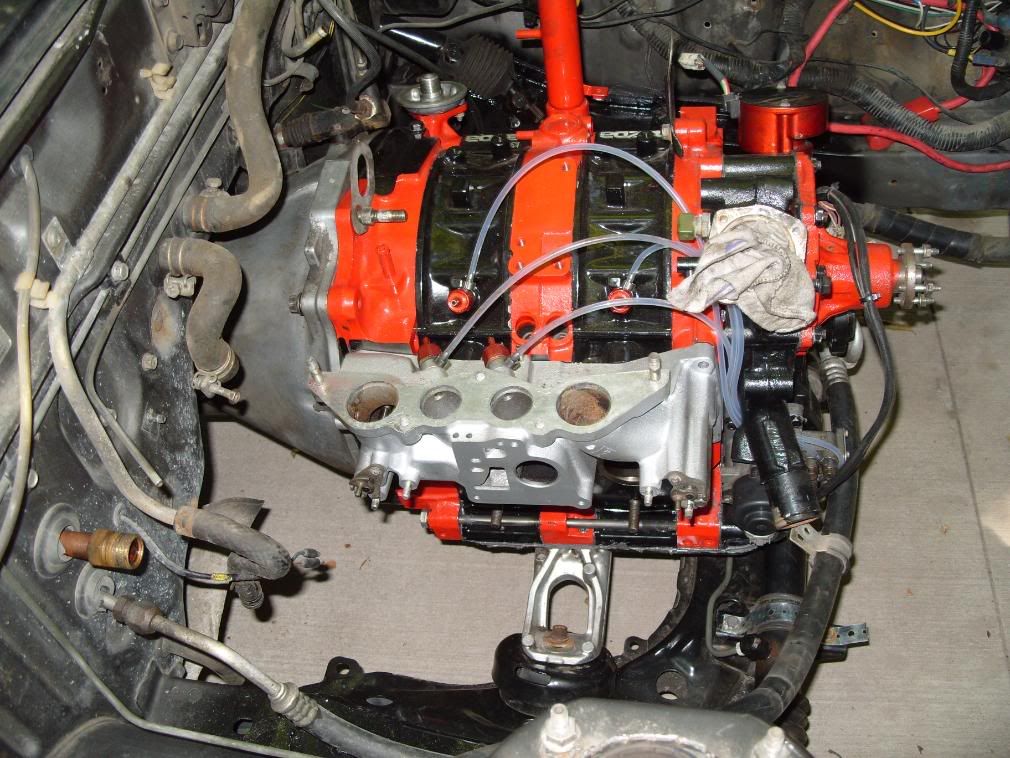
Next up is the Street Ported S5 engine. I have some pictures of my port work but I don't know where they went. Anyway, here are a couple of pics of the assembled block.
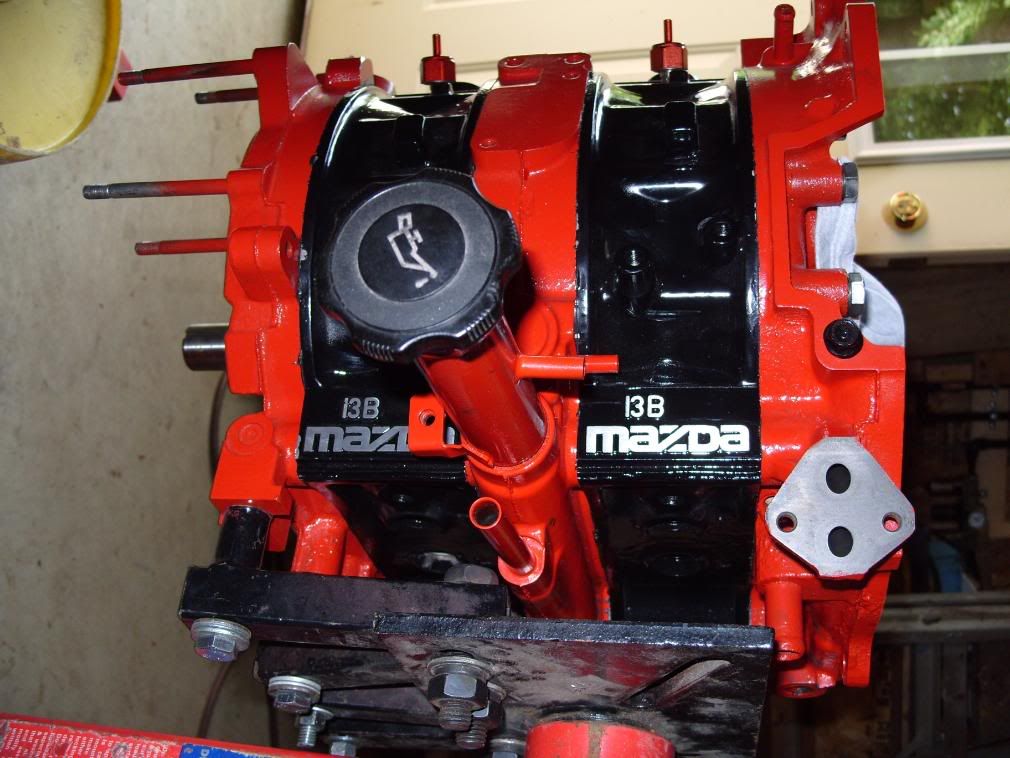
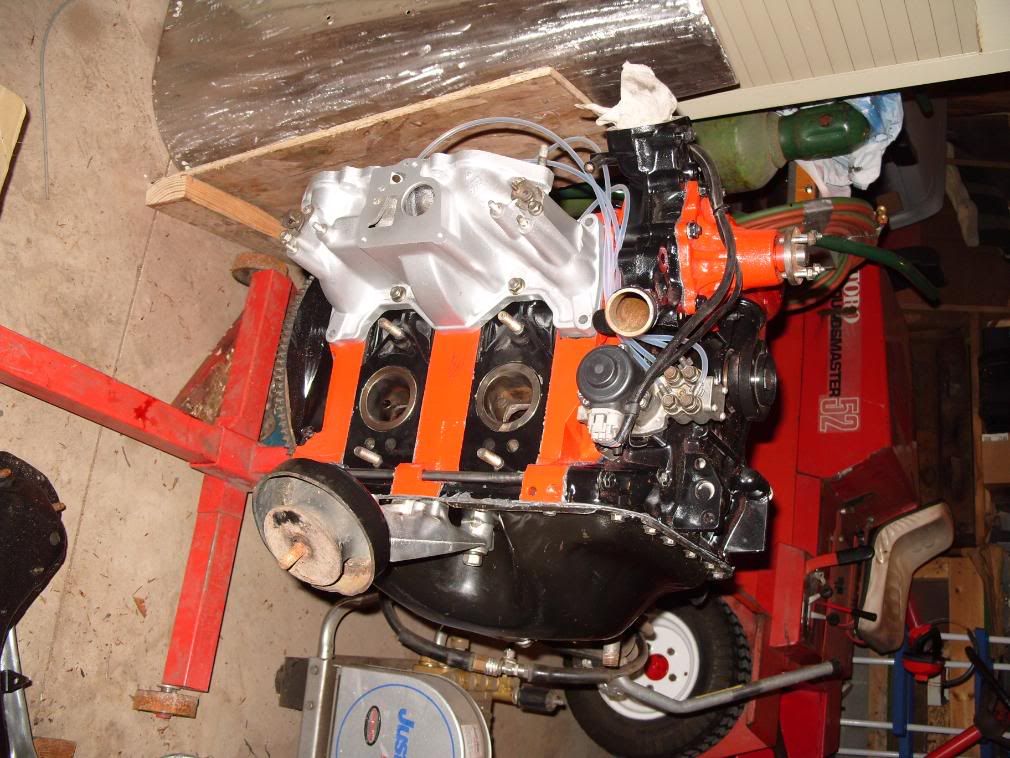
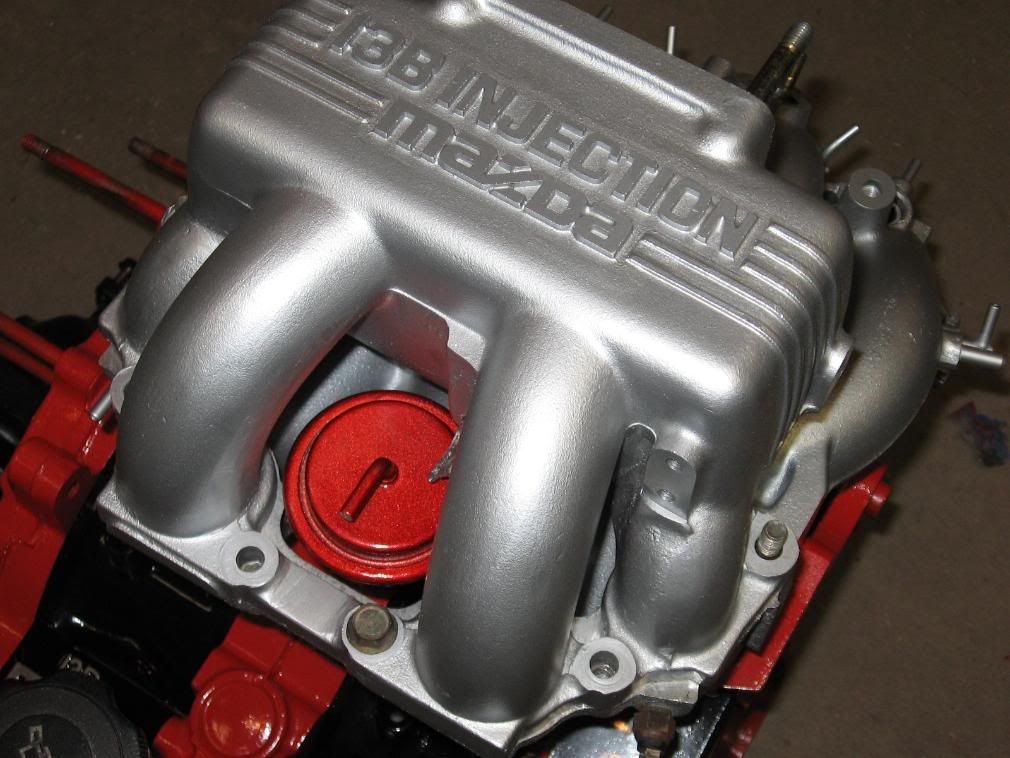
I made new lines for the OMP because the originals were old and cracked. I followed this thread https://www.rx7club.com/2nd-generation-specific-1986-1992-17/rebuilding-omp-oil-injection-lines-614754/
I think the only thing I'd change from what Racer X-8 wrote were the lengths of the tubing. I have not crimped my ends yet and may shorten them once the intake is assembled.
First off, my roll bar is finished and mounted. I have not taken any pictures of it with the completed interior but you get the idea.
Next time I'm in the garage I'll have to snap a few with the seats in place. I'm really proud of how it turned out. I also made a camera mount that attaches to the bar. It works great at the weekend autocrosses. The roll bar really helped me in two ways. I believe it really stiffened up the chassis, but it also forced me to deal with the rust forming in the wheel wells.
Next up is the Street Ported S5 engine. I have some pictures of my port work but I don't know where they went. Anyway, here are a couple of pics of the assembled block.
I made new lines for the OMP because the originals were old and cracked. I followed this thread https://www.rx7club.com/2nd-generation-specific-1986-1992-17/rebuilding-omp-oil-injection-lines-614754/
I think the only thing I'd change from what Racer X-8 wrote were the lengths of the tubing. I have not crimped my ends yet and may shorten them once the intake is assembled.
Thread Starter
Joined: Aug 2007
Posts: 273
Likes: 0
From: Muskegon, MI
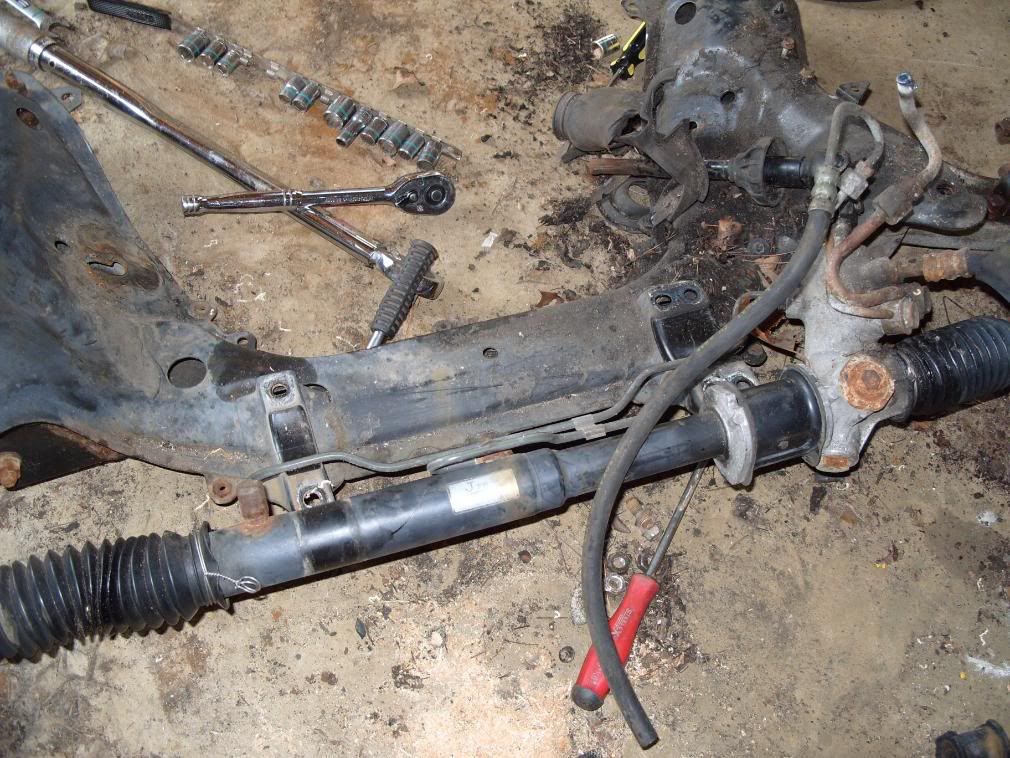
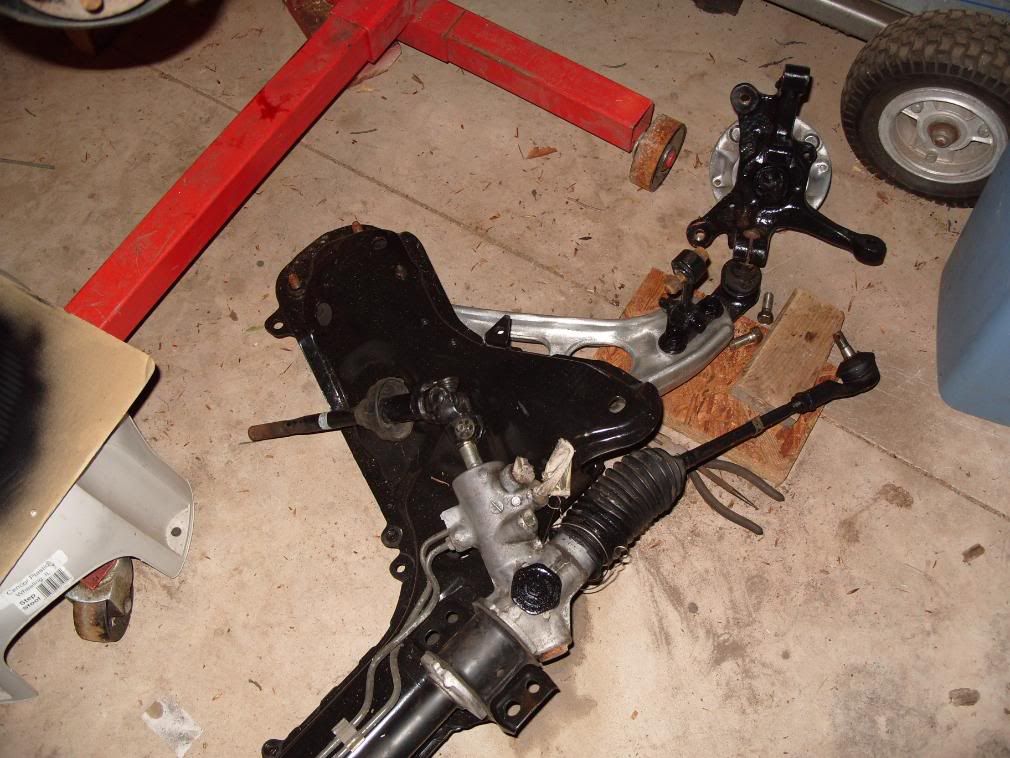
My next big project was to reassemble the new sub-frame. What a difference some paint can make.
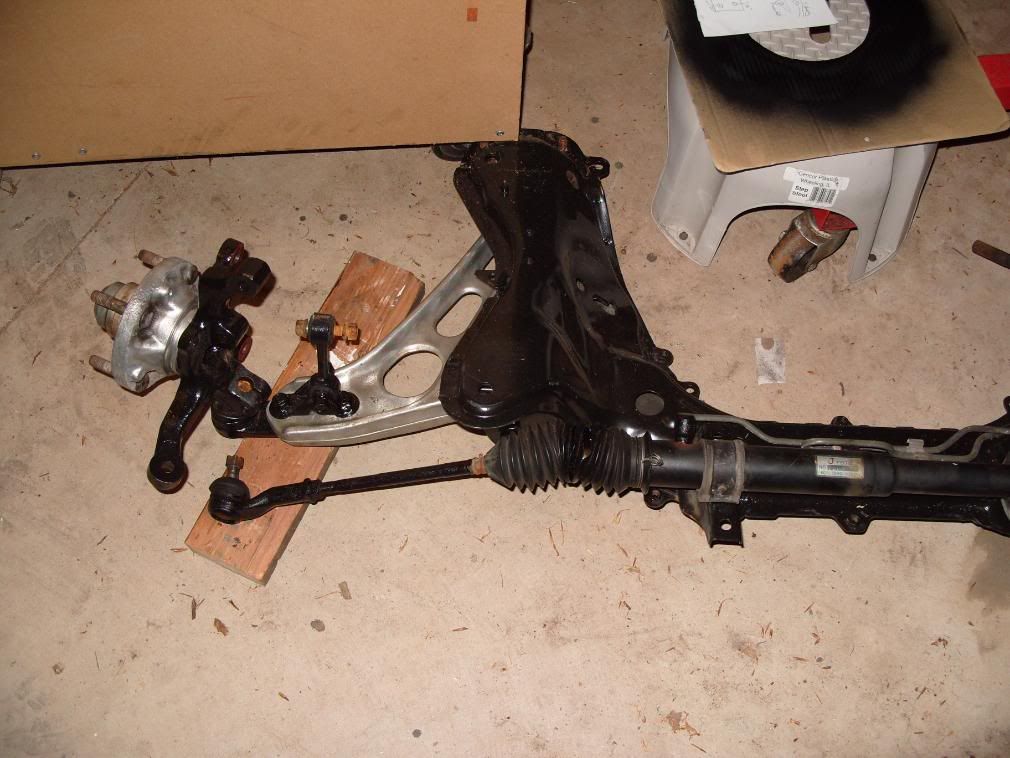
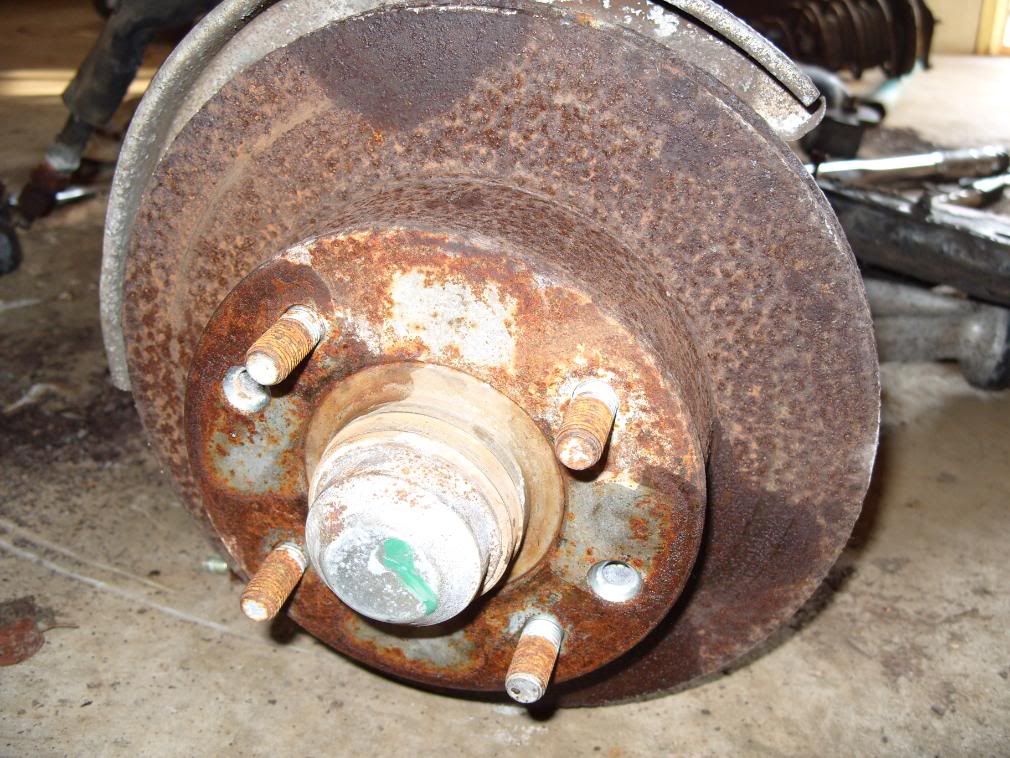
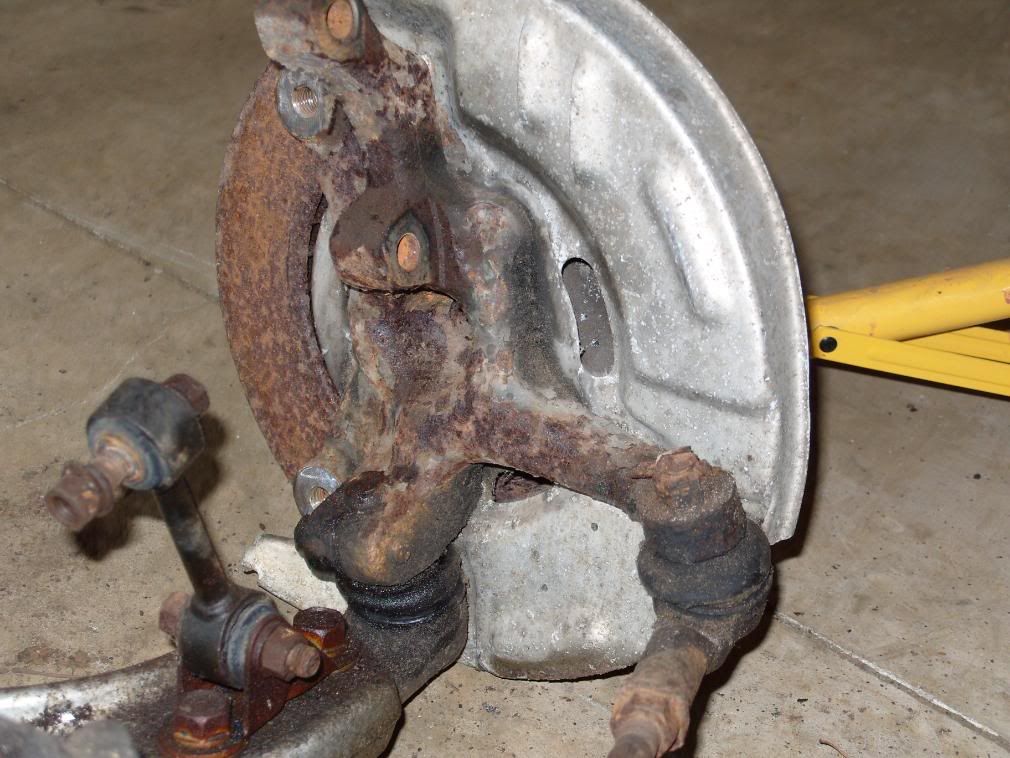
I had to use a torch and a 30ton press to remove the old brake rotors from the hubs. The aluminum had seized to the rotor and would not budge. I don't know if anyone else has had this problem but my method got the job done.
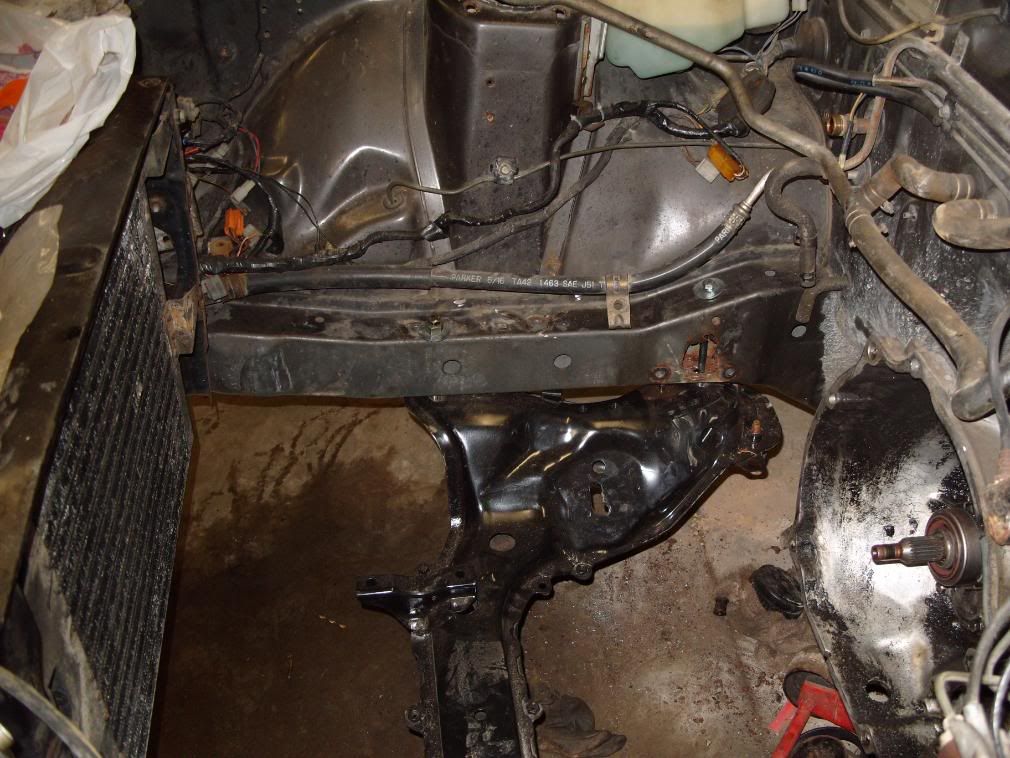
Then it was time for out with the 12a.


Everything went smoothly for the engine removal. Only hitch was breaking the bolt for the rear engine lift point. A little drilling and it was out of there.
I had to use a torch and a 30ton press to remove the old brake rotors from the hubs. The aluminum had seized to the rotor and would not budge. I don't know if anyone else has had this problem but my method got the job done.
Then it was time for out with the 12a.
Everything went smoothly for the engine removal. Only hitch was breaking the bolt for the rear engine lift point. A little drilling and it was out of there.
Trending Topics
Lives on the Forum
Joined: Jun 2004
Posts: 11,359
Likes: 14
From: Grand Rapids Michigan
Looking good man! 
I don't suppose you'll be at the Lansing race on 8/9, eh?
Have you had a chance to check out the video of your car from Knoll Gass this spring? Your car looked awesome man...
I don't suppose you'll be at the Lansing race on 8/9, eh?
Have you had a chance to check out the video of your car from Knoll Gass this spring? Your car looked awesome man...
Thread Starter
Joined: Aug 2007
Posts: 273
Likes: 0
From: Muskegon, MI
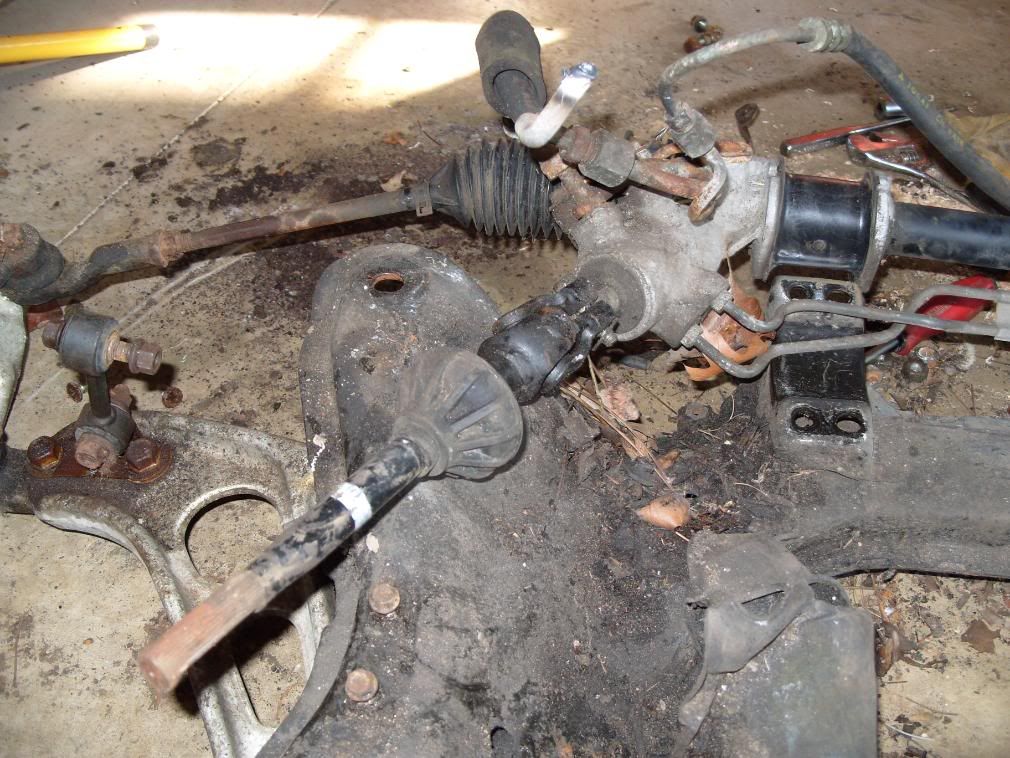
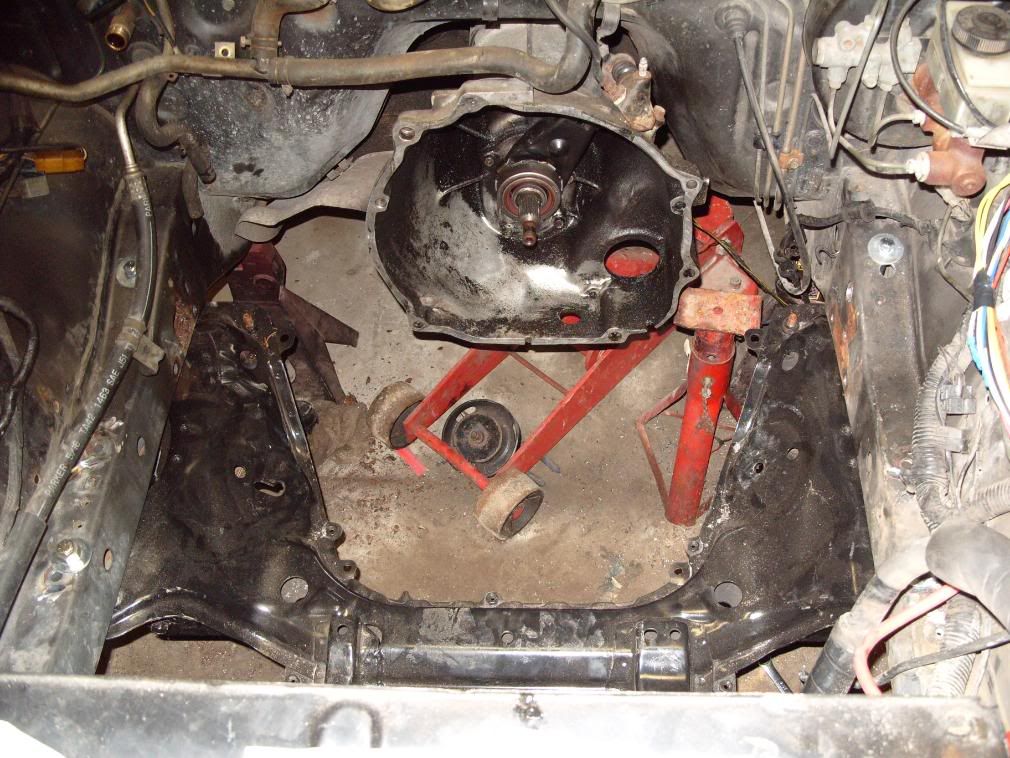
Once the engine was out, the original sub-frame could be removed. There are 4 nuts that hold the engine support on and then another 6 or so bolts that hold the front drag links and sway bar. After disconnecting the strut tops and steering it all just falls in your lap.
Pretty satisfying to have that thing out of there.
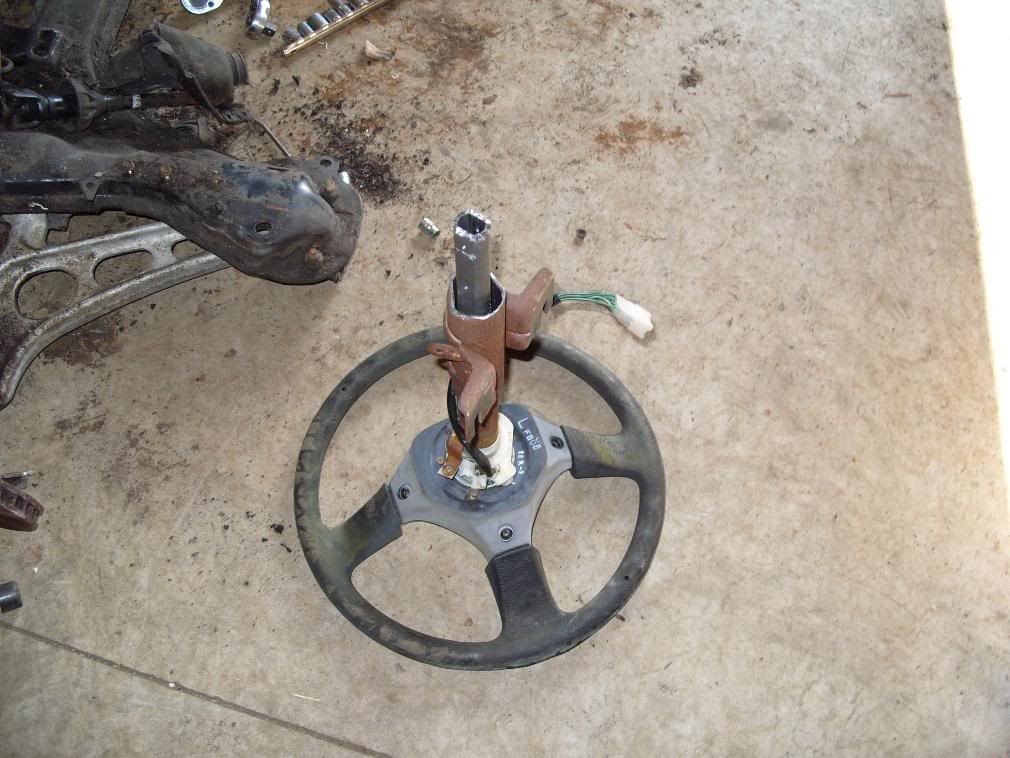
For my next trick I removed the steering column. I didn't take any pictures of this but it was pretty straight forward. After unplugging everything I unbolted it from the dash support. I realize now that the ignition switch is held on by 2 funny looking bolts but at first glance they didn't look much like bolts at all, so I drilled them out. Lesson learned. For the record they are 8mm x 1.25.
The lower half of the FC column needs to be added to the upper half of the FB one. Other things I read said that these should just slide together, that is after you break the plastic pins. Mine did not slide together as well as I would like, so I ground off a little on the flat parts. The FC piece must slide all of the way into the FB one. Once it was in place I put 2 5/16" x 3/4" roll pins through both to hold them together. The engine bay end of the FC column has a needle bearing in it to support the shaft. After carefully measuring the position of the bearing, I welded the FC tube and bearing to the FB tube. A bracket had to be made and also welded to the tube to support it. Originally the steering box had supported the other end.
Pretty satisfying to have that thing out of there.
For my next trick I removed the steering column. I didn't take any pictures of this but it was pretty straight forward. After unplugging everything I unbolted it from the dash support. I realize now that the ignition switch is held on by 2 funny looking bolts but at first glance they didn't look much like bolts at all, so I drilled them out. Lesson learned. For the record they are 8mm x 1.25.
The lower half of the FC column needs to be added to the upper half of the FB one. Other things I read said that these should just slide together, that is after you break the plastic pins. Mine did not slide together as well as I would like, so I ground off a little on the flat parts. The FC piece must slide all of the way into the FB one. Once it was in place I put 2 5/16" x 3/4" roll pins through both to hold them together. The engine bay end of the FC column has a needle bearing in it to support the shaft. After carefully measuring the position of the bearing, I welded the FC tube and bearing to the FB tube. A bracket had to be made and also welded to the tube to support it. Originally the steering box had supported the other end.
Thread Starter
Joined: Aug 2007
Posts: 273
Likes: 0
From: Muskegon, MI
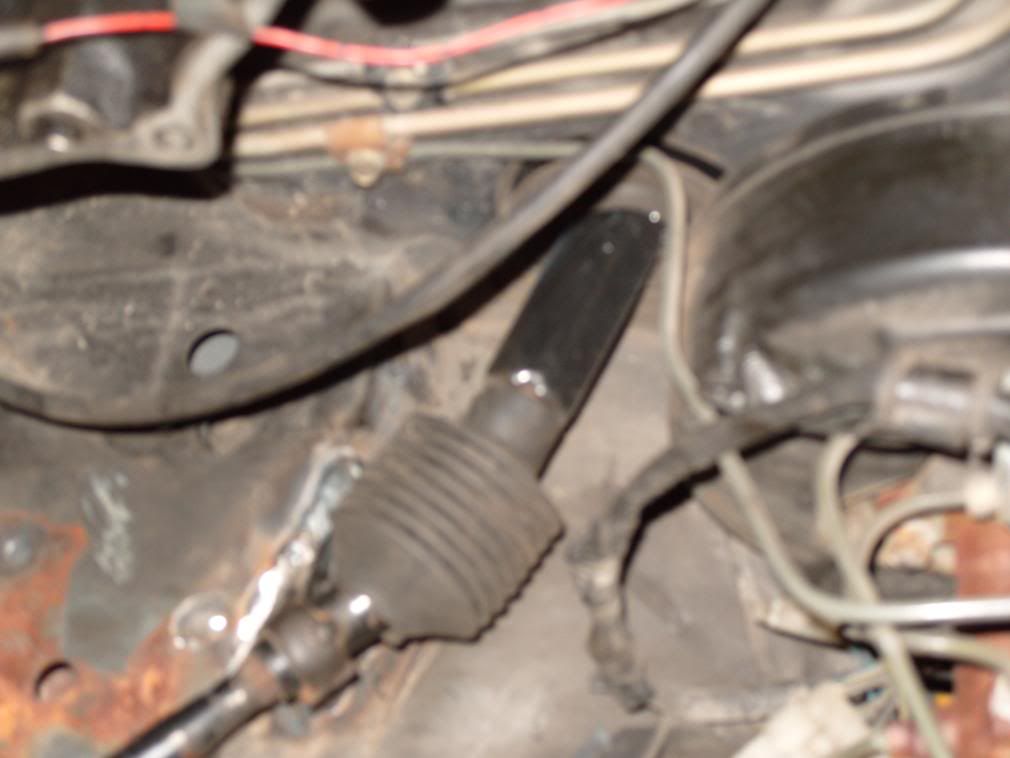
Sorry for the blurry pic in the last post. I'll have to to get another.
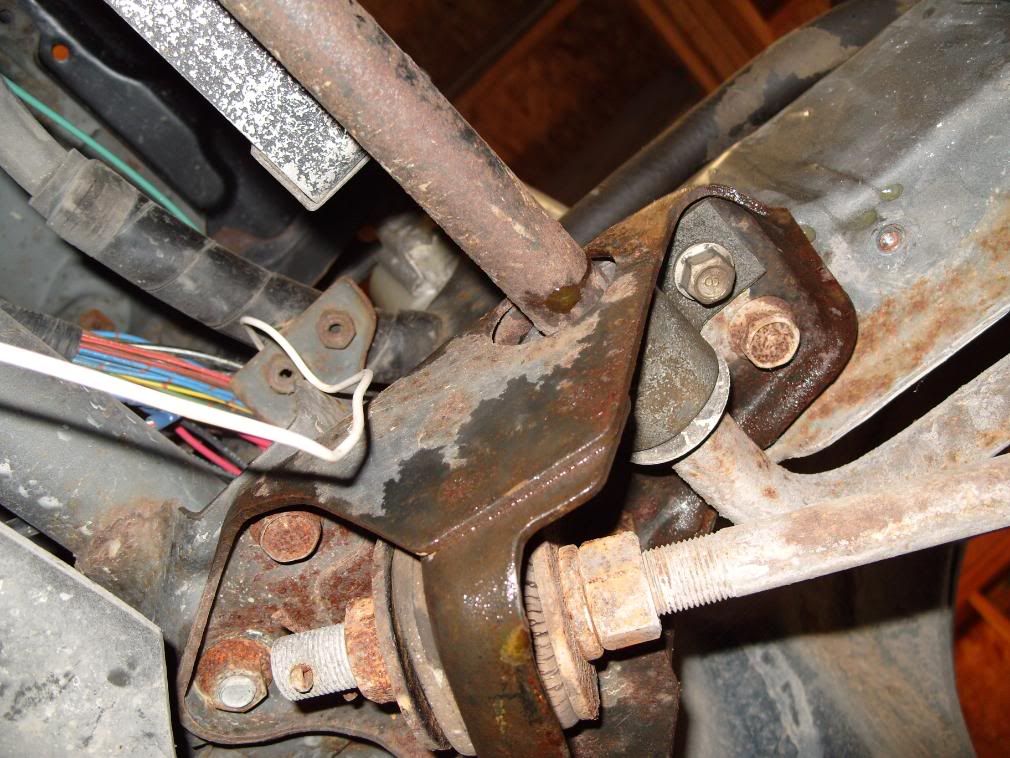
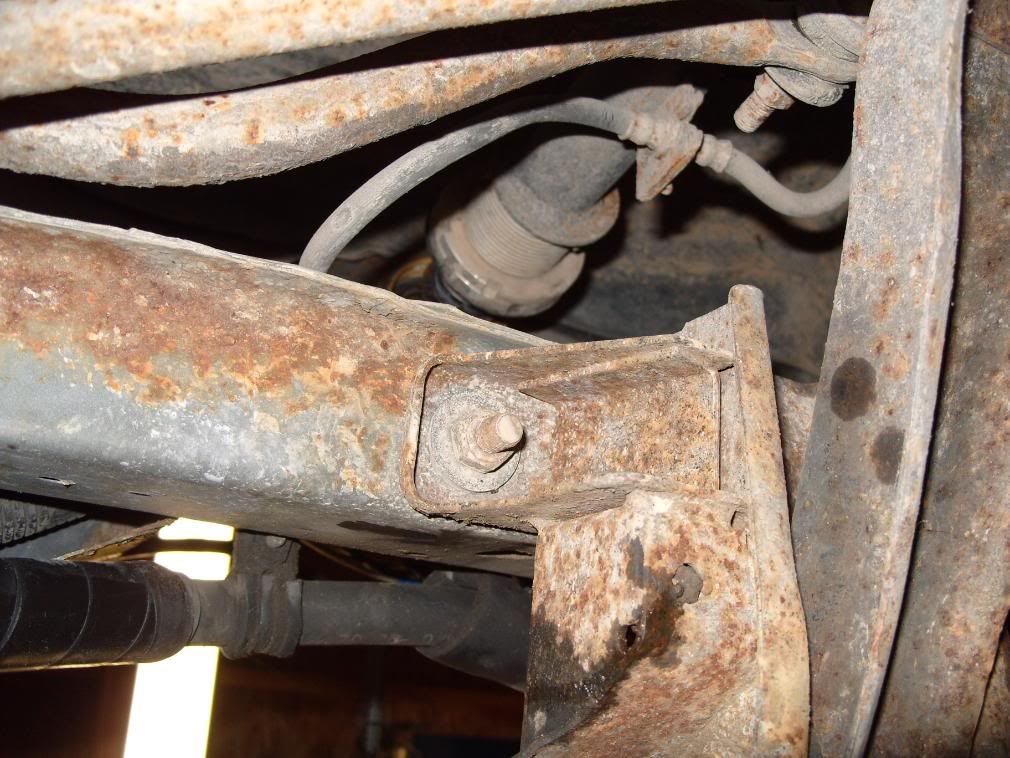
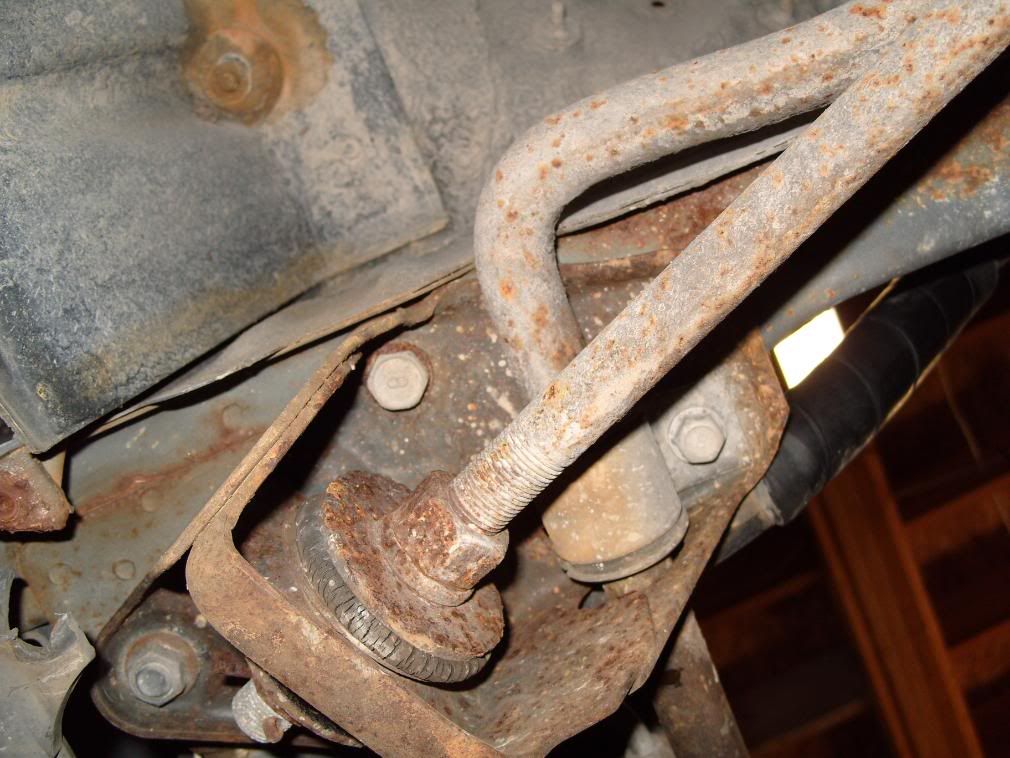
Now for the fun part. Mounting the new sub-frame. According to other things I've read this was supposed to be a mostly bolt in operation. The frame can be mounted on the bolts that originally held the frame in place, but after some measuring, I decided I did not like it. Doing this will locate the frame too far forward in my opinion.
I opted to drill some holes and move my mounts 1" to the rear. This allows for better caster and engine mount alignment. Since the holes were so close to the original holes and crush collars, I decided that welding a 1/8" plate over the top would be sufficient. The rear holes pass though the support for the steering box and idler arm. There was a rust spot where the idler was so I welded a plate over it as well.
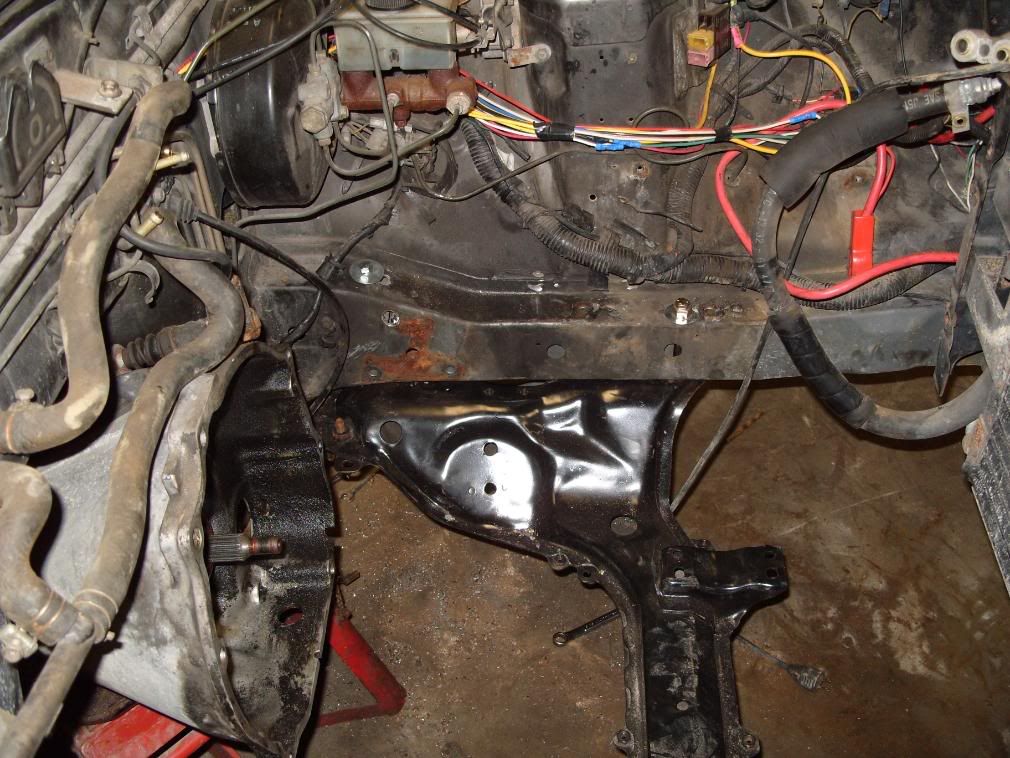
The fender washers were just to hold it in place while I made up my mind about where to put it. Don't worry.
There was a short lip that used to protrude down from the inner fender that needed a little modification with the big hammer, but after some pounding the frame fits nicely.
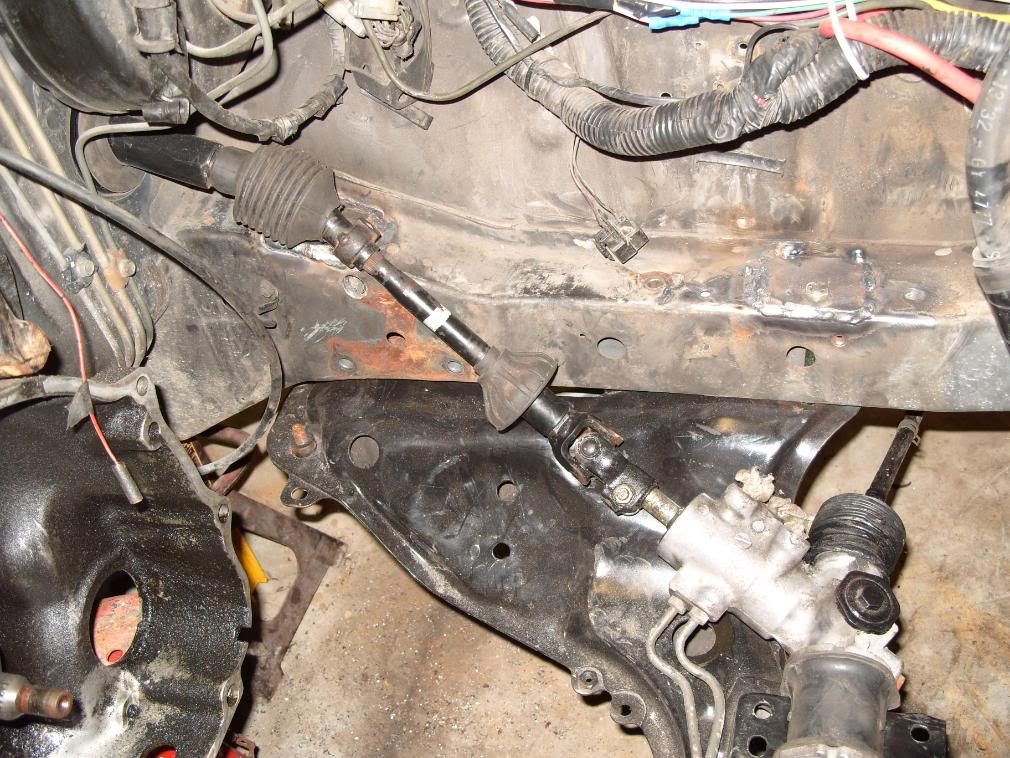
The front bolts are 3/8"-16 x 4.5" and the rear are 3/8"-16 x 7" all 4 are grade 8. I reused the heavy washers to hold the bottom.
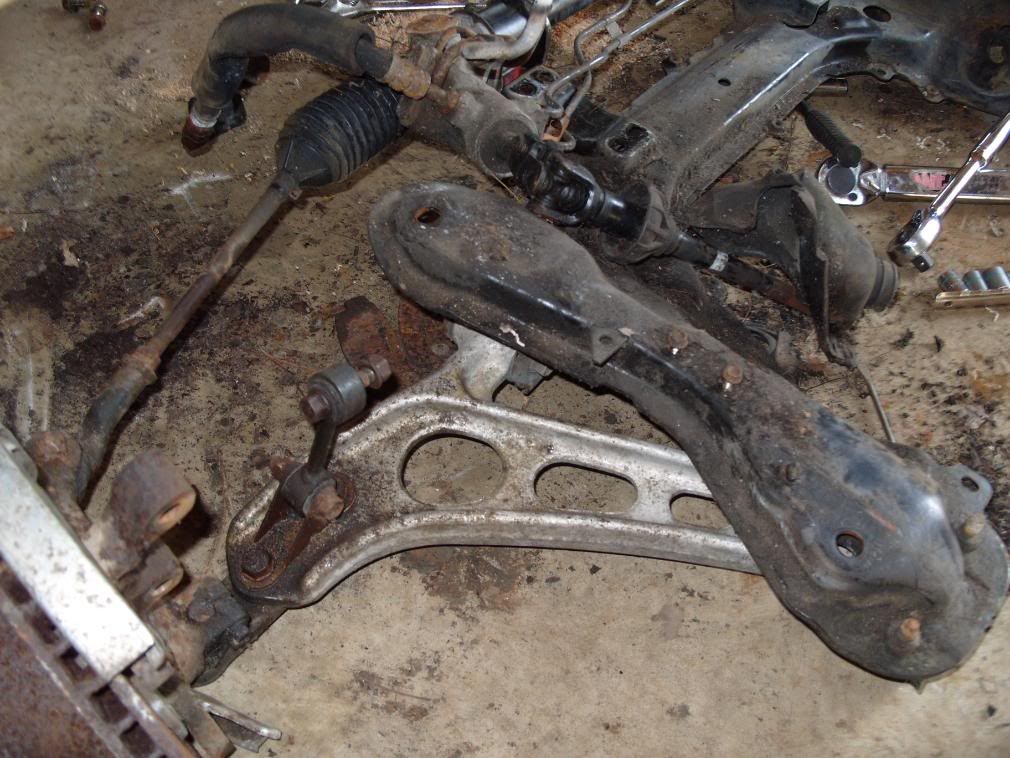
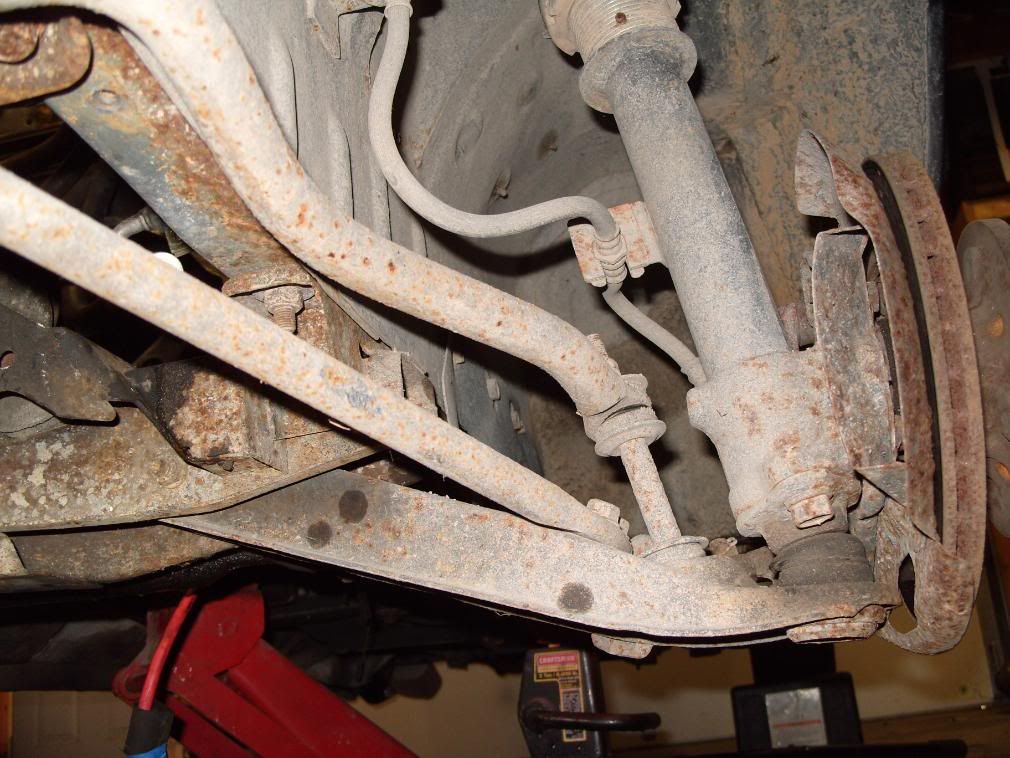
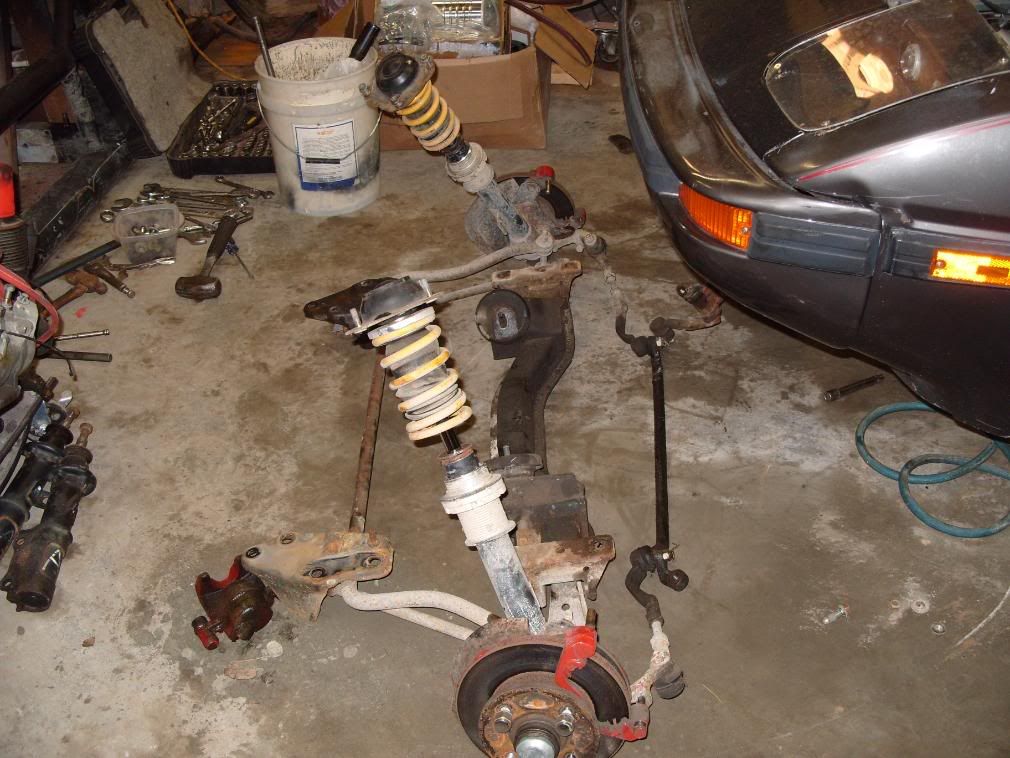
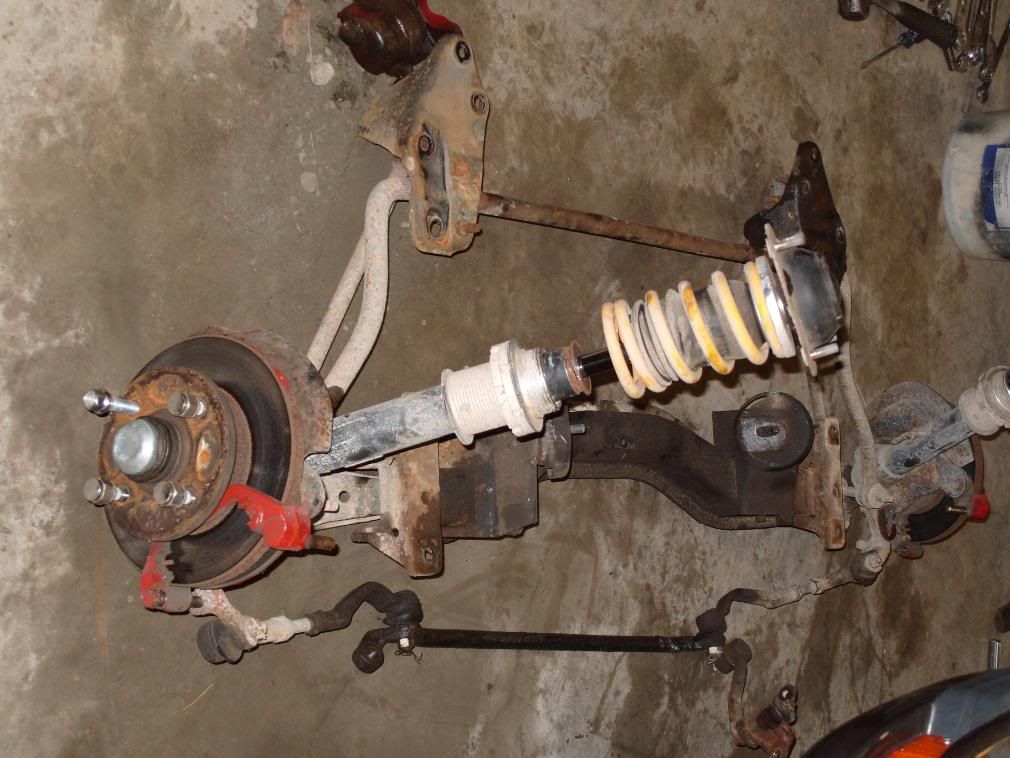
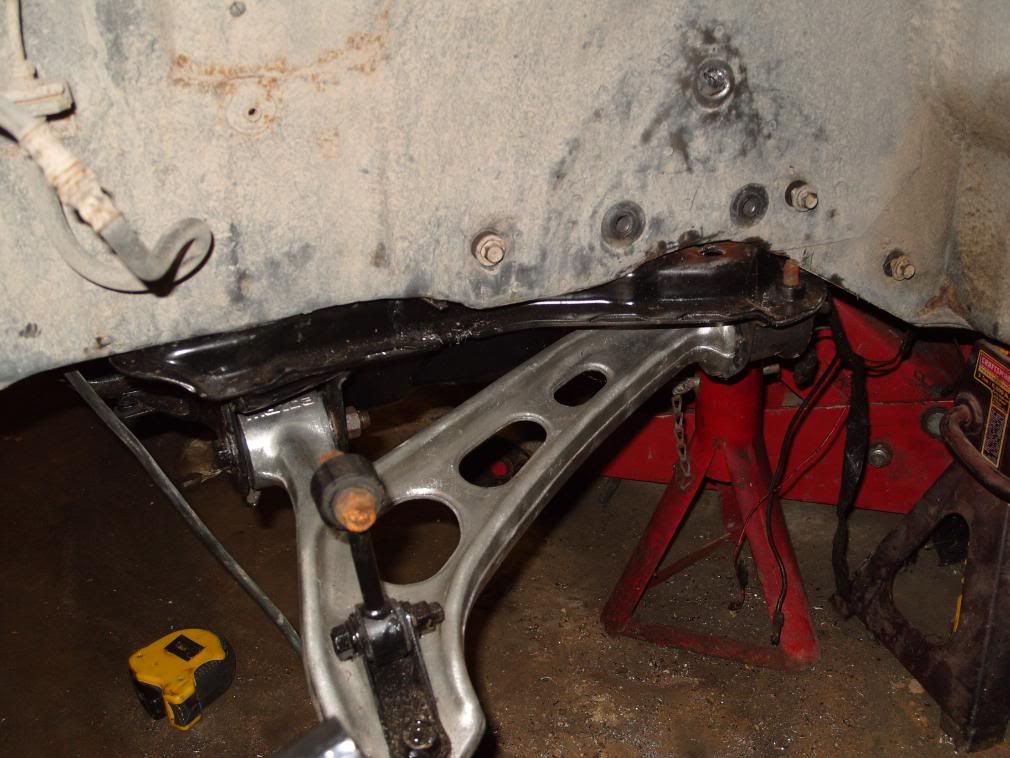
Here it is with the rack and knuckle set into place.
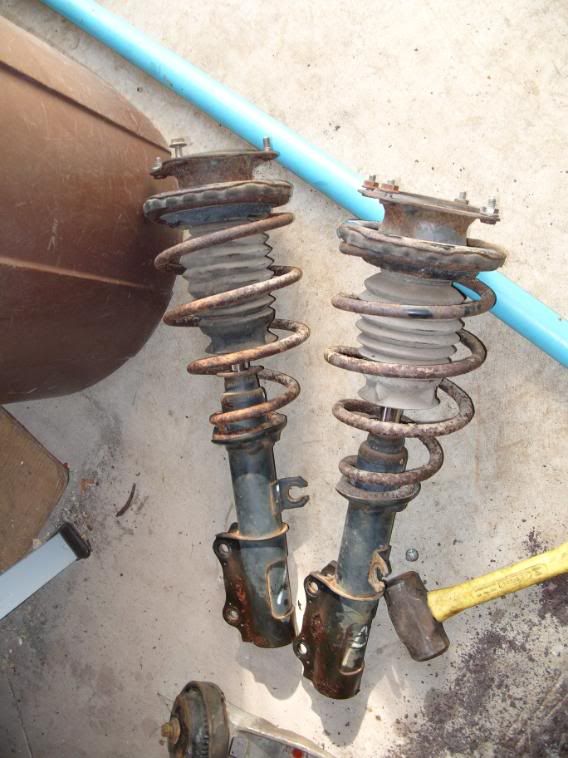
For the springs I reused the coilovers and adjusters from before. I wanted to get some FC struts but didn't want to spend a lot more money, so I drained the oil from the original struts that were junk. I cut the tops off and welded on the top of the FB strut tube that will house the Illumina struts I already had. I decided to paint the springs while I was at it.

That's about all I've got for now. Hopefully I'll be back soon with another update and some more pictures.
Now for the fun part. Mounting the new sub-frame. According to other things I've read this was supposed to be a mostly bolt in operation. The frame can be mounted on the bolts that originally held the frame in place, but after some measuring, I decided I did not like it. Doing this will locate the frame too far forward in my opinion.
I opted to drill some holes and move my mounts 1" to the rear. This allows for better caster and engine mount alignment. Since the holes were so close to the original holes and crush collars, I decided that welding a 1/8" plate over the top would be sufficient. The rear holes pass though the support for the steering box and idler arm. There was a rust spot where the idler was so I welded a plate over it as well.
The fender washers were just to hold it in place while I made up my mind about where to put it. Don't worry.
There was a short lip that used to protrude down from the inner fender that needed a little modification with the big hammer, but after some pounding the frame fits nicely.
The front bolts are 3/8"-16 x 4.5" and the rear are 3/8"-16 x 7" all 4 are grade 8. I reused the heavy washers to hold the bottom.
Here it is with the rack and knuckle set into place.
For the springs I reused the coilovers and adjusters from before. I wanted to get some FC struts but didn't want to spend a lot more money, so I drained the oil from the original struts that were junk. I cut the tops off and welded on the top of the FB strut tube that will house the Illumina struts I already had. I decided to paint the springs while I was at it.
That's about all I've got for now. Hopefully I'll be back soon with another update and some more pictures.
Thread Starter
Joined: Aug 2007
Posts: 273
Likes: 0
From: Muskegon, MI
I really hope it handles well and runs like the wind. I've got the brakes assembled and the steering completed. I painted the unibody where I welded in the mounts, but am contemplating painting the whole engine bay since everything is out. I really want to drop the engine in on Monday. Then it's electrical work....
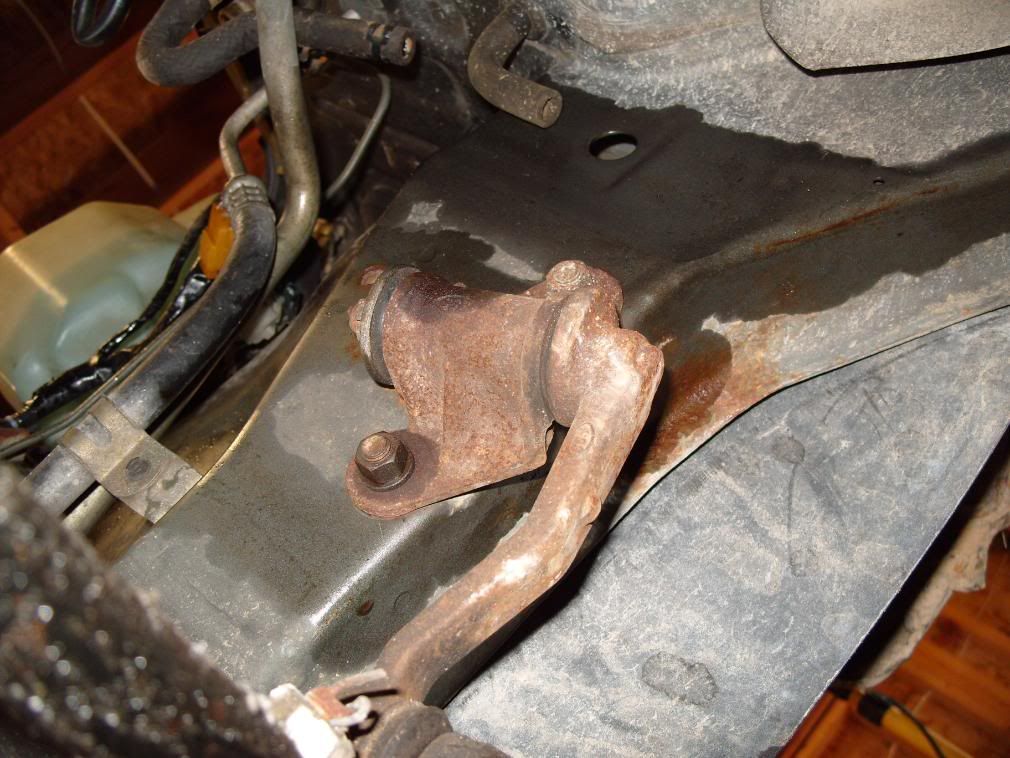
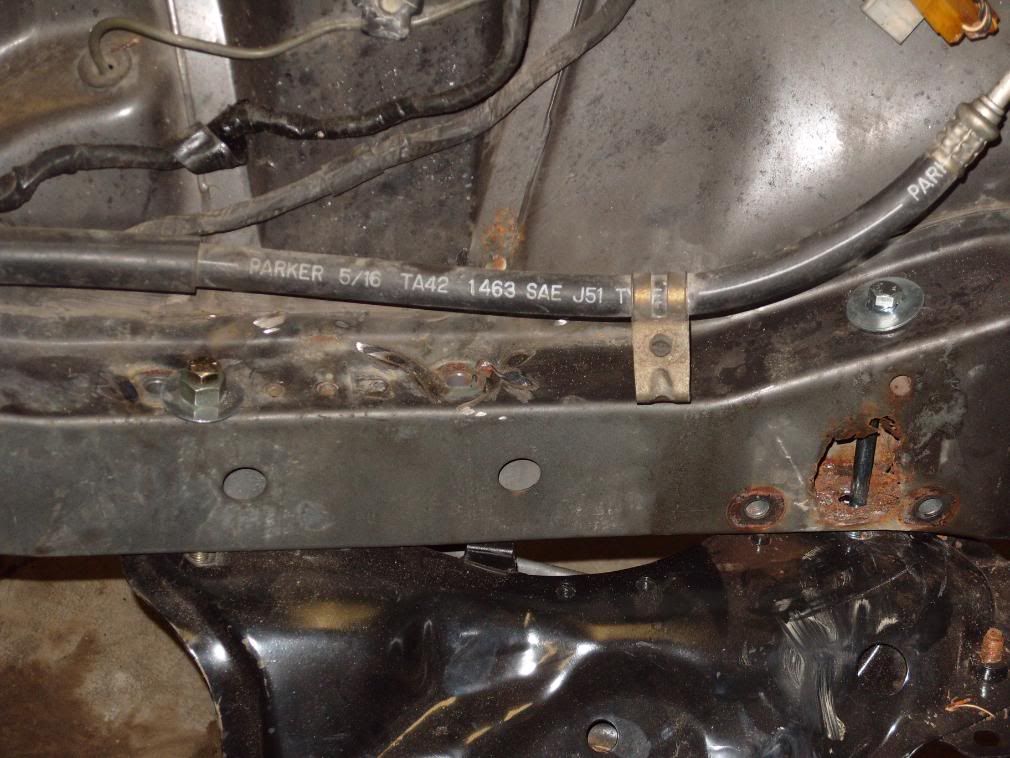
Kudos for your attention to restoration and detail. I'm not sure if you noticed, but the through bolts that hold the oem crossmember go through captured tubes that are welded inside the frame rails. That prevents the frame rails from crushing when the bolts are tightened. Those tubes are a must to prevent the frame rails from collapsing and tearing out due to metal fatigue.
If you haven't added tubes, do so. Otherwise the entire front suspension and engine cradle can fail, not a pretty sight if it gets left behind you on the track. Adding the tubes at this point would be simple. Simply drill out the holes slightly larger and weld the tubes into the frame rail. The steering box and idler arm have the same sleeves that will need to be replaced. Since you're at it, now is a good time to upgrade the fuel lines too. The 12A fuel fuel lines are smaller than the S5 lines. If you're chassis had the 13B SE engine, all you'll need to replace is the rubber fuel lines with fresh FI rated ones.
Since you've gone to this much effort so far, most definitely rehab the entire engine bay. Not only will it give a more professionally finished look, it will address any weak points you may find during the rehab.
Keep up the great work and good lick with the project.
Thread Starter
Joined: Aug 2007
Posts: 273
Likes: 0
From: Muskegon, MI
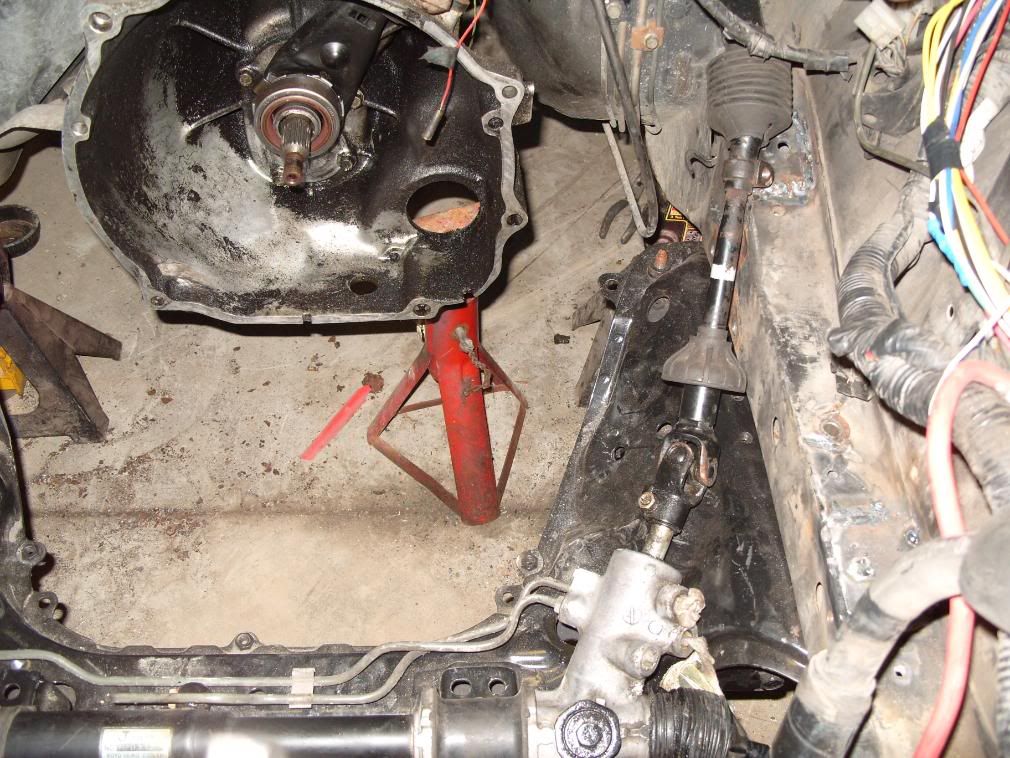
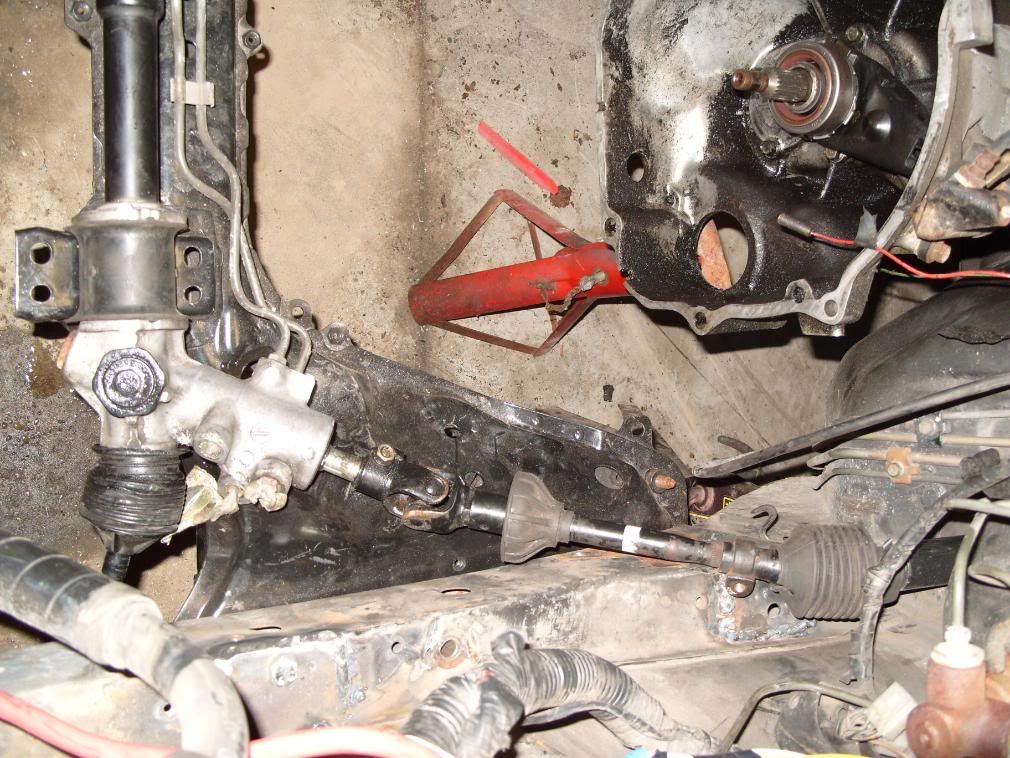
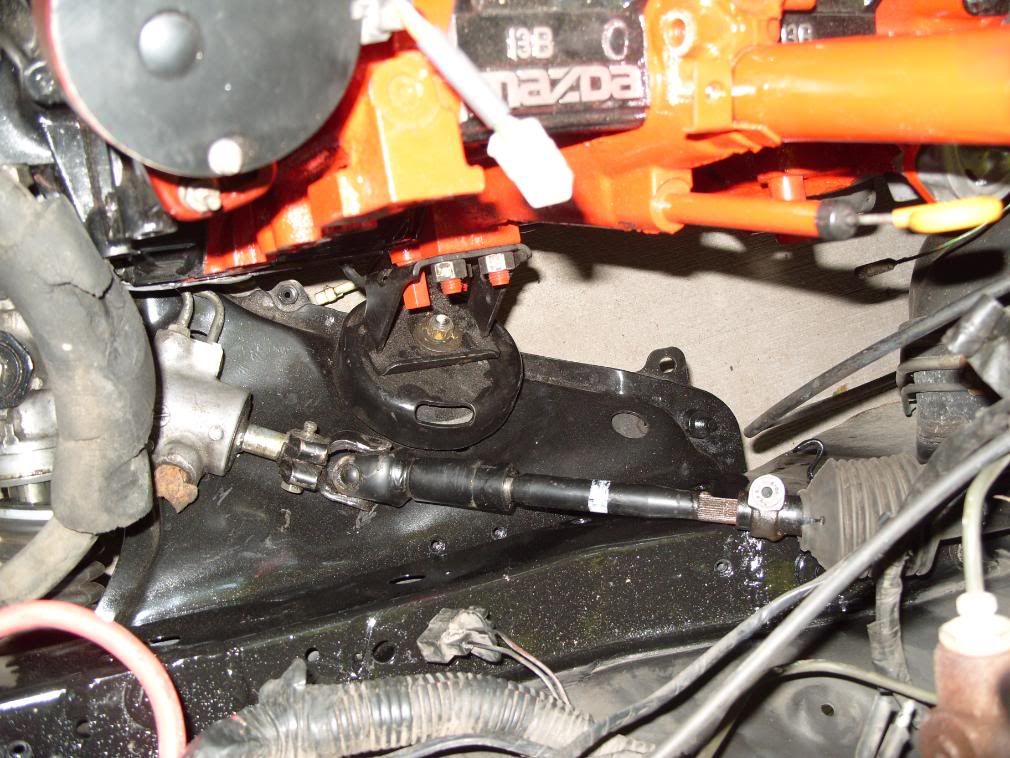
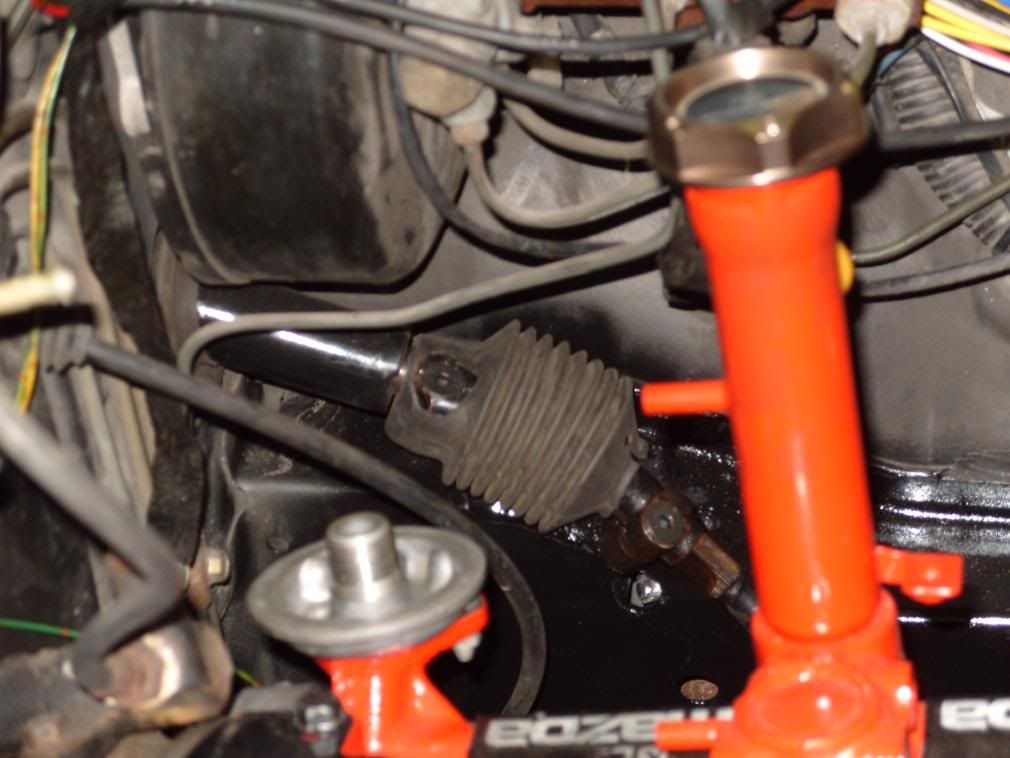
It has been a while since I've updated this thread. The engine is in and has been in for a while now. I had to leave for school, so I won't be able to get much done in the near future. Anyway, here are the pictures of my progress.
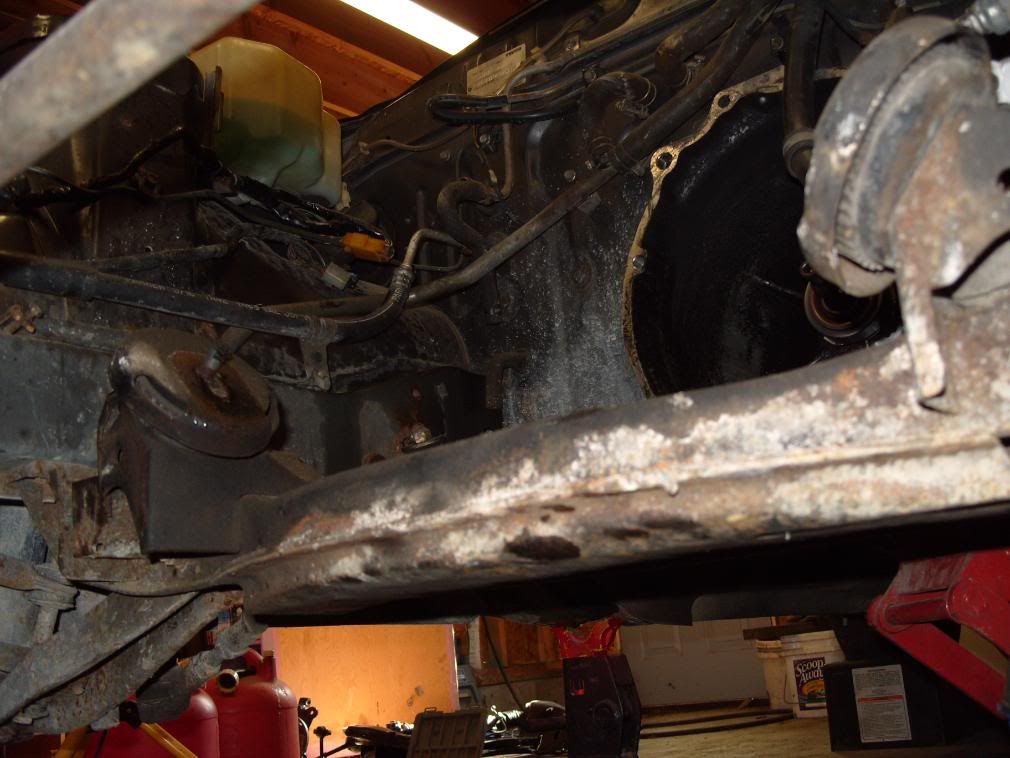
I did add some structure to the sub frame mounts as was suggested earlier. The engine mount holes had to be moved ever so slightly, but everything fits together great now.
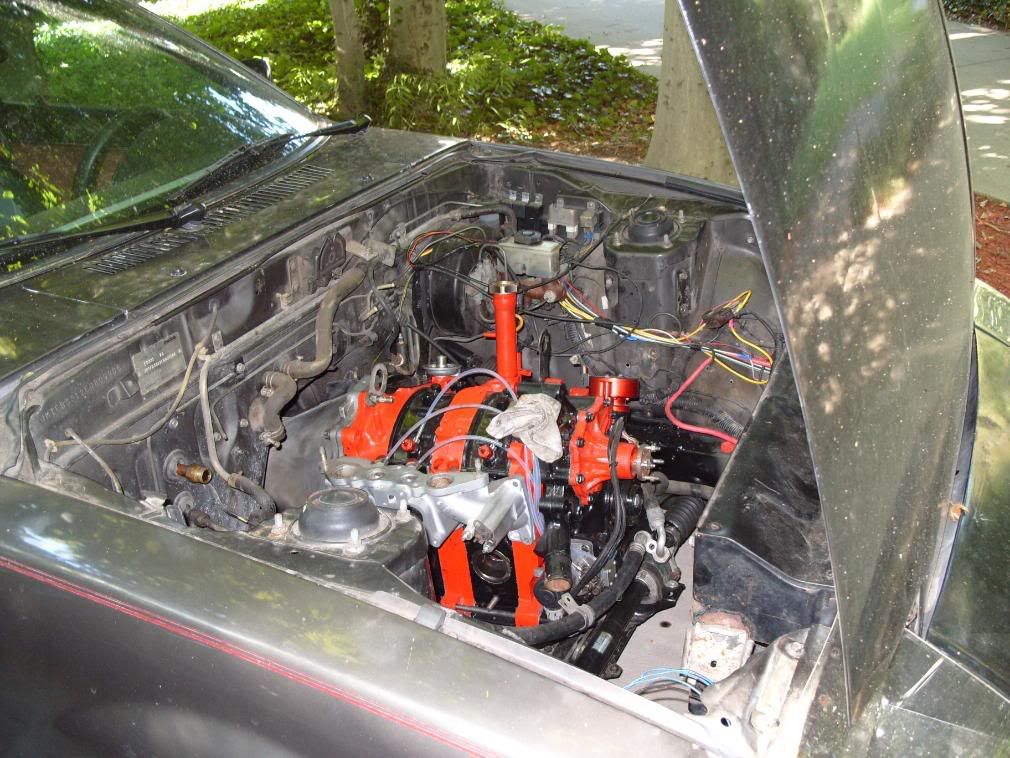
In these two you can see how the steering shaft clears the unibody and makes it's way to the rack. Right now the rack is just held on with some pipe strap because I needed to push it outside and couldn't find the actual brackets at the moment.
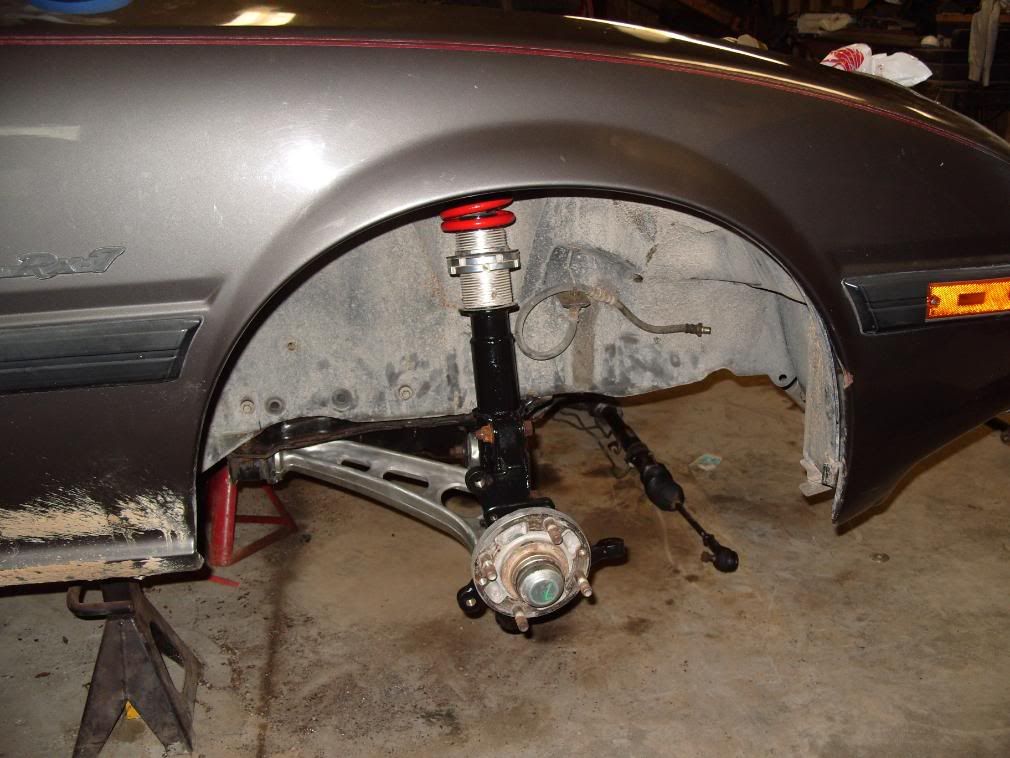
One problem I need to deal with is the width of the car now. Since the FC is a wider track width than the FB, my front wheels are about 3" wider than the rear, so we've for an aggressive front wheel drive look.
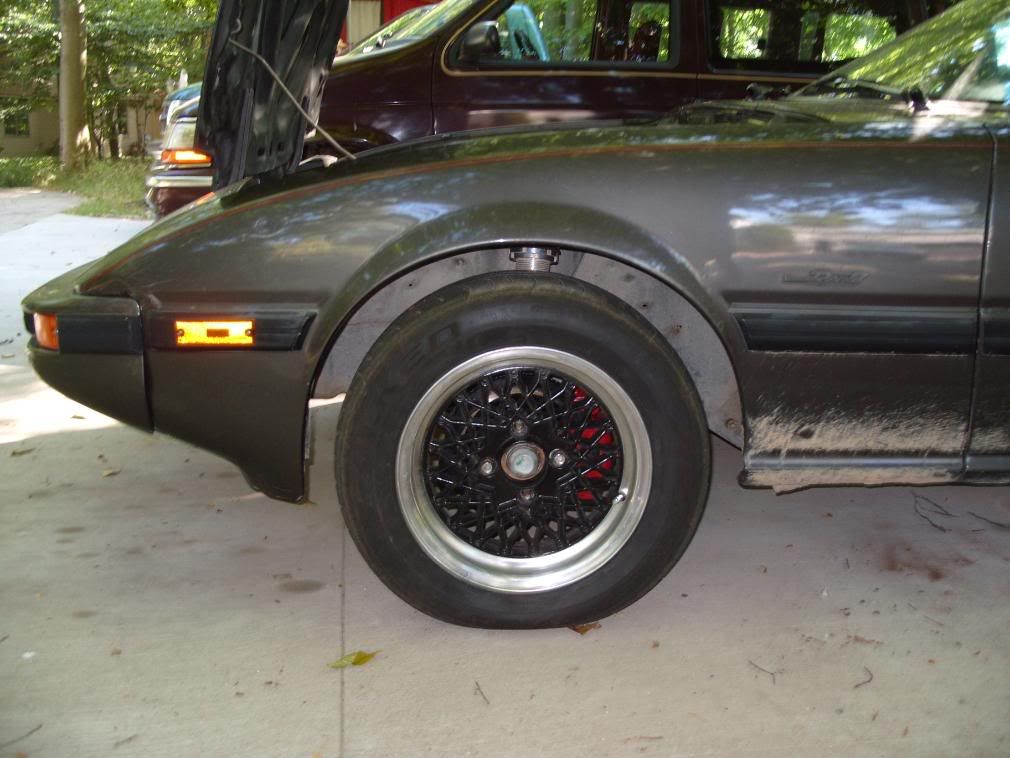
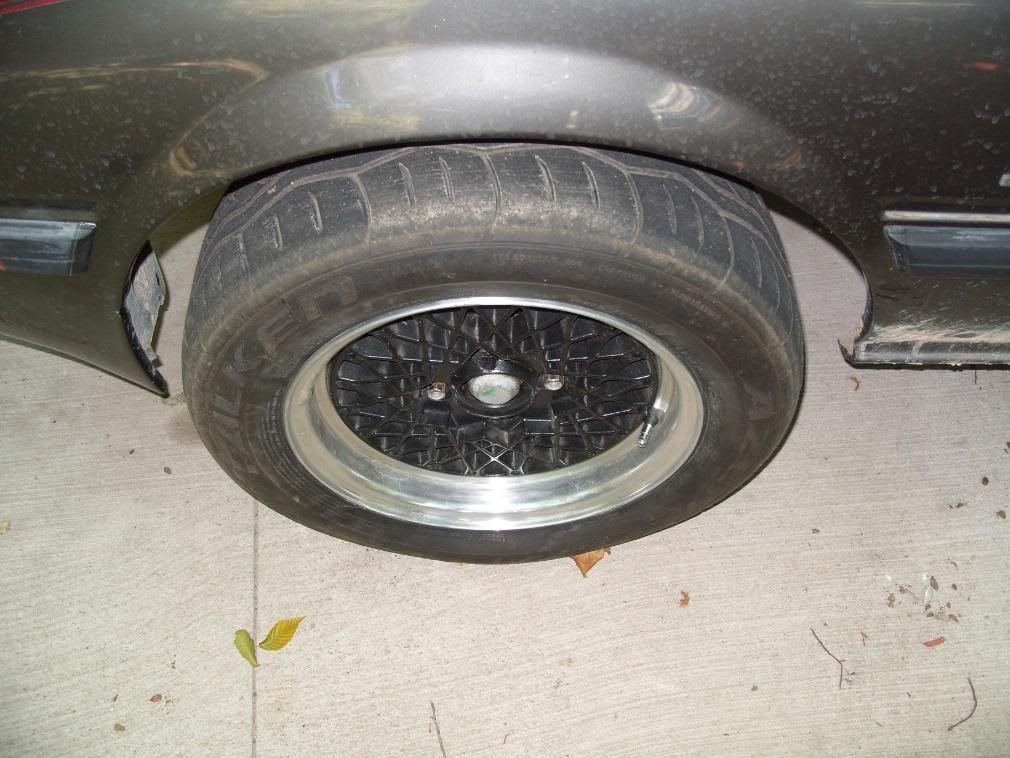
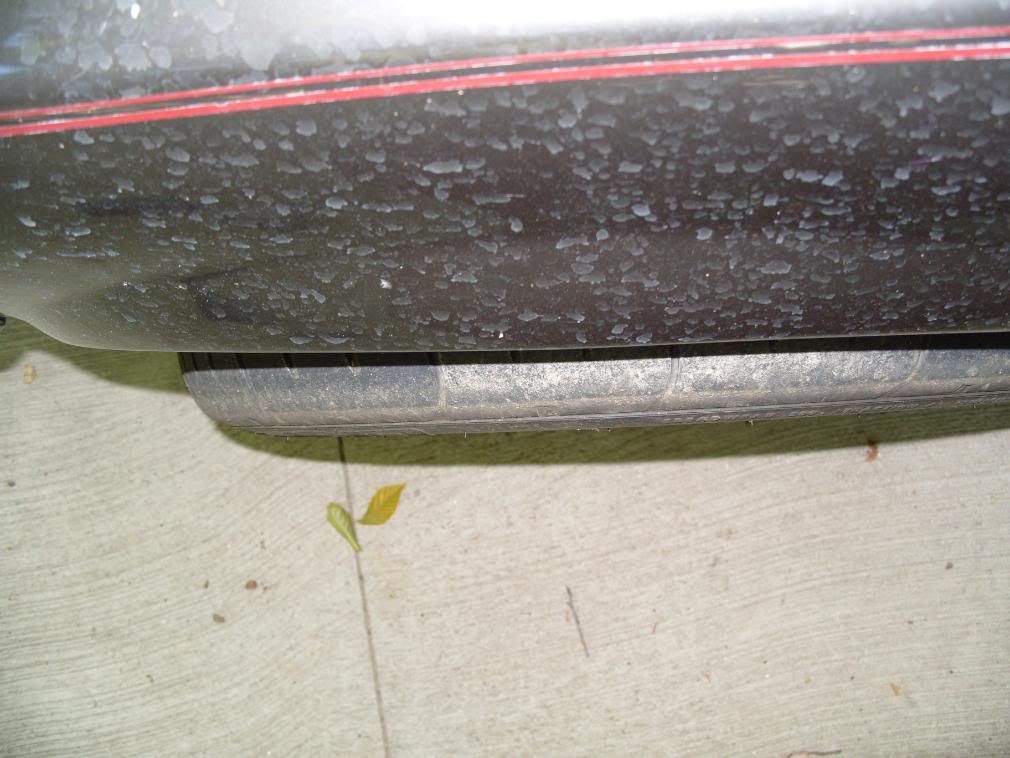
I should have taken one with both wheels in view for perspective, but the wheels that are on it used to be .5" inside the fender and are now about 1" outside. The front is so tall because I did not readjust the coilover perches when I put the struts on.
I did add some structure to the sub frame mounts as was suggested earlier. The engine mount holes had to be moved ever so slightly, but everything fits together great now.
In these two you can see how the steering shaft clears the unibody and makes it's way to the rack. Right now the rack is just held on with some pipe strap because I needed to push it outside and couldn't find the actual brackets at the moment.
One problem I need to deal with is the width of the car now. Since the FC is a wider track width than the FB, my front wheels are about 3" wider than the rear, so we've for an aggressive front wheel drive look.
I should have taken one with both wheels in view for perspective, but the wheels that are on it used to be .5" inside the fender and are now about 1" outside. The front is so tall because I did not readjust the coilover perches when I put the struts on.
Thread Starter
Joined: Aug 2007
Posts: 273
Likes: 0
From: Muskegon, MI
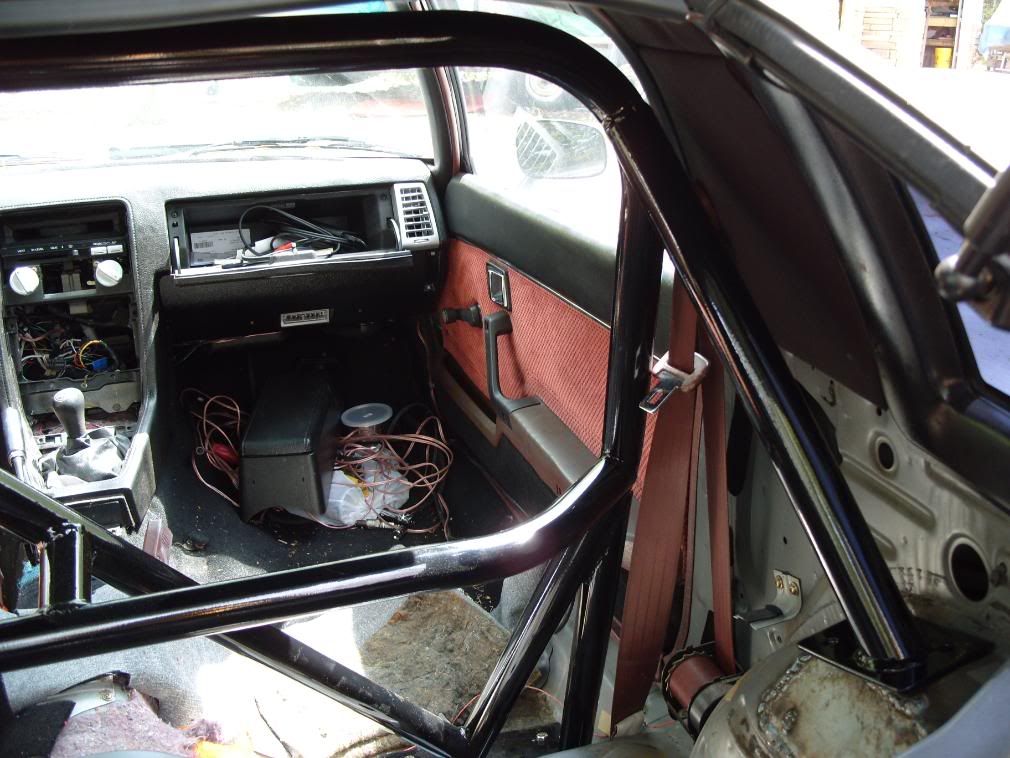
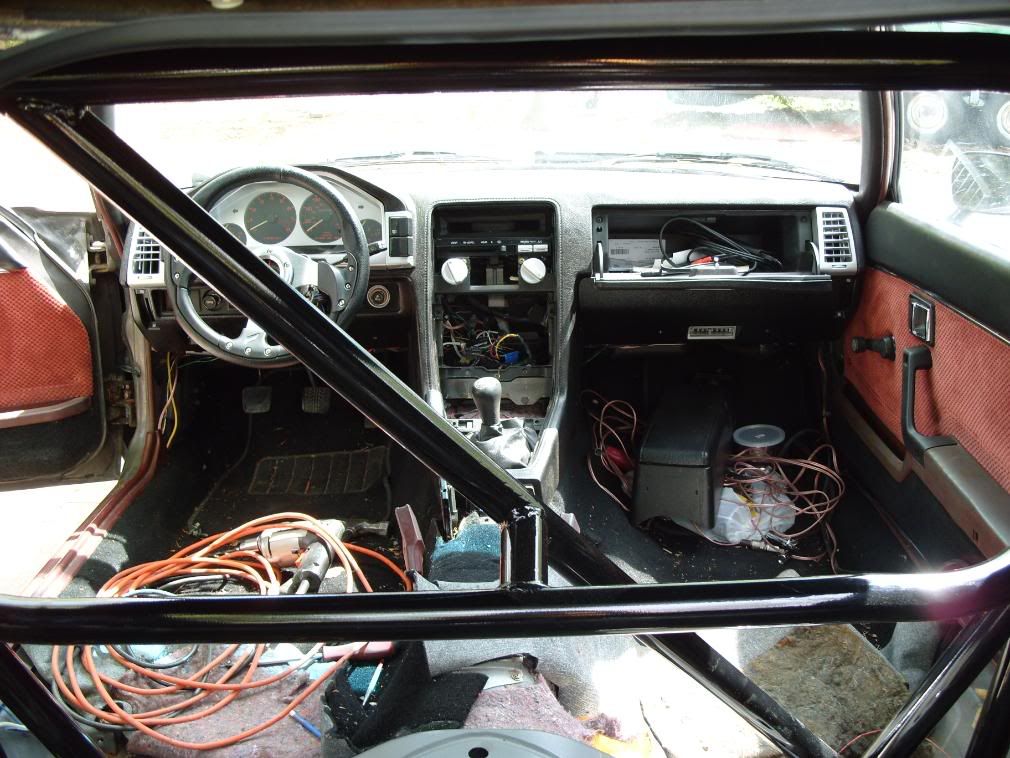
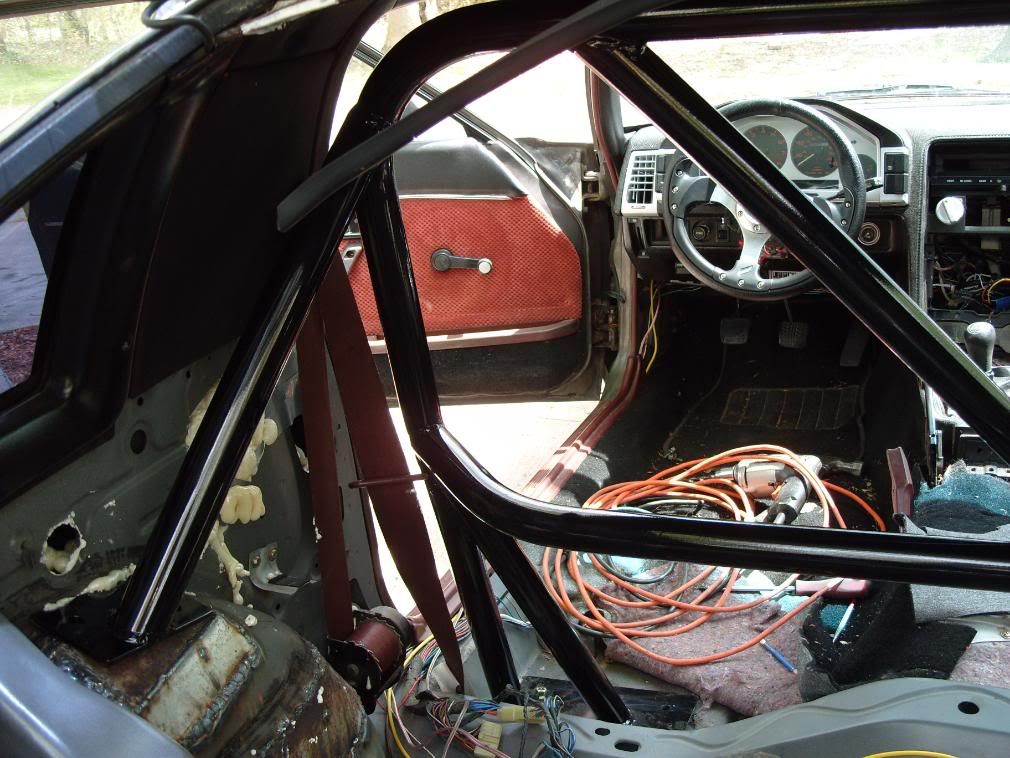
As promised I have some pictures of the roll bar after it was installed with the interior mostly put back together.
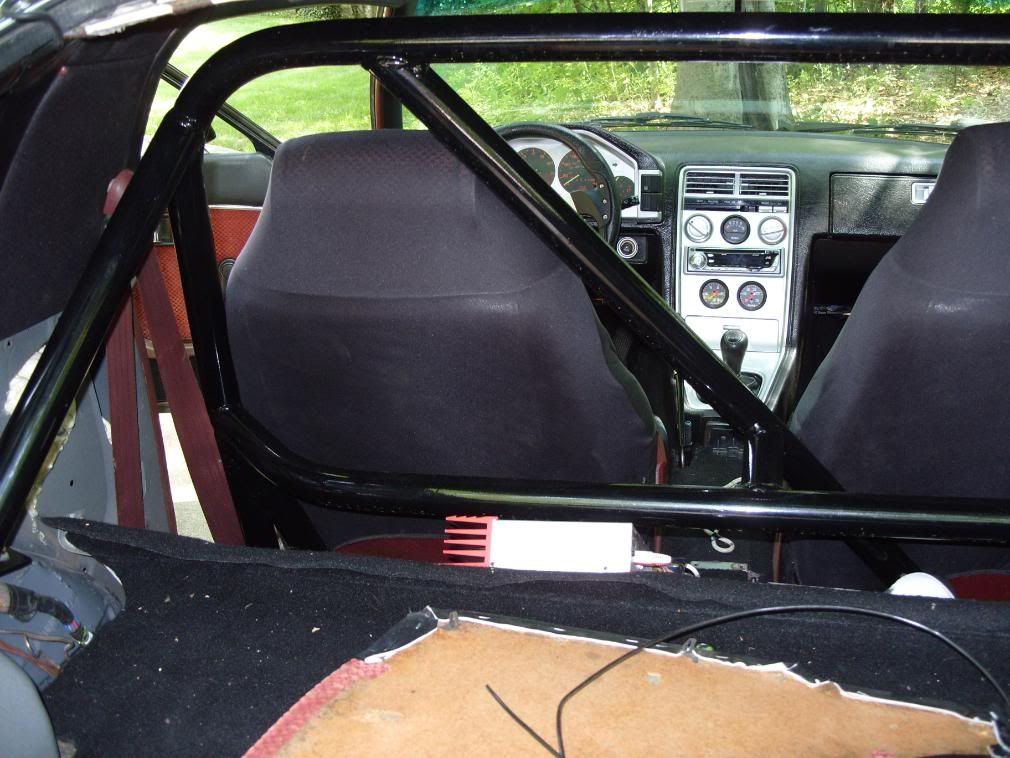
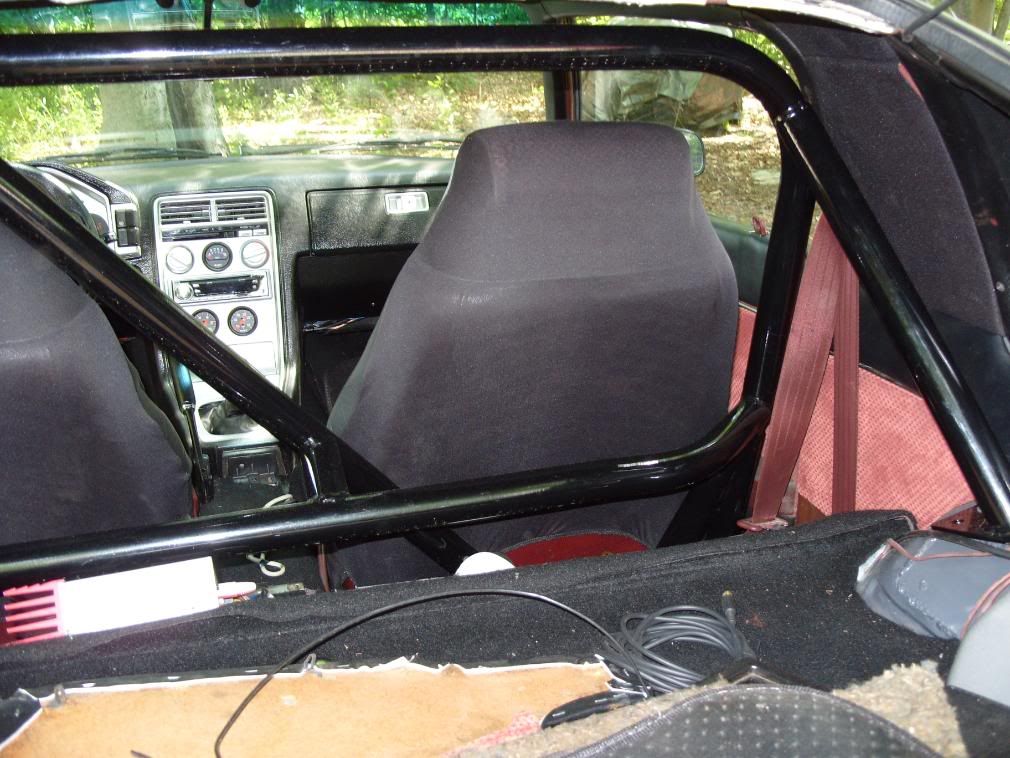
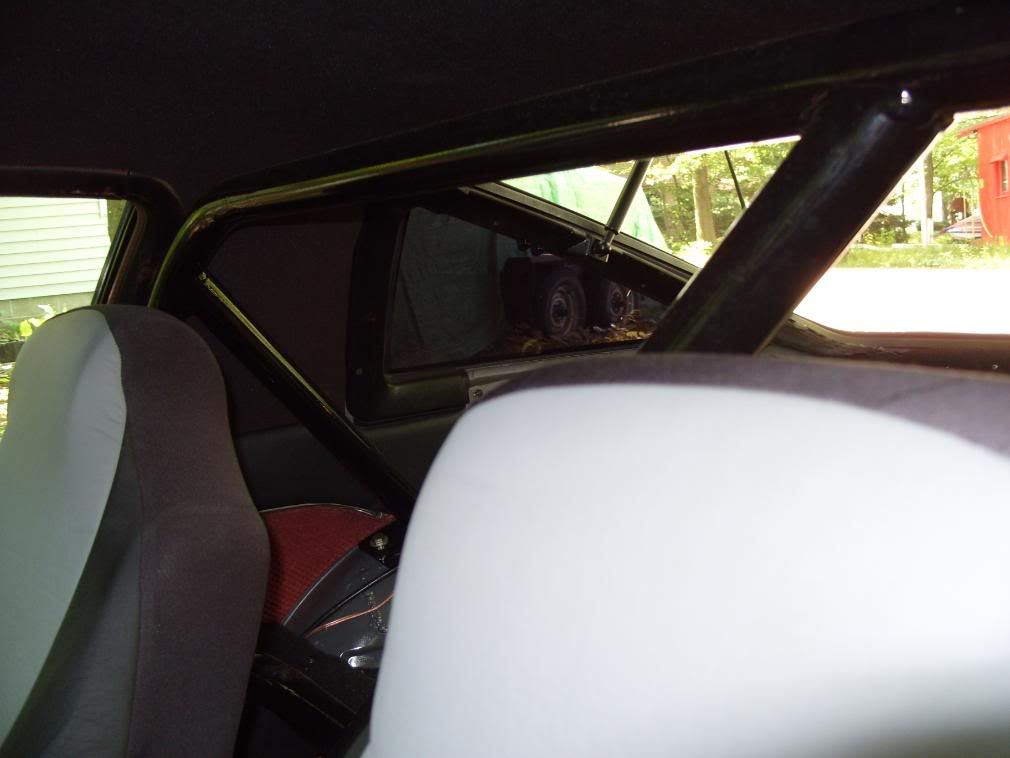
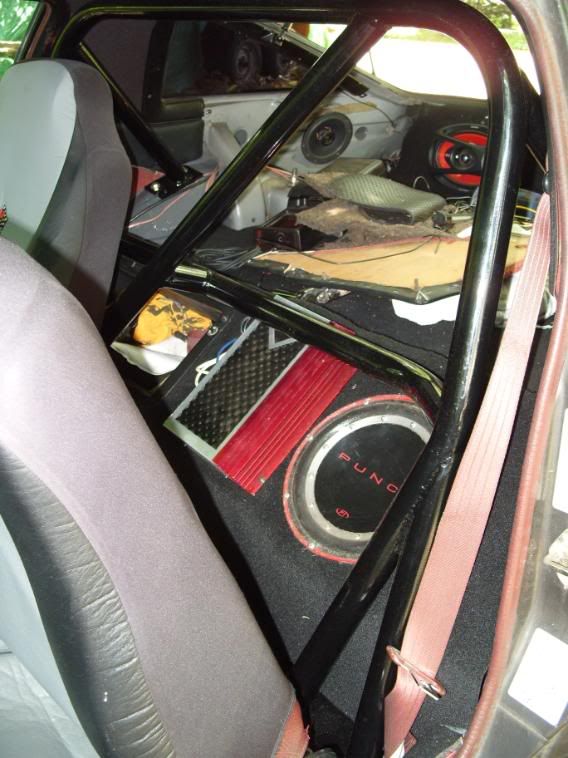
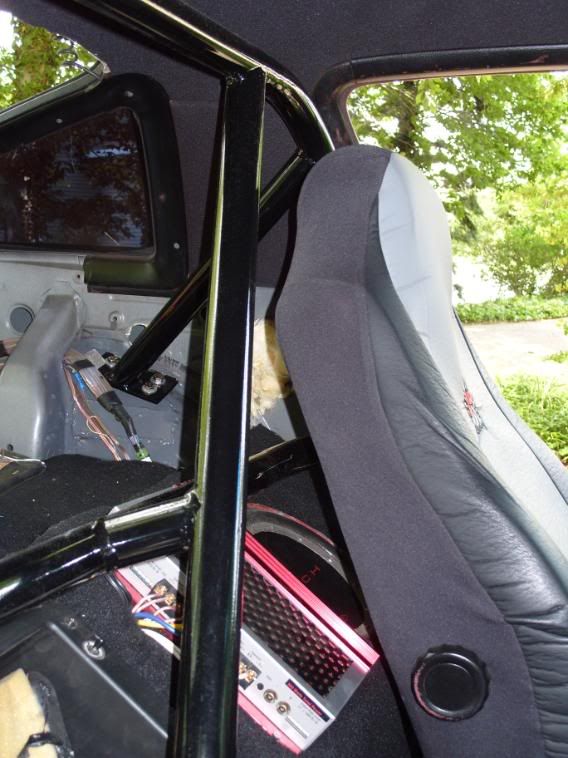
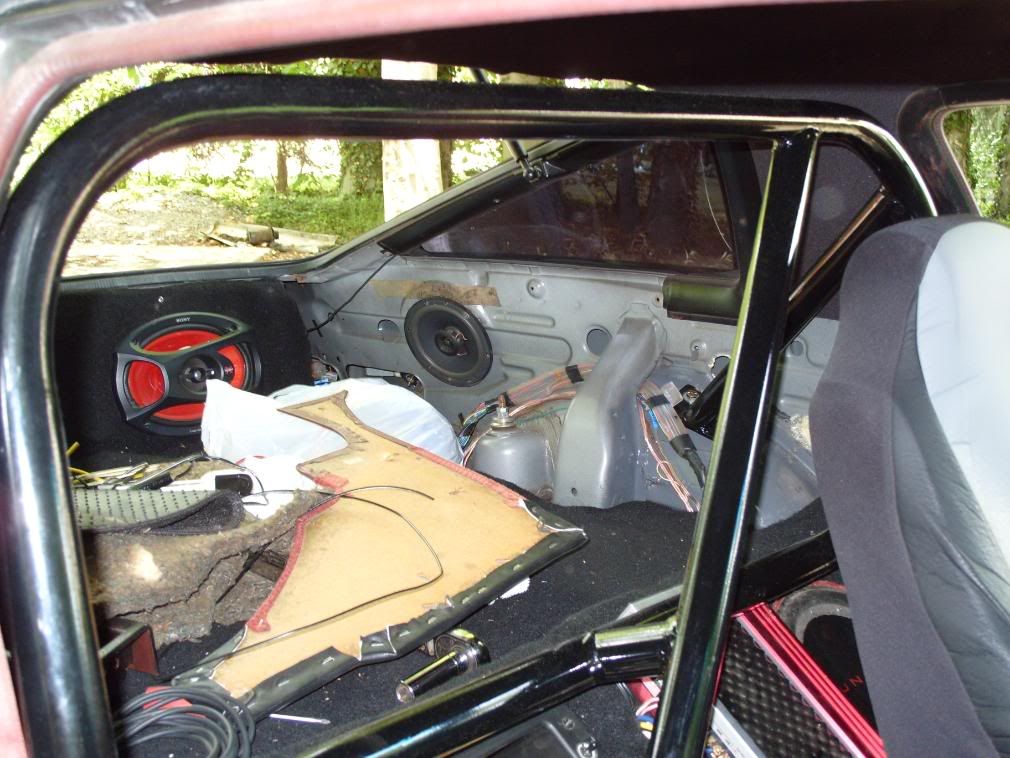
That's all I've got for now. Hopefully I'll have some more done after Thanksgiving. BTW, if anyone is interested in some wheels, I'll have some up for sale as I have to change to the 4x114.3 GSL-SE pattern for the FC front.
That's all I've got for now. Hopefully I'll have some more done after Thanksgiving. BTW, if anyone is interested in some wheels, I'll have some up for sale as I have to change to the 4x114.3 GSL-SE pattern for the FC front.
Just read through this thread, and wanted to say very nice work! Do you have any better pics of the steering column from inside the car? Just curious how you attached the bottom of the colum to hold it in place. Also sorry if you mentioned this already, but what are the specs on those wheels you have? offset etc... I'm wondering if I ran FC wheels on that setup if they would fit in the fenders without flares or rolling the lip at all....
Thread Starter
Joined: Aug 2007
Posts: 273
Likes: 0
From: Muskegon, MI
The column was an interesting challenge. I had read before this swap that the halves of the FC and FB columns just slid together. THIS IS NOT THE CASE. The first thing that had to be done was to grind down the steering wheel end of the FB shaft so that it would slide into the FC one. They have to slide all the way together and maybe a little farther. Then I took the FC column tube and trimed all of the extraneous mounting stuff from it. I made a mount for it that bolts to the firewall from the inside where the rubber boot goes. Then I trimmed the FB column to length. I just put roll pins through the steering shafts to keep them from sliding apart. Then I welded the two column tubes together. I was kind of frustrated during the whole process so I don't think I took any pics, but I will look. I can take some pics of it installed if you want, but it will have to wait until I get home in a few weeks.
As for the wheels, they are 14x6 0 offset. I've really been looking for some wheels to run with the setup as the wheels on it in the picture are 4x110 just slid on with two nuts for rolling purposes. I'm pretty sure that I will need to roll the fenders and get some flares once I lower the spring perches down. The other problem is the width. The FC is ~3" wider from hub to hub than the FB, so I need to get some major spacers for the rear or some high negative offset wheels for the rear.
As for the wheels, they are 14x6 0 offset. I've really been looking for some wheels to run with the setup as the wheels on it in the picture are 4x110 just slid on with two nuts for rolling purposes. I'm pretty sure that I will need to roll the fenders and get some flares once I lower the spring perches down. The other problem is the width. The FC is ~3" wider from hub to hub than the FB, so I need to get some major spacers for the rear or some high negative offset wheels for the rear.
No worries on the pics, I understand what you did with it, sounds fairly straightforward (as straightforward as it could be lol)
One thing I'm a little confused about is that you said the FC is 3" wider than the FB, unless the figures I saw were wrong I thought the track width was only 1.2" wider on the FC... I'll have to break out the tape measure and check my FC to be sure I guess.... Again nice work man!
One thing I'm a little confused about is that you said the FC is 3" wider than the FB, unless the figures I saw were wrong I thought the track width was only 1.2" wider on the FC... I'll have to break out the tape measure and check my FC to be sure I guess.... Again nice work man!