My recent stealthy stereo install pics (including 5.25" speakers up front)
 10-07-07, 06:21 PM
#1
Brap, Brap, Ole!
Thread Starter
Join Date: Apr 2005
Location: kalamazoo, mi
Posts: 1,461
Likes: 0
Received 0 Likes
on
0 Posts
My recent stealthy stereo install pics (including 5.25" speakers up front)
So i decided to upgrade a little. Got a little crazy and went to town. Took longer than expected, but it was worth it.
Here goes
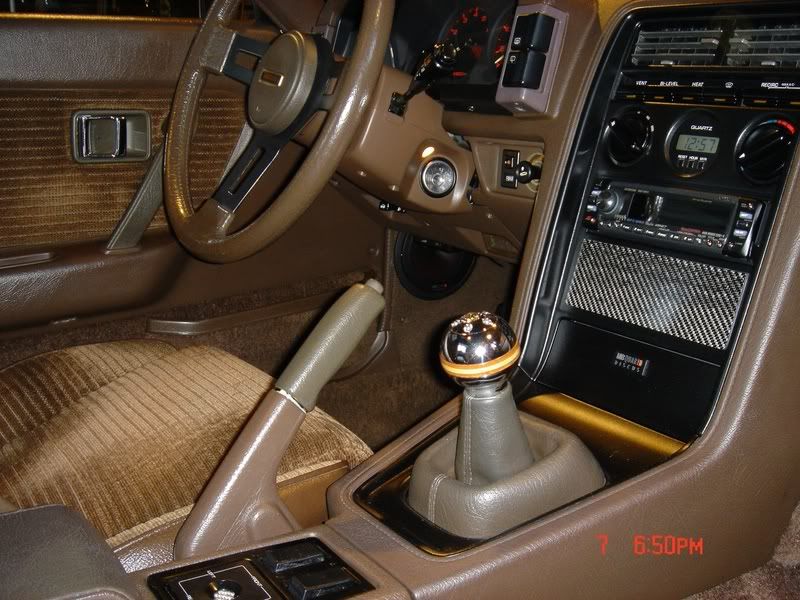
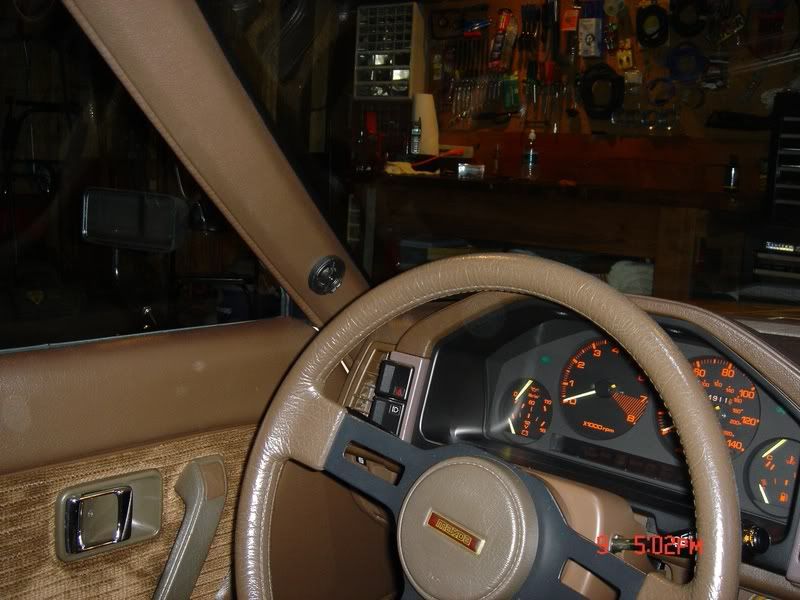
I flush mounted the new Clarion deck i got, painted the dash black and stuffed 4 crossovers behind the dash.
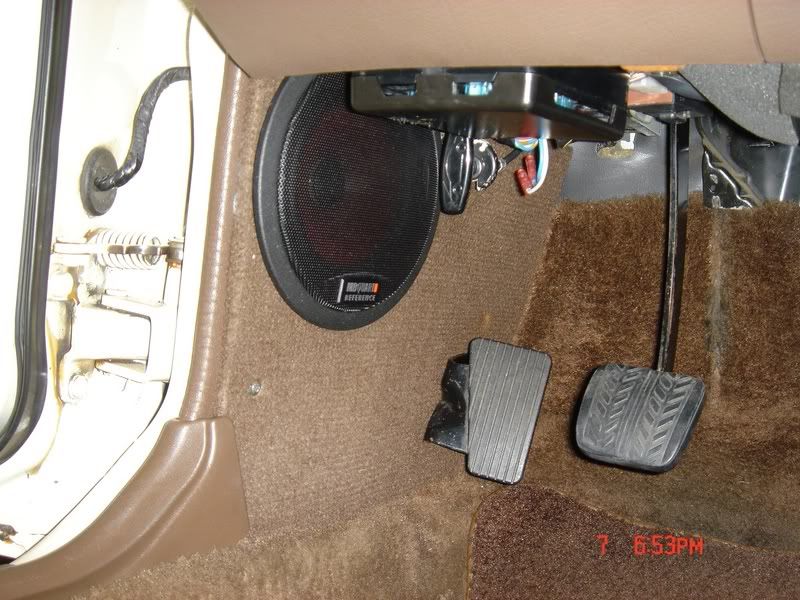
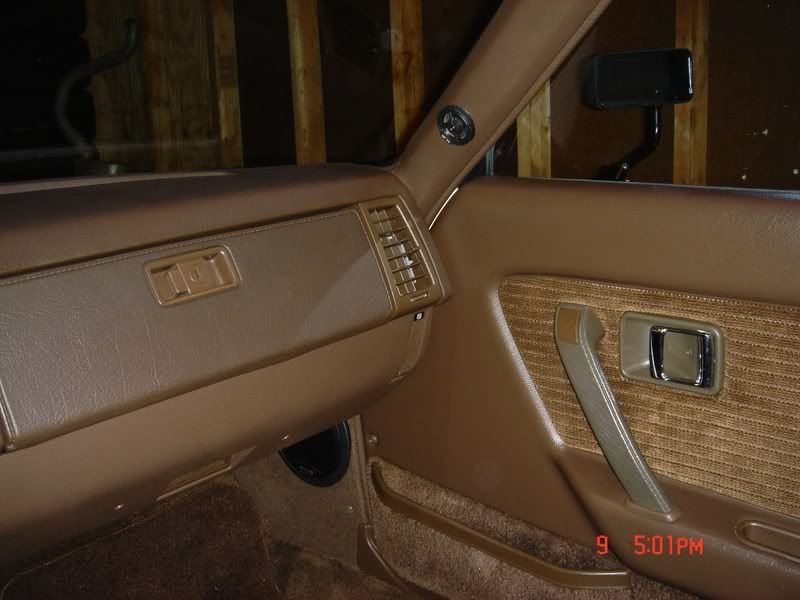
The 5.25" mid ranges went in the stock location with little to no effort. Infact the speakers came with spacers and no cutting was required!
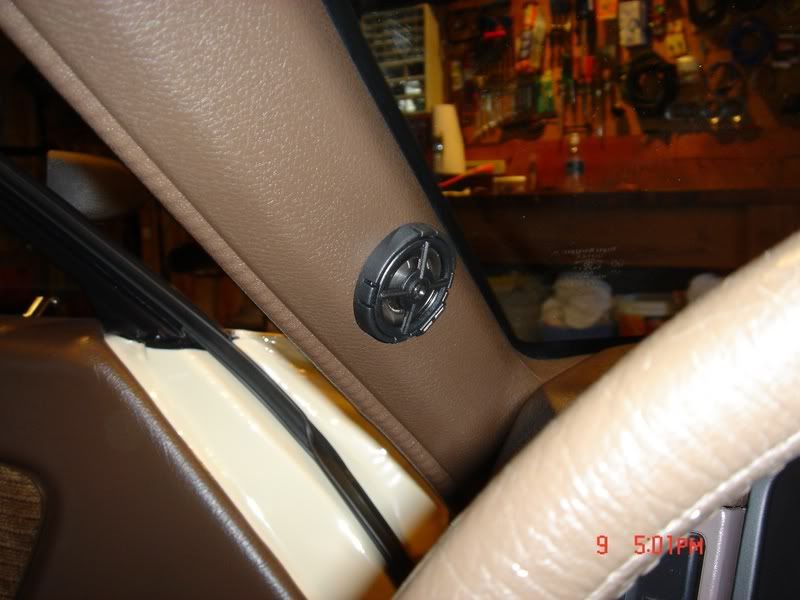
I forgot to take a pic of the tweeters, but they are in the a pillars.
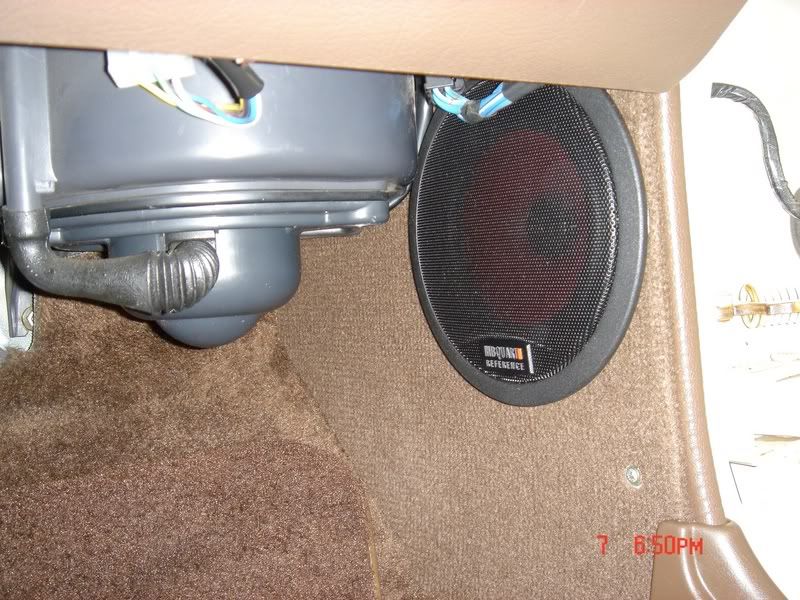
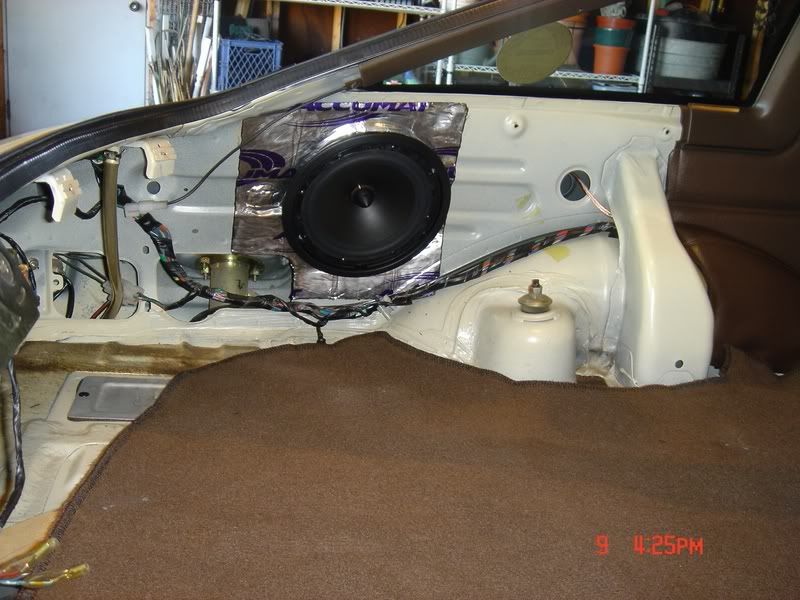
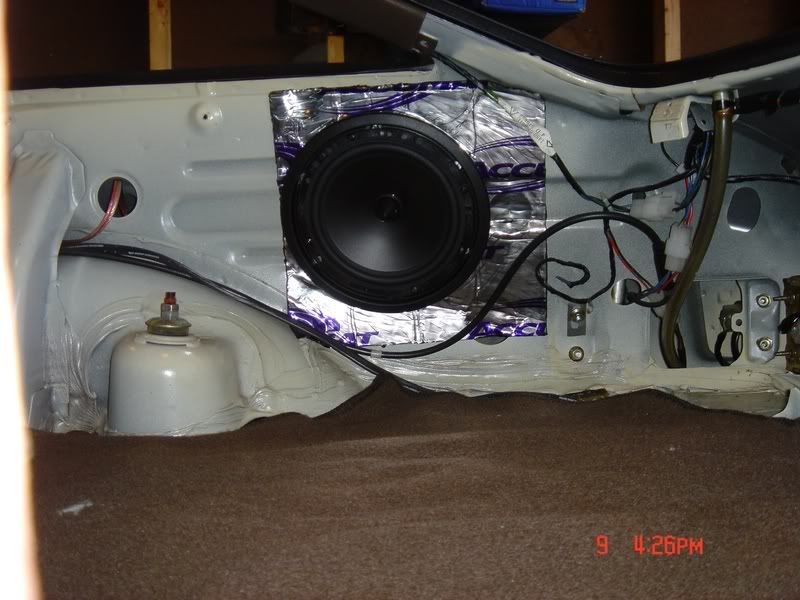
Part of my three way MB Quart setup included some massive 6.5" midbass drivers. They however took a lot of cutting and spacers to mount up in the rear locations.
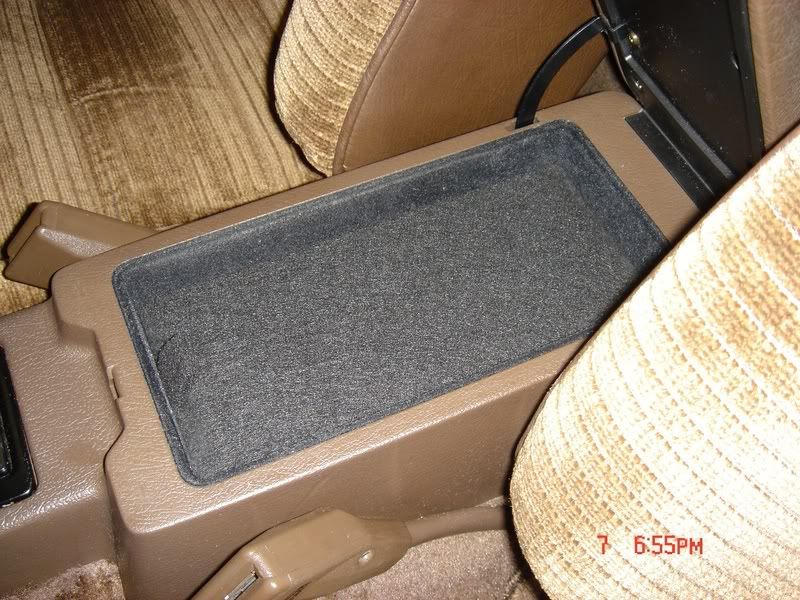
I then mounted the 4 way distribution block in the center console and made a trick false floor to sit on top of it snugly. That way i can still use the center compartment and i only loose a little depth.
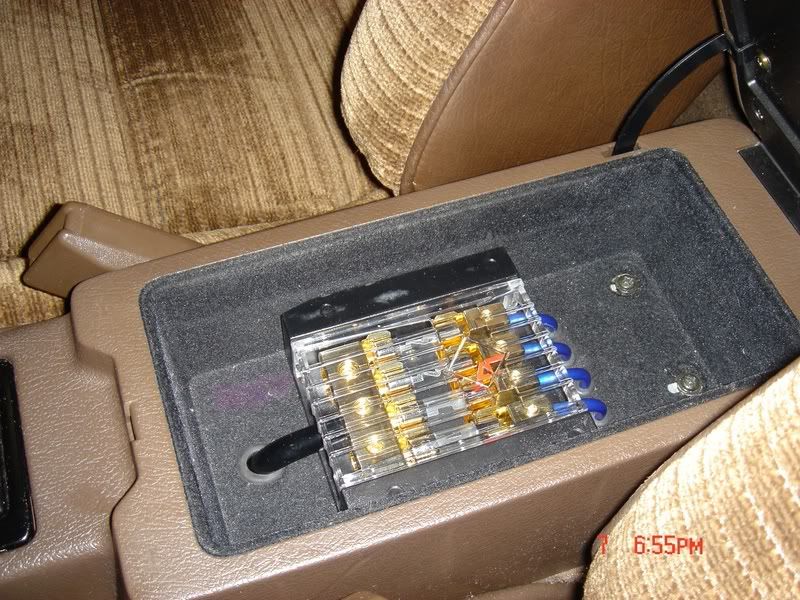
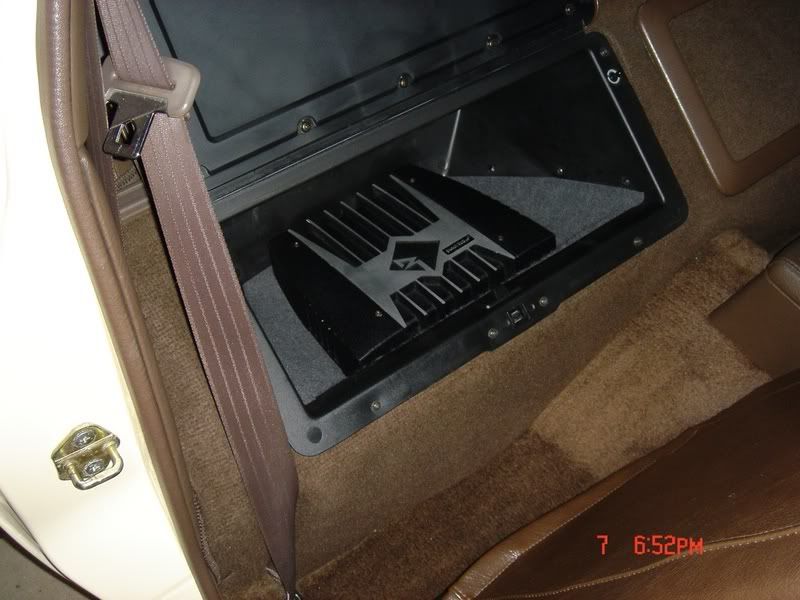
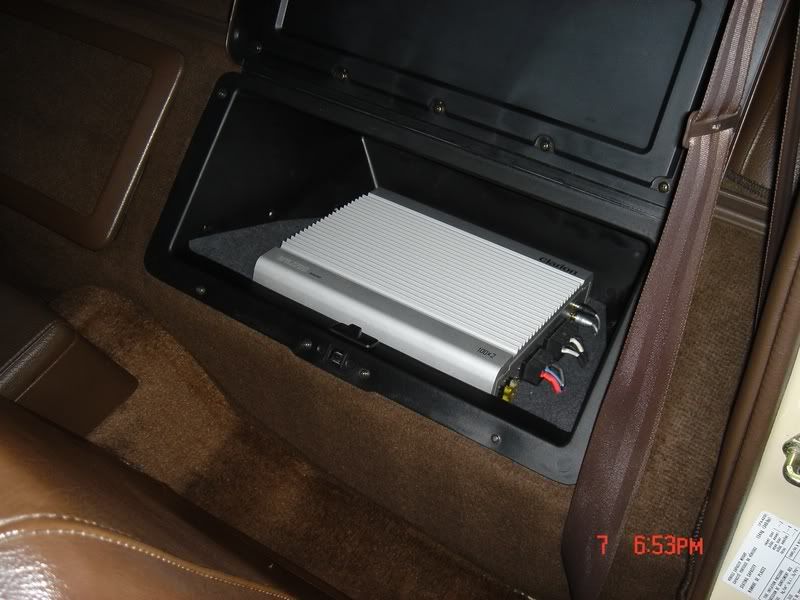
Power goes to the head unit and the two amps which are mounted in the bins.
Rockford 250a2 goes to the sub.
And the Clarion APA2200 goes to the mids and highs.
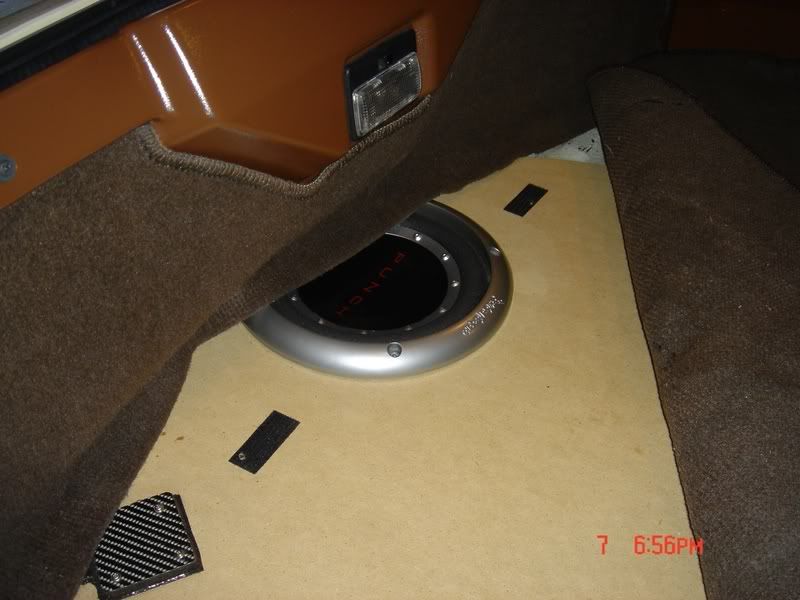
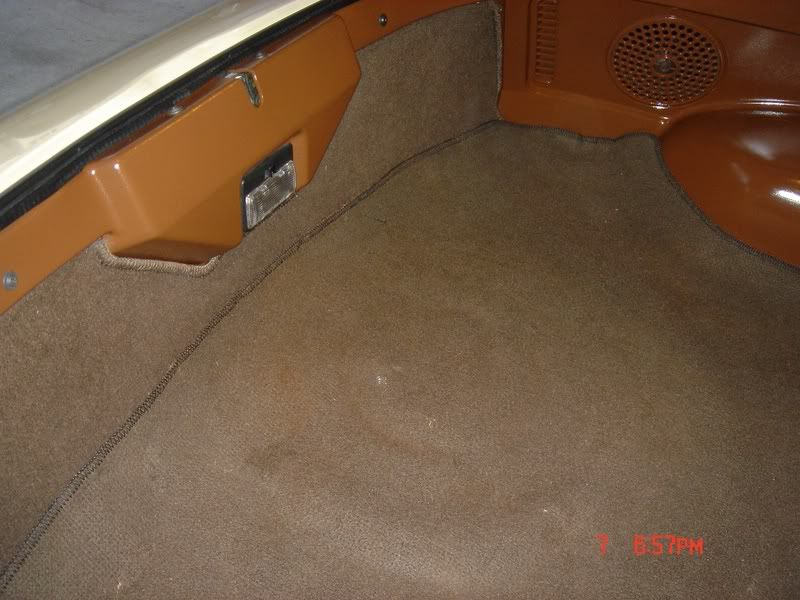
The 8" Rockford sub is mounted in a custom spare tire well enclosure. After i lay the rear carpet over the speaker in back the whole thing is stealth! Excuse the wrong color paint on the rear plastic parts, its on the ever growing/never ending list of things to do.
How does it sound? I think pretty darn well. The bigger speakers up front made a huge difference, plus i added dynamte in all speaker mount locations, that must have helped.
The main goal was to make this setup stealthy and sound nice.
Now all i have to do is figure out how to quiet that darn Carter fuel pump, lol.
Here goes
I flush mounted the new Clarion deck i got, painted the dash black and stuffed 4 crossovers behind the dash.
The 5.25" mid ranges went in the stock location with little to no effort. Infact the speakers came with spacers and no cutting was required!
I forgot to take a pic of the tweeters, but they are in the a pillars.
Part of my three way MB Quart setup included some massive 6.5" midbass drivers. They however took a lot of cutting and spacers to mount up in the rear locations.
I then mounted the 4 way distribution block in the center console and made a trick false floor to sit on top of it snugly. That way i can still use the center compartment and i only loose a little depth.
Power goes to the head unit and the two amps which are mounted in the bins.
Rockford 250a2 goes to the sub.
And the Clarion APA2200 goes to the mids and highs.
The 8" Rockford sub is mounted in a custom spare tire well enclosure. After i lay the rear carpet over the speaker in back the whole thing is stealth! Excuse the wrong color paint on the rear plastic parts, its on the ever growing/never ending list of things to do.
How does it sound? I think pretty darn well. The bigger speakers up front made a huge difference, plus i added dynamte in all speaker mount locations, that must have helped.
The main goal was to make this setup stealthy and sound nice.
Now all i have to do is figure out how to quiet that darn Carter fuel pump, lol.
 10-07-07, 06:27 PM
#3
7-less

Join Date: Dec 2005
Location: No. Virginia, USA
Posts: 2,053
Likes: 0
Received 0 Likes
on
0 Posts
Wow. I'm liking the center console. Did you have to prep it up any special way before painting? And, is that rattle can paint? Very nice, I like that. Nothing like stealth.


Trending Topics
10-07-07, 07:57 PM
#8
Brap, Brap, Ole!
Thread Starter
Join Date: Apr 2005
Location: kalamazoo, mi
Posts: 1,461
Likes: 0
Received 0 Likes
on
0 Posts
10-07-07, 08:24 PM
#10
Nice job on getting the 5.25's to fit. My stereo is hid as well, as if there were none but my amp is mounted elsewhere for cooling and the bins still usable.
Black center console brings the cockpit an up to date feel and no glare when reading the gauges on the track. I have a silver one as well to swap out whenever the mood hits.

Black center console brings the cockpit an up to date feel and no glare when reading the gauges on the track. I have a silver one as well to swap out whenever the mood hits.
10-07-07, 08:38 PM
#11
Brap, Brap, Ole!
Thread Starter
Join Date: Apr 2005
Location: kalamazoo, mi
Posts: 1,461
Likes: 0
Received 0 Likes
on
0 Posts
they might get too warm, but i probably will never know.
The car has about 50k on the clock and i only put on 500 miles this year.
So its kind of a garage queen and when i do drive its pretty short trips, therefore i doubt i will ever push the amps to the limits... Not to mention i am a compulsive song skipper, darn ADD, lol.
The car has about 50k on the clock and i only put on 500 miles this year.
So its kind of a garage queen and when i do drive its pretty short trips, therefore i doubt i will ever push the amps to the limits... Not to mention i am a compulsive song skipper, darn ADD, lol.
 10-07-07, 10:53 PM
#13
Actin Like I'm Drunk
iTrader: (4)
Join Date: Jul 2007
Location: Charleston, South Carolina
Posts: 1,663
Likes: 0
Received 0 Likes
on
0 Posts
thats nice. i have my amps in my storage bin area too but i completely took out my storage bin to allow some air flow. i took a hour trip with my music up and it only got warm.
10-08-07, 12:37 AM
#15
Nice job on getting the 5.25's to fit. My stereo is hid as well, as if there were none but my amp is mounted elsewhere for cooling and the bins still usable.
Black center console brings the cockpit an up to date feel and no glare when reading the gauges on the track. I have a silver one as well to swap out whenever the mood hits.
Black center console brings the cockpit an up to date feel and no glare when reading the gauges on the track. I have a silver one as well to swap out whenever the mood hits.
10-08-07, 08:12 AM
#16
Brap, Brap, Ole!
Thread Starter
Join Date: Apr 2005
Location: kalamazoo, mi
Posts: 1,461
Likes: 0
Received 0 Likes
on
0 Posts
 10-08-07, 11:48 AM
#18
Brap, Brap, Ole!
Thread Starter
Join Date: Apr 2005
Location: kalamazoo, mi
Posts: 1,461
Likes: 0
Received 0 Likes
on
0 Posts
 10-09-07, 04:26 PM
#20
Brap, Brap, Ole!
Thread Starter
Join Date: Apr 2005
Location: kalamazoo, mi
Posts: 1,461
Likes: 0
Received 0 Likes
on
0 Posts
Alright, so i got motivated today and decided to strip the nasty wrong color paint off from the rear cargo plastic.
Two words for safely removing paint from plastic:
EASY OFF... I sprayed it on, let it sit for 30 minutes, then sprayed the parts with a garden hose, literally the paint melted off, clean as a whistle.
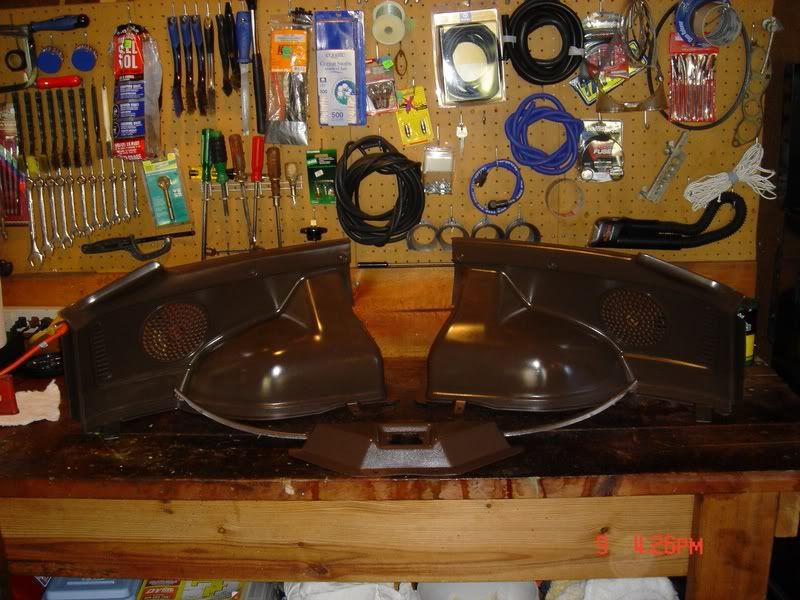
I took the parts and did a mixed combination of steel wool buffing and heat gun treatment. Finally i gave the pieces a coat of UV protectant.
I wish i would have taken a pic of how sunbaked and white they were, but trust me they were pretty bad, so i was very excited to see how well they turned out.
Here is a pic of the parts on the bench.
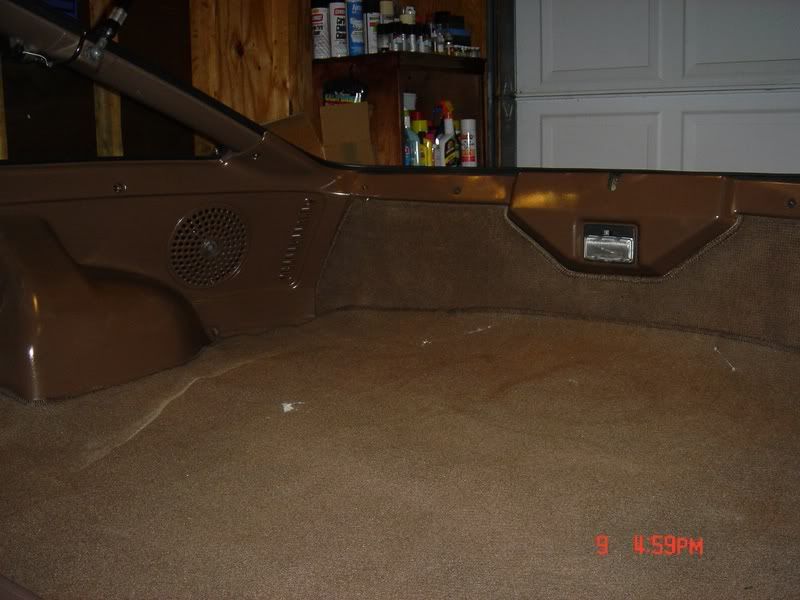
And here they are installed back in the car (remember there is a sub in there, gosh i love how stealth it is, lol).
Also, i forgot to take pics of the rear woofers.
And i forgot to take pics of the tweeters, so here ya go.
Two words for safely removing paint from plastic:
EASY OFF... I sprayed it on, let it sit for 30 minutes, then sprayed the parts with a garden hose, literally the paint melted off, clean as a whistle.
I took the parts and did a mixed combination of steel wool buffing and heat gun treatment. Finally i gave the pieces a coat of UV protectant.
I wish i would have taken a pic of how sunbaked and white they were, but trust me they were pretty bad, so i was very excited to see how well they turned out.
Here is a pic of the parts on the bench.
And here they are installed back in the car (remember there is a sub in there, gosh i love how stealth it is, lol).
Also, i forgot to take pics of the rear woofers.
And i forgot to take pics of the tweeters, so here ya go.
10-09-07, 04:55 PM
#21
Senior Member
iTrader: (1)
Join Date: Apr 2005
Location: Marlborough,Ma
Posts: 266
Likes: 0
Received 0 Likes
on
0 Posts
Very Very Nice I like the black center console ,,, I Iike tha fact that both of those interiors were done with car and not just put together,, Great JOb,,, I wonder if anyone has a pic with the center trim pieces in black, with red interior,,,
10-09-07, 05:08 PM
#23
7-less
Join Date: Dec 2005
Location: No. Virginia, USA
Posts: 2,053
Likes: 0
Received 0 Likes
on
0 Posts
He's probably skilled with a dremel tool. And, they could be slim-line subs, too.
That is the most useful thing I've read, yet. What do you mean by "heat gun treatment" ?
Two words for safely removing paint from plastic:
EASY OFF... I sprayed it on, let it sit for 30 minutes, then sprayed the parts with a garden hose, literally the paint melted off, clean as a whistle.
I took the parts and did a mixed combination of steel wool buffing and heat gun treatment. Finally i gave the pieces a coat of UV protectant.
EASY OFF... I sprayed it on, let it sit for 30 minutes, then sprayed the parts with a garden hose, literally the paint melted off, clean as a whistle.
I took the parts and did a mixed combination of steel wool buffing and heat gun treatment. Finally i gave the pieces a coat of UV protectant.
10-09-07, 06:39 PM
#24
Brap, Brap, Ole!
Thread Starter
Join Date: Apr 2005
Location: kalamazoo, mi
Posts: 1,461
Likes: 0
Received 0 Likes
on
0 Posts
I did a little bit of cutting with the dremel to make them fit, it wasnt too hard, but i went through about 20+ cutting wheels because its such a funky angle to get your wrist and arm into (gotta have that perfect cut right). After i cut the hole larger i used the supplied spacer rings and presto blammo, super tight and clean mid bass, i love it!
What i meant by the heat gun treatment is that if you have really sunfaded plastic parts (ie totally white) you can magically bring back the color by slowly and carefully heating up the plastic with a heat gun. Really it is like magic, you start to heat up that white faded plastic then the rich original color comes right up through, really weird that it works like that. After i used the heat gun it left some shiney and patchy looking color effect, so i busted out the ol bag of steel wool and polished the plastic to a uniform color and finish, thats it!
And thanks again guys, truly pictures dont really do much for this thread, the system sounds better than it looks. Very clear and clean with a tight puch. Cant wait to see what it sounds like after i deaden the whole car.
10-09-07, 06:49 PM
#25
7-less
Join Date: Dec 2005
Location: No. Virginia, USA
Posts: 2,053
Likes: 0
Received 0 Likes
on
0 Posts
I still can't get over how you did that trick center console dummy cover. By the way, if you don't have one, get one of those flexible shafts for your dremel tool. Makes getting into hard-to-reach places easier. Altho, you can't crank up the RPM too high, tho.
Oh, and you did provide pictures of how bad your rear trim pieces were sun faded. Your earlier pictures showed some decent shots of it. Pure white is what I saw.
Oh, and you did provide pictures of how bad your rear trim pieces were sun faded. Your earlier pictures showed some decent shots of it. Pure white is what I saw.