
My first time building an aluminum radiator :)


Thread Starter
Banned. I got OWNED!!!
iTrader: (2)
Joined: Oct 2004
Posts: 6,122
Likes: 1
From: London, Ontario
My first time building an aluminum radiator :)
Well more fabrication out of me again  This time was my first time welding a radiator. The total cost of this was only about 250$CA. I bought the core locally, only one shop allowed me to purchase the core by itself, as they tell me I could steal their business away ...
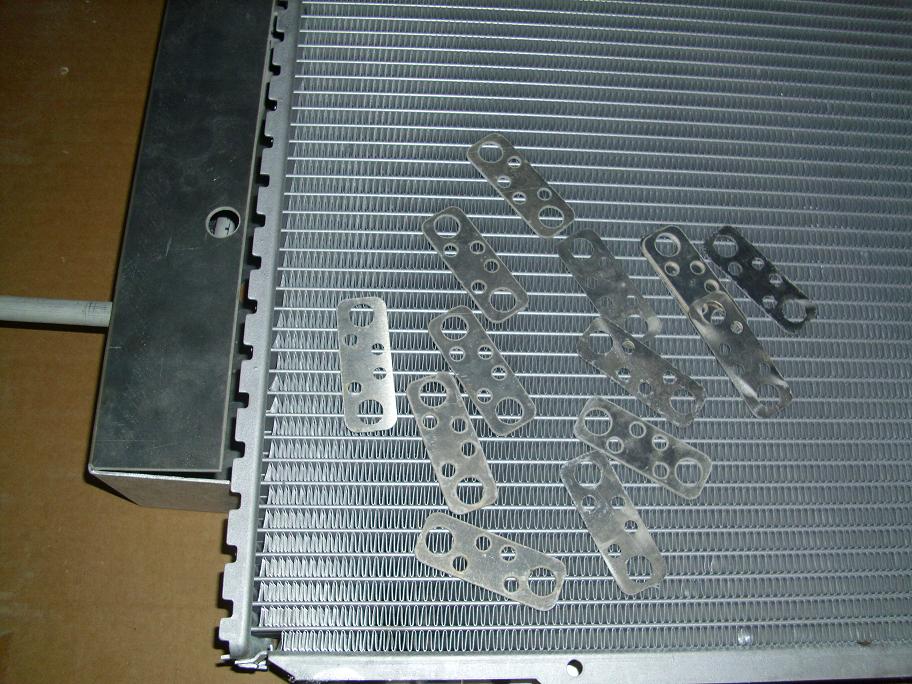
Anyways the shop that I went to was also nice enough to give me the filler neck piece, and the upper and lower tubing for the hoses. All I had to fabricate was the tanks, and also heater hose tubing, along with the low coolant threaded piece (Its an M12x1.25 if anyone is curious.
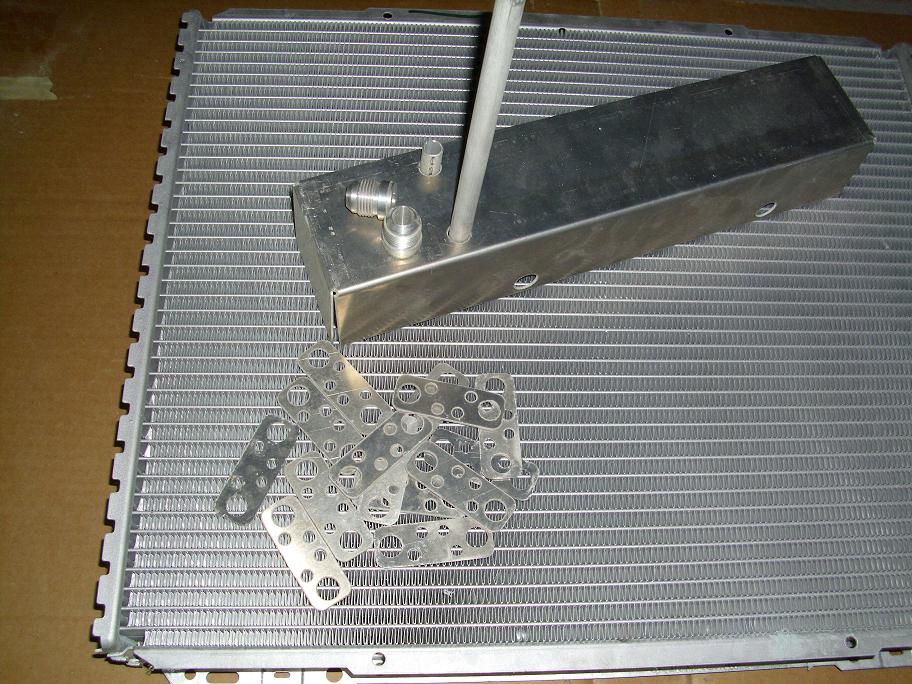
Now the core itself is actually bigger than the stock one (I believe it was 21x18). It also a 2 row. The tanks are 3" wide and 2" deep. I was going to go with smaller tanks but after talking to a few knowledgeable racers locally, they recommended to go as big as I could. Now you will also notice that the flow isn't moving from top to bottom anymore like it is from stock. The reason that I went with this design though is because its suppose to cool the water better as it provides a longer travel path.
Anyways, here's a few pictures and no its not going to be sitting like that in the car:
This time was my first time welding a radiator. The total cost of this was only about 250$CA. I bought the core locally, only one shop allowed me to purchase the core by itself, as they tell me I could steal their business away ... Anyways the shop that I went to was also nice enough to give me the filler neck piece, and the upper and lower tubing for the hoses. All I had to fabricate was the tanks, and also heater hose tubing, along with the low coolant threaded piece (Its an M12x1.25 if anyone is curious.
Now the core itself is actually bigger than the stock one (I believe it was 21x18). It also a 2 row. The tanks are 3" wide and 2" deep. I was going to go with smaller tanks but after talking to a few knowledgeable racers locally, they recommended to go as big as I could. Now you will also notice that the flow isn't moving from top to bottom anymore like it is from stock. The reason that I went with this design though is because its suppose to cool the water better as it provides a longer travel path.
Anyways, here's a few pictures and no its not going to be sitting like that in the car:
Lives on the Forum
Joined: Jun 2004
Posts: 11,359
Likes: 14
From: Grand Rapids Michigan
Dude, you never cease to amaze me. Your willingness to dive right in and do things that most of us would never even consider is quite admirable.
Do you think you'll have her back on her feet in time for the race?
.
Do you think you'll have her back on her feet in time for the race?
.
Thread Starter
Banned. I got OWNED!!!
iTrader: (2)
Joined: Oct 2004
Posts: 6,122
Likes: 1
From: London, Ontario
Yup there is a divider, if you look at the side by side comparison, you'll notice that there is a weld half way through holding the plate in.
Ken, I try to challenge myself as much as possible. I even took my broken clevis and welded a set screw to it as i couldn't find one the proper size in the time needed.
I actually might be able to make it, but i can't promise my alignment will be optimal like it was before. I had to borrow a pair of control arms for now, and they are a welded racing beat adjustable ones that have been previously welded on. The only major things to figure out is mounting of radiator, fix the bumper, figure out hoses for radiator and install all the other stuff.


Joined: Mar 2001
Posts: 31,837
Likes: 3,234
From: https://www2.mazda.com/en/100th/
wow that a neat project... its actually really close to the radiator we used to run in the FC's, the divider was KEY, get a good seal, and the car won't warm up unless you beat on it
Trending Topics
Thread Starter
Banned. I got OWNED!!!
iTrader: (2)
Joined: Oct 2004
Posts: 6,122
Likes: 1
From: London, Ontario
That's exactly what I was going for, the divider was so tight I had to tap it in place, also the bottom of it was shaped the same profile as the tanks inside, it still leaks past a bit, but should be decent.
Cool rad Sam.
I have one I started for "My ultimate first gen track car project" I started about 5 years ago
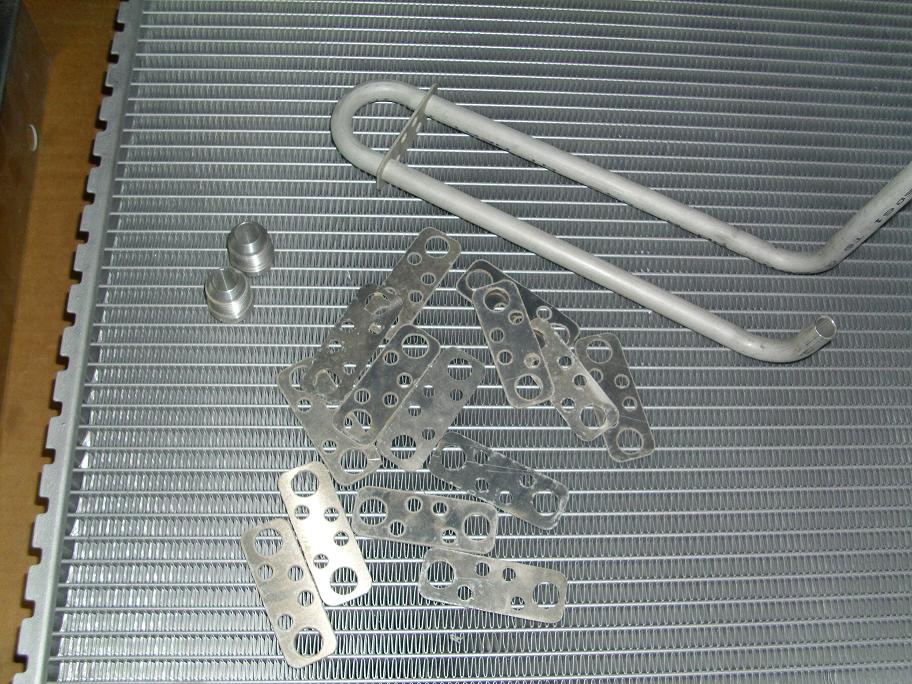
Super wide core, so wide that the mounting bolts fit through bungs welded in the middle of the end tanks. It even has a finned tube in the LH tank for oil cooler lines to plumb through. Wanted to play around with the extra water cooling of the oil.
-billy
I have one I started for "My ultimate first gen track car project" I started about 5 years ago
Super wide core, so wide that the mounting bolts fit through bungs welded in the middle of the end tanks. It even has a finned tube in the LH tank for oil cooler lines to plumb through. Wanted to play around with the extra water cooling of the oil.
-billy
Thread Starter
Banned. I got OWNED!!!
iTrader: (2)
Joined: Oct 2004
Posts: 6,122
Likes: 1
From: London, Ontario
Cool rad Sam.
I have one I started for "My ultimate first gen track car project" I started about 5 years ago
Super wide core, so wide that the mounting bolts fit through bungs welded in the middle of the end tanks. It even has a finned tube in the LH tank for oil cooler lines to plumb through. Wanted to play around with the extra water cooling of the oil.
-billy
I'm still running the beehive cooler right now ... that still need to be upgraded to the front mount oil cooler sometime in its lifetime.
Joined: Mar 2001
Posts: 31,837
Likes: 3,234
From: https://www2.mazda.com/en/100th/
Cool rad Sam.
I have one I started for "My ultimate first gen track car project" I started about 5 years ago
Super wide core, so wide that the mounting bolts fit through bungs welded in the middle of the end tanks. It even has a finned tube in the LH tank for oil cooler lines to plumb through. Wanted to play around with the extra water cooling of the oil.
-billy
I have one I started for "My ultimate first gen track car project" I started about 5 years ago
Super wide core, so wide that the mounting bolts fit through bungs welded in the middle of the end tanks. It even has a finned tube in the LH tank for oil cooler lines to plumb through. Wanted to play around with the extra water cooling of the oil.
-billy
Exactly where we get ours.
I was feeling froggy so I dug it out.
The 1/2" tube slides inside the LH end tank. Inlet/outlet are -10 fitting. The rectangular parts are the "fins" that fit along the tube every 5/16". You can also see the holes in the end tanks close to the core. Those are mounts for the stock mounting locations, so like you said, core as big as the opening.
(for those following along, the coolant in the end tank runs past the "fins" as the oil runs through the middle of the tube. Idea is that the coolant will lower the temperature of the oil. Normally used as supplemental cooling not a replacement of the oil cooler.)
Lives on the Forum
Joined: Jun 2004
Posts: 11,359
Likes: 14
From: Grand Rapids Michigan
That's a pretty slick setup Billy. I assume the oil would pass through the tank prior to going
through a FMOC, correct?
And don't give Sam any more ideas. He needs to get his car put back
together so he can come racing with me this weekend.
(Sam, get off the computer and back to work boy!!!)
through a FMOC, correct?
And don't give Sam any more ideas. He needs to get his car put back
together so he can come racing with me this weekend.
(Sam, get off the computer and back to work boy!!!)
Thread Starter
Banned. I got OWNED!!!
iTrader: (2)
Joined: Oct 2004
Posts: 6,122
Likes: 1
From: London, Ontario
Wow this is an amazing radiator ! I had the car idling for about 30 min and couldn't get the car to heat up over 83 degrees celcius! I had to wait about 20 min just for the thermostat to open a bit.

Thread
Thread Starter
Forum
Replies
Last Post