
My 12a blowthrough build-up

Thread Starter
OBEY YOUR MAZDA
Joined: Oct 2002
Posts: 3,060
Likes: 2
From: Denmark
My 12a blowthrough build-up
Proper topic title, this time  OLD THREAD: https://www.rx7club.com/1st-generation-specific-1979-1985-18/will-these-fd-rotorhousings-fit-my-12a-motor-696169/
Last year i had an epifany(sp) Going through threads i discovered Robert Rotaryshaggers red beautiful FB blowthrough Turbo monster, this inspired me to test my skills with a 12A.
I had a 12A core engine laying around that i decided to tear apart, came out really nice, but the housings were flaking really bad.
I started sourcing 12A housings, turns out they are hard to find and new ones would cost me my first born, here in Europe. Sucks.
What to do:
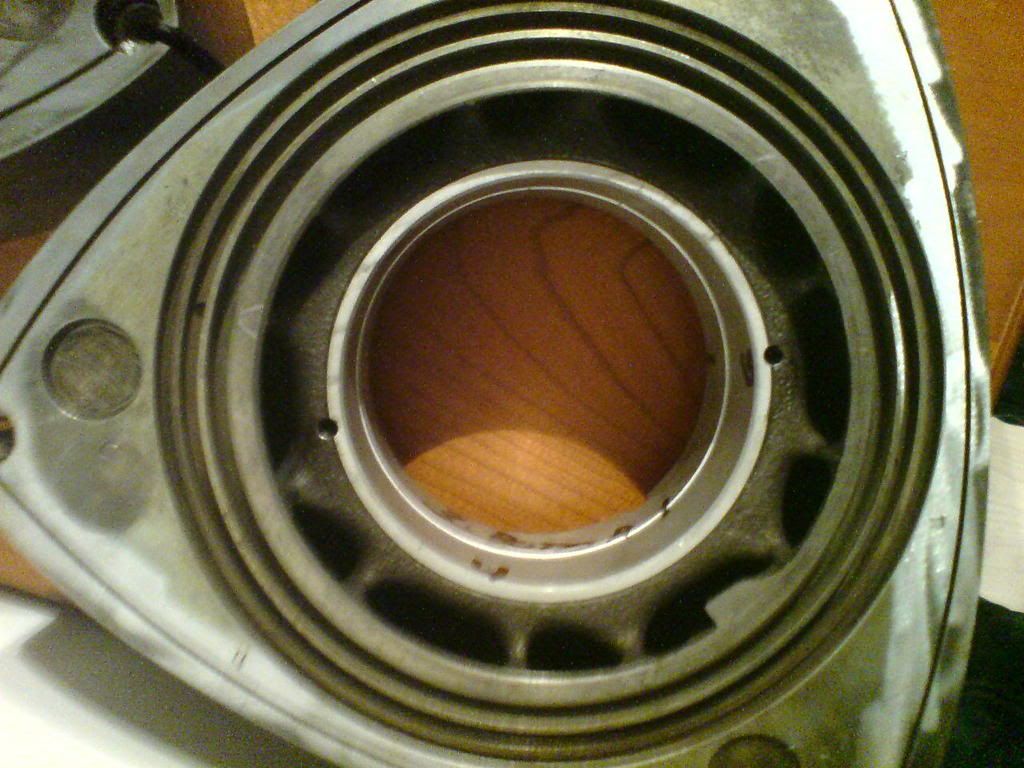
I got ahold of a fellow forum member in Belgium, bought two used REW housings with some chrome flaking.
Threw them in the the CNC mill and went to town

5 mm off each side.

Cut some water seal grooves in them and had a few beers.

Fitting Side seals.
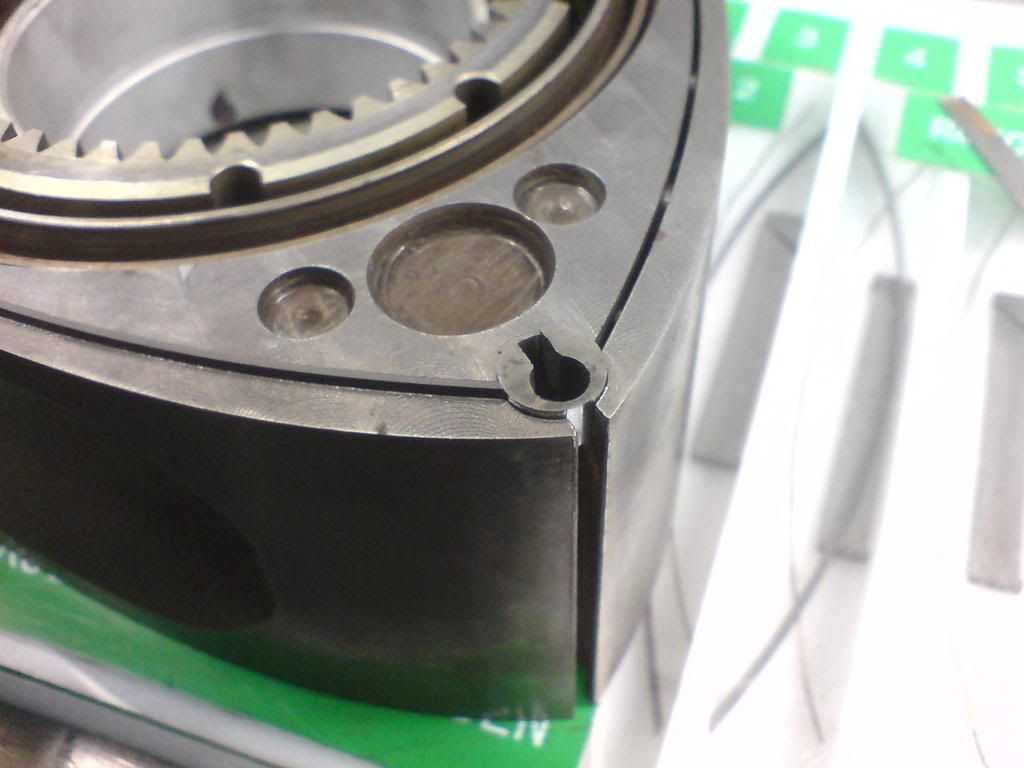
Securing bearings with M4 setscrews.
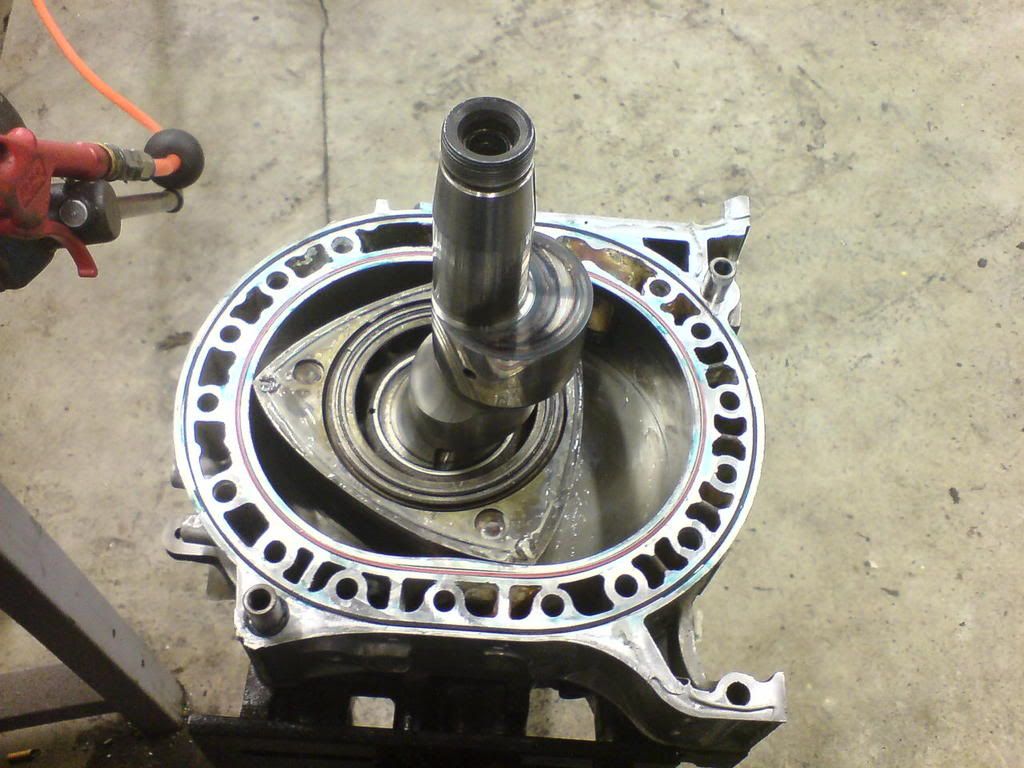
Random assembly picture.
ABCON assembly goo and Hylomar Smurf Snot is your friend
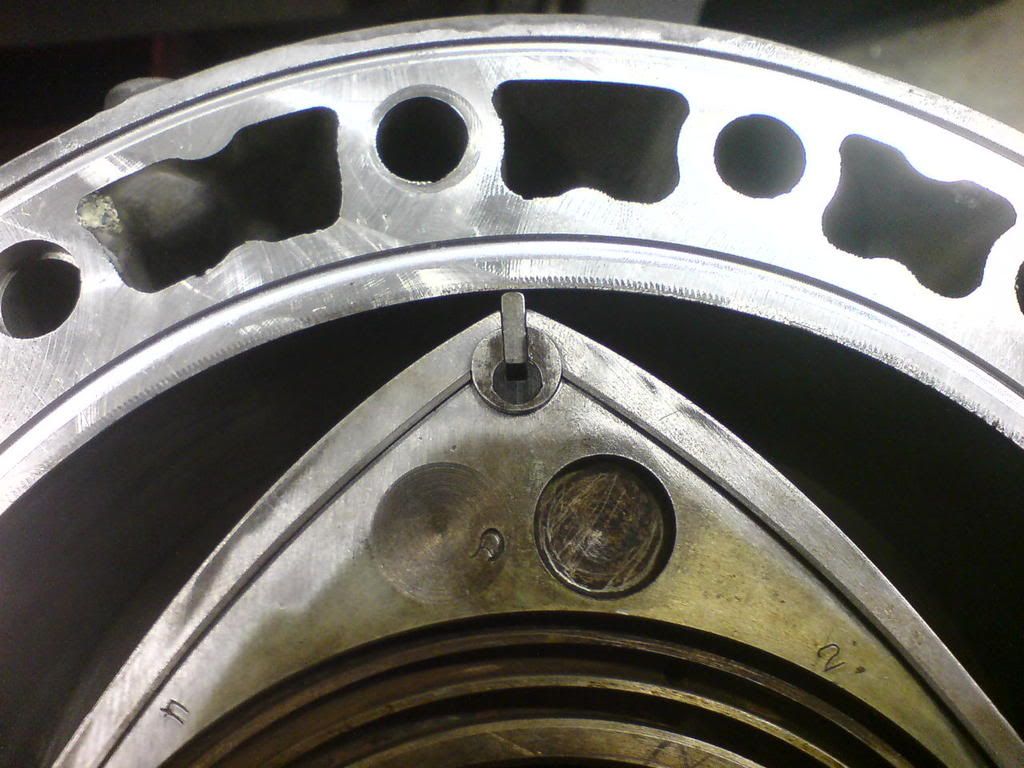
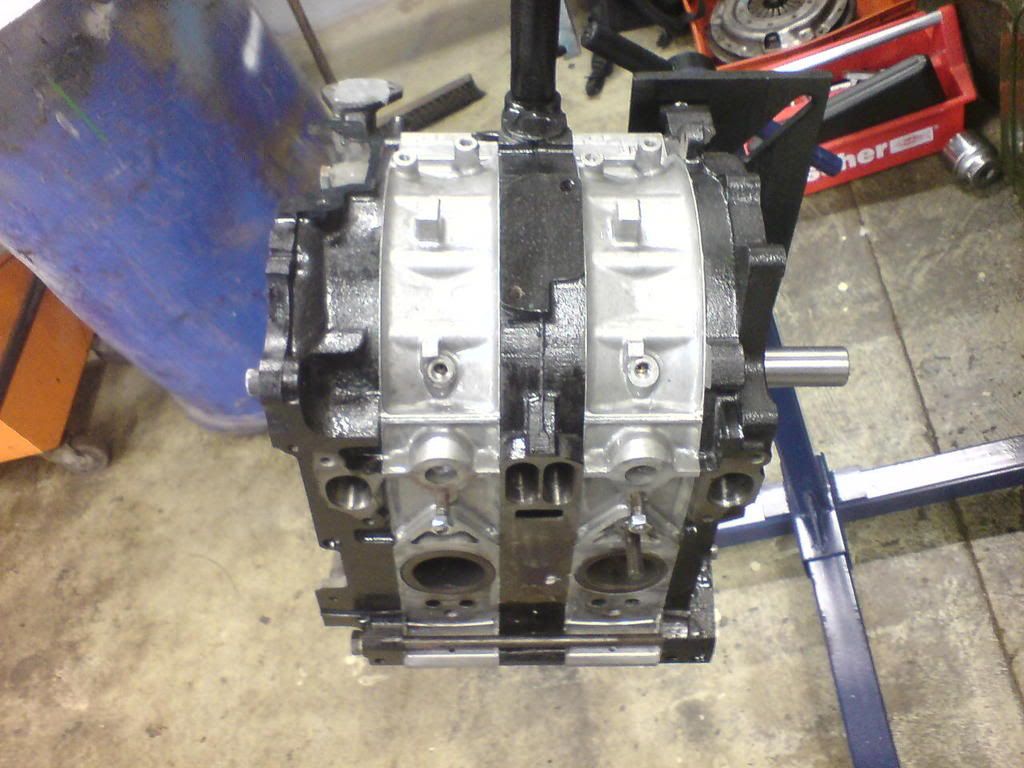
Mild Streetport.
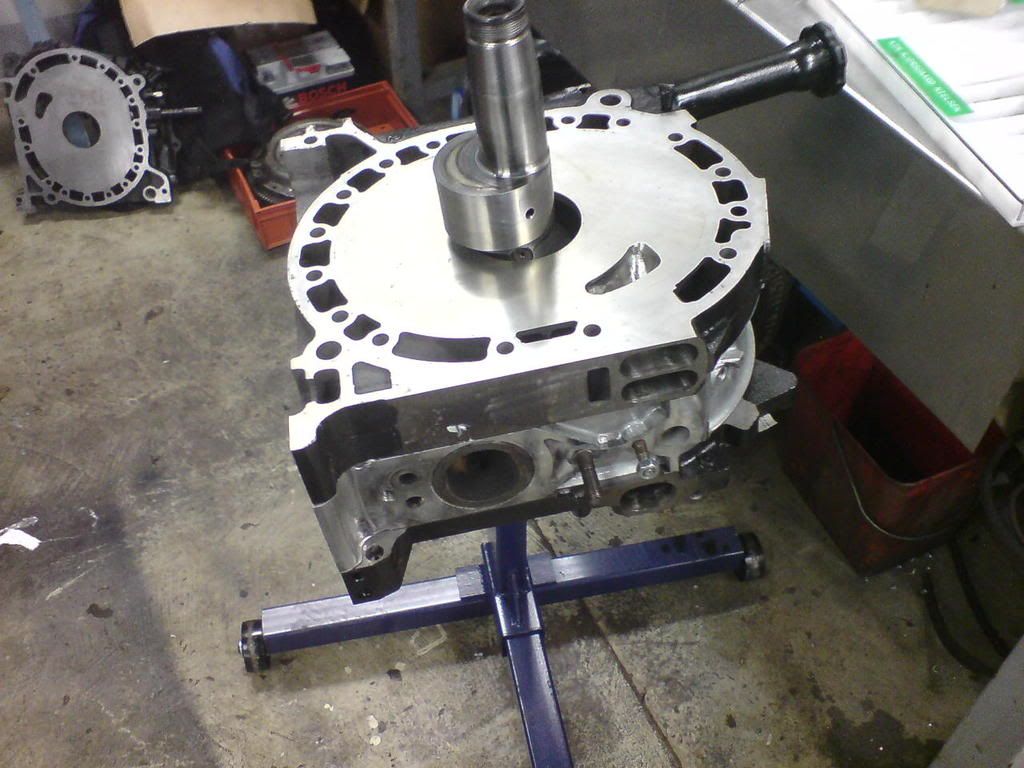
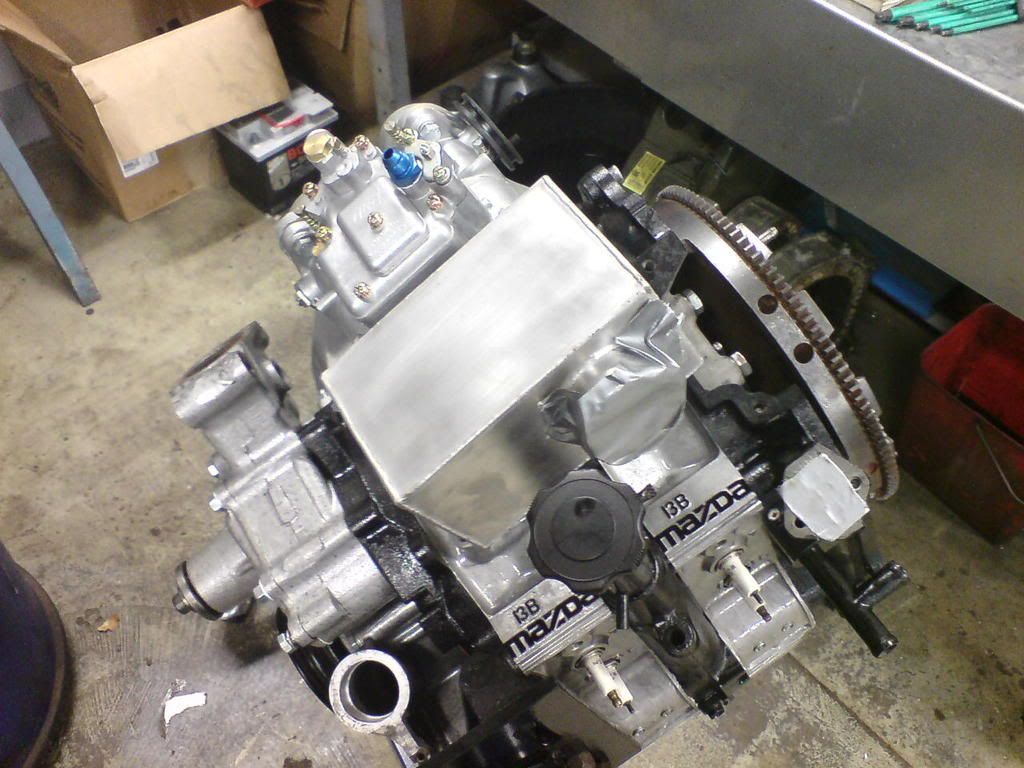
Very shortblock.
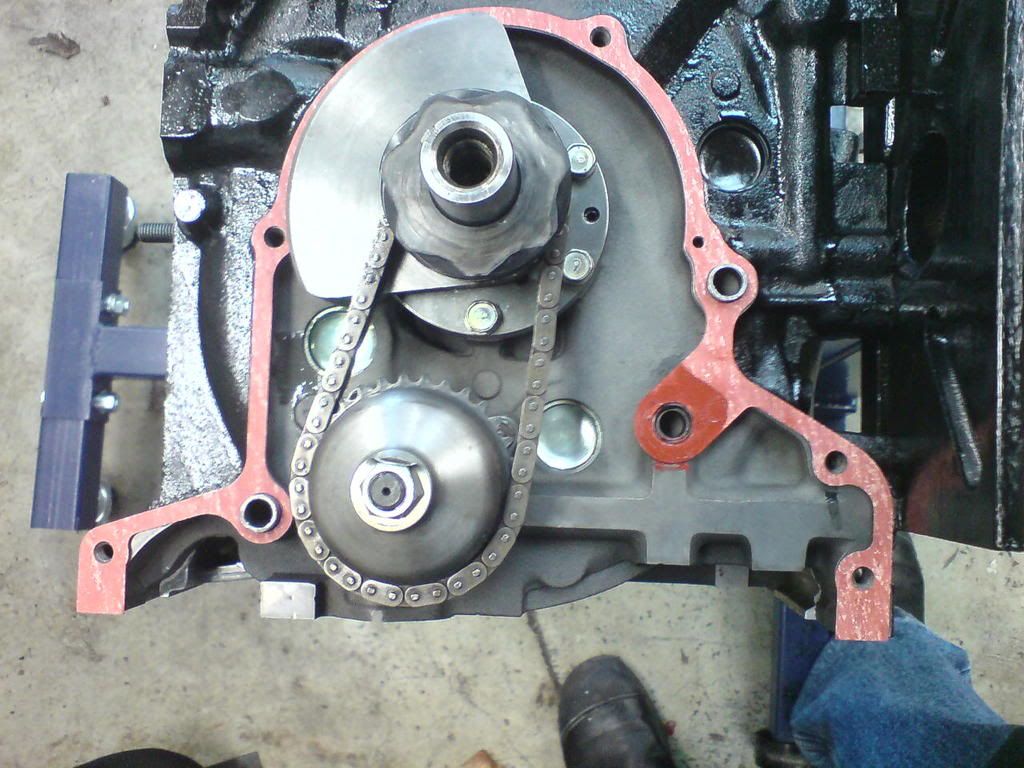
Frontcover internals.
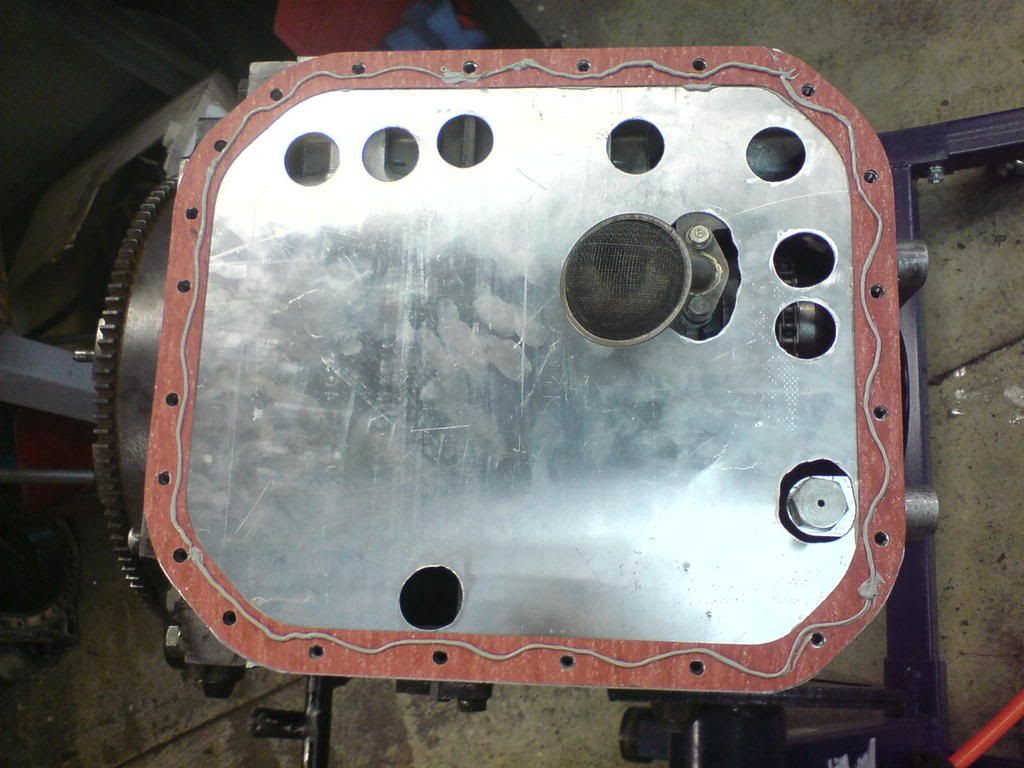
Oil Debubblificationplate (yeay I invent words)
I highlighted the 13B letters, just for the sake of total confusion, only the true rotard will notice.
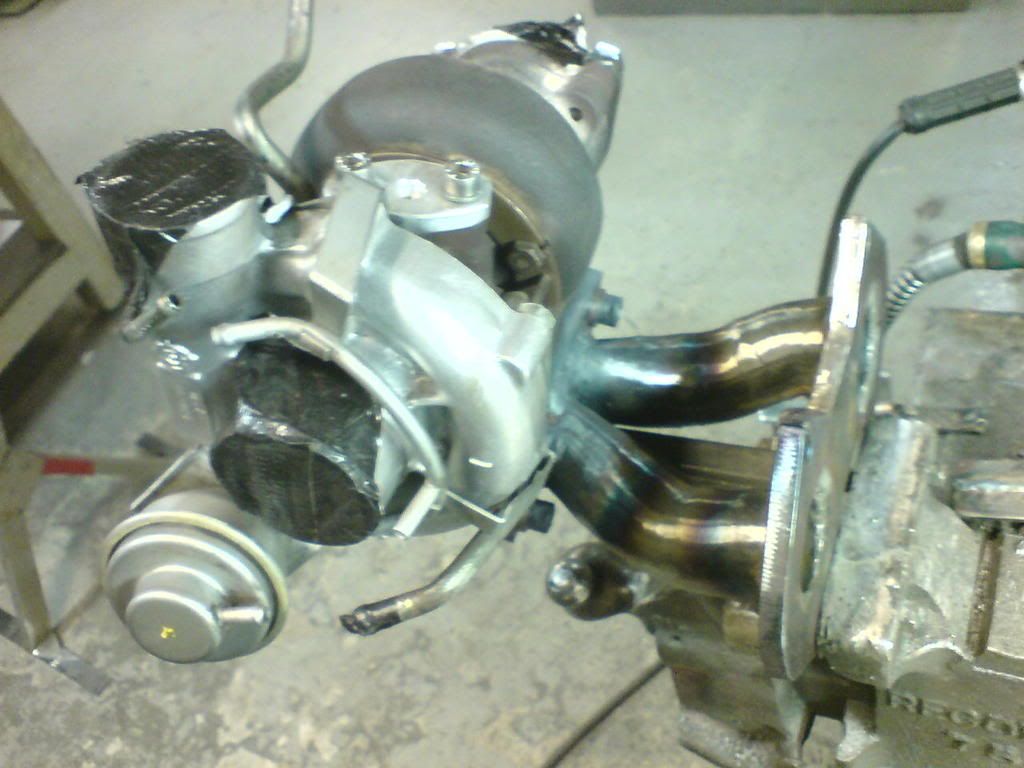
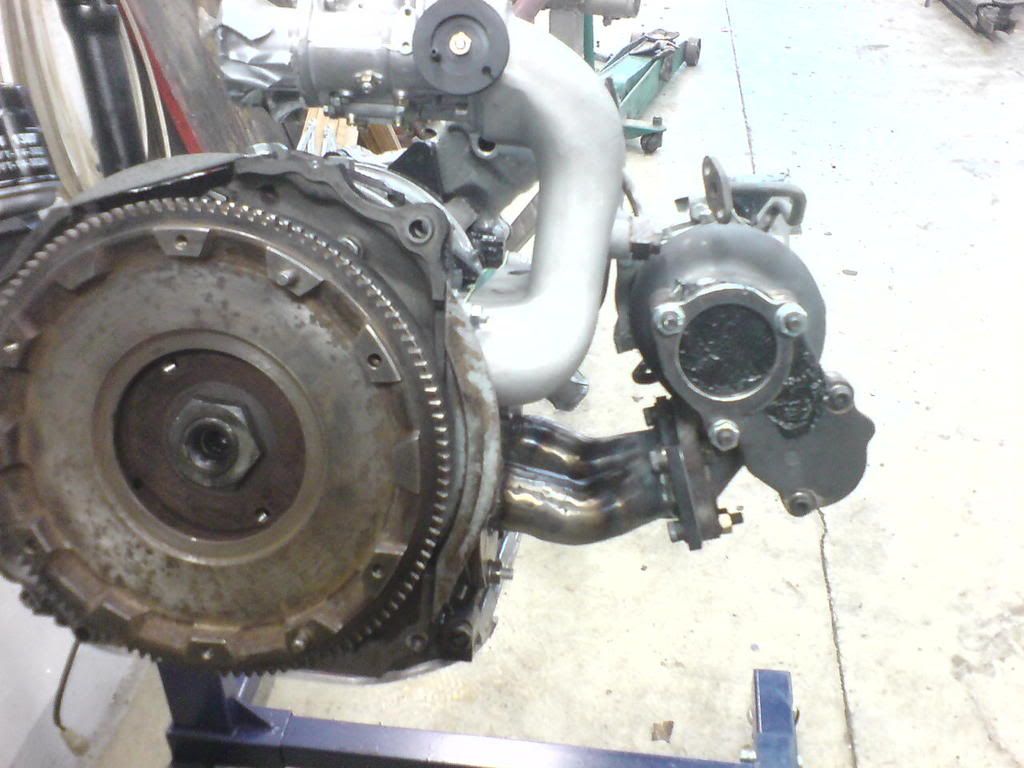
Turbo manifold fabrication. Later i wll get a better turbo/manifold.
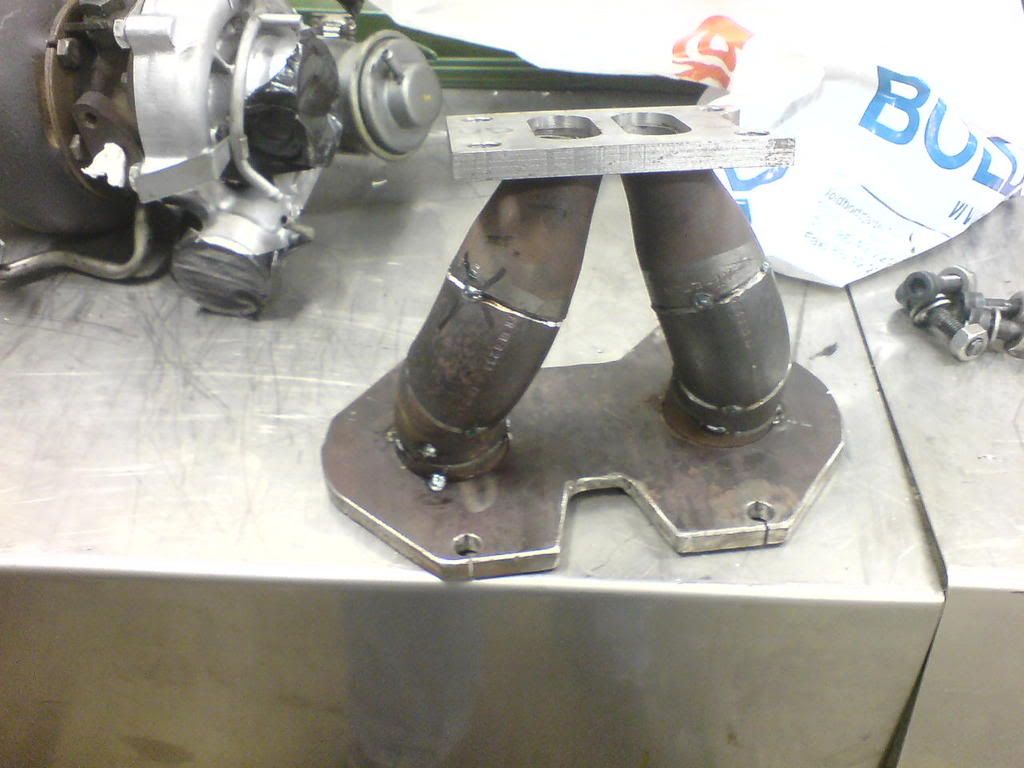
As above.
Bored at Work, why not put it to good use instead of posting random **** on the forum.:
Port scribing tool

Seal box

Just for fun, I hooked up the compression tester today. It showed 45psi.
Now that might seem low, but this was just me turning the flywheel by hand. Ha ha. I need to build a test stand.
OLD THREAD: https://www.rx7club.com/1st-generation-specific-1979-1985-18/will-these-fd-rotorhousings-fit-my-12a-motor-696169/Last year i had an epifany(sp) Going through threads i discovered Robert Rotaryshaggers red beautiful FB blowthrough Turbo monster, this inspired me to test my skills with a 12A.
I had a 12A core engine laying around that i decided to tear apart, came out really nice, but the housings were flaking really bad.
I started sourcing 12A housings, turns out they are hard to find and new ones would cost me my first born, here in Europe. Sucks.
What to do:
I got ahold of a fellow forum member in Belgium, bought two used REW housings with some chrome flaking.
Threw them in the the CNC mill and went to town
5 mm off each side.
Cut some water seal grooves in them and had a few beers.
Fitting Side seals.
Securing bearings with M4 setscrews.
Random assembly picture.
ABCON assembly goo and Hylomar Smurf Snot is your friend
Mild Streetport.
Very shortblock.
Frontcover internals.
Oil Debubblificationplate (yeay I invent words)
I highlighted the 13B letters, just for the sake of total confusion, only the true rotard will notice.
Turbo manifold fabrication. Later i wll get a better turbo/manifold.
As above.
Bored at Work, why not put it to good use instead of posting random **** on the forum.:
Port scribing tool
Seal box
Just for fun, I hooked up the compression tester today. It showed 45psi.
Now that might seem low, but this was just me turning the flywheel by hand. Ha ha. I need to build a test stand.
Thread Starter
OBEY YOUR MAZDA
Joined: Oct 2002
Posts: 3,060
Likes: 2
From: Denmark
Yep, I removed exactly 5mm on each side of the housings. Did it in a few steps and the last cut was super thin, so as to get a really flat smooth finish.
Four sides ate one cutter, I'm willing to believe, it aint just regular aluminium.
Well I'd be lying if I took credit for the CNC part, I had a friend do it for me. Numbers and computers hate me.
Four sides ate one cutter, I'm willing to believe, it aint just regular aluminium.
Well I'd be lying if I took credit for the CNC part, I had a friend do it for me. Numbers and computers hate me.
Thread Starter
OBEY YOUR MAZDA
Joined: Oct 2002
Posts: 3,060
Likes: 2
From: Denmark
Yes I made the plenum in stainless, the carb is turbo prepped from the factory.
Bought the manifold from Pierce Manifolds, looks okay on the outside but the ports needed to be matched to the irons. Im not impressed by the accuracy of their mould
Bought the manifold from Pierce Manifolds, looks okay on the outside but the ports needed to be matched to the irons. Im not impressed by the accuracy of their mould
Trending Topics
Nikki-Modder Rex-Rodder
Joined: Feb 2001
Posts: 2,890
Likes: 14
From: Trying to convince some clown not to put a Holley 600 on his 12a.
Dude, did you make that seal box?
That is just SICK if you did! :p
Everything is so clean and methodical, I don't see how this could be anything other than perfect in it's assembly.
Did you fabricate the manifold yourself?
That is just SICK if you did! :p
Everything is so clean and methodical, I don't see how this could be anything other than perfect in it's assembly.
Did you fabricate the manifold yourself?

Banned. I got OWNED!!!
Joined: Aug 2002
Posts: 4,666
Likes: 2
From: chatsworth,Ca.
looking good.. BUT, a long,long time ago i made a few carb hats with the charge pipe off set and for some reason the barrel that had the charge pipe directly in front of it was leaner than the other barrel( egt guage probes in front and rear exhaust header).. thats why all the carb hast i meke now are centered
so here is a tip for ya, jet the rear a few steps richer than the front
oh, and dont use a turbo other that a stock s4 or s5 with an oer carb, the needle valve can't flow enough fuel for anything bigger ... i found that out the hard way..
oh and whoever told you the OER carbs were turbo prepped from the factory lied to ya! they arn't
Thread Starter
OBEY YOUR MAZDA
Joined: Oct 2002
Posts: 3,060
Likes: 2
From: Denmark
Rx7learner.
Nah sorry, but im sure someone else is willing to make some money off you
Blwfly.
I lapped them myself, didnt bother to have them re-nitrided
Robert.
Thanks for the advice, I appreciate it.
It says somewhere in the manual that came with the carb that they are boost prepped.
Ohh well I believe in You, more than I believe in a piece of paper.
So what do I need to do to boostprep it ?
It allready has a plastic float, rubber sealed shaft bearings and it sees turbo pressure in the floatbowl somehow I guess.
Thanks
Kim
Banned. I got OWNED!!!
Joined: Aug 2002
Posts: 4,666
Likes: 2
From: chatsworth,Ca.
Robert.
Thanks for the advice, I appreciate it.
It says somewhere in the manual that came with the carb that they are boost prepped.
Ohh well I believe in You, more than I believe in a piece of paper.
So what do I need to do to boostprep it ?
It allready has a plastic float, rubber sealed shaft bearings and it sees turbo pressure in the floatbowl somehow I guess.
Thanks
Kim
Last edited by 680RWHP12A; Jan 30, 2008 at 11:28 AM. Reason: choked on sme cheese from denmark!
Thread Starter
OBEY YOUR MAZDA
Joined: Oct 2002
Posts: 3,060
Likes: 2
From: Denmark
Thanks Robert, I'll check the NV tomorrow.
Banjo is gone in favor of a 6-AN set-up.
When I asked in Your thread, in the Vendor forum, I had allready bought the carburetor.
It wont happen again, Master
Banjo is gone in favor of a 6-AN set-up.
When I asked in Your thread, in the Vendor forum, I had allready bought the carburetor.
It wont happen again, Master
Eats, Sleeps, Dreams Rotary
Joined: Jul 2004
Posts: 3,247
Likes: 2
From: Allentown, PA - Paterson, NJ
Thread Starter
OBEY YOUR MAZDA
Joined: Oct 2002
Posts: 3,060
Likes: 2
From: Denmark
Needle Valve is 1.8
I teflon taped the setscrews for the venturis.
My plan is to break it in without the turbo for about 2000km's (1200miles)
Oil hook up will be 4-AN or 6-AN in and 10-AN out
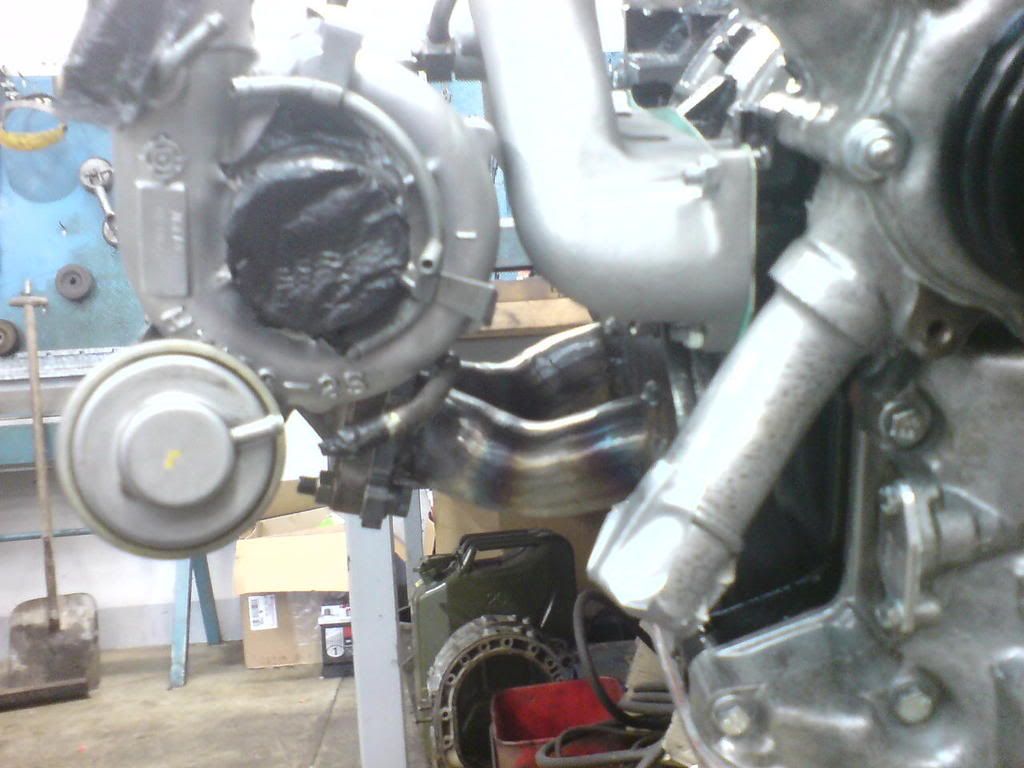
Tight fit
And a picture of my retirement plan LOL

I teflon taped the setscrews for the venturis.
My plan is to break it in without the turbo for about 2000km's (1200miles)
Oil hook up will be 4-AN or 6-AN in and 10-AN out
Tight fit
And a picture of my retirement plan LOL
Banned. I got OWNED!!!
Joined: Aug 2002
Posts: 4,666
Likes: 2
From: chatsworth,Ca.
ok good..
next, you will need to drill and tap your intake manifold (1/8 pipe) one on the front rotor and one on the rear rotor.. tap the manifold on the motor side since there isnt alot of room on the outside= run into turbo.. next,install fittings, use silicone hose and Y them together before going to the fpr and boost guage to insure a strong boost/ vac. signal..
Thread Starter
OBEY YOUR MAZDA
Joined: Oct 2002
Posts: 3,060
Likes: 2
From: Denmark
ok good..
next, you will need to drill and tap your intake manifold (1/8 pipe) one on the front rotor and one on the rear rotor.. tap the manifold on the motor side since there isnt alot of room on the outside= run into turbo.. next,install fittings, use silicone hose and Y them together before going to the fpr and boost guage to insure a strong boost/ vac. signal..
next, you will need to drill and tap your intake manifold (1/8 pipe) one on the front rotor and one on the rear rotor.. tap the manifold on the motor side since there isnt alot of room on the outside= run into turbo.. next,install fittings, use silicone hose and Y them together before going to the fpr and boost guage to insure a strong boost/ vac. signal..
J/K - Thanks you're the best.
Does it make a significant difference whether I tap the primary or secondary runners.
I was thinking about using PolyURethane hose and snap connectors that we also happen to use at work on the pick n' place robots. It's pretty strong ****.
Thread Starter
OBEY YOUR MAZDA
Joined: Oct 2002
Posts: 3,060
Likes: 2
From: Denmark
Some pictures Pre rebuild.
Carb and boostbox in its early stage.

Fresh welds. And by welds I mean I ran it together with the TIG

An hour in the microbiological cleaner and then I wirewheeled the **** out of the gunky rotors

Made an oil recess in the stationary gears, made them with the last dull lathe-bit available in the shop - hence the bad finish

Milled a few more windows in the bearings

Guess what

Man I love my job.
Carb and boostbox in its early stage.
Fresh welds. And by welds I mean I ran it together with the TIG
An hour in the microbiological cleaner and then I wirewheeled the **** out of the gunky rotors
Made an oil recess in the stationary gears, made them with the last dull lathe-bit available in the shop - hence the bad finish
Milled a few more windows in the bearings
Guess what
Man I love my job.