
LED rear light convo (How I did it, anyway)

Thread Starter
Senior Member
Joined: Oct 2010
Posts: 255
Likes: 1
From: England
LED rear light convo (How I did it, anyway)
Been asked about this a couple of times, so I thought I'd put up my own rather random and non-scientific method for anyone who's interested!
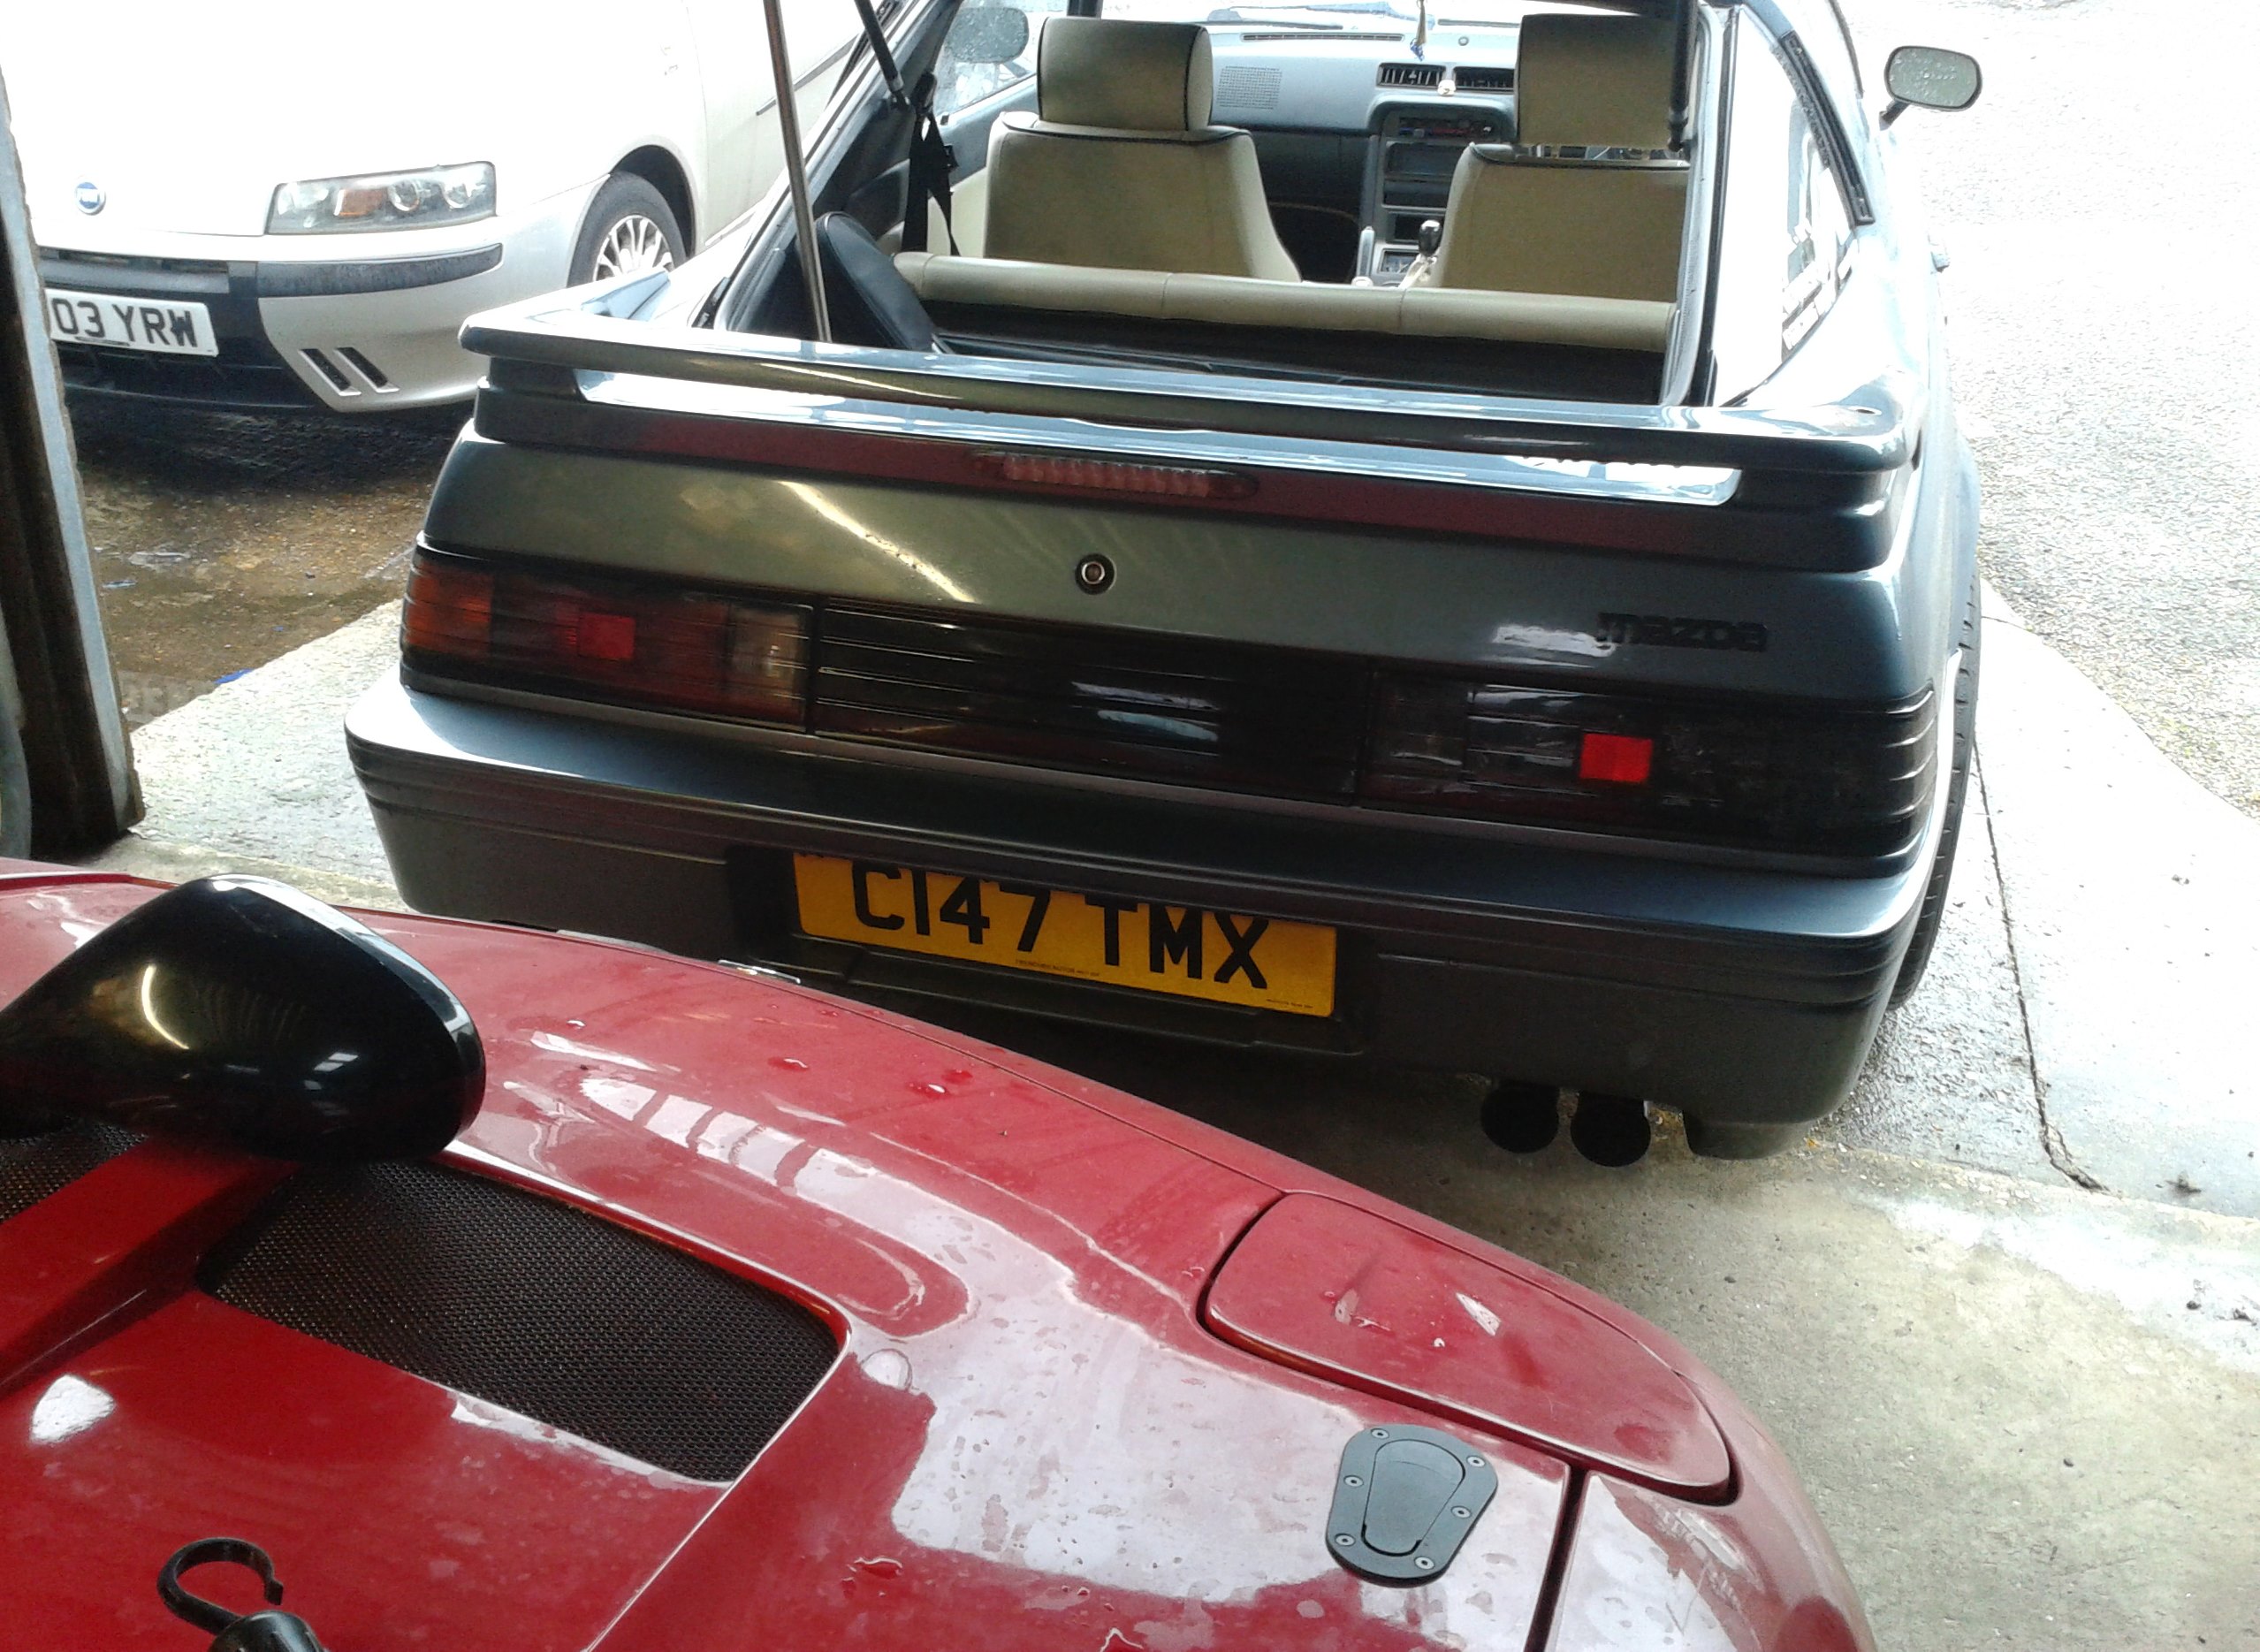
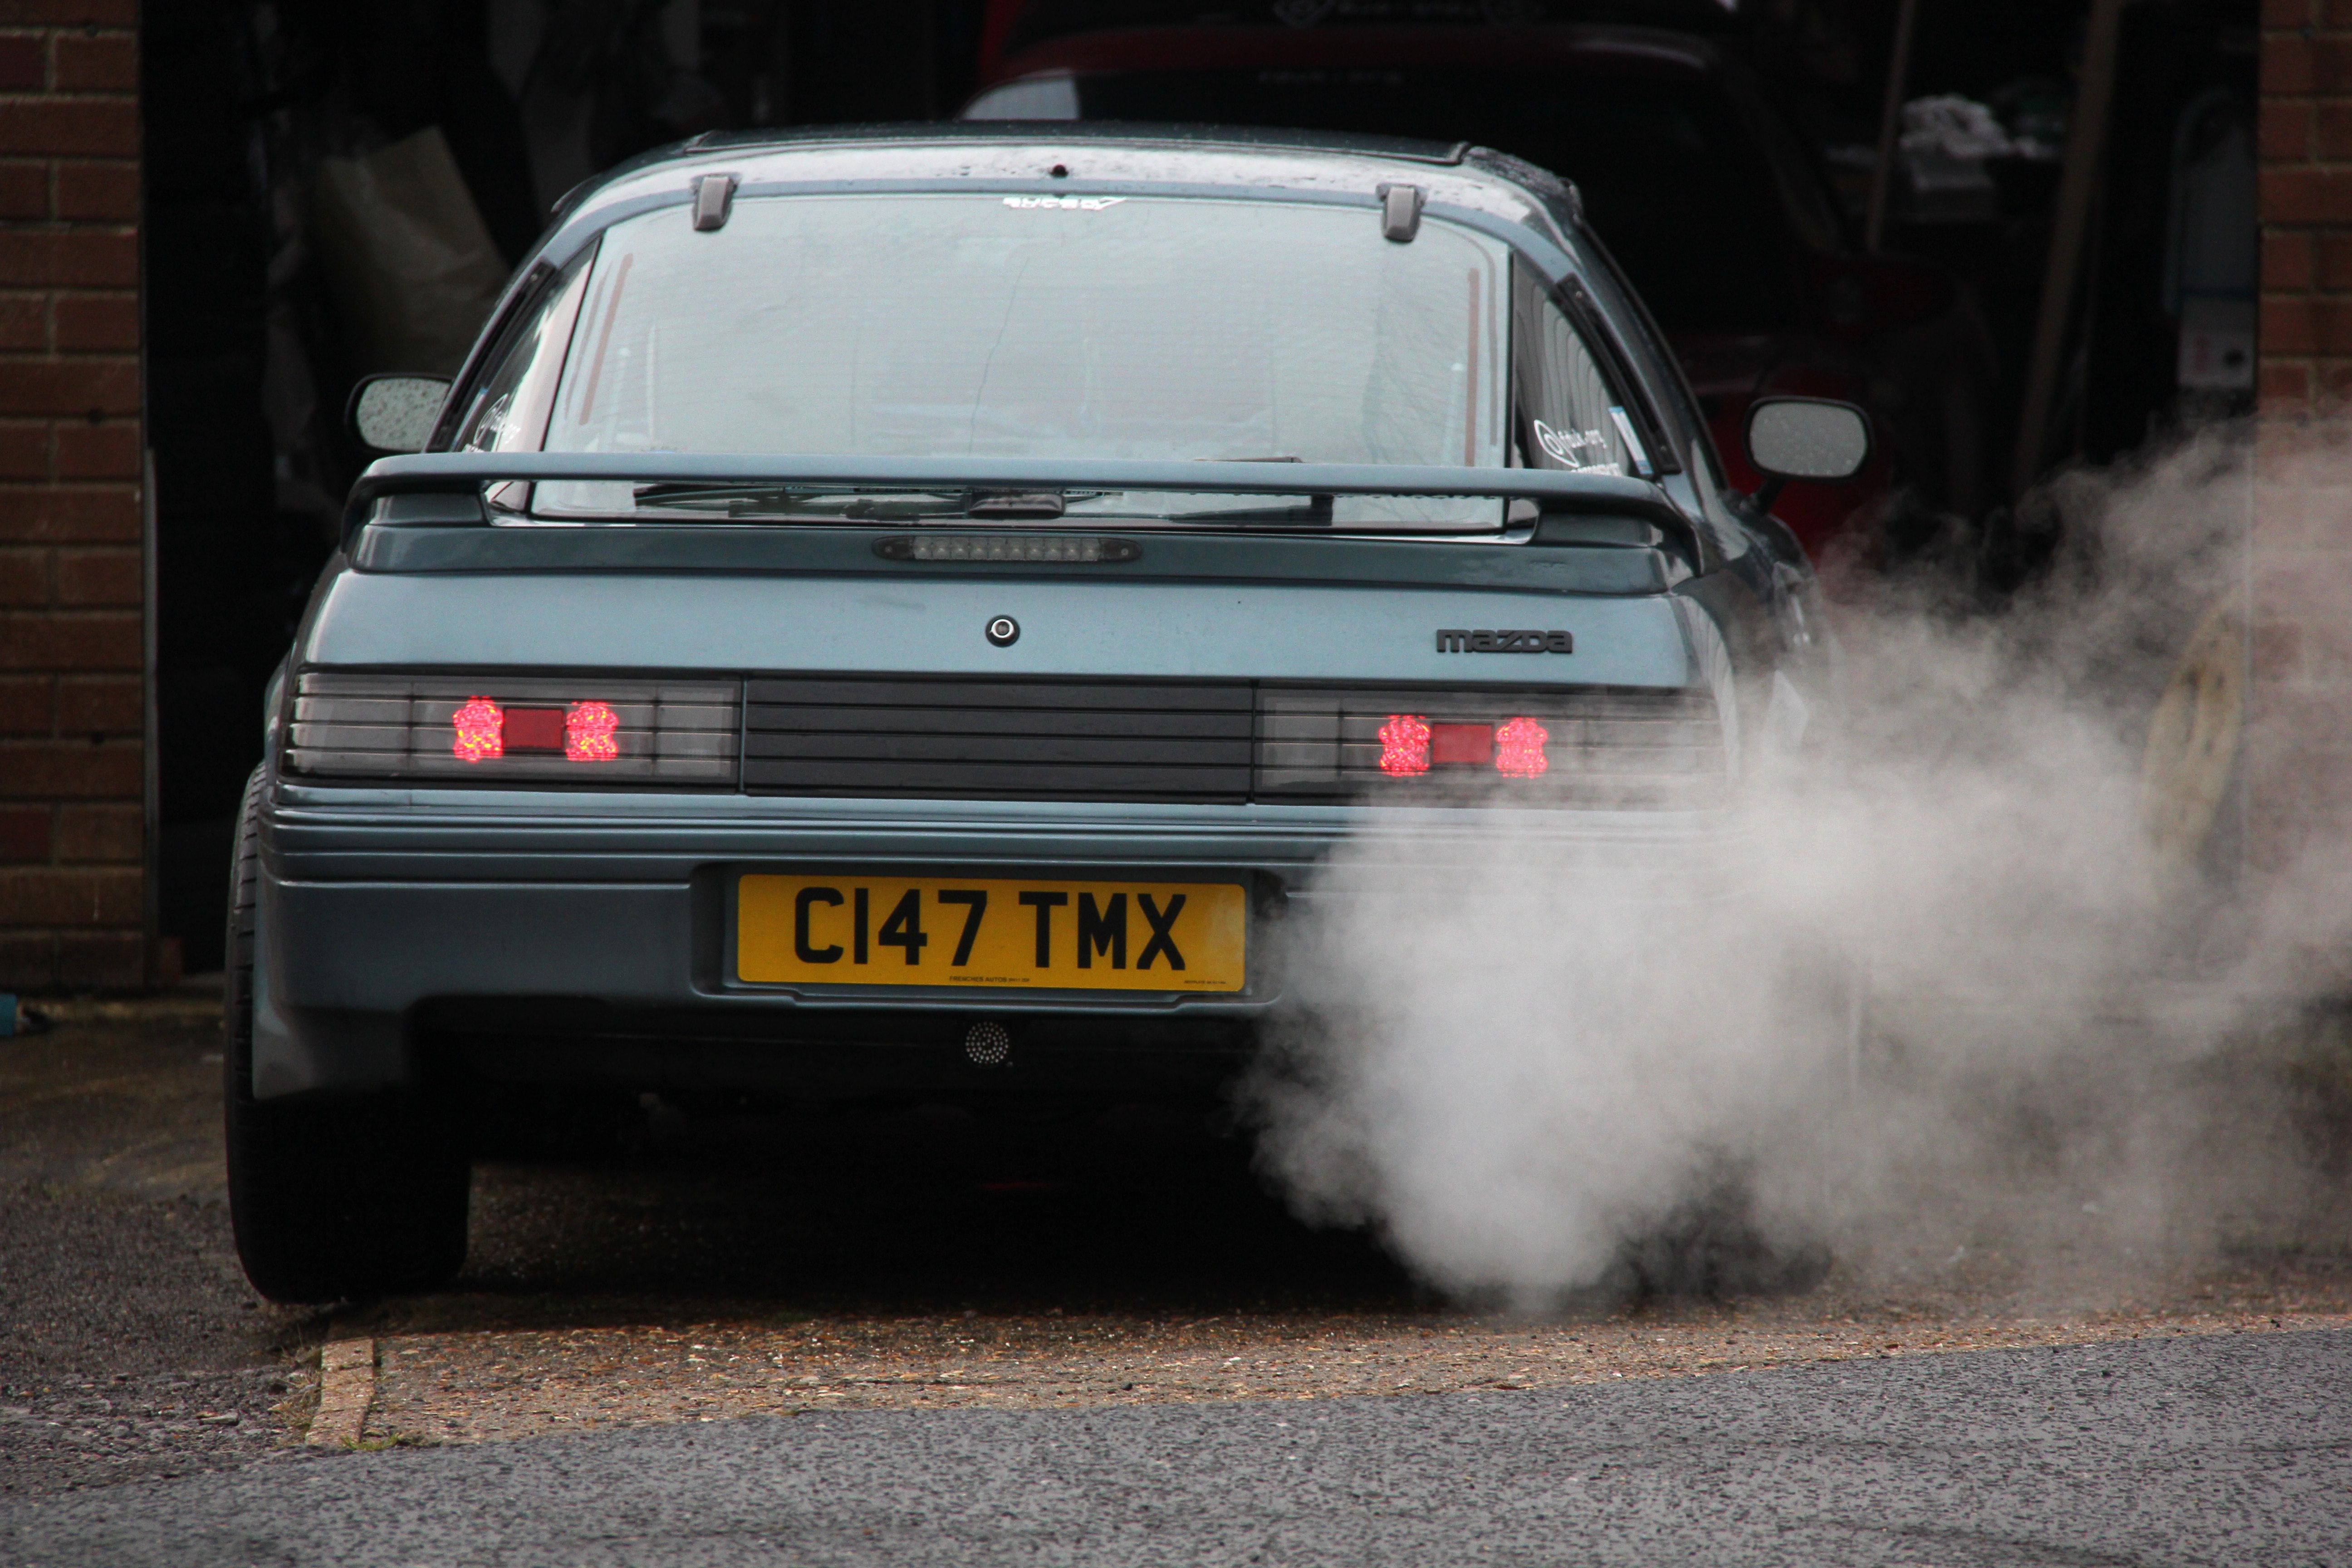
This mod has been about a couple of years in the making, but since it's long overdue and I had a bit of spare time for once I thought it was long past time I got the hell on with it! There are a couple of things that have always annoyed me about the back end of my S3. I blame my mate James, cos it was following his old and now stolen Silver Arrow S2 round the M25 London Orbital that it really brought it home how irritating they were. Know what I'm on about? Here, let me show you
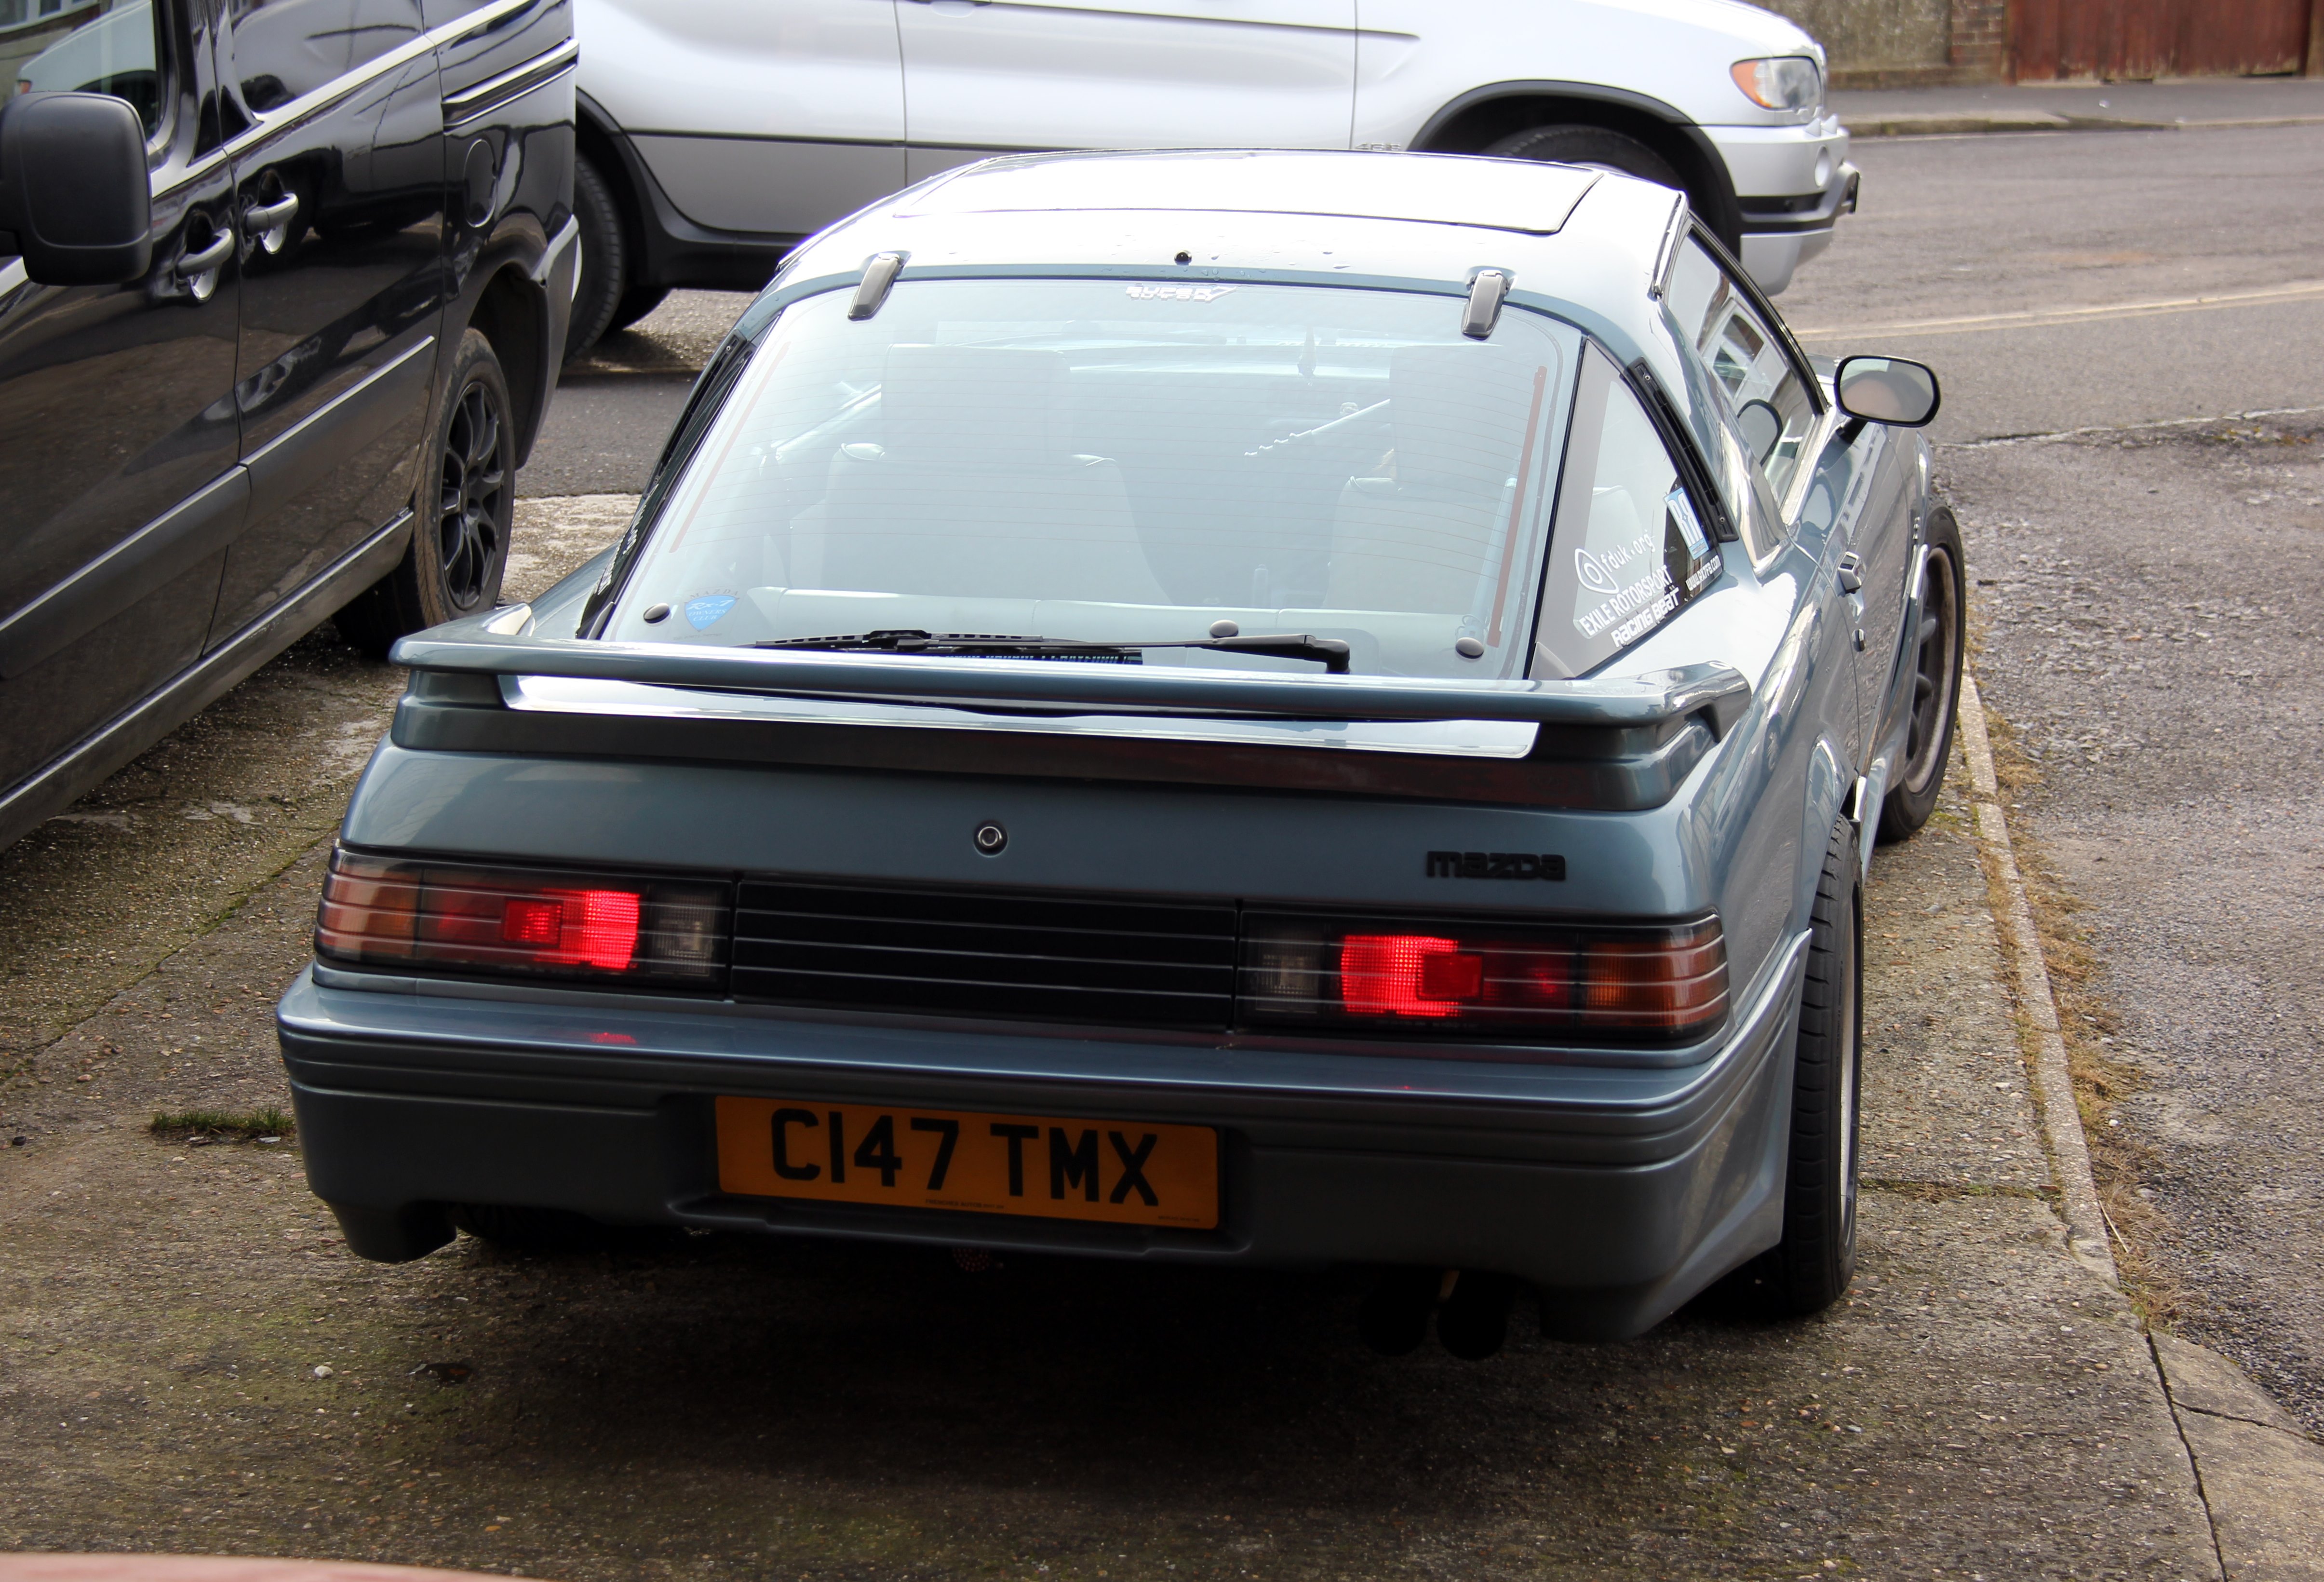
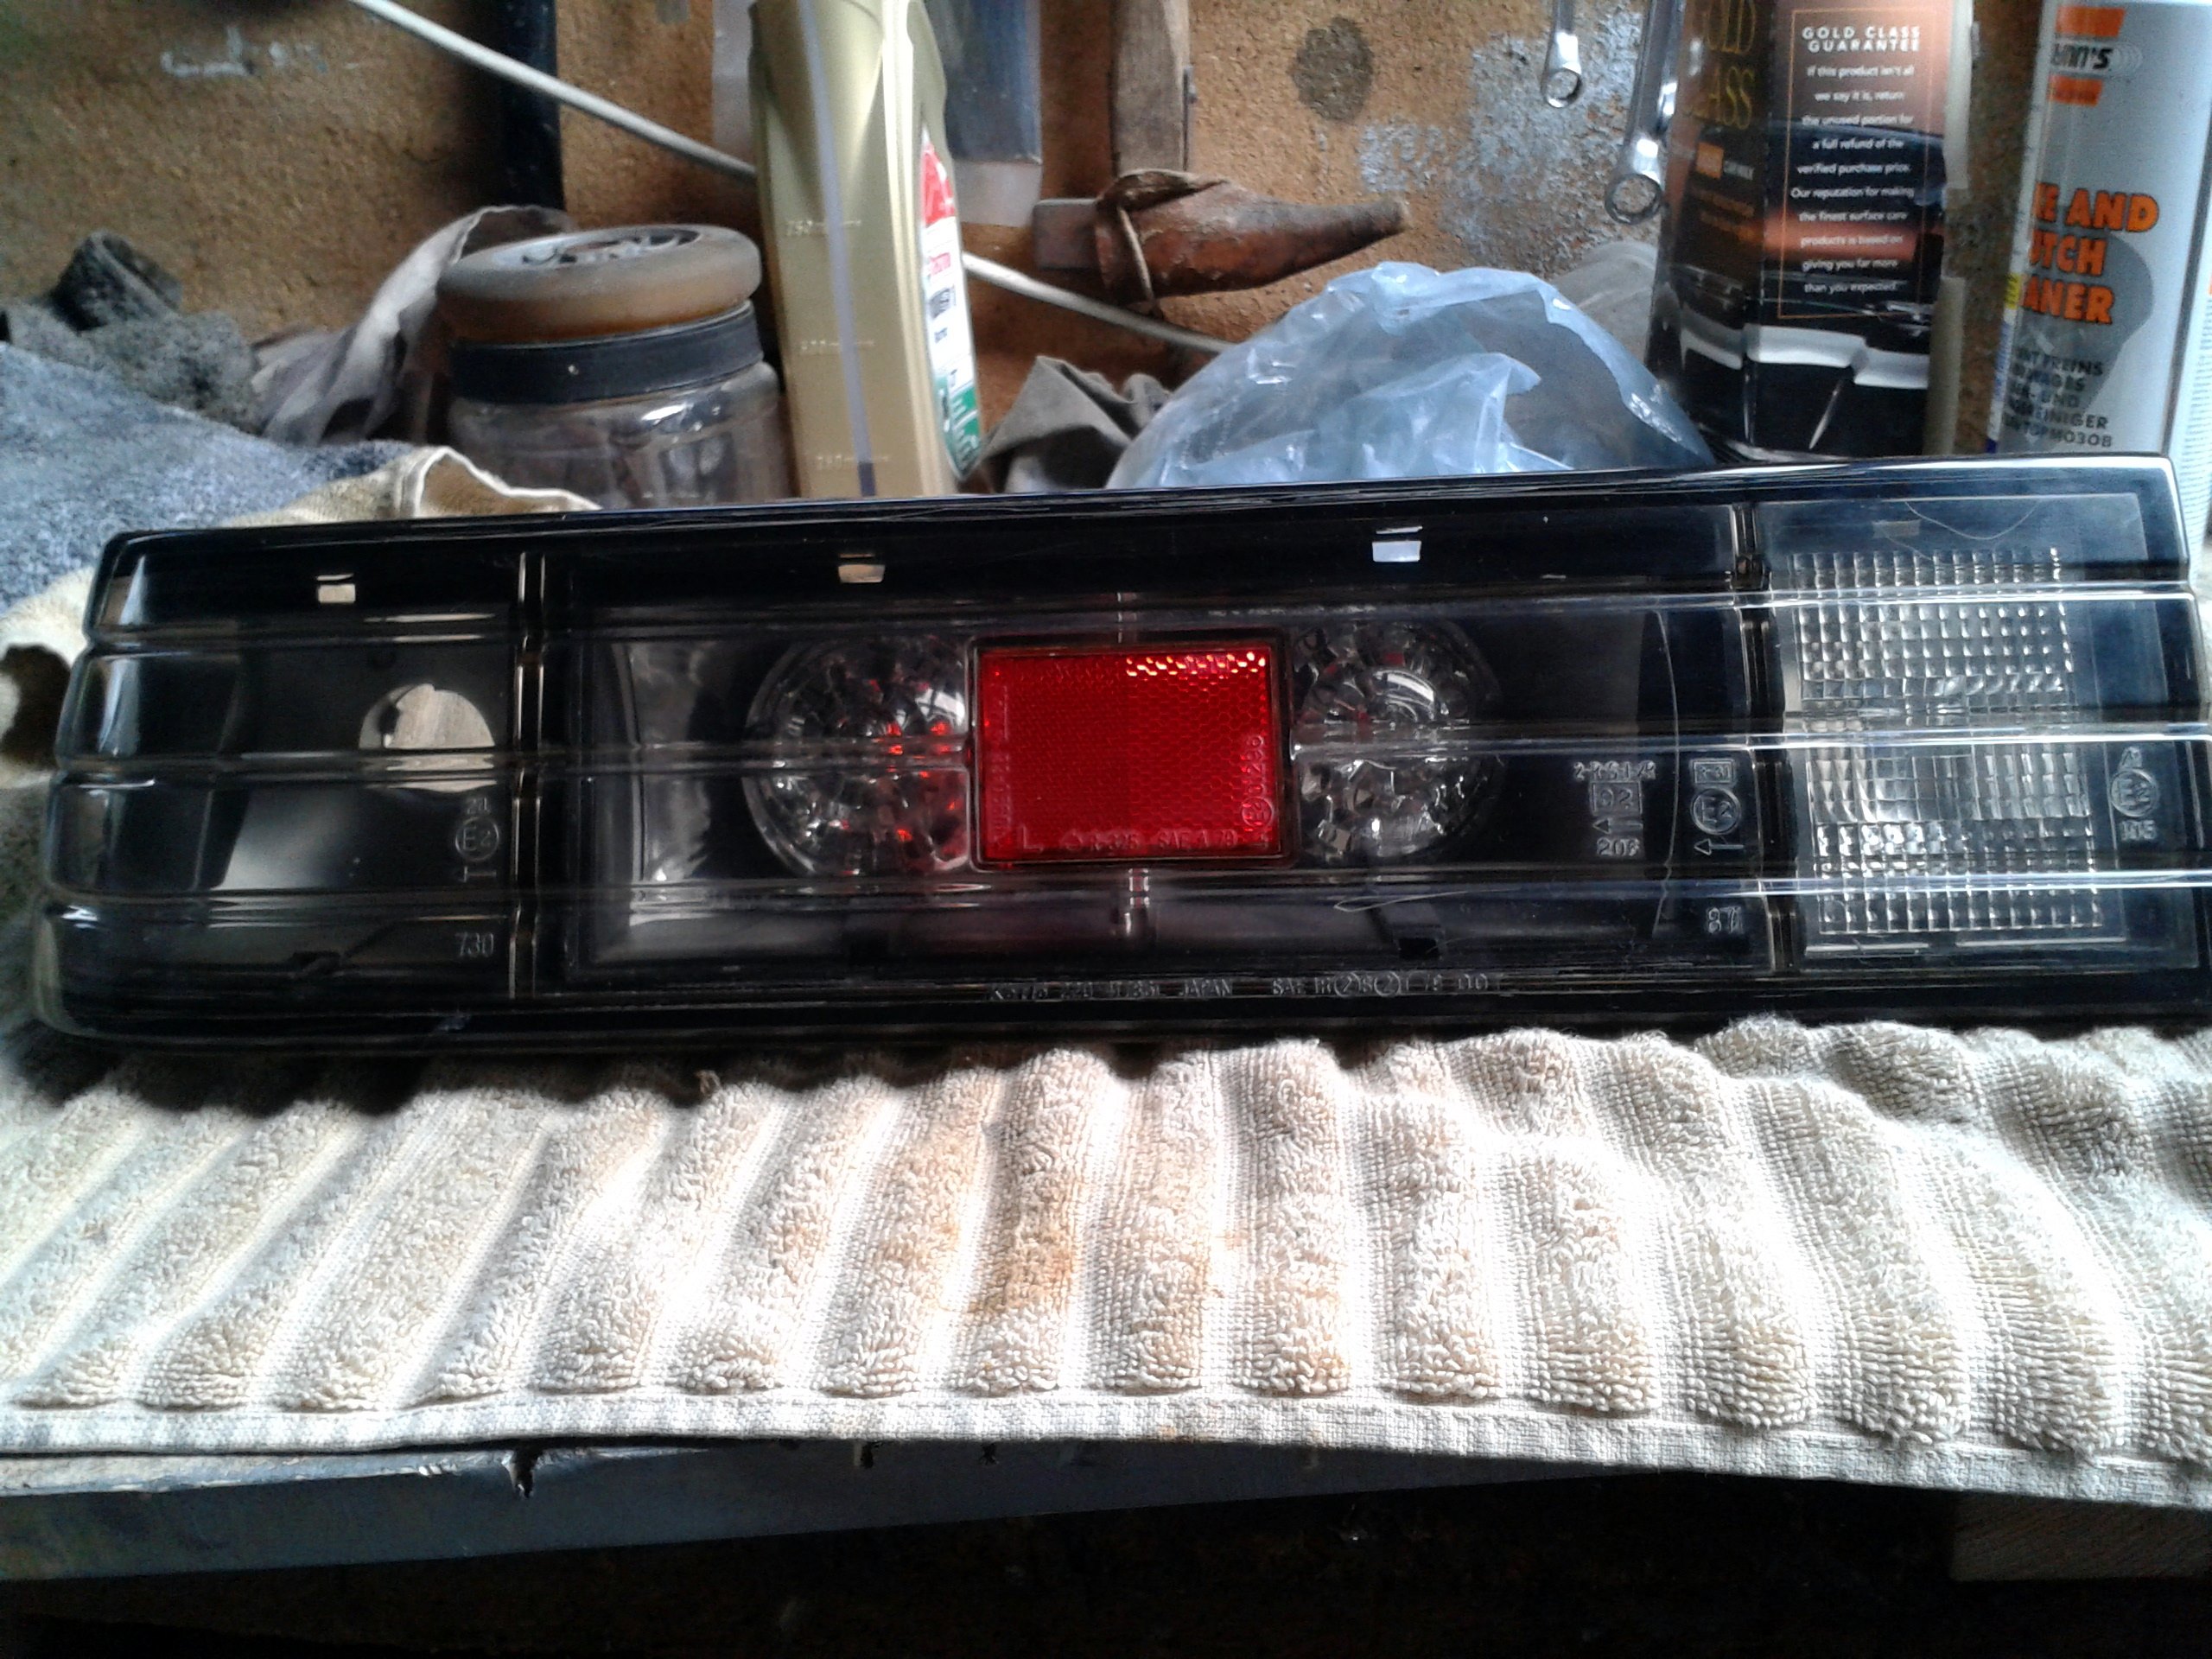
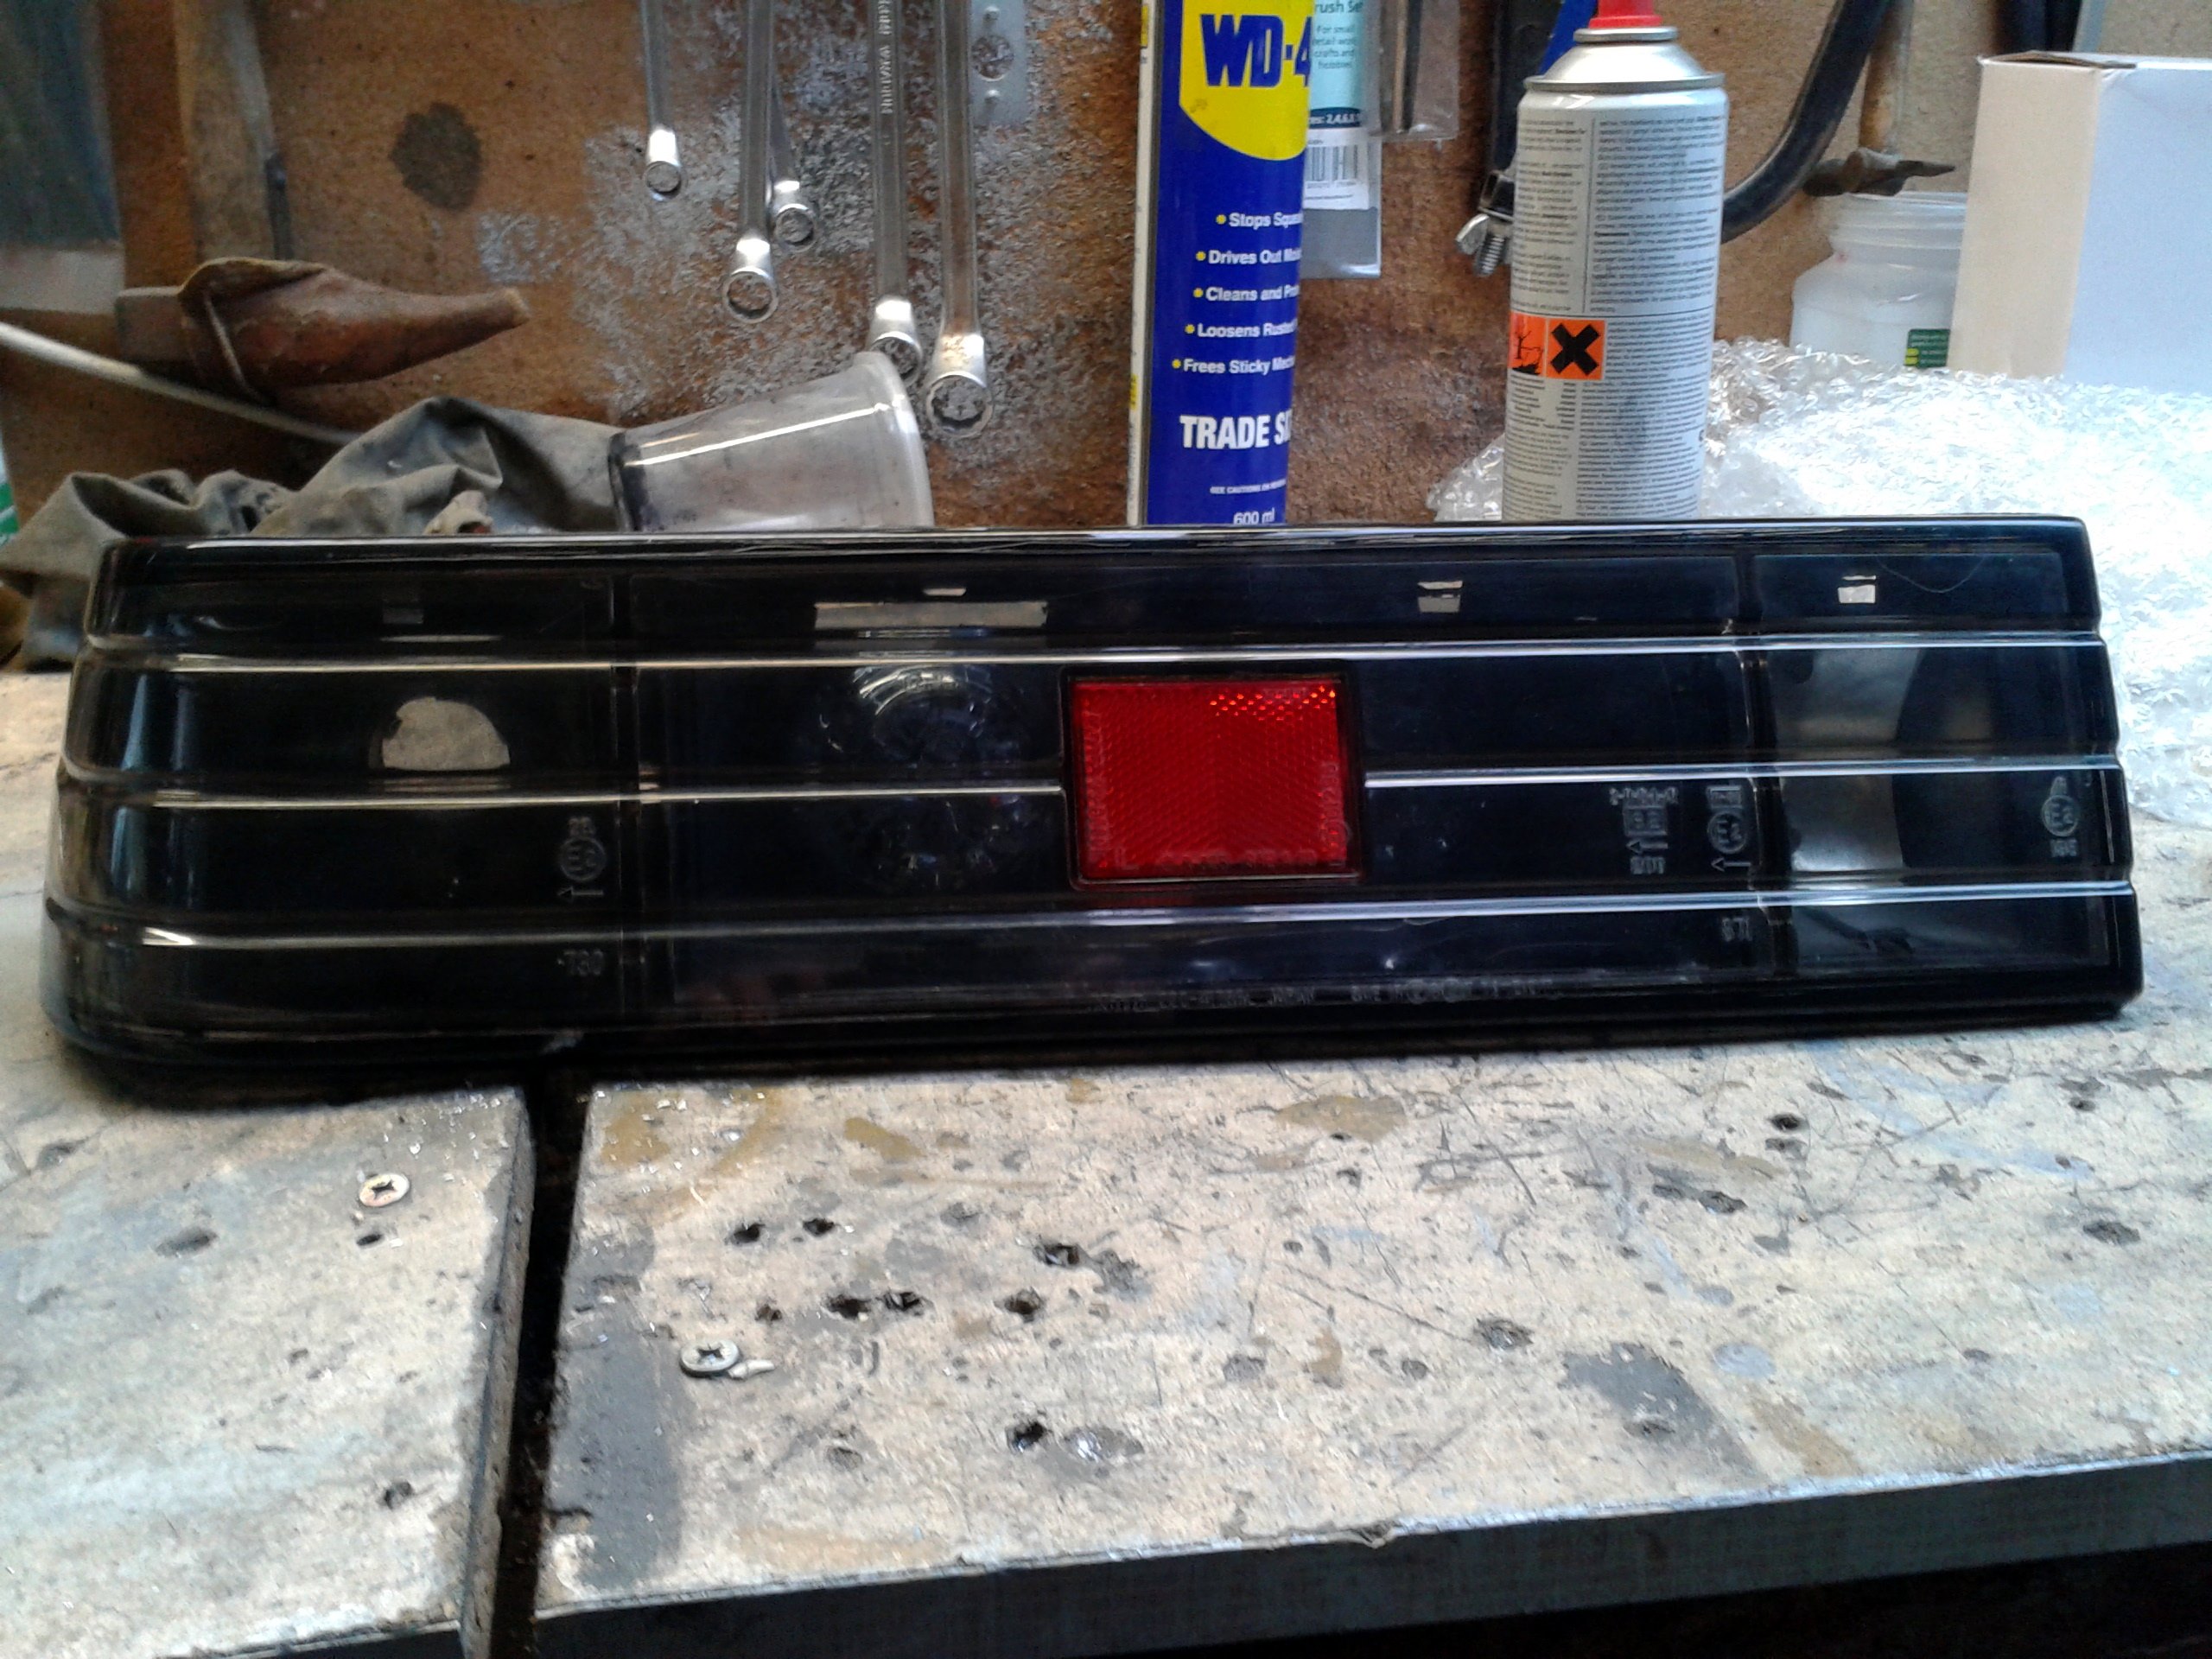
The first problem is that Mazda gave us the excellent beaver panel motif linking the lights together, all with matching strakes right across the rear of the car, but they kinda ballsed it up rather with the Fisher Price coloured inserts for the lenses. Admittedly, that's what they had to work with in the late 70s, but things have moved on a bit since then. Secondly, in that pic above, the tail lights are on. So why do we have two bulbs each side if only one works? :?
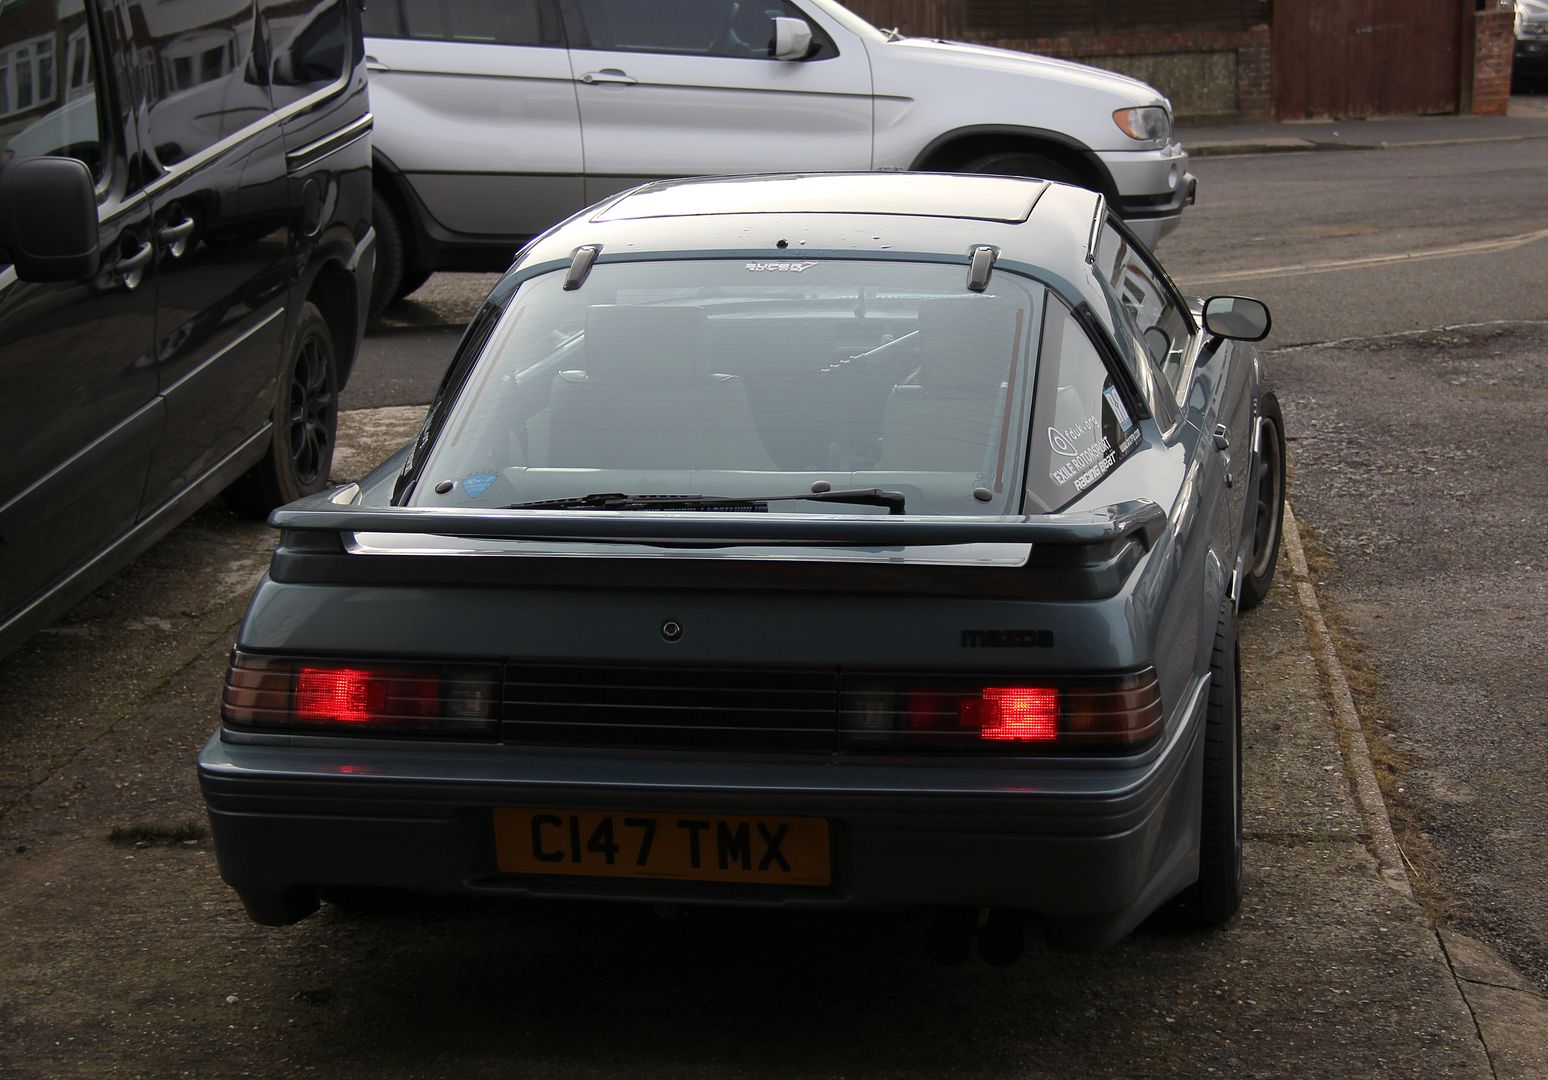
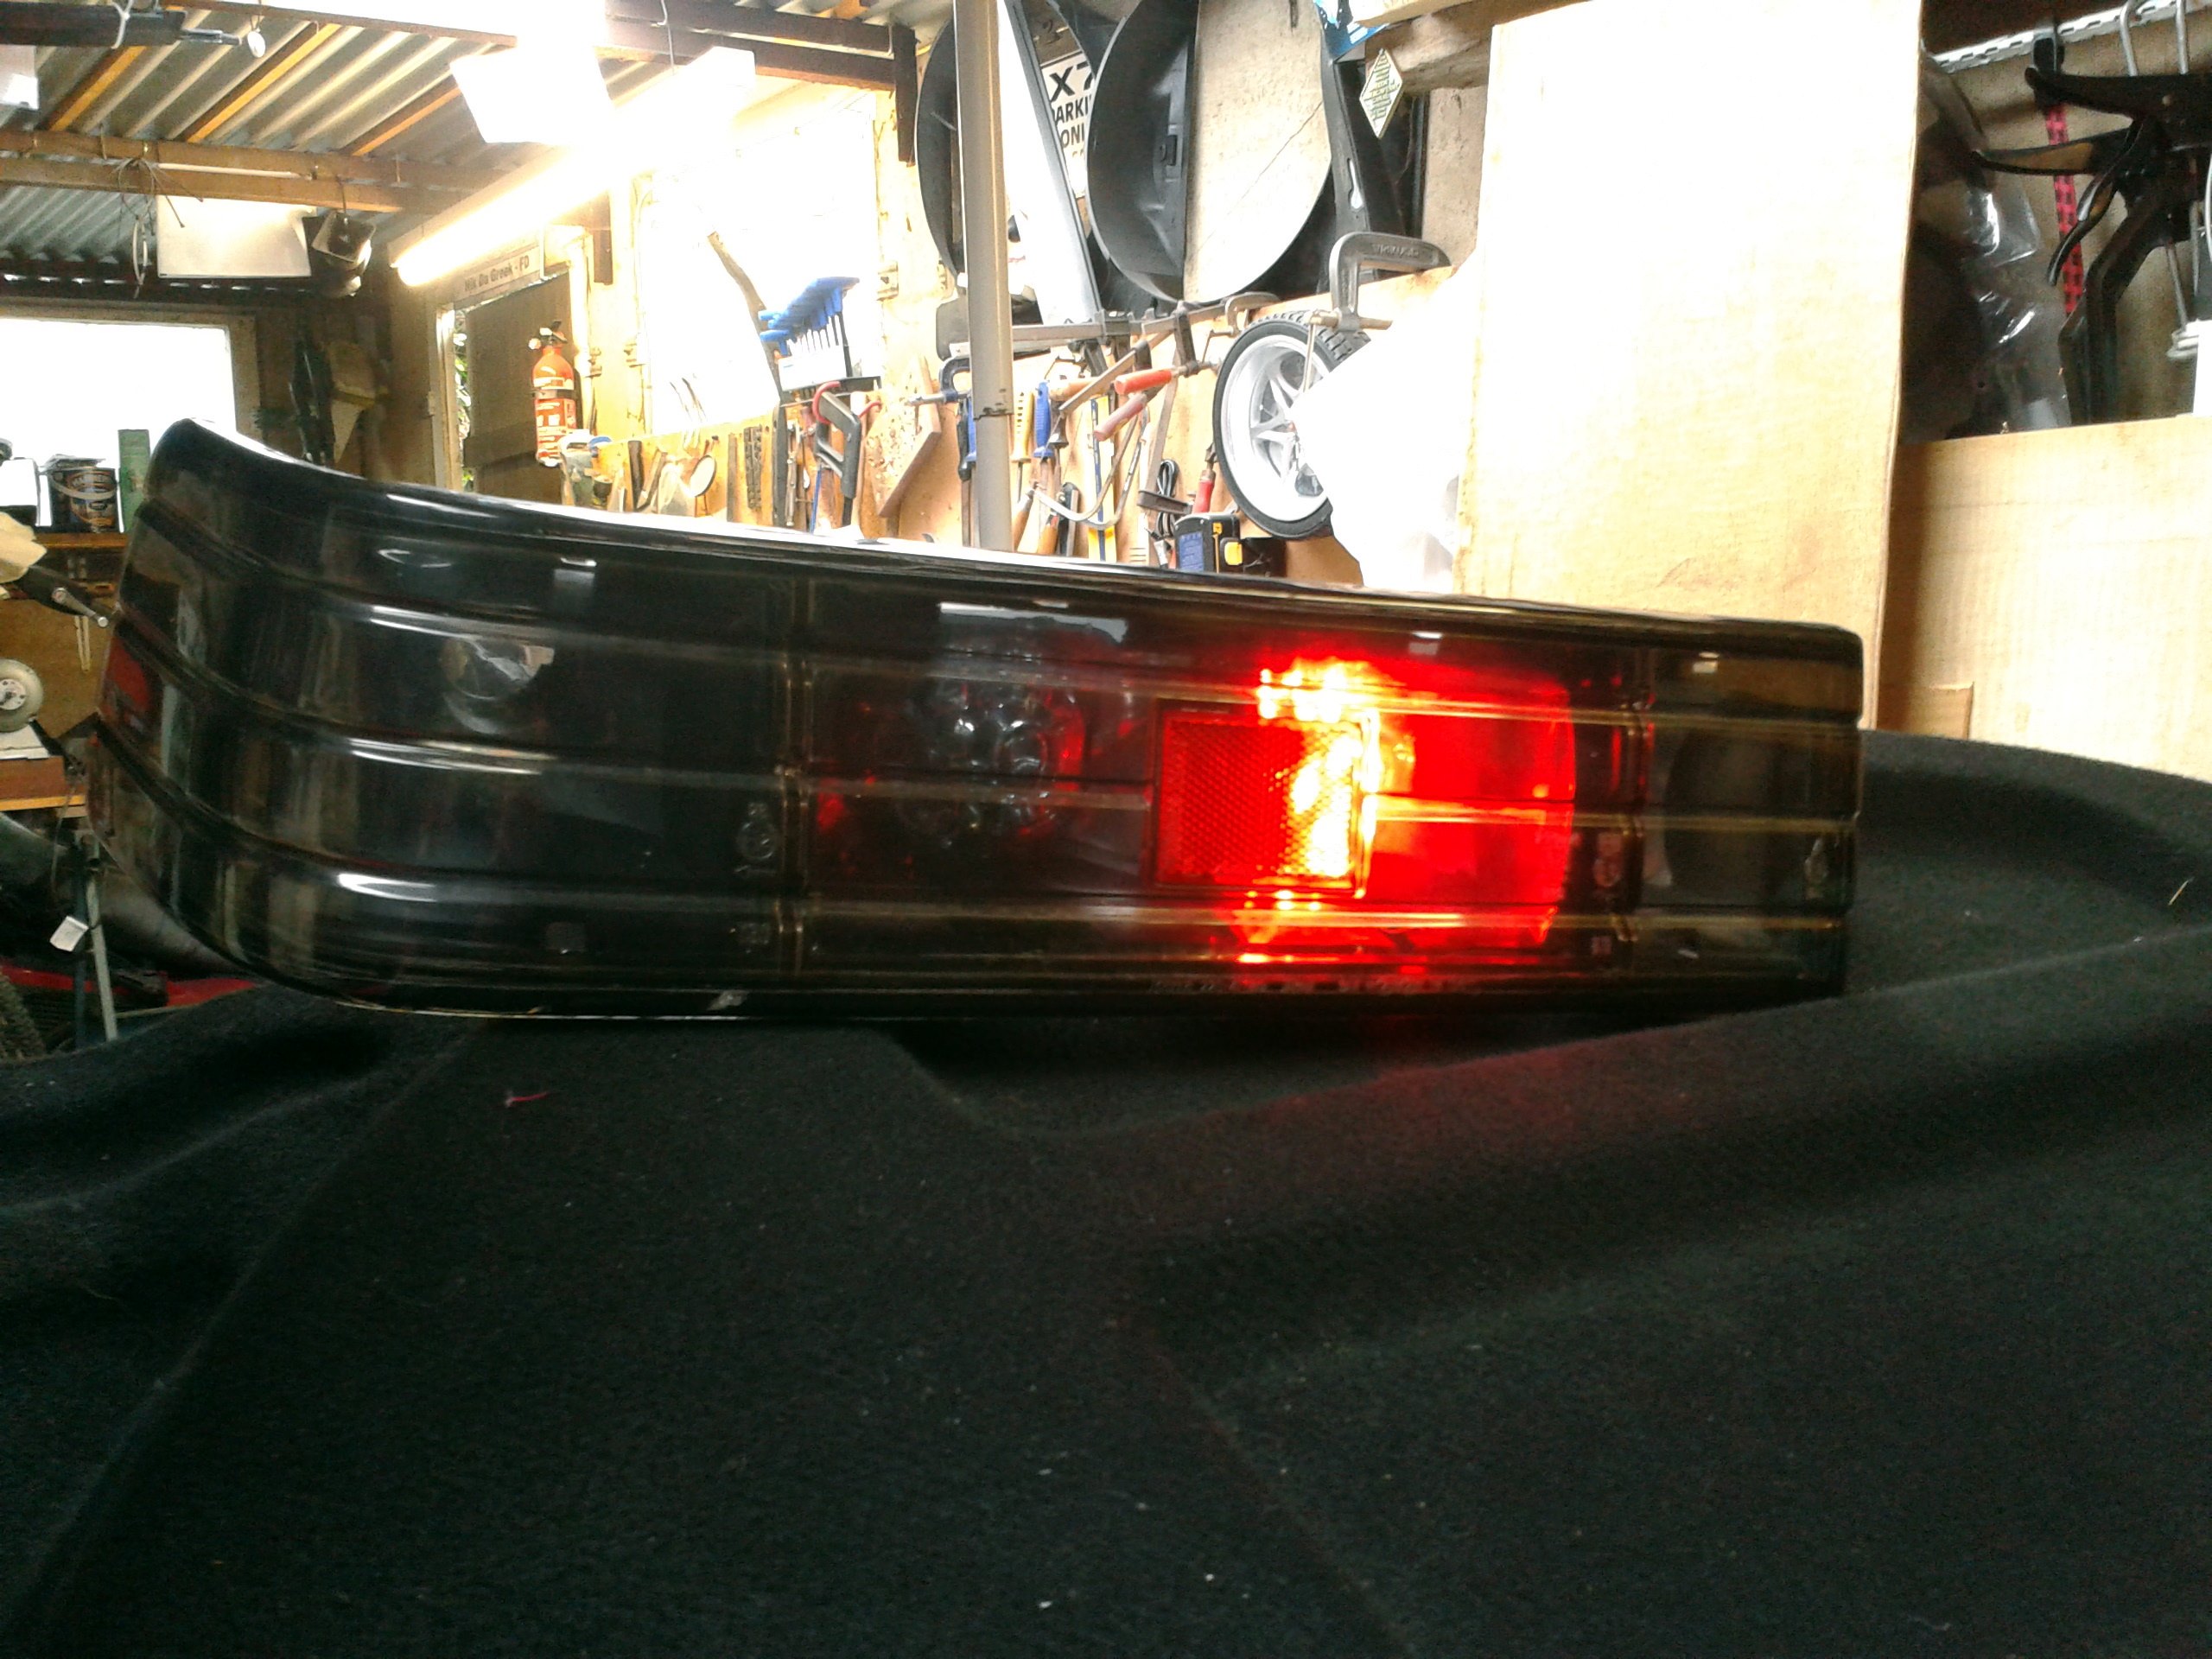
Oh yeah, it's cos the other two are the brake lights. Eh? Why? No doubt there's some arcane Construction and Use clause about lumen differentiation and distance in cubits and millimetres from the extreme locus of the geographical extent of car bodywork that says It Must Be So. well, I don't like it. I've never liked it and it's about time I did something about it. See, when you have the brake and the tail lights on simultaneously, you get all four bulbs lit
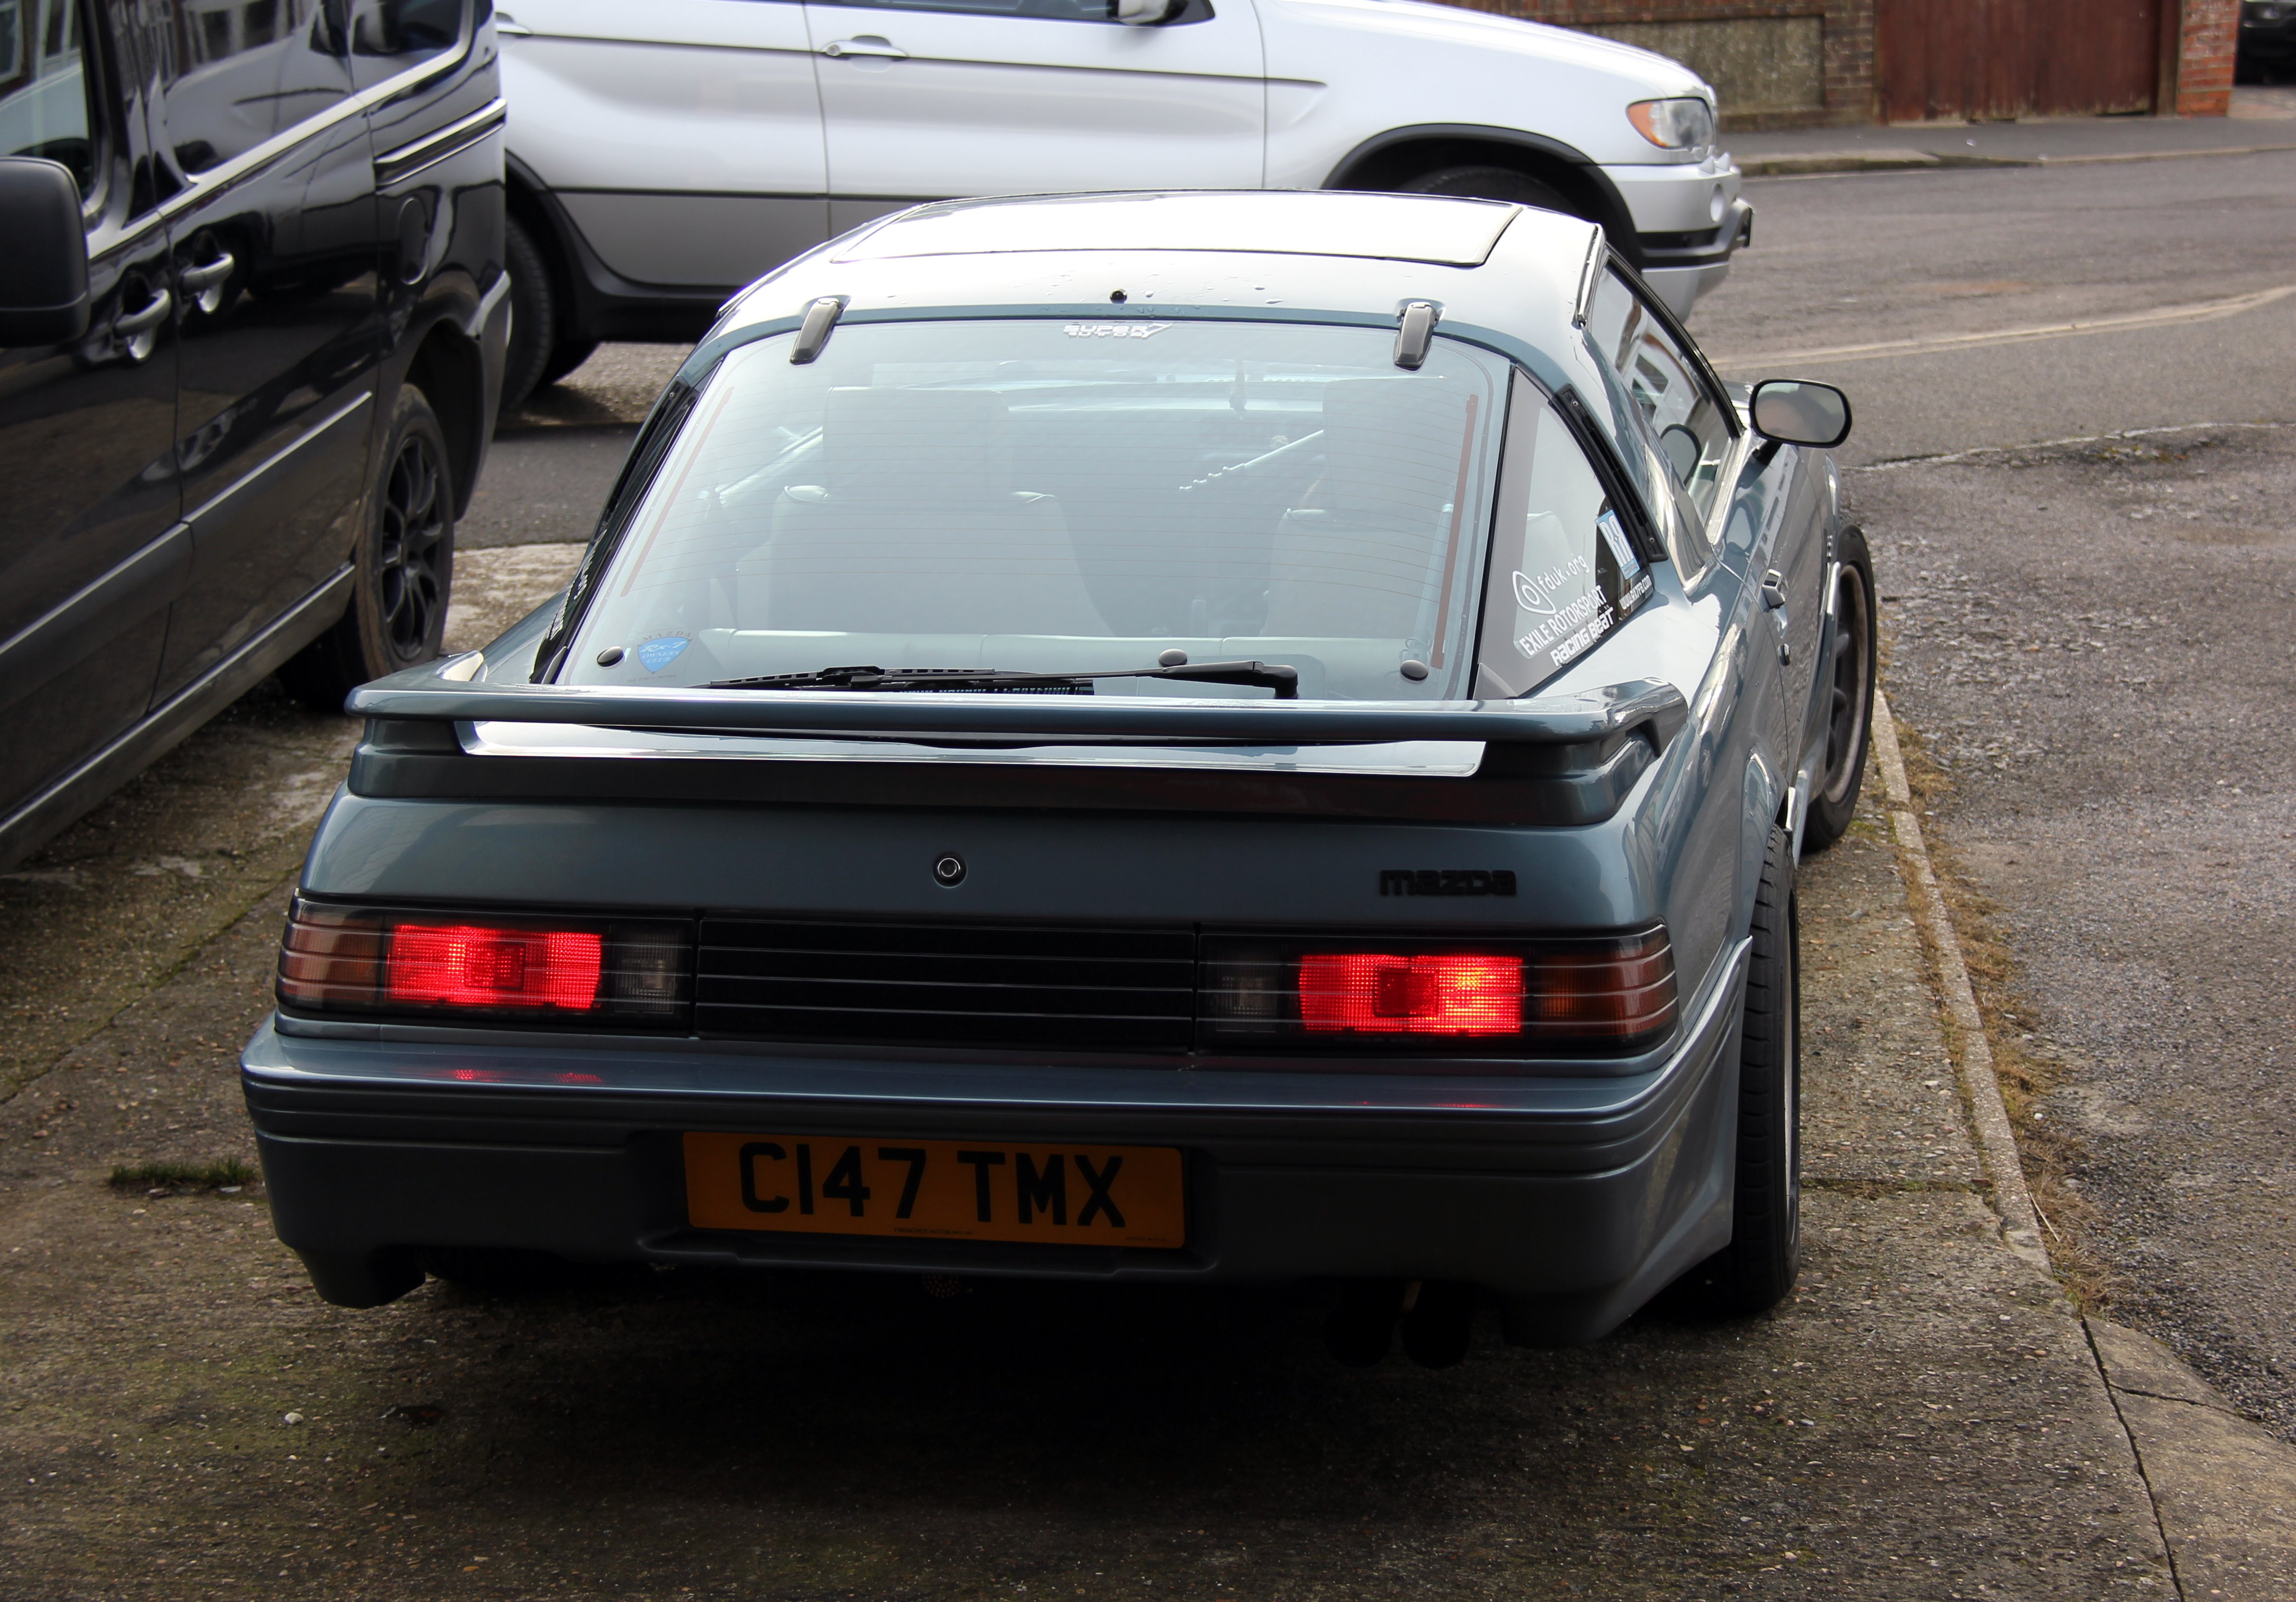
Now, this is what we want. I dunno if they're the same in other markets but I decided the humble old UK one-bulb-on-one-off system would have to give way for a more modern and funky style of light. How hard could it be, I wondered. Answer apparently is harder than you'd like!
Probably the easiest way to do it would be just to bridge the wiring so both bulbs do both things at the same time, but I figured why stop there? Why not upgrade to a more modern form of lighting? Maybe even some LEDs? Besides, bridging the original bulbs together wouldn't alleviate the problem of the coloured inserts... really there was nothing for it but to start taking some lights apart and see what happened from there.
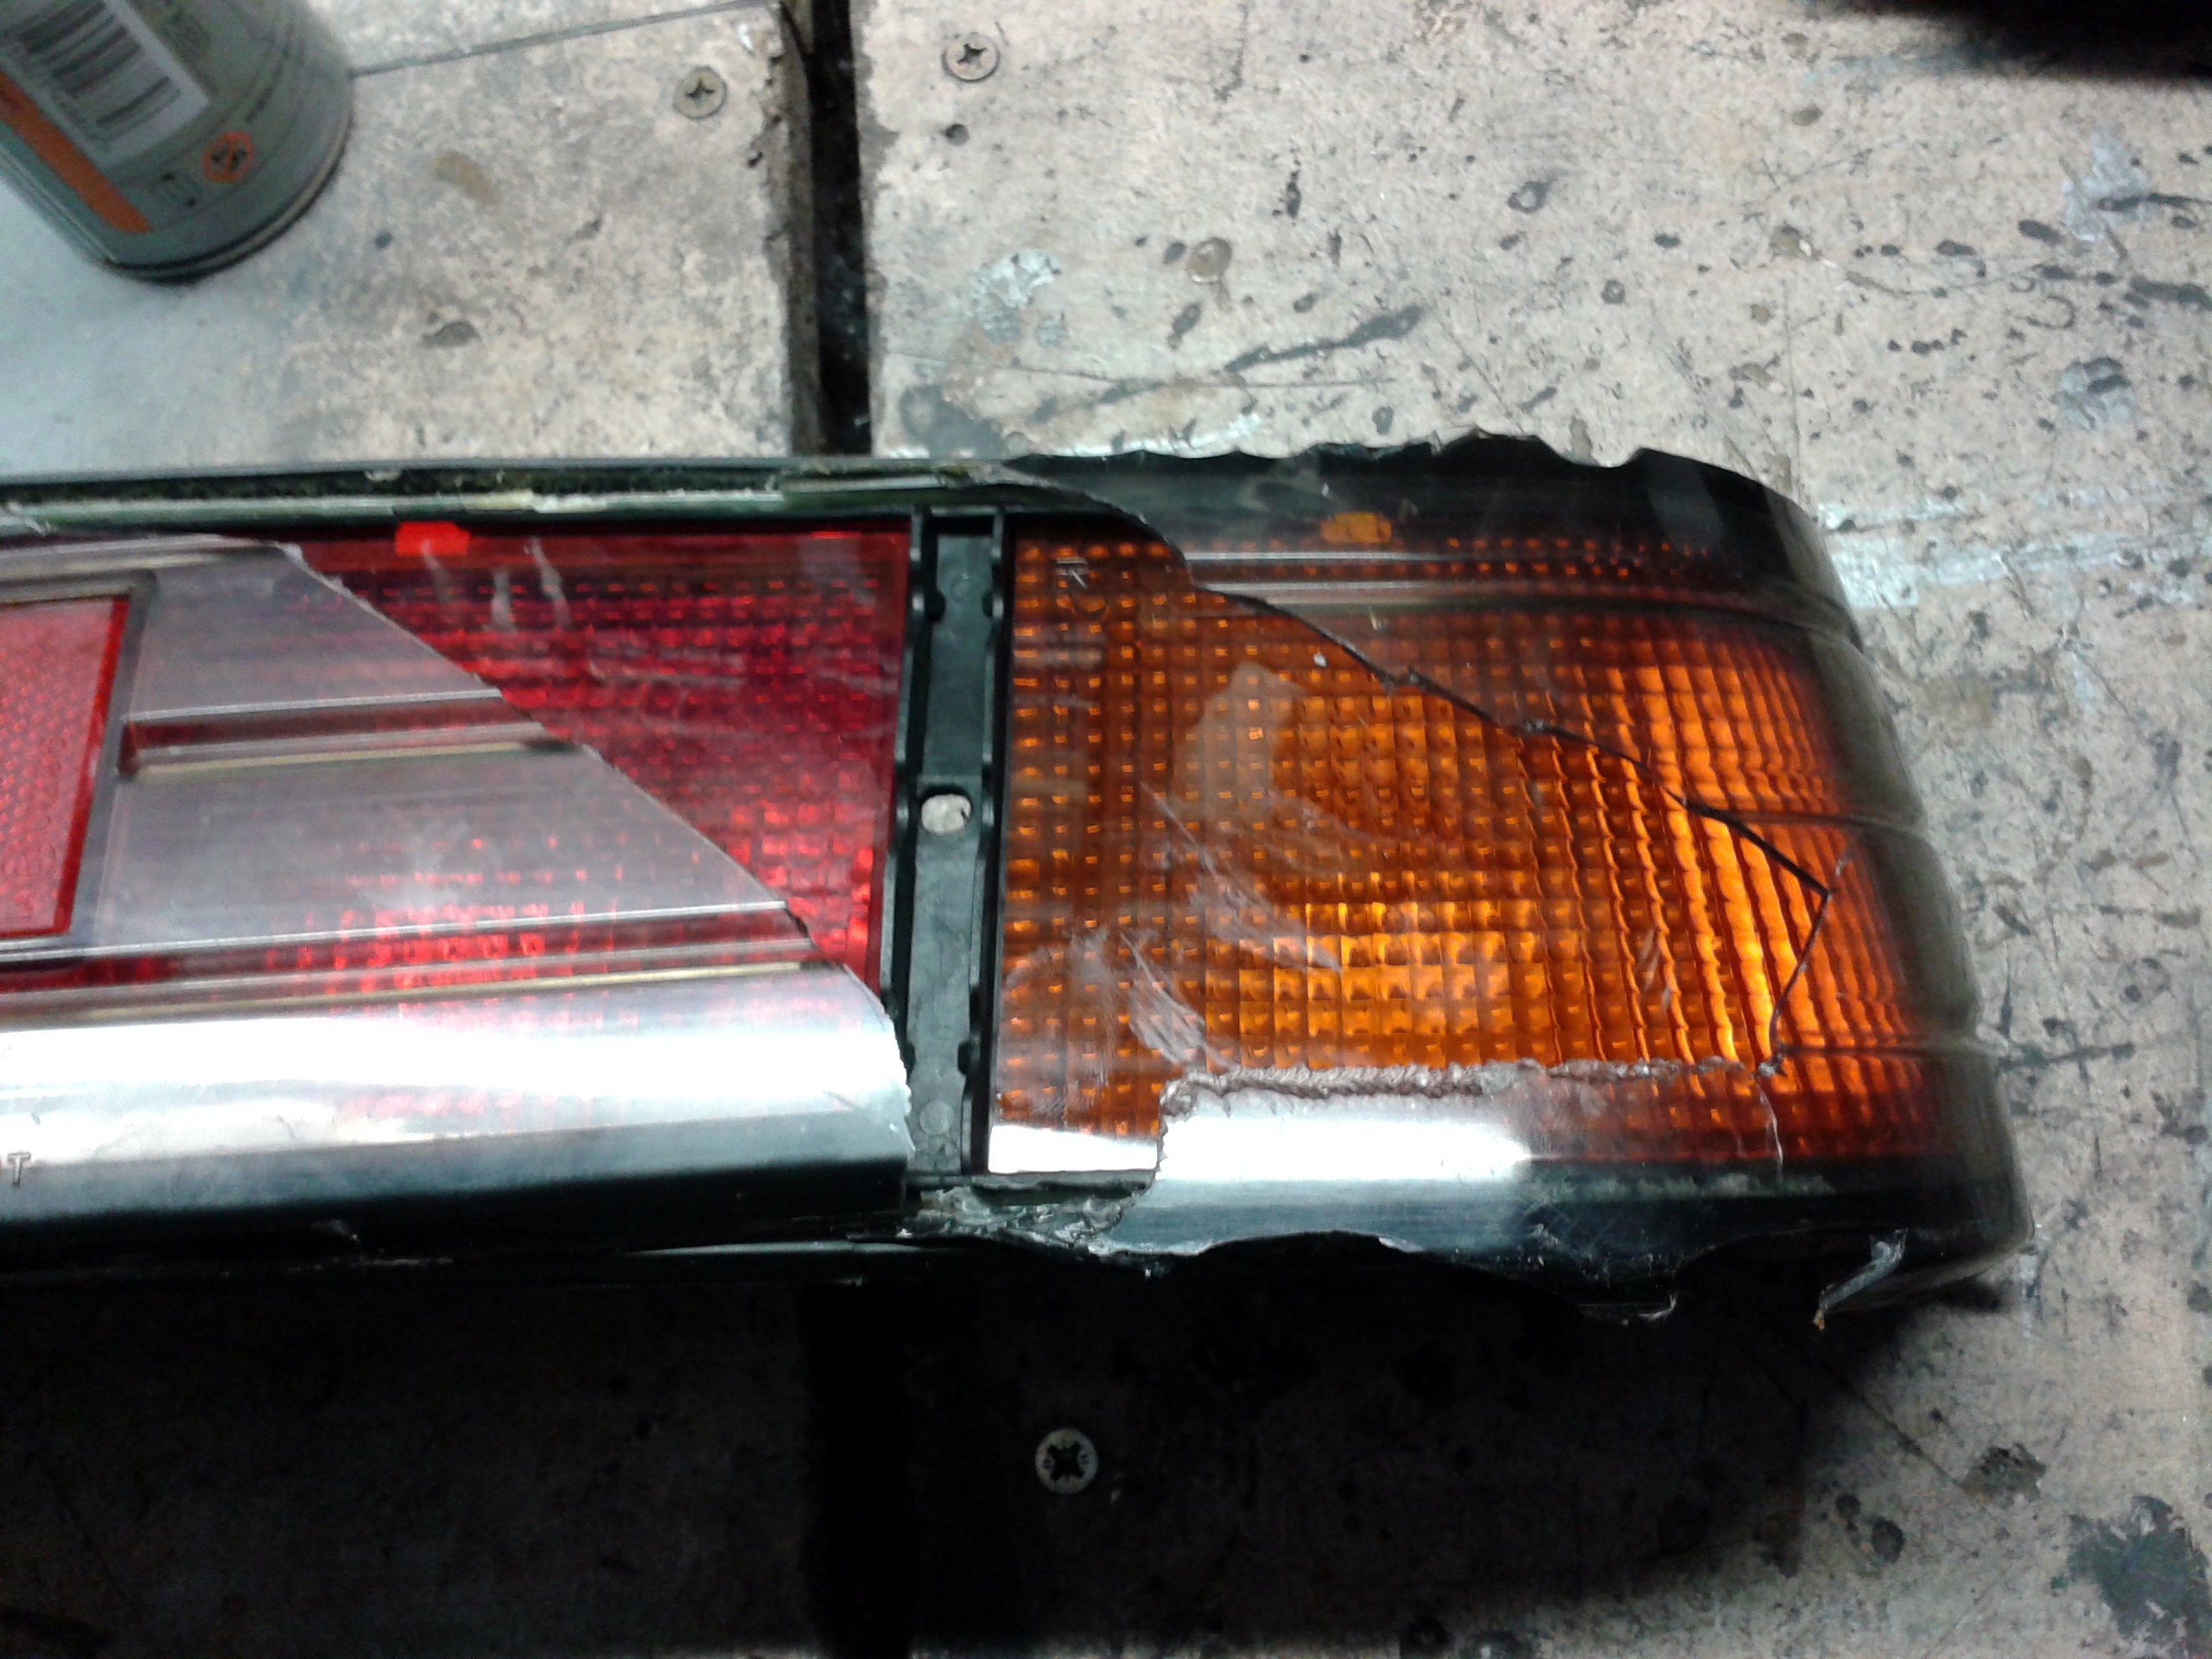
Easier said than done! Fortunately I'd managed to get some spares so I didn't have to risk mutilating the ones actually on the car. I've split a few sets of FD lights before to convert them to what's known as "99 spec"; that is, with the round circles rather than the early-model lozenge shaped lenses. They're a LOT easier to do. For a start, the tinted front covers are much thicker and more robust than the FB ones. All you need is careful application of a heat gun to melt the glue holding the halves together and they pry right apart easy as you like. The FB ones aren't like that. The lenses are really thin, and horribly brittle. Not sure whether it's age degrading them or they're like that anyway, but my first attempt involved a lot of shards of lens cracking and flying off the edge as I pried with a screwdriver. OK, lesson learned, you can't just jemmy them open like you would with FD lights!
However, since the first attempt was knackered anyway it gave me a great chance to experiment with what would work and what wouldn't. Before I get any further it's probably worth pointing out I am to vehicle electrics what Jeffrey Dahmer was to avant-garde cuisine so any solution I came up with would need to involve minimal wiring. The problem with this was that the FB taillights are really narrow and all the aftermarket light units I could find were too large. The simplest solution would be to just use tinting spray and darken the lights down to match the blacker beaver panel but in my experience tinting spray always looks cack and it's just so... well, M*x P*wer. The next easiest option seemed to be find some LED units that would fit into the light housing. First version went like this;
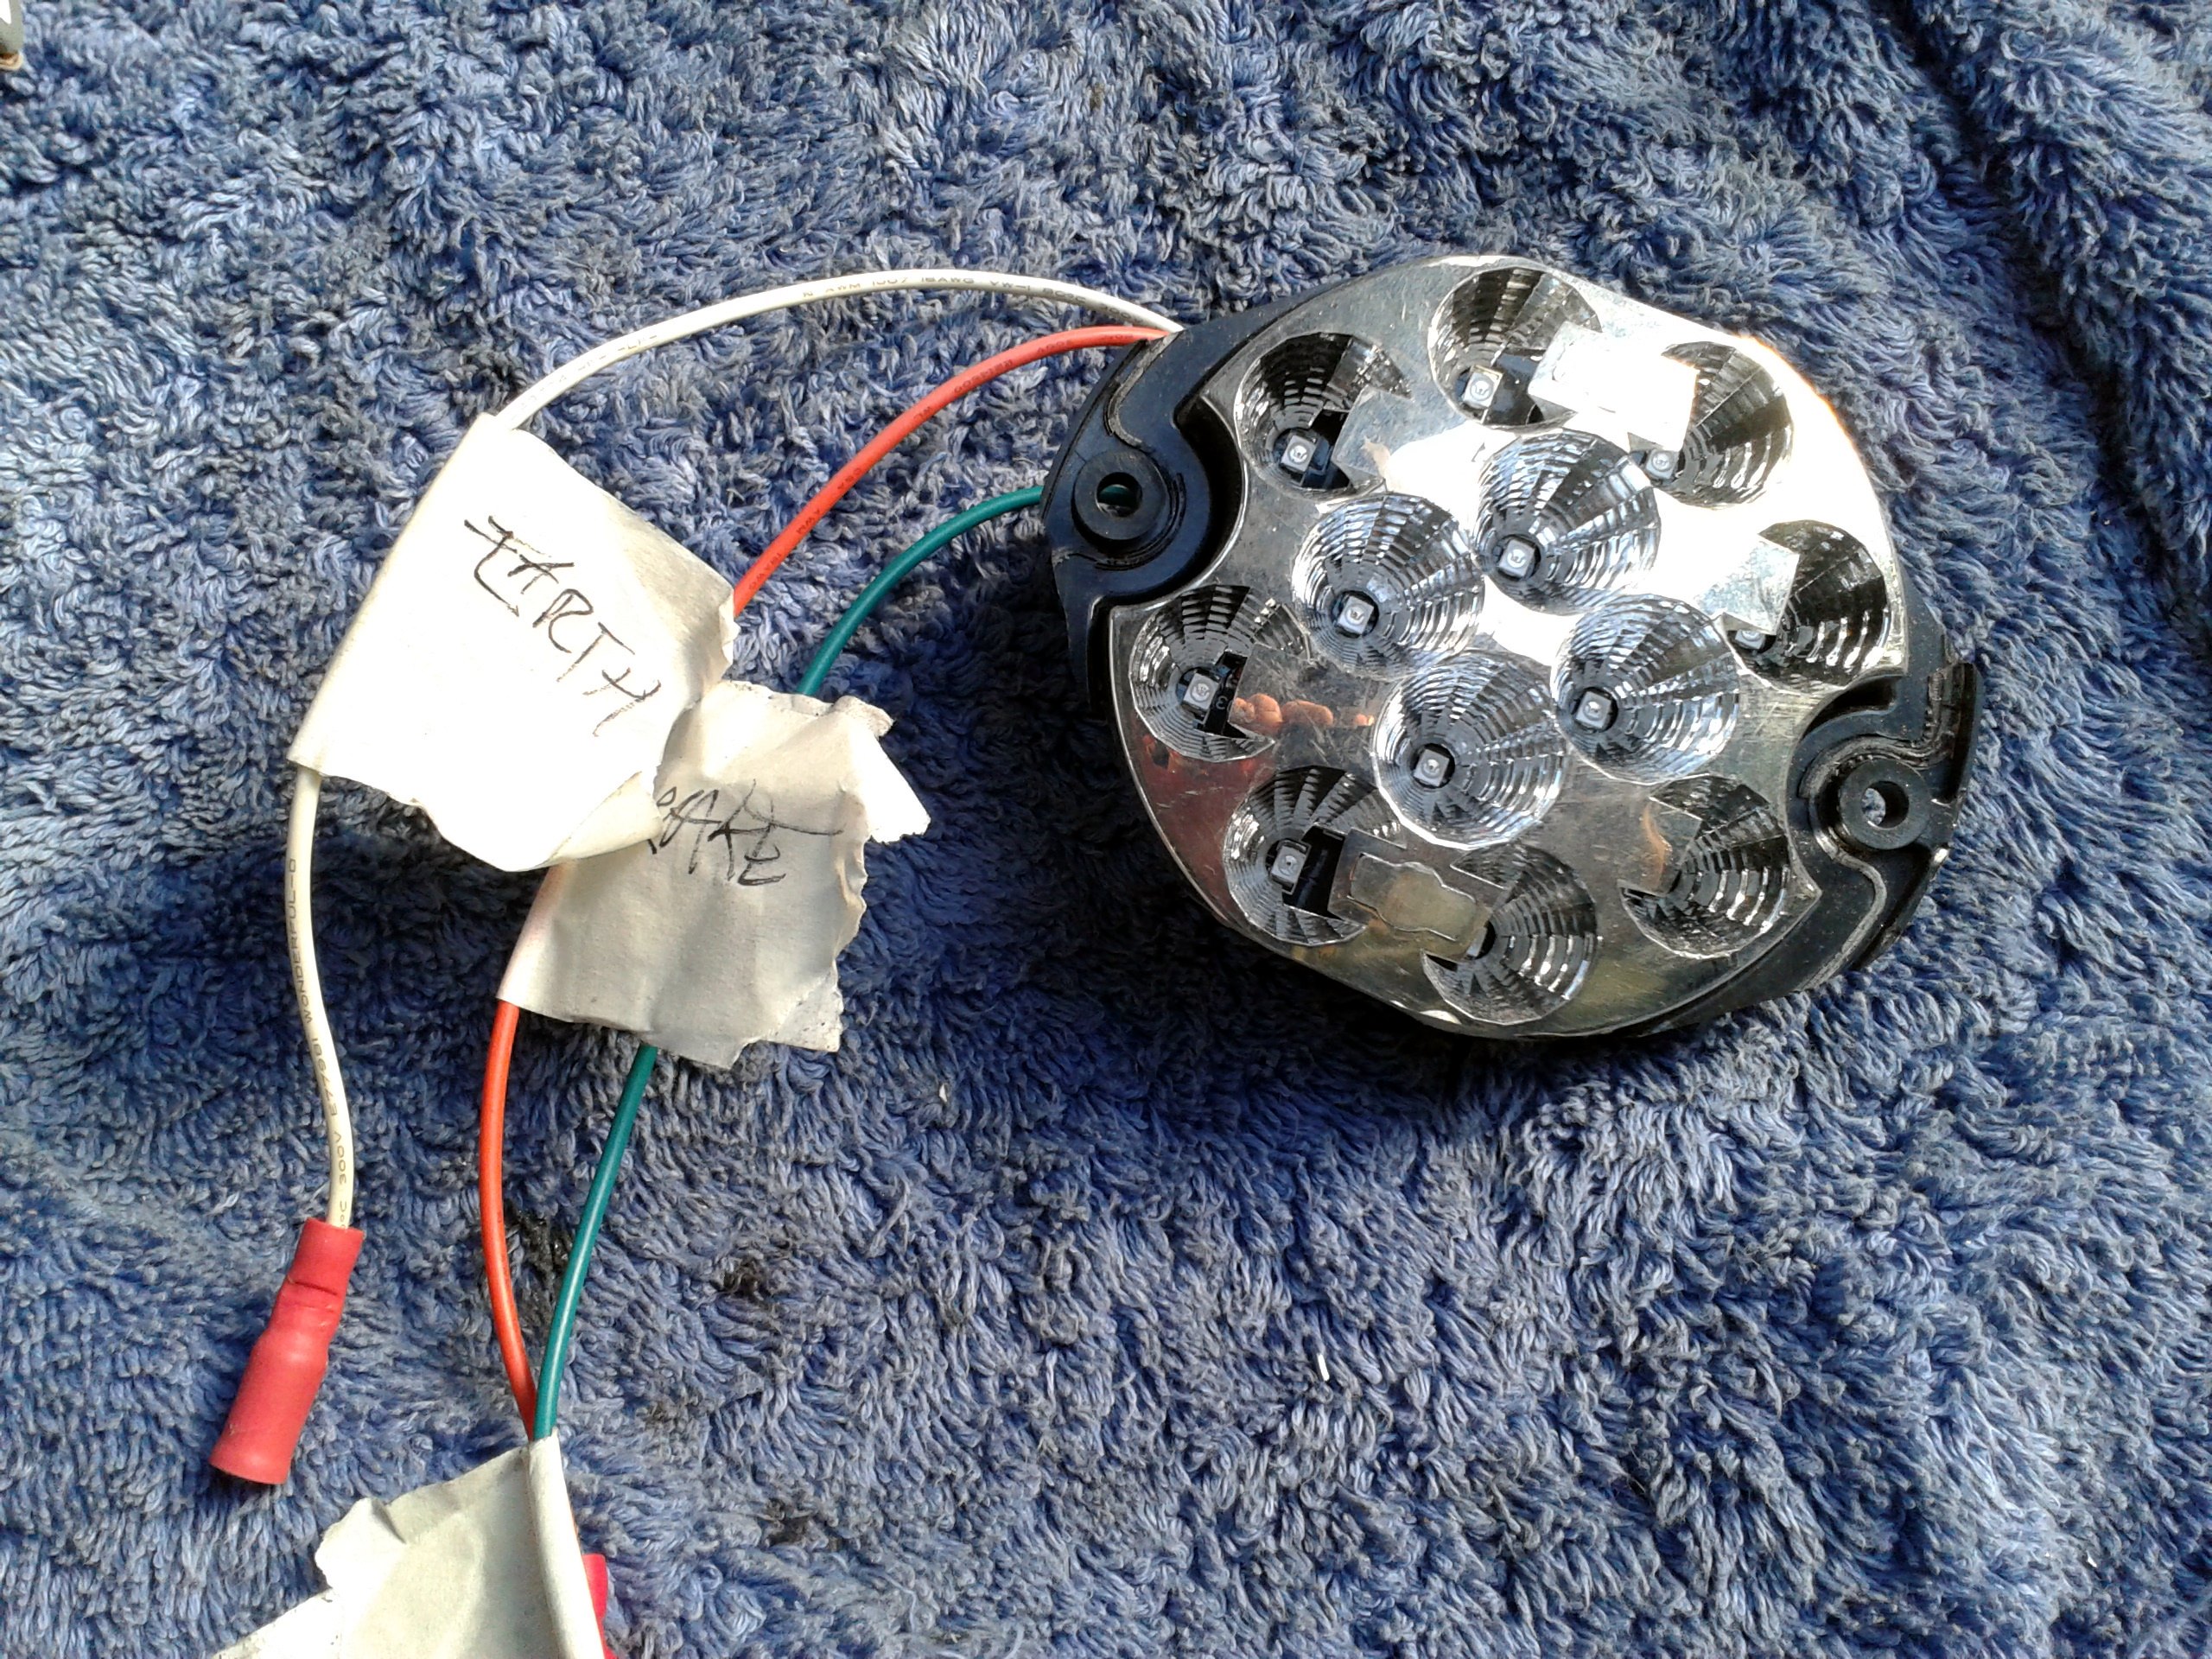
They were the smallest units I could find that combined brake and tail, and even these at around 95mm diameter were too big. I trimmed them as much as I dared without mangling the electronics, had to prise off the covers as well to make them shallow enough and even after all this butchery they were still too big. I tried to cut some relief slots in the FB light housing and this did prove successful as far as fitting the actual LED units in but caused all sorts of other problems (the main two being sealing them to make them waterproof afterwards and then getting them to fit inside the metal cage that retains the lights to the bodywork, and many other minor niggles).
Two-nil to the lights, then
At this point I did what all good car modifiers should do when faced with adversity and setbacks. I threw them in a drawer and forgot about them for about a year. And then, light and inspiration dawned, as it so often does, whilst sitting on the bog perusing the catalogue update from Car Builder Solutions that had come with my expansion bottle. Aha, new 73mm diameter LED brake and tail units, eh? They'll be the ones for me then!
Almost... I still had to trim off a tiny chord from the diameter to give them a flat base, but then they fitted without any butchery of the housing necessary. I could even leave the covers on, so quickly filled in the fillet I'd had to cut with PU sealant to keep their integrity against the elements. A bit of clingfilm kept it all where it needed to be as the sealant set (it won't stick to clingfilm. Neither will cement. Top tip for keeping your patio edging nice and neat there, lol)
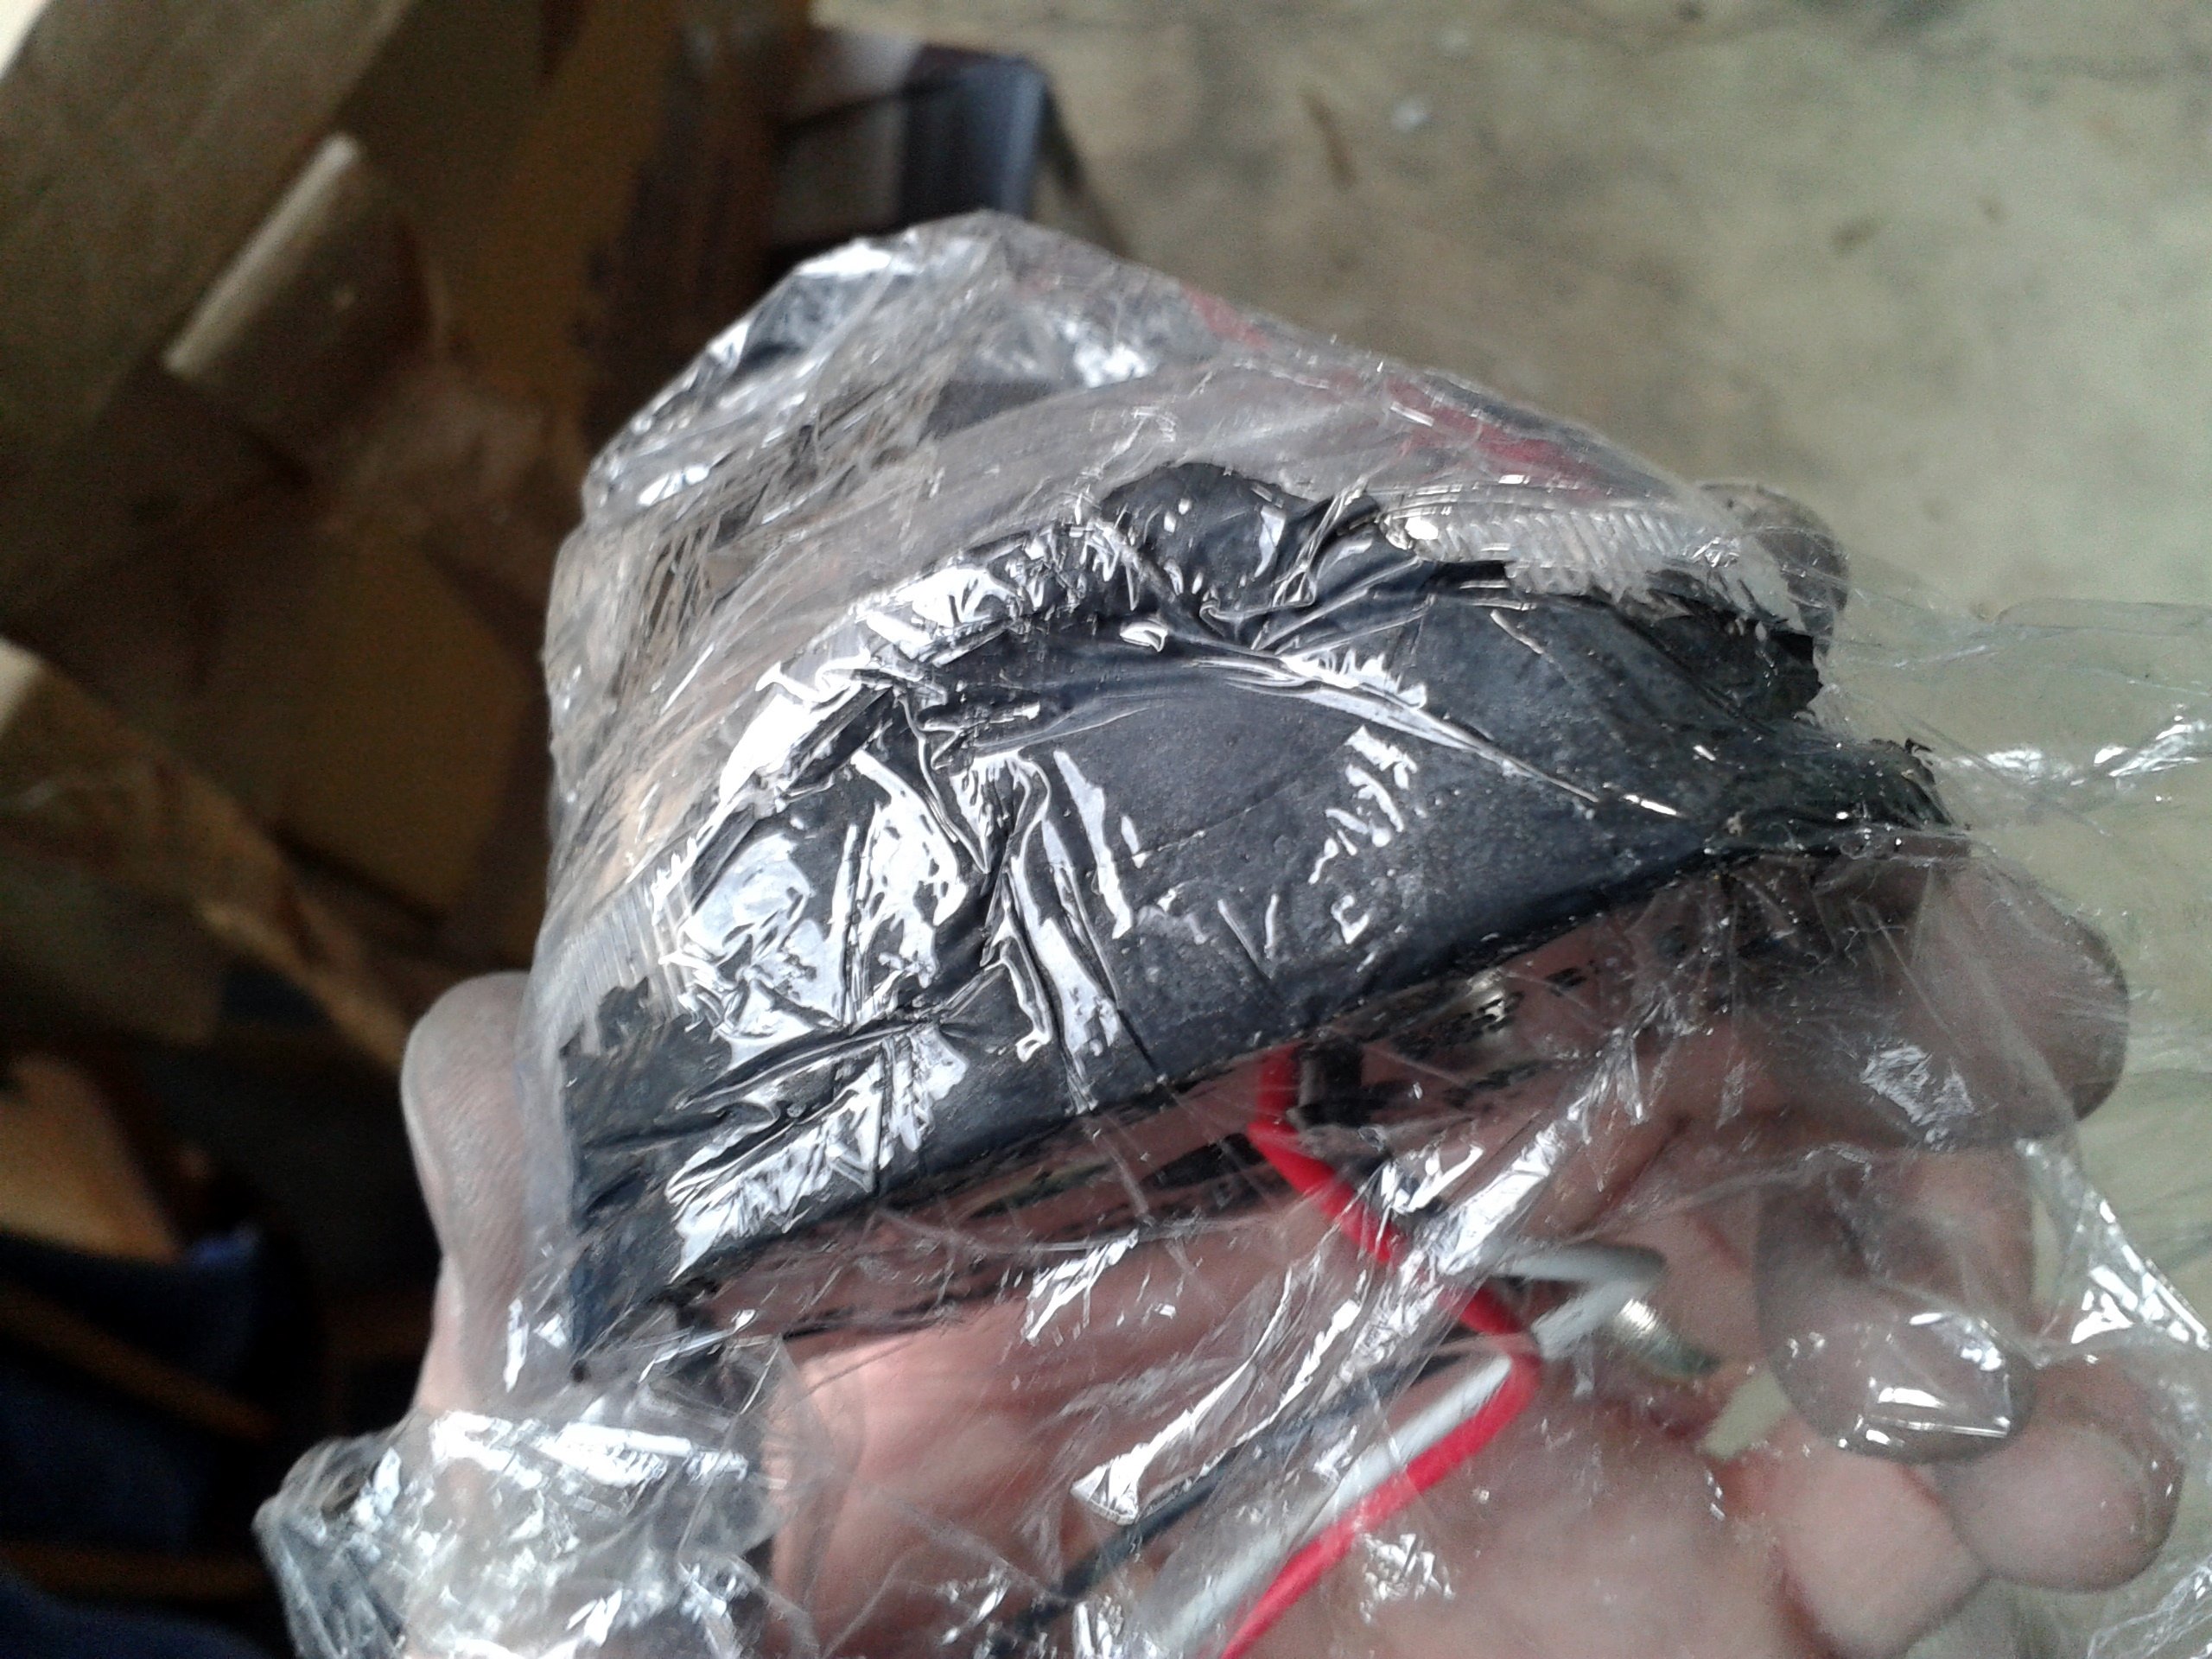
and when dry you'd never know they'd been messed with. Lol
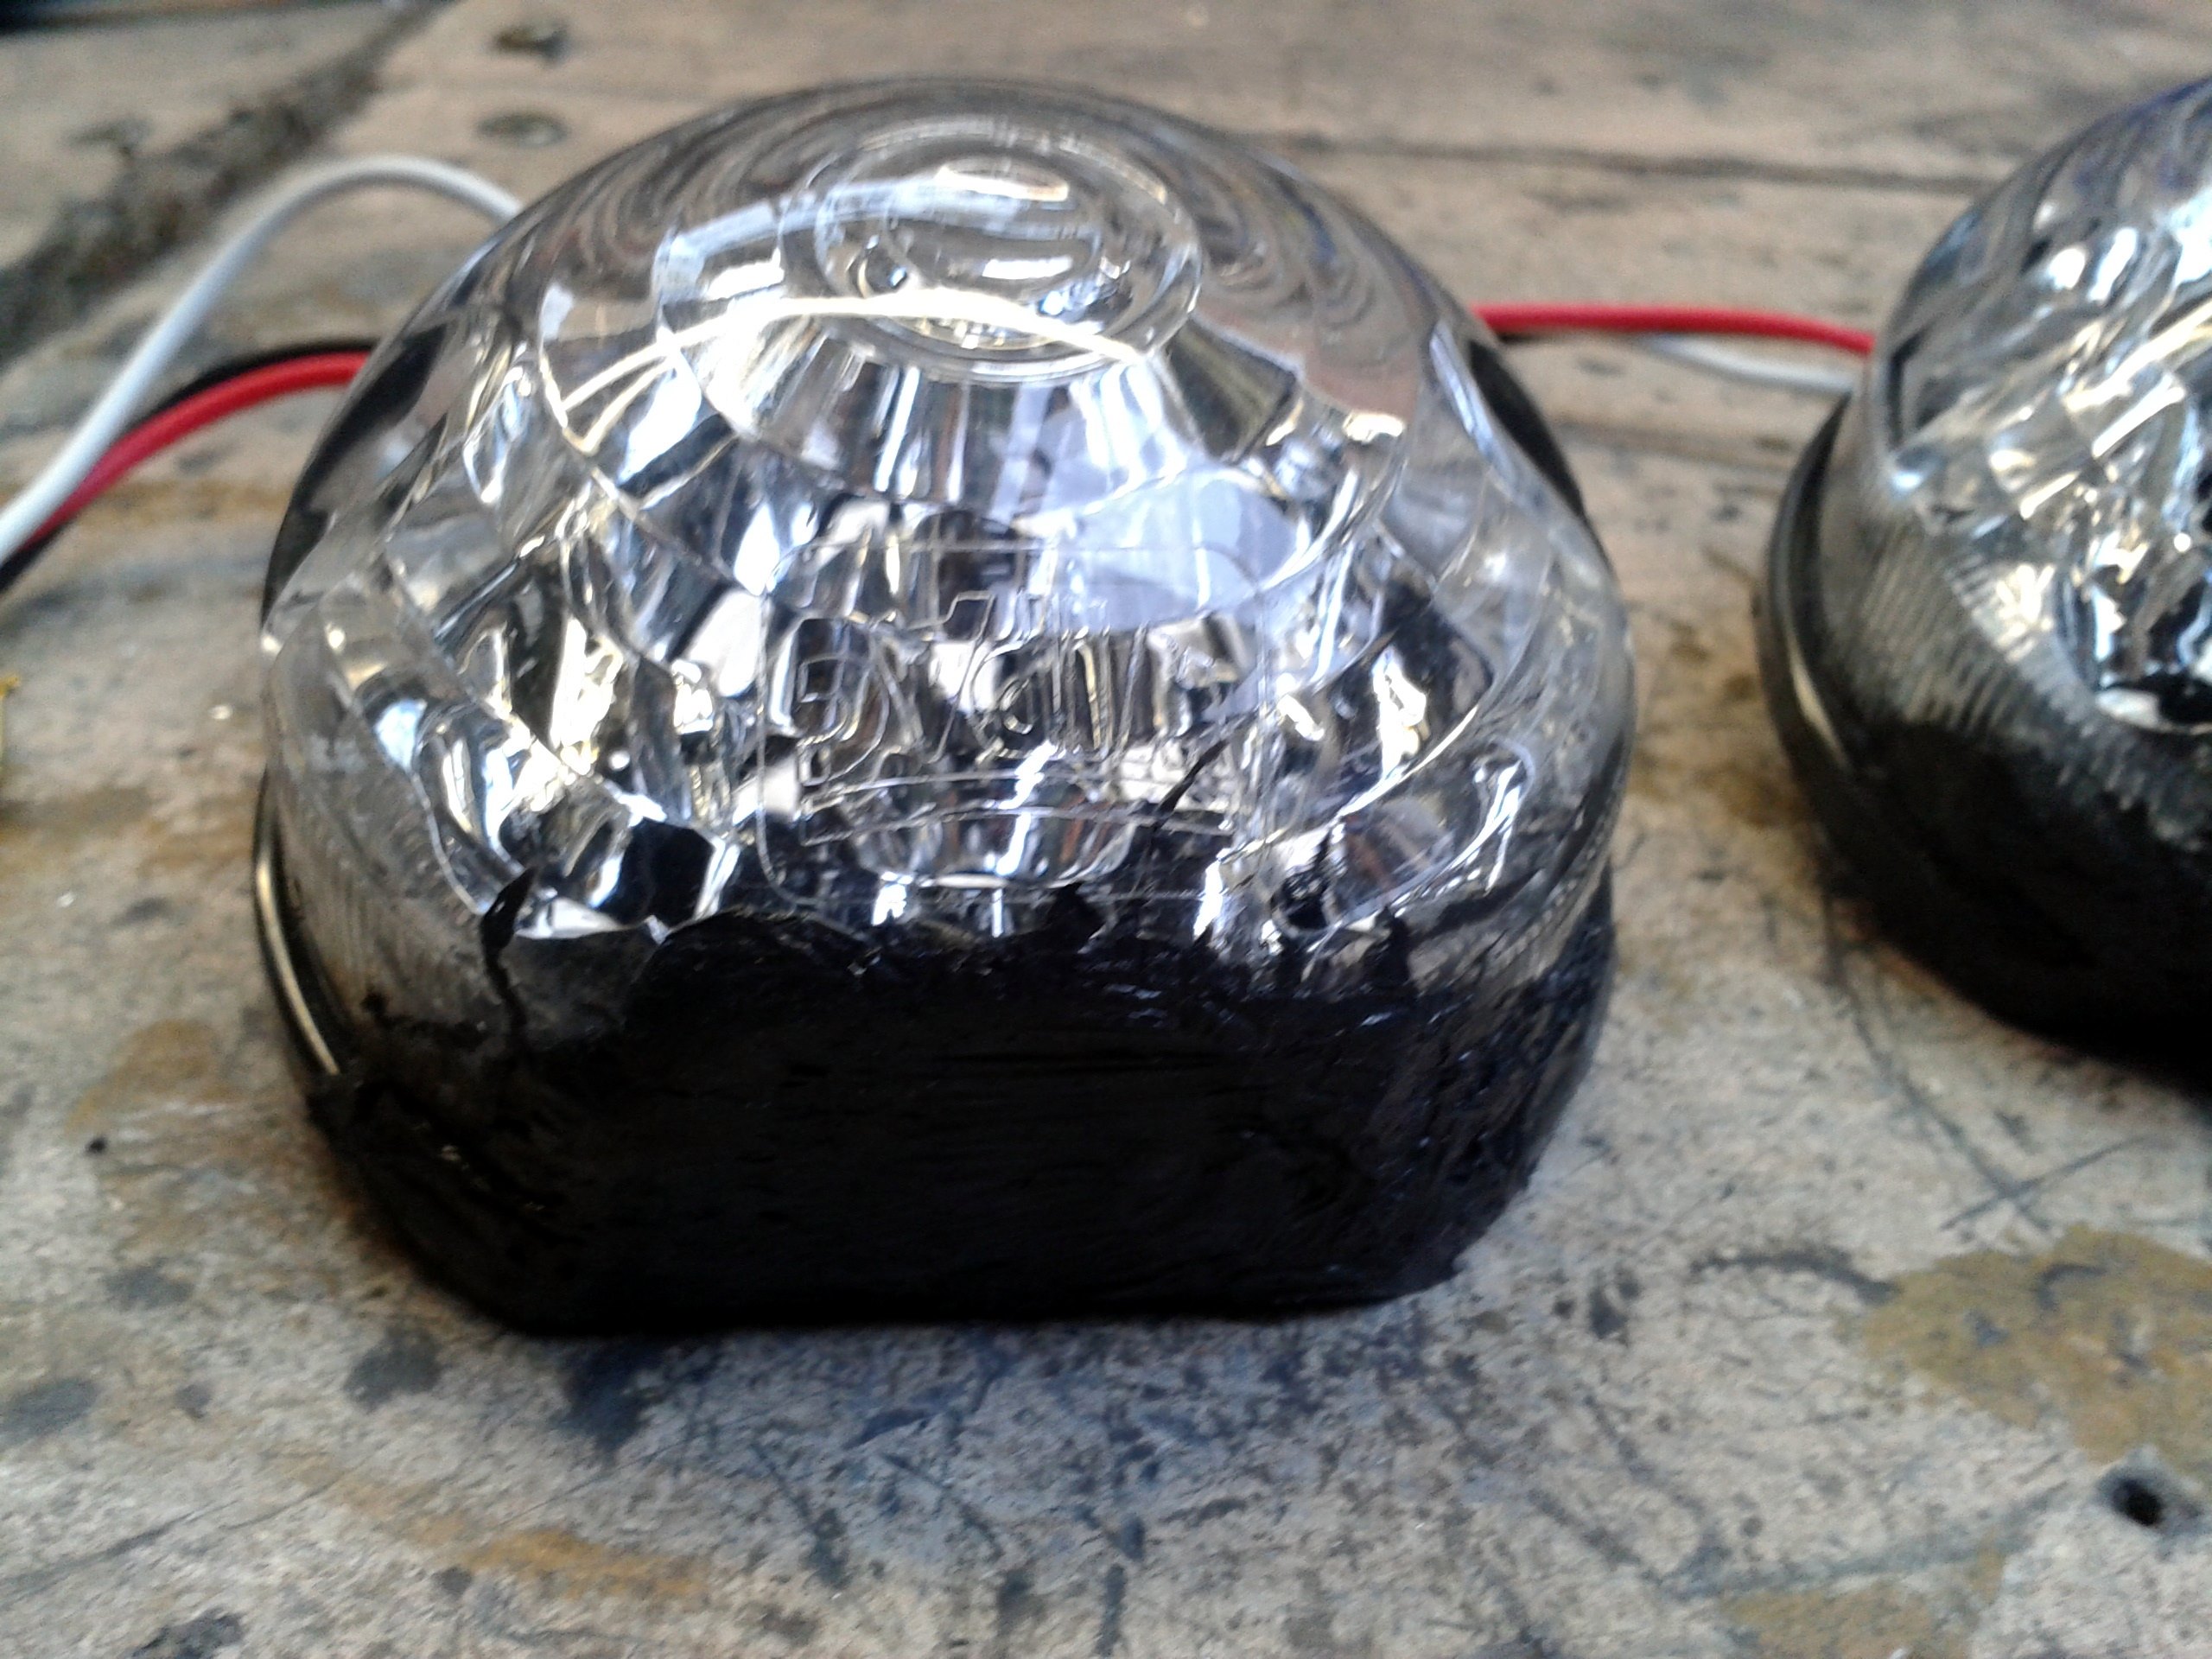
It's OK, that black gunge will be hard up against the base of the housing when assembled and it'll never be seen again! So, my calculations and test fits completed on my damaged light, it was time to man up and split decent set that would become the final version. I was careful to use plenty of heat gun, and left the light in a bucket of boiling water to ensure it softened the glue equally all round. This time I didn't pry at all with any tools, just used my fingers in under the edge and pulled the lens away from the housing as gently as I could... and that's easier said than done, you need to squeeze a few tennis ***** before trying this one because even thoroughly heated that glue GRIPS!
Anyway, the lens was peeling away nicely until...
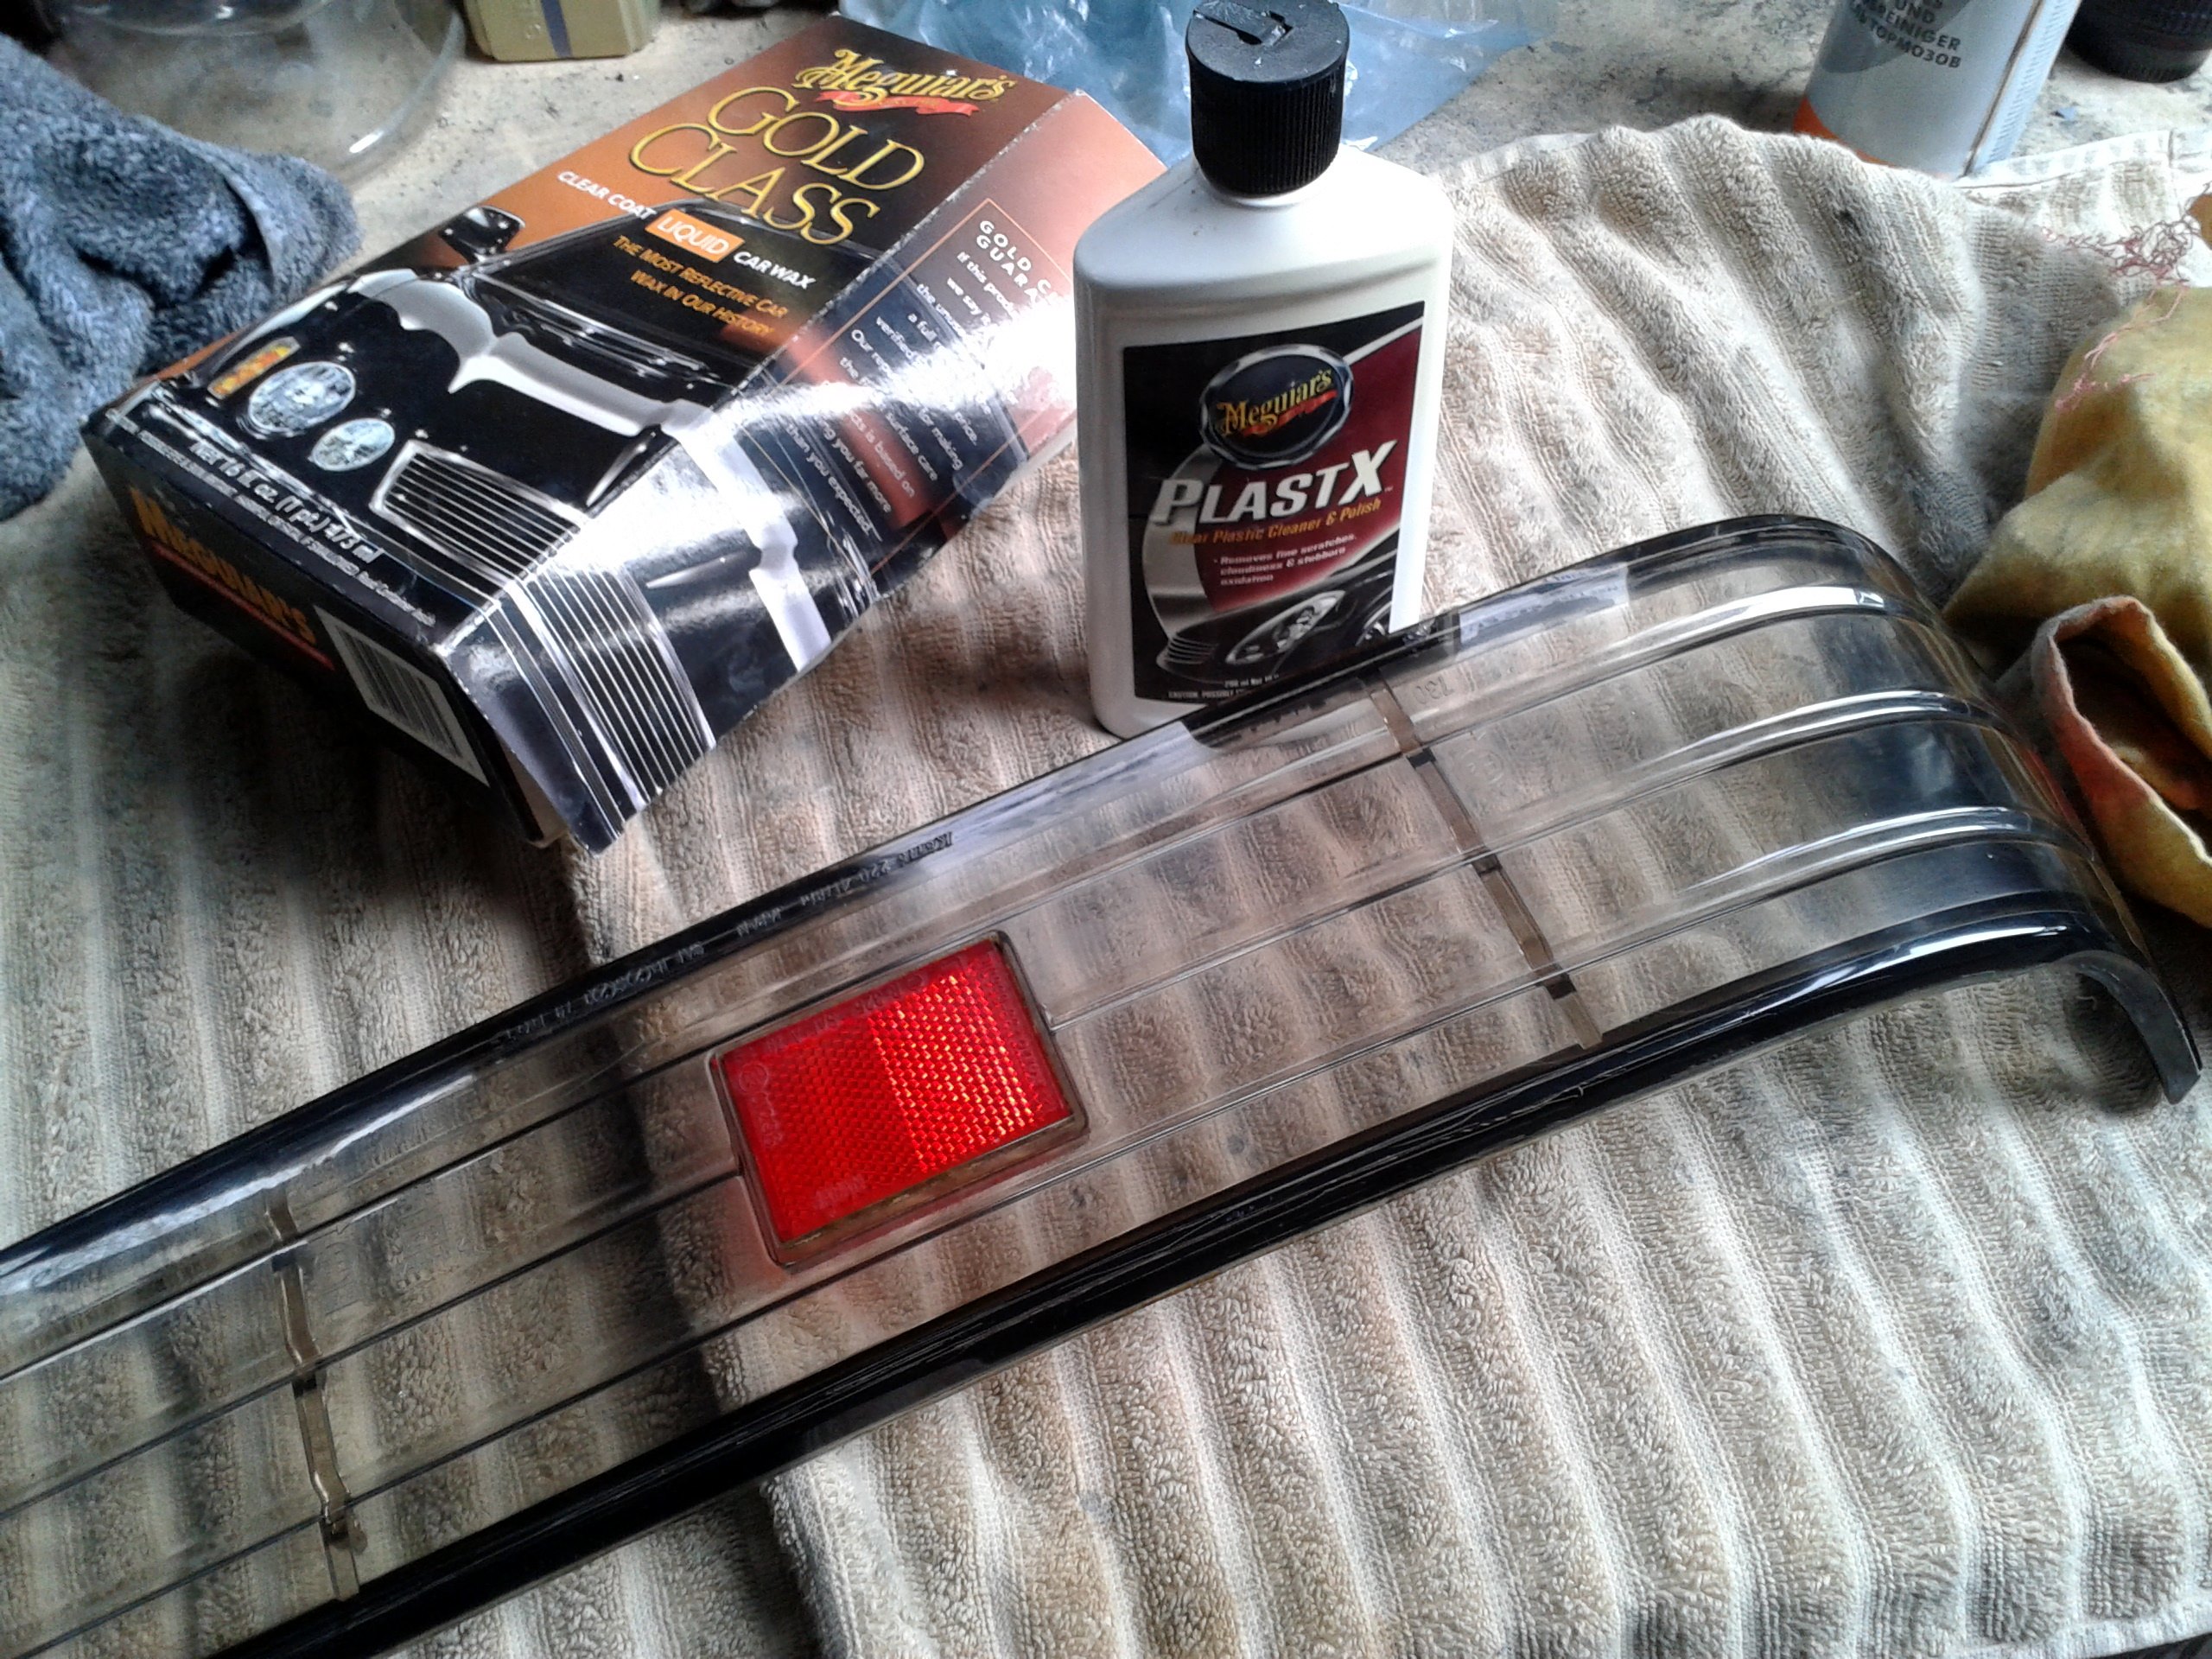
GAHhhh, that's that one knackered too, then. Lights three-nil *sigh*. OK, so you can neither pry them apart NOR stress the plastic too much by pulling it at too much of an angle away from the housing. The next attempt was mega-dicey, I was sweating it and not just because of the heat and the hard work. But FINALLY I had one apart completely un-mullered! Hurrah. Some Plast-X plastic polishing compound from the excellent-performing but rubbishly-named Meguiars' range soon had it gleaming. Phew!
While I was searching for LED units I came across some that were a bit like high-level brake lights; basically just a strip one LED high but about twenty or more long, and I thought three of these across the width of the light might be a good look. I abandoned this because a) everyone and their dog are doing these allegedly "Lambo-style" lights for every car imaginable, b) none of them were quite the right length and c) I couldn't remove the OE Mazda reflectors, which were right bang in the way of every arrangement I tried. Those reflectors are pegged, glued and interference-fit! I got one out from the broken lens (cos it didn't matter by then) but I had to drill the pegs out from behind, heat up the glue and pry out the reflector which then shattered and left behind loads of tiny little fragments irrevocably glued round the edges of the aperture which I then had to Dremel out. And after all that work, the recess where it had sat looked like a war had gone on in it. Even if it hadn't been carved up so much, it still would have looked like an important hole that something was missing from. So I decided the reflectors had to stay, and thus needed a light unit that would fit either side rather than right across the entire width.
Just in case you were wondering!
Anyway, before we went any further, no point in putting it off any further. All the original glue needed to be dug out of the grooves where the lens sealed to the housing. Yeah, it might have stuck like the proverbial to a blanket and resisted all my efforts to budge it, but it was thirty year old glue and I wasn't about to re-use it. Maybe I could have just re-heated it and it'd stick good as it always had but it seemed very brittle in places and to have lost all its malleability. I decided I was better off without it and to start anew. What a hateful job that was... blast it with the heat gun, then quickly scrape it out with a screwdriver and knife before it re-solidified again. By this point my hands were a scorched, burned, cut, scraped, raw mess and I hated the world. Why, it had simply ruined my manicure!

Test fit time! Hurrah, have it done in a moment now.
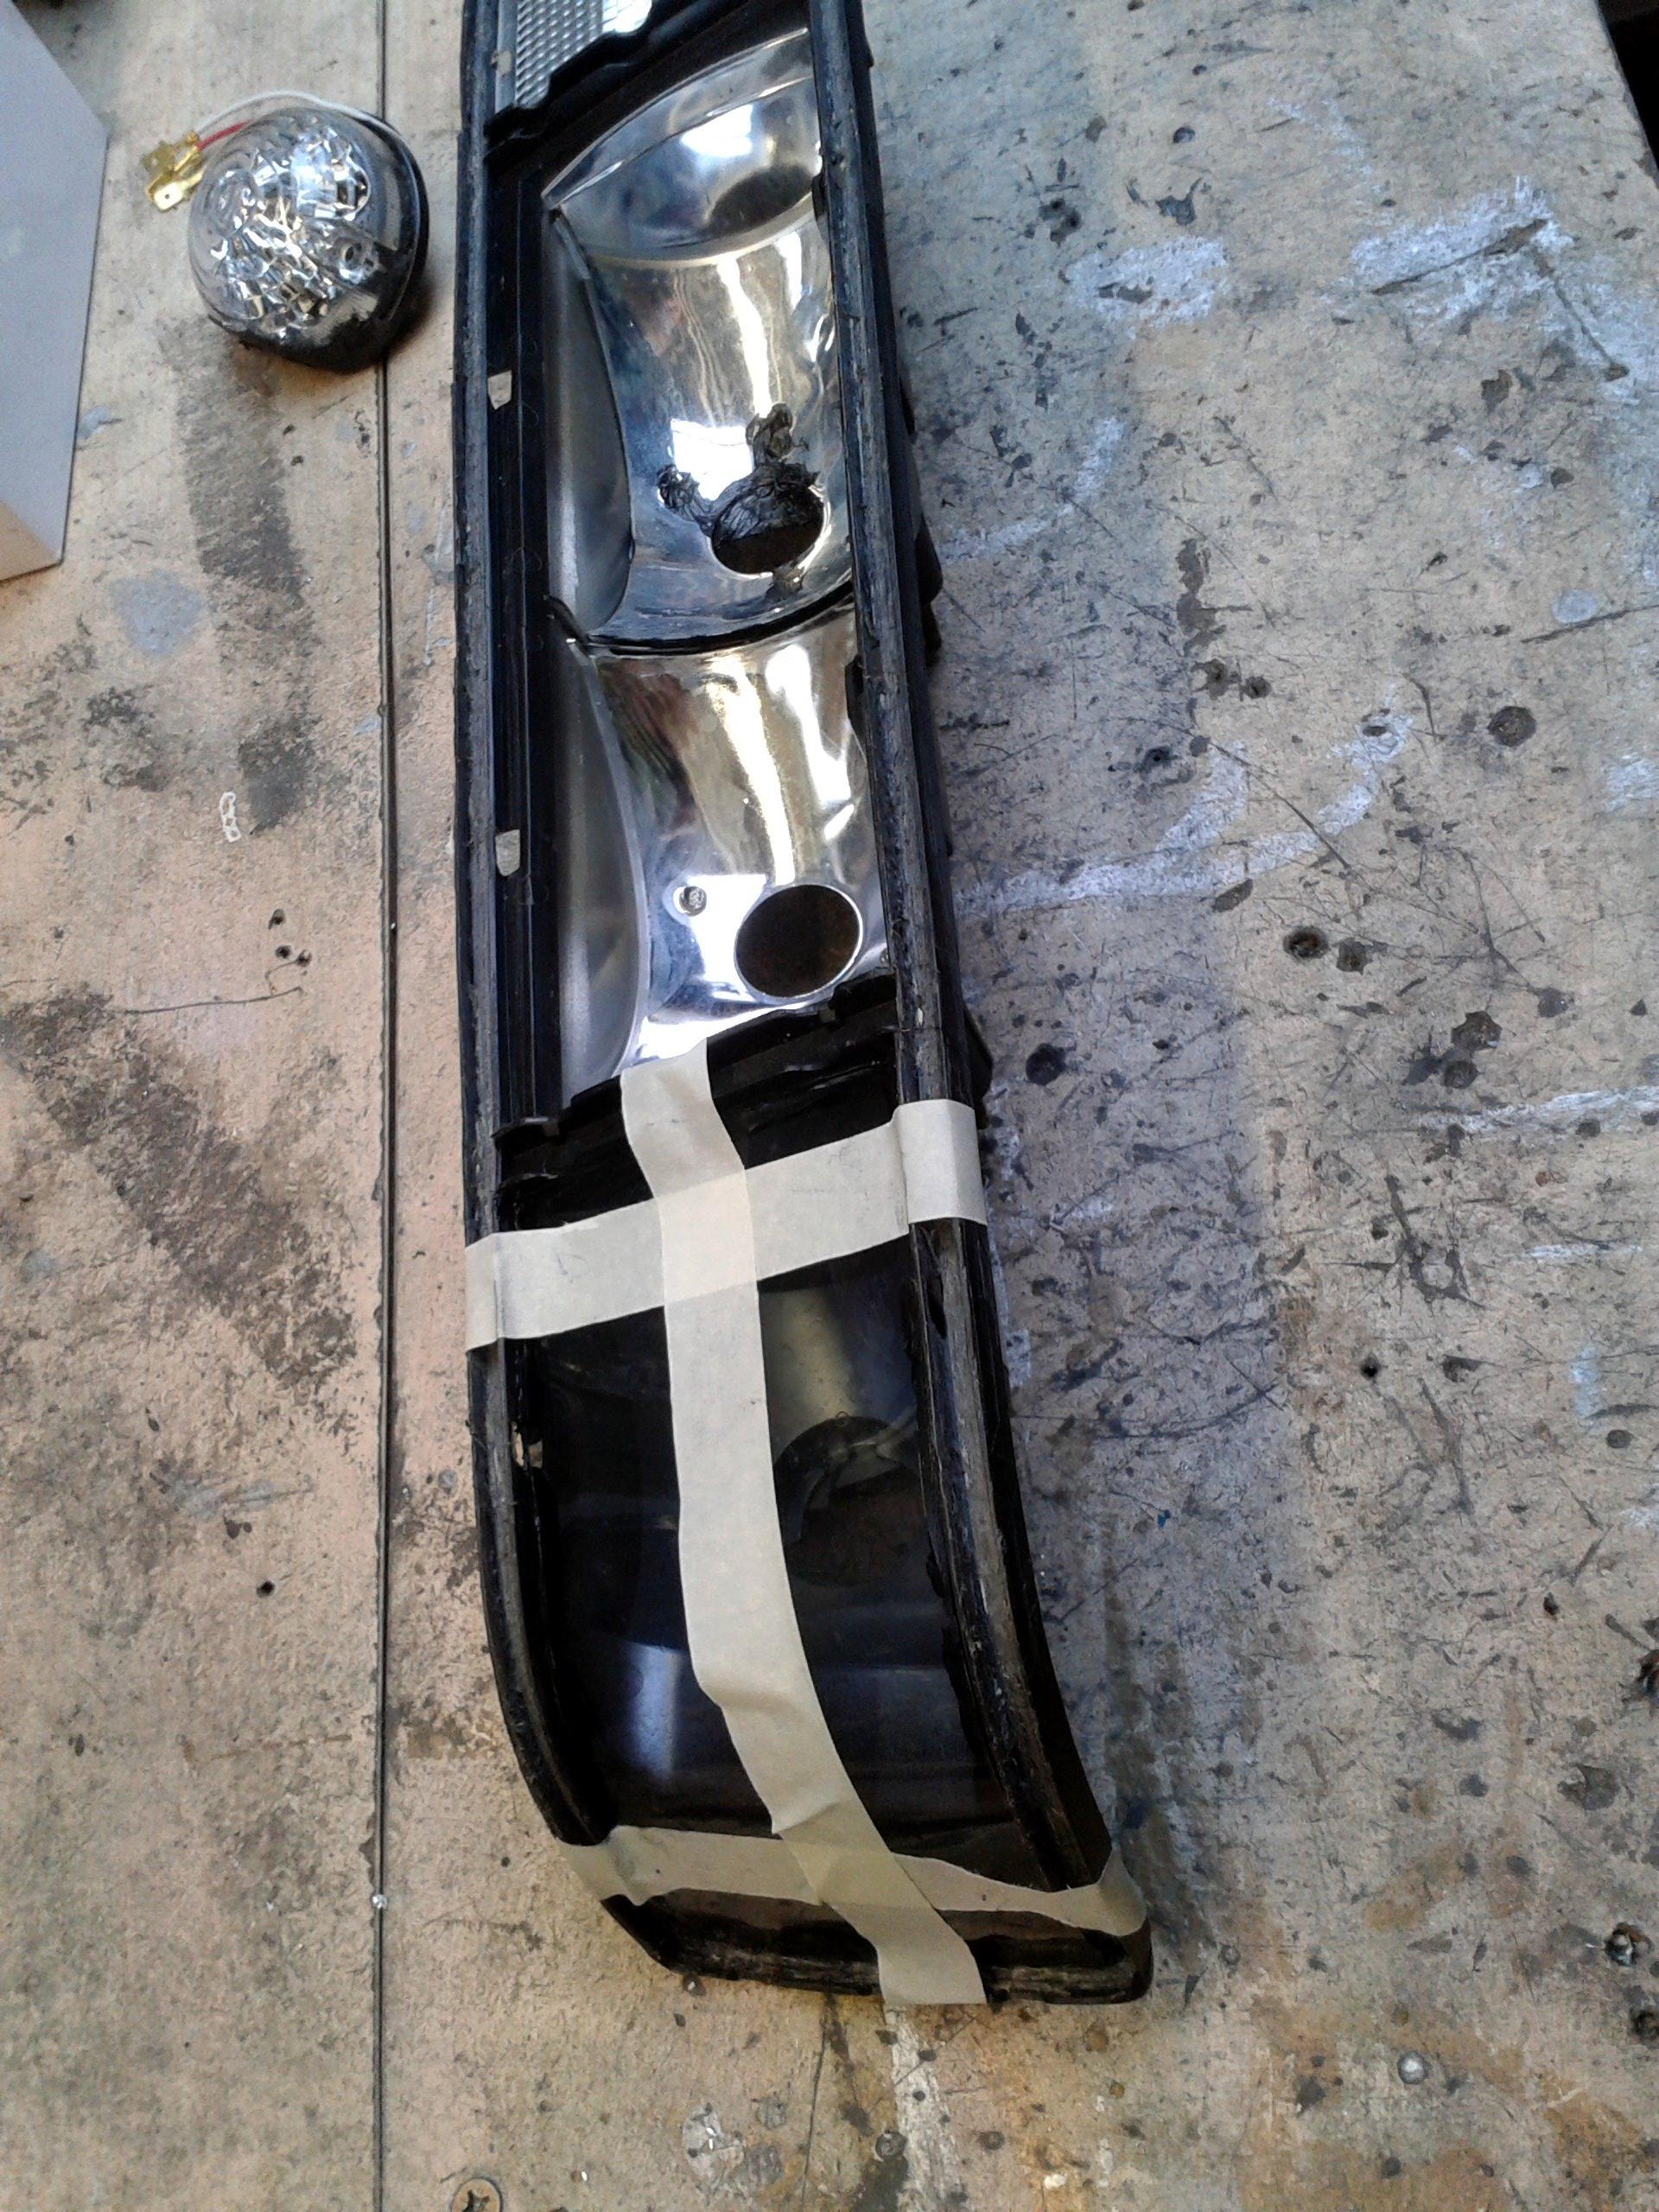
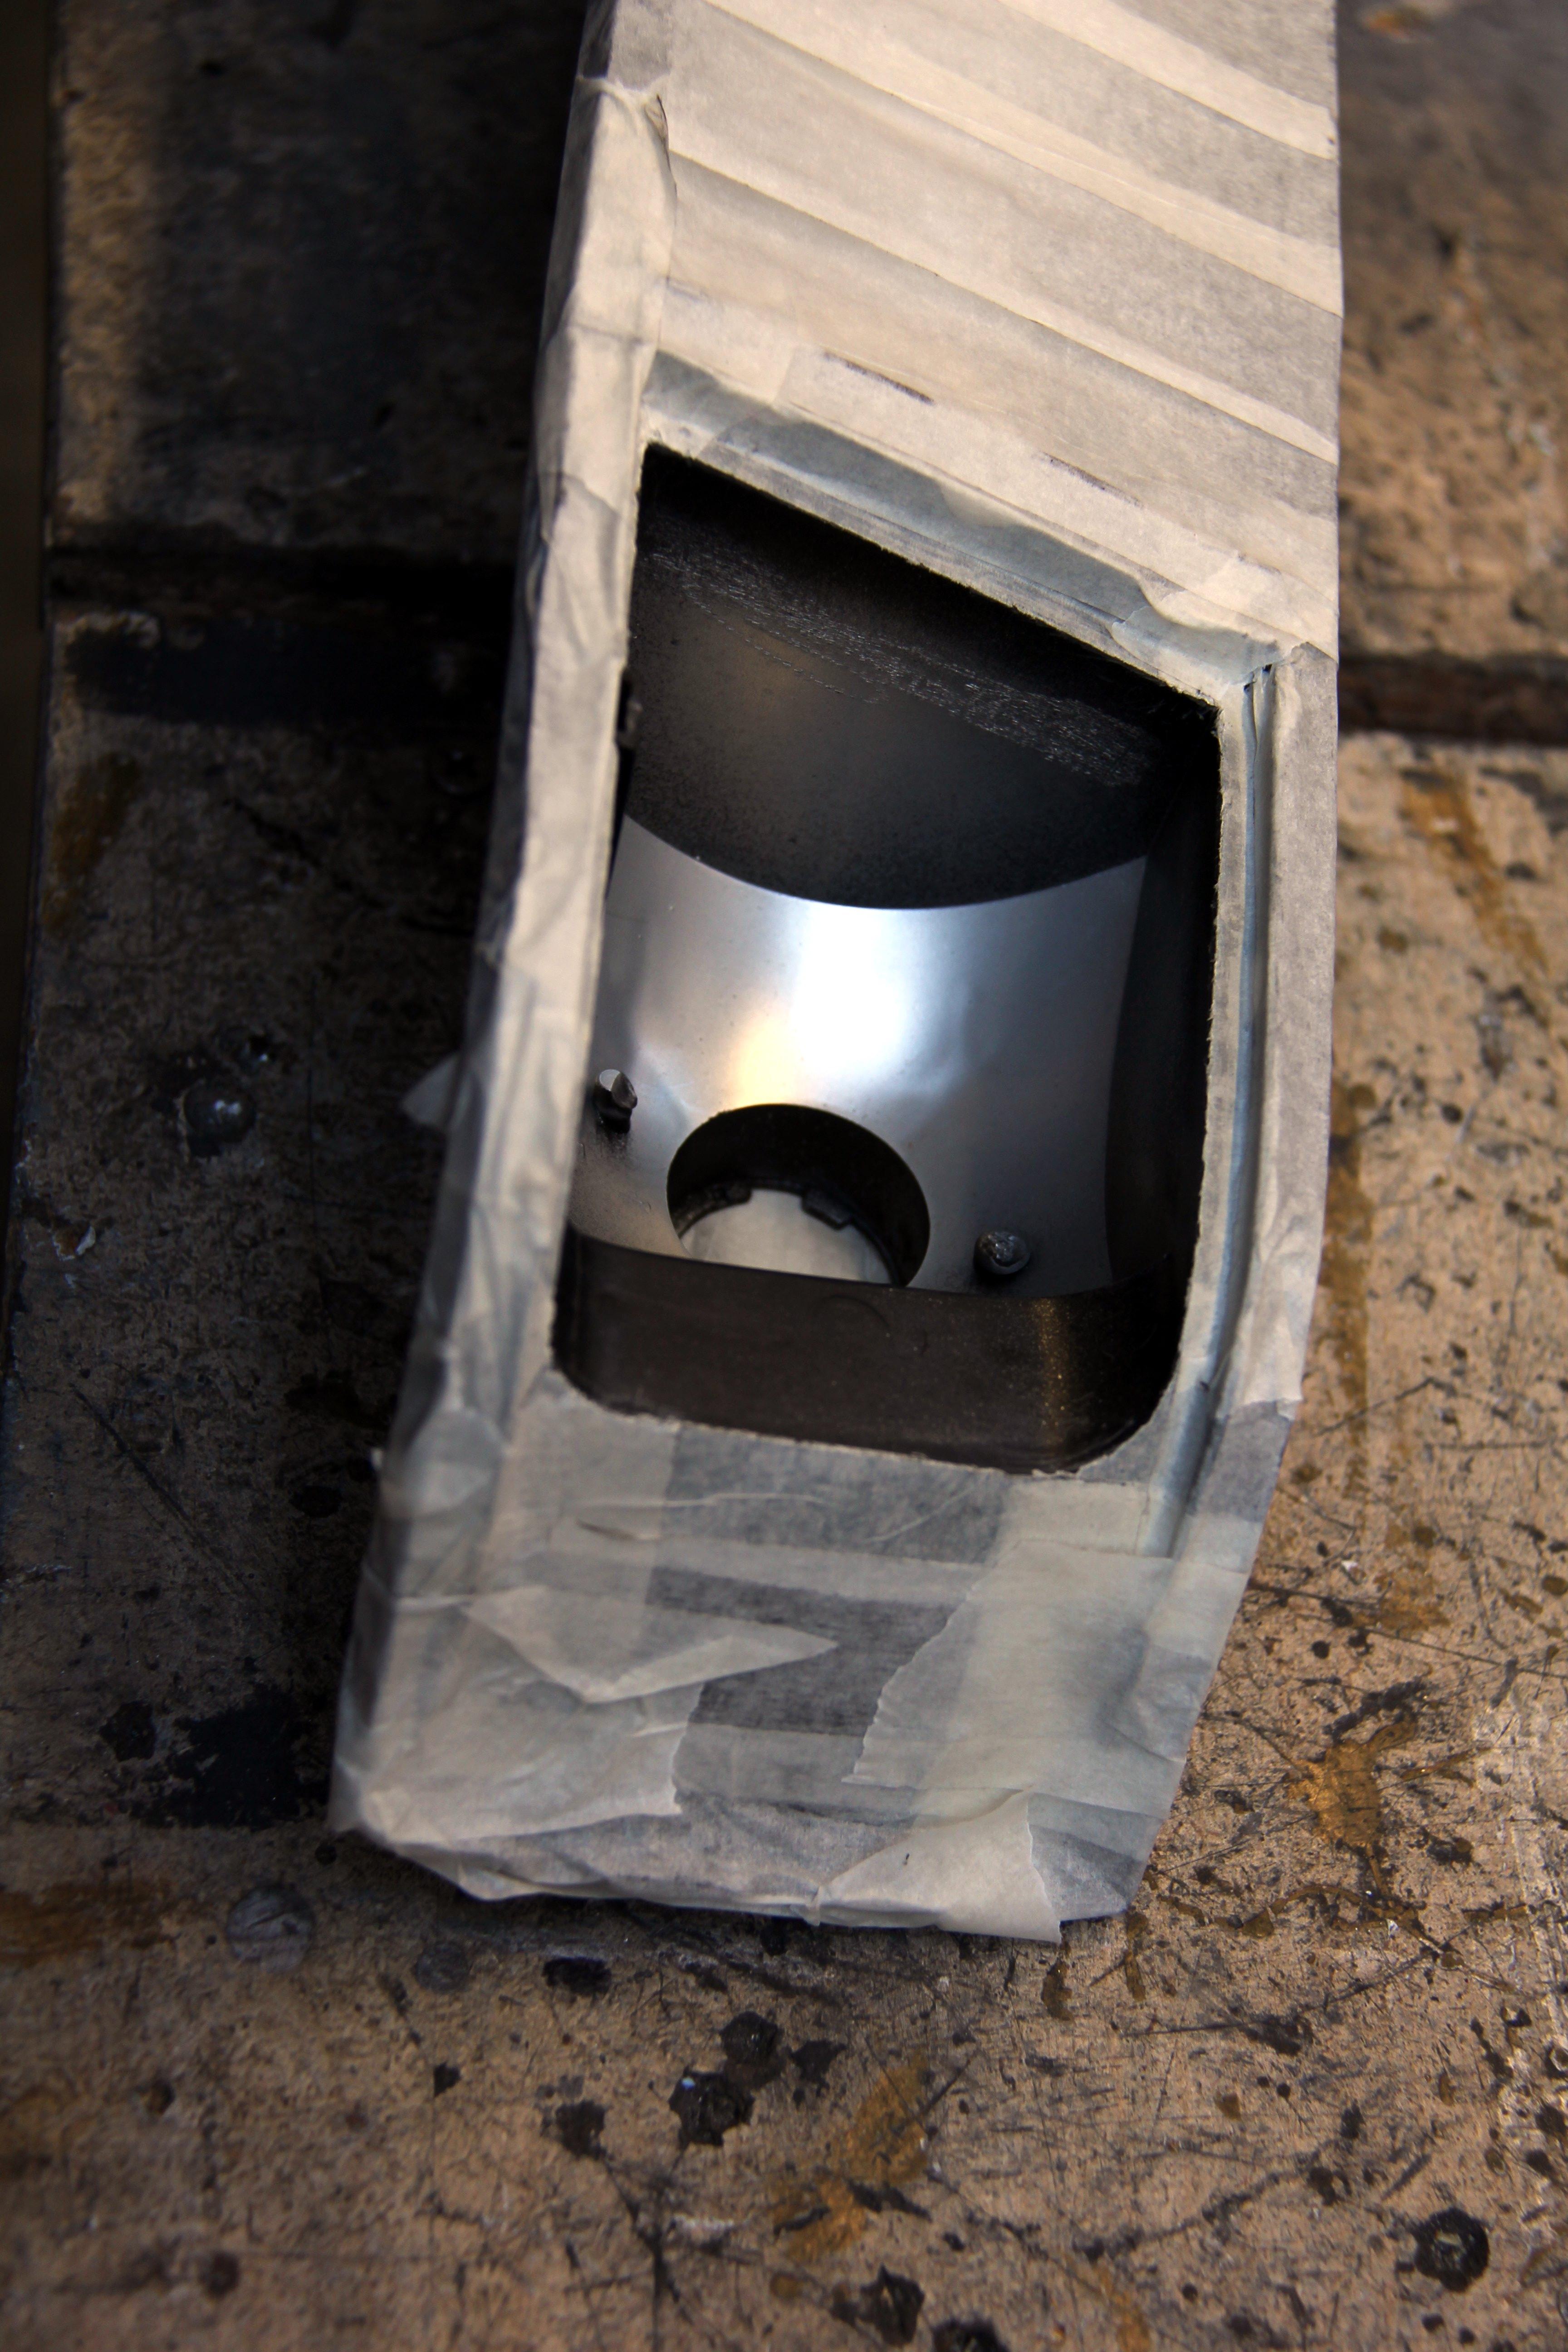
Oh no, bugger it, that isn't going to work. The tint of the lens was too light and you could see everything through it. Dang, this wasn't what I wanted, I wanted the lights to be almost as dark as the beaver panel. Which was, well... black. I needed some way of making them darker. As previously discussed, tinting spray was out because it's cack. I had some tinting film in a drawer that I'd never used (I'd looked at the compound double-curve of an FD rear screen and thought "hmmmm, that looks tricky, I'll leave that one and hope the elves take a night off from helping poor old cobblers and do my tints for me"). Well, you simply don't get the right work ethic in elves nowadays, so my tints were resolutely un-done. Nothing's ever wasted if you keep it long enough, see? However, the inside of the lens did not look like it would be conducive to good tint film application, since those strakes are actually really deep mouldings on the inside surface. You can best see from the slots they fit into in the housing;
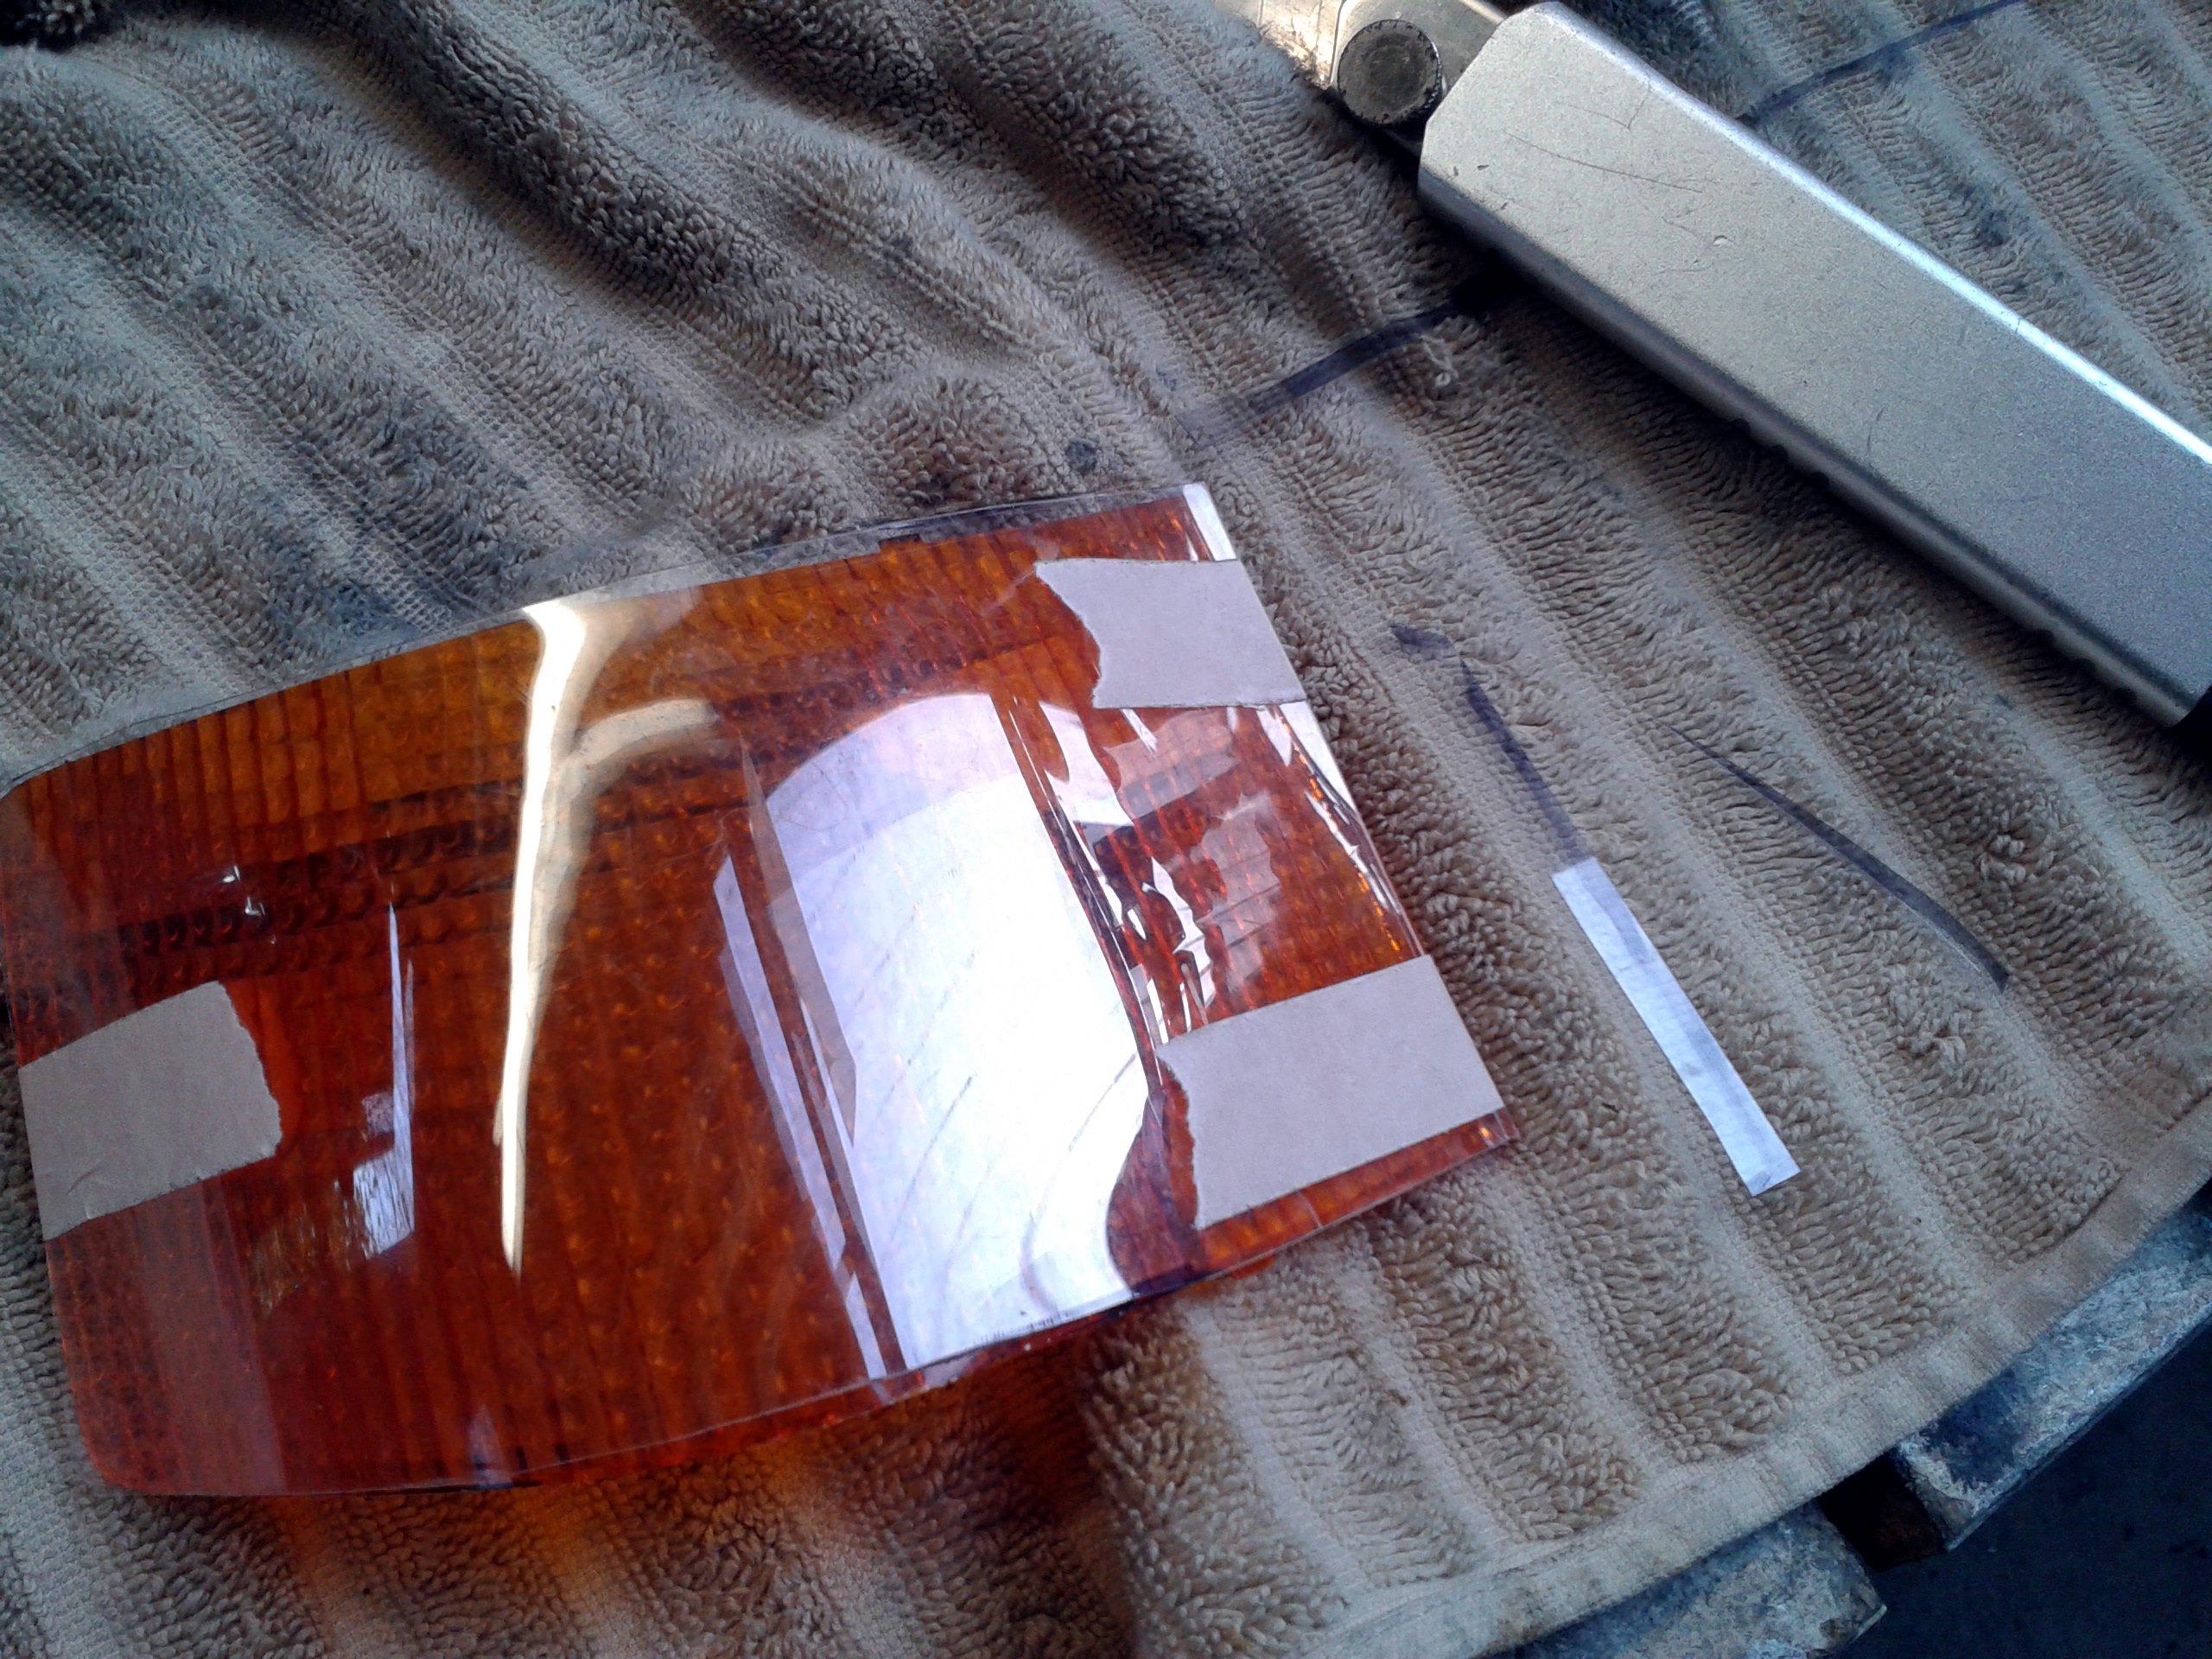
I tried a desultory attempt at tinting the strips in between but it just looked bad, and not in a good way. More in a Michael Jackson way, to be honest, kind of made from flimsy plastic and a bit fally-aparty. The next idea relied on making some inserts up to replace the coloured inserts I'd removed from the housings. Using the original lenses as templates I made some inserts of my own from thin plastic sheet. I was tempted to use proper aftermarket reticulated lens replacements, but the indicator one is a double curve and I wasn't sure how well the "proper" stuff would be able to mould to the shape. I settled for thin, flexible plastic and in true Blue Peter style, used stuff that was lying around so it had the extra bonus of being more or less free. Some of it was from the packaging of an HDMi cable (I've no idea even what one of those does anyway) and the rest came from a Sophia The First colouring set, graciously donated by the li'l un. Here is one of the indicators being copied;
This mod has been about a couple of years in the making, but since it's long overdue and I had a bit of spare time for once I thought it was long past time I got the hell on with it! There are a couple of things that have always annoyed me about the back end of my S3. I blame my mate James, cos it was following his old and now stolen Silver Arrow S2 round the M25 London Orbital that it really brought it home how irritating they were. Know what I'm on about? Here, let me show you

The first problem is that Mazda gave us the excellent beaver panel motif linking the lights together, all with matching strakes right across the rear of the car, but they kinda ballsed it up rather with the Fisher Price coloured inserts for the lenses. Admittedly, that's what they had to work with in the late 70s, but things have moved on a bit since then. Secondly, in that pic above, the tail lights are on. So why do we have two bulbs each side if only one works? :?

Oh yeah, it's cos the other two are the brake lights. Eh? Why? No doubt there's some arcane Construction and Use clause about lumen differentiation and distance in cubits and millimetres from the extreme locus of the geographical extent of car bodywork that says It Must Be So. well, I don't like it. I've never liked it and it's about time I did something about it. See, when you have the brake and the tail lights on simultaneously, you get all four bulbs lit

Now, this is what we want. I dunno if they're the same in other markets but I decided the humble old UK one-bulb-on-one-off system would have to give way for a more modern and funky style of light. How hard could it be, I wondered. Answer apparently is harder than you'd like!
Probably the easiest way to do it would be just to bridge the wiring so both bulbs do both things at the same time, but I figured why stop there? Why not upgrade to a more modern form of lighting? Maybe even some LEDs? Besides, bridging the original bulbs together wouldn't alleviate the problem of the coloured inserts... really there was nothing for it but to start taking some lights apart and see what happened from there.
Easier said than done! Fortunately I'd managed to get some spares so I didn't have to risk mutilating the ones actually on the car. I've split a few sets of FD lights before to convert them to what's known as "99 spec"; that is, with the round circles rather than the early-model lozenge shaped lenses. They're a LOT easier to do. For a start, the tinted front covers are much thicker and more robust than the FB ones. All you need is careful application of a heat gun to melt the glue holding the halves together and they pry right apart easy as you like. The FB ones aren't like that. The lenses are really thin, and horribly brittle. Not sure whether it's age degrading them or they're like that anyway, but my first attempt involved a lot of shards of lens cracking and flying off the edge as I pried with a screwdriver. OK, lesson learned, you can't just jemmy them open like you would with FD lights!
However, since the first attempt was knackered anyway it gave me a great chance to experiment with what would work and what wouldn't. Before I get any further it's probably worth pointing out I am to vehicle electrics what Jeffrey Dahmer was to avant-garde cuisine so any solution I came up with would need to involve minimal wiring. The problem with this was that the FB taillights are really narrow and all the aftermarket light units I could find were too large. The simplest solution would be to just use tinting spray and darken the lights down to match the blacker beaver panel but in my experience tinting spray always looks cack and it's just so... well, M*x P*wer. The next easiest option seemed to be find some LED units that would fit into the light housing. First version went like this;

They were the smallest units I could find that combined brake and tail, and even these at around 95mm diameter were too big. I trimmed them as much as I dared without mangling the electronics, had to prise off the covers as well to make them shallow enough and even after all this butchery they were still too big. I tried to cut some relief slots in the FB light housing and this did prove successful as far as fitting the actual LED units in but caused all sorts of other problems (the main two being sealing them to make them waterproof afterwards and then getting them to fit inside the metal cage that retains the lights to the bodywork, and many other minor niggles).
Two-nil to the lights, then
At this point I did what all good car modifiers should do when faced with adversity and setbacks. I threw them in a drawer and forgot about them for about a year. And then, light and inspiration dawned, as it so often does, whilst sitting on the bog perusing the catalogue update from Car Builder Solutions that had come with my expansion bottle. Aha, new 73mm diameter LED brake and tail units, eh? They'll be the ones for me then!
Almost... I still had to trim off a tiny chord from the diameter to give them a flat base, but then they fitted without any butchery of the housing necessary. I could even leave the covers on, so quickly filled in the fillet I'd had to cut with PU sealant to keep their integrity against the elements. A bit of clingfilm kept it all where it needed to be as the sealant set (it won't stick to clingfilm. Neither will cement. Top tip for keeping your patio edging nice and neat there, lol)

and when dry you'd never know they'd been messed with. Lol

It's OK, that black gunge will be hard up against the base of the housing when assembled and it'll never be seen again! So, my calculations and test fits completed on my damaged light, it was time to man up and split decent set that would become the final version. I was careful to use plenty of heat gun, and left the light in a bucket of boiling water to ensure it softened the glue equally all round. This time I didn't pry at all with any tools, just used my fingers in under the edge and pulled the lens away from the housing as gently as I could... and that's easier said than done, you need to squeeze a few tennis ***** before trying this one because even thoroughly heated that glue GRIPS!
Anyway, the lens was peeling away nicely until...

GAHhhh, that's that one knackered too, then. Lights three-nil *sigh*. OK, so you can neither pry them apart NOR stress the plastic too much by pulling it at too much of an angle away from the housing. The next attempt was mega-dicey, I was sweating it and not just because of the heat and the hard work. But FINALLY I had one apart completely un-mullered! Hurrah. Some Plast-X plastic polishing compound from the excellent-performing but rubbishly-named Meguiars' range soon had it gleaming. Phew!

While I was searching for LED units I came across some that were a bit like high-level brake lights; basically just a strip one LED high but about twenty or more long, and I thought three of these across the width of the light might be a good look. I abandoned this because a) everyone and their dog are doing these allegedly "Lambo-style" lights for every car imaginable, b) none of them were quite the right length and c) I couldn't remove the OE Mazda reflectors, which were right bang in the way of every arrangement I tried. Those reflectors are pegged, glued and interference-fit! I got one out from the broken lens (cos it didn't matter by then) but I had to drill the pegs out from behind, heat up the glue and pry out the reflector which then shattered and left behind loads of tiny little fragments irrevocably glued round the edges of the aperture which I then had to Dremel out. And after all that work, the recess where it had sat looked like a war had gone on in it. Even if it hadn't been carved up so much, it still would have looked like an important hole that something was missing from. So I decided the reflectors had to stay, and thus needed a light unit that would fit either side rather than right across the entire width.
Just in case you were wondering!
Anyway, before we went any further, no point in putting it off any further. All the original glue needed to be dug out of the grooves where the lens sealed to the housing. Yeah, it might have stuck like the proverbial to a blanket and resisted all my efforts to budge it, but it was thirty year old glue and I wasn't about to re-use it. Maybe I could have just re-heated it and it'd stick good as it always had but it seemed very brittle in places and to have lost all its malleability. I decided I was better off without it and to start anew. What a hateful job that was... blast it with the heat gun, then quickly scrape it out with a screwdriver and knife before it re-solidified again. By this point my hands were a scorched, burned, cut, scraped, raw mess and I hated the world. Why, it had simply ruined my manicure!

Test fit time! Hurrah, have it done in a moment now.

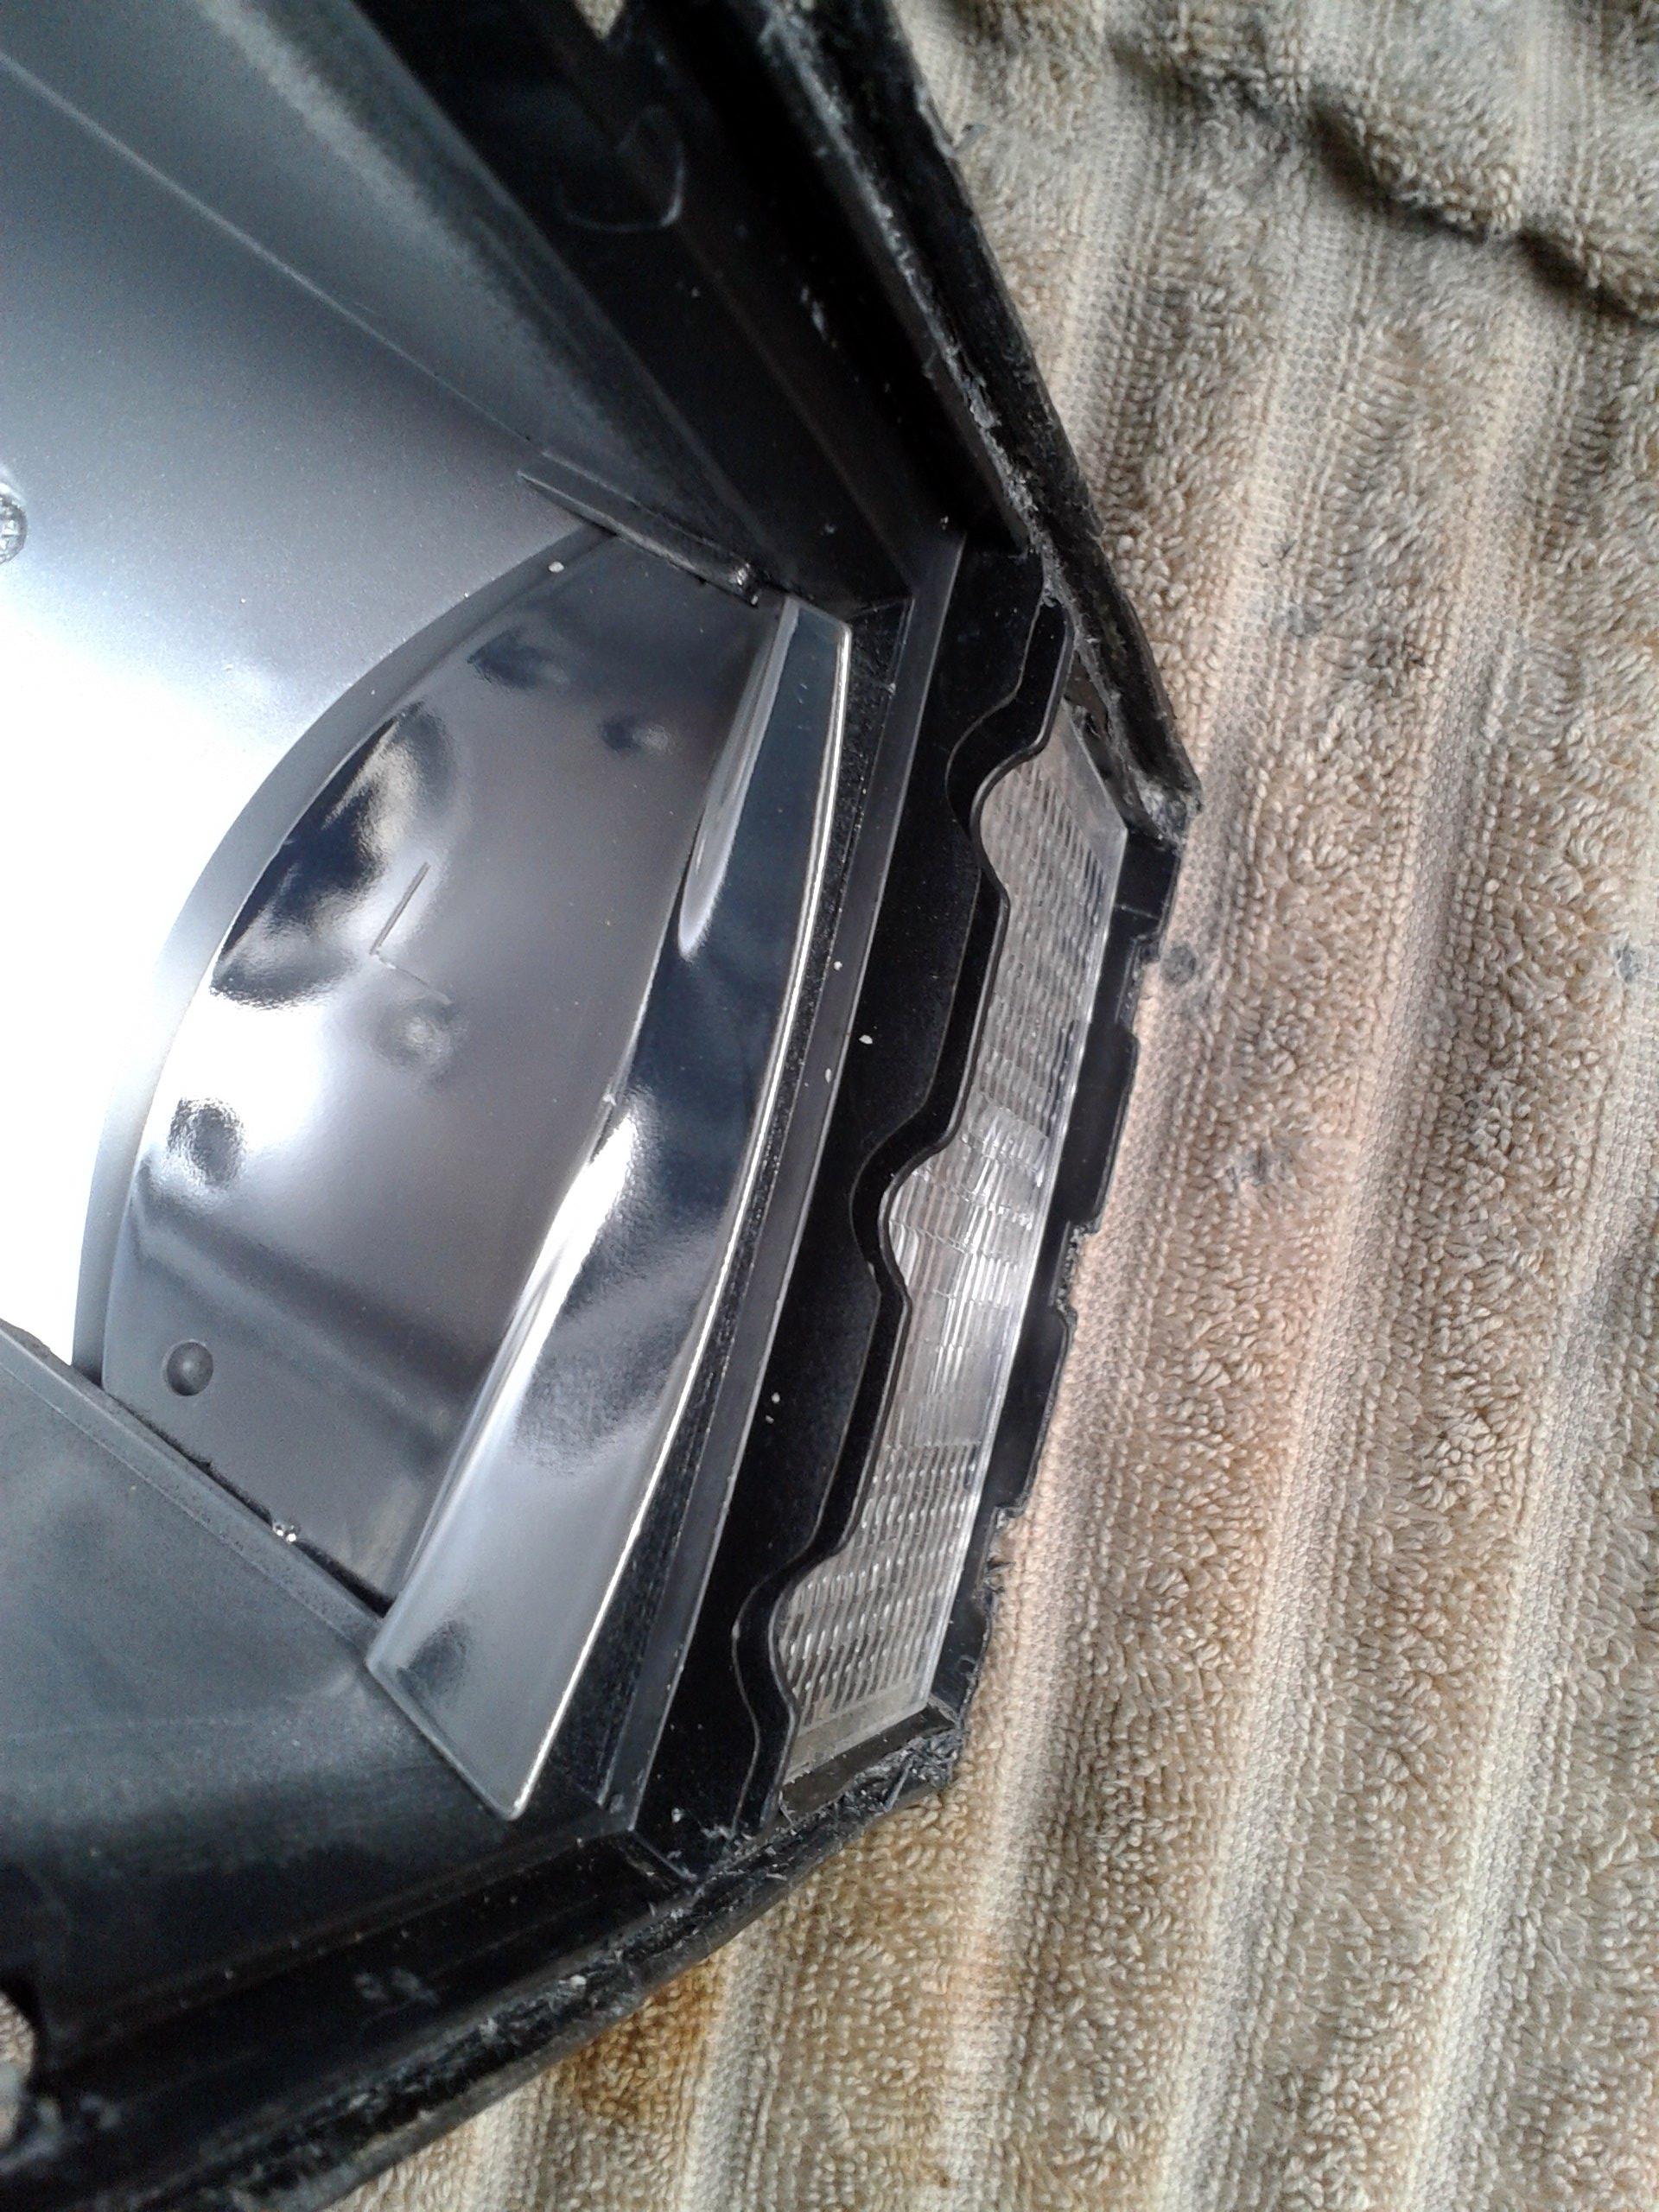
Oh no, bugger it, that isn't going to work. The tint of the lens was too light and you could see everything through it. Dang, this wasn't what I wanted, I wanted the lights to be almost as dark as the beaver panel. Which was, well... black. I needed some way of making them darker. As previously discussed, tinting spray was out because it's cack. I had some tinting film in a drawer that I'd never used (I'd looked at the compound double-curve of an FD rear screen and thought "hmmmm, that looks tricky, I'll leave that one and hope the elves take a night off from helping poor old cobblers and do my tints for me"). Well, you simply don't get the right work ethic in elves nowadays, so my tints were resolutely un-done. Nothing's ever wasted if you keep it long enough, see? However, the inside of the lens did not look like it would be conducive to good tint film application, since those strakes are actually really deep mouldings on the inside surface. You can best see from the slots they fit into in the housing;

I tried a desultory attempt at tinting the strips in between but it just looked bad, and not in a good way. More in a Michael Jackson way, to be honest, kind of made from flimsy plastic and a bit fally-aparty. The next idea relied on making some inserts up to replace the coloured inserts I'd removed from the housings. Using the original lenses as templates I made some inserts of my own from thin plastic sheet. I was tempted to use proper aftermarket reticulated lens replacements, but the indicator one is a double curve and I wasn't sure how well the "proper" stuff would be able to mould to the shape. I settled for thin, flexible plastic and in true Blue Peter style, used stuff that was lying around so it had the extra bonus of being more or less free. Some of it was from the packaging of an HDMi cable (I've no idea even what one of those does anyway) and the rest came from a Sophia The First colouring set, graciously donated by the li'l un. Here is one of the indicators being copied;

Thread Starter
Senior Member
Joined: Oct 2010
Posts: 255
Likes: 1
From: England
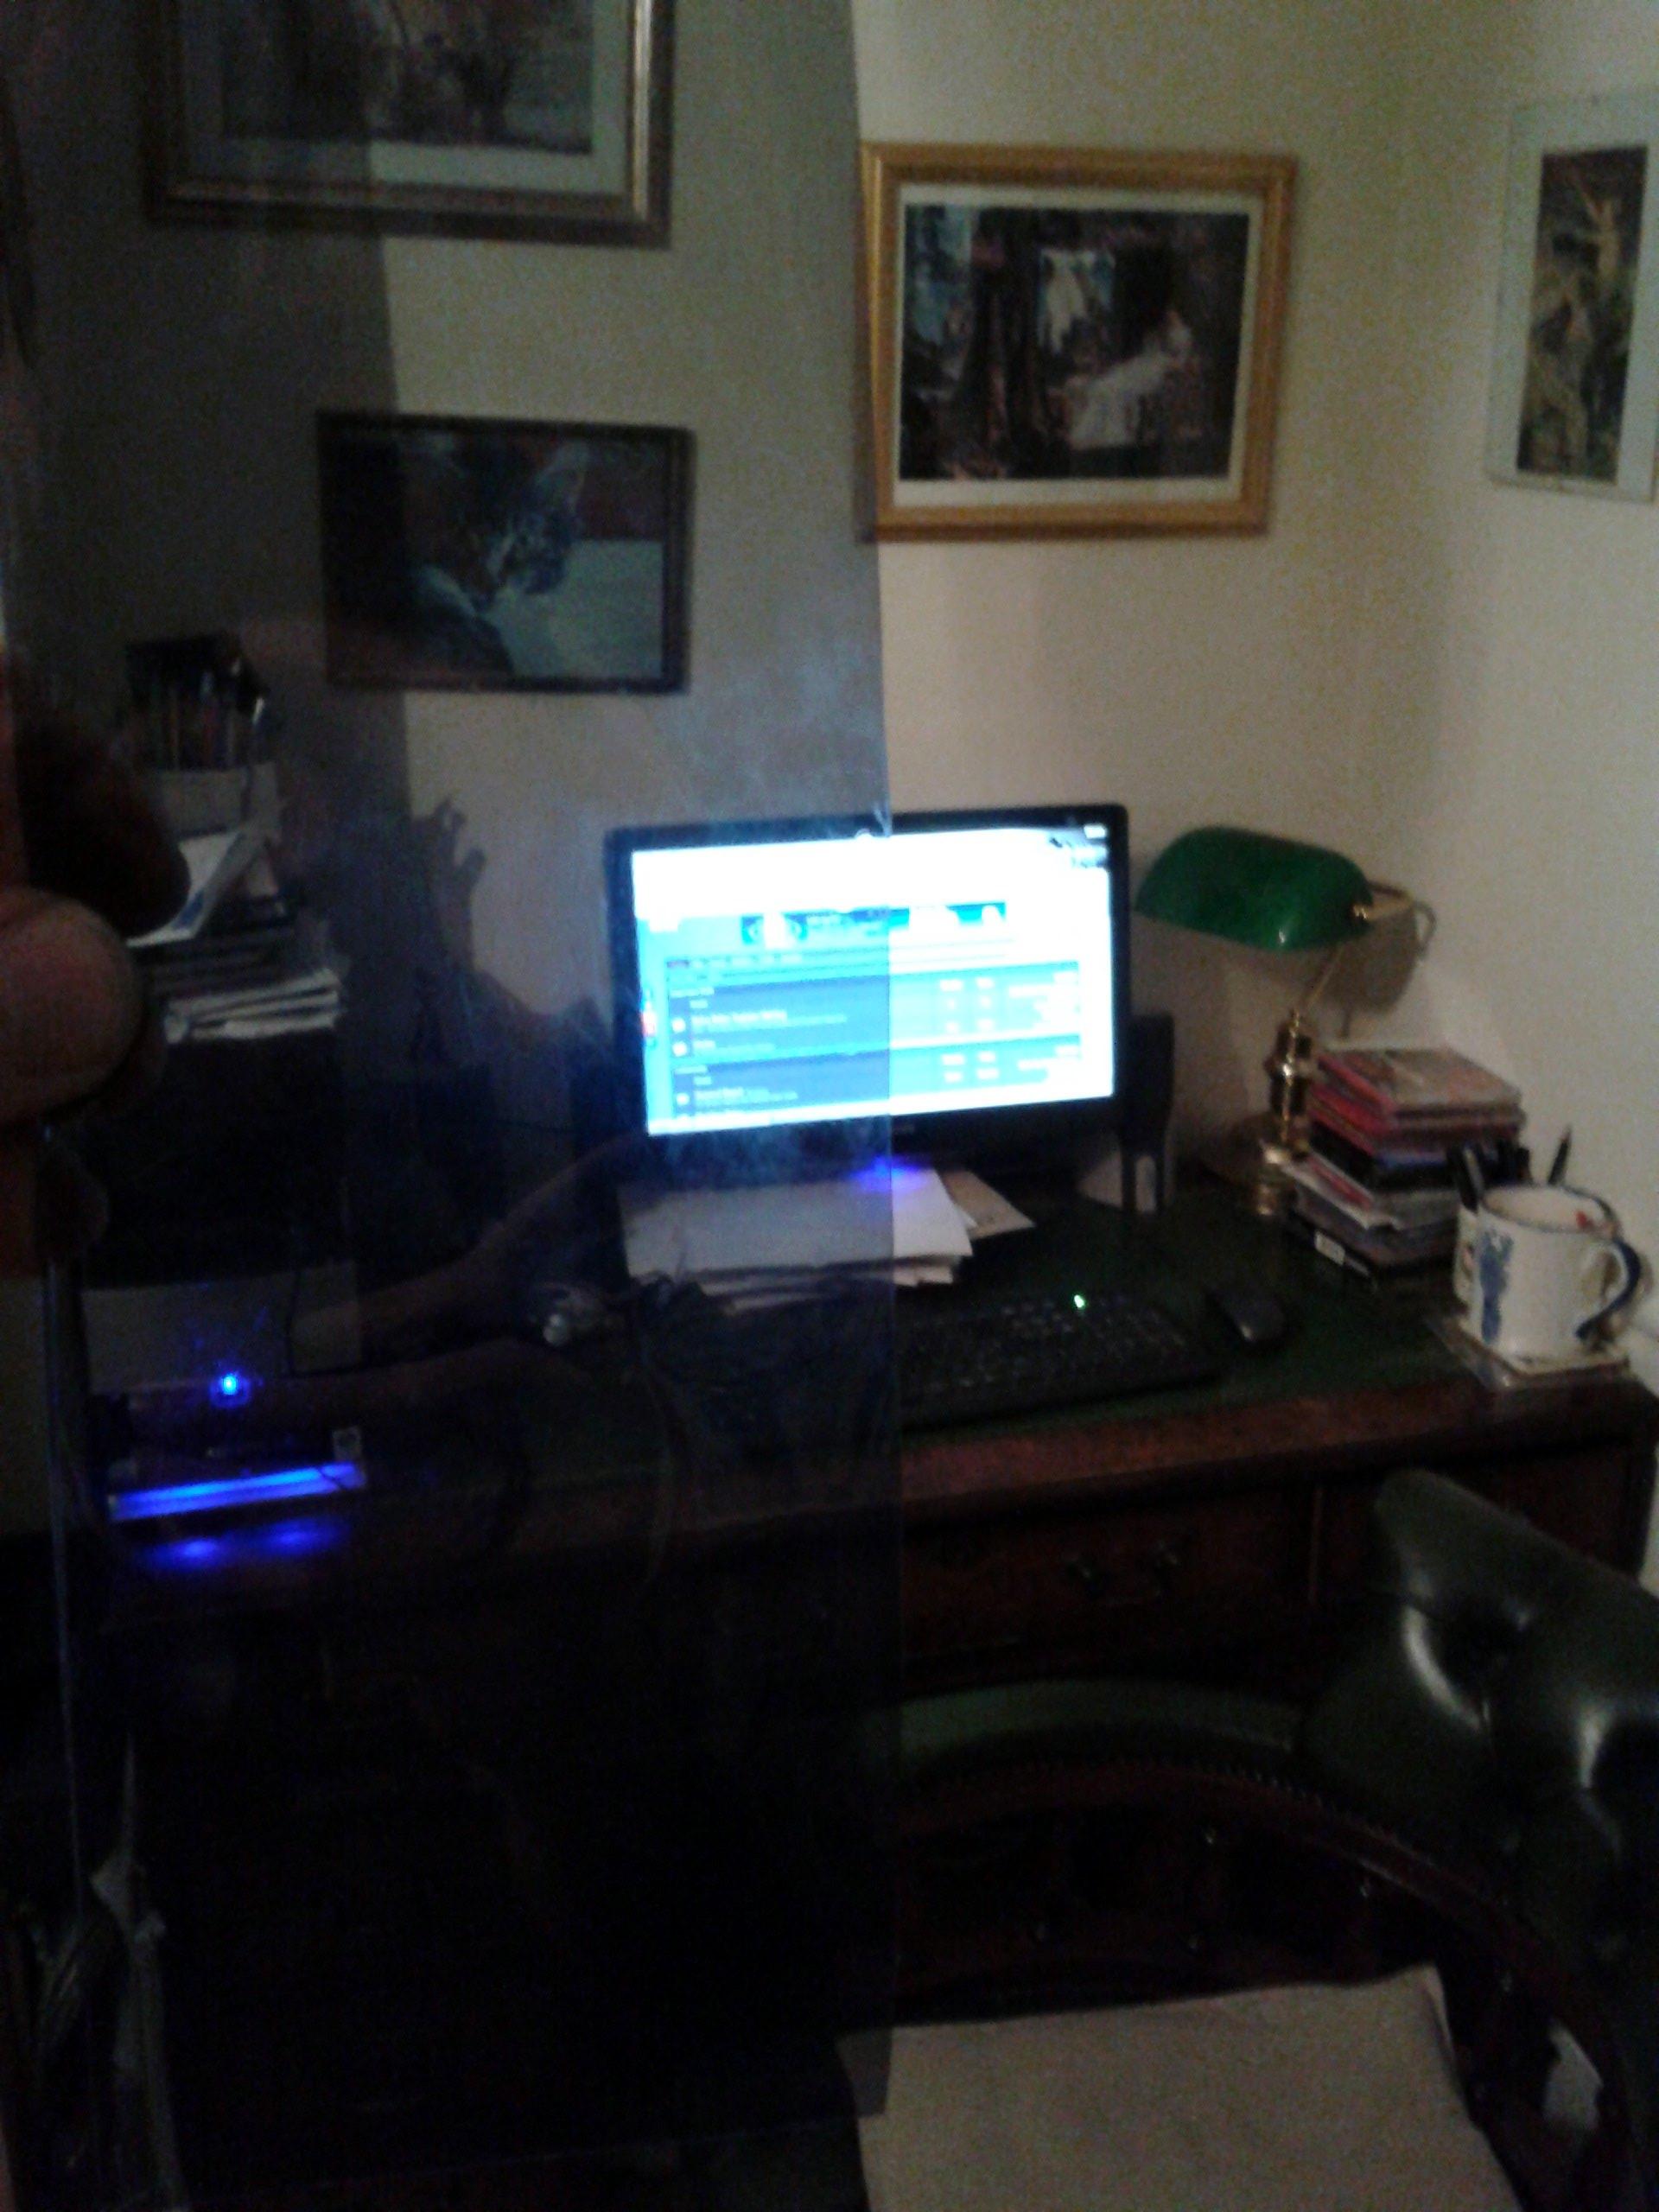
There then followed a steep learning curve on the niceties of tinting film. A few YouTube tutorials (as well as a humble pie RTFM moment) revealed the trick of using soapy water and a cushioned squeegee and I kinda got my shizzle down wid da tints pretty well. They turned out pretty good, dark enough to get the lights the correct shadiness but not so dark the LED light couldn't escape past them. This is my extremely scientific emitted-light-percentage test, holding them up against the usefully-brightly coloured Retro Rides forum page
Test fit showed promise; the inside of the housing was now hidden from sight, although in this pic you can see the relief slots I cut for the original LED units allowing light through. Glad I abandoned that idea, it would have been a nightmare to seal!
And with the simple application of the FD third brakelight wiring (simply because it was easily accessible, I had a spare loom to butcher, and the FB was outside in the rain) a test fire showed that plenty of light could still penetrate when the lights were on. Tail;

and brake;
#winning. Whatever that means. Next!
As a little departure from the main task, I noticed that the original housings only had chrome reflector bowls for the brake lights. The tail lights just had a plain plastic backing, with silver(ish) paint that really wasn't very shiny. Since I had a pair of mutilated lights I figured I may as well transfer the chromed bowls over as well.

Yeah, I know that LED light is far more directional than an incandescent bulb and most of it would be shining straight backwards out through the lens, but since I had them I might as well use them. Every little helps, as some famous fraud firm once sermonised. Here you can also see the indicator insert being glued in; I used Sikaflex because it grips like Lenny McLean and can pretty much lift the weight of the car when set. Once finished, I wanted these lights to last and never come apart ever again!
Before the inserts were glued down, I also masked up and sprayed the indicator housings with some silver as they were pretty matt too and a bit of extra shininess never hurts!
Projekt Cote enamel, the silveriest silver paint I could find. Not the best spraying the world's ever seen, mind *cough*
And of course, one thing leads to another. The method of securing the lights to the bodywork is a bit bizarre, to be honest. For those who don't know, there's an aperture in the bodyshell almost the same size as the actual light unit but with a lip that a rubber gasket on the housing butts up against. From the inside of the boot, a big metal cage fits over captive studs in the housings and basically acts as a big clamp pressing it all together. These are made from steel, zinc passivated but as with most 80s Mazda stuff, prone to rusting. So while I was prettifying things, I got down on cleaning a pair of these up
So with plenty of tough love from the wire brush and then some etch primer, a few coats of colour matched Tender Blue body colour (from Halfraud's surprisingly good and reasonable colour matching service, actually) and then galloooons of lacquer, they turned out OK

Test fit showed promise; the inside of the housing was now hidden from sight, although in this pic you can see the relief slots I cut for the original LED units allowing light through. Glad I abandoned that idea, it would have been a nightmare to seal!

And with the simple application of the FD third brakelight wiring (simply because it was easily accessible, I had a spare loom to butcher, and the FB was outside in the rain) a test fire showed that plenty of light could still penetrate when the lights were on. Tail;

and brake;

#winning. Whatever that means. Next!
As a little departure from the main task, I noticed that the original housings only had chrome reflector bowls for the brake lights. The tail lights just had a plain plastic backing, with silver(ish) paint that really wasn't very shiny. Since I had a pair of mutilated lights I figured I may as well transfer the chromed bowls over as well.

Yeah, I know that LED light is far more directional than an incandescent bulb and most of it would be shining straight backwards out through the lens, but since I had them I might as well use them. Every little helps, as some famous fraud firm once sermonised. Here you can also see the indicator insert being glued in; I used Sikaflex because it grips like Lenny McLean and can pretty much lift the weight of the car when set. Once finished, I wanted these lights to last and never come apart ever again!

Before the inserts were glued down, I also masked up and sprayed the indicator housings with some silver as they were pretty matt too and a bit of extra shininess never hurts!

Projekt Cote enamel, the silveriest silver paint I could find. Not the best spraying the world's ever seen, mind *cough*

And of course, one thing leads to another. The method of securing the lights to the bodywork is a bit bizarre, to be honest. For those who don't know, there's an aperture in the bodyshell almost the same size as the actual light unit but with a lip that a rubber gasket on the housing butts up against. From the inside of the boot, a big metal cage fits over captive studs in the housings and basically acts as a big clamp pressing it all together. These are made from steel, zinc passivated but as with most 80s Mazda stuff, prone to rusting. So while I was prettifying things, I got down on cleaning a pair of these up

So with plenty of tough love from the wire brush and then some etch primer, a few coats of colour matched Tender Blue body colour (from Halfraud's surprisingly good and reasonable colour matching service, actually) and then galloooons of lacquer, they turned out OK

Thread Starter
Senior Member
Joined: Oct 2010
Posts: 255
Likes: 1
From: England
At the indicator end of the housing are a couple of subsidiary brackets which screw to the light using teeny tiny coach screws and then their captive bolts protrude through a web in the monocoque inner wing sheet steel to locate the lights laterally. These got the same spray-up treatment for added niceness
The final main part of the jigsaw was how to seal up the rear of the housings. Obviously they originally had moulded plastic bulbholders, the receptacle for which stood quite proud from the rear of the housing. All I needed was a hole big enough to pass the three wires for the LEDs through, so it was going to leave a massive hole. Now I realise at this point I'm putting a lot of faith in LEDs reputation for being maintenance-free and lasting the life of the vehicle, but once the lights were back together there would be no way to access the LED units anyway without removing the entire front lens again. And I already knew what a ball-ache that was, plus I doubt very much they'd survive a second attempt without shattering. So it's a leap of faith, but I resolved they were all going to be irredeemably Sikaflexed together and they'd just have to keep bloody working so that's that. With this decision made, the solution became easier. Seal the whole rear of the housing up as tight as possible and try to prevent water ingress. For life, lol
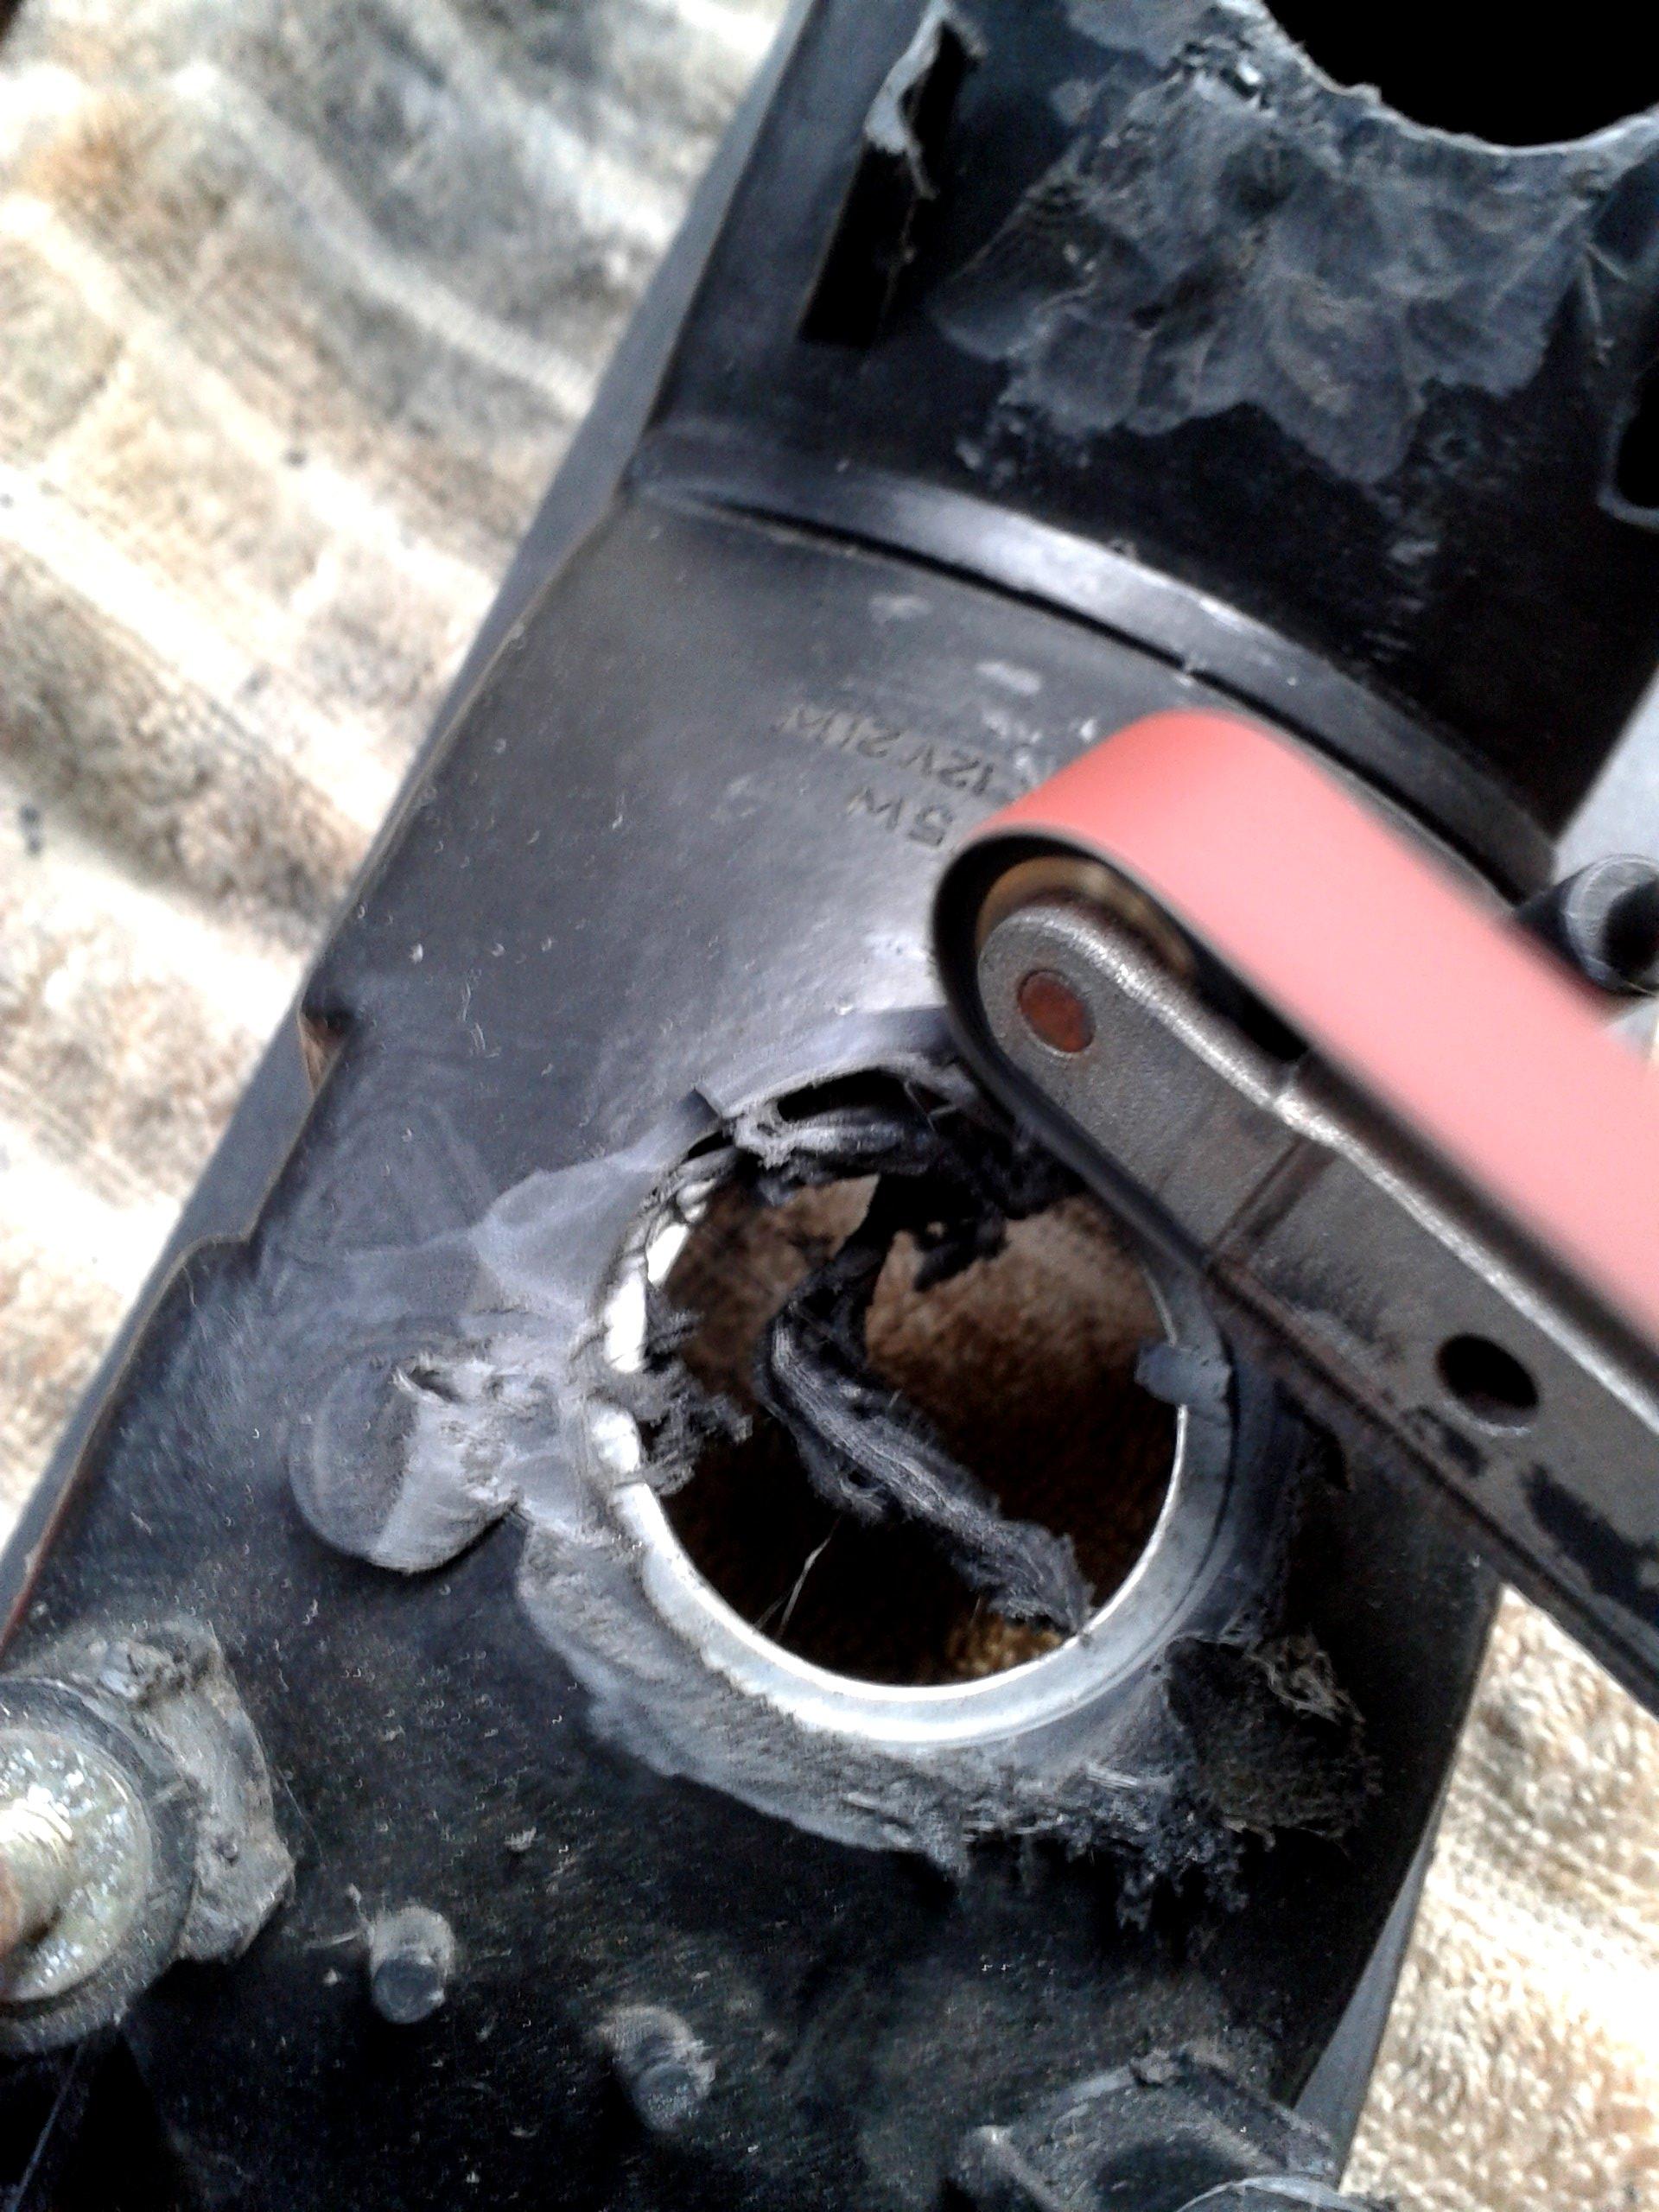
So, more butchery ensued! I used a linear sander to cut down the bulbholders flat as possible to the curve of the housing, as in the pic above. Then it was fairly simple to cut and shape some ally plates to the fit the required area
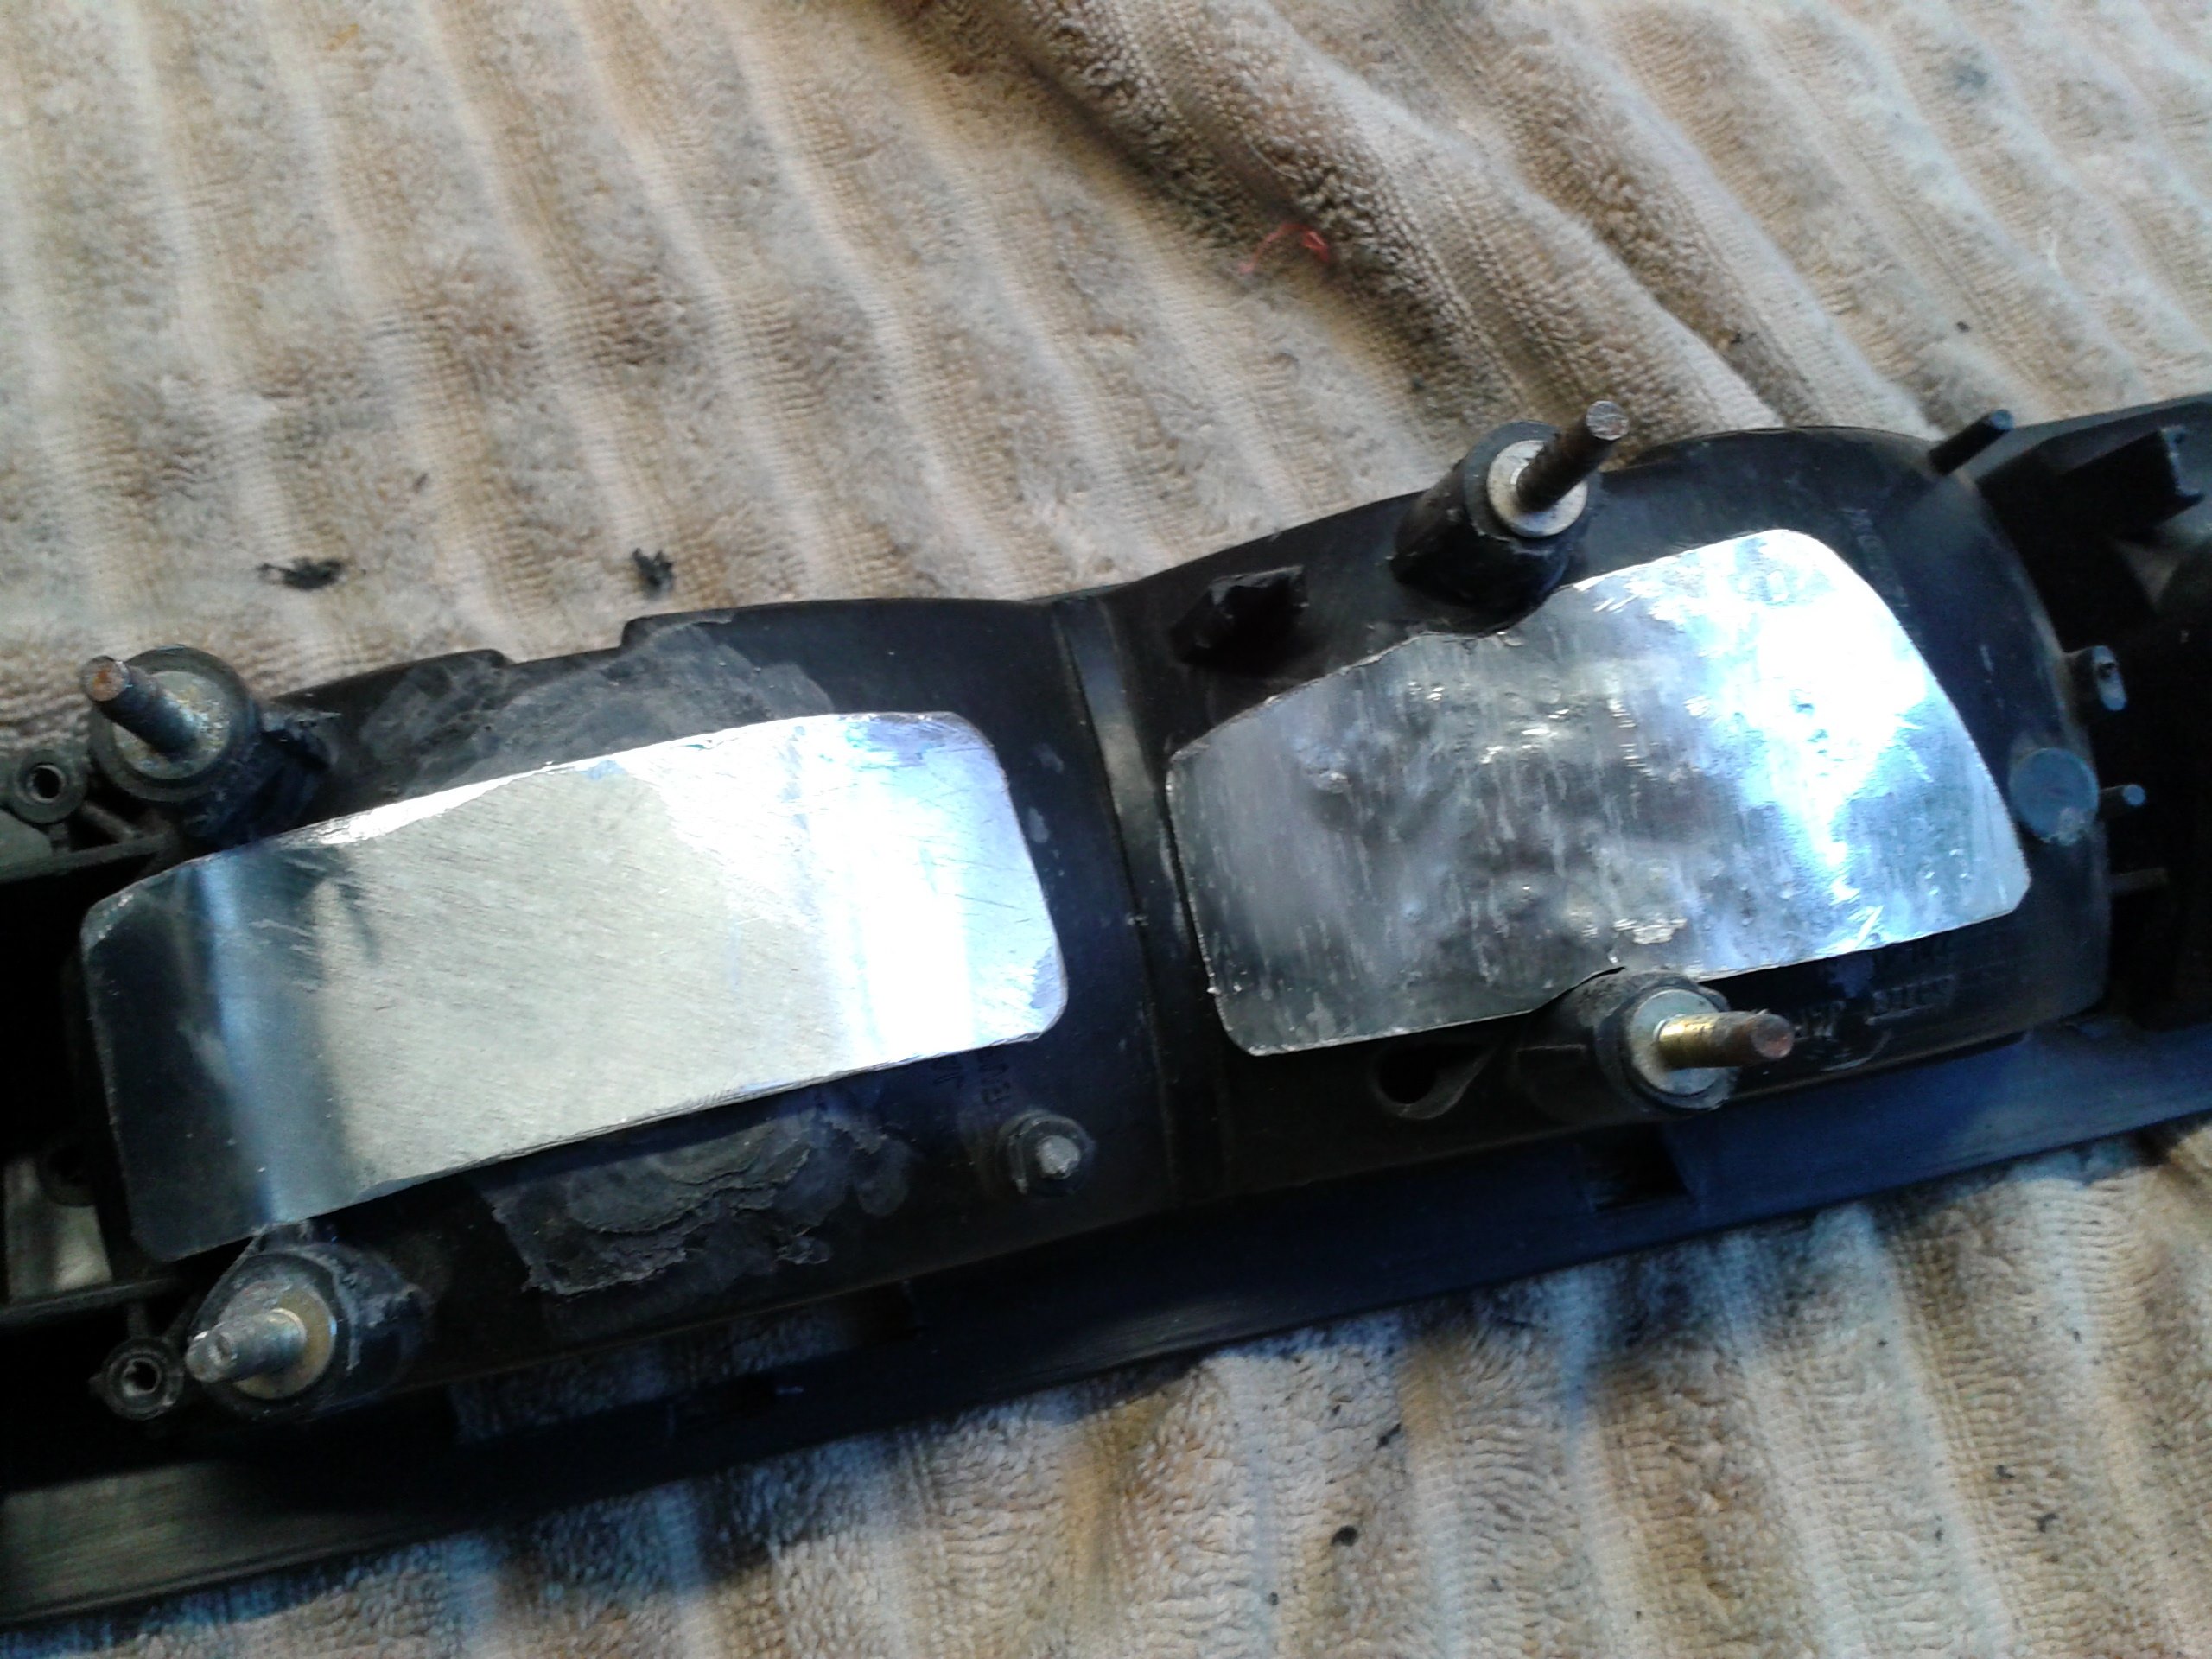
Finished up, they had two holes to bolt the LEDs through and one in the middle, fitted with a grommet to stop the wiring from chafing which would then additionally be plugged with PU sealant. The bolts also went through the plastic light housing so the whole lot would be sandwiched together with a layer of sealant in between and hopefully be robust, waterproof and long-lived. Some black enamel meant they blended in with the housing

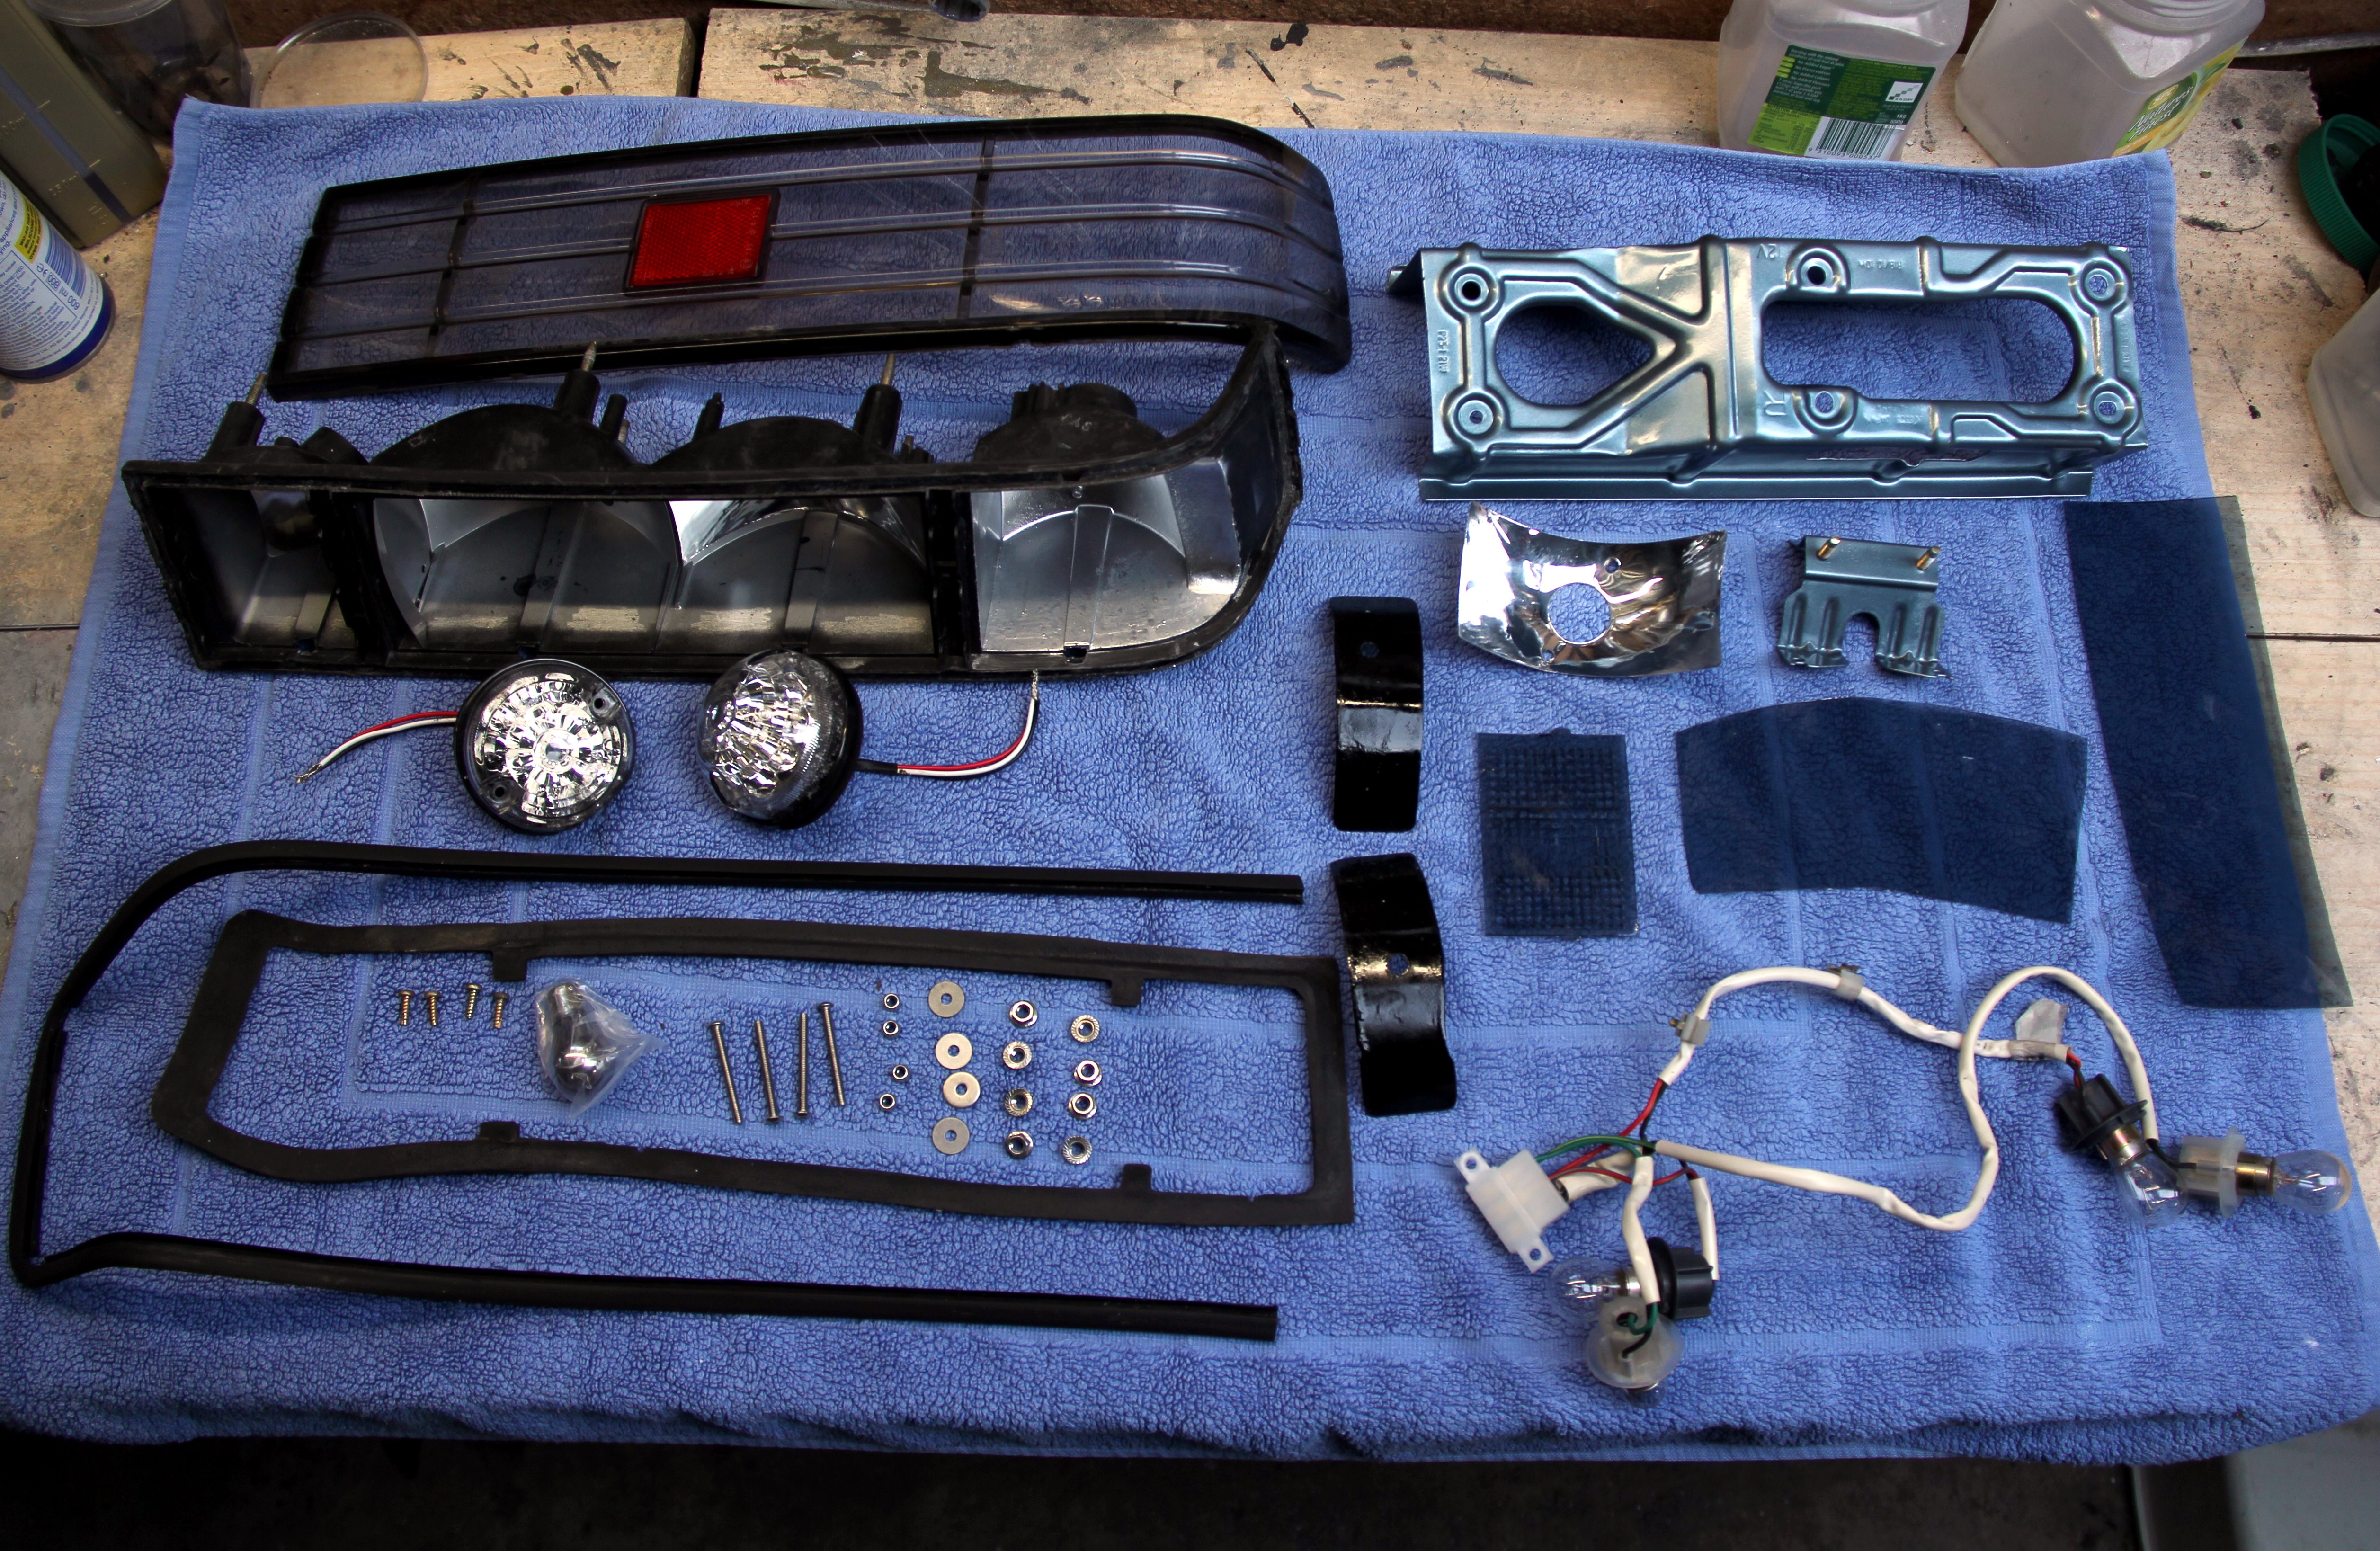
And so, finally, I was at a point where I could begin re-assembly of my take on unique, 21st Century FB taillights. Hurrah! Basically, I'd ended up with a surprisingly big kit of parts that when laid out looked a lot like this;
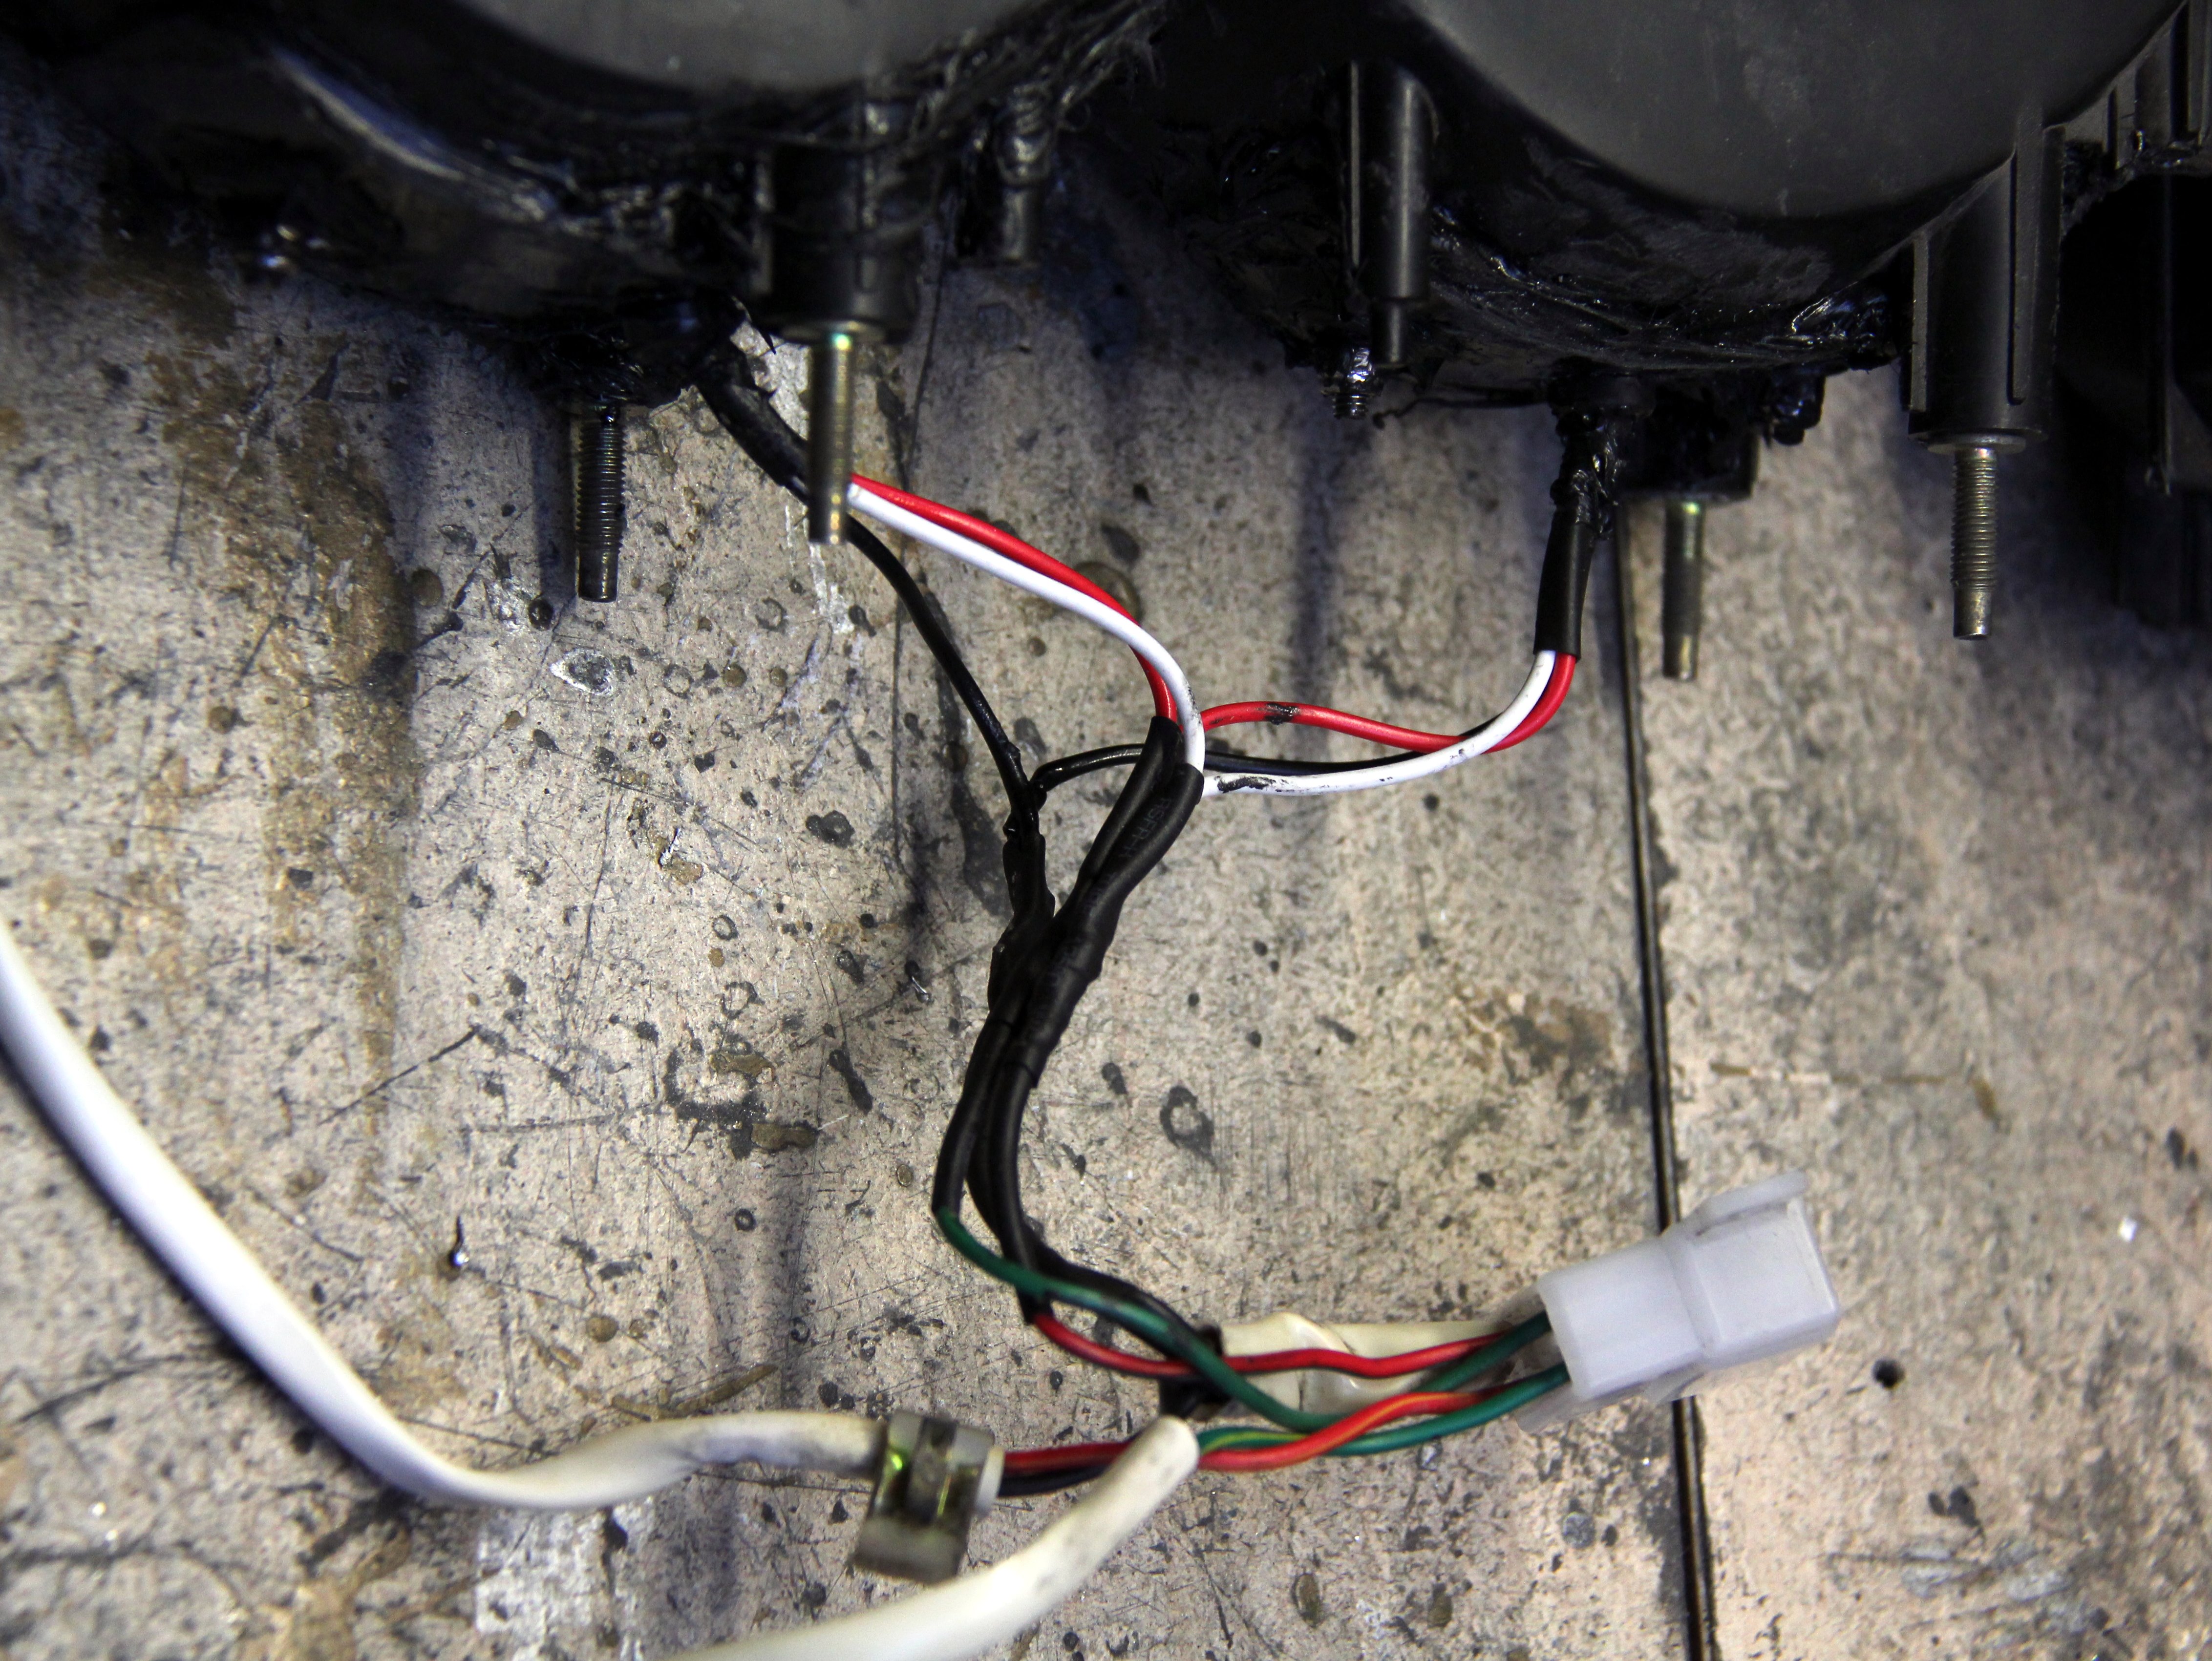
And so, on to putting them together and making them work. The FB taillights handily come with a sub-loom that stays on the light and multi-plugs into the body loom. So at least it was easy to wire the LEDs into the original wiring, even for someone of my aforementioned dunce-level electrical abilities. Slightly sucky soldering, but it will do!

There was no real point in using connectors as there was no need to separate out the LEDs from the rest of the loom once assembled, and solder seemed a more robust solution. Once tidied up and wrapped it was neat enough
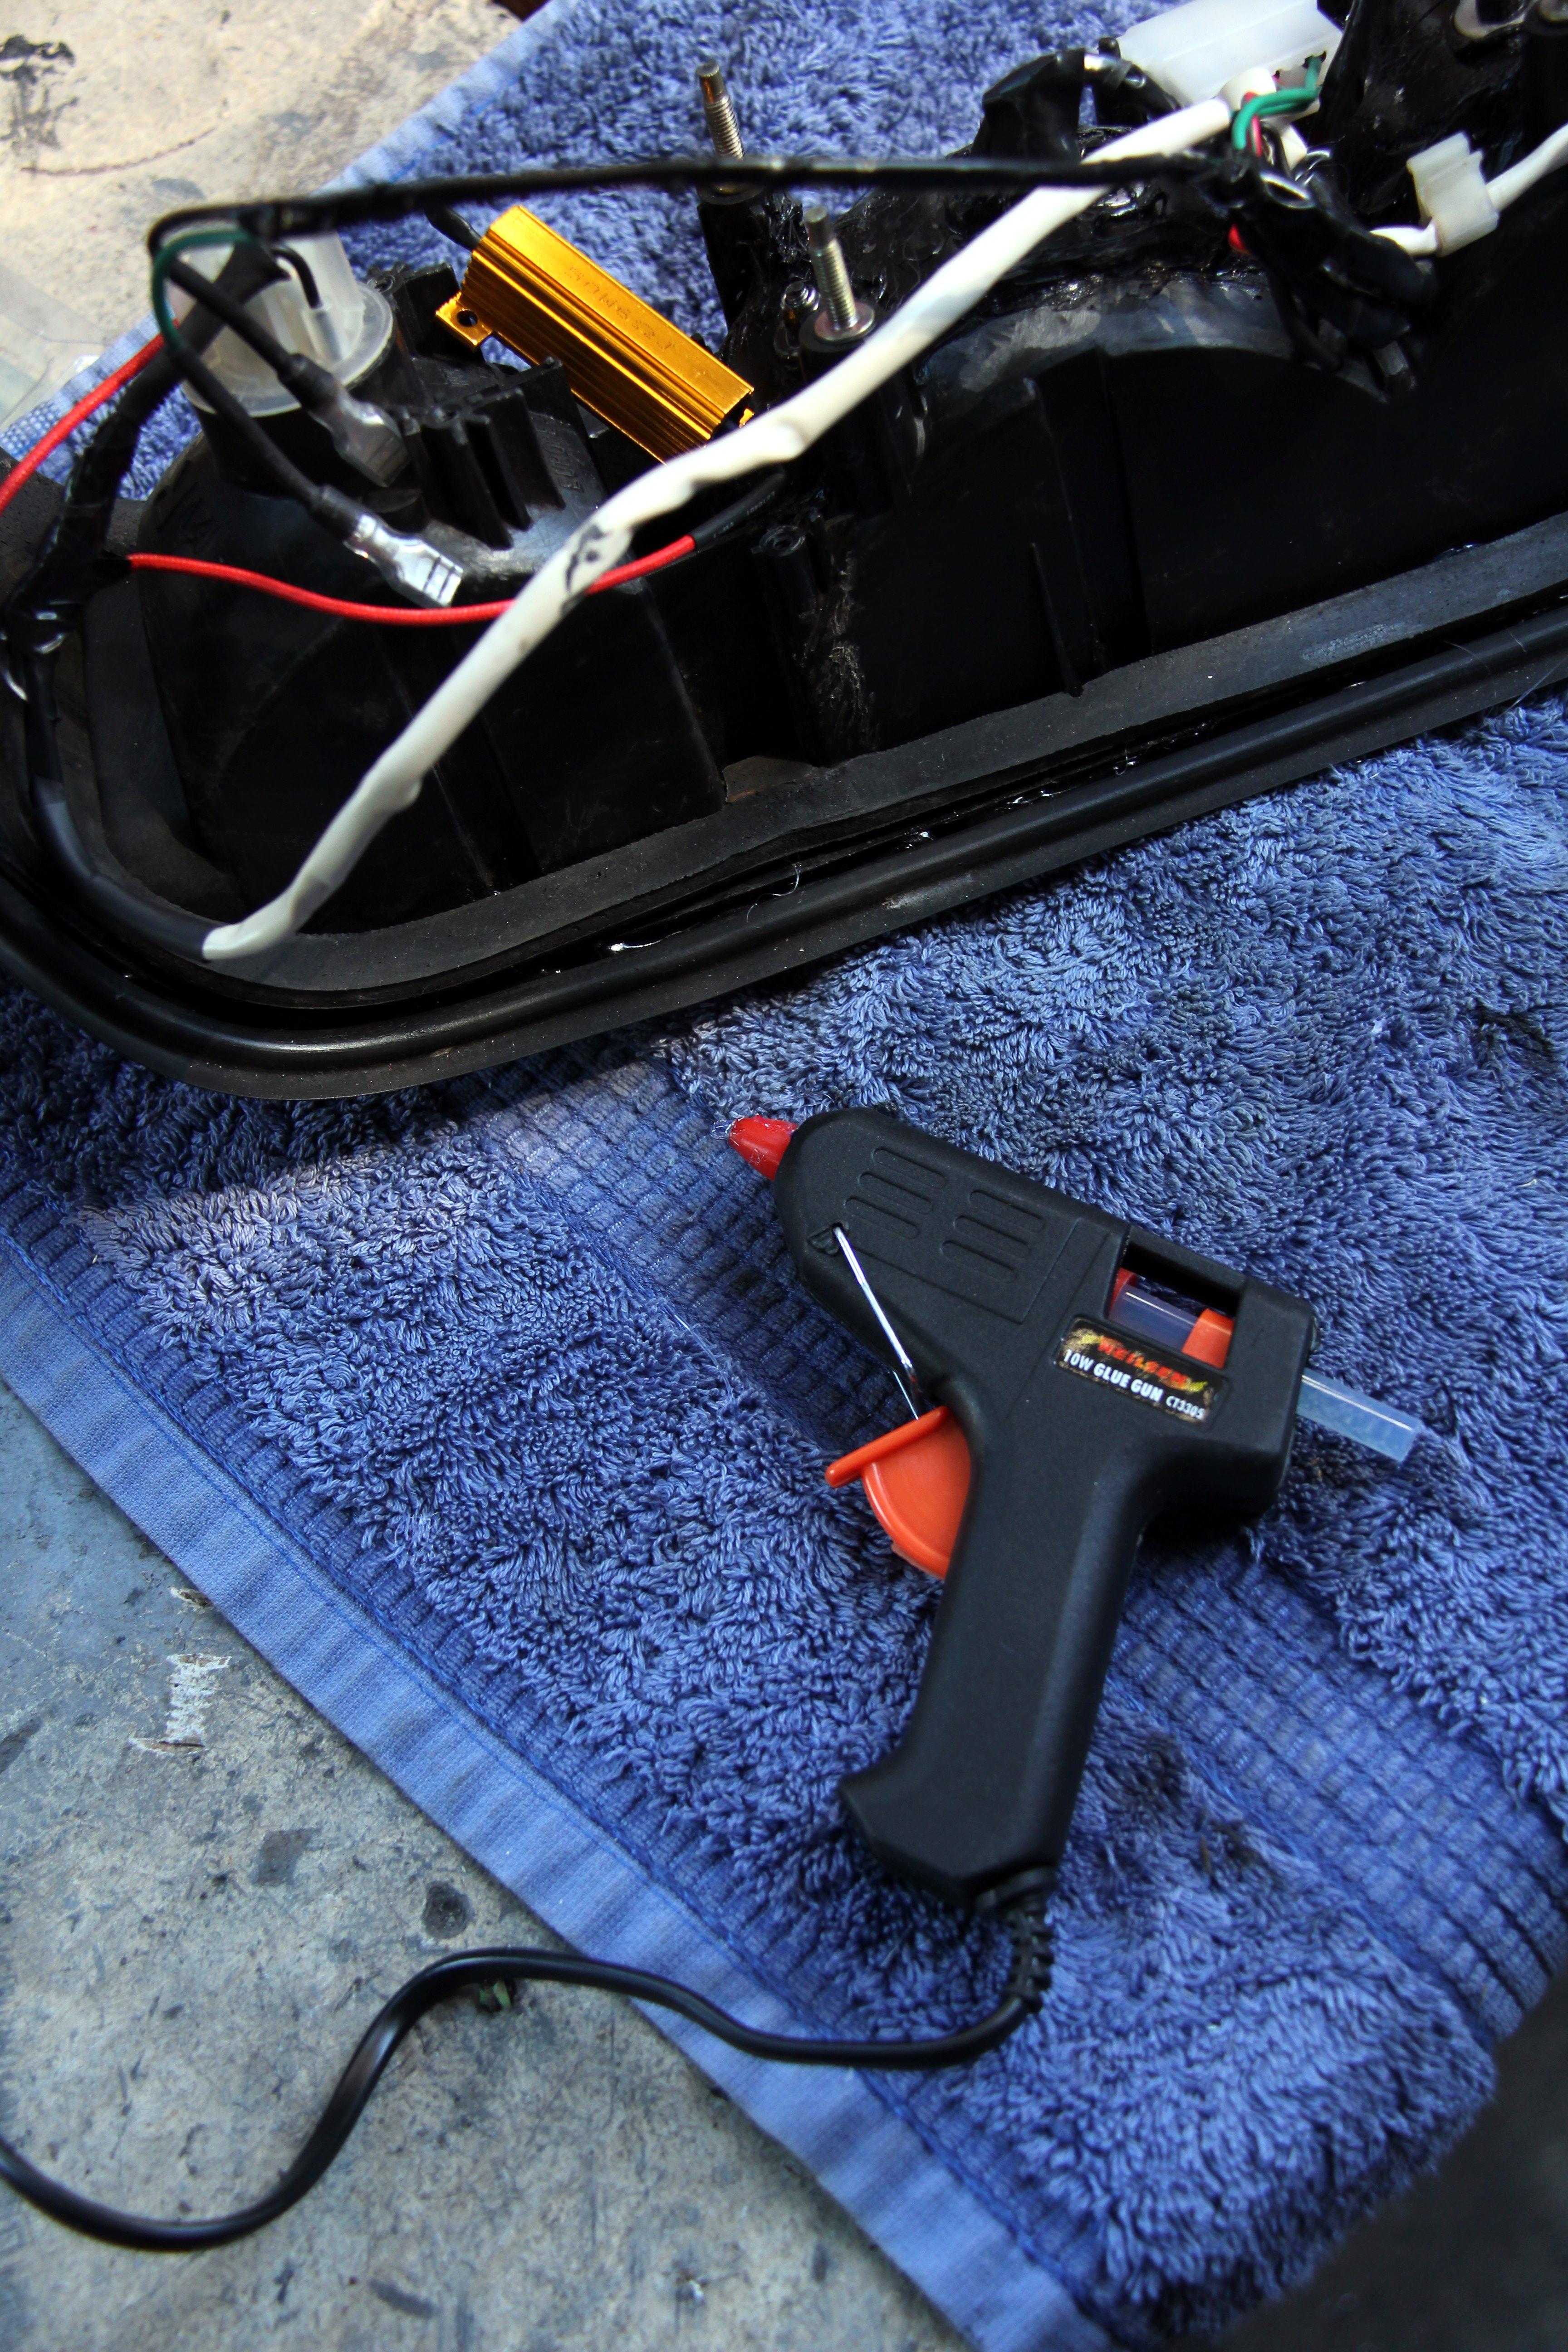
At this point I went down a bit of a blind alley. Ages ago I'd experimented with LED indicator bulbs and found, like many before, that they give an epileptically fast flash rate due to there not being enough resistance to properly operate the flasher relay. I bought some little ballast resistors and then did the decent thing; yep, chucked it all in a drawer and forgot about them. However, now it occurred that it would be nice to have flashy (arf) LED indicydators to match the brake/tail so I dug them out from Shelob's lair and warmed up the soldering iron again
Slightly less sucky soldering! However, when all done and tidied, they looked nice and very modern but they didn't actually work very well. What would happen was the LEDs would light, but they'd flash stroboscopically, like every third microsecond before going off at the normal flash interval. No idea why, maybe the resistors are the wrong rating, maybe the bulbs themselves were faulty. However, nice as they looked, I wasn't going to give some militant MOT man the opportunity to fail the car over something so daft, and I certainly don't need to give the cretinous brain-damaged drone that is the average motorist any added excuse to smash into me at random, so they came back out again
Shame really, they were certainly hella bright and funky. I'd even made some natty little ally brackets to mount the ballasts on. Never mind. A simpler solution that saved a fair amount of soldering presented itself
A whole passel of chrome-but-flash-orange indicator bulbs from good ol' ebay for less than a quid per bulb. Like, seriously, how is this even possible? Who's making money from this? Anyhoo, I figured even if they blow up a lot, I've plenty of spares, lol. And being chrome, there's no risk of the fried-eggified orange bulb syndrome that is one of the most unforgivable fashion faux pas in car modification! So, indicator cul-de-sac reversed out of, I could get on with Sikflexing the living sheeite out of the housings. Now going back now!
There followed a lot of wasted time waiting for stuff to dry, especially as this was January so wet, cold and generally very unconducive to sealant going off quickly. Much to the Waff's irritation, a good deal of time spent lying around on the kitchen radiator followed (the housings, not me!)


The final main part of the jigsaw was how to seal up the rear of the housings. Obviously they originally had moulded plastic bulbholders, the receptacle for which stood quite proud from the rear of the housing. All I needed was a hole big enough to pass the three wires for the LEDs through, so it was going to leave a massive hole. Now I realise at this point I'm putting a lot of faith in LEDs reputation for being maintenance-free and lasting the life of the vehicle, but once the lights were back together there would be no way to access the LED units anyway without removing the entire front lens again. And I already knew what a ball-ache that was, plus I doubt very much they'd survive a second attempt without shattering. So it's a leap of faith, but I resolved they were all going to be irredeemably Sikaflexed together and they'd just have to keep bloody working so that's that. With this decision made, the solution became easier. Seal the whole rear of the housing up as tight as possible and try to prevent water ingress. For life, lol

So, more butchery ensued! I used a linear sander to cut down the bulbholders flat as possible to the curve of the housing, as in the pic above. Then it was fairly simple to cut and shape some ally plates to the fit the required area

Finished up, they had two holes to bolt the LEDs through and one in the middle, fitted with a grommet to stop the wiring from chafing which would then additionally be plugged with PU sealant. The bolts also went through the plastic light housing so the whole lot would be sandwiched together with a layer of sealant in between and hopefully be robust, waterproof and long-lived. Some black enamel meant they blended in with the housing

And so, finally, I was at a point where I could begin re-assembly of my take on unique, 21st Century FB taillights. Hurrah! Basically, I'd ended up with a surprisingly big kit of parts that when laid out looked a lot like this;

And so, on to putting them together and making them work. The FB taillights handily come with a sub-loom that stays on the light and multi-plugs into the body loom. So at least it was easy to wire the LEDs into the original wiring, even for someone of my aforementioned dunce-level electrical abilities. Slightly sucky soldering, but it will do!

There was no real point in using connectors as there was no need to separate out the LEDs from the rest of the loom once assembled, and solder seemed a more robust solution. Once tidied up and wrapped it was neat enough

At this point I went down a bit of a blind alley. Ages ago I'd experimented with LED indicator bulbs and found, like many before, that they give an epileptically fast flash rate due to there not being enough resistance to properly operate the flasher relay. I bought some little ballast resistors and then did the decent thing; yep, chucked it all in a drawer and forgot about them. However, now it occurred that it would be nice to have flashy (arf) LED indicydators to match the brake/tail so I dug them out from Shelob's lair and warmed up the soldering iron again

Slightly less sucky soldering! However, when all done and tidied, they looked nice and very modern but they didn't actually work very well. What would happen was the LEDs would light, but they'd flash stroboscopically, like every third microsecond before going off at the normal flash interval. No idea why, maybe the resistors are the wrong rating, maybe the bulbs themselves were faulty. However, nice as they looked, I wasn't going to give some militant MOT man the opportunity to fail the car over something so daft, and I certainly don't need to give the cretinous brain-damaged drone that is the average motorist any added excuse to smash into me at random, so they came back out again

Shame really, they were certainly hella bright and funky. I'd even made some natty little ally brackets to mount the ballasts on. Never mind. A simpler solution that saved a fair amount of soldering presented itself

A whole passel of chrome-but-flash-orange indicator bulbs from good ol' ebay for less than a quid per bulb. Like, seriously, how is this even possible? Who's making money from this? Anyhoo, I figured even if they blow up a lot, I've plenty of spares, lol. And being chrome, there's no risk of the fried-eggified orange bulb syndrome that is one of the most unforgivable fashion faux pas in car modification! So, indicator cul-de-sac reversed out of, I could get on with Sikflexing the living sheeite out of the housings. Now going back now!

There followed a lot of wasted time waiting for stuff to dry, especially as this was January so wet, cold and generally very unconducive to sealant going off quickly. Much to the Waff's irritation, a good deal of time spent lying around on the kitchen radiator followed (the housings, not me!)

Thread Starter
Senior Member
Joined: Oct 2010
Posts: 255
Likes: 1
From: England
Whilst I was almost literally waiting for paint to dry, I did some thinking (it does happen sometimes). I admit to slight paranoia resulting from having been crashed into a few times, but I realised that one of the problems with both rear lights doing brake and tail is that some dozy motorists might not easily differentiate the two, especially if they're not paying much attention. I guess this is probably why only one of each bulb performed each function in the first place. What was needed was some kind of auxiliary brake light, one that would make it unequivocal that the car was absolutely stopping and would you please not ram it up the ****.... yeah, the same evolutionary process that led to the high-level brake light in the first place. Typical, like all amateur home philosophers, I found my thought path had been fully explored before. Still at least independent thought corroborates that it must be a good idea! Soooo...

I got hold of as subtle as possible a flush-fit LED third brake light. It's a quality thing, Hella-made and comparatively expensive but a level or two above the average eBay tat. A bit of marking up on a masking tape template and the next step was to insert some mounts for it. The TWR spoiler is pretty thick fibreglass so I felt safe suing aluminium rivnuts. With my not-so-elegantly repaired rivnut tool, lol

The most difficult bit was getting the wiring through to the boot. I wasn't about to take the spolier off because it's an absolute pig of a job; the front mounts are hidden within three layers of sheet metal and almost impossible to reach for anyone without the manual dexterity of a Siamang Gibbon. Plus you need four hands to line up the bolts with their nuts along the trailing edge... no, it wasn't about to happen. So, I drilled a hole through from the back face of the spoiler, then one to match up from inside the boot. This meant I then had to thread the wire through two 6mm holes at 90� to each other, with absolutely no access from inside whatsoever. After a few abortive attempts that shortened my life and good humour by a considerable margin, I came up with the bodgetastic method of a giant bodkin. A length of thick wire, bent to the right curve to negotiate both holes and with the wire securely taped to it. even this took several attempts to make work, as the edge of the holes tended to scrape through the tape and the wire would come off right at the last moment. Fortunately there was about three metres of the stuff so I could afford to lose a bit and eventually the Bodkin Method� resulted in the wire being inside the boot. Hurrah!
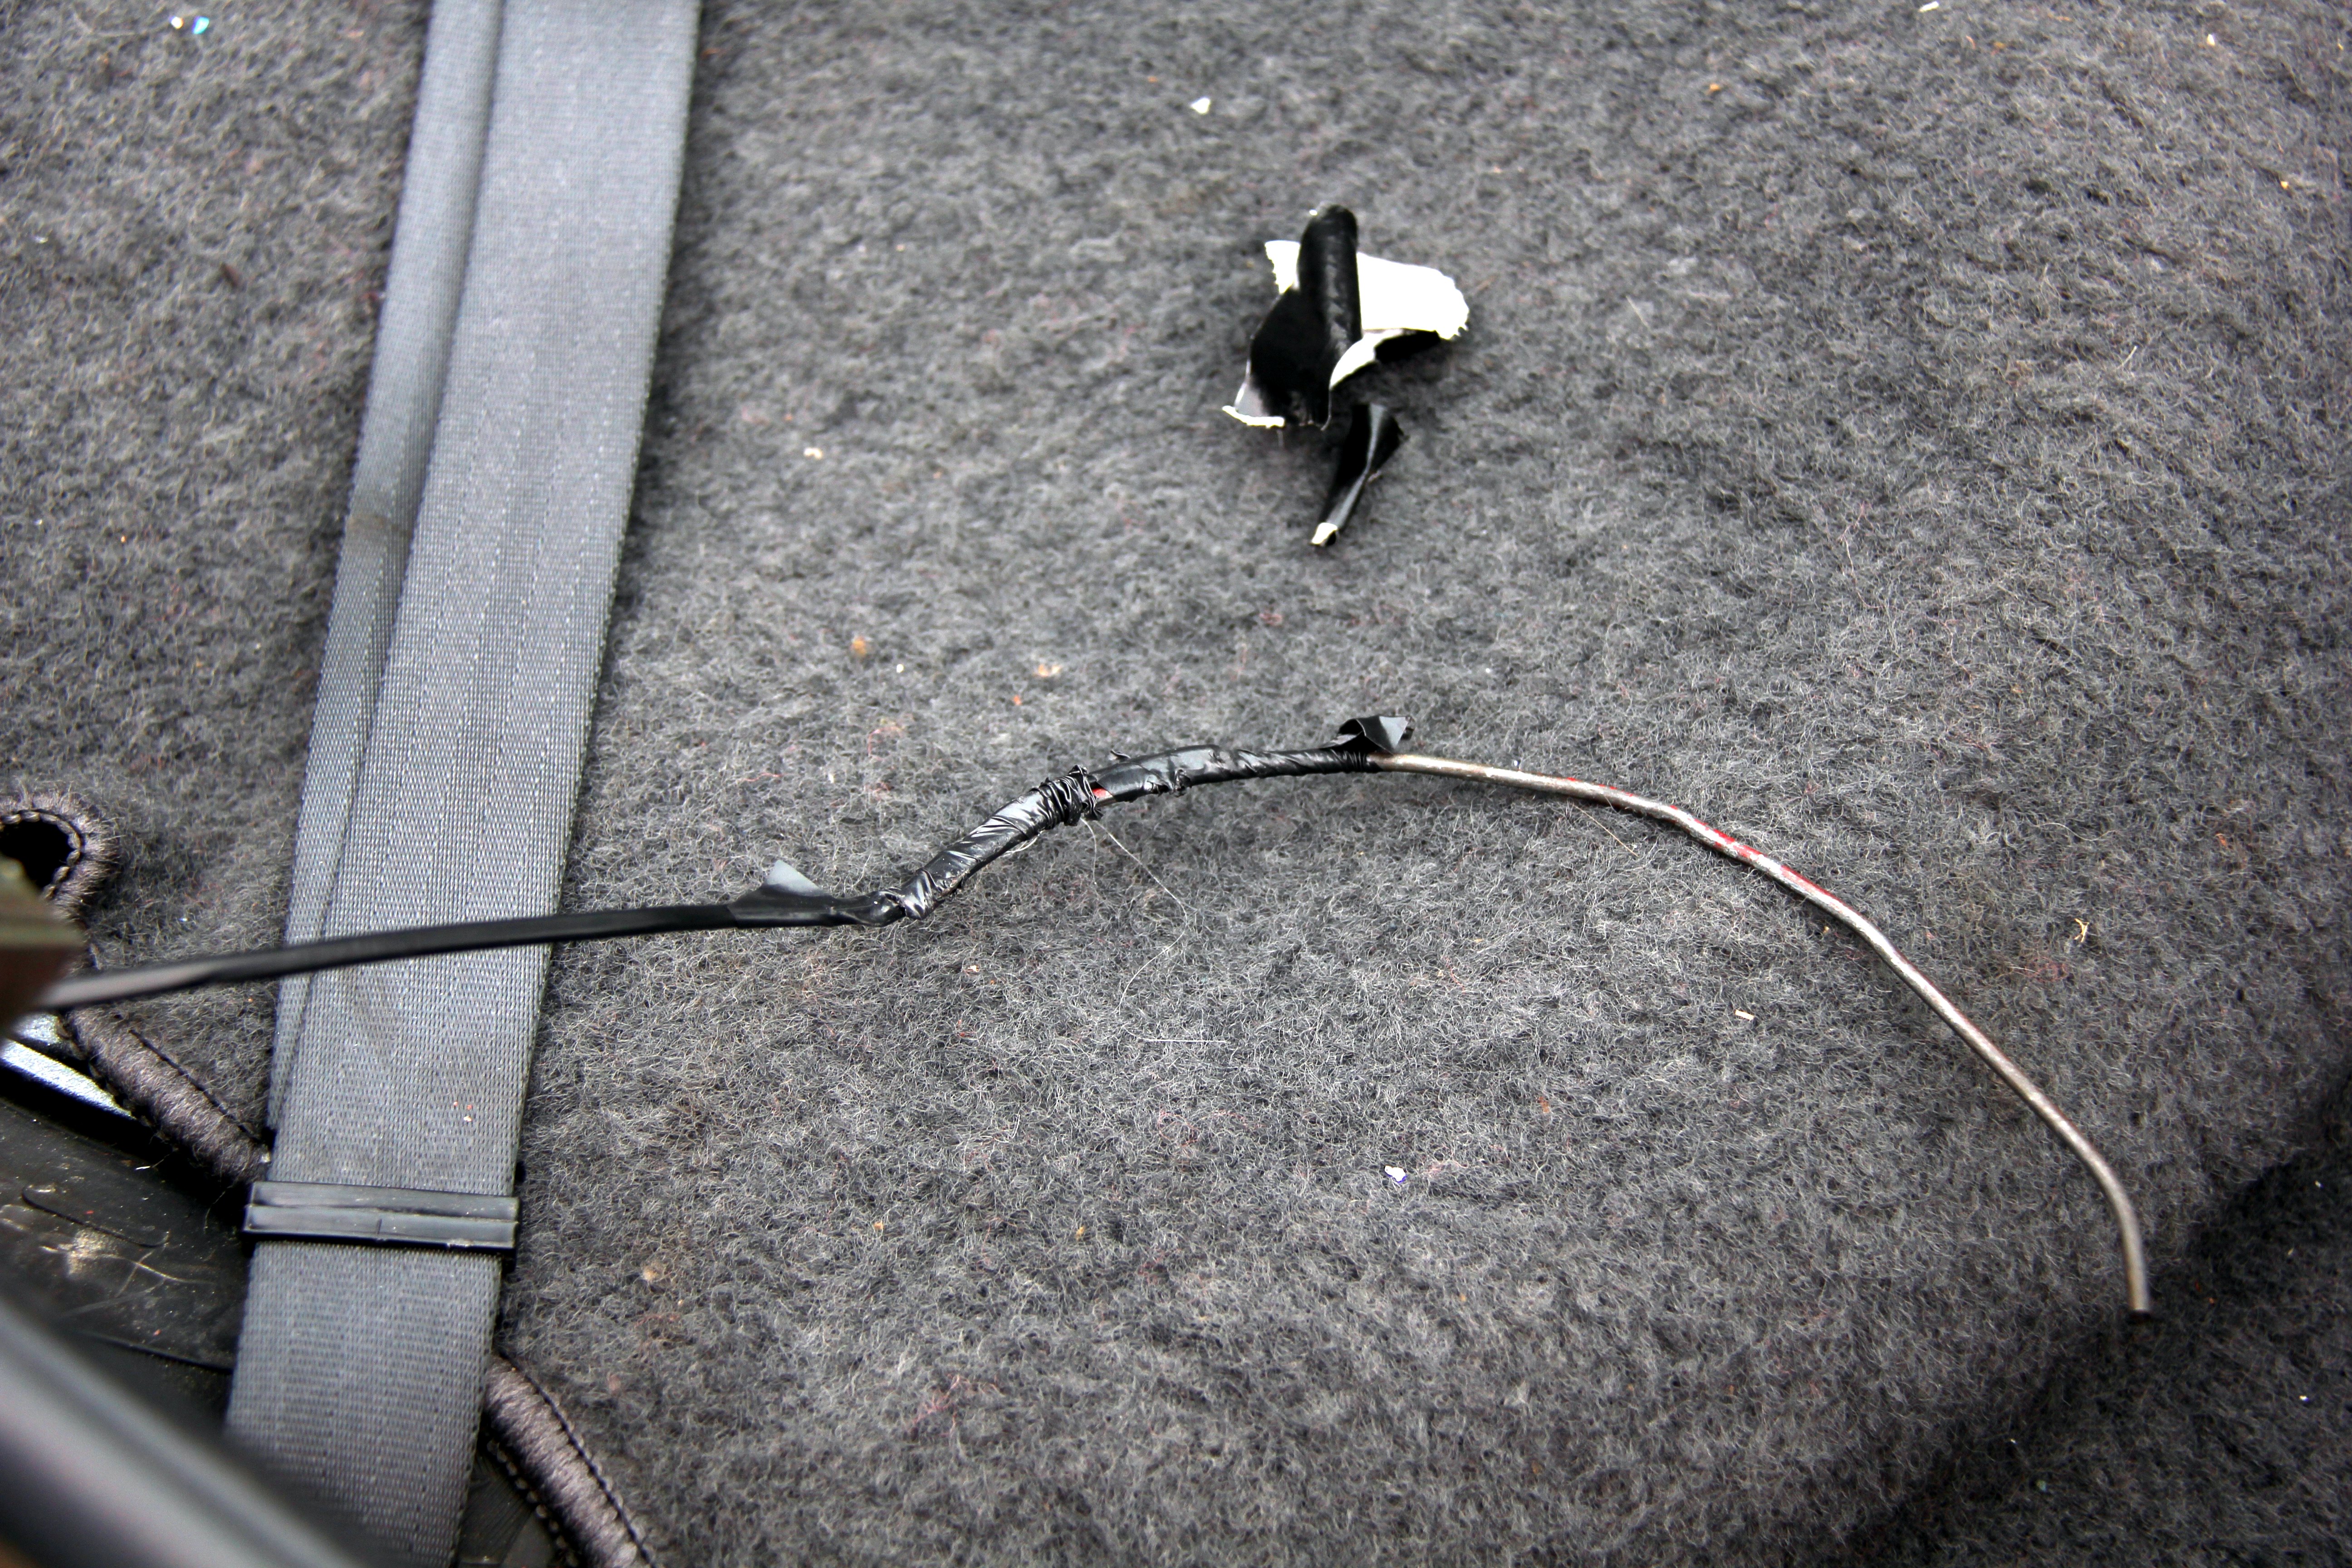
Then plenty of ol' faithful sealant (don't worry, I tidied this up before screwing the light unit down) to make sure it all stayed waterproof;
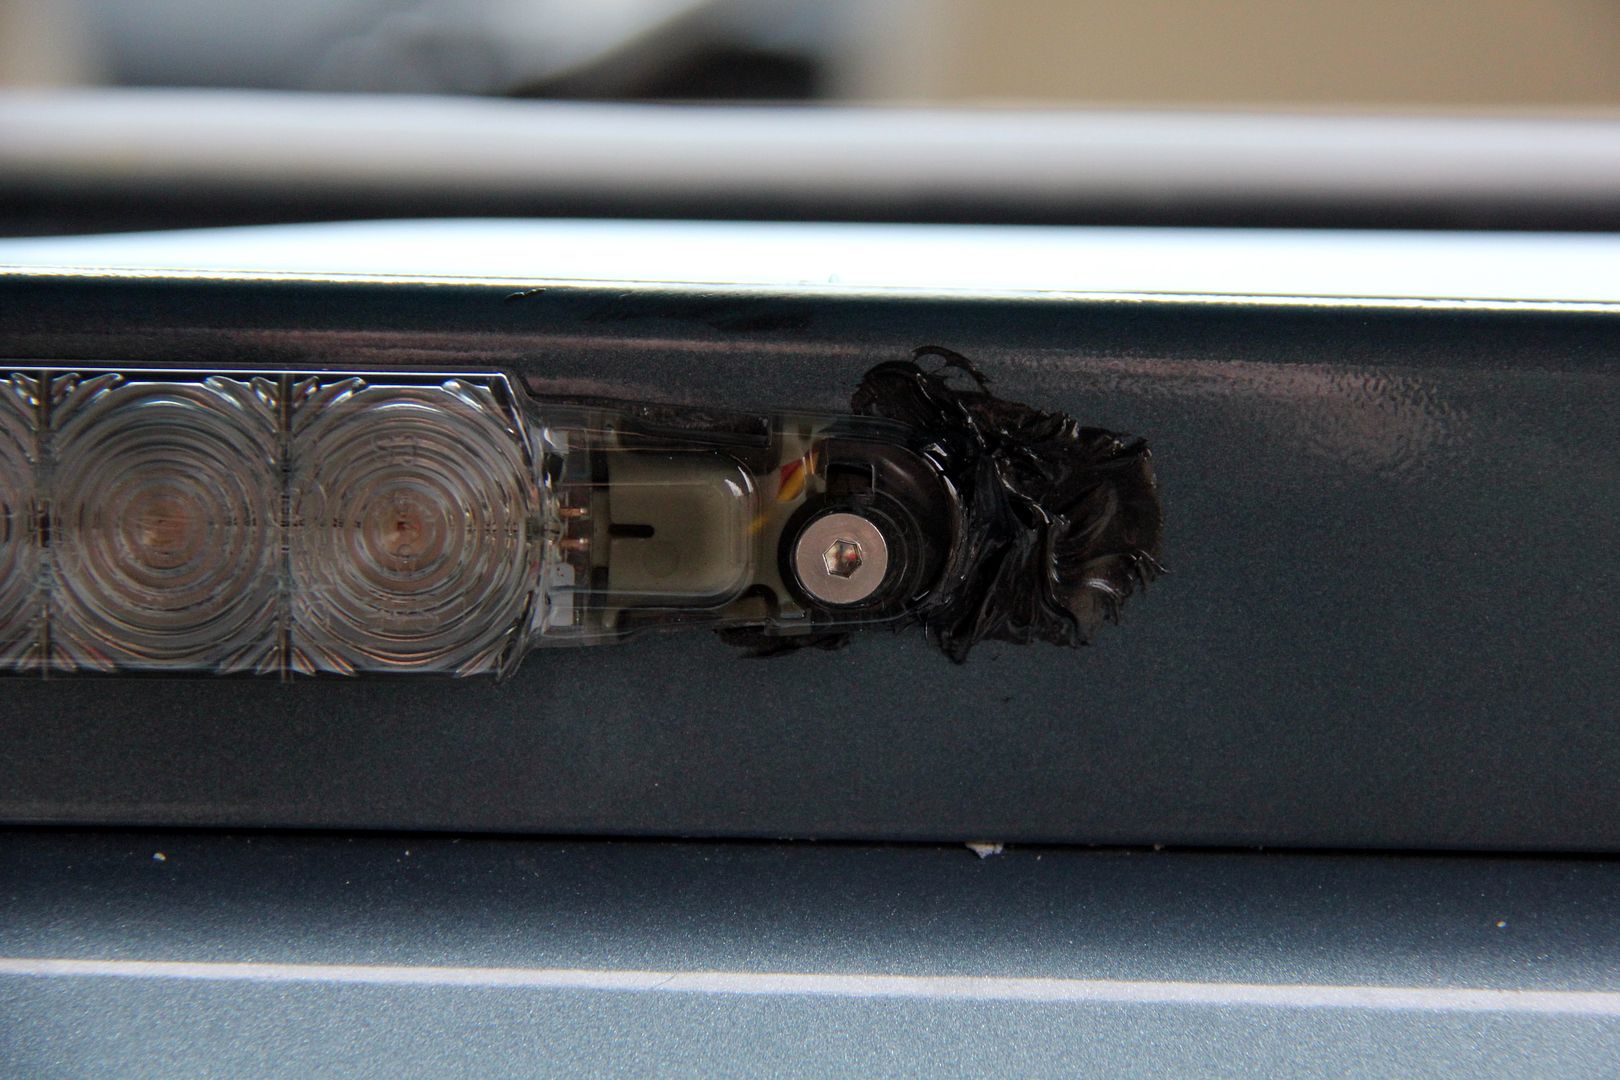
...and we had a nice, unobtrusive third brake light to make sure a) any pernicious MOT-type dudes would be kept quiet and b) hopefully no utter buffoons will be crashing into me. I like it because you barely notice it's there until lit and even if you do, it kinda looks like it was always supposed to be there (#whatwouldChipdo?)

I simply spliced a couple of wires from the offside light loom to power it, and with the assistance of the kids we checked it worked

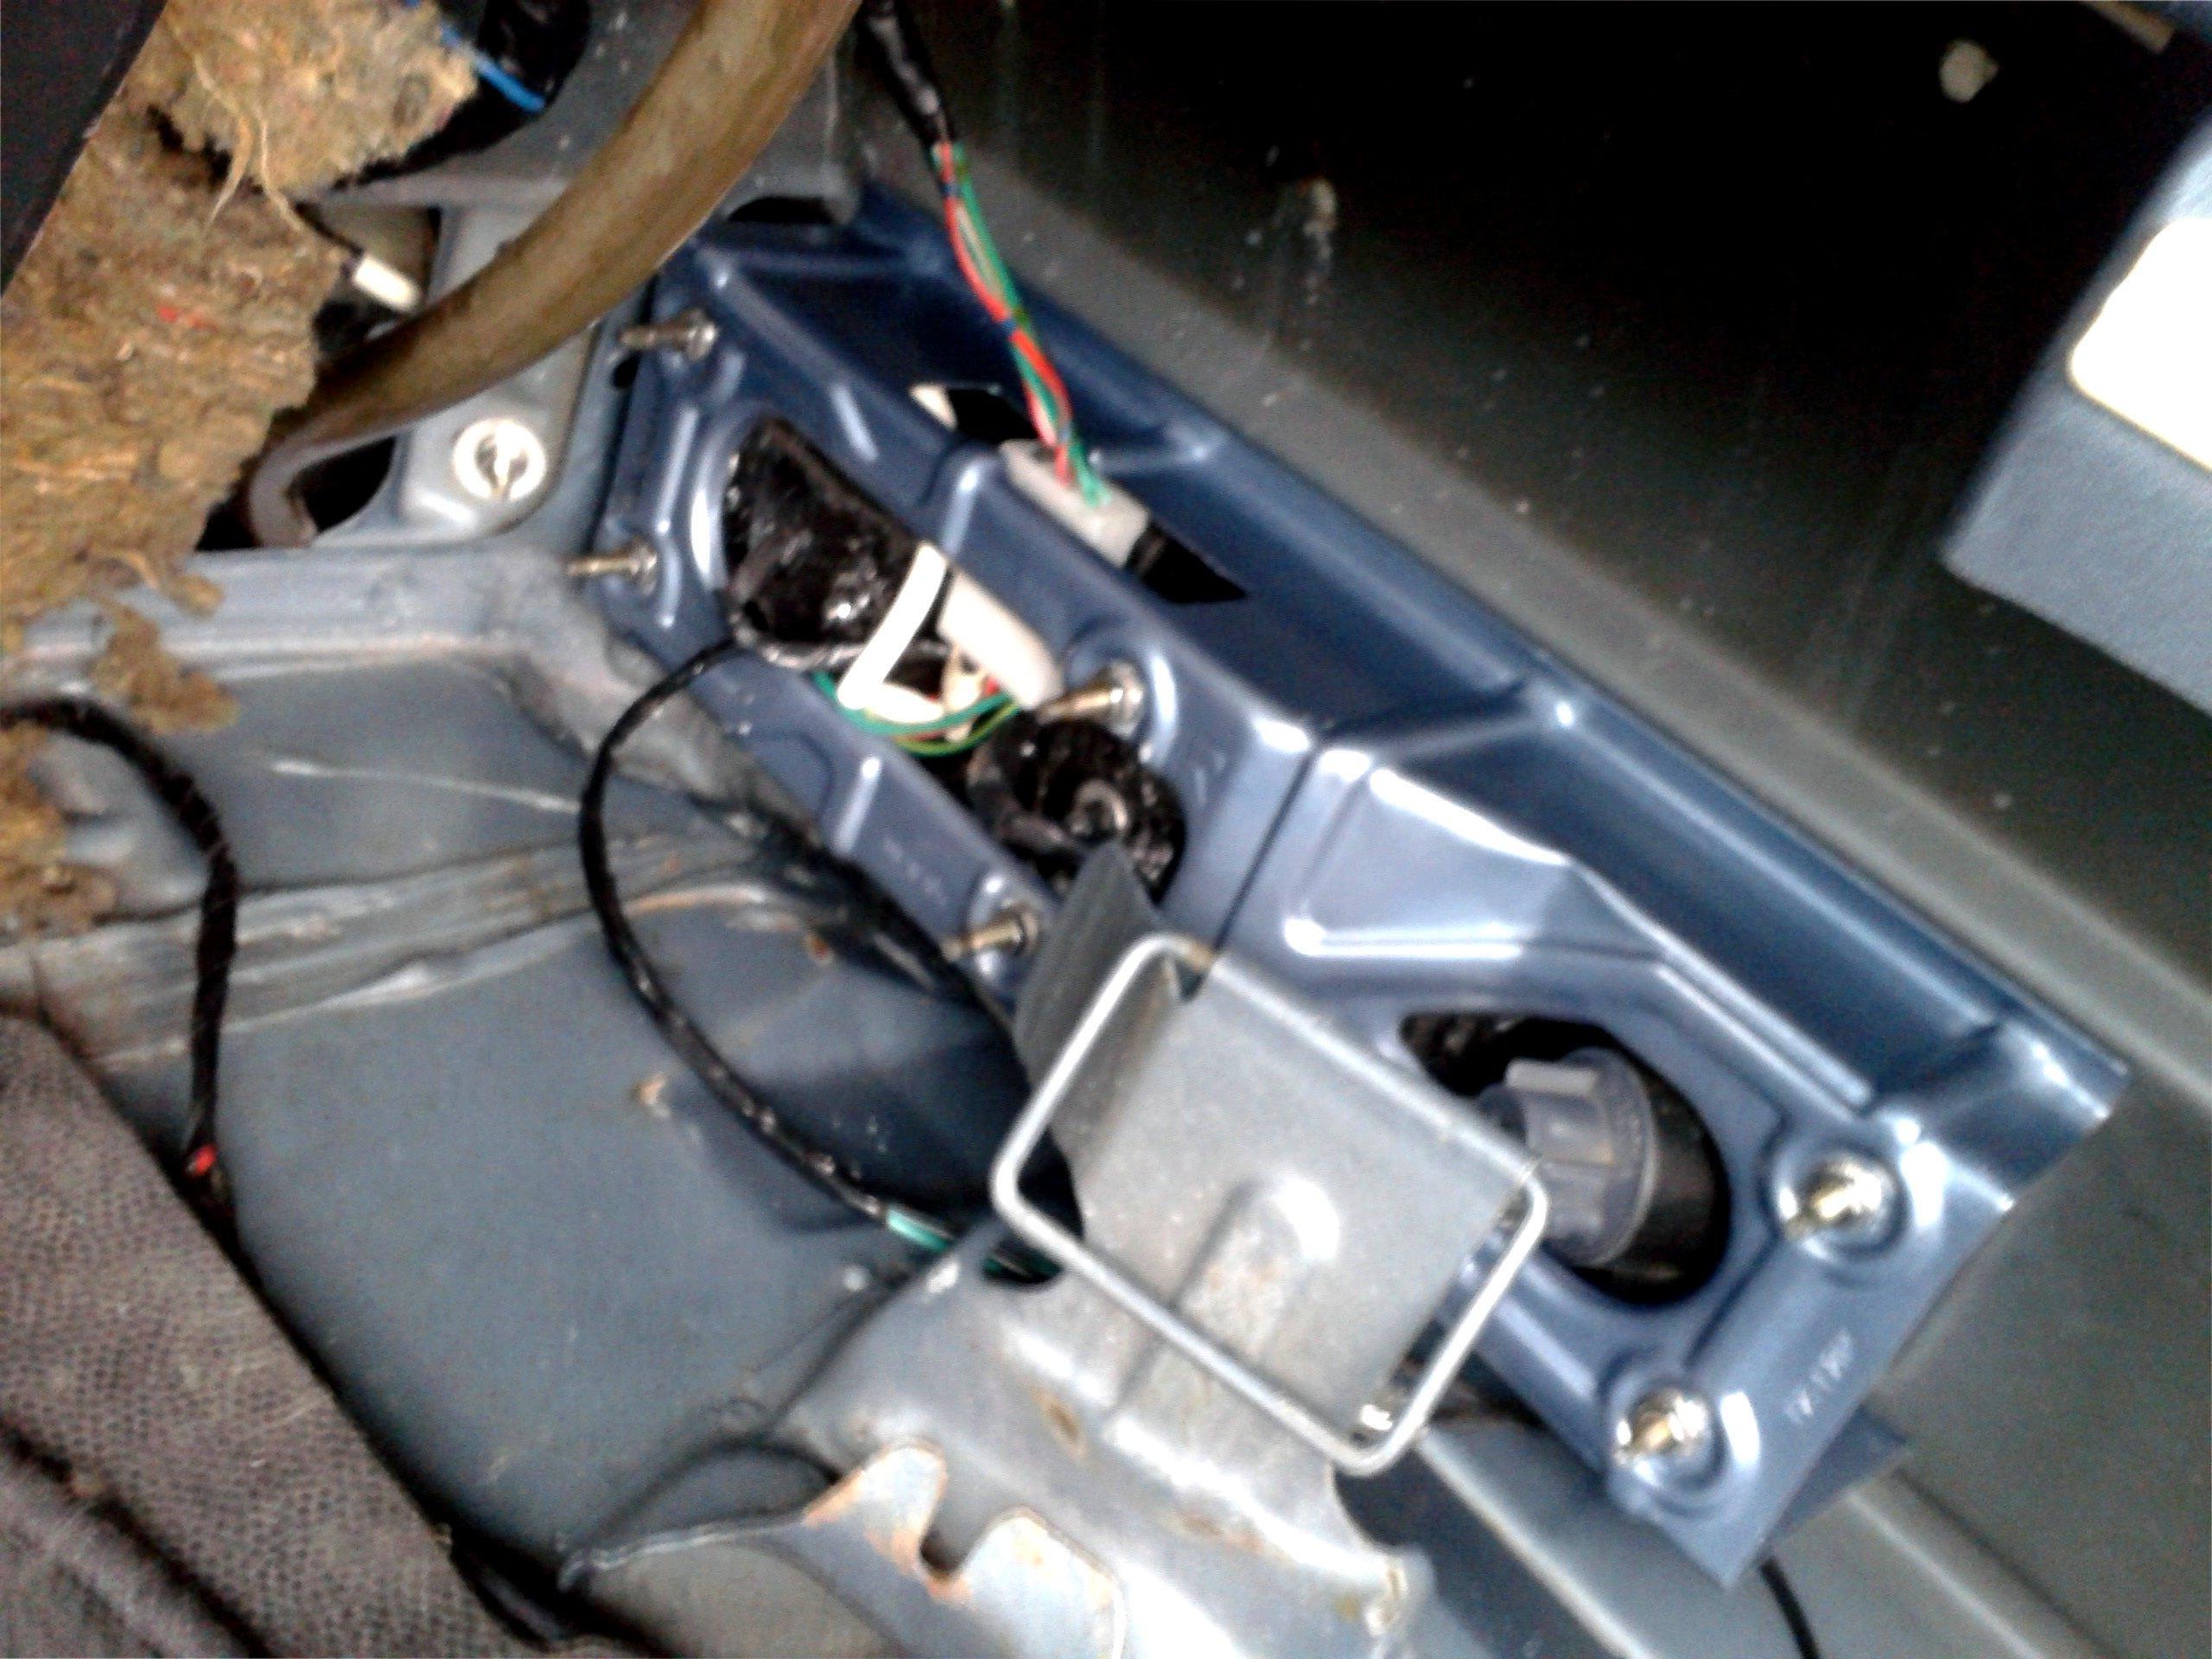
Final bit of assembly was the two gaskets that seal the lights to the bodywork. The outer rubber one I tacked to the housing with Sikaflex. The inner one is a more deformable foam rubber sort and can degrade over time, so I attached this with hot glue as it would make it easier to replace if and when it perishes
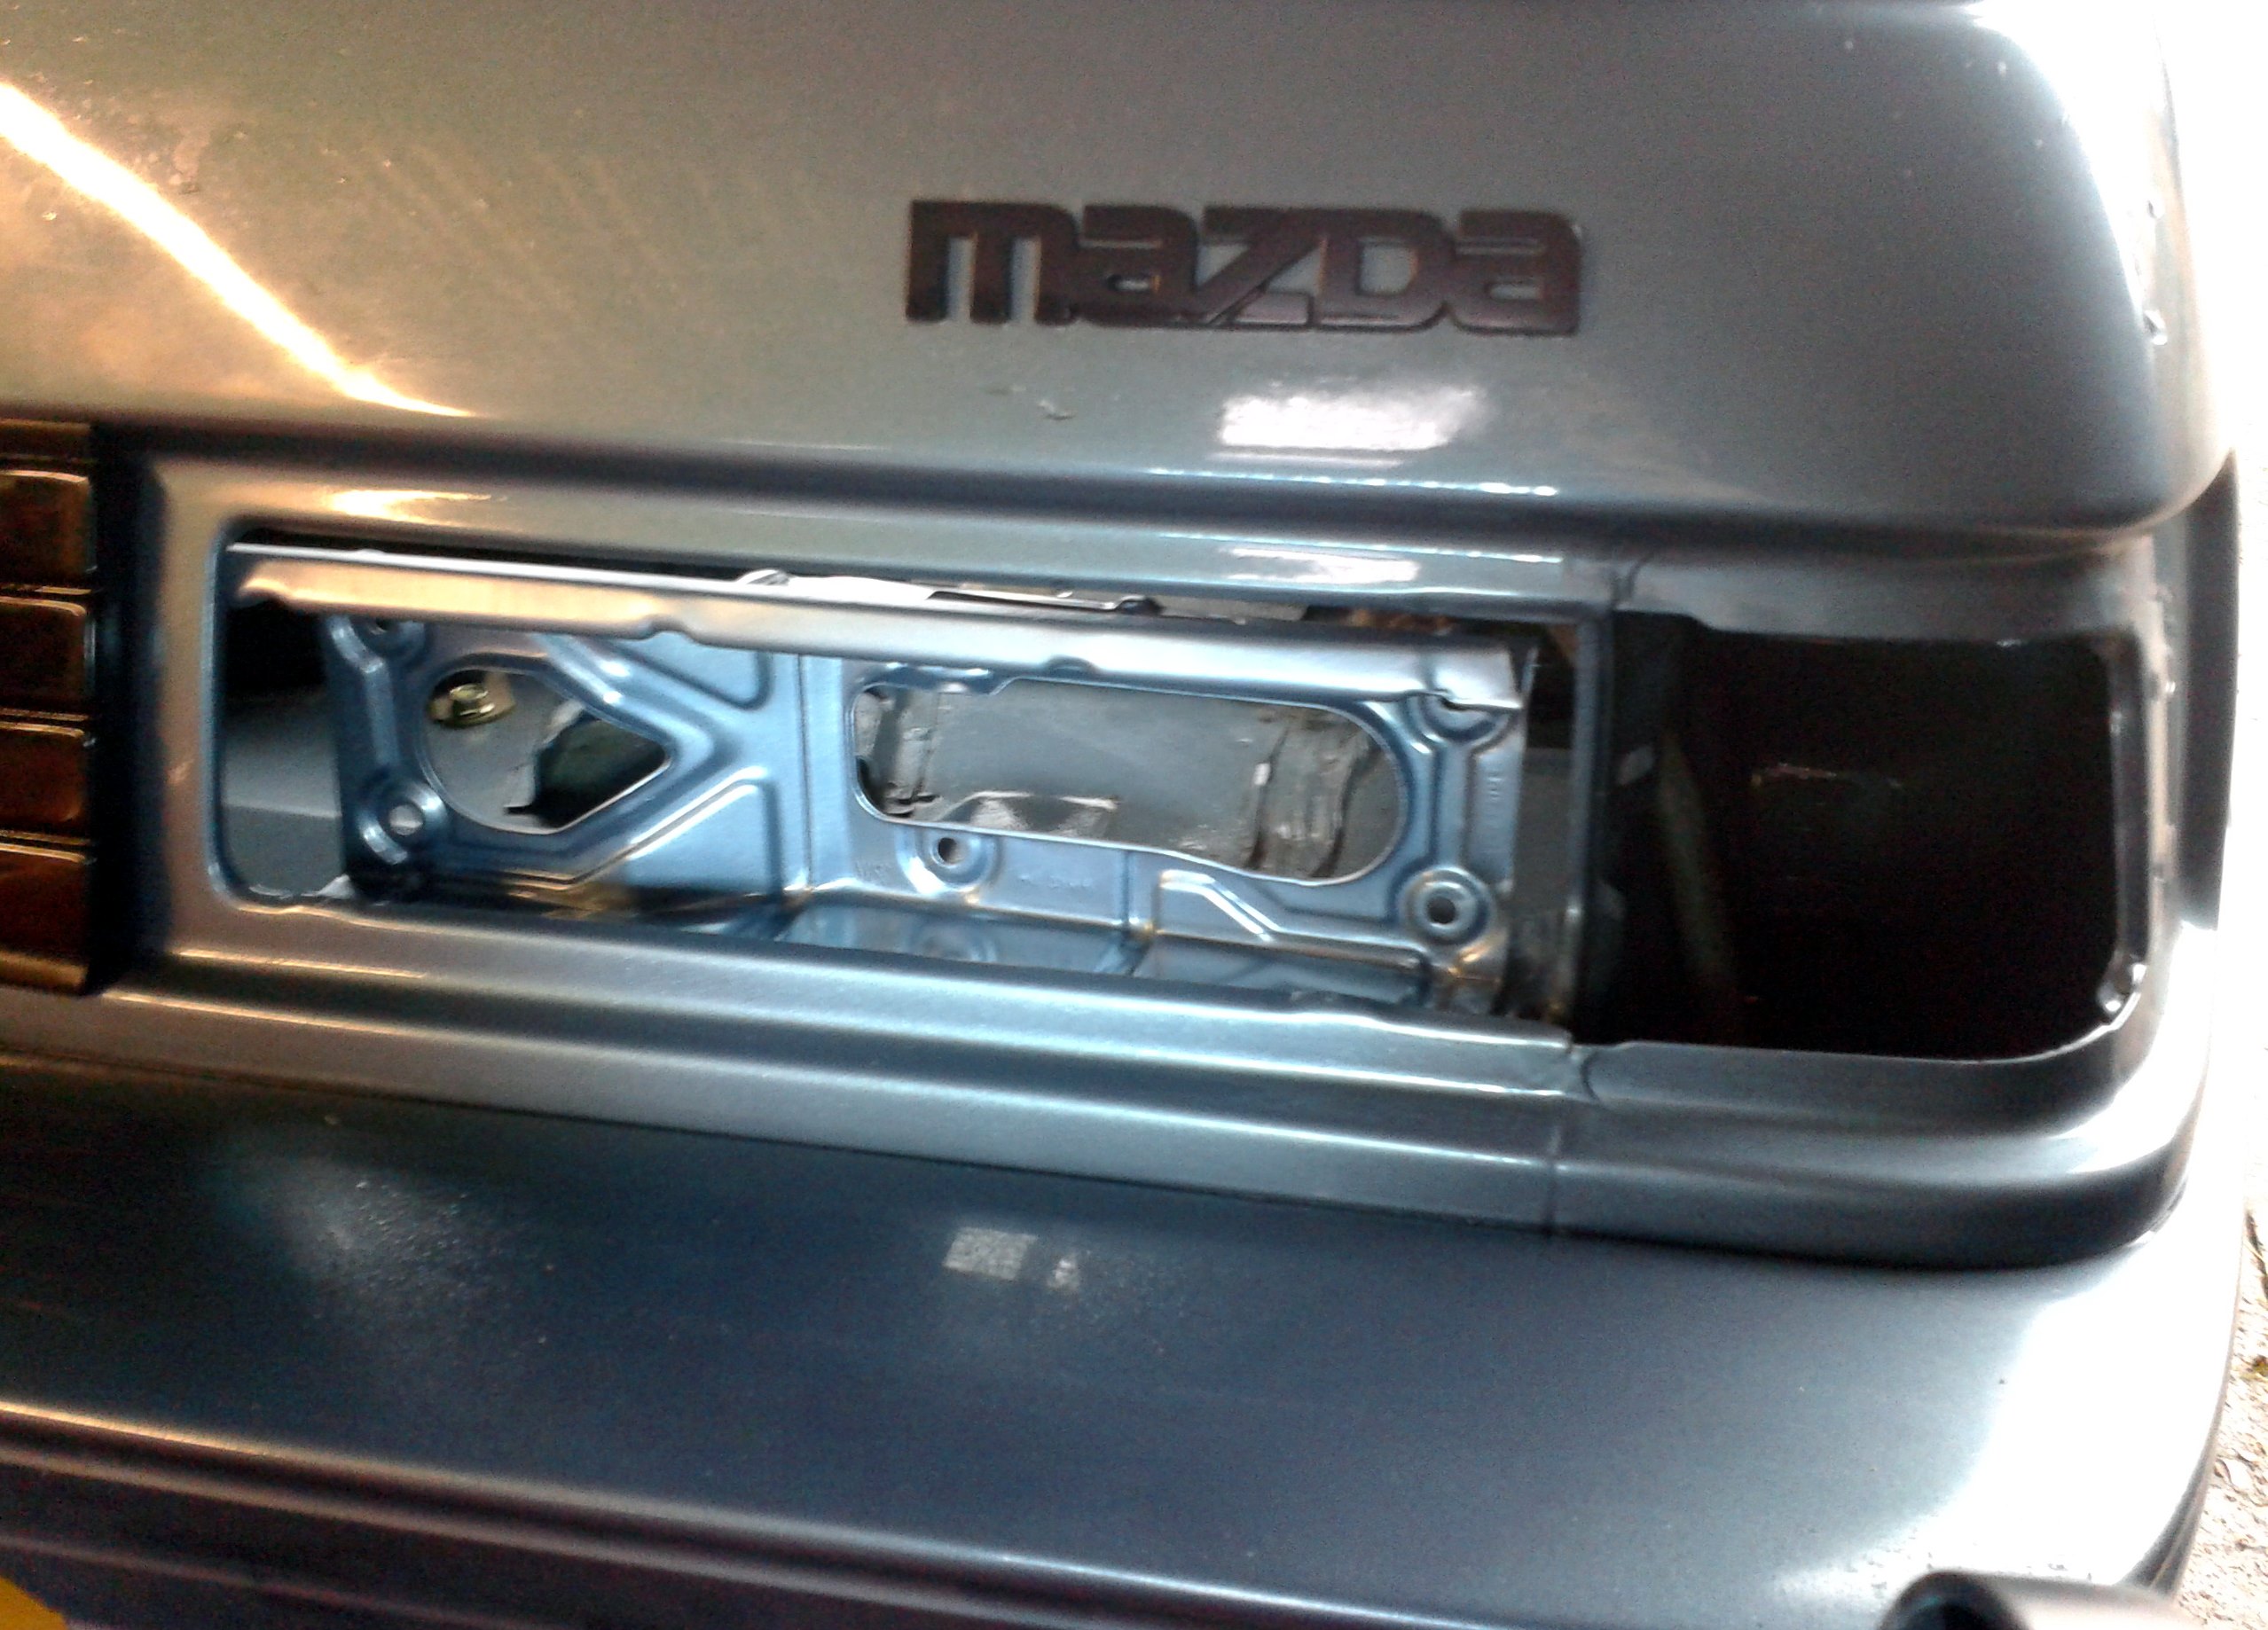
The actual aperture in the bodyshell was pleasingly free from corrosion, as might perhaps be expected given it was only painted a couple of years ago but it did give me a chance to fill all the cavities behind the wheel well and inside the inner wing with ACF50 protective gunk. These are pretty much inaccessible unless you remove the lights, but needless to say water can still find its way in and thus any protection is good whenever you get the chance
This is what it looks like inside. One day I'll get round to replacing the OE Mazda chopped-up-blanket sound deadening with some nice modern Dynamat, lol.
For contrast, here's what it looks like one old, one new. Note the last remaining earthly vestige of my first FD pressed into use; the Montego Blue door mirror being used so I could test the lights all worked, as my little helpers had cleared off to watch Nick Jr.

I got hold of as subtle as possible a flush-fit LED third brake light. It's a quality thing, Hella-made and comparatively expensive but a level or two above the average eBay tat. A bit of marking up on a masking tape template and the next step was to insert some mounts for it. The TWR spoiler is pretty thick fibreglass so I felt safe suing aluminium rivnuts. With my not-so-elegantly repaired rivnut tool, lol

The most difficult bit was getting the wiring through to the boot. I wasn't about to take the spolier off because it's an absolute pig of a job; the front mounts are hidden within three layers of sheet metal and almost impossible to reach for anyone without the manual dexterity of a Siamang Gibbon. Plus you need four hands to line up the bolts with their nuts along the trailing edge... no, it wasn't about to happen. So, I drilled a hole through from the back face of the spoiler, then one to match up from inside the boot. This meant I then had to thread the wire through two 6mm holes at 90� to each other, with absolutely no access from inside whatsoever. After a few abortive attempts that shortened my life and good humour by a considerable margin, I came up with the bodgetastic method of a giant bodkin. A length of thick wire, bent to the right curve to negotiate both holes and with the wire securely taped to it. even this took several attempts to make work, as the edge of the holes tended to scrape through the tape and the wire would come off right at the last moment. Fortunately there was about three metres of the stuff so I could afford to lose a bit and eventually the Bodkin Method� resulted in the wire being inside the boot. Hurrah!

Then plenty of ol' faithful sealant (don't worry, I tidied this up before screwing the light unit down) to make sure it all stayed waterproof;

...and we had a nice, unobtrusive third brake light to make sure a) any pernicious MOT-type dudes would be kept quiet and b) hopefully no utter buffoons will be crashing into me. I like it because you barely notice it's there until lit and even if you do, it kinda looks like it was always supposed to be there (#whatwouldChipdo?)

I simply spliced a couple of wires from the offside light loom to power it, and with the assistance of the kids we checked it worked

Final bit of assembly was the two gaskets that seal the lights to the bodywork. The outer rubber one I tacked to the housing with Sikaflex. The inner one is a more deformable foam rubber sort and can degrade over time, so I attached this with hot glue as it would make it easier to replace if and when it perishes

The actual aperture in the bodyshell was pleasingly free from corrosion, as might perhaps be expected given it was only painted a couple of years ago but it did give me a chance to fill all the cavities behind the wheel well and inside the inner wing with ACF50 protective gunk. These are pretty much inaccessible unless you remove the lights, but needless to say water can still find its way in and thus any protection is good whenever you get the chance

This is what it looks like inside. One day I'll get round to replacing the OE Mazda chopped-up-blanket sound deadening with some nice modern Dynamat, lol.

For contrast, here's what it looks like one old, one new. Note the last remaining earthly vestige of my first FD pressed into use; the Montego Blue door mirror being used so I could test the lights all worked, as my little helpers had cleared off to watch Nick Jr.

Thread Starter
Senior Member
Joined: Oct 2010
Posts: 255
Likes: 1
From: England
and that's it. Done. Here we have some sketchily-cobbled together After/Before shots so youse can see the results. Tail;

Brake;
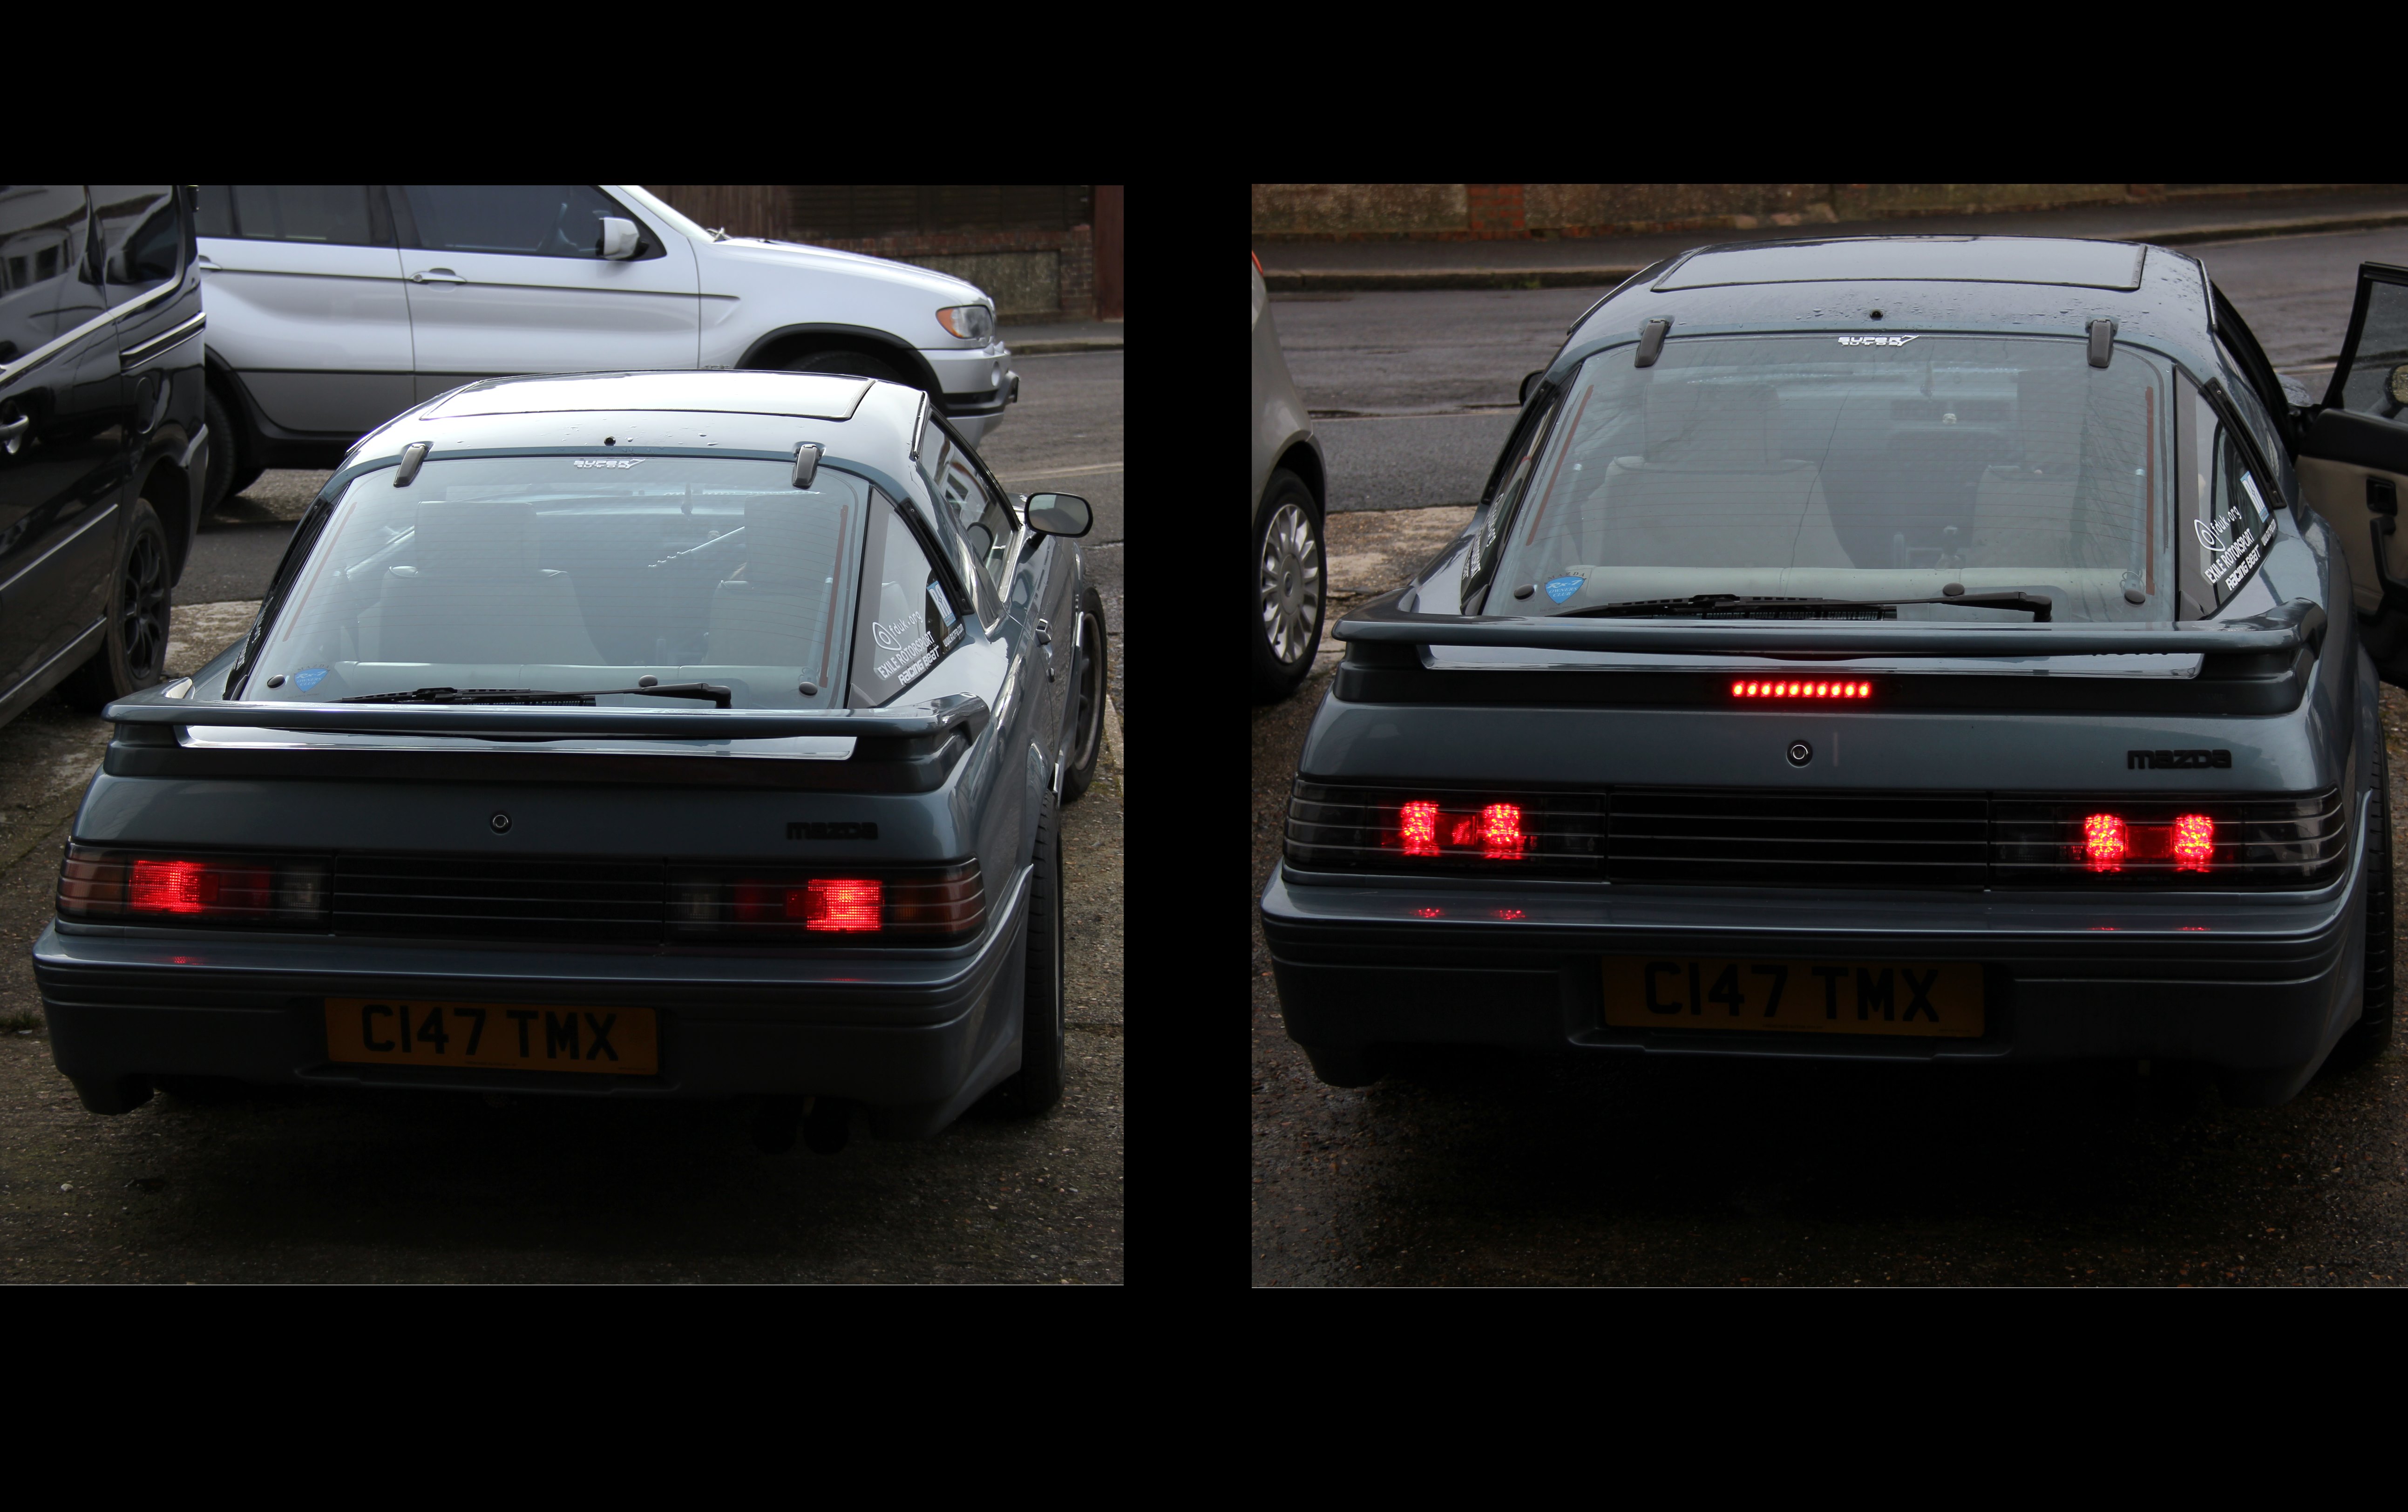
and unlit. (this makes the lights look a lot paler than they do in real life, I think it's to do with the angle of the daylight, such as it was. It's not a great phone camera, you'll just have to take my word for it they're a lot darker in real life)
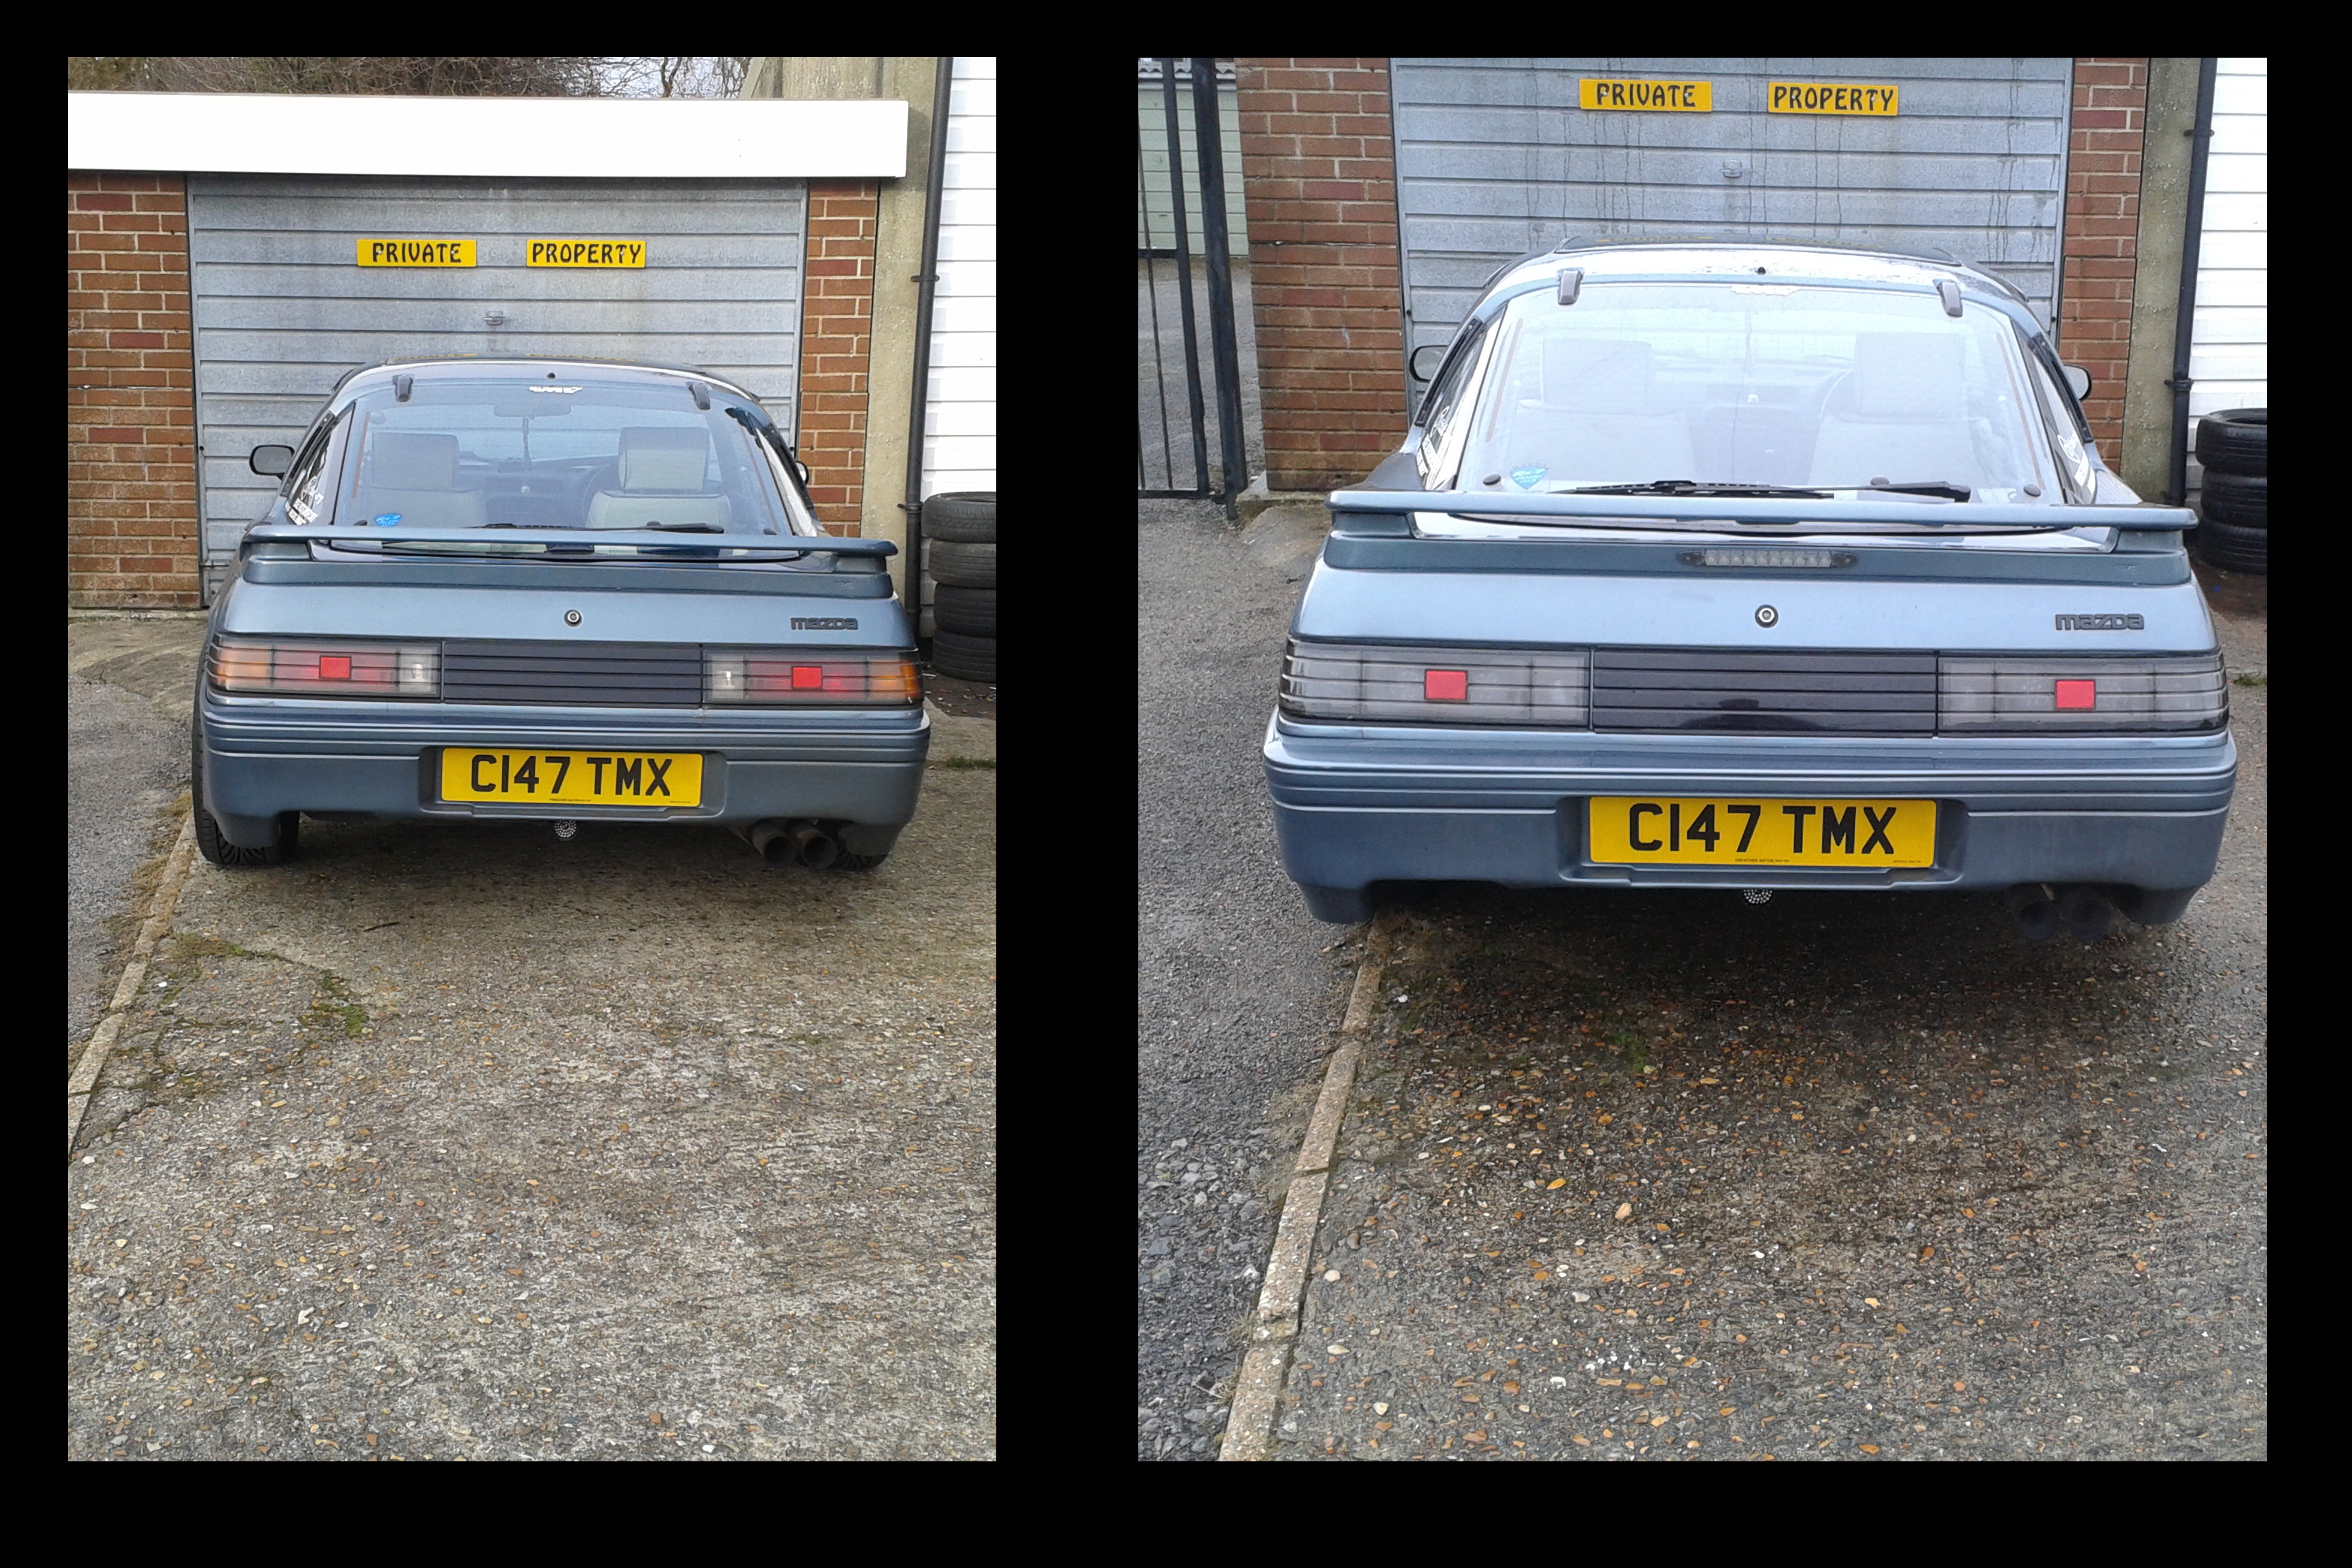
Worth it? I think so. If I were to do another set, I might be tempted to try the proper reticulated lens inserts and I might do a few other things differently. But given that this has been pure trial and error and I've pretty much made it up as I went along, I'm happy with the result. I don't remember ever seeing a set of LED lights on an FB and my own personal feeling on car modification is that it should be making your car unique. So I'd call it a success. And if you disagree, then that's fine
Coming up in our next thrilling instalment we'll be inventing a labour-saving method of transporting coals to Newcastle and as an encore, a foolproof methodology for teaching your elephant to ballet dance. Stay tuned for more essential updates, groovers

Brake;

and unlit. (this makes the lights look a lot paler than they do in real life, I think it's to do with the angle of the daylight, such as it was. It's not a great phone camera, you'll just have to take my word for it they're a lot darker in real life)

Worth it? I think so. If I were to do another set, I might be tempted to try the proper reticulated lens inserts and I might do a few other things differently. But given that this has been pure trial and error and I've pretty much made it up as I went along, I'm happy with the result. I don't remember ever seeing a set of LED lights on an FB and my own personal feeling on car modification is that it should be making your car unique. So I'd call it a success. And if you disagree, then that's fine

Coming up in our next thrilling instalment we'll be inventing a labour-saving method of transporting coals to Newcastle and as an encore, a foolproof methodology for teaching your elephant to ballet dance. Stay tuned for more essential updates, groovers
Joined: Aug 2011
Posts: 3,078
Likes: 42
From: Cambridge, Minnesota
This is AWESOME!
I'm going to be hopefully making custom LED FB tail lights with a full circuit board, so they resemble some FD LED tail lights.
FD LED Tail Light ****

I'm going to be hopefully making custom LED FB tail lights with a full circuit board, so they resemble some FD LED tail lights.
FD LED Tail Light ****


Trending Topics
Nik - amazing work and perseverance!! well done, nicely -hell - entertainingly! - presented.
Thanks for taking the time to share. This is the stuff that makes this Forum so great.
Stu Aull
80GS
Alaska
Thanks for taking the time to share. This is the stuff that makes this Forum so great.
Stu Aull
80GS
Alaska


This is AWESOME!
I'm going to be hopefully making custom LED FB tail lights with a full circuit board, so they resemble some FD LED tail lights.
FD LED Tail Light ****
I'm going to be hopefully making custom LED FB tail lights with a full circuit board, so they resemble some FD LED tail lights.
FD LED Tail Light ****


Thread
Thread Starter
Forum
Replies
Last Post
David Hayes
3rd Generation Specific (1993-2002)
13
Sep 5, 2022 12:45 PM
fastsaab
New Member RX-7 Technical
5
Aug 19, 2015 11:42 AM