
Installing Autometer Oil pressure and water temp gages....FITTINGS??

Thread Starter
Joined: Jul 2008
Posts: 1,671
Likes: 9
From: Chino Calif
Installing Autometer Oil pressure and water temp gages....FITTINGS??
I am installing a set of Autometer gages to my 12a. Do the fittings they send with the kit properly connect up to our engines?
I am wondering if there is a metric vs. SAE problem with the fittings?
Any ideas??
I am wondering if there is a metric vs. SAE problem with the fittings?
Any ideas??
Joined: Jun 2008
Posts: 8,376
Likes: 28
From: Chino Hills, CA
Jim, when I put in my Autometer gauge cluster years ago, I seem to recall the adapters that came with them were all I needed - - but I was using the RB gauge block, too, which probably cancelled out any fitment issues.
FWIW, their Type 2 Gauge Block is a quick & easy solution for getting oil temp and pressure, and looks nice to boot. Very easy install, too, which could not be said of the older units. As I'm using electric senders, I needed to use a 90-deg elbow (couple bucks from Home Depot) to fit the giant electric pressure sender the way I liked, but otherwise was painless.
FWIW, their Type 2 Gauge Block is a quick & easy solution for getting oil temp and pressure, and looks nice to boot. Very easy install, too, which could not be said of the older units. As I'm using electric senders, I needed to use a 90-deg elbow (couple bucks from Home Depot) to fit the giant electric pressure sender the way I liked, but otherwise was painless.
my oil pressure(autometer) and water temp(sun pro) gauges r both mechanical. i have the aluminum block under the oil filter for the oil pressure with no problem with the fitting to it. the probe for the temp gauge is in the back of the w/p housing using a pre-existing threaded hole. an adapter was needed cause the hole was larger than the fitting to secure the probe. these r just pipe thread fittings that can be found anywhere plumbing supplies r sold.
easiest way is to tap the rear oil cooler line's banjo bolt. I'm currently working on another S3 with oil-to-water cooler. I'm going to experiment if an aftermarket oil pressure gauge will work IF I tap it on the plug @ rear iron (this is where the banjo bolt is for those with oil-to-air cooler.


depends on where you're hooking them up to.... if you're replacing the stock oil pressure sender then it is 1/8" NPT, pretty standard. The best place for water temp if you're still running a heater is the outlet/thermostat housing on the backside of the water pump, but it has some weird metric fitting ans will likely require drilling/tapping and an adapter.
If you don't have a heater on non-beehive engines you can unscrew the outlet from the rear iron below the oil filter. It's already 3/8 NPT and a temp gauge will screw right in. If you used to have beehive and have since converted to FMOC, you can pull the pressed in fitting from the rear iron and tap it for 3/8 NPT.
Oil temp is a whole other story and you should go with the Re-Speed or RB pedestals.
easiest way is to tap the rear oil cooler line's banjo bolt. I'm currently working on another S3 with oil-to-water cooler. I'm going to experiment if an aftermarket oil pressure gauge will work IF I tap it on the plug @ rear iron (this is where the banjo bolt is for those with oil-to-air cooler.
Originally Posted by 81WideMariah
depends on where you're hooking them up to.... if you're replacing the stock oil pressure sender then it is 1/8" NPT, pretty standard. The best place for water temp if you're still running a heater is the outlet/thermostat housing on the backside of the water pump, but it has some weird metric fitting ans will likely require drilling/tapping and an adapter.
If you don't have a heater on non-beehive engines you can unscrew the outlet from the rear iron below the oil filter. It's already 3/8 NPT and a temp gauge will screw right in. If you used to have beehive and have since converted to FMOC, you can pull the pressed in fitting from the rear iron and tap it for 3/8 NPT.
If you don't have a heater on non-beehive engines you can unscrew the outlet from the rear iron below the oil filter. It's already 3/8 NPT and a temp gauge will screw right in. If you used to have beehive and have since converted to FMOC, you can pull the pressed in fitting from the rear iron and tap it for 3/8 NPT.
Trending Topics
1. banjo behind the beehive? this is the line coming out from front cover to beehive.
2. Plug at the bottom of rear plate.
Im all ears bro

depends on where you're hooking them up to.... if you're replacing the stock oil pressure sender then it is 1/8" NPT, pretty standard. The best place for water temp if you're still running a heater is the outlet/thermostat housing on the backside of the water pump, but it has some weird metric fitting ans will likely require drilling/tapping and an adapter.
If you don't have a heater on non-beehive engines you can unscrew the outlet from the rear iron below the oil filter. It's already 3/8 NPT and a temp gauge will screw right in. If you used to have beehive and have since converted to FMOC, you can pull the pressed in fitting from the rear iron and tap it for 3/8 NPT.
Oil temp is a whole other story and you should go with the Re-Speed or RB pedestals.
1. Behind water pump housing: slightly tap it with 3/8.
2. Rear iron: 83-85 or beehive have pressed-in heater outlet
Thread Starter
Joined: Jul 2008
Posts: 1,671
Likes: 9
From: Chino Calif
It is an 84 engine with beehive. I am NOT currently using any factory gages. There is an oil pressure and water temp sender in the rear iron. I was "hoping" I could just connect here. I am afraid the bulb of the mechanical gage will not fit the rear iron's water hole.
That is why I feel I might need to go to the water pump. Any idea what adapter is needed to mate up the water temp bulb to the water pump?
That is why I feel I might need to go to the water pump. Any idea what adapter is needed to mate up the water temp bulb to the water pump?
Thread Starter
Joined: Jul 2008
Posts: 1,671
Likes: 9
From: Chino Calif
Sorry, forgot to mention 2nd gen housing!!
Originally Posted by WackyRicer
which one do you prefer for oil pressure?
1. banjo behind the beehive? this is the line coming out from front cover to beehive.
2. Plug at the bottom of rear plate.
Im all ears bro
1. banjo behind the beehive? this is the line coming out from front cover to beehive.
2. Plug at the bottom of rear plate.
Im all ears bro

It is quite possible to remove a beehive while leaving the long steel tube installed on the beehive itself. That's how I do it every time. Unhook from front cover (23mm) and the two 10mm nuts under the pedestal. Also the 12mm bolt on the upper rear plate at the inpection cover (this is really for the noobs, not you wacky
 ). I know some folks remove the upper banjo bolt, then wonder why it's leaking (those stock copper crush washers only work once, then become work hardened so don't seal a second time unless annealed, and then good luck since they're technically used parts).
Originally Posted by 80's old school
I have an FC Aluminum water pump housing. It has some kind of water sensor in the pump now that I am not using.
Sorry, forgot to mention 2nd gen housing!!
Sorry, forgot to mention 2nd gen housing!!
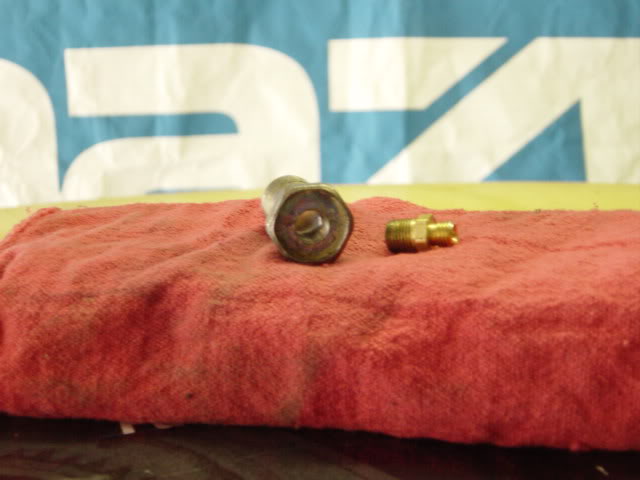
Oh I also removed the thermowax steel nipple and cut 1/8" NPT threads. It's a somewhat oversized hole for this size of NPT so I was sure to use lots of pipe goop and cranked the little NPT plug in there with a vengeance.
Oh I also made sure to cut these two sets of threads straight. I put the taps in the drill press and cranked it by hand, then removed and finished on the workmate portable workbench. If you have a milling machine it's even easier. Getting them 100% straight by eyeballing it is a bit tough and not recommended on something with an oversized hole like this. Or just take a piece of 3/8" hose and block it (the stock nipple) off with a bolt and a couple of clamps. You're choice. Of course if yours is a rusty mess, it may not hold up for long; might be best to nip it in the bud now.
As for the temp sensor, you could probably do it (cut NPT threads) by eyeballing it, but I had the drill press handy and the result was perfect straightly cut threads even into the already threaded hole. Note you don't need to enlarge these holes first with a drill bit. The sensor hole is perfect already and the nipple hole, should you choose to attempt it, is a bit oversized so straight/true thread cutting is very important.
One more thing. See the most recent archive that vipernicus saved. It shows how/what to do if you're going to attempt an aluminum on aluminum waterpump mod. In that thread I don't recommend using a clutch fan with this mod as Mazda always had at least one iron component to sort of act as the strength member while the aluminum was the lightening member. This time on the GLC I'm going for it with a clutch fan.


Thread
Thread Starter
Forum
Replies
Last Post
trickster
2nd Generation Specific (1986-1992)
25
Jul 1, 2023 04:40 PM
sherff
Adaptronic Engine Mgmt - AUS
9
Feb 24, 2019 12:09 PM
befarrer
Microtech
3
Aug 22, 2015 05:52 PM