
How to: Front suspension and brakes.

Thread Starter
506 RWHP 12A..
Joined: May 2004
Posts: 485
Likes: 3
From: Norway
How to: Front suspension and brakes.
Thought i could make a write up on how to change the front suspension/brakes, pretty simple job on the RX7, especially if things hasnt rusted to pieces! If you have access to a lift, this is by far the best way, but a jack and some stands will do just fine.
1. jack the car up, and support it. Its a good idea to jack both sides while you are at it, i`ll explain later. Do not attemp working on the car, only supported by the jack. Its dangerous, and stupid. You should now be looking at something like this:
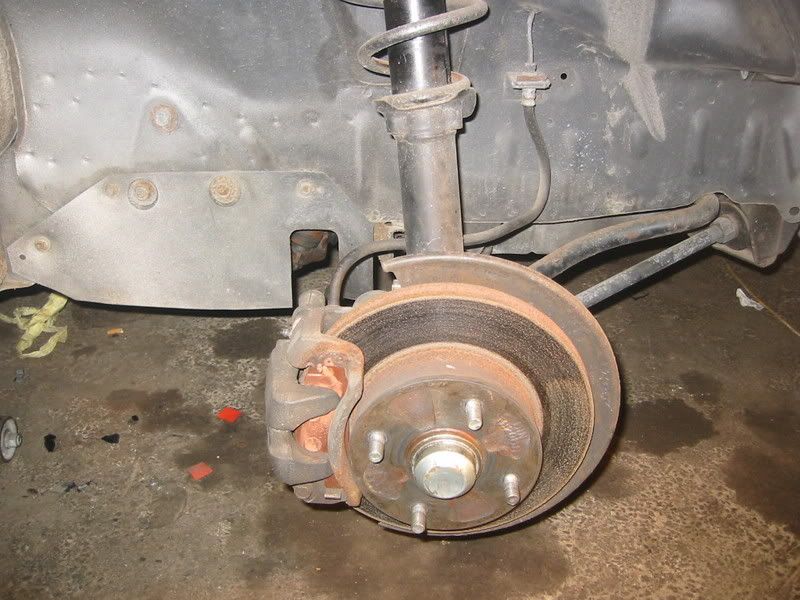
My car basically has GSL-SE suspension (its really a GT-X) but im guessing that its almost the same for other models.
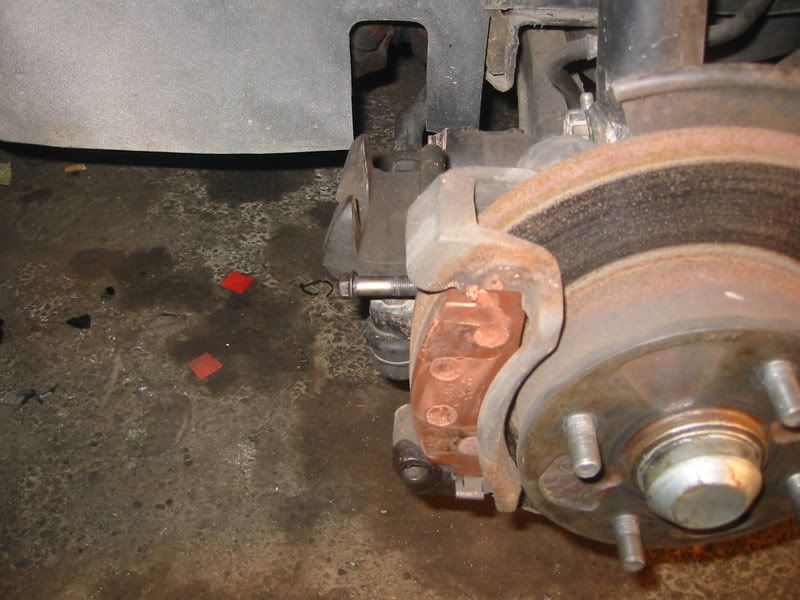
2. Start with removing the caliper. Its attached with one 14mm bolt on the bottom. The caliper is hinged at the top, and should slide right up, if not, a screwdriver will normally pry it out. It can the be removed from the bracket, by sliding it "into" the vehicle. At the back of the strut, the brake line is attached with a clip. Pry it out, and secure the caliper out of the way of the strut. A zip-tie will do. You should now be about here:
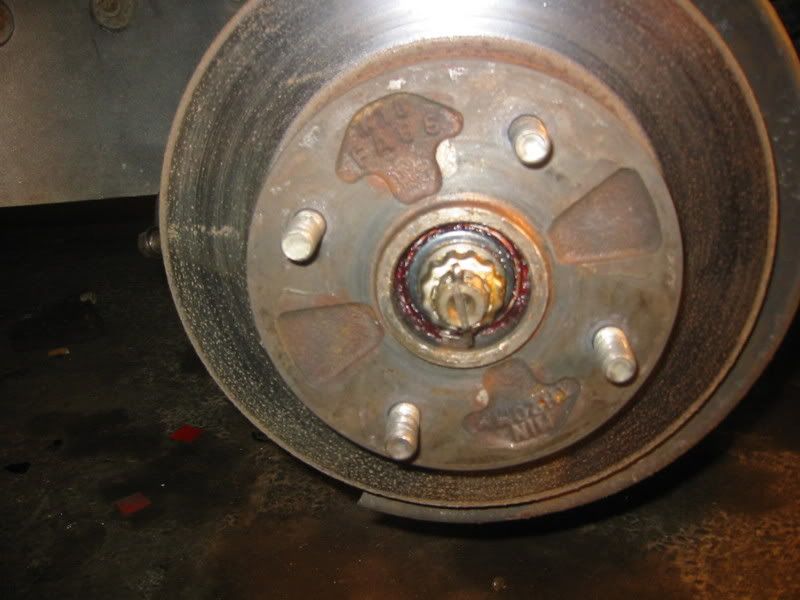
3. The pads can now be removed. Remember how the clips are mounted. The caliper mounting bracket is removed by undoing the two 17mm bolts. The lower one can be a little bit hard to get to, but is easily accesible with a angled spanner. Now is also a good time to remove the dustcap in the middle of the disc, a few good hits, and it pryes out. You should now be looking at:
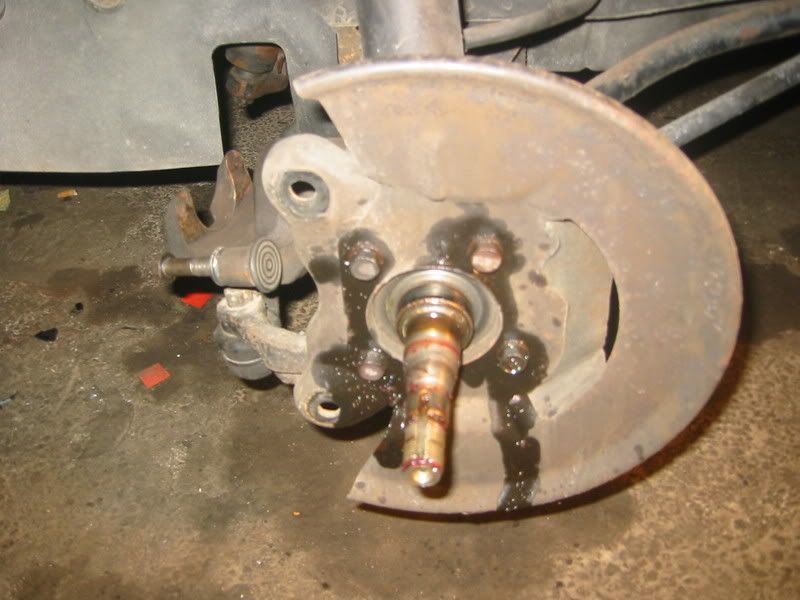
4. The disc and bearings are held on to the spindle by one 23mm nut, but before undoing this, the clip and nut cover must be removed. Remember the order of the bearings etc. during disassembly, i`ll make it a whole lot easier later. If you are planning on reusing the bearings, try not to get a whole lot of sand/dust in them. Same goes for the spindle. I usually tape a plastic bag of some sort over the spindle. The dust cover, and backing plate comes of by undoing the 4 14mm bolts.
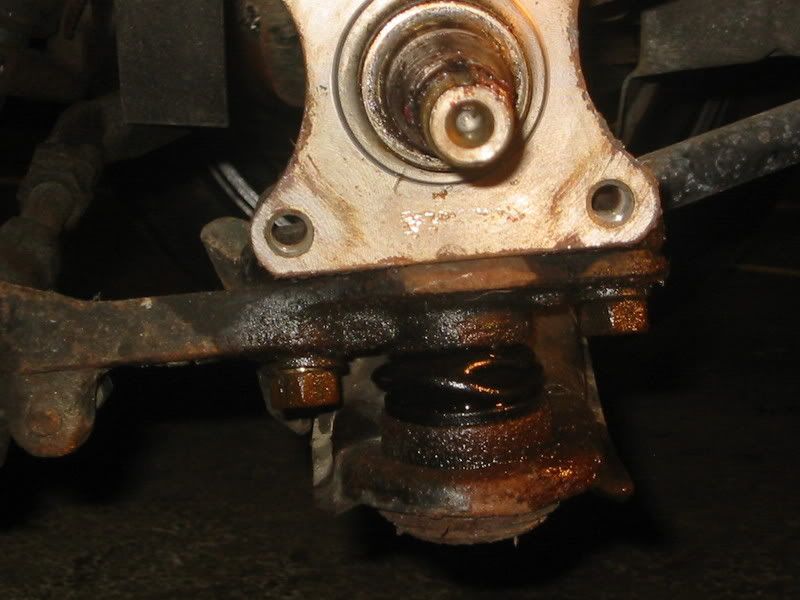
5. The struts is attached with two 17mm bolts under the spindle. Access is gained by turning the wheel, and moving it left and right. It looks like this:
6. You will also have to undo the 4 bolts on the top, and the strut is loose. It comes out by prying the lower control arm down. Here is where it helps having the car jacked up on both sides, keeping the car level, but you can also undo the sway bar. Hey presto, its out!
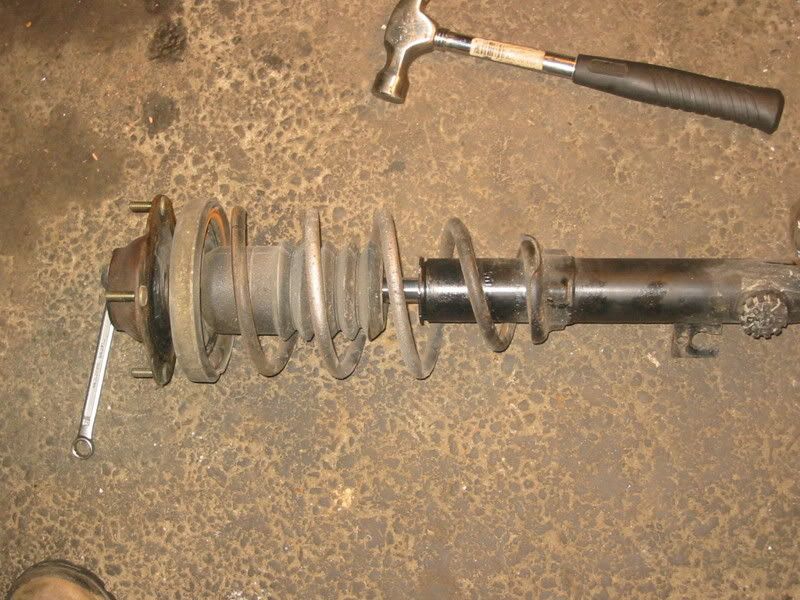
7. You will need to compress the springs BEFORE undoing the nut at the top. Do not attemp anything else. The springs are under considerable pressure. I use clamps, like shown below. Compress the springs until you can feel that the spring no longer is in contact with the top mount. You can now undo the 21mm nut, by either using airtools like me, or by holding the rods center while turning the nut. Do not try to clamp the rod other than at the top if you are planning to reuse the damper. Again, remember the order of the various parts when disassembling.
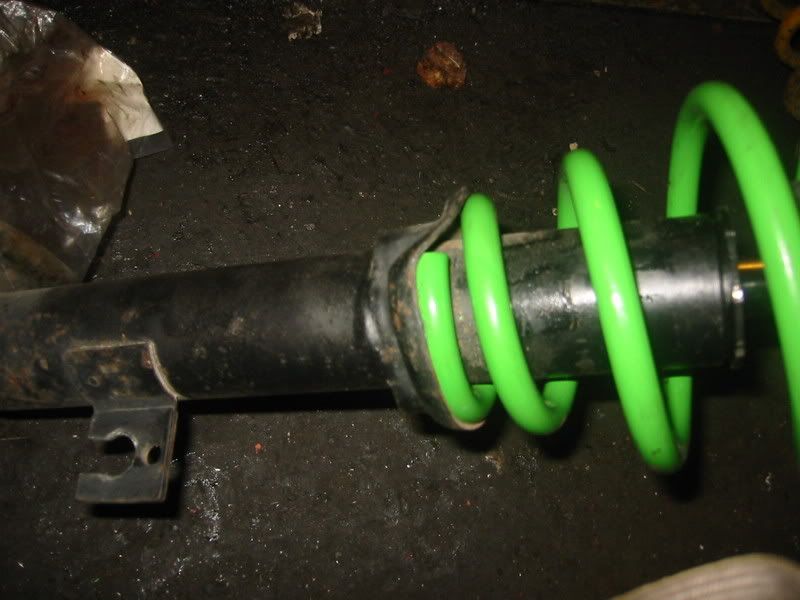
8. Replace damper, and spring. Be sure that the springs lower part meets the groove at the bottom like shown on the picture below. The same goes for the top. See picture below. You will have to compress the new spring to get it in there, same as when you took it apart.
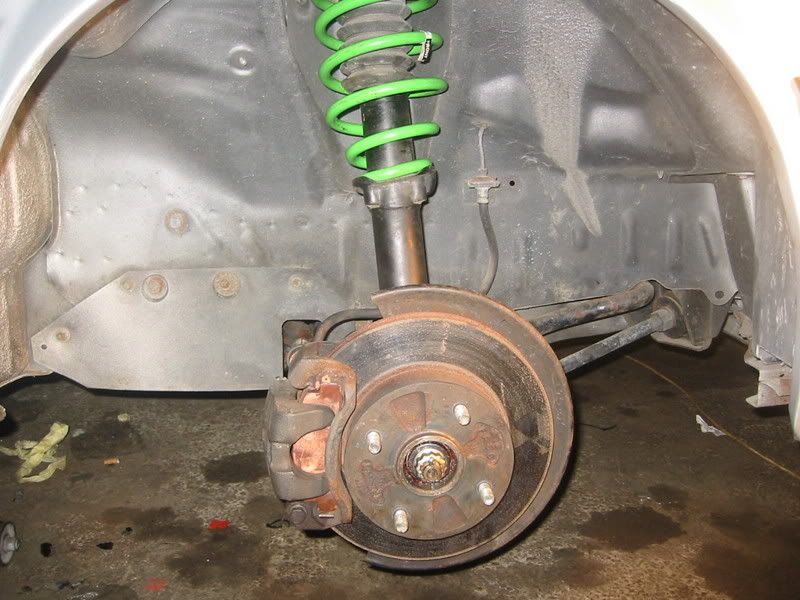
9. Now its time for putting it all together again. It goes on like it came of, but here is a few smart hints
-Remember to regrease the spindle and bearings. Replace if necessary.
-Also, when tightening the 23mm spindle nut, dont use to much force! Check that the disc still turns easily, before thightening more. It should spin freely.
-To avoid screamy brake pads, use for instance copper grease on the BACK of the pads.
-If using new discs, clean them with thinner/white spirit/etc as new discs often have a silicone coating when supplied
DONE!
1. jack the car up, and support it. Its a good idea to jack both sides while you are at it, i`ll explain later. Do not attemp working on the car, only supported by the jack. Its dangerous, and stupid. You should now be looking at something like this:
My car basically has GSL-SE suspension (its really a GT-X) but im guessing that its almost the same for other models.
2. Start with removing the caliper. Its attached with one 14mm bolt on the bottom. The caliper is hinged at the top, and should slide right up, if not, a screwdriver will normally pry it out. It can the be removed from the bracket, by sliding it "into" the vehicle. At the back of the strut, the brake line is attached with a clip. Pry it out, and secure the caliper out of the way of the strut. A zip-tie will do. You should now be about here:
3. The pads can now be removed. Remember how the clips are mounted. The caliper mounting bracket is removed by undoing the two 17mm bolts. The lower one can be a little bit hard to get to, but is easily accesible with a angled spanner. Now is also a good time to remove the dustcap in the middle of the disc, a few good hits, and it pryes out. You should now be looking at:
4. The disc and bearings are held on to the spindle by one 23mm nut, but before undoing this, the clip and nut cover must be removed. Remember the order of the bearings etc. during disassembly, i`ll make it a whole lot easier later. If you are planning on reusing the bearings, try not to get a whole lot of sand/dust in them. Same goes for the spindle. I usually tape a plastic bag of some sort over the spindle. The dust cover, and backing plate comes of by undoing the 4 14mm bolts.
5. The struts is attached with two 17mm bolts under the spindle. Access is gained by turning the wheel, and moving it left and right. It looks like this:
6. You will also have to undo the 4 bolts on the top, and the strut is loose. It comes out by prying the lower control arm down. Here is where it helps having the car jacked up on both sides, keeping the car level, but you can also undo the sway bar. Hey presto, its out!
7. You will need to compress the springs BEFORE undoing the nut at the top. Do not attemp anything else. The springs are under considerable pressure. I use clamps, like shown below. Compress the springs until you can feel that the spring no longer is in contact with the top mount. You can now undo the 21mm nut, by either using airtools like me, or by holding the rods center while turning the nut. Do not try to clamp the rod other than at the top if you are planning to reuse the damper. Again, remember the order of the various parts when disassembling.
8. Replace damper, and spring. Be sure that the springs lower part meets the groove at the bottom like shown on the picture below. The same goes for the top. See picture below. You will have to compress the new spring to get it in there, same as when you took it apart.
9. Now its time for putting it all together again. It goes on like it came of, but here is a few smart hints
-Remember to regrease the spindle and bearings. Replace if necessary.
-Also, when tightening the 23mm spindle nut, dont use to much force! Check that the disc still turns easily, before thightening more. It should spin freely.
-To avoid screamy brake pads, use for instance copper grease on the BACK of the pads.
-If using new discs, clean them with thinner/white spirit/etc as new discs often have a silicone coating when supplied
DONE!
mortenf - THANKS for taking the effort! You make it _LOOK_ easy 
Couple of notes:
-4 bolts on top of strut tower ONLY NEED ABOUT 17-20ft/lbs of torque!!!!!!! or you will strip the threads (ask me how I know... ;P )
-the strut top plate (Part with the 4 threaded bolts -sorry for poor naming) must be CORRECTLY INDEXED to face the "right" way or you will screw up your camber (caster?)
There is an ARROW marking on the plate: NOTE WHICH WAY THEY POINT WHEN REMOVING -you must align this way on re-install!!
Stu Aull
80GS
Alaska

Good write-up.
I will be doing this soon....again. This time I was thinking of replacing the strut tops. The inner bearing is openly visible and worn when removing the cap.
Is the inner bearing the thrust bearing?
Has anyone done this?
Anyone know it's purpose or reason for needing replaced?
Thanks
I will be doing this soon....again. This time I was thinking of replacing the strut tops. The inner bearing is openly visible and worn when removing the cap.
Is the inner bearing the thrust bearing?
Has anyone done this?
Anyone know it's purpose or reason for needing replaced?
Thanks

Thread
Thread Starter
Forum
Replies
Last Post
GrossPolluter
Suspension/Wheels/Tires/Brakes
12
Aug 15, 2015 10:32 PM