
How to: Front Brakes

Thread Starter
Wheel Revolutionist!
Joined: Apr 2005
Posts: 1,018
Likes: 1
From: West Virginia
How to: Front Brakes
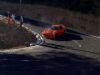
Ok first remove your wheel bolts they are 21mm.
Get the bolt on the bottom of the caliper.

You should now be able to flip the caliper up and remove your brake pads

You should be able to pull the caliper offand let it hang by the brake line.
Now there are 2 bolts that hold the other part of the caliper to the rotor. remove the one on the top and bottom. On the bottom bolt you have to remove a big 17mm bolt the move the tie rod so you can access 1 of the 2 14mm bolts. To be able to move the tie rod out of the way there is another 17mm that you must loosen!

Loosen this bolt ^^^^

Now you can move the tie rod after taking this screw out( also shown is the 2 bolts to remove the 2nd part of the caliper.
Now you can move the tie rod to access the bolt. Pry it apart.( wont damage anything)

Bottom bolt 14mm

Top Bolt.

After this take a screw driver and hammer and knock off the dust cap, lightly tap behind it till it comes off. Then take some needle nose pliers, grab on to the cotter pin ( make the pin straight to pull up and out) tap it with a hammer till it comes out. Take the next metal piece off and un screw the bolt and pull off the old rotor! Installation is reverse of tearing down. When you done you should have a nice new rotor, yes the red caliper is ricey but it why not.

yes i had to use my old brake pads again for awhile because the auto store ordered the wrong kind so i have to drive it like this for a bit. Hope this helps just figured i would document it while i did it. Its a little vague but will hopefully help ya out.
Get the bolt on the bottom of the caliper.
You should now be able to flip the caliper up and remove your brake pads
You should be able to pull the caliper offand let it hang by the brake line.
Now there are 2 bolts that hold the other part of the caliper to the rotor. remove the one on the top and bottom. On the bottom bolt you have to remove a big 17mm bolt the move the tie rod so you can access 1 of the 2 14mm bolts. To be able to move the tie rod out of the way there is another 17mm that you must loosen!
Loosen this bolt ^^^^
Now you can move the tie rod after taking this screw out( also shown is the 2 bolts to remove the 2nd part of the caliper.
Now you can move the tie rod to access the bolt. Pry it apart.( wont damage anything)
Bottom bolt 14mm
Top Bolt.
After this take a screw driver and hammer and knock off the dust cap, lightly tap behind it till it comes off. Then take some needle nose pliers, grab on to the cotter pin ( make the pin straight to pull up and out) tap it with a hammer till it comes out. Take the next metal piece off and un screw the bolt and pull off the old rotor! Installation is reverse of tearing down. When you done you should have a nice new rotor, yes the red caliper is ricey but it why not.
yes i had to use my old brake pads again for awhile because the auto store ordered the wrong kind so i have to drive it like this for a bit. Hope this helps just figured i would document it while i did it. Its a little vague but will hopefully help ya out.
Last edited by Eriks85Rx7; Jan 16, 2006 at 12:30 AM.


Savanna Rx-7


Joined: Jun 2004
Posts: 1,577
Likes: 12
From: yokosuka japan
Nice Job Erik 
For those of you that are not as experienced this is a great way to get your feet wet.
Of particular notice: the photo showing the rotor, shows heavy glazing and pitting. this is typical of a older set of rotors. When they get like this it tends to make the brakes work less efficiently, getting them turned, or in Eriks case replaceing them (along with the pads) will make a dramatic difference in braking power.
also remember if you reuse your pads as Eric did, you need to bust the glaze and high spots off of them with some 100 grit sandpaper, they will not bed-in to the rotors properly if you don't and can cause un-even braking from side to side as well as uneven wear.
kenn
Moving the tie rod makes removing that bottom bolt easier, but it isn't necessary. I bought an offset wrench to do this and it worked fine. Might have to hold the head of the wrench on the bolt head with a large screwdriver pried in there.
Rich
Rich
Good pictures! Just want to point out a couple of things tho.
Don't let the caliper hang by the brake line, it could damage it without resulting in visible damage. Use an old hanger to hang it from the springs or wedge it up by the shock to it doesn't stress the hose.
You didn't really remove the tie rod but loosened one of the bolts to the steering knuckle at the bottom that holds the strut on. This is a good way to get at that bolt if its being really stubborn. Usually not a problem but maybe I've been lucky :-)
Also might want to mention the new bearings and races that needed to be installed with those new rotors. Shouldn't reuse the old bearings on the new rotors, it will result in early bearing failure.

Trending Topics
Full Member
Joined: Sep 2005
Posts: 139
Likes: 0
From: Whistler
Great.. I will use this for a refrence when I rebuild my brakes next month. I will probably install new ss brake lines and wheel bearings while im at it. I only have socket wrenchs.. i guess I will need some open ended wrenchs as well any other tools that I would need? bleeder perhaps.. this will be my first time.
Is it difficult to rebuild the calipers? or am I better off purchasing new.
thx in advance.. btw didnt mean to high jack thread
Is it difficult to rebuild the calipers? or am I better off purchasing new.
thx in advance.. btw didnt mean to high jack thread
Last edited by 3times; Jan 16, 2006 at 02:37 PM.
Thread Starter
Wheel Revolutionist!
Joined: Apr 2005
Posts: 1,018
Likes: 1
From: West Virginia
yes all the pics are on the passenger side except the finished product that is the driver side. Also I got the caliper painting kit at advance auto so it can withstand up to 500 degrees. glad yall like it. Oh yeah the caliper hanging thing isnt good lol i didnt mean to condone it. I rested mine on the suspension area. Sorry if i used incorrect terms for certain parts.
btw: I also got new bearings but didnt take pics of installing them into the rotors.
since this "How to" worked pretty well i prolly do one of the rear disc brakes also.
btw: I also got new bearings but didnt take pics of installing them into the rotors.
since this "How to" worked pretty well i prolly do one of the rear disc brakes also.
Rotary Enthusiast
Joined: Jun 2004
Posts: 1,081
Likes: 2
From: Richmond, VA
nice
now you just need some new wheels to show em off....
and then a new springs/ shocks/ struts/ etc. to go along with your bigger wheels....
and then once your suspension is tricked out, mod the crap out of the engine! lol it never ends
-
now you just need some new wheels to show em off....
and then a new springs/ shocks/ struts/ etc. to go along with your bigger wheels....
and then once your suspension is tricked out, mod the crap out of the engine! lol
it never ends-

Thread
Thread Starter
Forum
Replies
Last Post
Frisky Arab
2nd Generation Specific (1986-1992)
13
Aug 18, 2015 05:30 PM