Here's the beginnings of my subwoofer enclosure...
 05-04-06, 11:40 AM
#1
On the prowl for an FB
Thread Starter
iTrader: (1)
Join Date: Sep 2002
Location: Surrounded by Sebey parts, Rhode Island
Posts: 2,932
Likes: 0
Received 6 Likes
on
4 Posts
Here's the beginnings of my subwoofer enclosure...
Finally got a nice weather day... Mocking it up in 1/4" MDF, then I will fiberglass the **** out of it. When it's done, it will be completely hidden.
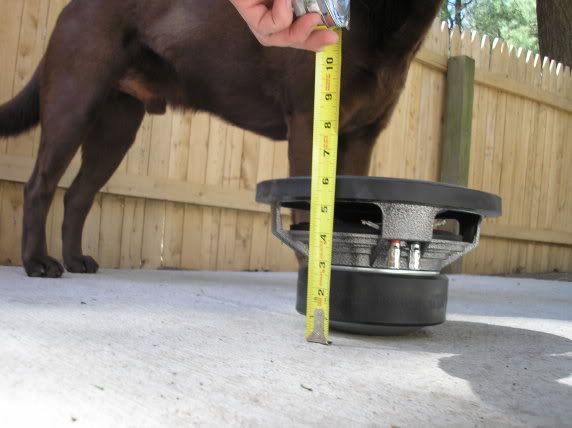
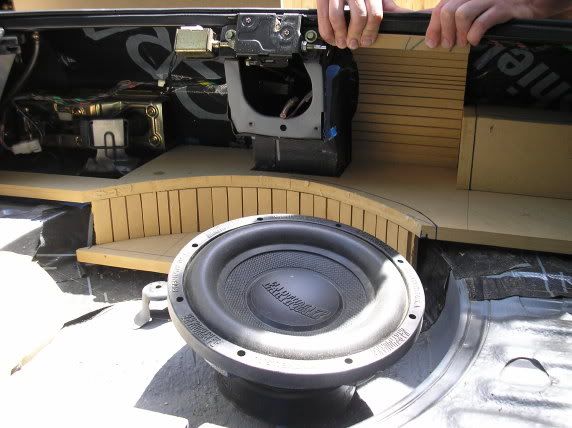
Here's the sub I'm using for the mock up... It's a 10" Earthquake sub, it's the biggest 10" I had around, so if it will fit, then 99% of 10" subs will fit. That's my lab in the background.
I started by taping off the bottom of the hatch so that I could establish a shape for the base.
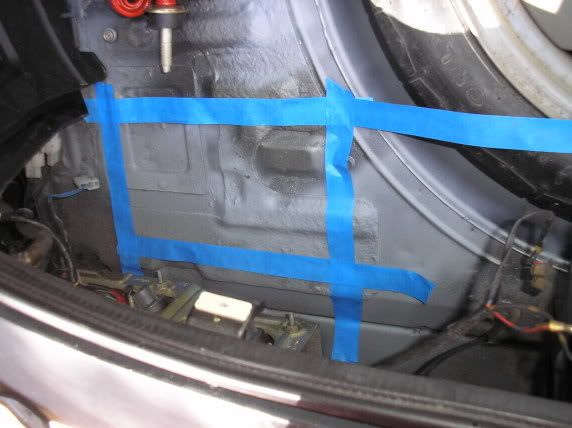
I had put down the sound deadening material a couple days ago, so that it would be in place for building the enclosure:
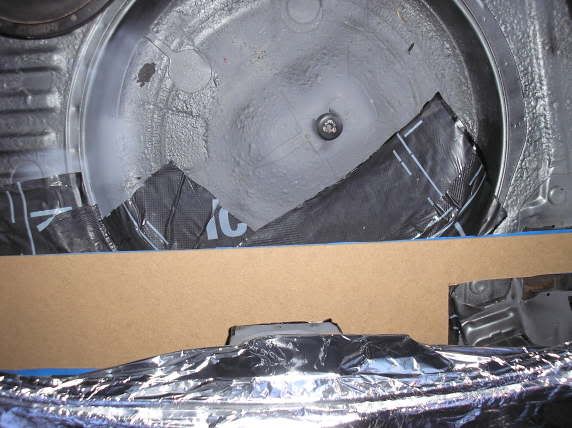
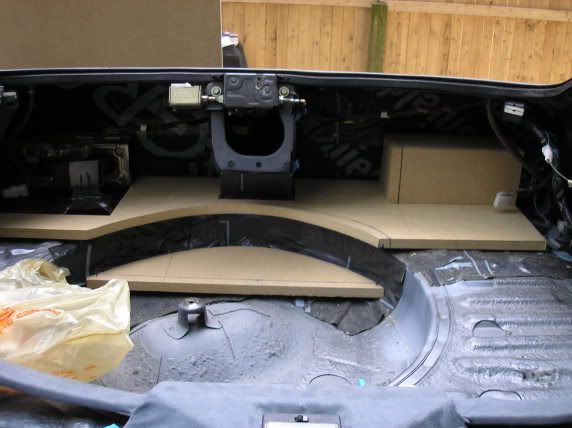
Then it was just a matter of cutting and fitting forms to build up the sides. The back and top, I am just going to lay the cloth down and free form it, to allow for the wiring harness and the drains from the hatch. I used a hot glue gun to tack the panels into place... I need to trim down the piece that will hold the sub once I establish the angle it needs to rest at. Then, I'll put that angle onto my table saw or my miter saw, cut the base at the correct angle, and it will be good to go.

I'm not going to have my spare tire in, so the amp will go in the spare tire well.
Next up, fiberglass!
Here's the sub I'm using for the mock up... It's a 10" Earthquake sub, it's the biggest 10" I had around, so if it will fit, then 99% of 10" subs will fit. That's my lab in the background.
I started by taping off the bottom of the hatch so that I could establish a shape for the base.
I had put down the sound deadening material a couple days ago, so that it would be in place for building the enclosure:
Then it was just a matter of cutting and fitting forms to build up the sides. The back and top, I am just going to lay the cloth down and free form it, to allow for the wiring harness and the drains from the hatch. I used a hot glue gun to tack the panels into place... I need to trim down the piece that will hold the sub once I establish the angle it needs to rest at. Then, I'll put that angle onto my table saw or my miter saw, cut the base at the correct angle, and it will be good to go.
I'm not going to have my spare tire in, so the amp will go in the spare tire well.
Next up, fiberglass!
 05-04-06, 11:45 AM
#2
Senior Member
Join Date: Jan 2006
Location: Cali Baby
Posts: 411
Likes: 0
Received 0 Likes
on
0 Posts
Awesome, please lots of pics and step by step instruction of all fiberglass proceedures! Not that you dont just lettin you know i am interested in the fiberglass and you explain everything really well. Keep up the good work.
05-04-06, 01:53 PM
#3
Rotary Enthusiast
iTrader: (4)
Join Date: Jan 2003
Location: Bryan, TX
Posts: 766
Likes: 0
Received 0 Likes
on
0 Posts
Can you make it so it doesn't cover up the spare? Or make it so it pulls out so you can still keep the spare? Road trips without one worry me. (I have crappy tires on the car. . . )
It looks really good. I look forward to updates.
It looks really good. I look forward to updates.
05-04-06, 02:12 PM
#6
On the prowl for an FB
Thread Starter
iTrader: (1)
Join Date: Sep 2002
Location: Surrounded by Sebey parts, Rhode Island
Posts: 2,932
Likes: 0
Received 6 Likes
on
4 Posts
Originally Posted by Tranquil
Whoa boy! How is the amp going to cool itself if it is stuck underneath in the spare's well? If it overheats you're fucked.
05-04-06, 02:13 PM
#7
On the prowl for an FB
Thread Starter
iTrader: (1)
Join Date: Sep 2002
Location: Surrounded by Sebey parts, Rhode Island
Posts: 2,932
Likes: 0
Received 6 Likes
on
4 Posts
Originally Posted by dantheman
Can you make it so it doesn't cover up the spare? Or make it so it pulls out so you can still keep the spare? Road trips without one worry me. (I have crappy tires on the car. . . )
It looks really good. I look forward to updates.
It looks really good. I look forward to updates.
Trending Topics
05-04-06, 03:04 PM
#9
Senior Member

Join Date: Jan 2006
Location: Michigan
Posts: 313
Likes: 0
Received 0 Likes
on
0 Posts
Looks awesome. Interested to see the progression. Is the sound deadening material also a waterproofing material. Just wondering cuz I just did a few things in my hatch area and drove in the rain the other day and noticed the new vinyl was wet. Helpful advice...double check all your seals ( hatch, tailights ) before you install it so it doesn't get damp. Wouldn't want all the hard work to get ruined. Keep us updated.
 05-04-06, 05:13 PM
#11
Senior Member

Join Date: Mar 2005
Location: massachusetts
Posts: 697
Likes: 0
Received 0 Likes
on
0 Posts
are you going to make it removable.. other wise.. how are you going to get at the tail light blubs when you burn one out?
I was thinking of doing something similar except I was going to place them more foward and to the side. Almost in the location of the stock speakers.
I was thinking of doing something similar except I was going to place them more foward and to the side. Almost in the location of the stock speakers.
05-04-06, 06:53 PM
#13
On the prowl for an FB
Thread Starter
iTrader: (1)
Join Date: Sep 2002
Location: Surrounded by Sebey parts, Rhode Island
Posts: 2,932
Likes: 0
Received 6 Likes
on
4 Posts
Originally Posted by drunkclever
are you going to make it removable.. other wise.. how are you going to get at the tail light blubs when you burn one out?
I was thinking of doing something similar except I was going to place them more foward and to the side. Almost in the location of the stock speakers.
I was thinking of doing something similar except I was going to place them more foward and to the side. Almost in the location of the stock speakers.
 05-04-06, 10:00 PM
#16
Senior Member
Join Date: Mar 2005
Location: massachusetts
Posts: 697
Likes: 0
Received 0 Likes
on
0 Posts
Originally Posted by $100T2
Yep, it's removable. I'm making it so it bolts in so that no one can smash and grab it. I also have a couple other tricks up my sleeve for it that I think you all will like.
thats going to come out really nice. the box I am looking to make involves.. some '80s touch. Its a few 12V leds, 1way mirrowed glass. It makes it look like its infinite. Hopefully when I get everything squared away, as far as getting my car painted and road worthy, I look forward to do this as some sort of winter project.
05-05-06, 01:06 AM
#17
Your lab has awesome posture! Sorry I love dogs almost as much as i love cars. You know why dogs are better than women? Cause you can beat the $#!+ out of a dog and when you get home from work the first think its gonns do is stick its face in your crotch. LOL!!! HA AH HAaaaaa...
 05-05-06, 08:51 AM
#21
Burning Oil-Grinding 3rd
Originally Posted by blwfly
you stole my idea
but are 1month ahead of me lol
but are 1month ahead of me lol
https://www.rx7club.com/1st-generation-specific-1979-1985-18/fiberglass-speaker-pods-rear-car-224500/
05-05-06, 12:04 PM
#24
On the prowl for an FB
Thread Starter
iTrader: (1)
Join Date: Sep 2002
Location: Surrounded by Sebey parts, Rhode Island
Posts: 2,932
Likes: 0
Received 6 Likes
on
4 Posts
Originally Posted by Hades12
By the way, the box I built yesterday got trashed. I didn't like it, so it's back to the drawing board. Pics of the new one will be up soon, I'm in the middle of it right now.
05-05-06, 01:21 PM
#25
On the prowl for an FB
Thread Starter
iTrader: (1)
Join Date: Sep 2002
Location: Surrounded by Sebey parts, Rhode Island
Posts: 2,932
Likes: 0
Received 6 Likes
on
4 Posts
Alright, so I wanted to form fit the enclosure to the area behind the spare, as you all know. The problem is, it's a very awkward space. I switched to 3/4" MDF for the base, and decided to use as much 3/4" as I could. So, now my 10" sub won't fit. Why? It's hitting the forms over the taillight, which sucks. So, I considered dropping part of the base into the spare tire well.
Unfortunately, that created more problems than it solved. Now I'd have to mate two curved pieces with a 3 5/8" drop. Not a big deal with the fiberglass, but it also fucked up how the sub would sit. I decided to try to mate the two curved pieces anyway, and made an assload of 1" x 3/4" x 3 5/8" pieces, planning to glue them in place then fiberglass them.

Then it hit me. My genius was in full effect, yo! My kids have a little wooden snake that can actually slither. How? It's got slats cut down each side. That stupid little snake solved 90% of my problems. Watch me go!
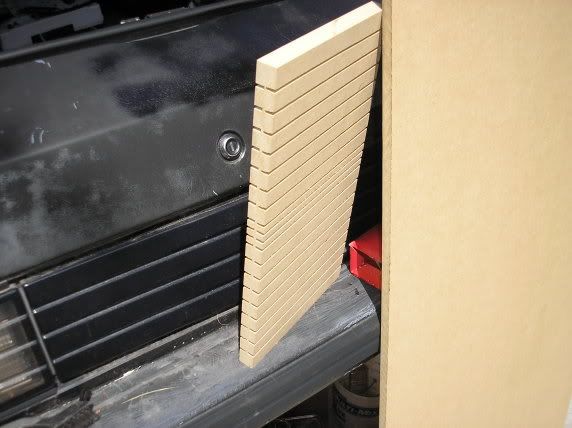
The bonus? It will be super easy to fiberglass these, and they are still technically solid pieces. Here I am holding the back piece in place:
The form over the taillight has since been removed and replaced with Snake Board. Snake Board is my new $100T2 term for that technique.
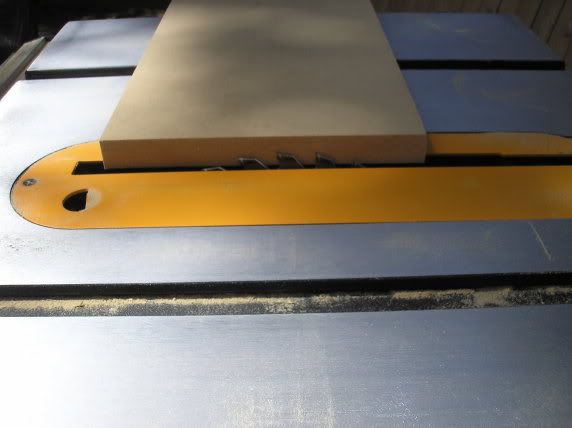
Here's how I did it. I set the depth on my table saw (if you don't have one, you can duplicate this with a circular saw, but it will be a bitch and a half), and made equi-distant cuts on both sides of the board.
These are the pieces for the back. Notice they are trimmed on the side. Why? Because that's how you have to do it so they'll fit.
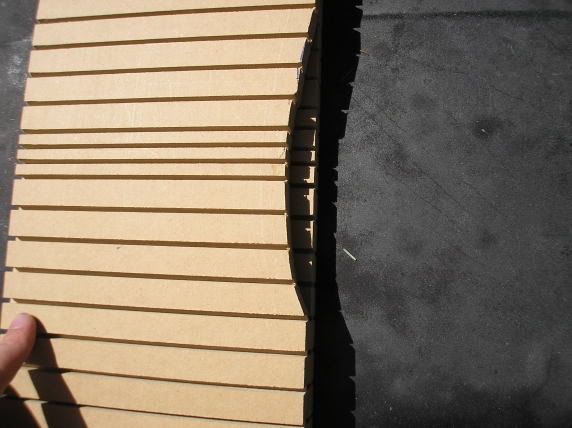
So now, I get to rebuild the base again, because I am using the Snake Board technique over the tail lights, across the back, and I'm going to do it on the front piece, so that it will match the curve of the interior. When covered with black speaker cloth, it will totally blend in.
Unfortunately, that created more problems than it solved. Now I'd have to mate two curved pieces with a 3 5/8" drop. Not a big deal with the fiberglass, but it also fucked up how the sub would sit. I decided to try to mate the two curved pieces anyway, and made an assload of 1" x 3/4" x 3 5/8" pieces, planning to glue them in place then fiberglass them.
Then it hit me. My genius was in full effect, yo! My kids have a little wooden snake that can actually slither. How? It's got slats cut down each side. That stupid little snake solved 90% of my problems. Watch me go!
The bonus? It will be super easy to fiberglass these, and they are still technically solid pieces. Here I am holding the back piece in place:
The form over the taillight has since been removed and replaced with Snake Board. Snake Board is my new $100T2 term for that technique.
Here's how I did it. I set the depth on my table saw (if you don't have one, you can duplicate this with a circular saw, but it will be a bitch and a half), and made equi-distant cuts on both sides of the board.
These are the pieces for the back. Notice they are trimmed on the side. Why? Because that's how you have to do it so they'll fit.
So now, I get to rebuild the base again, because I am using the Snake Board technique over the tail lights, across the back, and I'm going to do it on the front piece, so that it will match the curve of the interior. When covered with black speaker cloth, it will totally blend in.
Last edited by $100T2; 05-05-06 at 01:36 PM.