When you click on links to various merchants on this site and make a purchase, this can result in this site earning a commission. Affiliate programs and affiliations include, but are not limited to, the eBay Partner Network.
'85 S, 5-speed
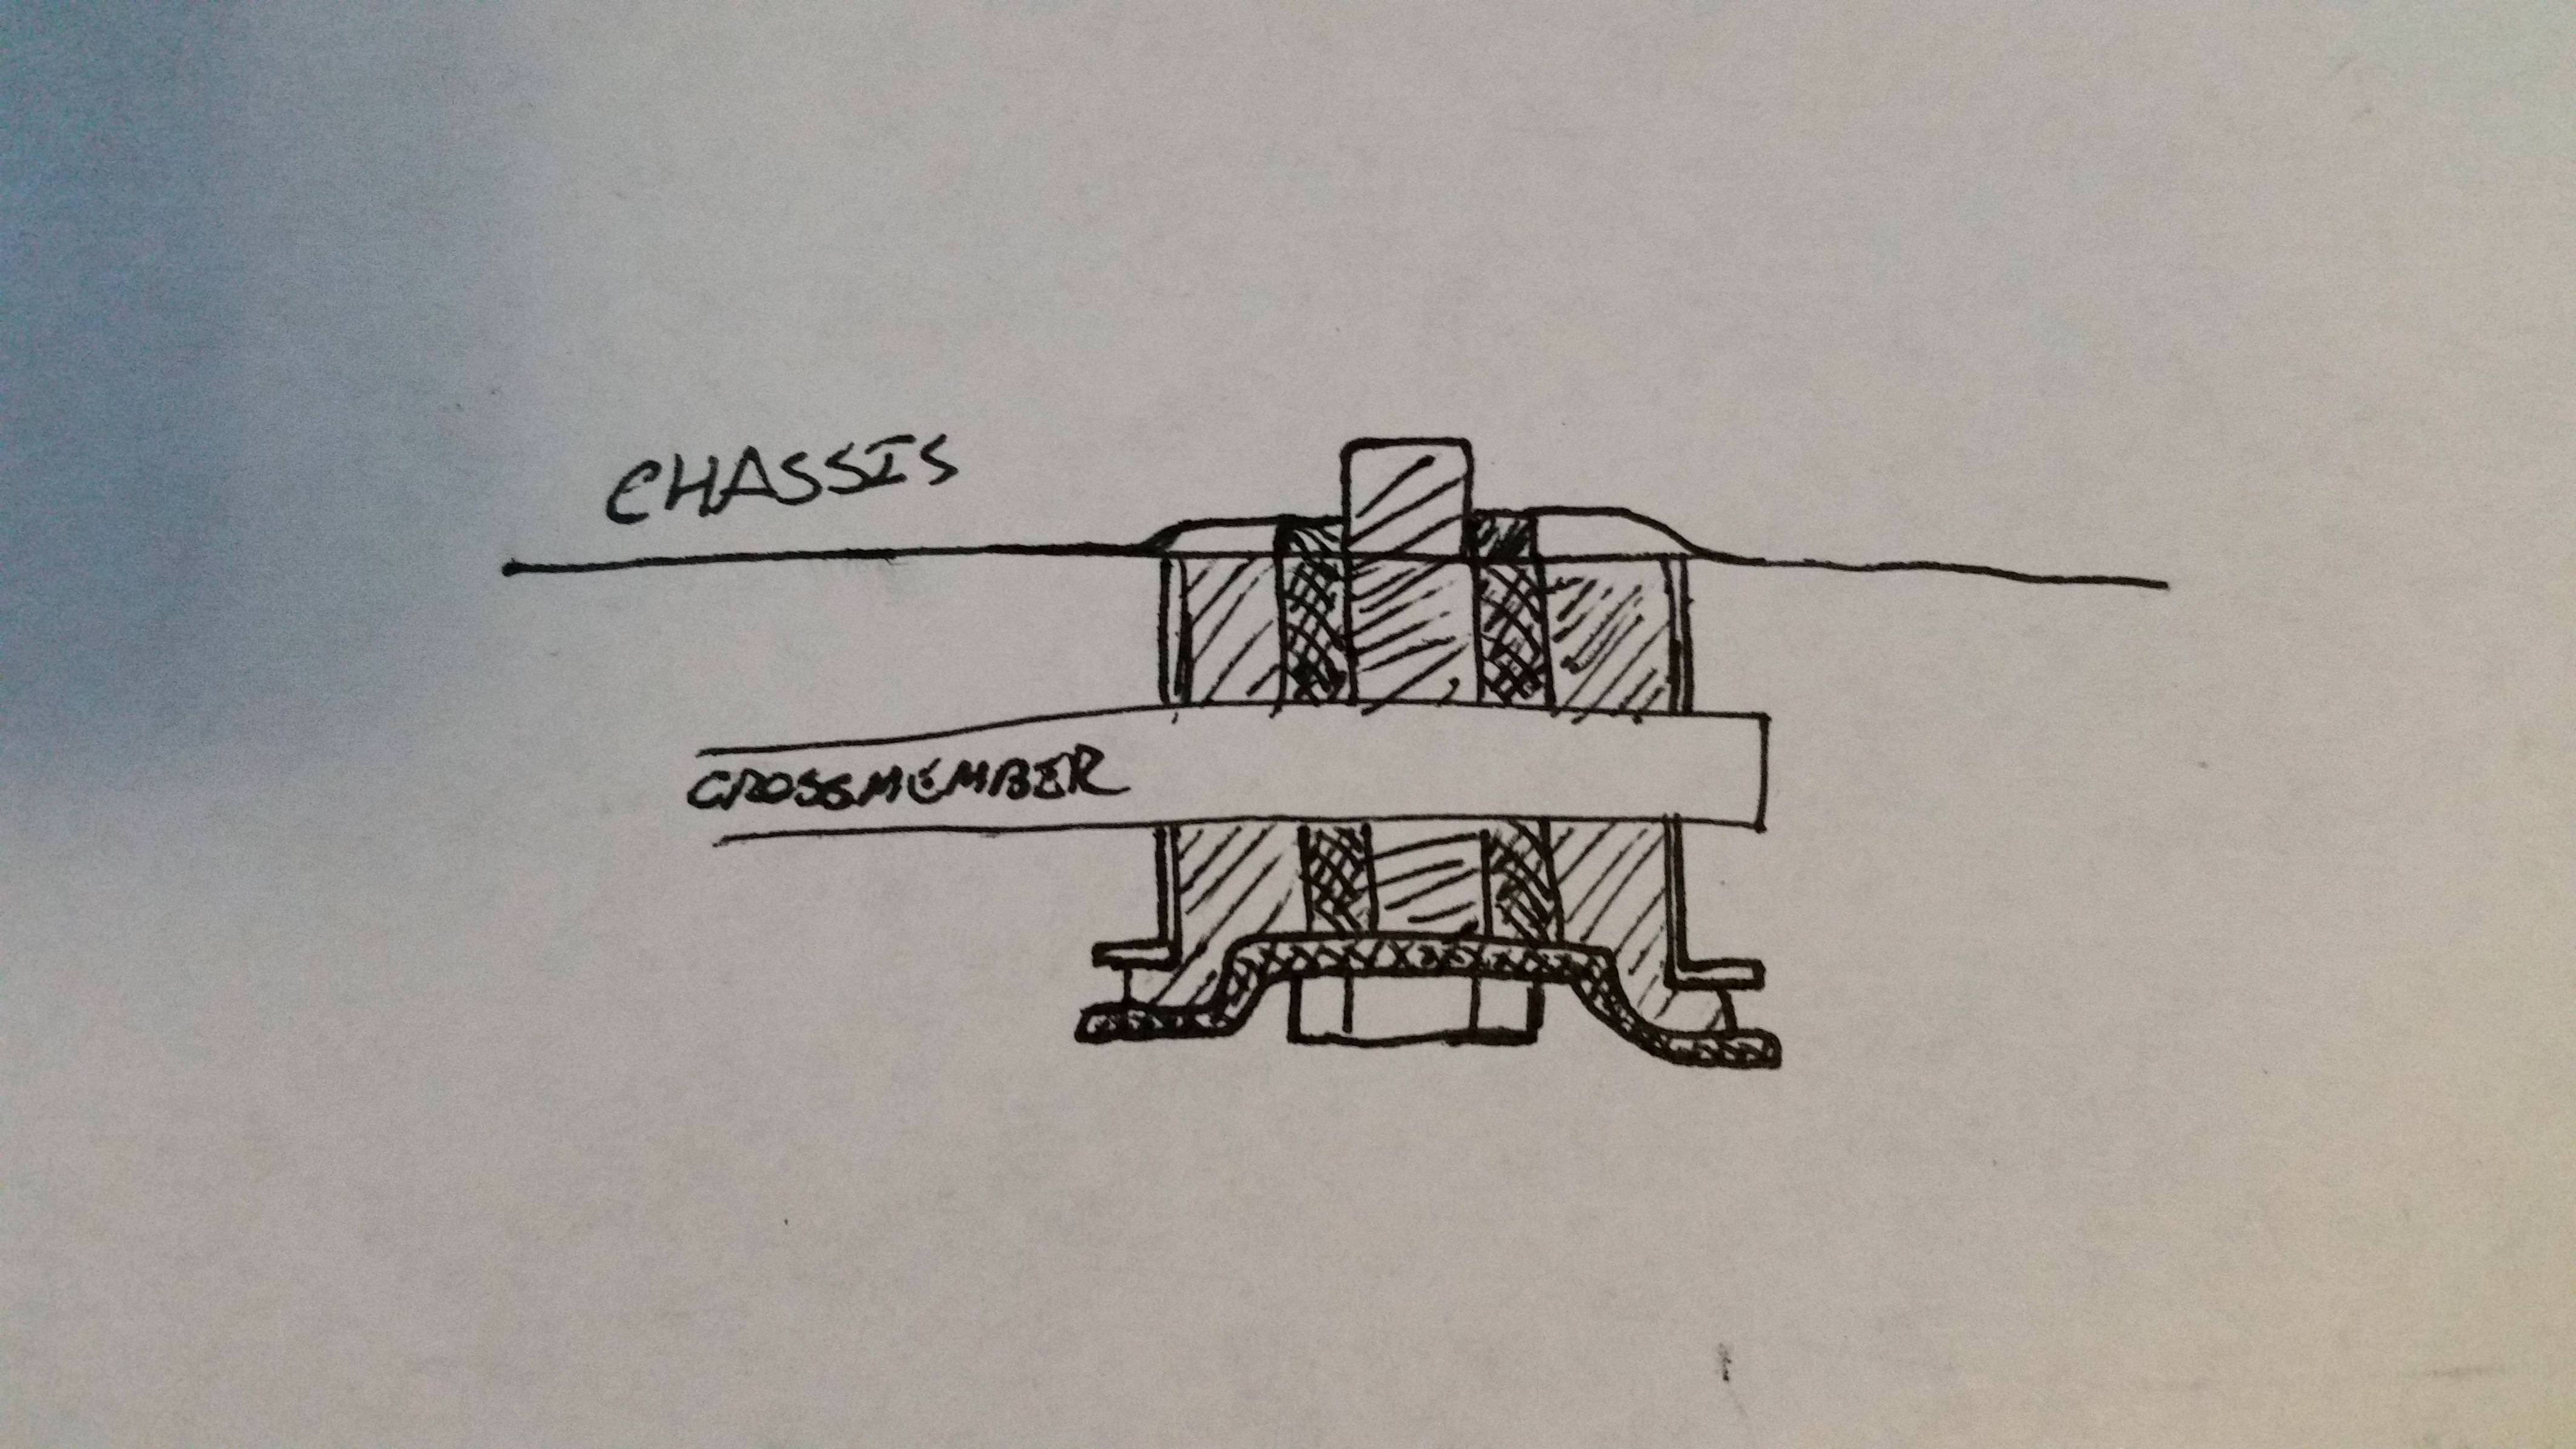
My crossmember bushings are soaked in oil from a very leaky engine (which has since been addressed). I am in the process of replacing mounts, bushings, etc. and fully expect to find the crossmember bushings to be completely wasted when I pull it out of the car to change the trans mount soon. What are the current options for this? I know the bushings are NLA from Mazda, and the one reference for replacements I could find is a 10+ year old thread and the shop making the part doesn't exist anymore.
The trans cross member bushings on the 1984/1985 manual trans are not replaceable. From what I can tell, the 1979/1980 cross member is very close to the 1984/1985 but use the donut style bushings. I havn't looked at he 1981-1983 cross member bushings to see what they use.
As a side note, the 1984/1985 automatic cross member uses the donut style.
Last edited by KansasCityREPU; Jan 13, 2018 at 08:58 PM.
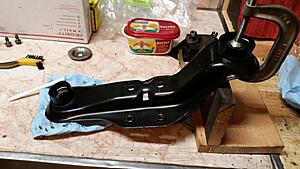
I ended up making a custom polyurethane mounting system with a chassis cross brace/stiffener for my TII transmission in the FB. Wasn't terribly difficult and provides a super gnarly solid mount and lifting point for the car.
I'm making a new mounting system since the one I had last season was totally wrong, so keep that in mind.
If you're into fabrication, could be an option.
Nice! How is that secured to the car, I think the mounts are at an angle (going from memory of being under the car; I've not pulled mine yet)? I suppose a custom crossmember is another option to consider as long as the geometry doesn't get too crazy.
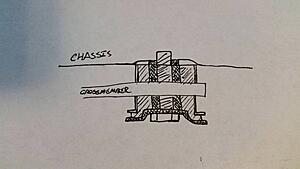
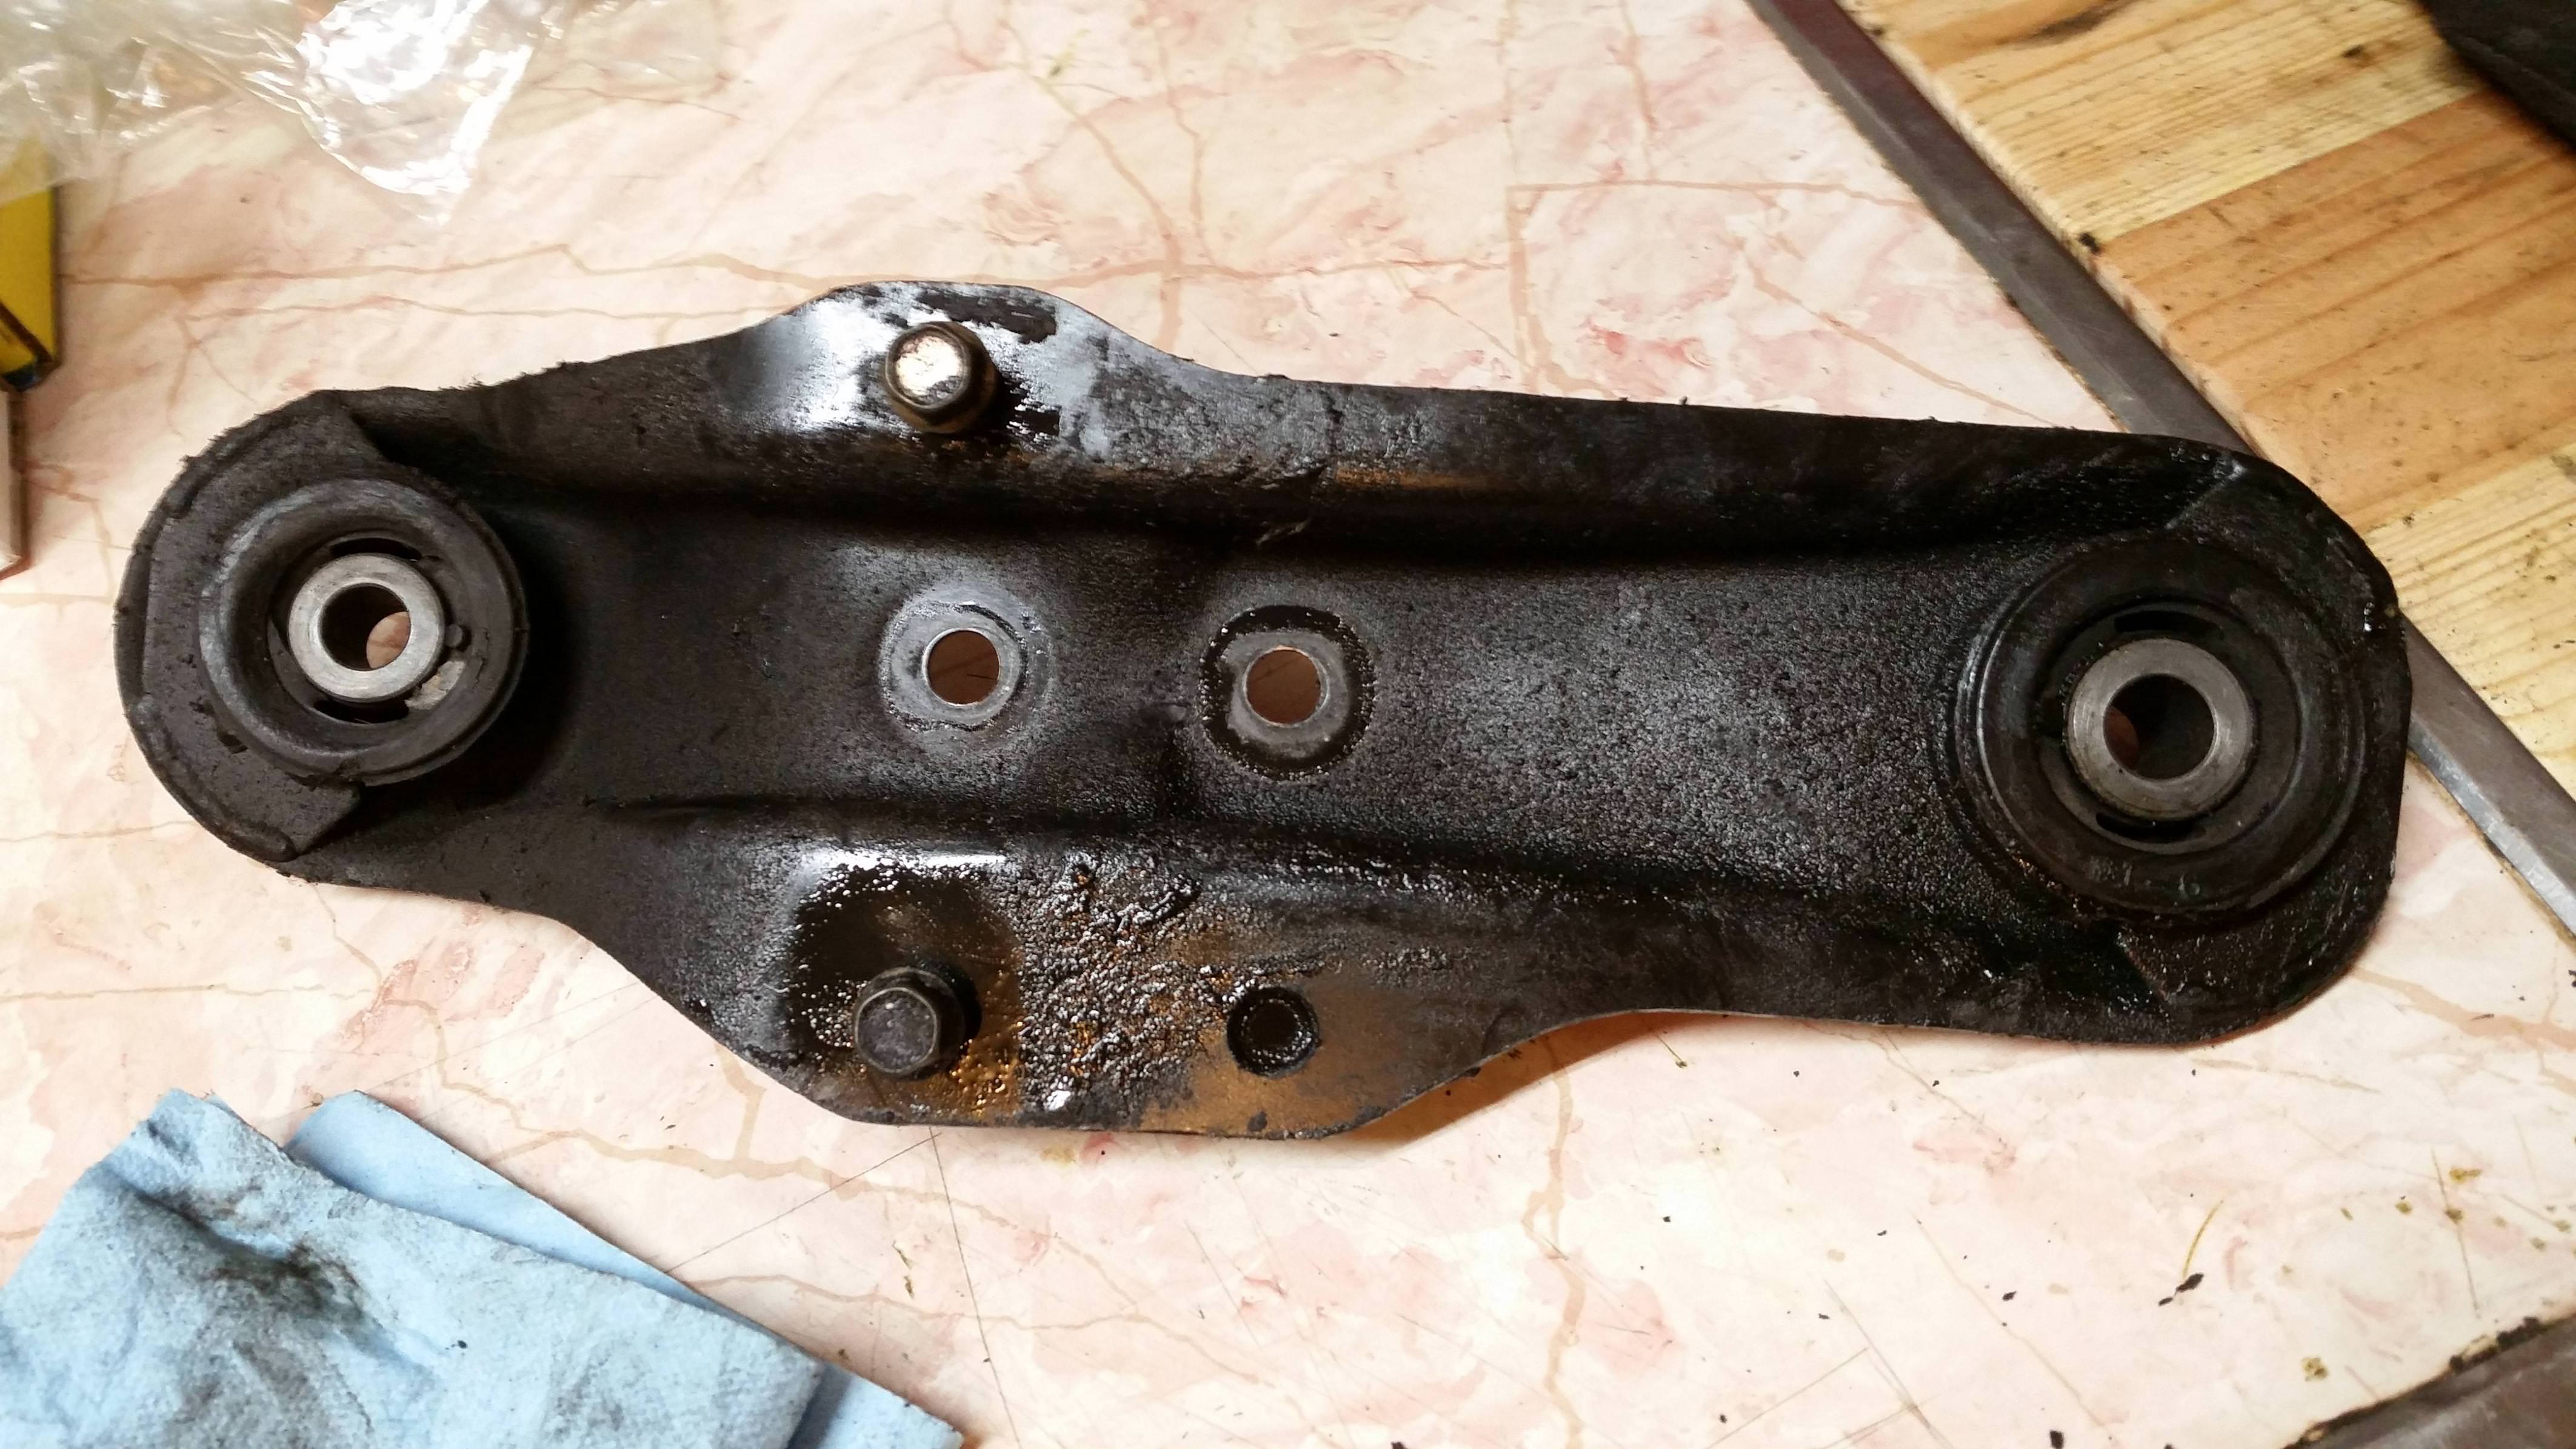
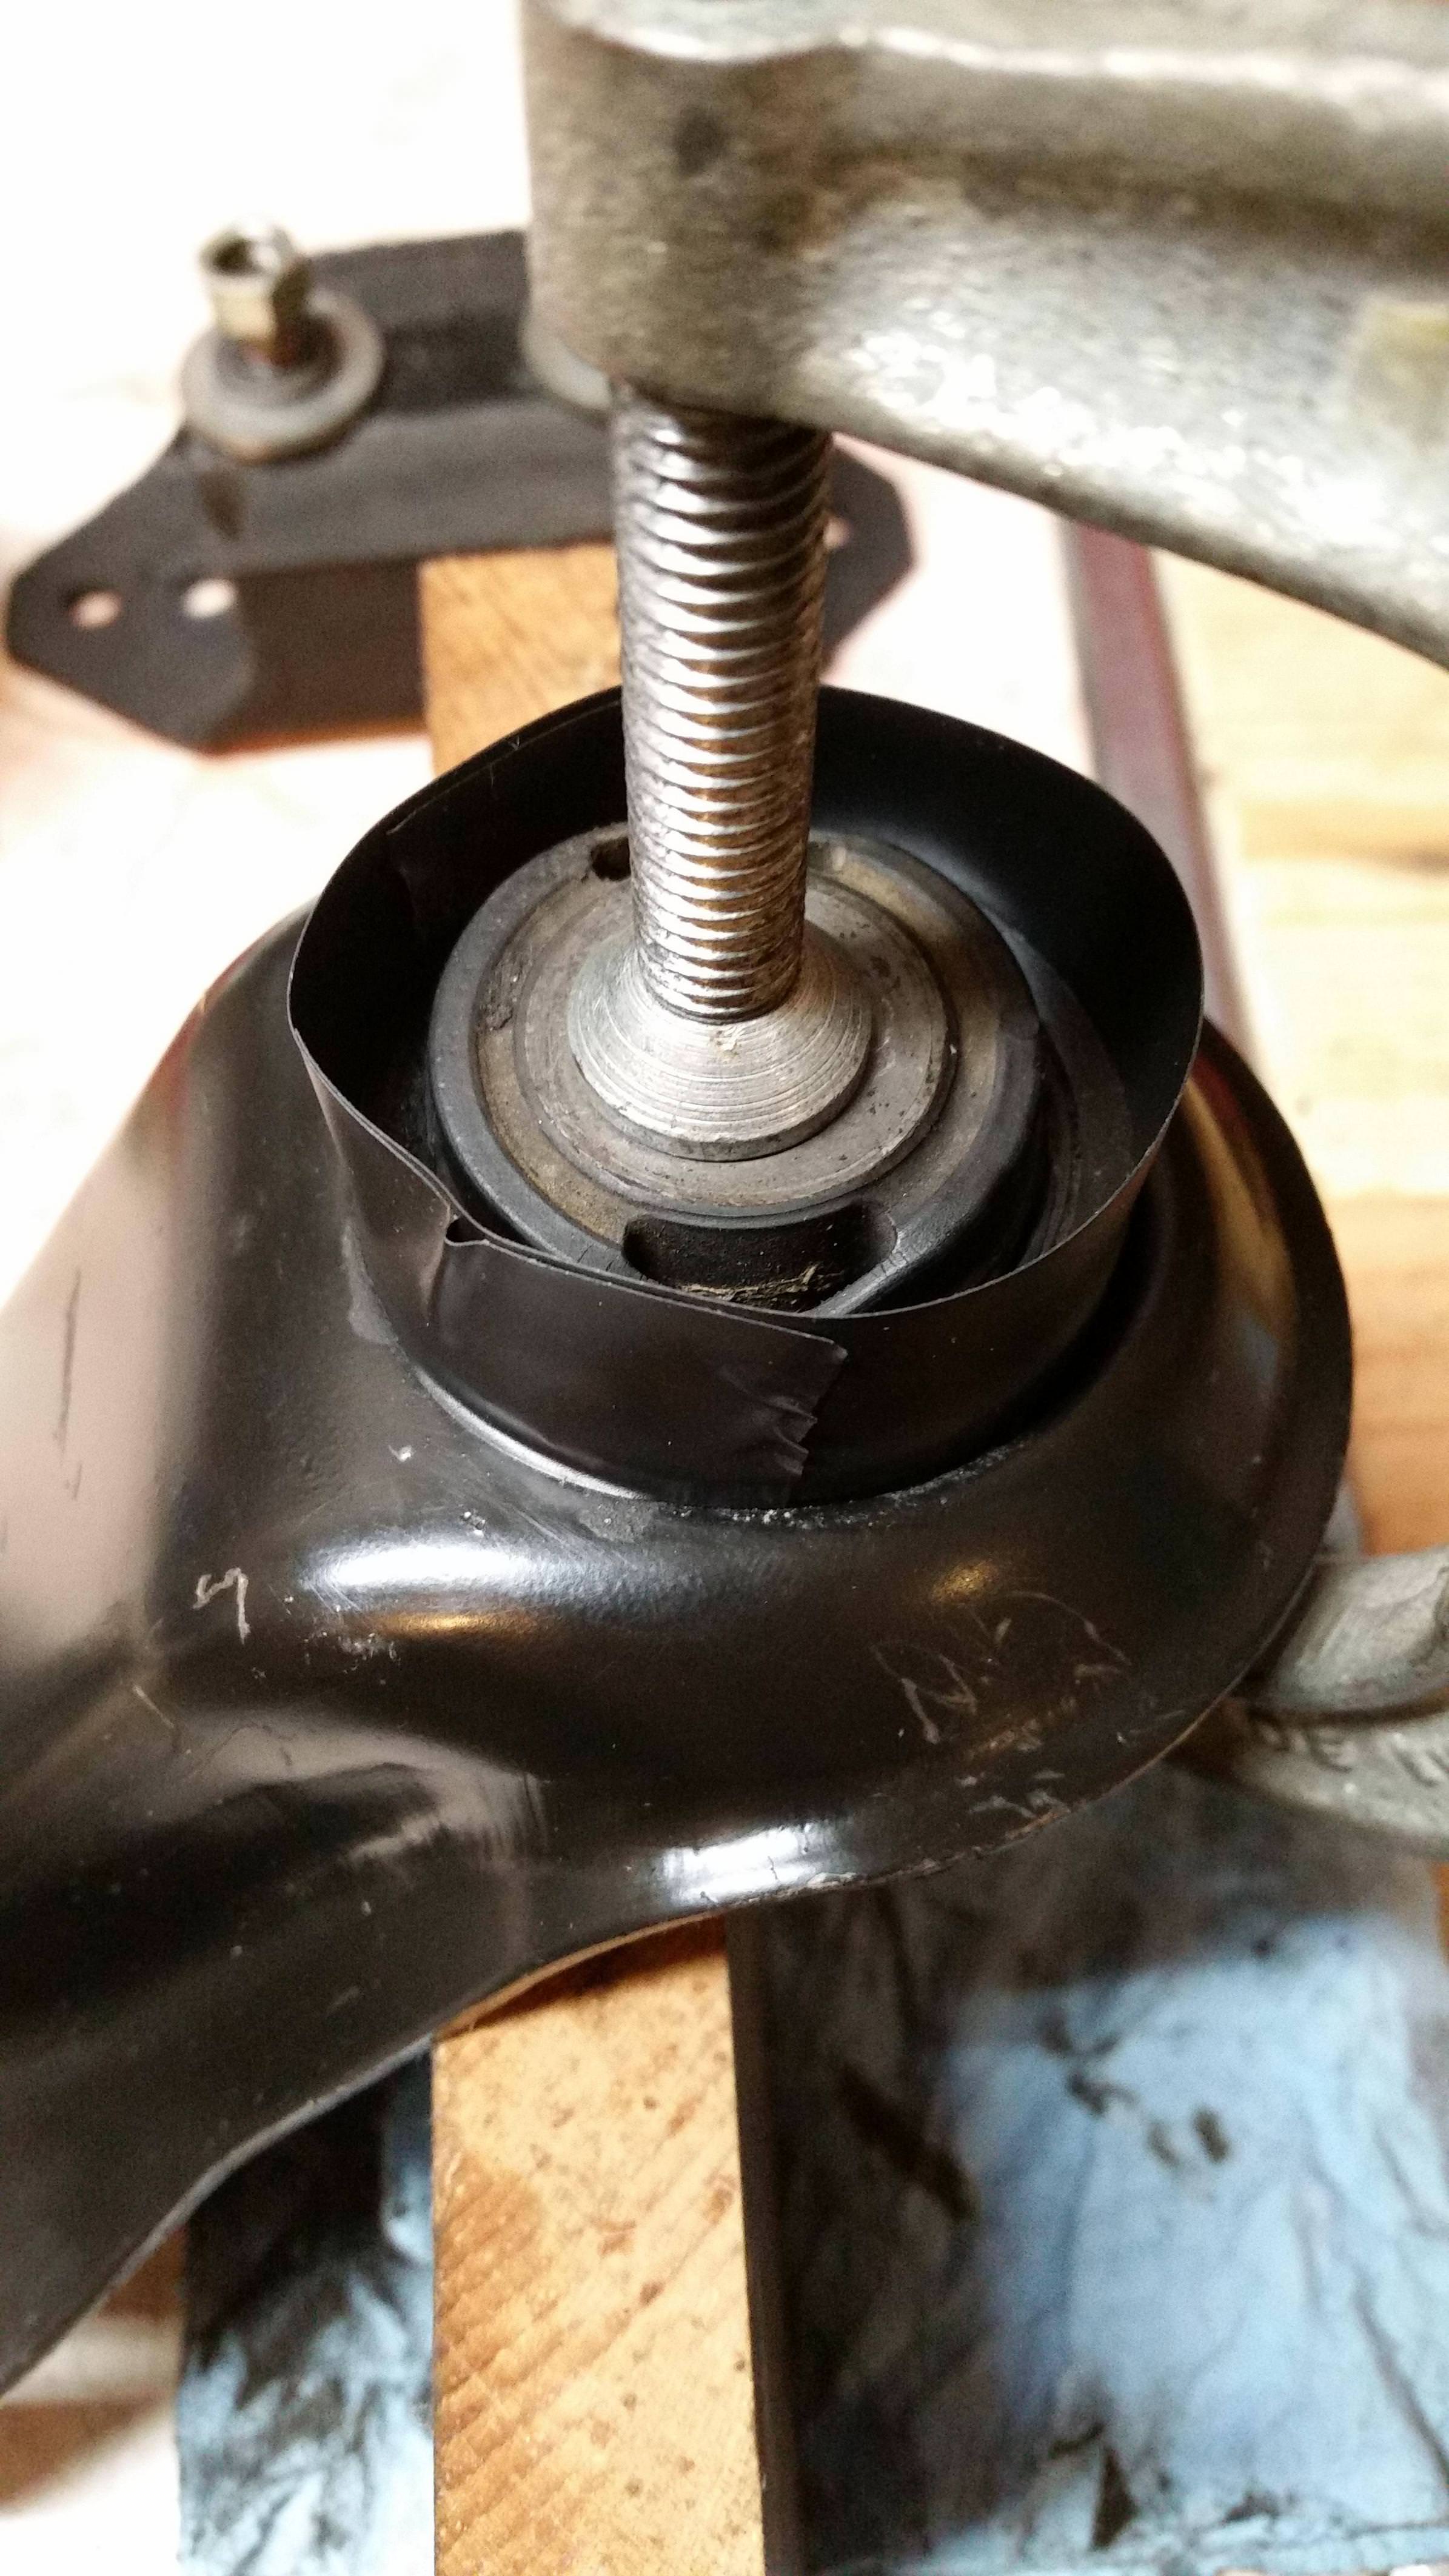
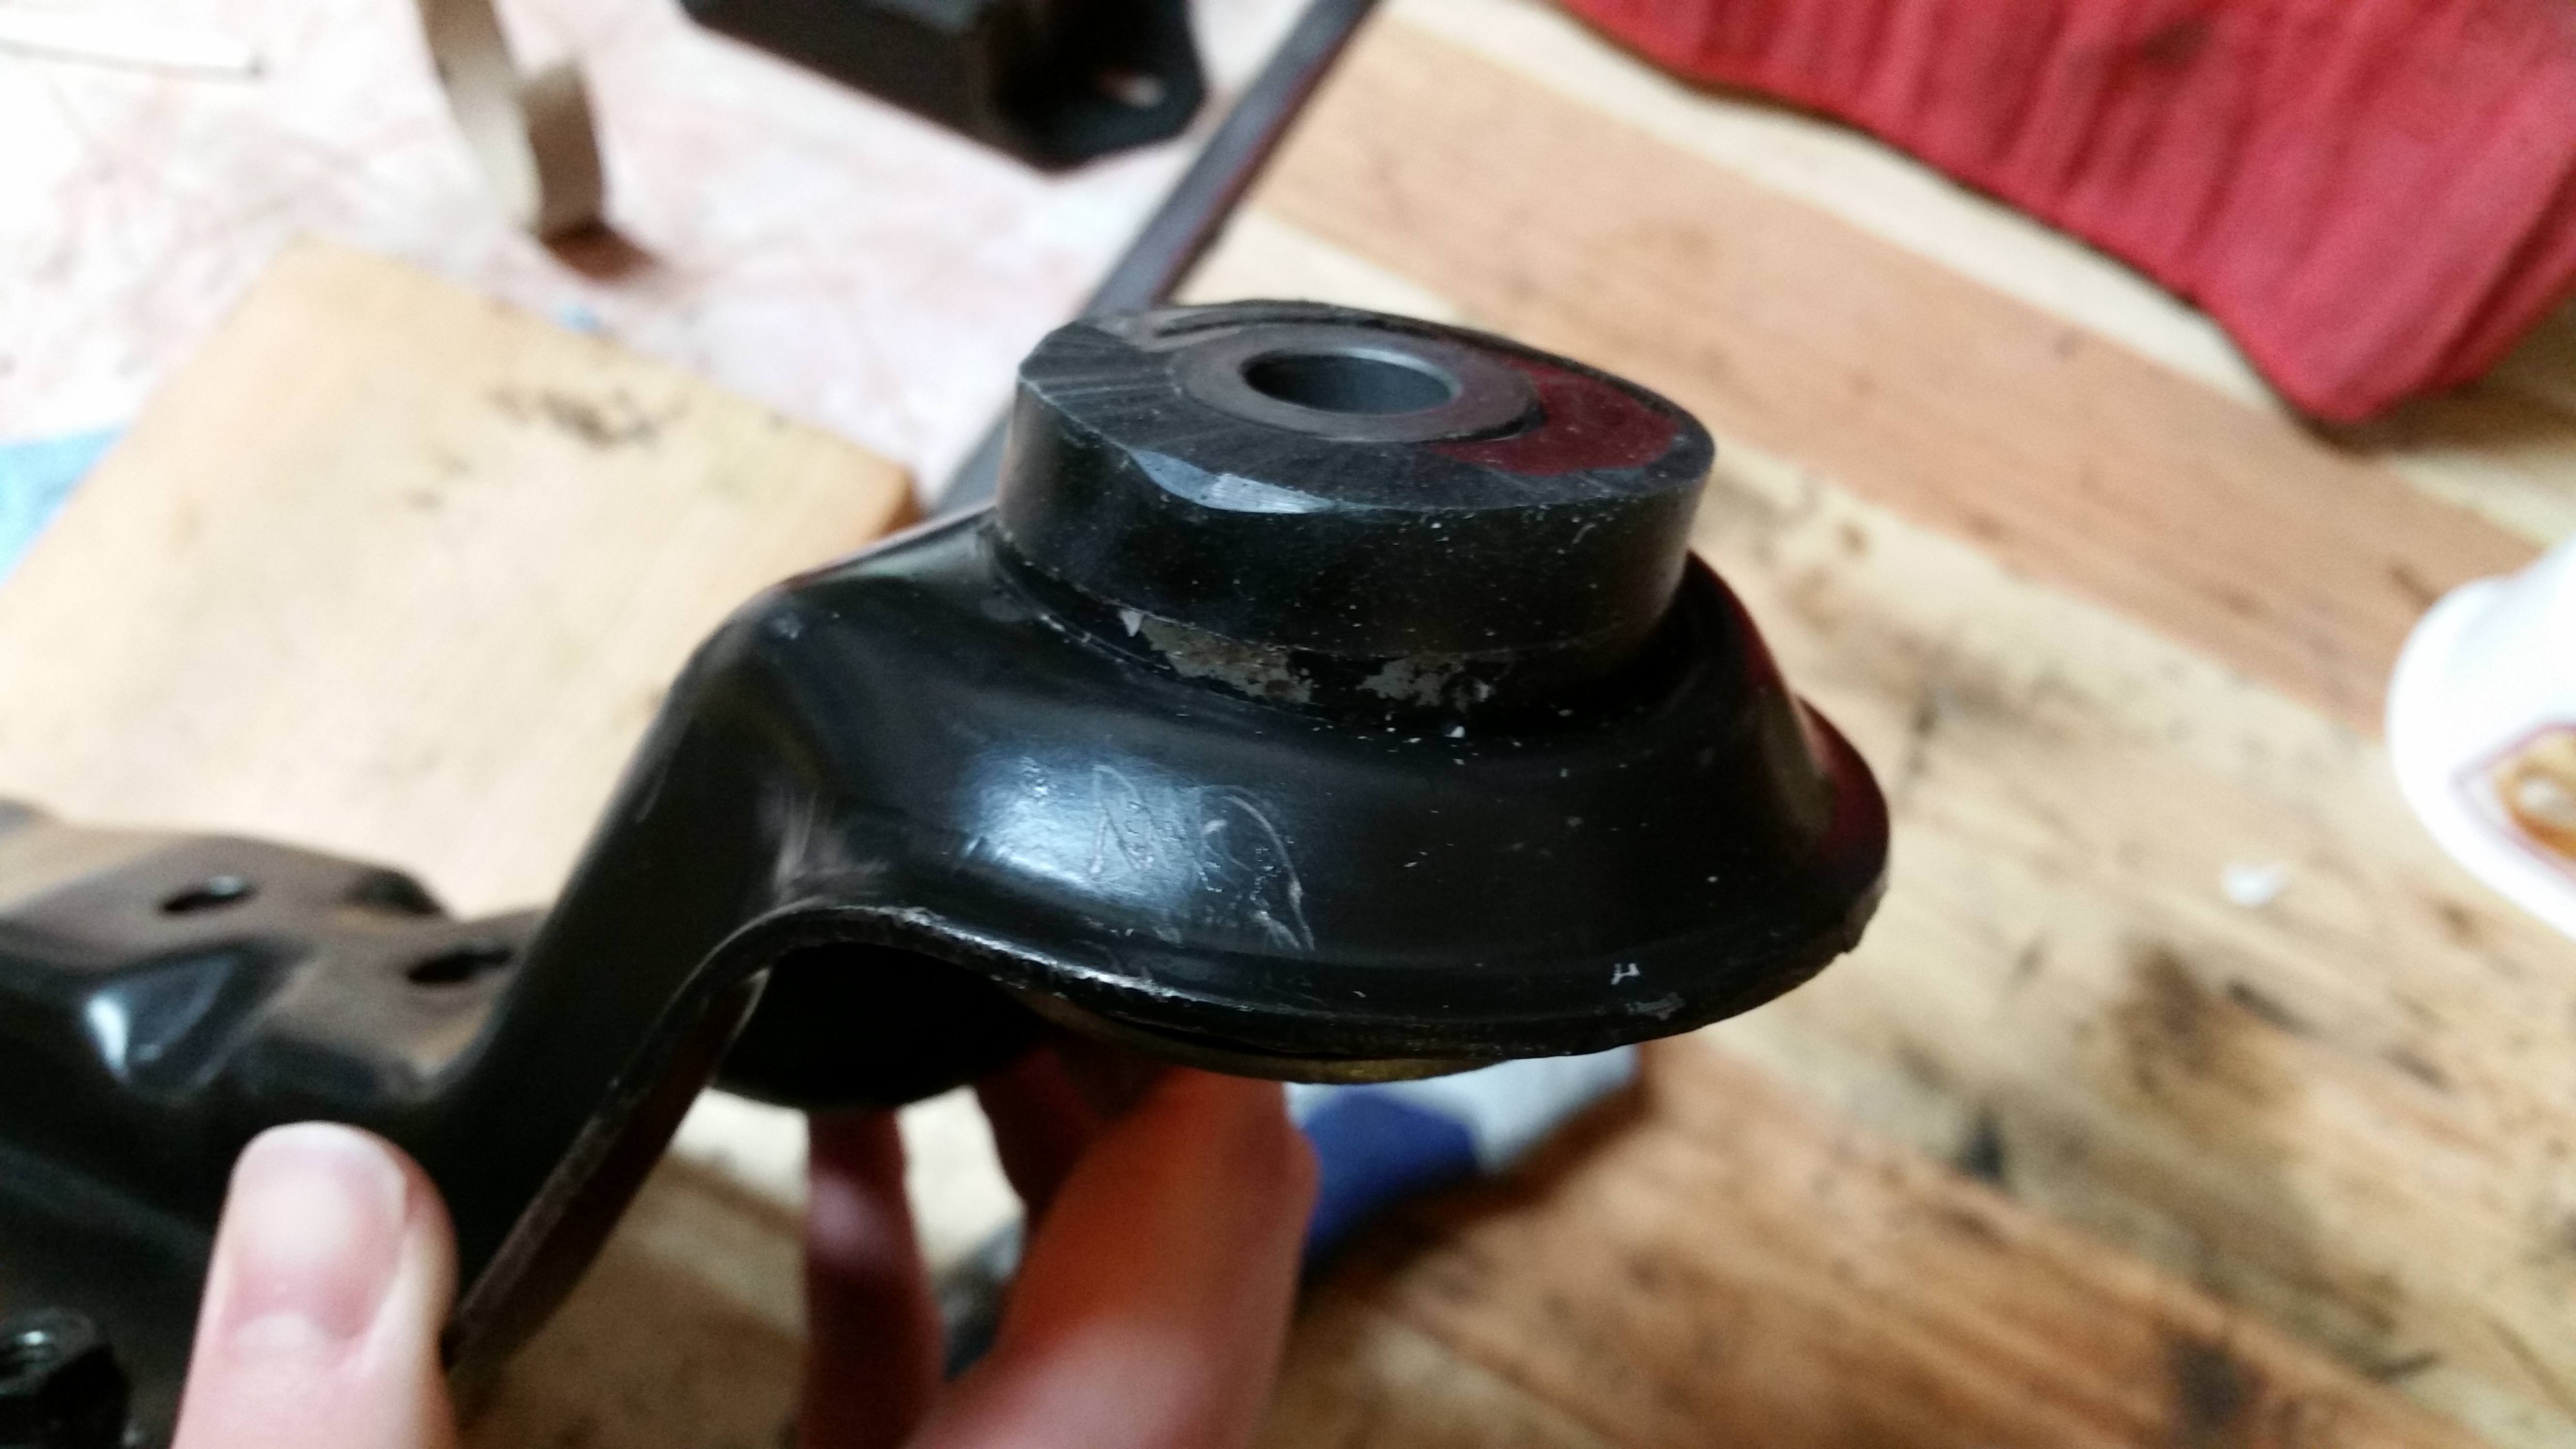
I pulled the crossmember, as expected the one bushing was super soft from being soaked in oil, and the upper one was dried out and cracked. I looked into general polyurethane flange bushings, but because of the way these mount to the chassis (the bushing extends past the outer shell) use of a bushing not bonded to the shell will present quite an opportunity for movement and clunking. A flanged bushing on both sides is possible, but the shell isn't flanged on the body-side so it would eventually dig into the flange and introduce that motion potential again.
After much debate, I ordered some casting urethane (in 80A durometer) from McMaster-Carr, which I picked up after work today: https://www.mcmaster.com/#8644K57
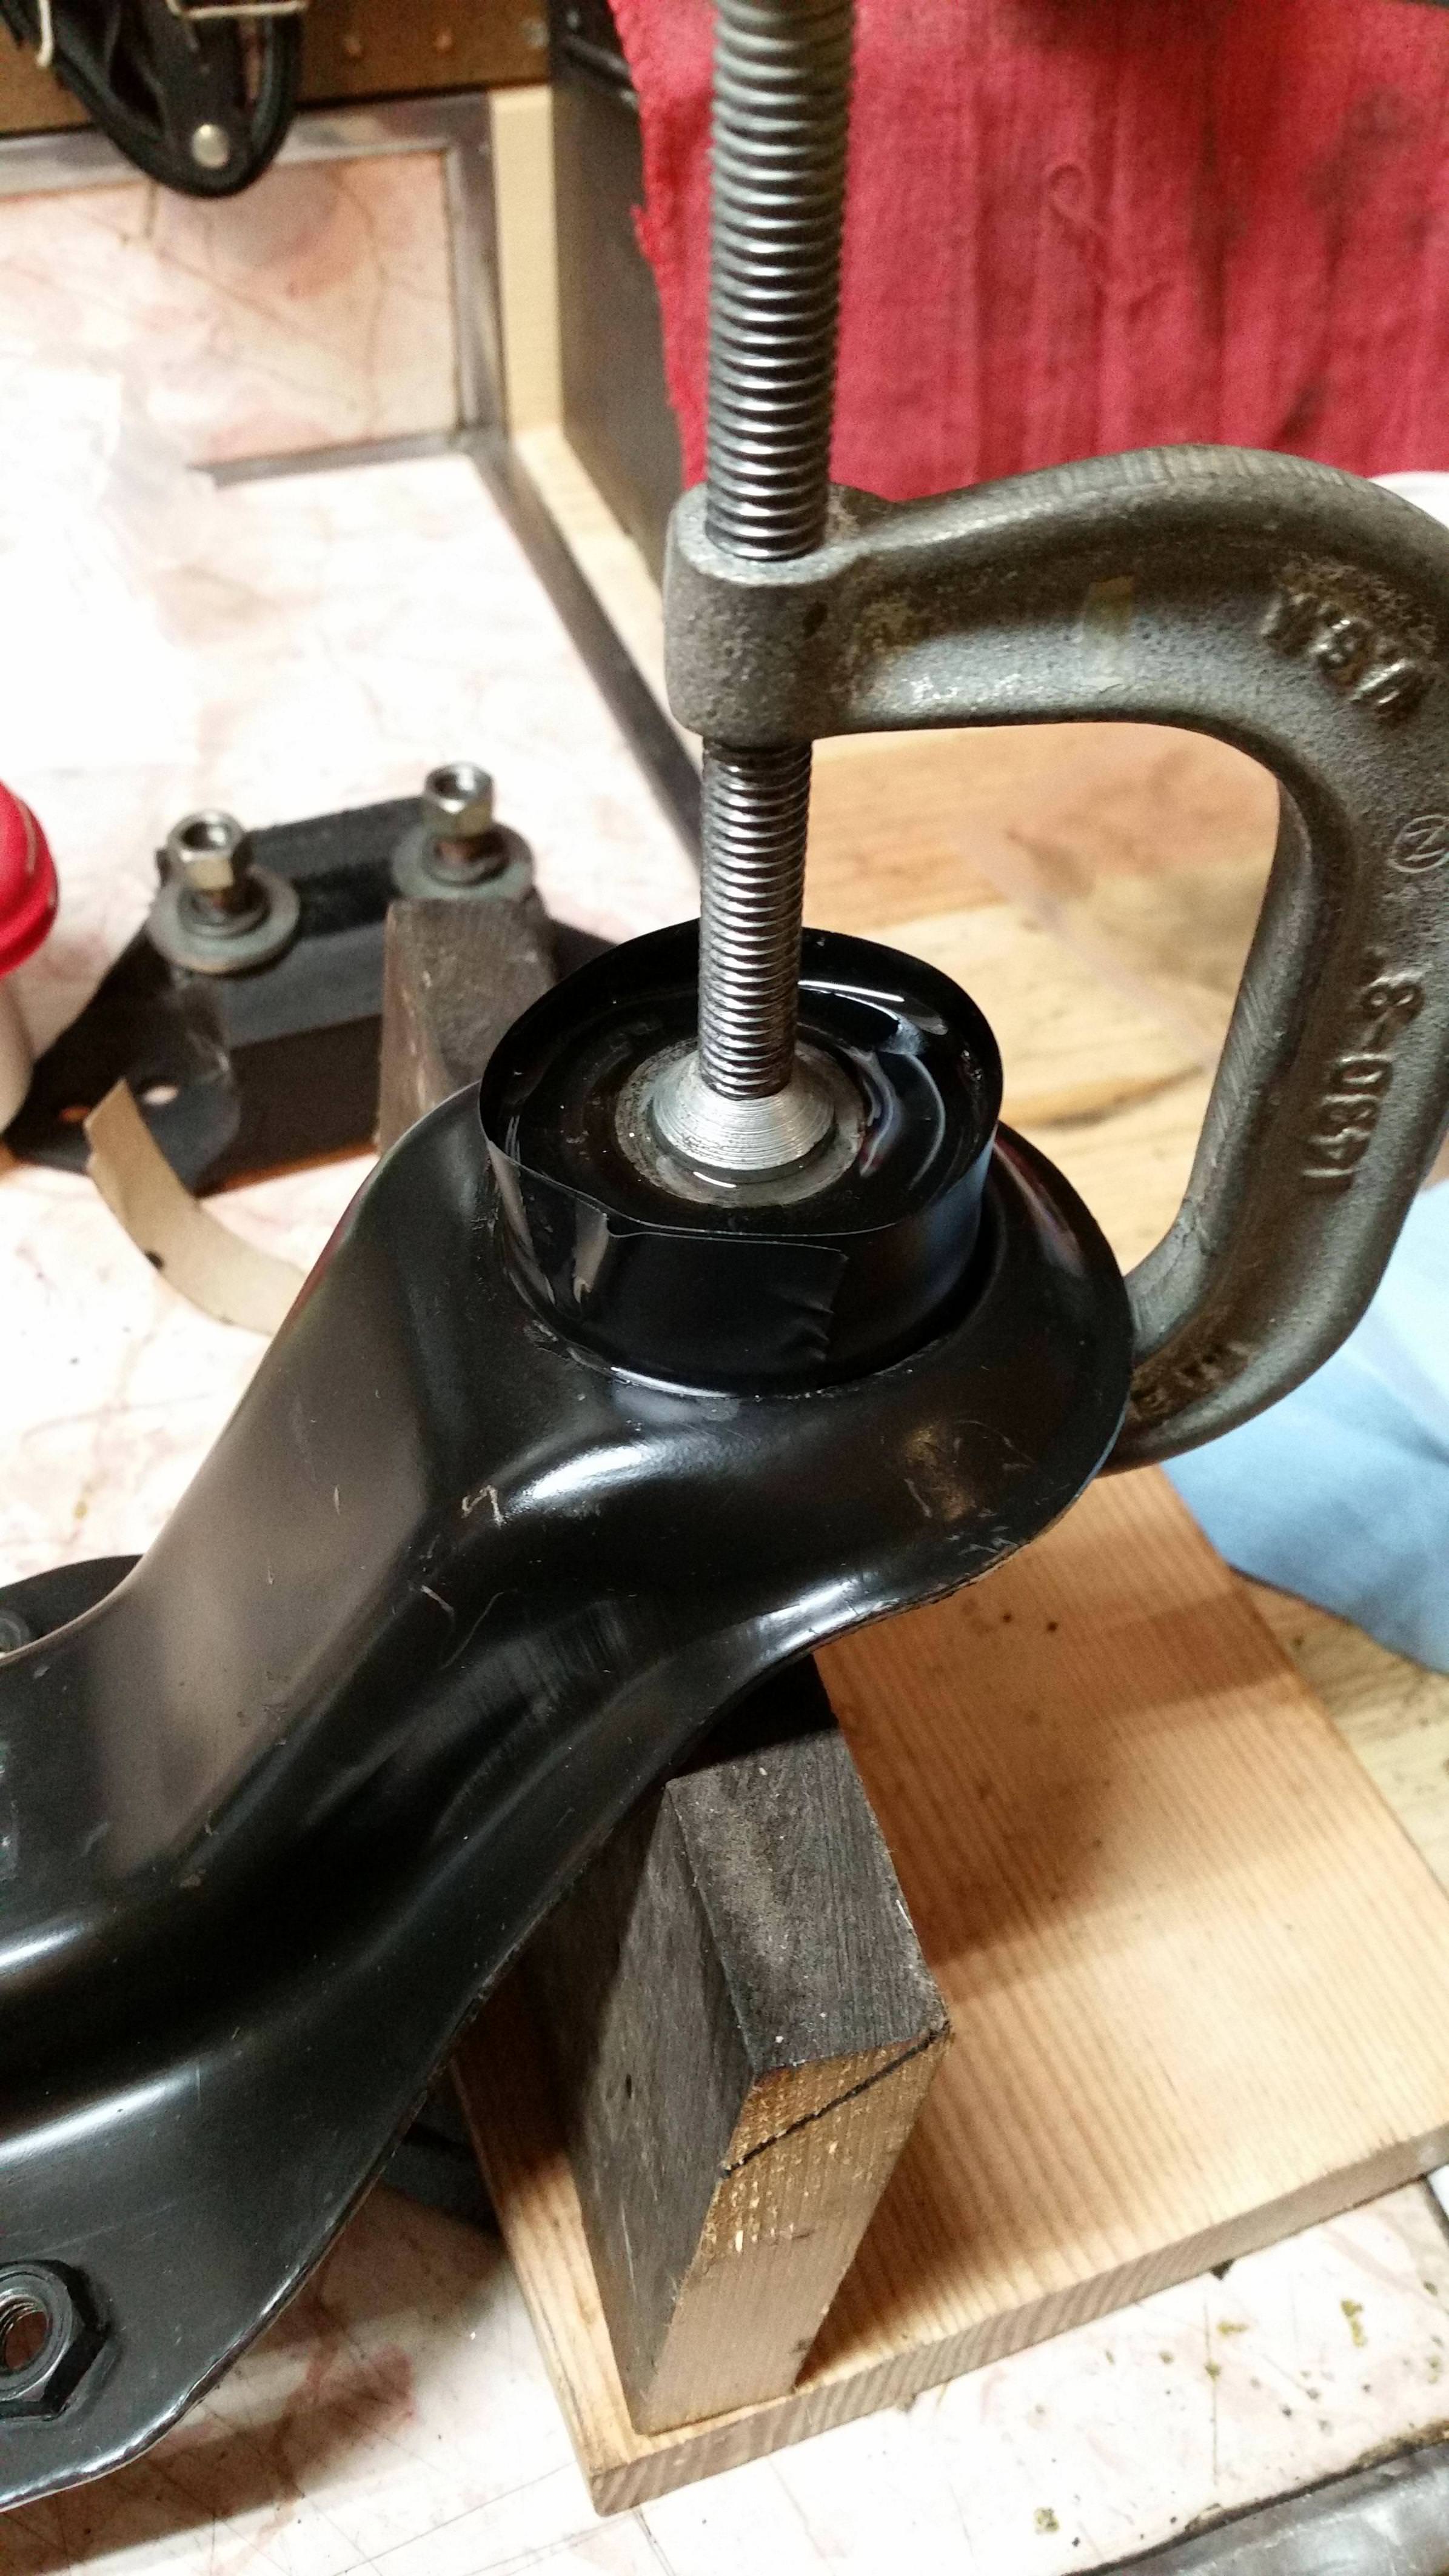
What I've done is clamp the stamped "washer" to the bottom of the dried out bushing and sealed the outer rim to the flange with a tiny bit of RTV. On the top, I made a ring out of some electrical tape (I didn't have any better ideas) to act as a form; this will allow me to pour a little "flange" to the top, which will sturdy it up. Also the urethane will run into the spaces and hopefully cracks to stiffen the bushing back up. On the oil-soaked one, I just sealed off the gaps and poured into the openings to stiffen it up a little bit, A similar dam was put in place as the other bushing to keep from making a mess; I will square it off with a knife once it all sets. The bushings are not parallel to eachother, and I figured it more important to get the big pour even than the smaller pour (that 1/4lb kit has a single pre-measured volume, so it's one shot).
This is curing in the garage at the moment, we'll see how it turns out. Shouldn't be any worse than it was before! I was disappointed to determine that an off-the-shelf bushing of the right size (such as energy suspension 3.2124 or prothane 19-608) wouldn't be an acceptable replacement due to the axial play it would permit.
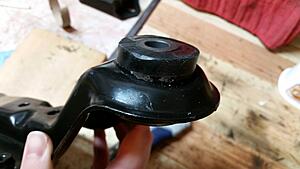
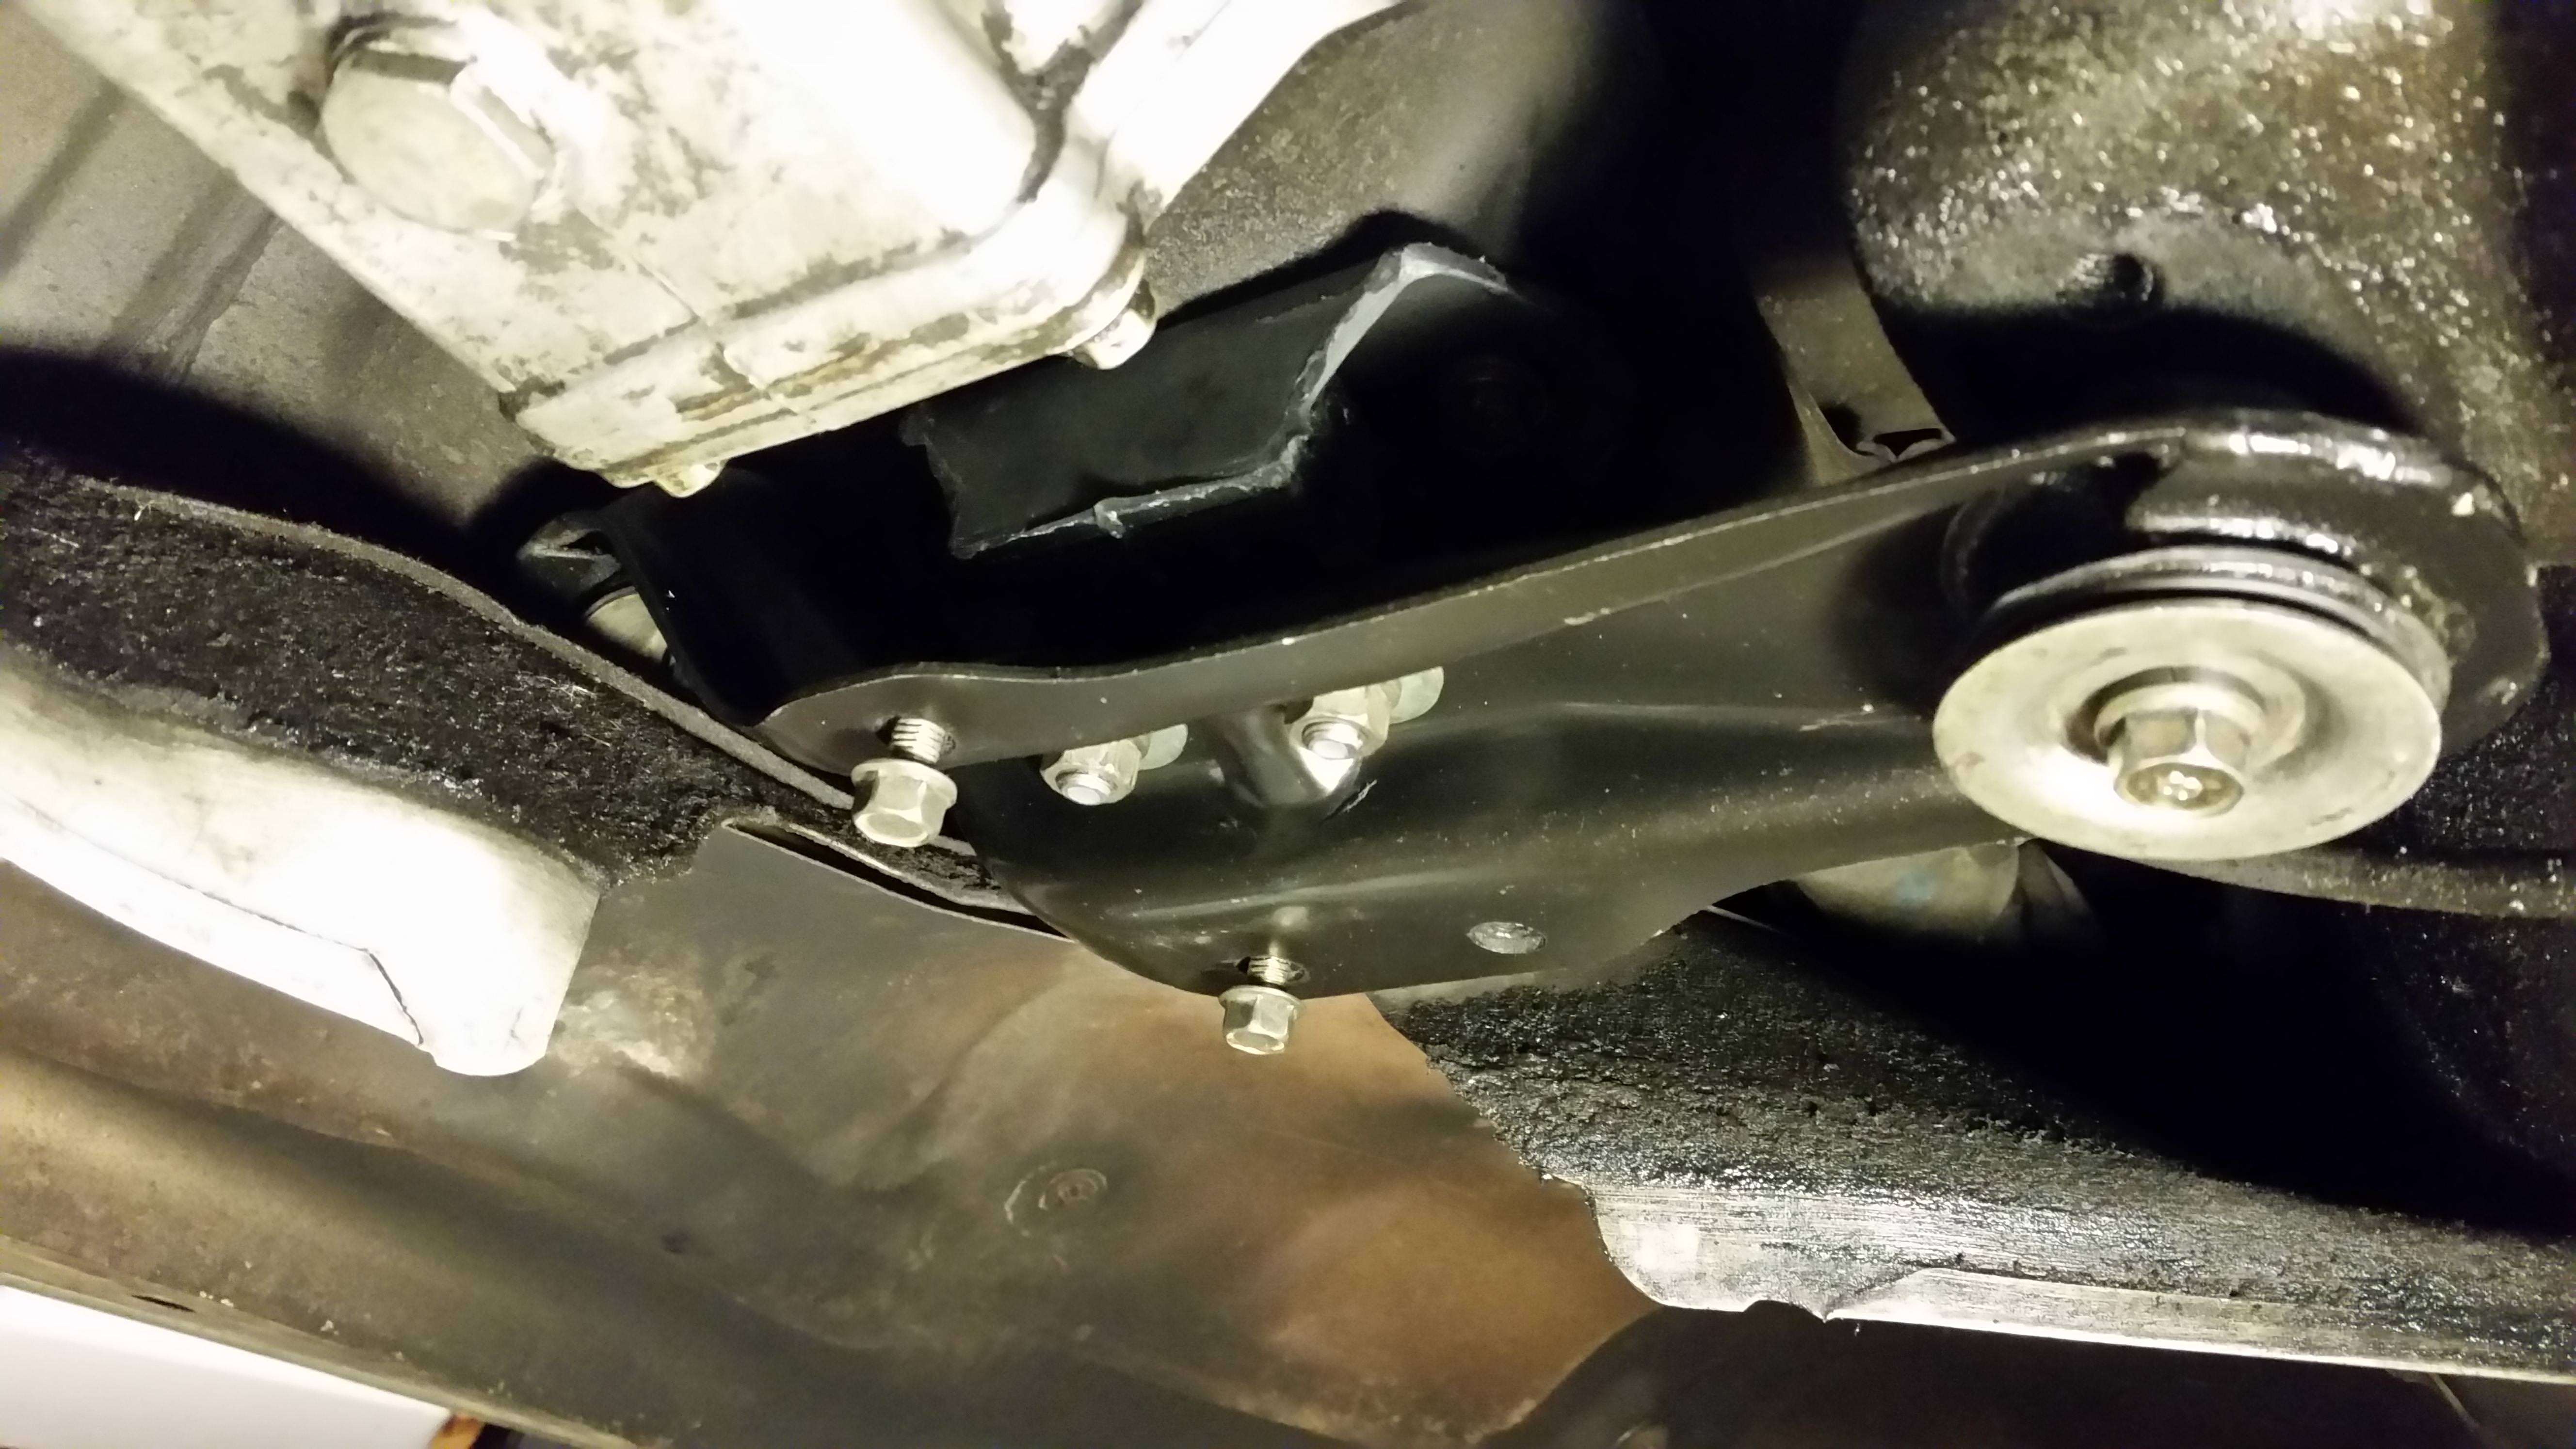
Well, it cured and I'm pretty pleased with it. The "cast in and around the failed one" was a success and the "fill the soft one" seems to have worked, but isn't much to look at. Here's the completed bushing in the crossmember, I did use a razor to square it up (wasn't perfectly level) but it's good, feels like 80A urethane (which is what I used). Re-installed the crossmember, a new transmission mount, and the heat shields this evening. Come springtime we'll see how it works!
(Yes this car has leaked oil for a long time, the not-clean spots on the heat shield are all oily goo - not about to remove my rustproofing, though!)
Nice work, and good problem solving skills. With the rarity of parts getting worse each year, these types of fixes become more common. Like you, the underside of my SE has a natural undercoat of oil for rustproofing,
Based on Richard Miller's post, I bought urethane and adhesion promoter (aka "primer"). Interestingly, the company isn't Energy Suspension, but I assumed their urethane was recommended for suspension bushings. When it arrived, I could see it was manufactured by Forsch Polymer Corp.
MM54: Who made your urethane?
The mod:
1. Removed material from the crossmember (lightening holes, trimmed flanges, etc). This is something I usually do, with the objective to make the car a little lighter.
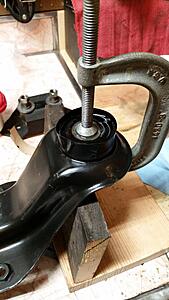
2. Burned out the rubber bushings
3. Opened up the ID of the lower hat washer to match that of the inner bushings and welded them together
4. Turned down the OD of the lower hat washer to match that of the crossmember sleeve
5. Scored the OD of the inner bushing and the ID of the crossmember sleeve so the urethane would have some bite
6. Painted the inner bushing assy and crossmember sleeve with adhesion promoter
7. Spaced the inner bushing assy in the crossmember sleeves with silicone "corks" that I had on hand (great for paint masking). These remained in the crossmember, fully encased in urethane.
8. Wrapped the lower flanges in transparent silicone tape to retain the urethane
9. Mixed the urethane and poured it in
Notes:
i. The lager ID on the lower hat washer is necessary to allow the bolts to work at their weird angles (nothing is square to any frame of reference). I'll use a large washer on the mounting bolts to accommodate.
ii. The silicone tape worked well; its transparency allowed me to see that I had good fill, and it released from the urethane easily
Observations:
a. Burning out the OEM bushings is nasty. It makes a lot of noxious smoke, and takes quite a while. I used MAP gas, which is hotter than propane.
b. Welding the lower hat washer to the bushing made this a lot easier -- fewer parts to hold in position
c. This urethane is fairly expensive -- if the McMaster option is similar, I'd recommend it
d. I used the 80A durometer, High Performance. I'm sure it will work fine, but my experience says this is too stiff if trying to replicate the original rubber bushings that had "tuning voids". If I were to do it again, I'd opt for the 60A or 40A.
e. The urethane takes a long time to cure -- 100% physical properties requires 7 days at 77 deg F
Next Steps: I'll clean up the crossmember, paint it, and eventually install it. With this process, I don't think bushing failure is likely, since there is a halo of urethane between the lower hat washer and inner bushing that takes shear loads off the structure
.
Based on Richard Miller's post, I bought urethane and adhesion promoter (aka "primer"). Interestingly, the company isn't Energy Suspension, but I assumed their urethane was recommended for suspension bushings. When it arrived, I could see it was manufactured by Forsch Polymer Corp.
MM54: Who made your urethane?
The mod:
1. Removed material from the crossmember (lightening holes, trimmed flanges, etc). This is something I usually do, with the objective to make the car a little lighter.
2. Burned out the rubber bushings
3. Opened up the ID of the lower hat washer to match that of the inner bushings and welded them together
4. Turned down the OD of the lower hat washer to match that of the crossmember sleeve
5. Scored the OD of the inner bushing and the ID of the crossmember sleeve so the urethane would have some bite
6. Painted the inner bushing assy and crossmember sleeve with adhesion promoter
7. Spaced the inner bushing assy in the crossmember sleeves with silicone "corks" that I had on hand (great for paint masking). These remained in the crossmember, fully encased in urethane.
8. Wrapped the lower flanges in transparent silicone tape to retain the urethane
9. Mixed the urethane and poured it in
Notes:
i. The lager ID on the lower hat washer is necessary to allow the bolts to work at their weird angles (nothing is square to any frame of reference). I'll use a large washer on the mounting bolts to accommodate.
ii. The silicone tape worked well; its transparency allowed me to see that I had good fill, and it released from the urethane easily
Observations:
a. Burning out the OEM bushings is nasty. It makes a lot of noxious smoke, and takes quite a while. I used MAP gas, which is hotter than propane.
b. Welding the lower hat washer to the bushing made this a lot easier -- fewer parts to hold in position
c. This urethane is fairly expensive -- if the McMaster option is similar, I'd recommend it
d. I used the 80A durometer, High Performance. I'm sure it will work fine, but my experience says this is too stiff if trying to replicate the original rubber bushings that had "tuning voids". If I were to do it again, I'd opt for the 60A or 40A.
e. The urethane takes a long time to cure -- 100% physical properties requires 7 days at 77 deg F
Next Steps: I'll clean up the crossmember, paint it, and eventually install it. With this process, I don't think bushing failure is likely, since there is a halo of urethane between the lower hat washer and inner bushing that takes shear loads off the structure.
That looks good! It's been a while, but I'm pretty sure the urethane I used was the same "Forsch" that you had (though I had a smaller quantity, came in bags of goo instead of bottles, meant to be made all at once). For what it's worth, my repair seems to have help up very well for a good year worth of regular driving, and should still be good (the car has been in storage for a couple years, other things have been occupying my time/shop space, but it'll be back out soon I hope). I suspect your repair will also hold up for a long time!