
Cheap Suspension

Thread Starter
Joined: Aug 2007
Posts: 273
Likes: 0
From: Muskegon, MI
Cheap Suspension
I suppose I should start off by introducing myself as I am new to this forum but not to rotaries. I'm Brian Husted and have owned my 84 GS for about 3 years now. The car is my daily driver, but spends about every weekend at autocross somewhere.
So, I searched through the archive and did really see anything that covered what I have done to my car. After a season of autocross I decided that i didn't like how spongy my car felt. In my opinion there was way to much moving around. Being young (read had no income) I couldn't afford the racing beat, ground control...setups. My solution was to make one and I think it turned out great.
This setup cost me $30 with the struts NOT included. The spring set is originally for a Miata.
Starting in the front.
Attachment 265882
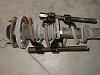
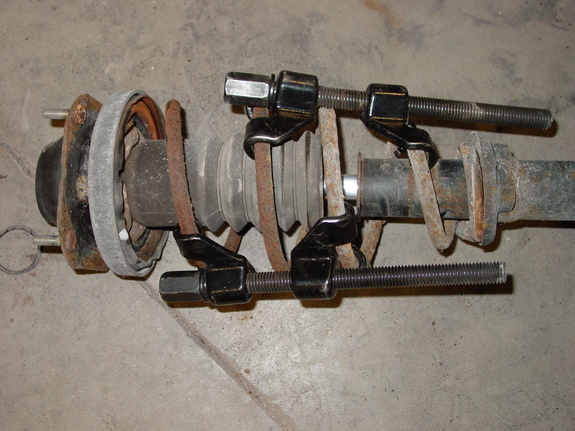
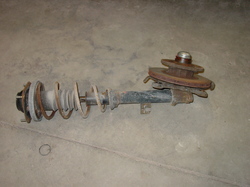
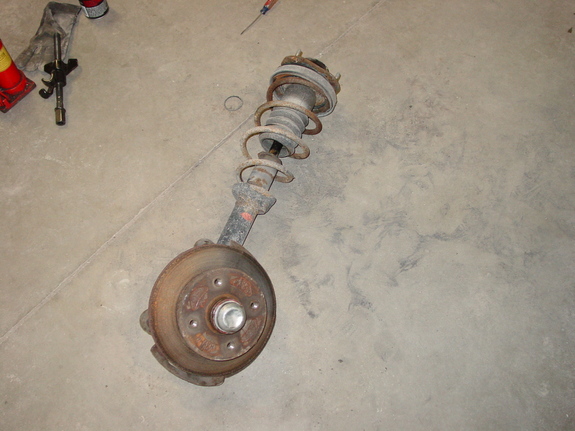
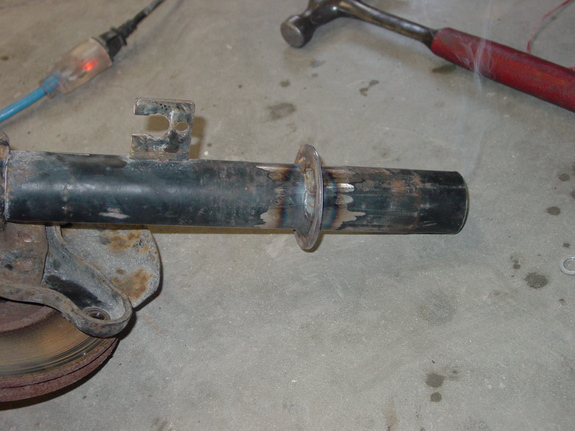
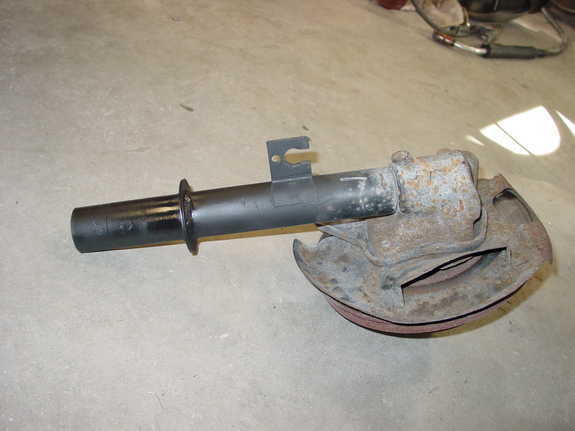
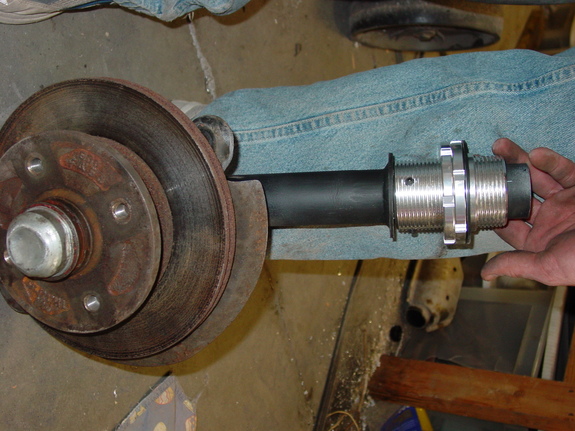
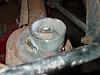
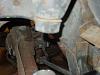
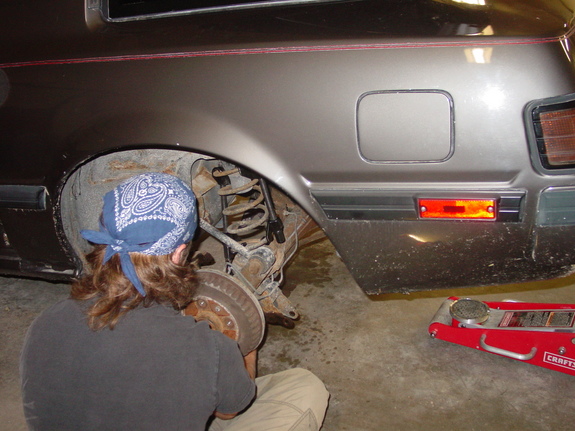
The first task is removing the hub & strut assembly. I didn't take any pictures of this, but the way I did was to take off the 4 14mm nuts on top of the strut tower. Then take off the 2 17mm bolts on the bottom of the lower ball joint. The assembly will then be free aside from the 2 14mm bolts that hold the caliper on. Here's what you're left with when you get it out.
Attachment 265880
Attachment 265881
Attachment 265883
So, I searched through the archive and did really see anything that covered what I have done to my car. After a season of autocross I decided that i didn't like how spongy my car felt. In my opinion there was way to much moving around. Being young (read had no income) I couldn't afford the racing beat, ground control...setups. My solution was to make one and I think it turned out great.
This setup cost me $30 with the struts NOT included. The spring set is originally for a Miata.
Starting in the front.
Attachment 265882
The first task is removing the hub & strut assembly. I didn't take any pictures of this, but the way I did was to take off the 4 14mm nuts on top of the strut tower. Then take off the 2 17mm bolts on the bottom of the lower ball joint. The assembly will then be free aside from the 2 14mm bolts that hold the caliper on. Here's what you're left with when you get it out.
Attachment 265880
Attachment 265881
Attachment 265883
Thread Starter
Joined: Aug 2007
Posts: 273
Likes: 0
From: Muskegon, MI
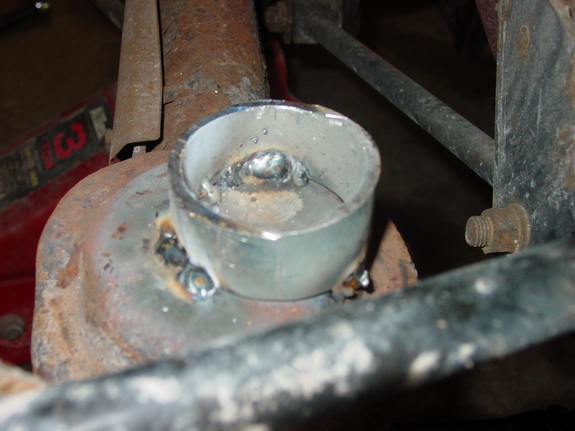
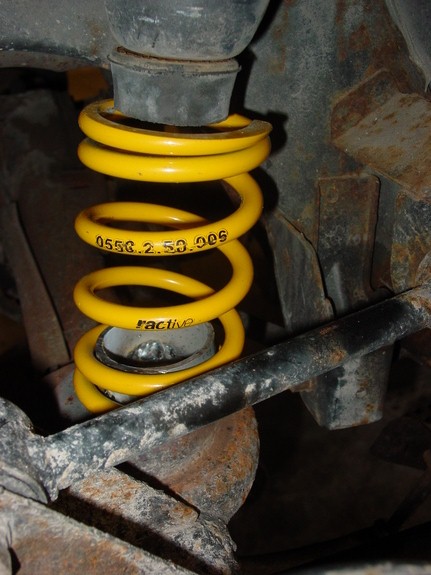
Next is to get the spring compressors on the spring, and get it tightened down enough to take all of the pressure off of the top perch. Some people I know have tried just taking the nut off of the top of the strut and letting the spring fly across the room, but this is dangerous and can lead to broken parts.
With the spring compressed, the 21mm nut at the top that holds the mount to the top can be taken off. We found that the easiest method was to have one person hold the assembly while the other used the impact wrench. This is the assembly with the spring removed.
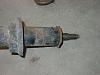
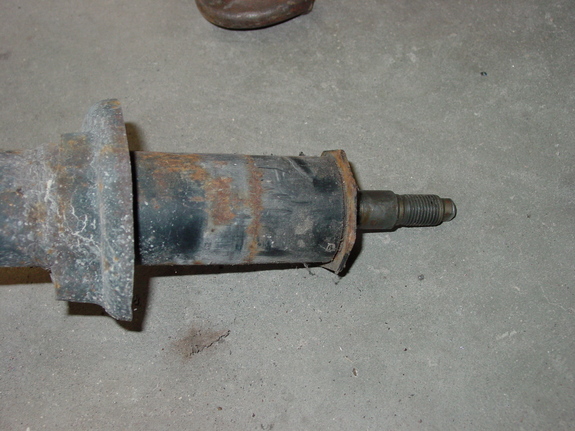
To start the real modification the old shock must be removed. It took a while to figure it out, but the retainer on the top of the shock tube unscrews. A couple of pipe wrenches did the trick. Be careful when you take it off fully; the original strut is oil filled and sure to make a mess. Mine just sort of fell out and self destructed.
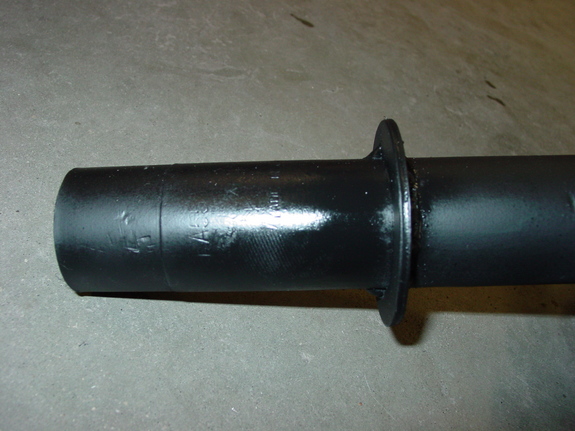
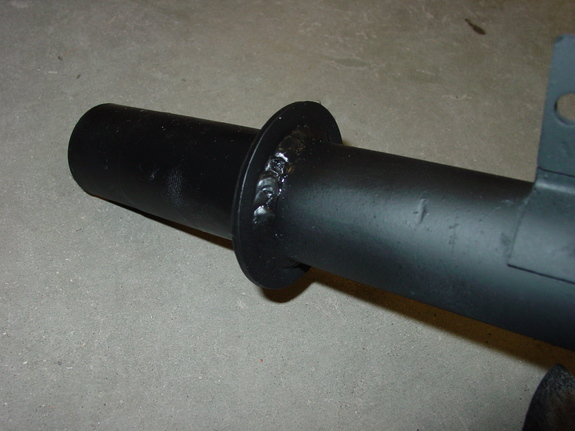
The original spring perches are welded on in three places and fairly easy to remove with a small grinder and a hammer. They can be saved along with the springs should you ever decide to bring the car back to stock. With the old perches removed, the strut tube can be cleaned up.
With the spring compressed, the 21mm nut at the top that holds the mount to the top can be taken off. We found that the easiest method was to have one person hold the assembly while the other used the impact wrench. This is the assembly with the spring removed.
To start the real modification the old shock must be removed. It took a while to figure it out, but the retainer on the top of the shock tube unscrews. A couple of pipe wrenches did the trick. Be careful when you take it off fully; the original strut is oil filled and sure to make a mess. Mine just sort of fell out and self destructed.
The original spring perches are welded on in three places and fairly easy to remove with a small grinder and a hammer. They can be saved along with the springs should you ever decide to bring the car back to stock. With the old perches removed, the strut tube can be cleaned up.

Thread Starter
Joined: Aug 2007
Posts: 273
Likes: 0
From: Muskegon, MI
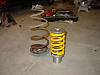
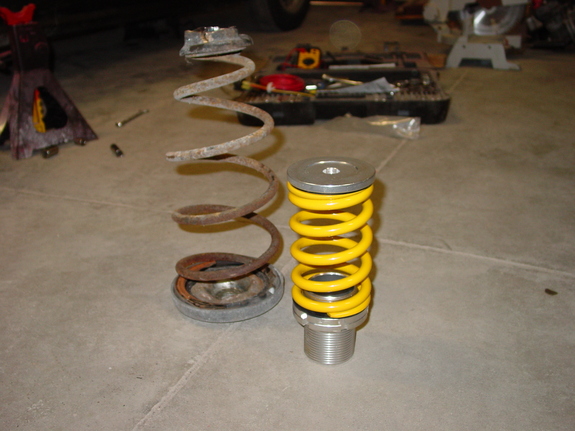
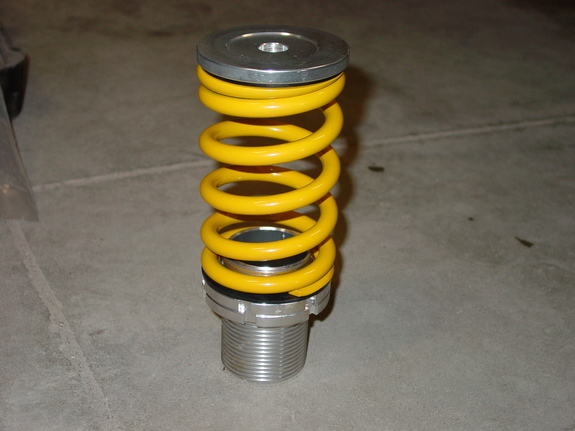
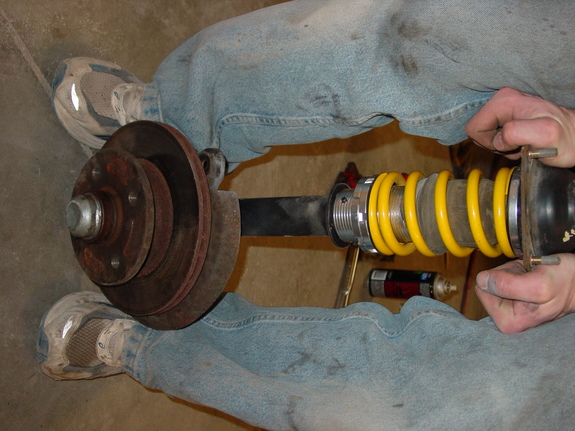
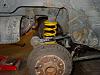
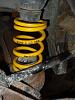
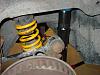
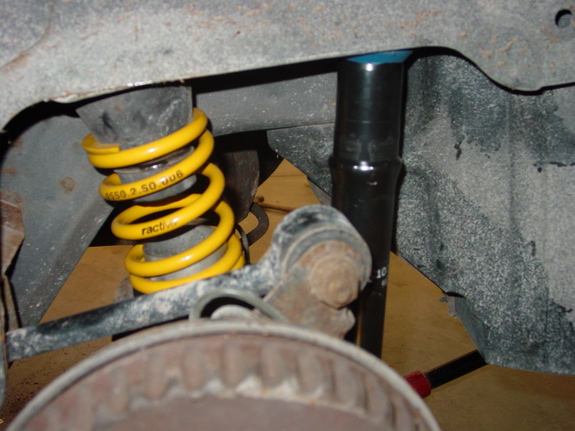
Now it's just time to put everything back together. The first thing to add is the new strut cartridges. I bought a pair of Tokico Illuminas, which are 5 way adjustable. (Note: This modification is not a good idea if you plan to still use the original struts, since the tube is actually the original strut casing.) Make sure to remove the rubber garbage from the cap that goes on the end of the tube. I recommend pouring some oil around the strut body in the tube to help with heat dissipation.
I added a cut up piece of old heater hose between the threaded sleeve and the strut tube to make sure it wouldn't clunk around.
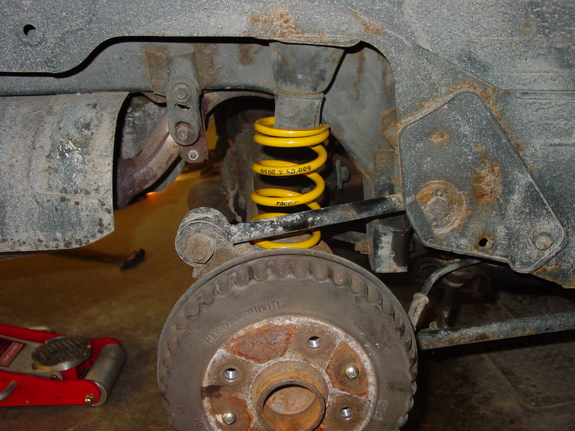
Next is to add the spring and all other associated components. there are rubber washers that go between the spring and the sleeve, once again to eliminate sounds. The dust boot must be cut down to fit inside the spring. The bump-stop must also be fit in. I decided to leave the length the original bump-stops as insurance that the struts would not bottom out and be ruined. Due to the size of the struts, the top perches that came with the kit had to be bored out in the center to fit over the piston. There is a thick, flat washer that goes on next and then the mount with the bearing can be bolted on. Here is the completed assembly.
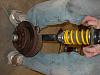
The whole thing is then bolted back into the car and the ride height set by placing the locking screws at the desired location. Mine are set nine threads from the bottom.
The overall height was lowered by 1.25". Sorry for not taking a pic with the tape measure on the fender before taking everything apart.
On to the rear...
I added a cut up piece of old heater hose between the threaded sleeve and the strut tube to make sure it wouldn't clunk around.
Next is to add the spring and all other associated components. there are rubber washers that go between the spring and the sleeve, once again to eliminate sounds. The dust boot must be cut down to fit inside the spring. The bump-stop must also be fit in. I decided to leave the length the original bump-stops as insurance that the struts would not bottom out and be ruined. Due to the size of the struts, the top perches that came with the kit had to be bored out in the center to fit over the piston. There is a thick, flat washer that goes on next and then the mount with the bearing can be bolted on. Here is the completed assembly.
The whole thing is then bolted back into the car and the ride height set by placing the locking screws at the desired location. Mine are set nine threads from the bottom.

The overall height was lowered by 1.25". Sorry for not taking a pic with the tape measure on the fender before taking everything apart.

On to the rear...
Thread Starter
Joined: Aug 2007
Posts: 273
Likes: 0
From: Muskegon, MI
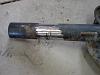
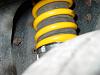
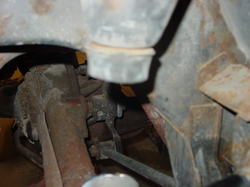
The rear suspension change was easier to do than the front but required more planning. We started off by unbolting the shocks (1 17mm bolt) and sway bar (2 14mm bolts) to drop the axle as far as possible. With the car on jack stands, the axle was low enough to get the spring compressors on and get the old springs out.


New spring set in place to see where to put the new mount.
To mount the bottom of the spring, a 1" long section of 2" pipe was welded to the original mounts.
The bump stops were cut in half to keep the car from bottoming out continuously.

New spring set in place to see where to put the new mount.
To mount the bottom of the spring, a 1" long section of 2" pipe was welded to the original mounts.
The bump stops were cut in half to keep the car from bottoming out continuously.
 working on mine now and this gives me some good idea's.
Trending Topics
Thread Starter
Joined: Aug 2007
Posts: 273
Likes: 0
From: Muskegon, MI
With this done, no compression is needed to get the springs in. To keep them from falling out and control the bouncing, shorter shocks were required. The ones I used were from the front of a 2000 Mazda Miata and are the perfect length to keep the springs in. The only modification required is that the bottom mount is too wide so it needed to be ground down a bit. The best part is that if I ever want adjustable struts for the rear all I have to do is order them for the front of the Miata.
The only downside is that the height in the rear isn't adjustable, but I have no complaints about the height this way so I don't see any need for adjustment.
As it stands, the new springs in front are about 400lbs/in and the rear are around 300lbs/in. Some would say that it's too stiff for a daily driver, but I just tell them that it's a race car.
A better formatted writeup with more pictures is on my cardomain page.
http://www.cardomain.com/ride/2105457/6
I hate drum brakes
Joined: Oct 2006
Posts: 638
Likes: 0
From: West Palm Beach, Florida
Awesome, I think I just found my next mod. One question though, do you think it'd be possible to fit the adjuster in the rear suspension? or cut it down to fit if there are clearance issues? Also, how does the rear of your car sit now?

Great stuff!
The only thing I would worry about the the small diameter springs in the back. Since they are not large enough ID to sit where they are supposed to they stop and seat on the tapered bump stop mount.
Over time this may cause the spring to open up on that end and slowly lower the static ride height and weaken the spring. Possibly even fail.
Also, I think you will find the springs rates to be a bit to stiff for the rear and way to stiff for tokico shocks, but let us know how they work.
Again, great stuff.
-billy
Thread Starter
Joined: Aug 2007
Posts: 273
Likes: 0
From: Muskegon, MI
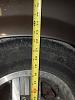
Okay, let's see. A couple of things I forgot to add. First, here is a picture of the height in the rear with 195/60/14 Falken Azenis.
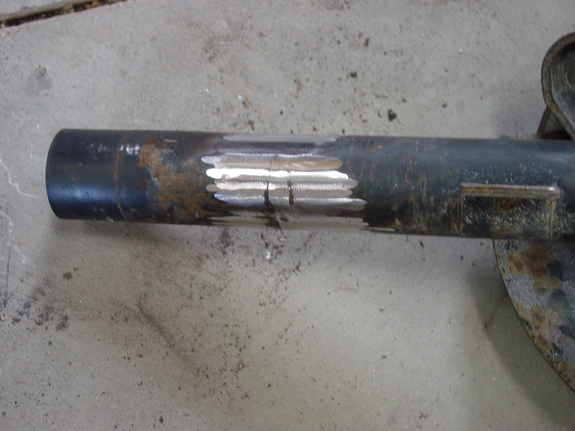
A second thing I forgot to add was where to weld the collar on the strut tube for the front. The ring is made of 1/8" steel and is 2" inside, 3" out. It's positioned 4.25" from the top of the tube. This allows for a maximum of 2" lowering, which in my opinion would be more than anyone would want to go.
As for the spring rates, I have noticed no problems with the struts keeping up with the springs. At autocross there is a noticeable difference with the settings on the struts, so they must be doing something. I drove the car for a while with the rear swaybar on, and then took it off for this past summer's autocross, and think I like the handling better with it off.
Originally I was worried about the tapered bump stop mount being crushed over time, but have driven for about 2 years and 5k miles and noticed no difference.
Lives on the Forum
Joined: Jun 2004
Posts: 11,359
Likes: 14
From: Grand Rapids Michigan
Thread Starter
Joined: Aug 2007
Posts: 273
Likes: 0
From: Muskegon, MI
Last I was on the MI club there didn't seem to be much going on, but that was a while ago. I'll check it out again.
As for the say bar, I would like to add a bigger front sway bar, but right now all of my funding is going into rebuilding a S5 6port.
As for the say bar, I would like to add a bigger front sway bar, but right now all of my funding is going into rebuilding a S5 6port.

Thread
Thread Starter
Forum
Replies
Last Post
Postman09
3rd Generation Specific (1993-2002)
0
Sep 29, 2015 11:23 AM