When you click on links to various merchants on this site and make a purchase, this can result in this site earning a commission. Affiliate programs and affiliations include, but are not limited to, the eBay Partner Network.
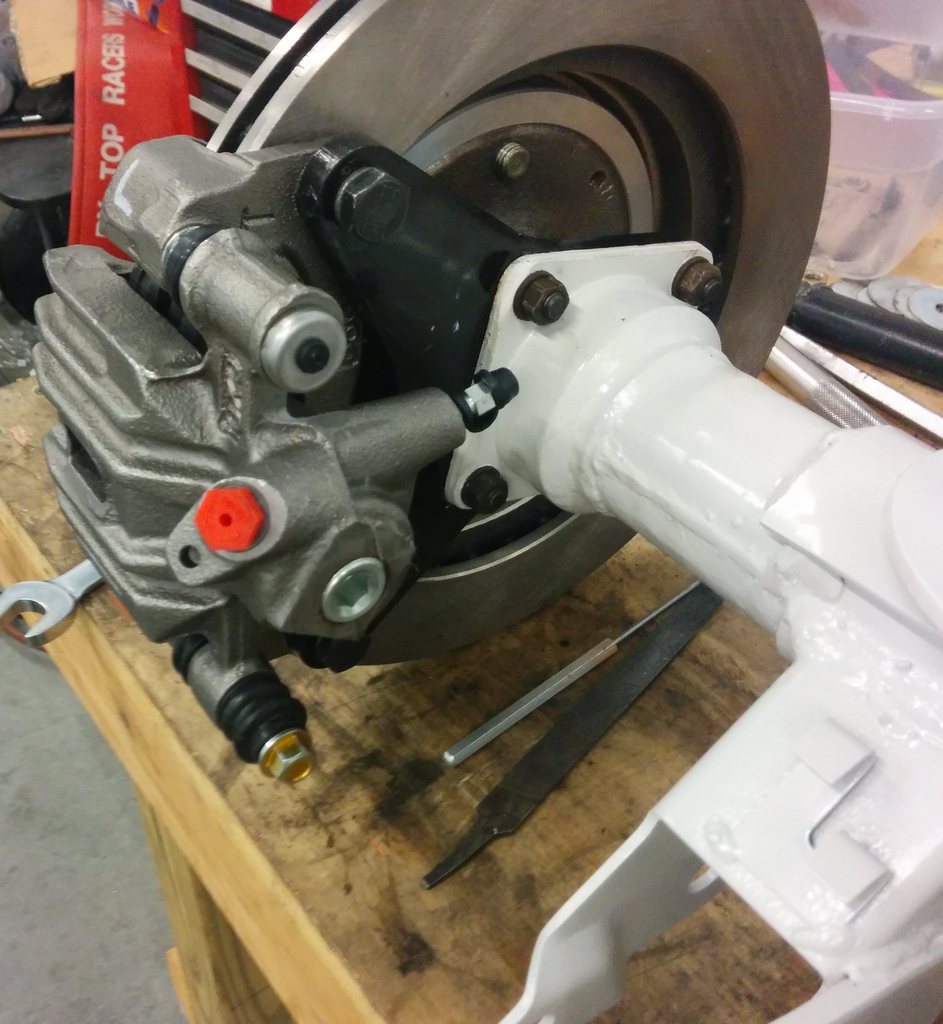
We got taken out at VIR and I ended up with a bent rear end housing, since disk brake housings are getting more rare and valuable I designed a system to install big brakes on a drum brake housing. I got 2 of the drum housings for free, and I scrapped 2 others last winter so I should have an easy supply if I need more in the future.
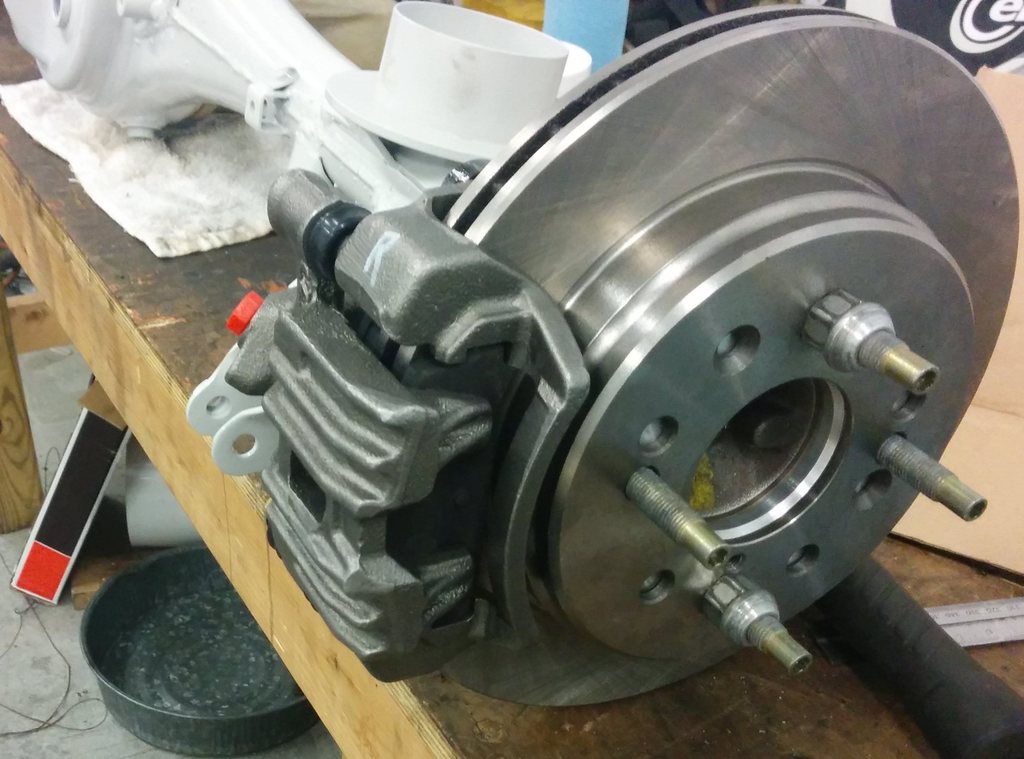
With my design the bracket becomes the axle bearing retainer which is good since you need a heavy duty retainer anyway. Since the bracket is on the axle side of the housing and I made it 3/8 thick I need a spacer to fit between the axle and the rotor. It just so happens that when I race with one sanctioning body they consider wheel spacers value add, but the spacers are part of the big brake conversion and necessary to get the rotors to line up with the calipers, if they just happen to space the wheels out to where I would rather have them that is just a happy coincidence…
You can do it, but it takes some work. Machine the rotors off the front hubs and the second gen rotors slide over the hubs. Redrill the rotors to 4X110 and make some brackets to hold the calipers.
Hey Mike,
I know we've chatted about this a bit on various forums but now that racing is back in action finally looking at it again. With re-drilling the rotors to 4x110, do you just have 1 shitty hole thats sort of ovalled/double hole and not worry about it? I can't see anyway to make 4x110 and 5x114.3 not overlap on one hole and its touch to see from the picture but the left hole might be shared?
If this is the case, have you had any issues with those holes ovalling further, or breaking studs while racing?
Jesse
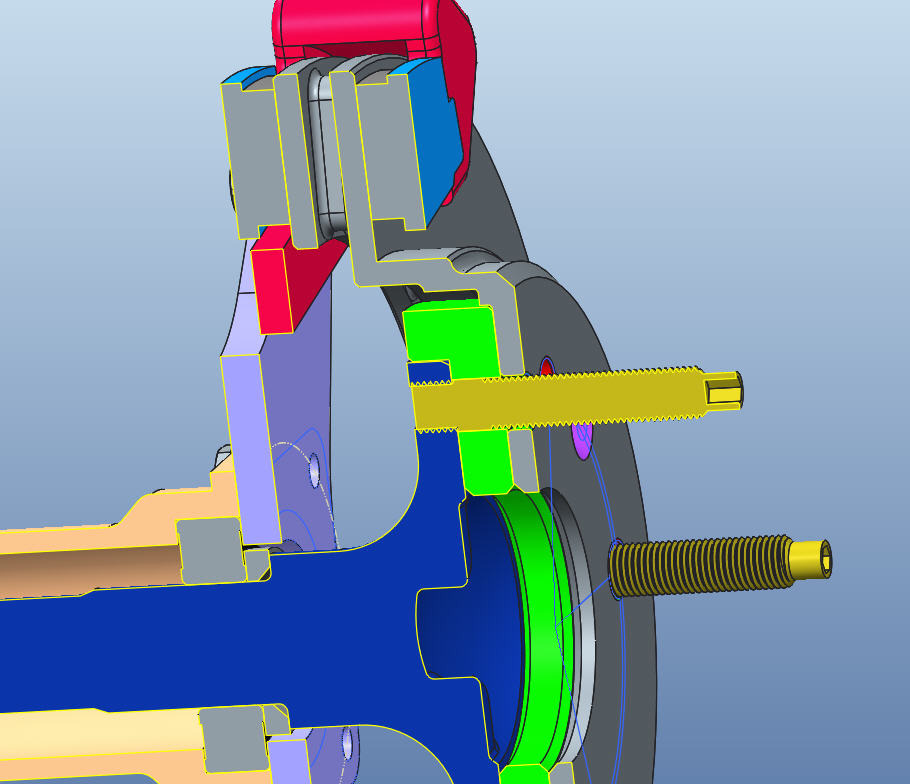
Yes, one of the 4X110 holes gets shared with one of the 5X114.3 holes. It is important which hole gets shared because of the 2 extra countersunk holes which the factory uses to screw the rotor to the hub but we never use.
The best way to machine the oval hole is just to plunge with a � end mill, I had access to some special drilling end mills which made the whole job very easy.
Using � inch holes with the M12 wheel studs results in a better fit than the stock rotor holes which are more like 13.2mm. I have never seen any indication of any wear at all on the holes in the rotors.
Here is a nice color coded shot of the rotor, red are the existing 5X114.3 holes, green are the new 4X110 holes, and purple are the countersunk holes.
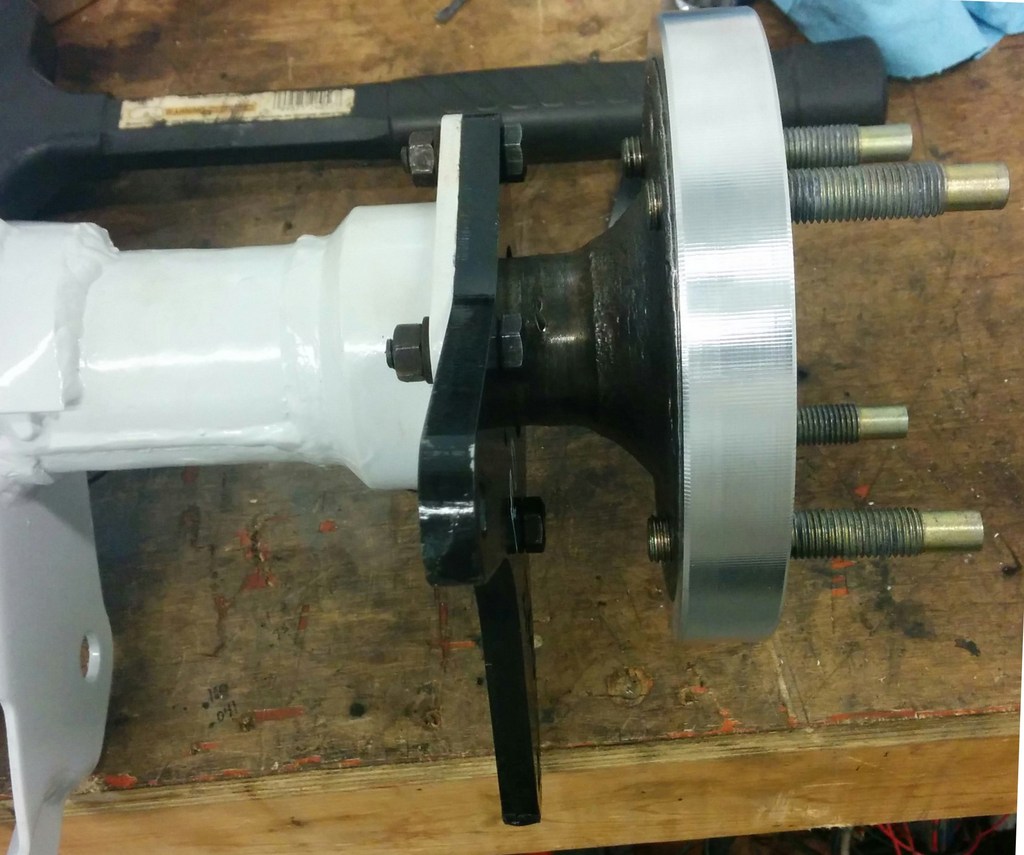
Here is a shot of a finished rotor sitting on the hub
And a shot of the finished assembly, you can see how the � inch holes fit the M12 studs quite tightly, so you are not going to get any movement of the rotor in use.
Eventually I will sell my complete setup when I convert to Wilwood, but I have to get motivated to get the car back racing…
having that one oblong shaped hole wont matter. the hub holds the studs and the rotor just slides over the studs and just rotates with the hub. different story if it were the stud hole in the hub.
Yes, one of the 4X110 holes gets shared with one of the 5X114.3 holes. It is important which hole gets shared because of the 2 extra countersunk holes which the factory uses to screw the rotor to the hub but we never use.
The best way to machine the oval hole is just to plunge with a � end mill, I had access to some special drilling end mills which made the whole job very easy.
Using � inch holes with the M12 wheel studs results in a better fit than the stock rotor holes which are more like 13.2mm. I have never seen any indication of any wear at all on the holes in the rotors.
Here is a nice color coded shot of the rotor, red are the existing 5X114.3 holes, green are the new 4X110 holes, and purple are the countersunk holes.
Here is a shot of a finished rotor sitting on the hub
And a shot of the finished assembly, you can see how the � inch holes fit the M12 studs quite tightly, so you are not going to get any movement of the rotor in use.
Eventually I will sell my complete setup when I convert to Wilwood, but I have to get motivated to get the car back racing�
Wicked - much appreciated. I'm definitely over thinking things while being somewhat burnt out at work and not having the parts in hand. Could not visualize how it works and spent way too much time playing with bolt patterns in solid works haha.
Its a good option if you don't have any of the components already - looks like a well made kit.
For us, we are racing and need to have a full set of spare uprights and axles to be able to quickly swap in the event of a wall hit (has happened before). As a result, 3k USD for 2 sets (so like 4k in canadian money) isn't justifiable. That and when we inevitably break something, want to be able to manufacture our own replacements.
I like what mhr650 (Mike? or Mark?) has done. Pretty easy to replicate on a short timeframe as long as you have the second gen parts which are more readily available. We had a set of second gen hubs but they were seized to the spindles so we kaiboshed that.