
3" Cold Air Intake

Thread Starter
Joined: Jun 2001
Posts: 340
Likes: 6
From: Sunny So. Calif
3" Cold Air Intake
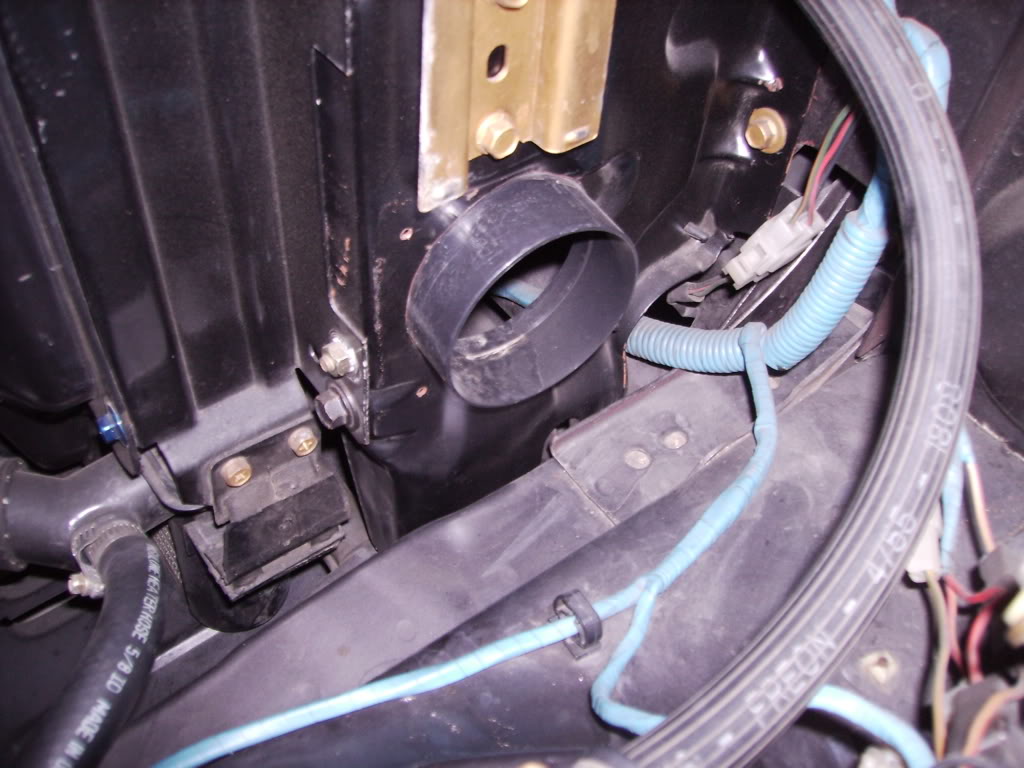
It's midnight and I'm playing around with a cold air intake design. My friend was the Controller at Specter, and he had a few extra parts in a box. So I tried to see what I could make out of them. Looks like I need once more coupling.
A bracket will be fabbed up to slightly relocate the radiator overflow bottle.
Using a K&N air filter in the stock air cleaner can.
A bracket will be fabbed up to slightly relocate the radiator overflow bottle.
Using a K&N air filter in the stock air cleaner can.

Joined: Jun 2008
Posts: 8,376
Likes: 28
From: Chino Hills, CA
There's space below the stock bottle to locate a 3-in duct in the rad side support without having to move the bottle.
At least, on an SA there is; maybe the bottle on the FB is larger?
An experiment from some years back:

At least, on an SA there is; maybe the bottle on the FB is larger?
An experiment from some years back:
Thread Starter
Joined: Jun 2001
Posts: 340
Likes: 6
From: Sunny So. Calif
The SA tank actually looks larger than that of the FB. I thought about going under, but with the components that I had, a more direct line seemed better at the time. The flex hose seems more straight forward. Not as many connections to worry about rattling loose.
Full Member
Joined: Nov 2011
Posts: 242
Likes: 1
From: Sacramento
Looks pretty good
It's midnight and I'm playing around with a cold air intake design. My friend was the Controller at Specter, and he had a few extra parts in a box. So I tried to see what I could make out of them. Looks like I need once more coupling.
A bracket will be fabbed up to slightly relocate the radiator overflow bottle.
Using a K&N air filter in the stock air cleaner can.
A bracket will be fabbed up to slightly relocate the radiator overflow bottle.
Using a K&N air filter in the stock air cleaner can.
Charge, drill, charge drill...
2) Ensure that the flap on the air cleaner housing is not diverting air from the heat riser and instead is allowing your nice cool air into the carb.
Great Job.
Notice anything in the butt dyno?

ReSpeed sells the side radiator support just for this with the standard size hole plumbed ready
for your filter and piping connections. Doing it the hard way is always fun the first time tho
I'd like to do this for my dell but I finding/fabbing an airbox holds me back for now.
Let us know how it does for ya.
for your filter and piping connections. Doing it the hard way is always fun the first time tho
I'd like to do this for my dell but I finding/fabbing an airbox holds me back for now.
Let us know how it does for ya.

Trending Topics


Thread Starter
Joined: Jun 2001
Posts: 340
Likes: 6
From: Sunny So. Calif
1) Buy a sawzall...With my luck, it would take me a week to drill those holes. I can see it now, hole #2, battery dies, go to second battery, it's dead even though I charged last time I used it. Pray I can find the location for spare batt #3.
Charge, drill, charge drill...
Charge, drill, charge drill...
That's why God invented drill presses.
The holes only took about 4 minutes and that's with a very dull rusty 30 yr old 1/8" drill bit.
I was too tired, too lazy and too intoxicated to reach over for a fresh bit.
Then I finished off the hole with one Dremel cut-off wheel.
Drilling holes is what I do everyday.
I seriously have a battery power Makita with me all day long.
The flapper is removed and the hot air inlet is sealed.
Using the -SE rad support is awesome.
I wish I had a spare -SE sitting around.
I sold the last one I had and only took out the drive-train, EGI, fuel system, rear-end, gauges.....
