1st Generation Specific (1979-1985) 1979-1985 Discussion including performance modifications and technical support sections

1st gen 13b-REW Redo....

Thread Tools
 
Search this Thread
 
Old 01-19-08, 08:02 PM
  #51  
kiwi from downunder..

iTrader: (4)
 
blwfly's Avatar
 
Join Date: Nov 2005
Location: springfield,oregon
Posts: 3,423
Received 5 Likes on 5 Posts
very nice
what clean porting you have
Old 01-19-08, 09:15 PM
  #52  
Shell 93

Thread Starter
iTrader: (4)
 
kevinbtz's Avatar
 
Join Date: Jun 2004
Location: Little Rock, Arkansas
Posts: 1,019
Received 20 Likes on 11 Posts
Originally Posted by blwfly
very nice
what clean porting you have
Thanks, but don't say that too soon.... I still have one more to do. lol
Old 01-19-08, 10:12 PM
  #53  
FD Daily

iTrader: (26)
 
K-Tune's Avatar
 
Join Date: Jul 2003
Location: Gulf Breeze, FL
Posts: 3,308
Likes: 0
Received 13 Likes on 13 Posts
what sort of tool did you use for the port on that rotor housing?
Old 01-19-08, 10:20 PM
  #54  
Shell 93

Thread Starter
iTrader: (4)
 
kevinbtz's Avatar
 
Join Date: Jun 2004
Location: Little Rock, Arkansas
Posts: 1,019
Received 20 Likes on 11 Posts
two of these one in 3/8 one in 1/2
http://www.carbidebur.com/longshank/longshanksc.htm

one of these (Cylindrical Radius End 1/4" by 1/2" for the beveling which I will probably to a tad more)

http://www.carbidebur.com/18shank/51series.htm

some of these for the smoothing

http://store.summitracing.com/partde...5&autoview=sku

and some of these for the polishing

http://store.summitracing.com/partde...5&autoview=sku

polishing compound

http://www.sears.com/shc/s/p_10153_1...shing+compound
Old 01-20-08, 12:17 AM
  #55  
FD Daily

iTrader: (26)
 
K-Tune's Avatar
 
Join Date: Jul 2003
Location: Gulf Breeze, FL
Posts: 3,308
Likes: 0
Received 13 Likes on 13 Posts
ah, assuming that was air power on those cylinder bits?


im trying my hand at porting on some ruined rotor housings and its much harder than irons for me for some reason :[
Old 01-20-08, 02:02 AM
  #56  
Shell 93

Thread Starter
iTrader: (4)
 
kevinbtz's Avatar
 
Join Date: Jun 2004
Location: Little Rock, Arkansas
Posts: 1,019
Received 20 Likes on 11 Posts
1/4 shanks are air die grinder
1/8 bits are a dremel
Old 01-20-08, 03:14 AM
  #57  
Old Fart Young at Heart

iTrader: (6)
 
trochoid's Avatar
 
Join Date: Apr 2004
Location: St Joe MO
Posts: 15,145
Likes: 0
Received 7 Likes on 7 Posts
Originally Posted by FBDrifter
ah, assuming that was air power on those cylinder bits?


im trying my hand at porting on some ruined rotor housings and its much harder than irons for me for some reason :[
What works well for me on porting housings is to use a long shank bit, the double cut cylinder with a rounded end, and port from the outside. I also use a lube, P B Blaster/WD-40 to reduce clogging of the bit.

Kevin, how well do you like those abrasive buffs. I ran across a small one that came in a cheap knock off Dremel kit I have. I was quite suprised how well it worked for final finish since I didn't polish IanS' exhaust ports.
Old 01-20-08, 11:29 AM
  #58  
Shell 93

Thread Starter
iTrader: (4)
 
kevinbtz's Avatar
 
Join Date: Jun 2004
Location: Little Rock, Arkansas
Posts: 1,019
Received 20 Likes on 11 Posts
Originally Posted by trochoid
Kevin, how well do you like those abrasive buffs. I ran across a small one that came in a cheap knock off Dremel kit I have. I was quite suprised how well it worked for final finish since I didn't polish IanS' exhaust ports.

I think they work pretty good, unfortunately I only had one used bit left and it ate it up pretty fast. I found a 36 pack for under 20 bucks shipped, so as soon as those come in I will polish it up a good bit more. I also put compound on them for the Iron, and for aluminum I put a liquid polish on them to aid in the polishing. Most of the polishing done on it in these pics was from a used sanding bit coated in polishing compound.
Old 01-24-08, 06:03 PM
  #59  
Shell 93

Thread Starter
iTrader: (4)
 
kevinbtz's Avatar
 
Join Date: Jun 2004
Location: Little Rock, Arkansas
Posts: 1,019
Received 20 Likes on 11 Posts
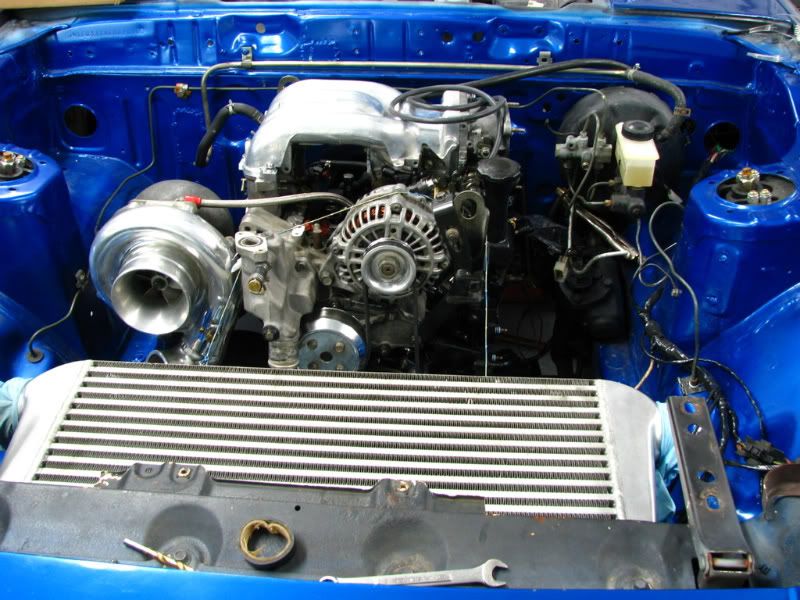
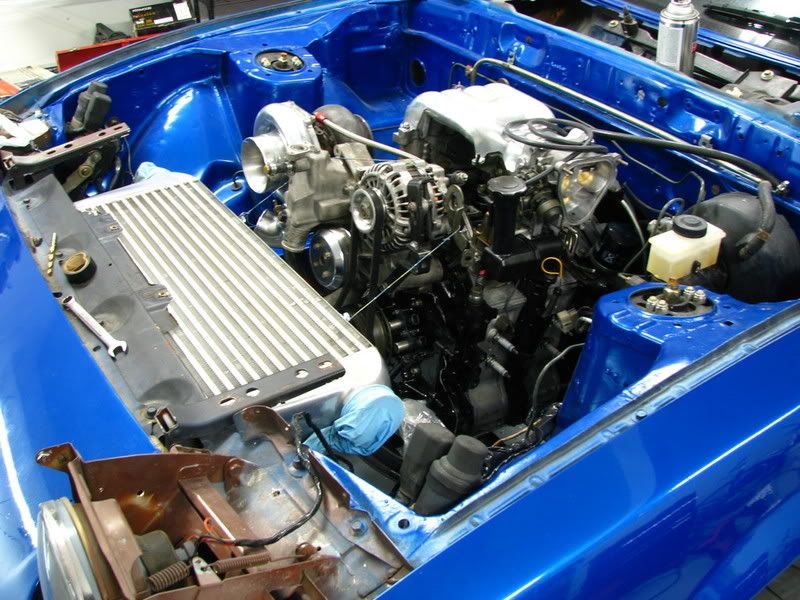
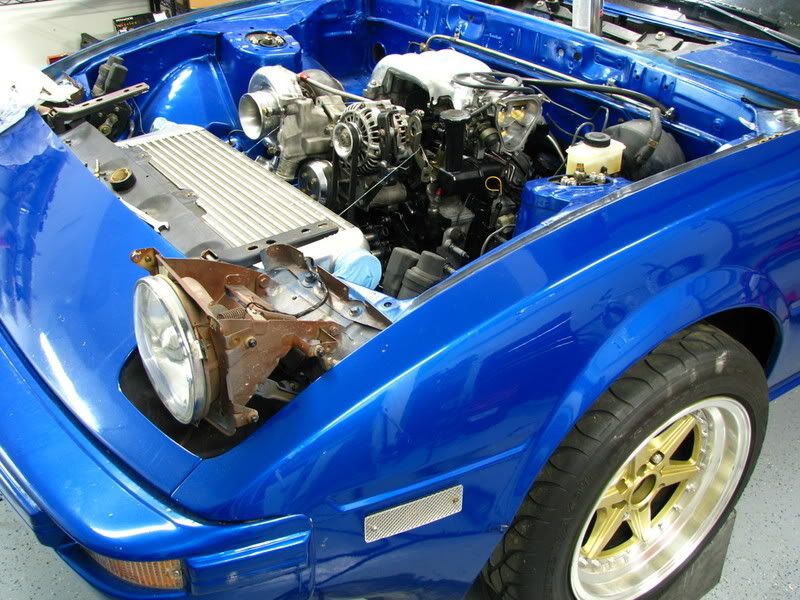
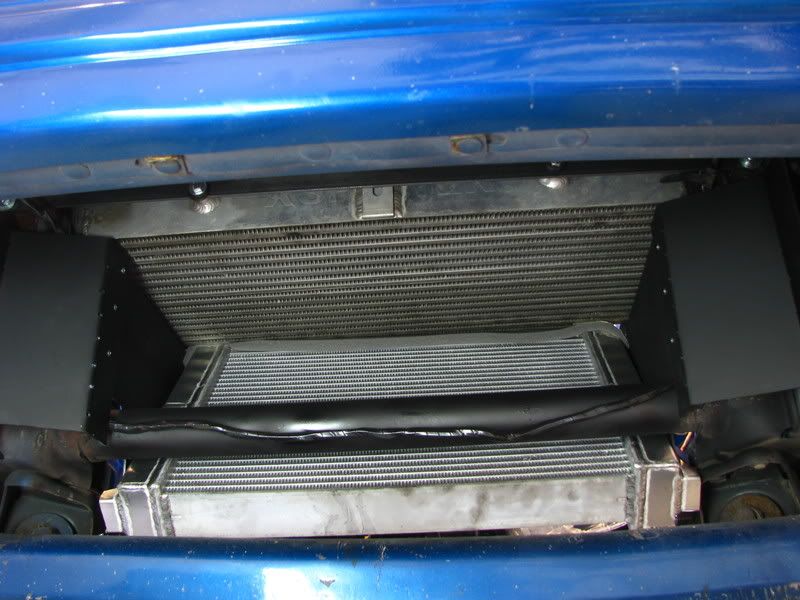
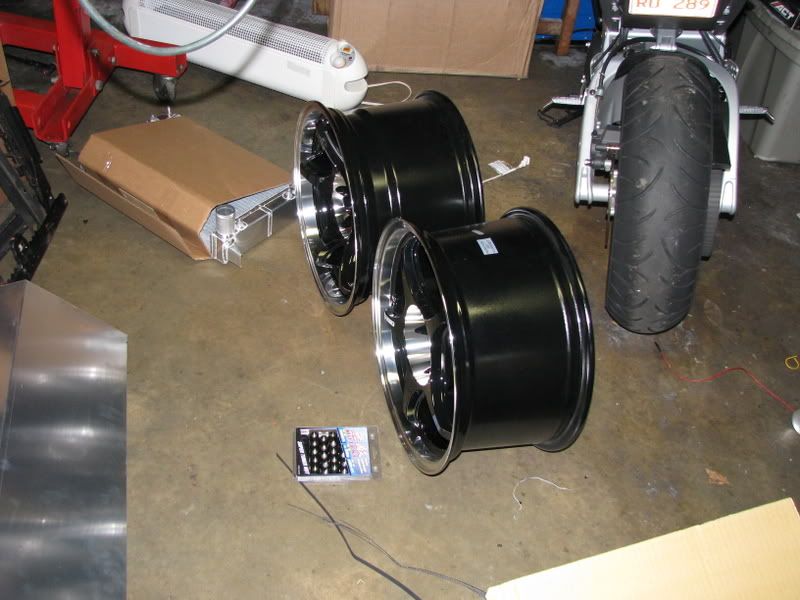
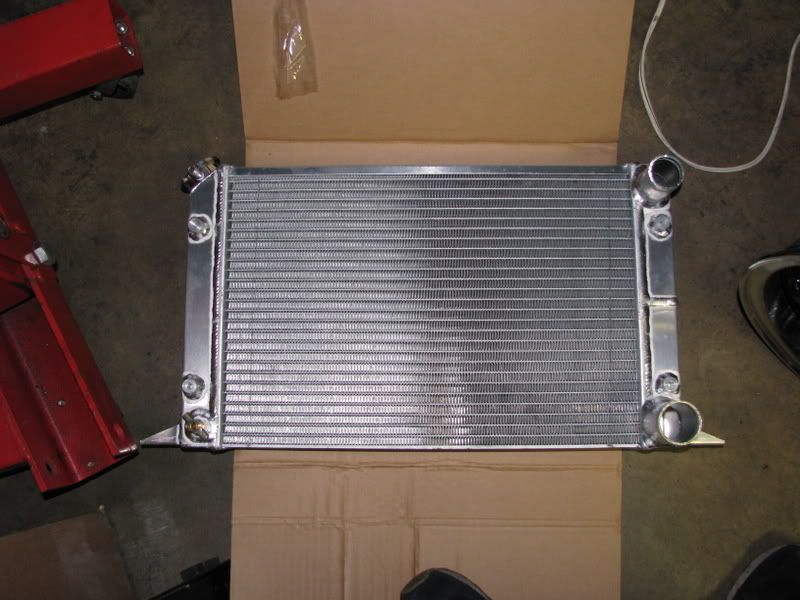
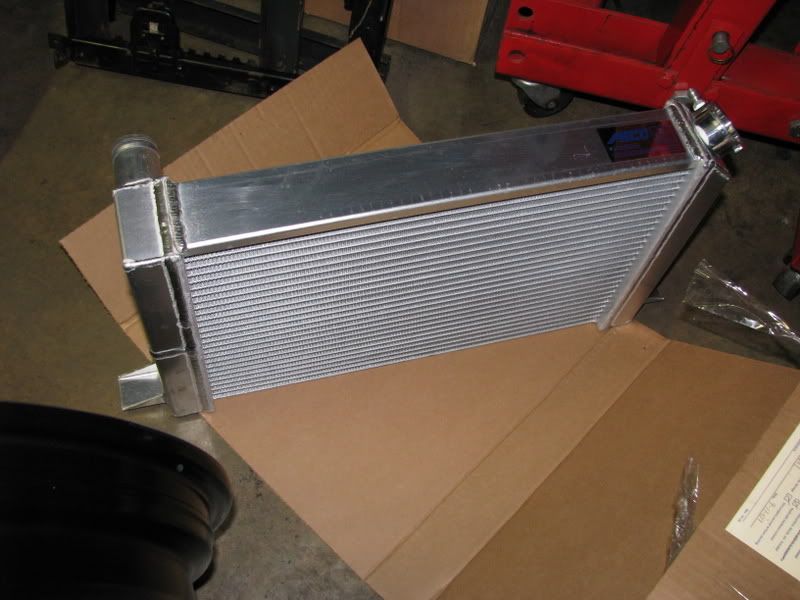
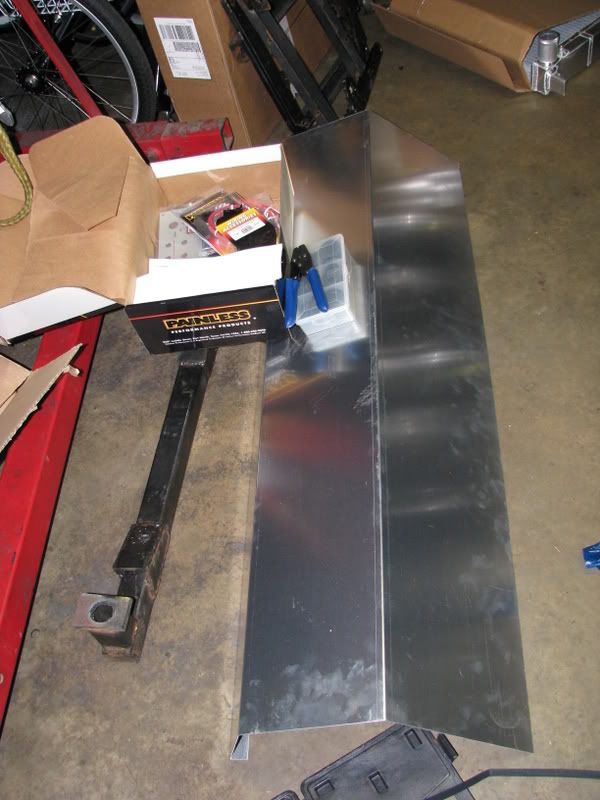
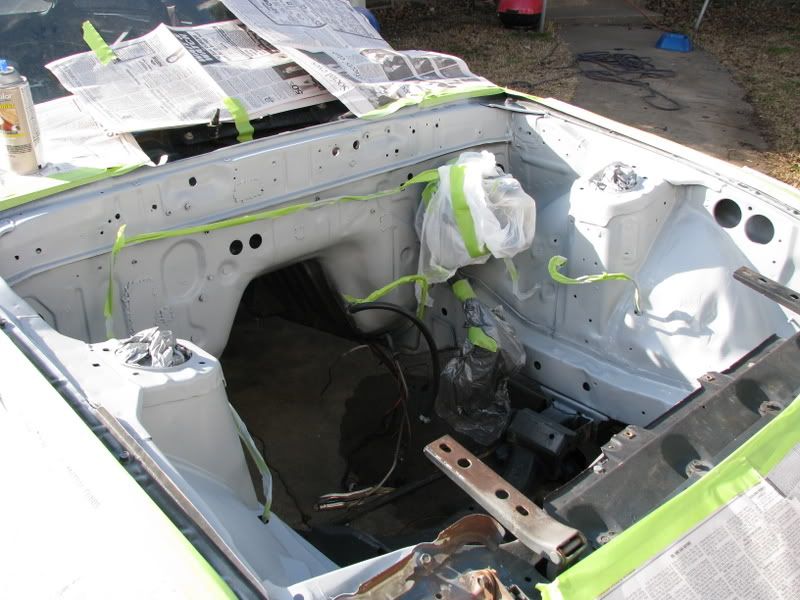
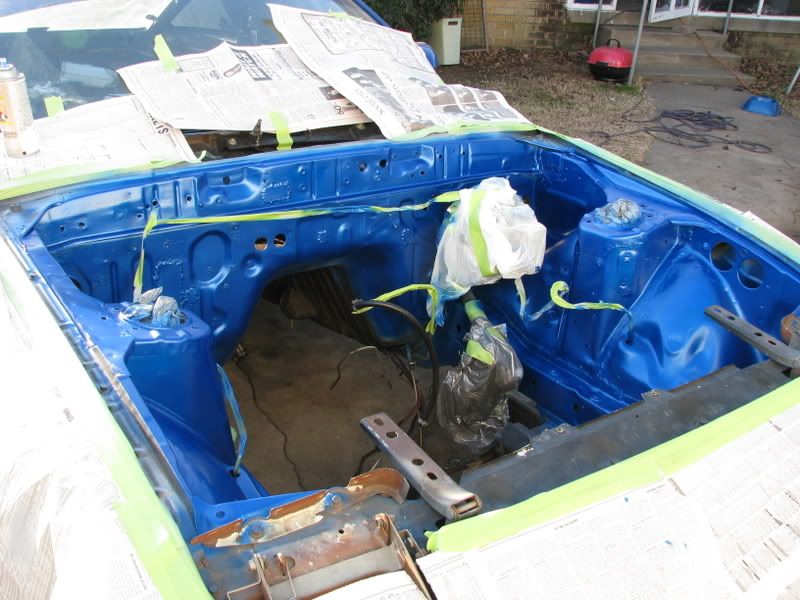
Got some more parts in!!!


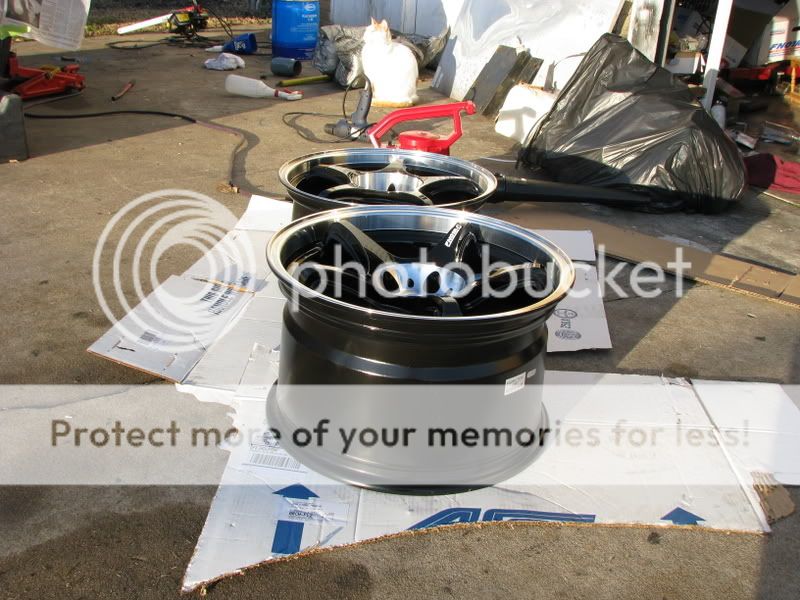
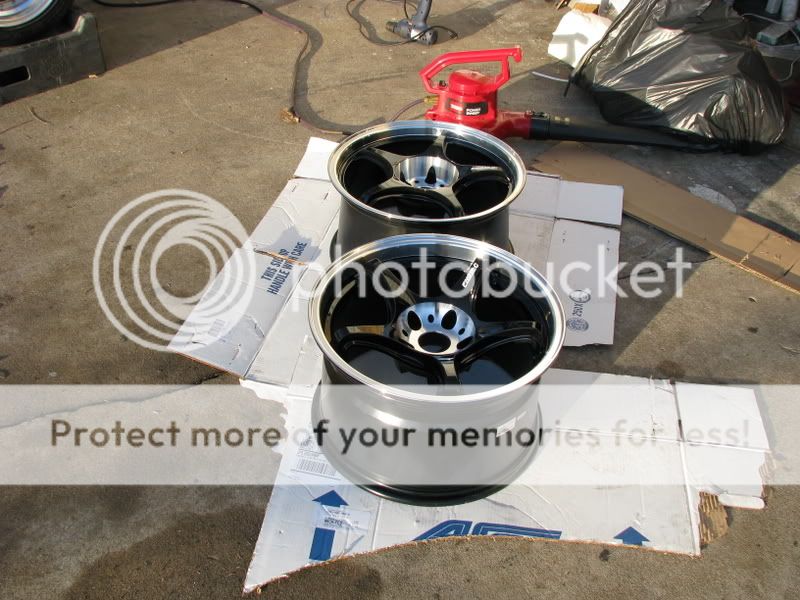
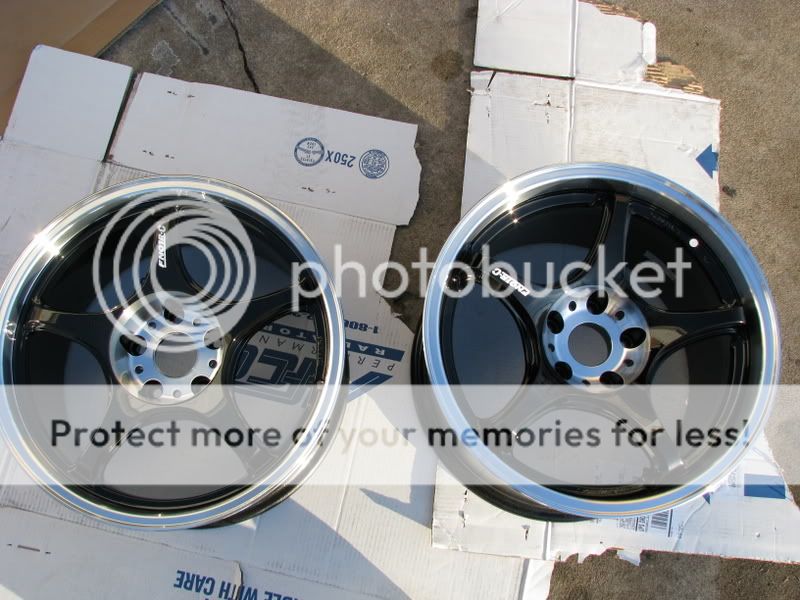
Wheels....... 17x9 +15 17x10 +12 I think I am going to paint the machined center black.
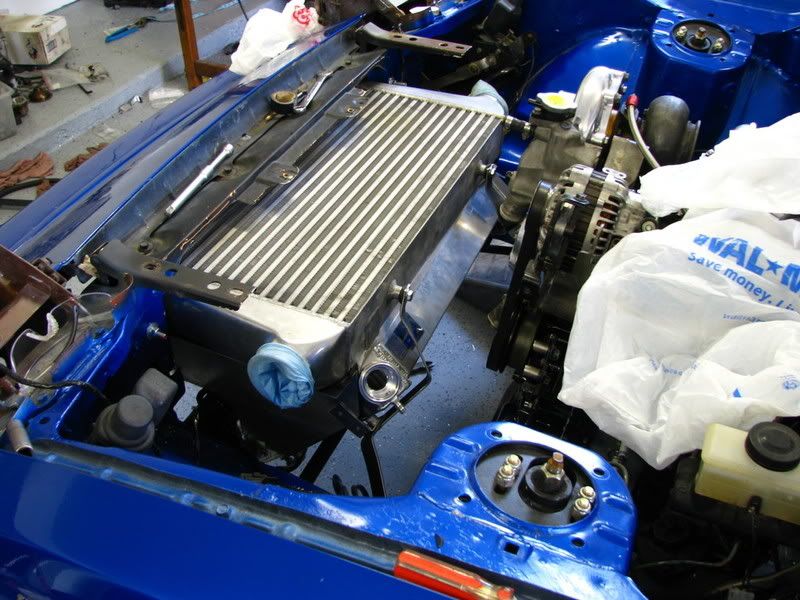


Radiator 22x13x3


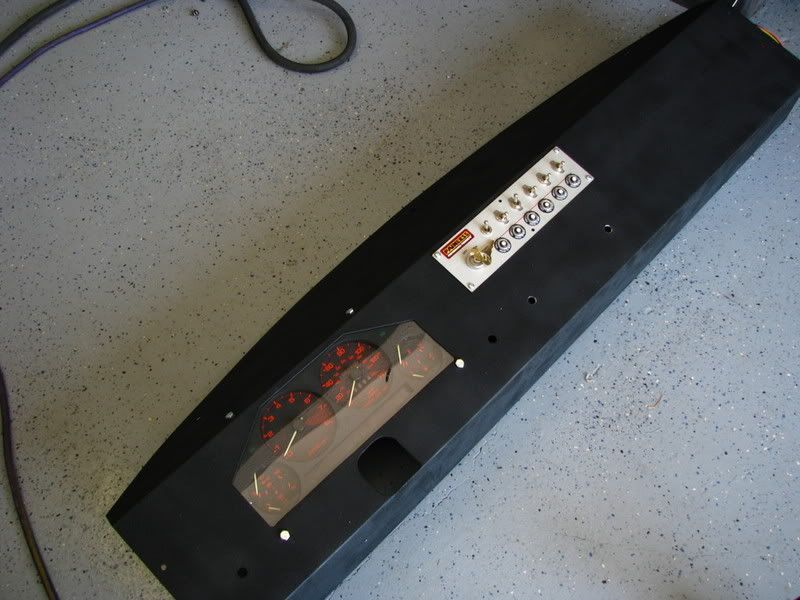
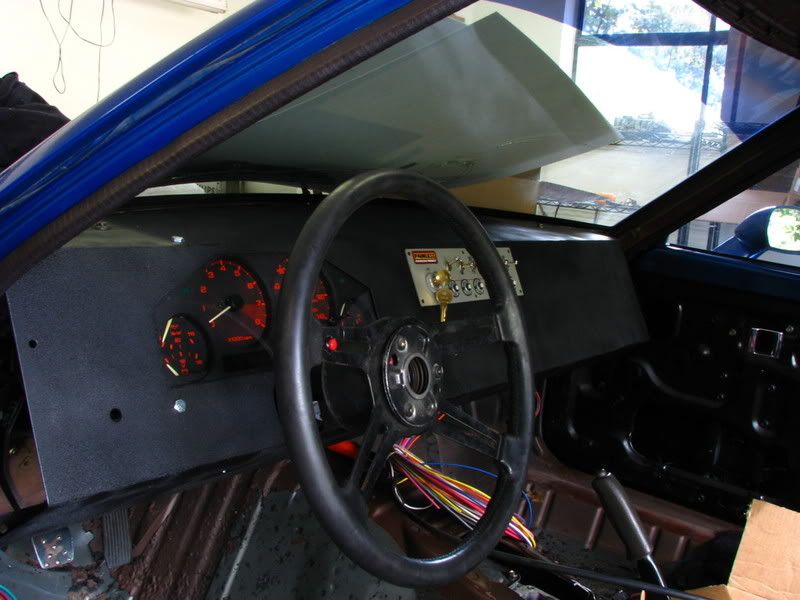
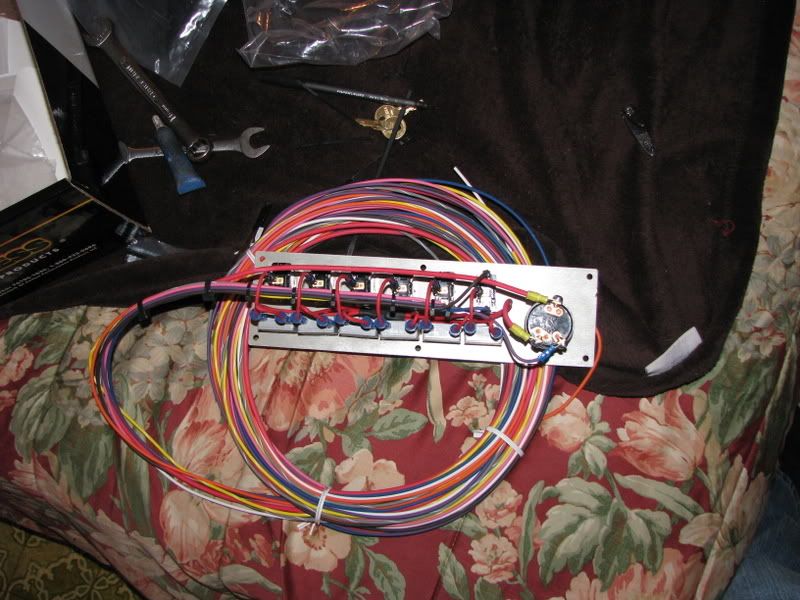
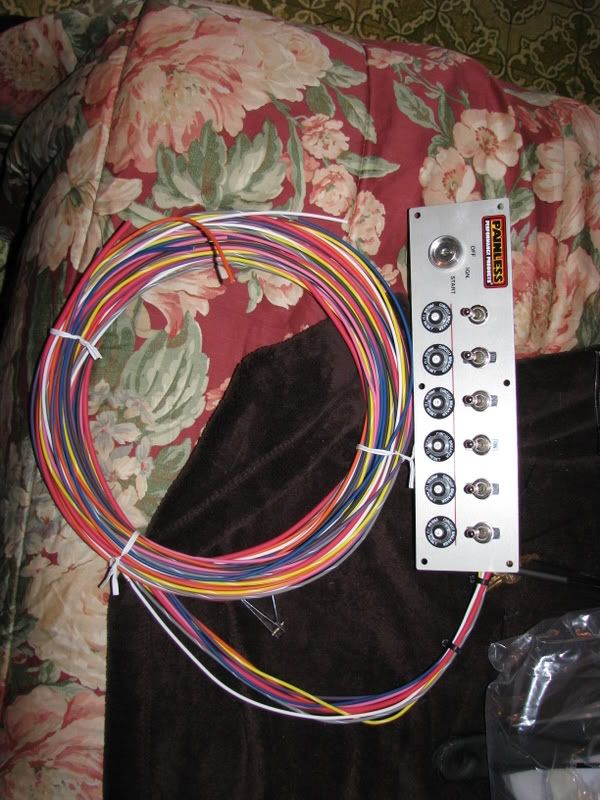
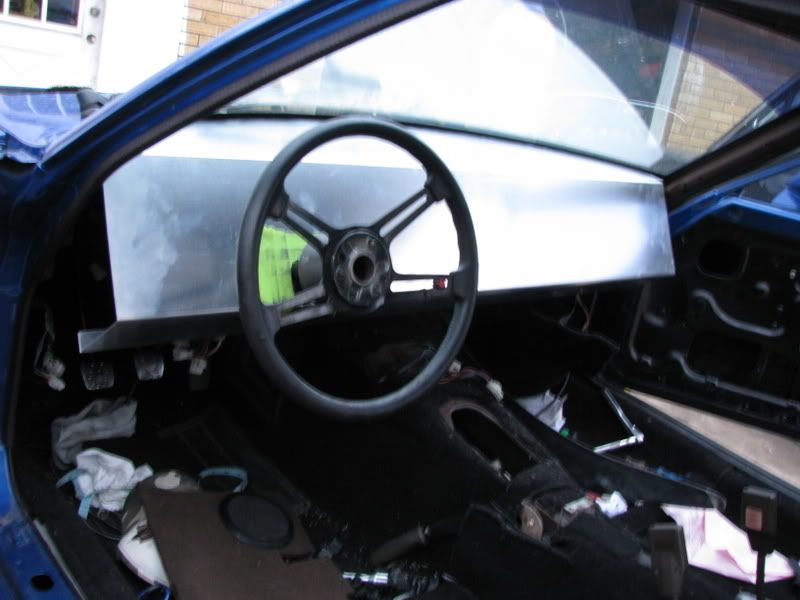
Aluminum dash and painless wiring harness.

Old 01-27-08, 05:22 PM
  #60  
Shell 93

Thread Starter
iTrader: (4)
 
kevinbtz's Avatar
 
Join Date: Jun 2004
Location: Little Rock, Arkansas
Posts: 1,019
Received 20 Likes on 11 Posts
Got the painless switch panel wired up.


Started trimming on the dash.


Primed, seam sealed, and almost all the way painted.


Old 01-27-08, 06:04 PM
  #61  
Rotary Enthusiast

 
'84-12A-GSL's Avatar
 
Join Date: May 2007
Location: Canada
Posts: 770
Likes: 0
Received 0 Likes on 0 Posts
Is that dash a universal kit, or did you get a sheet of aluminum bent? It looks awesome, and the engine bay looks much better than the flat black...cleaaan.
Old 01-27-08, 06:26 PM
  #62  
Senior Member
 
TeamSMS's Avatar
 
Join Date: Sep 2007
Location: Texas
Posts: 338
Likes: 0
Received 0 Likes on 0 Posts
i would also like to know where you got the pre-bent aluminum dash....also where did you get the painless wiring?
Old 01-27-08, 09:18 PM
  #63  
Shell 93

Thread Starter
iTrader: (4)
 
kevinbtz's Avatar
 
Join Date: Jun 2004
Location: Little Rock, Arkansas
Posts: 1,019
Received 20 Likes on 11 Posts
A local sheet metal place did the dash off of the measurements I gave them. The painless kit I bought from Summit.
Old 01-27-08, 09:48 PM
  #64  
Old Fart Young at Heart

iTrader: (6)
 
trochoid's Avatar
 
Join Date: Apr 2004
Location: St Joe MO
Posts: 15,145
Likes: 0
Received 7 Likes on 7 Posts
Nothing nicer, imho, than a well done engine bay. Post a pic of the front of the wheels and what size tires are you going with?
Old 01-27-08, 11:05 PM
  #65  
Shell 93

Thread Starter
iTrader: (4)
 
kevinbtz's Avatar
 
Join Date: Jun 2004
Location: Little Rock, Arkansas
Posts: 1,019
Received 20 Likes on 11 Posts
Your right about that, I hope my bay turns out the way I want it to. Here are some more pics of the wheels. As of now because of my budget, I am going to pull the tires of my REPU which are Falken Azenis 255/40/17 and 225/45/17, which I know is on the narrow side but the price is right. After I wear those out, or get some tire cash I will probably go with some 40 treadwear autox ruber in a 275/40/17 and a 245/45/17 in the front.


Old 01-28-08, 08:36 PM
  #66  
REW'd FB

 
z-beater's Avatar
 
Join Date: Dec 2004
Location: WA
Posts: 2,685
Likes: 0
Received 0 Likes on 0 Posts
Nice wide wheels you have there. The 5zigens are nice and light too. They will look great on the car.
Old 01-28-08, 09:39 PM
  #67  
Full Member
 
rx-freak's Avatar
 
Join Date: Feb 2007
Location: Brossard, QC
Posts: 240
Likes: 0
Received 0 Likes on 0 Posts
Wow, everything looks great. Can't wait to see the finished product.
Old 02-04-08, 10:51 PM
  #68  
Shell 93

Thread Starter
iTrader: (4)
 
kevinbtz's Avatar
 
Join Date: Jun 2004
Location: Little Rock, Arkansas
Posts: 1,019
Received 20 Likes on 11 Posts
Originally Posted by z-beater
Nice wide wheels you have there. The 5zigens are nice and light too. They will look great on the car.
Yea, I'm hoping they turn out like I think they will.

Originally Posted by rx-freak
Wow, everything looks great. Can't wait to see the finished product.
Thanks. I can't wait ether, I am having a couple of snags, but It getting close.


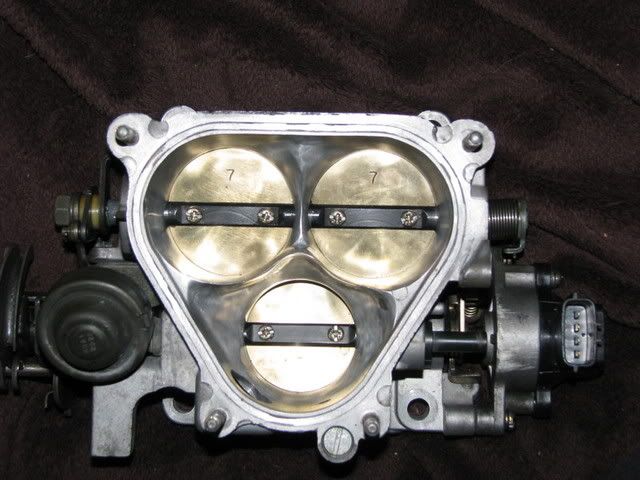
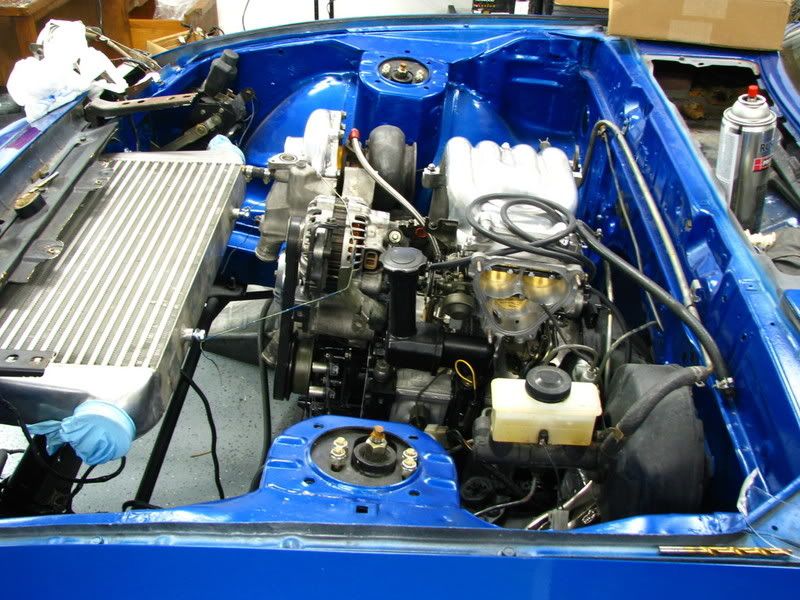
I got the throttle body back together...

Old 05-21-08, 08:59 PM
  #69  
Shell 93

Thread Starter
iTrader: (4)
 
kevinbtz's Avatar
 
Join Date: Jun 2004
Location: Little Rock, Arkansas
Posts: 1,019
Received 20 Likes on 11 Posts
Got the motor in, and have started mocking up the V mount.


Old 05-22-08, 05:15 PM
  #70  
Shell 93

Thread Starter
iTrader: (4)
 
kevinbtz's Avatar
 
Join Date: Jun 2004
Location: Little Rock, Arkansas
Posts: 1,019
Received 20 Likes on 11 Posts
Put the cluster in the dash ,installed it in the car, and finished up the V mount (for the most part).


Old 05-22-08, 06:00 PM
  #71  
Senior Member

iTrader: (3)
 
Keeble's Avatar
 
Join Date: Oct 2007
Location: Rockwall, TX
Posts: 658
Likes: 0
Received 2 Likes on 2 Posts
Nice Work you got going on there, inspires me to do the aluminum dash and strip the stock wiring down
Old 05-22-08, 06:38 PM
  #72  
Shell 93

Thread Starter
iTrader: (4)
 
kevinbtz's Avatar
 
Join Date: Jun 2004
Location: Little Rock, Arkansas
Posts: 1,019
Received 20 Likes on 11 Posts
I'm trying to find the piece of paper that I had the dimensions for the dash on for ya. If I can't find it, I will measure it.

Thanks,
Kevin
Old 05-23-08, 05:44 PM
  #73  
Senior Member

iTrader: (3)
 
Keeble's Avatar
 
Join Date: Oct 2007
Location: Rockwall, TX
Posts: 658
Likes: 0
Received 2 Likes on 2 Posts
hey i was wondering how you went about stripping the harness down.
Old 05-23-08, 06:56 PM
  #74  
Sleeper but still slow

iTrader: (1)
 
'87 turbo II's Avatar
 
Join Date: Jan 2006
Location: Georgia
Posts: 1,766
Likes: 0
Received 0 Likes on 0 Posts
Wow, really nice build man. Keep it up, this will be a great finished product.
Old 05-24-08, 10:30 AM
  #75  
REW'd FB

 
z-beater's Avatar
 
Join Date: Dec 2004
Location: WA
Posts: 2,685
Likes: 0
Received 0 Likes on 0 Posts
How much weight did you remove with the dash?


Quick Reply: 1st gen 13b-REW Redo....


All times are GMT -5. The time now is 04:43 AM.