
Show us yer knobs!


Full Member
Joined: Mar 2010
Posts: 111
Likes: 0
From: MN

 You are a funny guy. With a shifter as nice as the RX-8's though, I would look at it just for fun.
 MUCH heavier than the SA **** - feels like its lead-filled. Certainly gives a different (tho not unpleasant) heft to the shift action! leather-wrapped too....
Stu Aull
80GS
Alaska
When I had my RX8, I liked the look of the stock ****, but it felt weird in my hand. I always liked simple big grip ball shift *****. I swapped it for a Team Vodoo magnum ****. When I sold my RX8, I kept the RX8 **** as a momento. I ended up giving it to my best friend as a birthday gift for his Turbo II. Still has it.


Full Member
Joined: Apr 2011
Posts: 150
Likes: 0
From: Victoria, BC, Canada
Haha that's what everyone asks. But i turned it from dried Laburnam, then stained and coated it with polyurethane and satin clear coat.
But in order to get the perfect piece of wood, my friend and I trekked into the forest one morning with nothing but an axe and the determination to find the perfect wood for this shift ****. We found the Laburnam tree, chopped it down(took at least 13 hours). Then we took a core sample from the heart of the trunk. Trekked back home with the perfect piece and continued to spend hours on hand shaping it to get it perfect. Then it was sanded to 4000 grit, coated with tung oil, let it dry dry and then has about 8 coats of satin polyurethane. Then sanded back to 4000 inbetween each coat for smoothness.
-Based on a true story.
If you ask me this is the most epic shift **** to ever have been in a first gen.
Last edited by Colbskee; Sep 28, 2011 at 12:51 PM.
Environmentally-Hostile
Joined: Sep 2005
Posts: 1,662
Likes: 3
From: Ennis/Arlington Texas

Full Member
Joined: Jun 2011
Posts: 103
Likes: 0
From: Minnesota
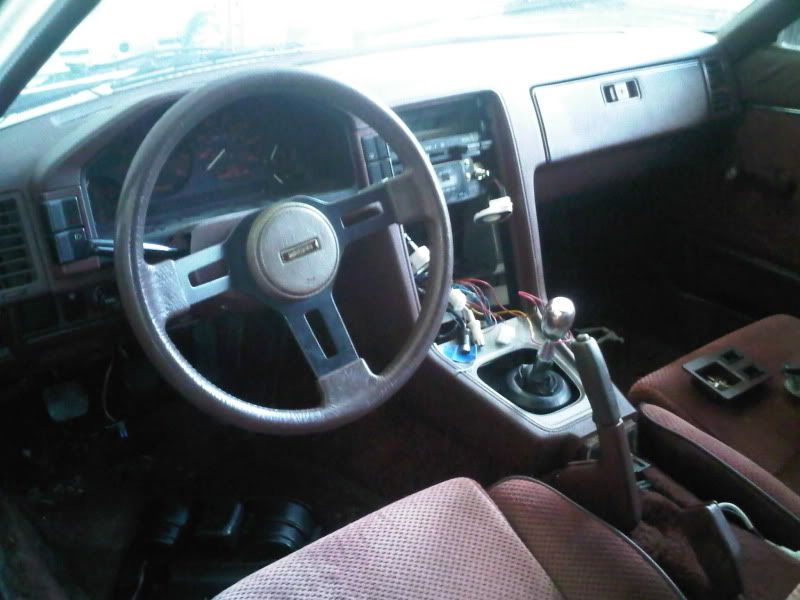
This thread is also more proof that Mazda did a ****-poor job of engineering for the the proper fitment of the shifter boots.
Almost everyone's here has fallen out of place or is just kind "thrown into the hole"
We really need to come up with a permanent fix that looks great, without having to drill holes and what-not.
Perhaps some kind of Billet ring? IDK.
Almost everyone's here has fallen out of place or is just kind "thrown into the hole"
We really need to come up with a permanent fix that looks great, without having to drill holes and what-not.
Perhaps some kind of Billet ring? IDK.
I fixed mine by making my own "clips" to replace the broken ones on the underside of the panel. Here's the secret: hot glue the boot into place on the underside by sealing all of the cracks around the edge of the rubber, and carefully let it dry without moving the boot (so that the glue stays clear when it hardens and not cloudy/milky). Next, put a drop or two of super glue straight into the holes on the boot where the clips are supposed to be, until there's a small pool of glue overflowing onto the rubber. Immediately afterwards, take some Zip Kicker* and spray the pools to instantly harden them, effectively creating a fastening clip out of super glue. Finish up by wiping/cleaning off the excess Zip Kicker on the underside of the boot and panel. You can leave the hot glue on for extra security or you can peel it off at this point (I just left mine on). Install back into the car and enjoy your fixed shifter boot!
*If you've never used Zip Kicker before, make ABSOLUTELY SURE that there's no super glue on your fingers, even in trace amounts. There's nothing pleasant about accidentally touching a Zip Kicker-coated surface and then having to saw at frozen, dead skin between your finger and the surface to free yourself. Ask me how I know.
Sounds like you need to make a full write-up with detailed steps and pictures.

Rotary Freak
Joined: Sep 2004
Posts: 1,901
Likes: 0
From: Kitchener, Ont. Canada
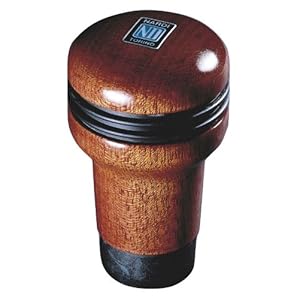
got this one custom made by another forum member  I love the old school 'm' symbol
http://imageshack.us/photo/my-images/441/047kr.jpg/
I love the old school 'm' symbolhttp://imageshack.us/photo/my-images/441/047kr.jpg/
got this one custom made by another forum member I love the old school 'm' symbol
http://imageshack.us/photo/my-images/441/047kr.jpg/
I love the old school 'm' symbolhttp://imageshack.us/photo/my-images/441/047kr.jpg/
Rotary Freak
Joined: Sep 2004
Posts: 1,901
Likes: 0
From: Kitchener, Ont. Canada
'85 Rx7 GSL
Joined: Oct 2011
Posts: 33
Likes: 0
From: Penticton
Haha that's what everyone asks. But i turned it from dried Laburnam, then stained and coated it with polyurethane and satin clear coat.
But in order to get the perfect piece of wood, my friend and I trekked into the forest one morning with nothing but an axe and the determination to find the perfect wood for this shift ****. We found the Laburnam tree, chopped it down(took at least 13 hours). Then we took a core sample from the heart of the trunk. Trekked back home with the perfect piece and continued to spend hours on hand shaping it to get it perfect. Then it was sanded to 4000 grit, coated with tung oil, let it dry dry and then has about 8 coats of satin polyurethane. Then sanded back to 4000 inbetween each coat for smoothness.
-Based on a true story.
If you ask me this is the most epic shift **** to ever have been in a first gen.
But in order to get the perfect piece of wood, my friend and I trekked into the forest one morning with nothing but an axe and the determination to find the perfect wood for this shift ****. We found the Laburnam tree, chopped it down(took at least 13 hours). Then we took a core sample from the heart of the trunk. Trekked back home with the perfect piece and continued to spend hours on hand shaping it to get it perfect. Then it was sanded to 4000 grit, coated with tung oil, let it dry dry and then has about 8 coats of satin polyurethane. Then sanded back to 4000 inbetween each coat for smoothness.
-Based on a true story.
If you ask me this is the most epic shift **** to ever have been in a first gen.

Alas, you are not going to find one unless you pry it from mazdaverx713b iron grip. As far as I know he has the only NOS maroon **** in the country and I've offered to buy it from him with no success.
I've been messing around with *****, and really fell in love with the Razo ra121. Then I was thinking about getting a wood one to match my steering wheel, ebrake handle, and my black/brown interior so I picked up a momo and sanded/painted the chrome black. Looks good, but don't like the feel very much so I've thought about going back to the Razo or getting the heavier RA122 which is 450g compared to 350...... and while looking I stumbled on this beauty I'd never seen before.
Ordered it right away.
Ordered it right away.


Nothing extremely hi-tech or outrageous, just ole school stock appearing. I recently had a tired & worn leather covered **** from a 79 Limited redone. Same place Stu had his wheel recovered, Kraft Custom's out of Texas.
The flash makes everything appear grey(er) than they are. The **** is black, I had them put charcoal stitching in it to make it stand out slightly. The boots (shift and ebrake) are charcoal w/silver stiching and are the only things on the car not true to OEM. My version of modifing my car! It's ok, I still have the original boots tucked away in a zip lock......