
(INTERIOR) How-to: Remove your dashboard (84 and 85)

Thread Starter
Joined: Sep 2002
Posts: 2,932
Likes: 6
From: Surrounded by Sebey parts, Rhode Island
I didn't remove the A/C, I only popped out the vents. I'm sure a Haynes manual will tell you how to remove the A/C, either that or an FSM.
My FSP Fiesta eats Jettas
Joined: Aug 2002
Posts: 1,616
Likes: 3
Wow, the SA dashes are a LOT easier to remove.
I can pull one in about 30 minutes (without destroying anything!)
The RX4 dash is the hardest of all, the damn thing bolts to the firewall and literally EVERYTHING attaches to it, including the wiring harness. When I got my '74 RX4 coupe the dash was just wasted so I replaced it with one that only had about 3-4 cracks that came out of the '74 RX4 wagon I had for parts. I took the wasted one out first so I had some insight before attacking the better one. The whole thing took two full days and my poor old bones ached for a week afterwards. All that to install a cracked dash
Old [Sch|F]ool


Joined: May 2001
Posts: 12,876
Likes: 575
From: Cleveland, Ohio, USA
You're making me regret my decision to put an SA dashboard in my '85.
But I'll do it anyway, because the thieves trashed my dash in their vain attempt to get my radio out. I hope to be able to use the FB logicon and heater ducting in the SA dash, make things somewhat simpler. (The evaporator core will be long gone) Plus my SA dash didn't come with anything, just empty shell/frame and the instrument cluster, which I lust for.
It will also make it easier for me to use an SA shift tower. And the SA dash is about an inch or so closer to the firewall than the Series 3 setup, meaning more kneeroom for my lanky self.
Thread Starter
Joined: Sep 2002
Posts: 2,932
Likes: 6
From: Surrounded by Sebey parts, Rhode Island
Originally Posted by Hades12
I find that taking out the seats helps with this job. Also the full metal frame can be removed with just a few more screws makes taking the dash pad off very easy.
I'll find out when I pull the rest of the carpet.

Senior Member
Joined: Mar 2004
Posts: 589
Likes: 3
From: Coastal
Have reviewed this one? Maybe it can help with some of the steps:
http://www.rotorhead.ca/topic.php?fl=howto&cntnt=index
http://www.rotorhead.ca/topic.php?fl=howto&cntnt=index

REW'd FB
Joined: Dec 2004
Posts: 2,685
Likes: 1
From: WA
Originally Posted by $100T2
Every last scrap of maroon is out of that car. The color change is under way!
Looking great can't wait to see it with your custom color.
Thread Starter
Joined: Sep 2002
Posts: 2,932
Likes: 6
From: Surrounded by Sebey parts, Rhode Island
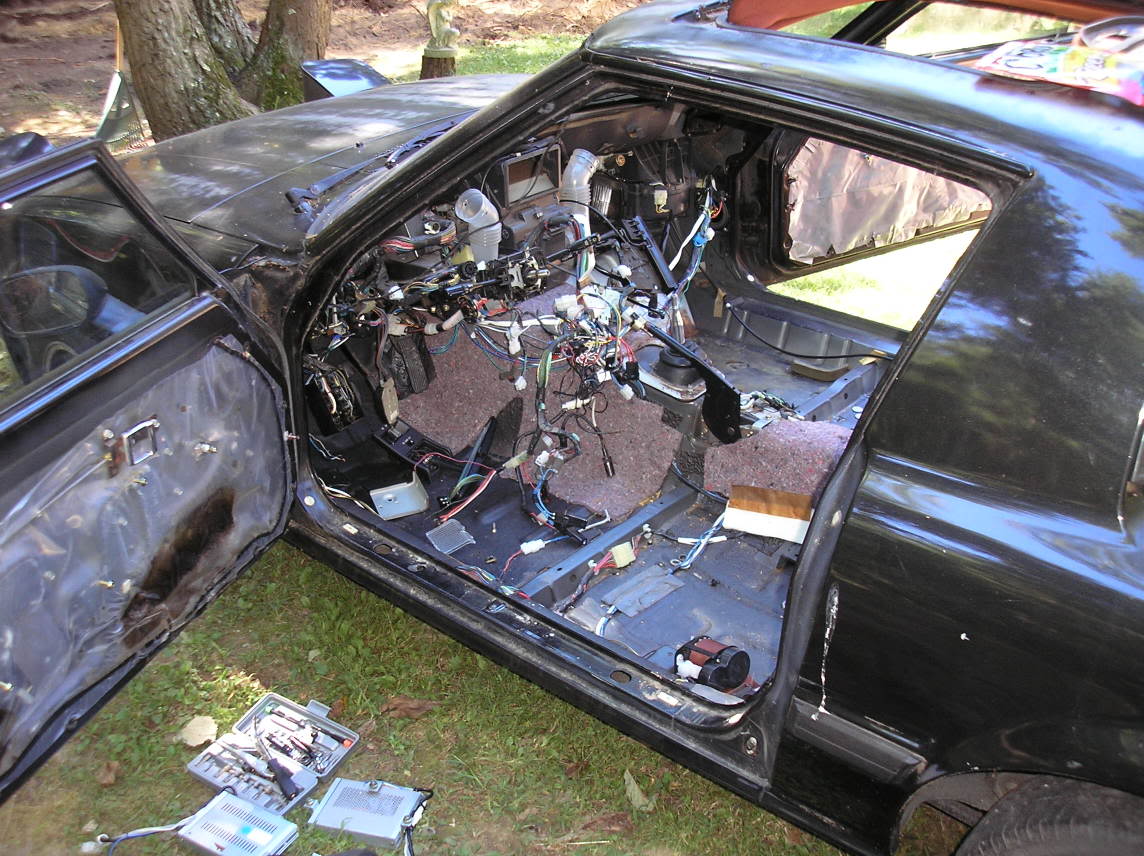
That pic was before the removal of the headliner. Trust me, the only maroon in there is just blood from my knuckles or something.
As far as it looking intimidating, yeah, I agree it looks bad. But honestly, it looks worse than it is.
As far as it looking intimidating, yeah, I agree it looks bad. But honestly, it looks worse than it is.

Thread
Thread Starter
Forum
Replies
Last Post
KAL797
Test Area 51
0
Aug 11, 2015 03:47 PM