
RENESISFD's Robust Build: Powered by Pepperoni Pizza and Chikken Nuggets

Thread Starter
Joined: Feb 2008
Posts: 2,979
Likes: 9
From: Long Island NY 11746
Last summer I decided I wanted to up the power of my FD as well as take it to the road course and some autocross events. I have been collecting parts for this build since August and still have a lot more to purchase.
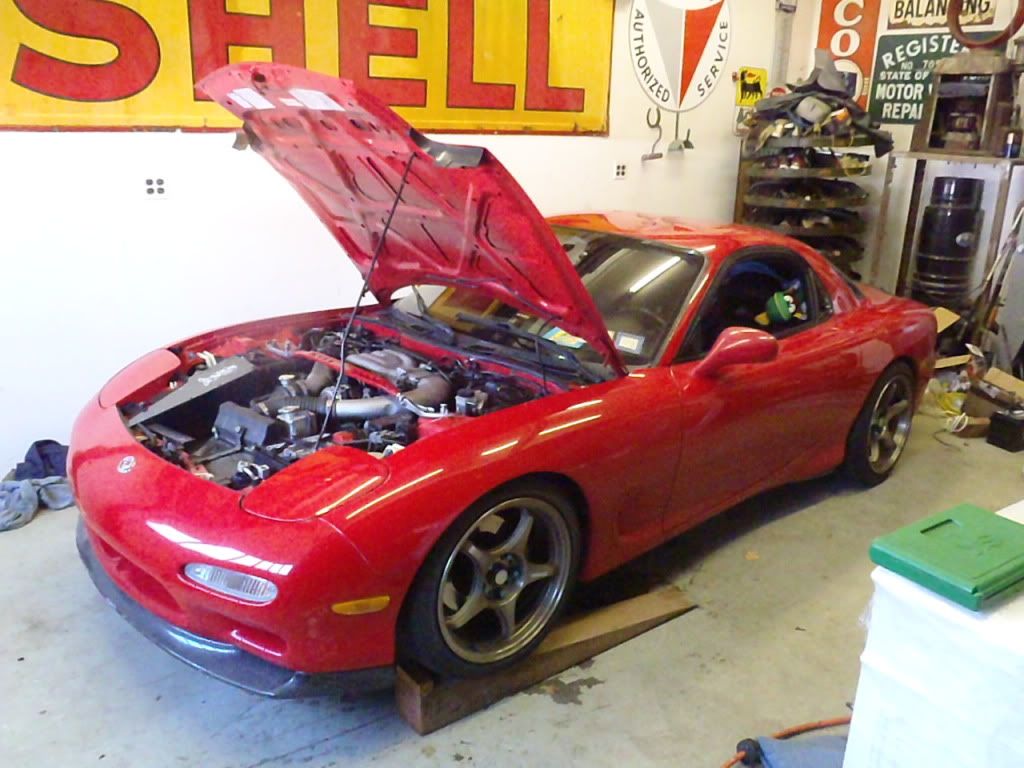
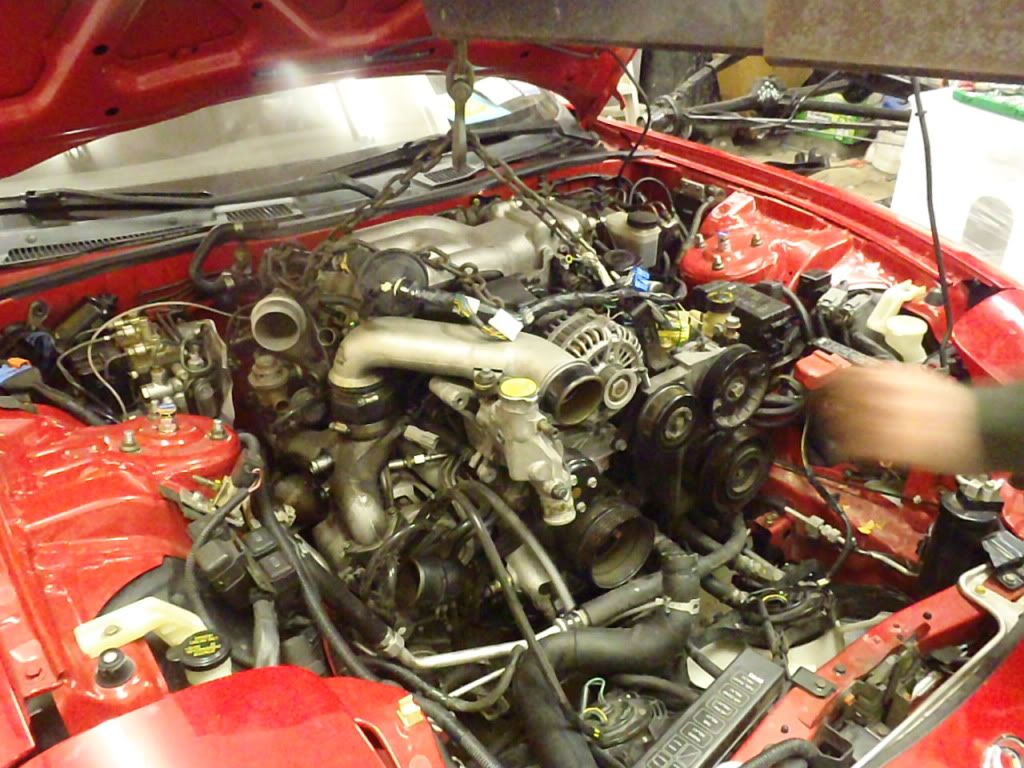
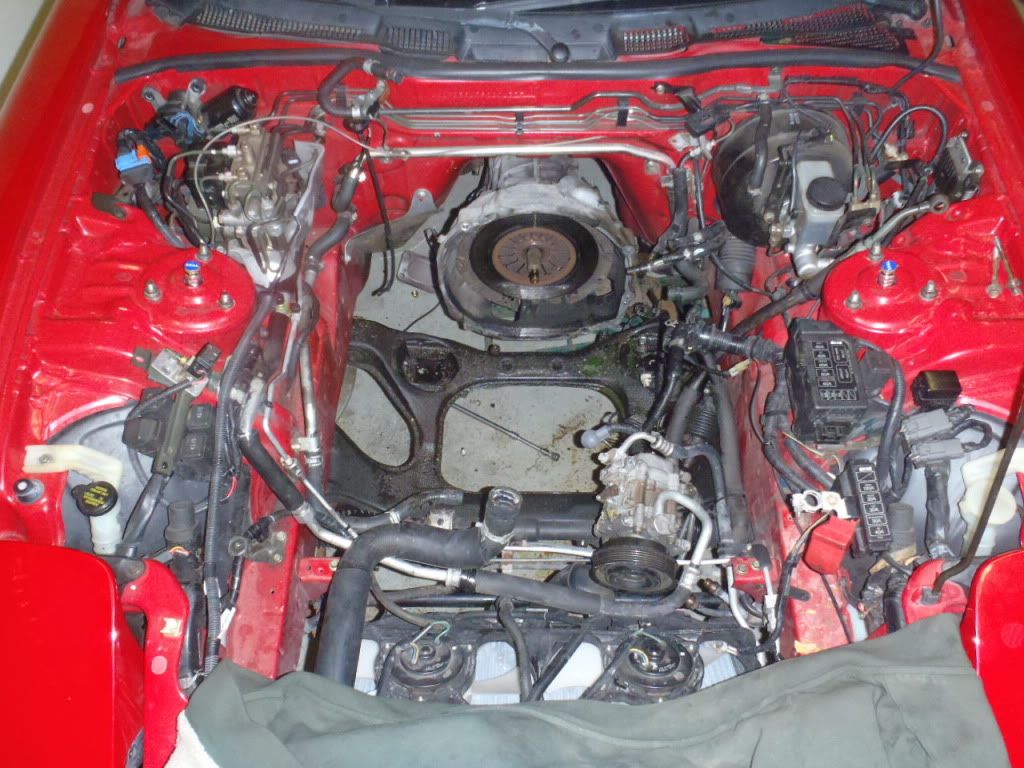
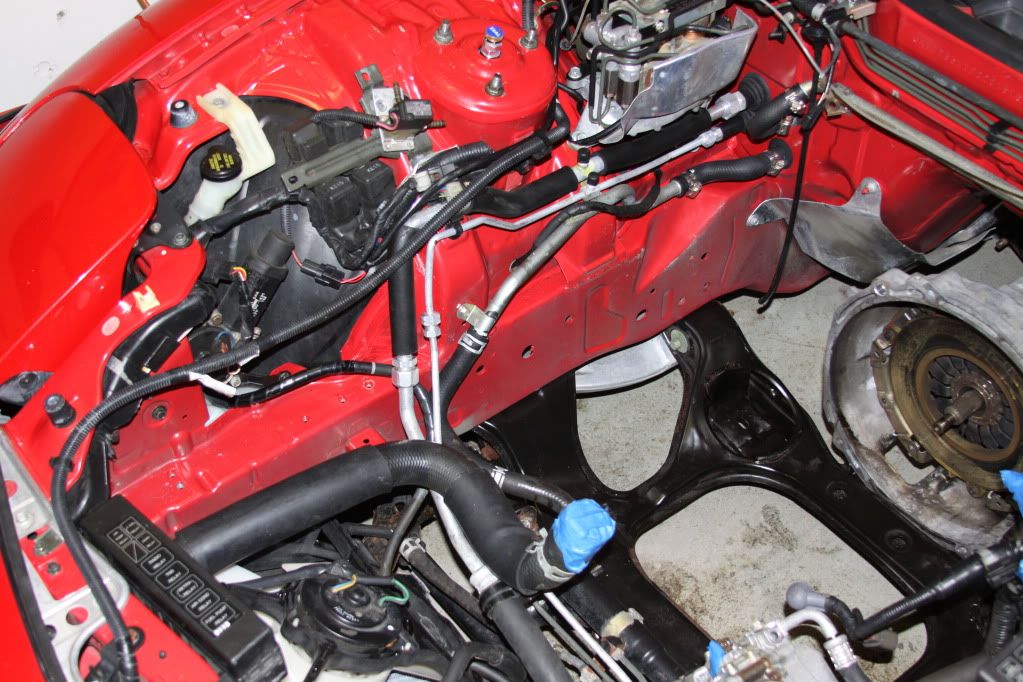
Due to a badly leaking oil pan, me wanting to upgrade to BNR's, and upgrade the clutch. I decided that it would be easier to just pull the motor and perform all the major upgrades with the engine out. Here are some pics as I know thats what people want to see. The First pic is right before I started disassemblying it
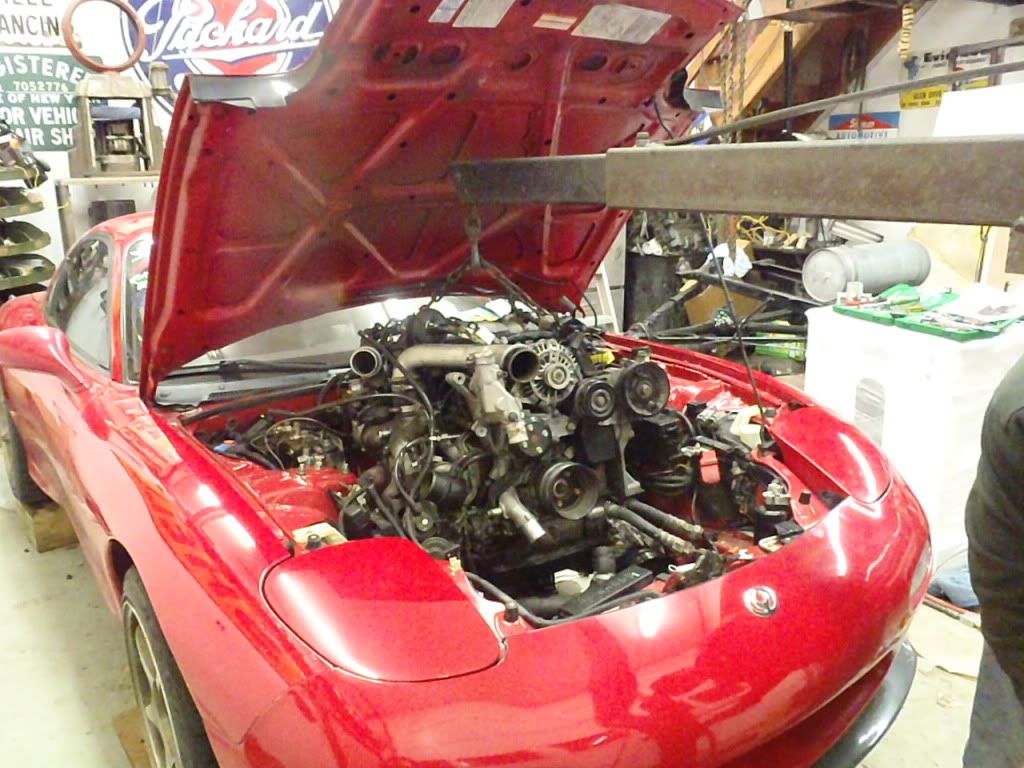
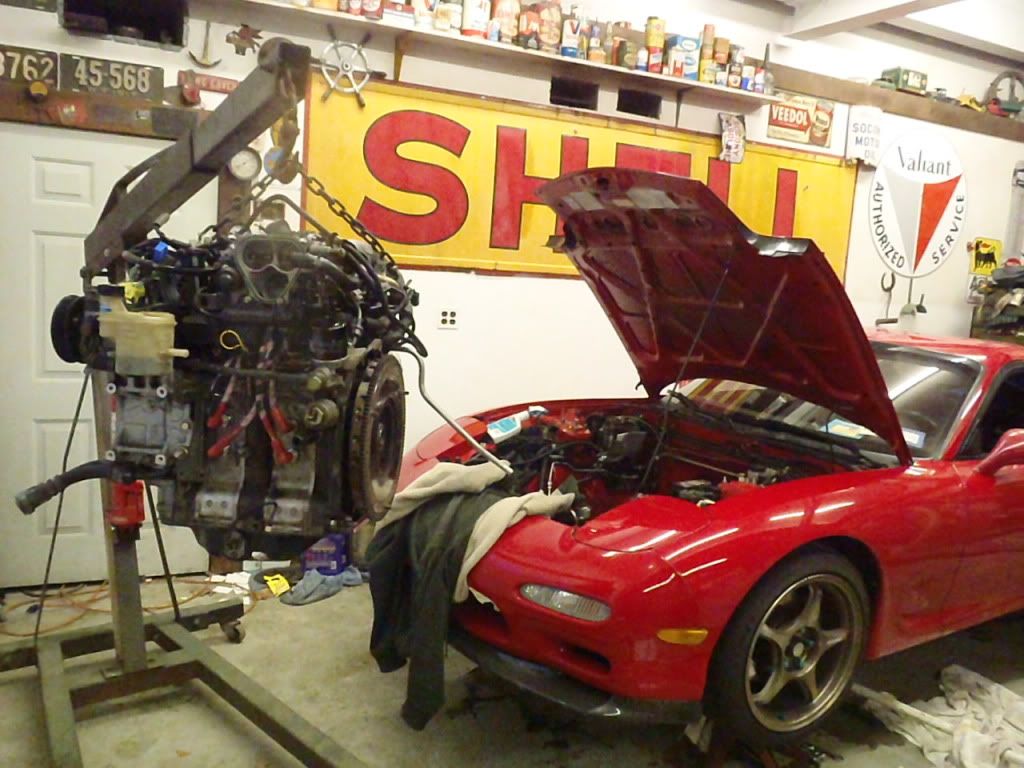
The next pic is when Tig418 and I were getting ready to pull the motor
More Pics to follow.
Comments, suggestions, and questions are encouraged. Also, I suck at taking pictures
John
Due to a badly leaking oil pan, me wanting to upgrade to BNR's, and upgrade the clutch. I decided that it would be easier to just pull the motor and perform all the major upgrades with the engine out. Here are some pics as I know thats what people want to see. The First pic is right before I started disassemblying it
The next pic is when Tig418 and I were getting ready to pull the motor
More Pics to follow.
Comments, suggestions, and questions are encouraged. Also, I suck at taking pictures
John
Last edited by RENESISFD; May 20, 2013 at 09:11 AM.
Thread Starter
Joined: Feb 2008
Posts: 2,979
Likes: 9
From: Long Island NY 11746
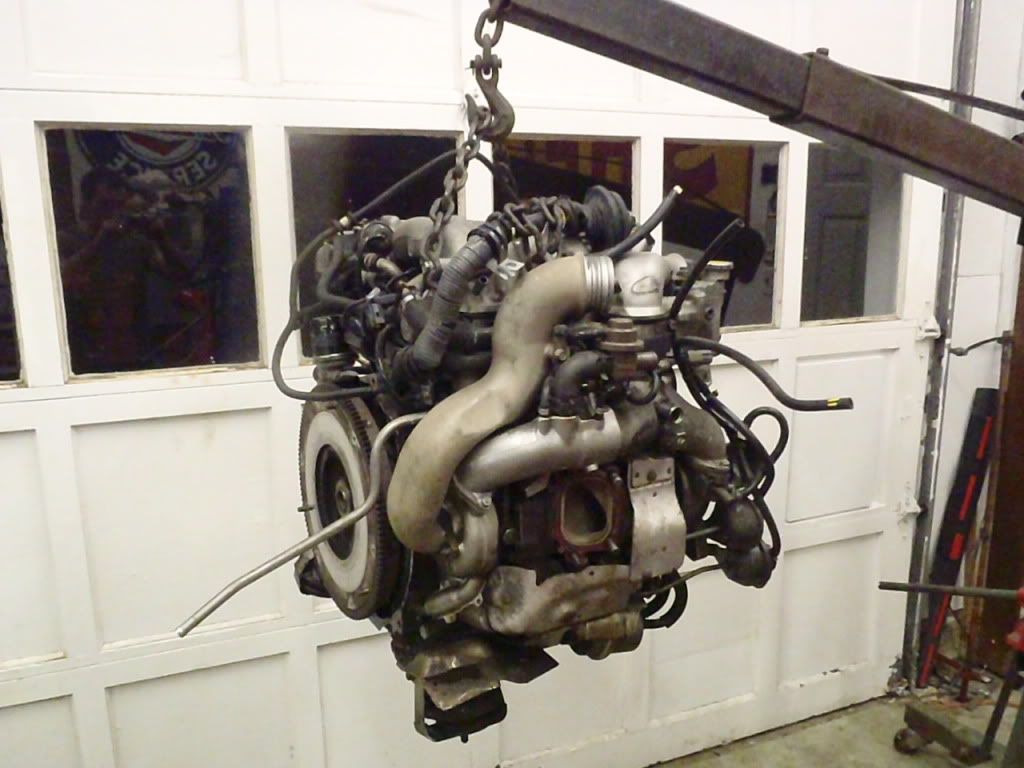
Continuing on with the pics......
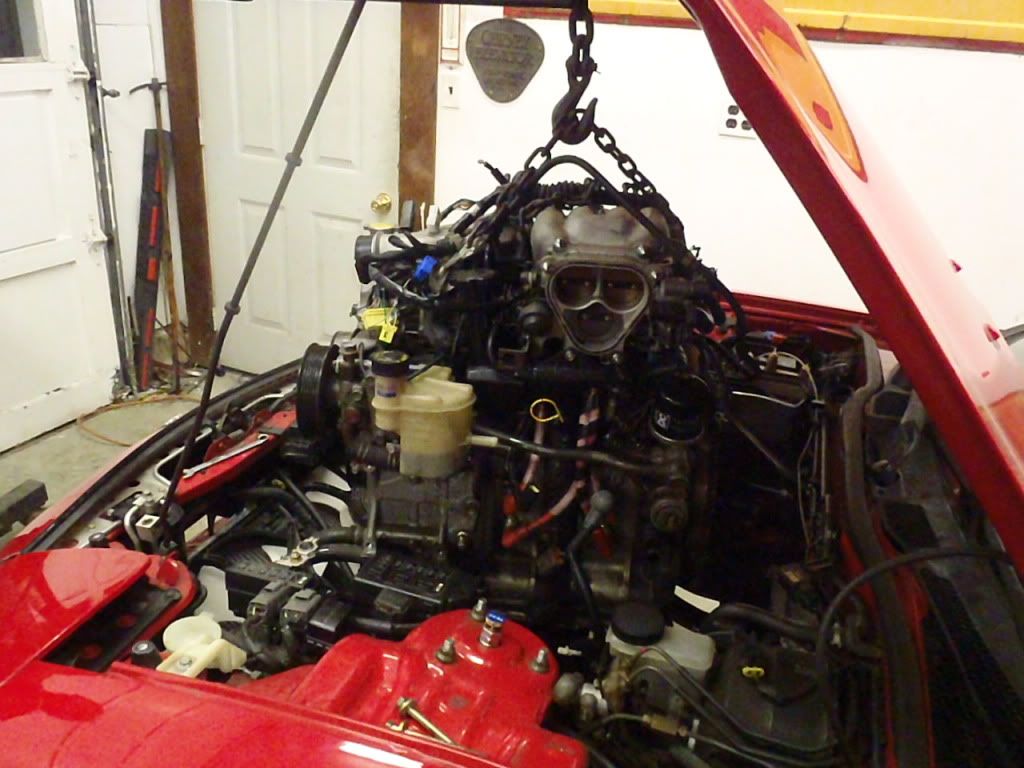
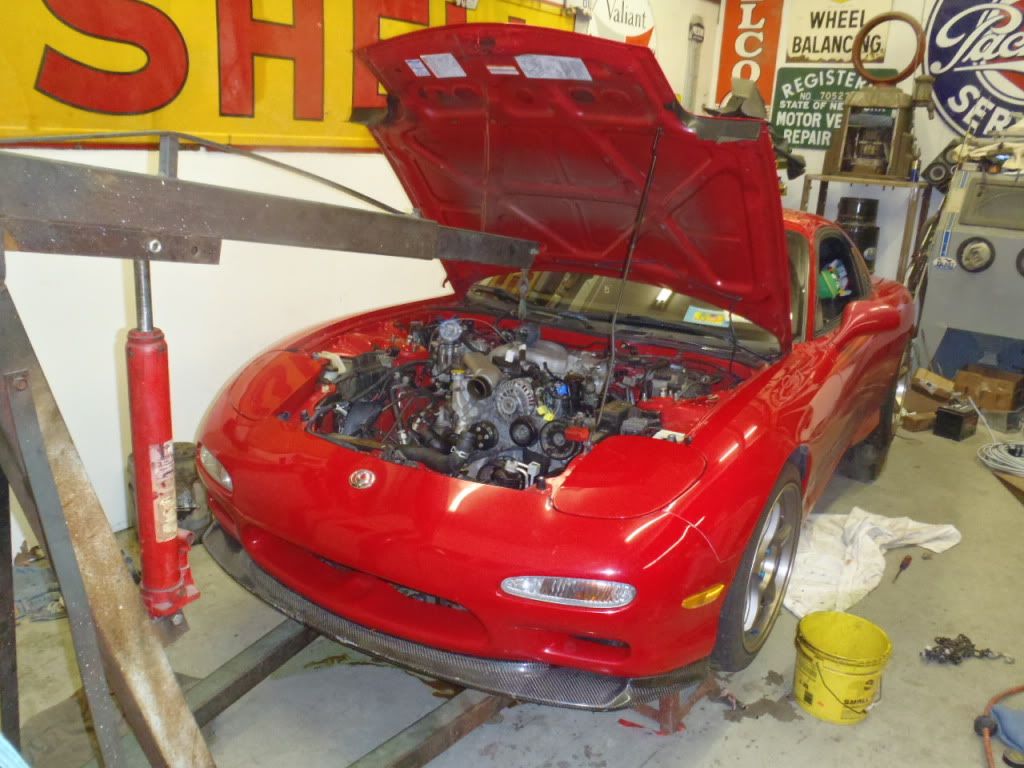
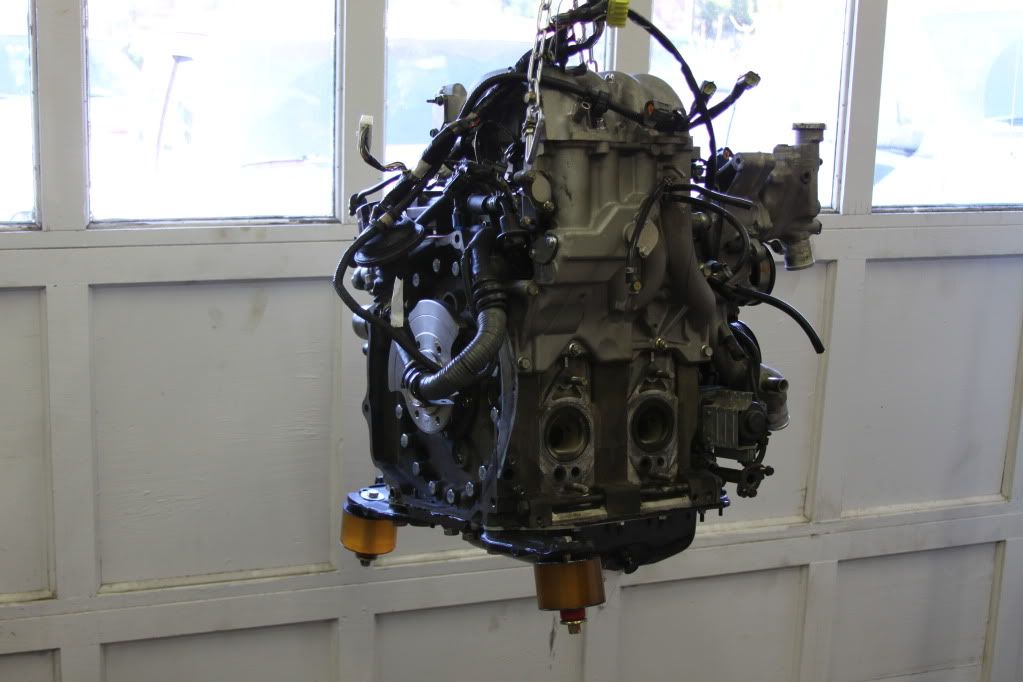
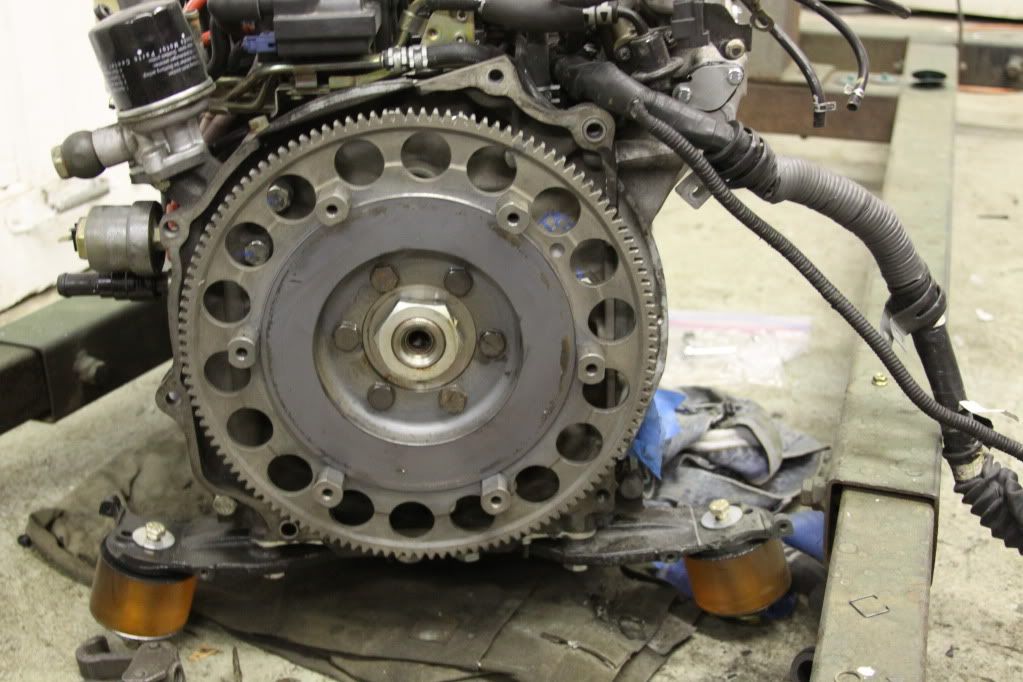
And here is the motor out and in the air.
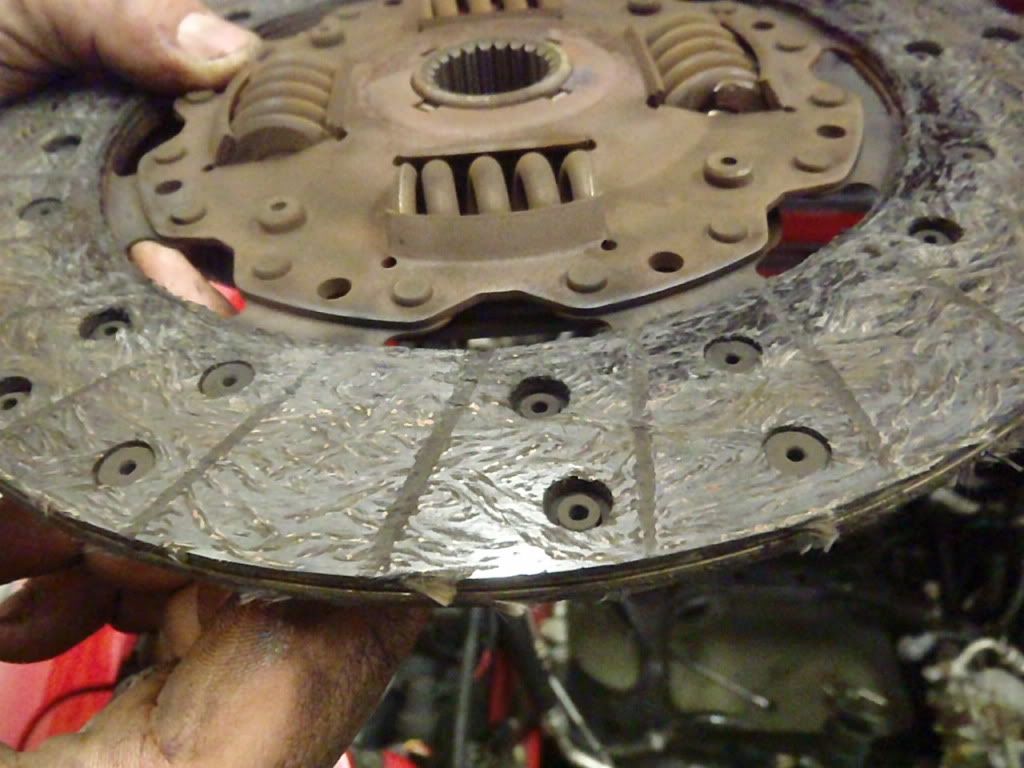
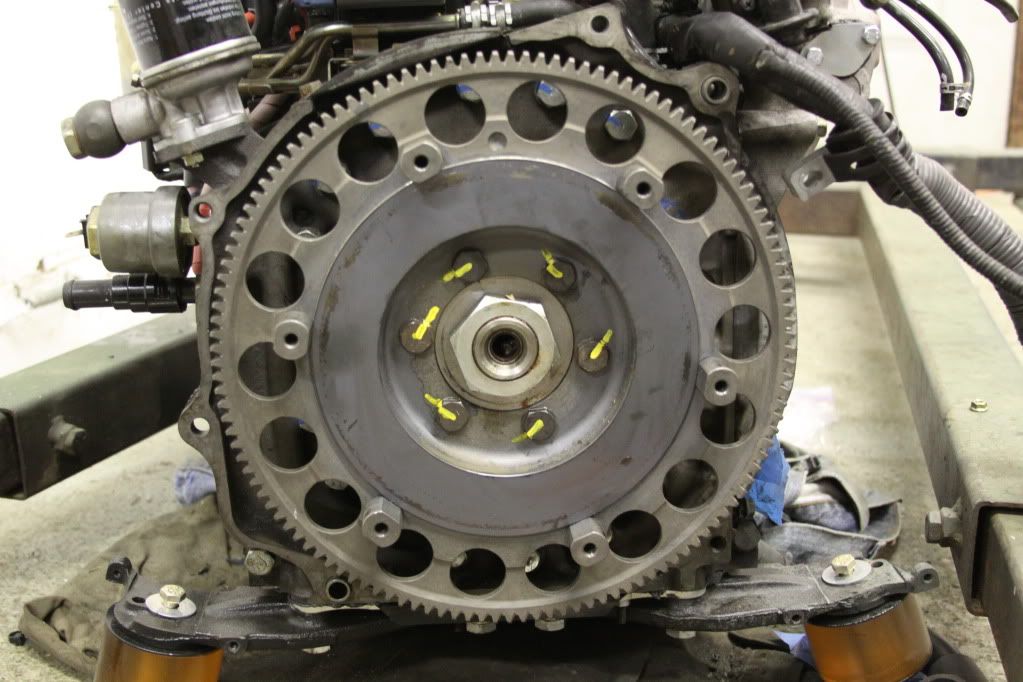
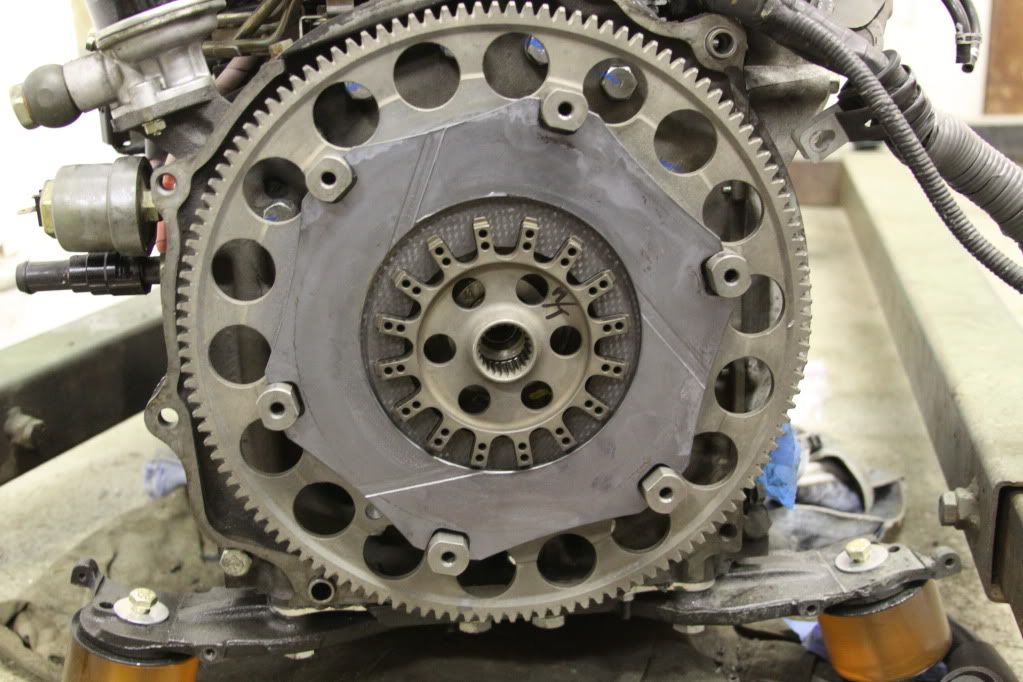
I think it was time for a new clutch
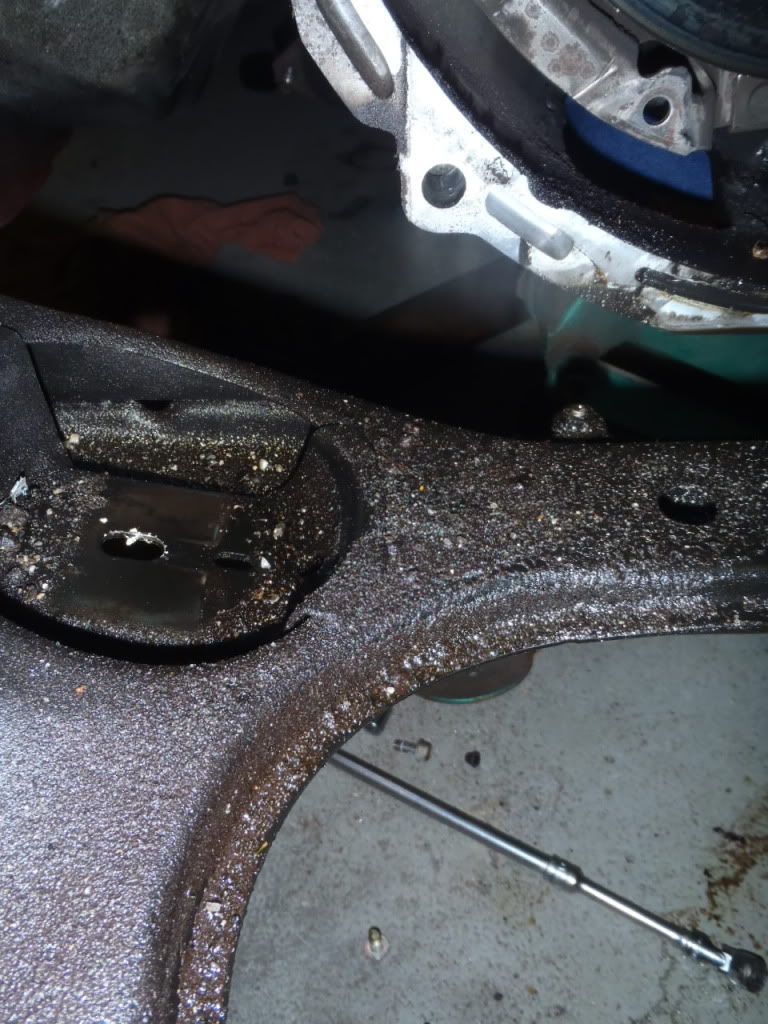
Just look at how grimey the subframe is from the oil leak(s)
And one final pic for today.
John
And here is the motor out and in the air.
I think it was time for a new clutch
Just look at how grimey the subframe is from the oil leak(s)
And one final pic for today.
John


Im looking forward to seeing this build through. I remember the first time we met back on the caravan to Deals Gap last year. All we really knew about your car was that it was pretty much stock for the most part... I remember it was really late and we had made it to NC and were probably about 40 minutes from the cabins and I was riding with Dan. The straight highways had ended and the fun twisty roads had started up. Dan had decided he did not want to go slow with the rest of the group so he took off into the twisties to have some fun (like he did many times that road trip  ). We noticed one car had decided to follow and was keeping up, we had assumed it was Rich but when we were not blinded by the poorly aimed headlights we knew it was not. You pulled up next to us and the last guy we expected to see was the guy in the stock FD .... RESPECT.
Anyway, enough with story time... I have a small collection of pics of your car so I guess this is the best place to share them

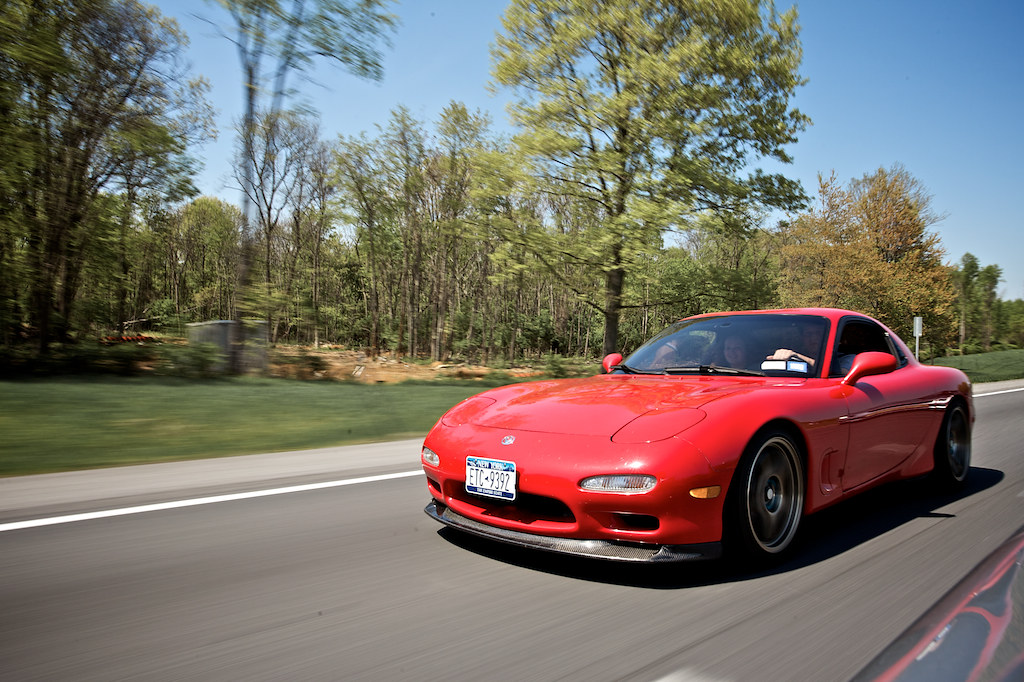

). We noticed one car had decided to follow and was keeping up, we had assumed it was Rich but when we were not blinded by the poorly aimed headlights we knew it was not. You pulled up next to us and the last guy we expected to see was the guy in the stock FD .... RESPECT.Anyway, enough with story time... I have a small collection of pics of your car so I guess this is the best place to share them
Thread Starter
Joined: Feb 2008
Posts: 2,979
Likes: 9
From: Long Island NY 11746
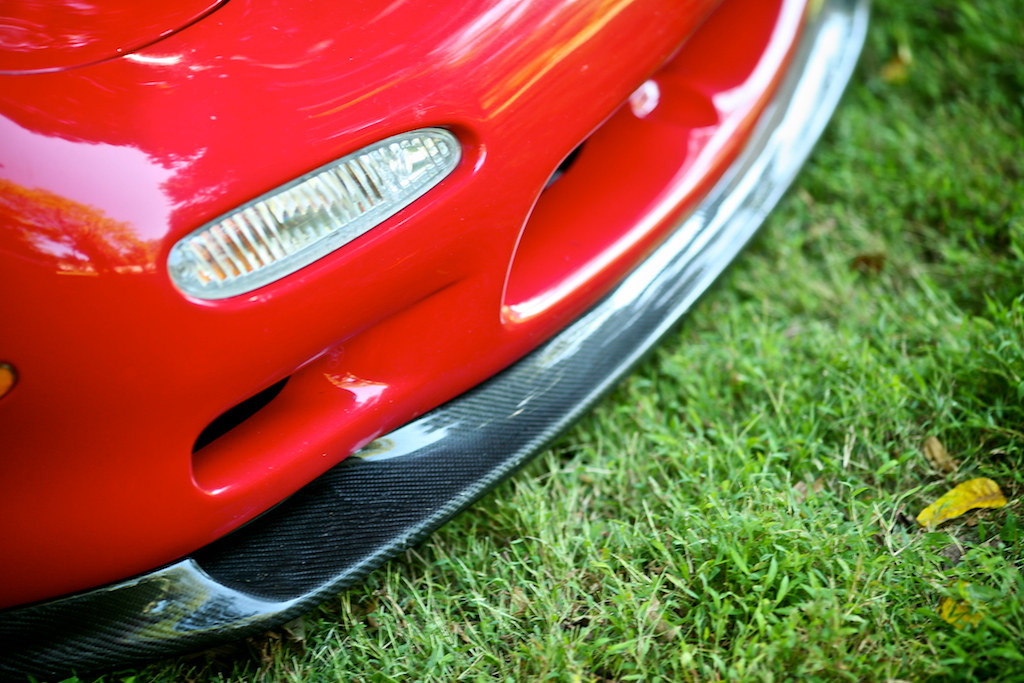
John, lol you were suprised that I could keep up. Thanks for my new background pic. I really like the rolling shot. Also im happy you got some pics of my front lip. It unfortunately does not look as nice anymore  . I will have to find another one to replace it.
Barban, I like the stock lines and plan to keep them that way.
As far as setup, I will elaborate on that as the build continues.
Will probably update later or tomorrow.
John
. Thanks for my new background pic. I really like the rolling shot. I will have to find another one to replace it.Barban, I like the stock lines and plan to keep them that way.
As far as setup, I will elaborate on that as the build continues.
Will probably update later or tomorrow.
John

Trending Topics

Thread Starter
Joined: Feb 2008
Posts: 2,979
Likes: 9
From: Long Island NY 11746
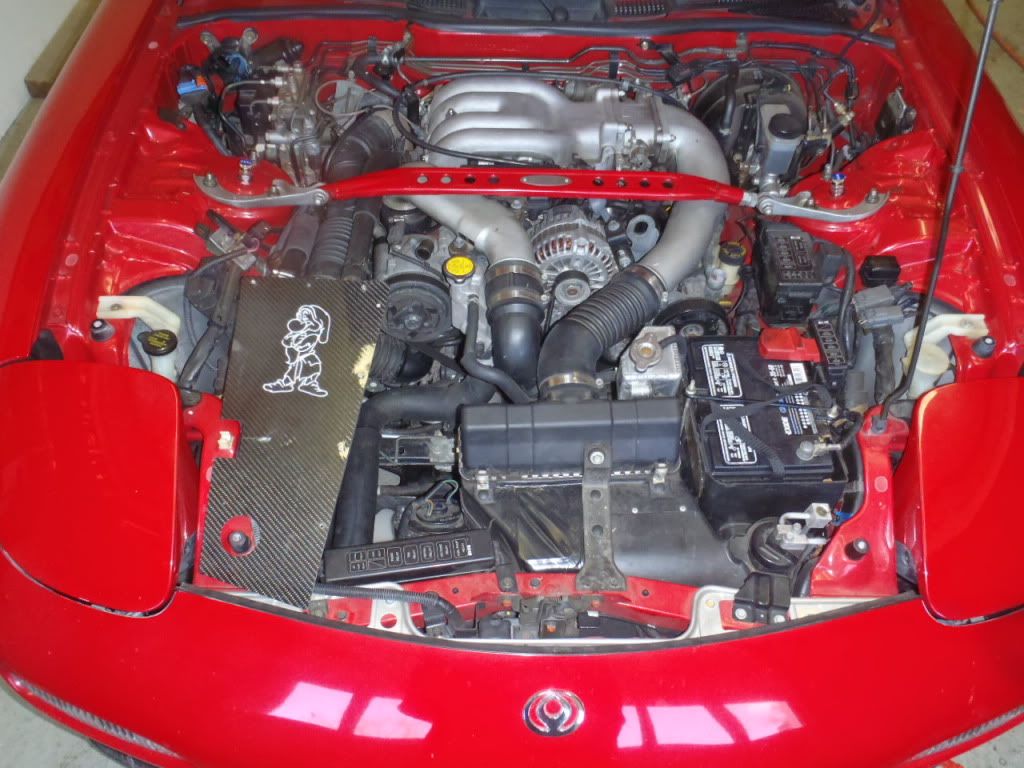
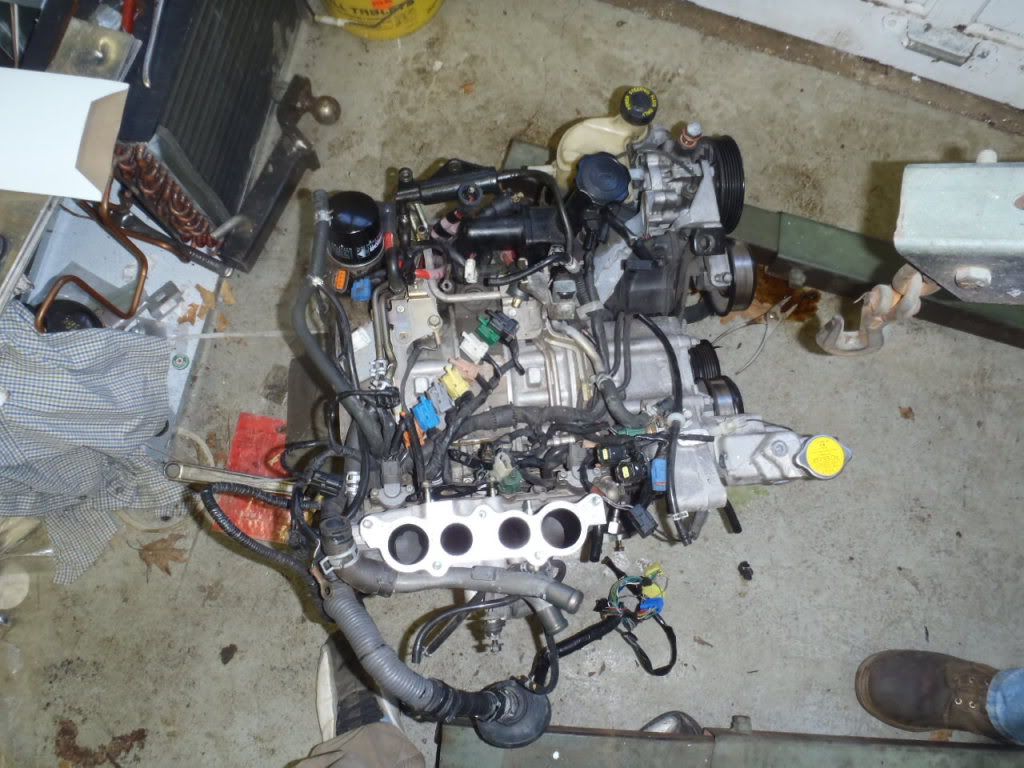
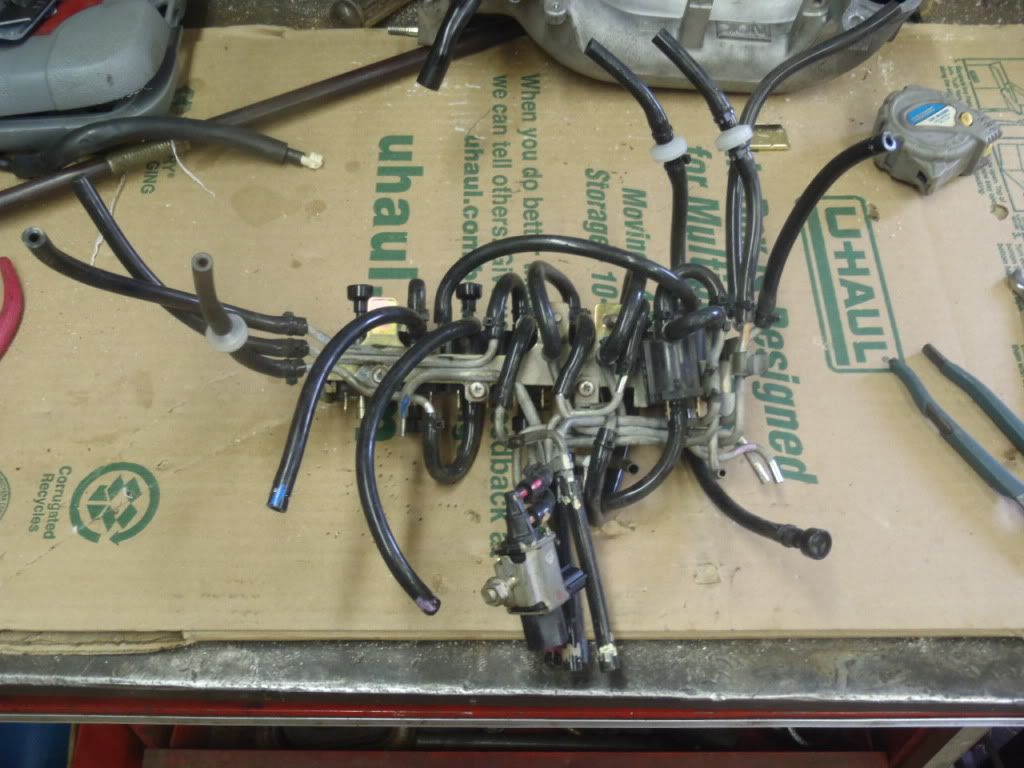
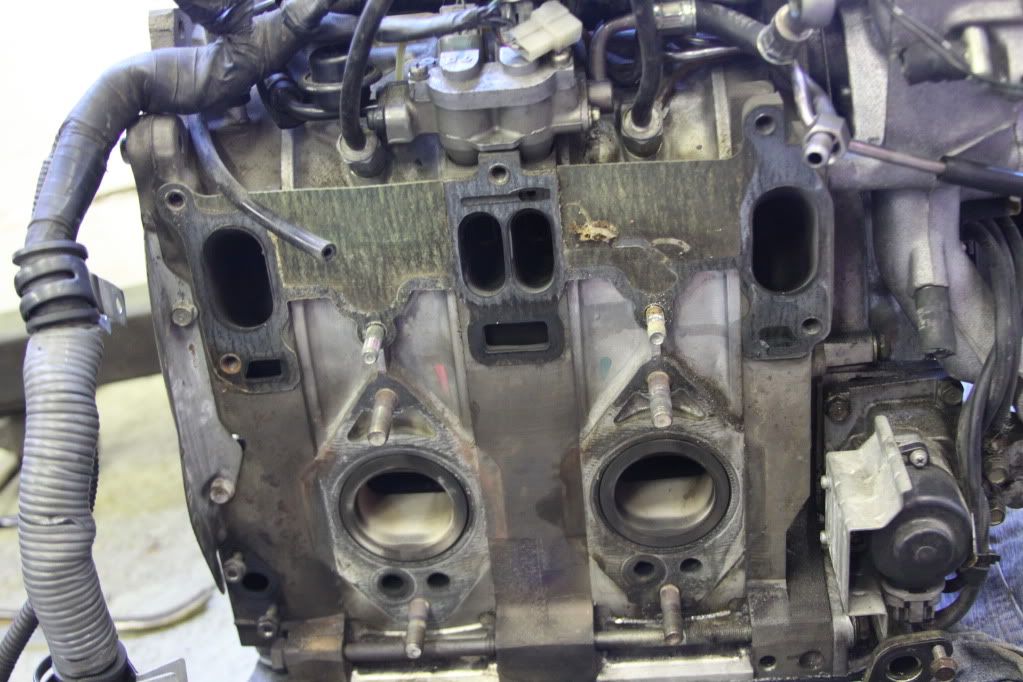
After the motor was removed. I took off the turbos , removed the UIM, and the rats nest. Since there was nothing wrong with my turbos I decided to find a set of cores for the BNR conversion. My friend had a set of low mile JDM twins that he removed from a front clip he purchased a few years ago. Those were sent off 2 weeks ago and arrived at BNR last week.
While I had the rats nest out I went simplified sequential. (In New York there is no more emissions testing for cars 1995 and older anymore) I installed Banzai block-off plates to remove the double throttle control, AWS, ACV, and all of the rest of the emissions equipment.
Here is a pic with everything removed.
This is my rats nest with pretty color coded hose so i didnt screw up installing the hoses when i did the silicone vacuum hose job 2 years ago. I just used paint marker when removing the old hoses from the car and when I installed the new hose I transfered the colors over. Made for a real easy install and no suprises later.
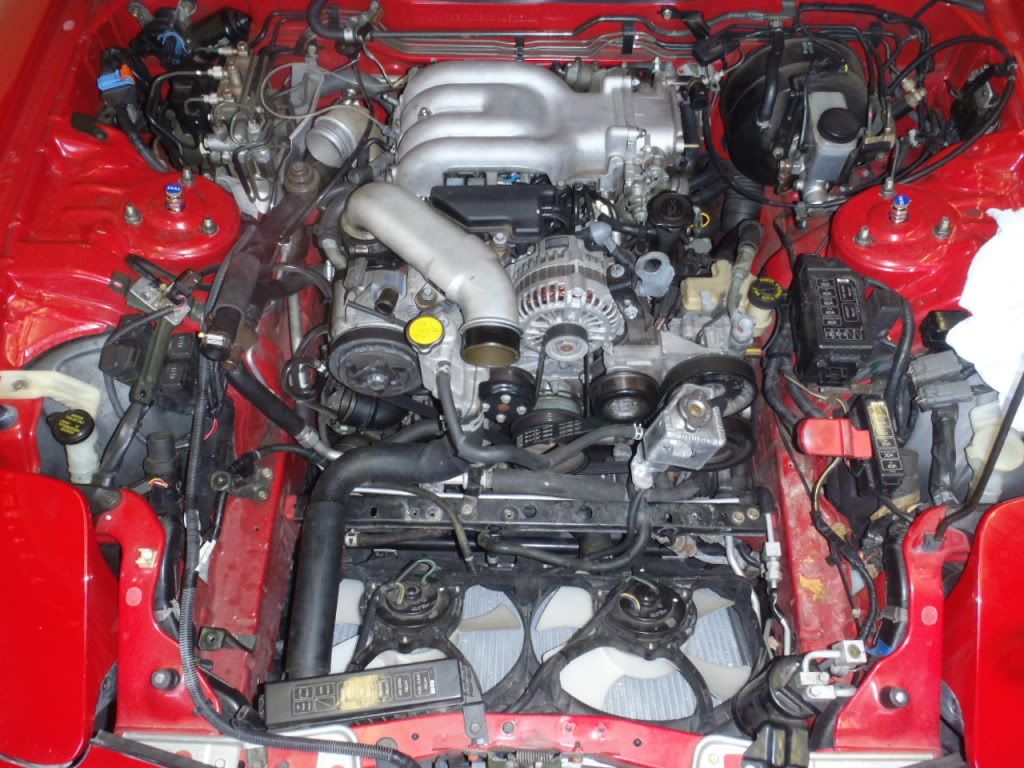
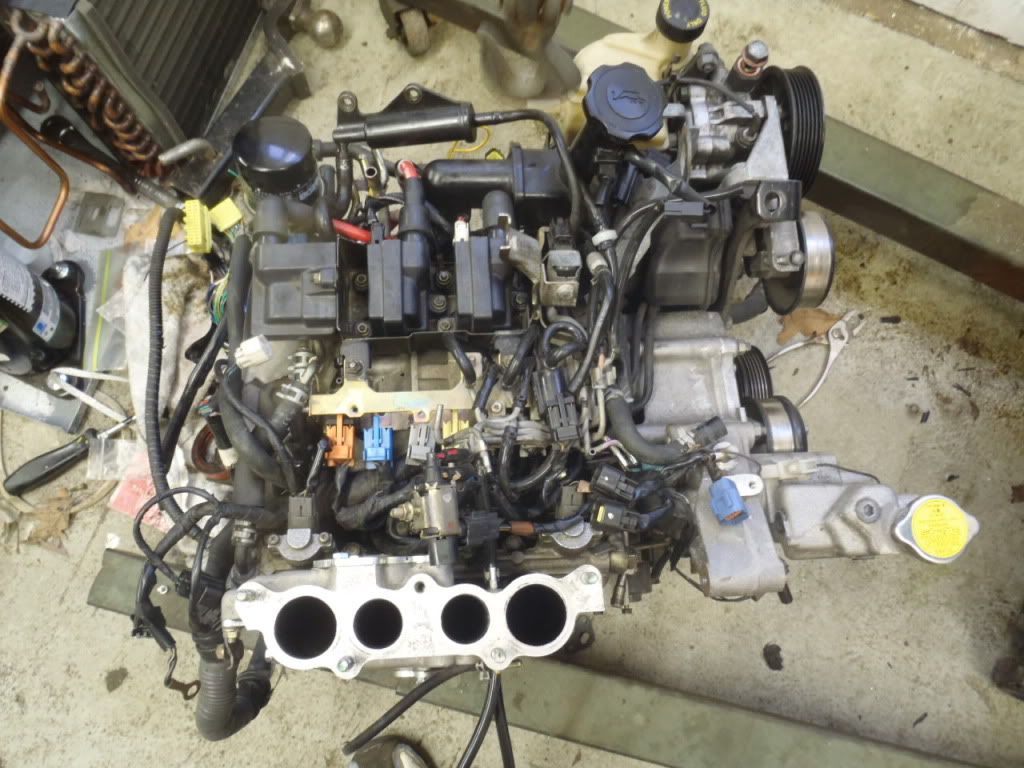
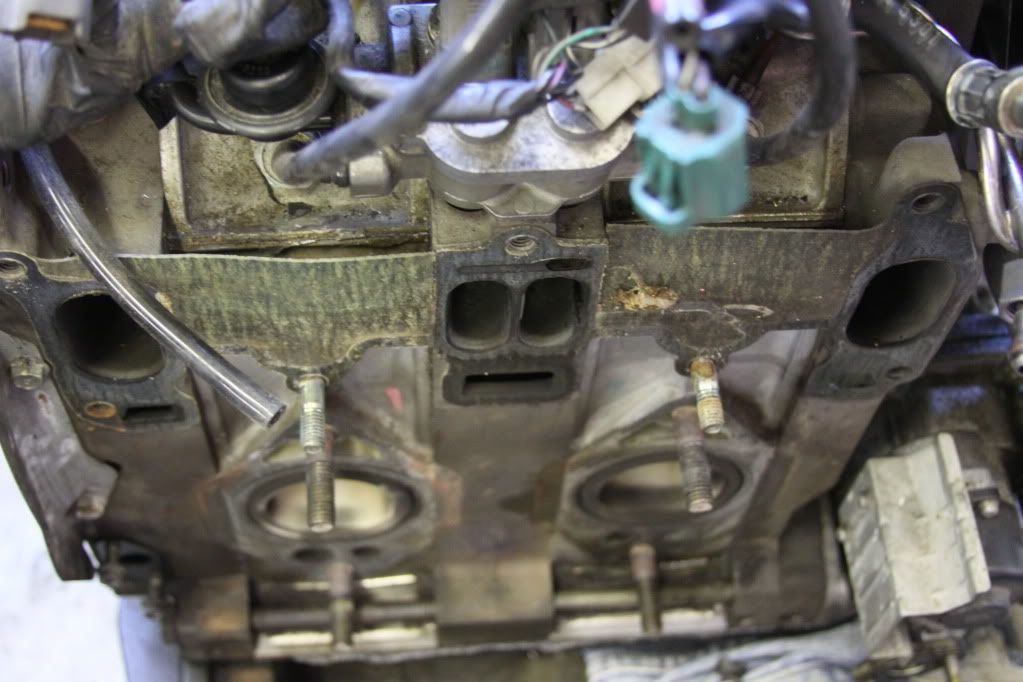
I re installed the rats nest and the UIM then hoisted the motor in the air to remove the oil pan. This is what the simplified sequential looks like installed. You can also see some of the block off plates in this picture.
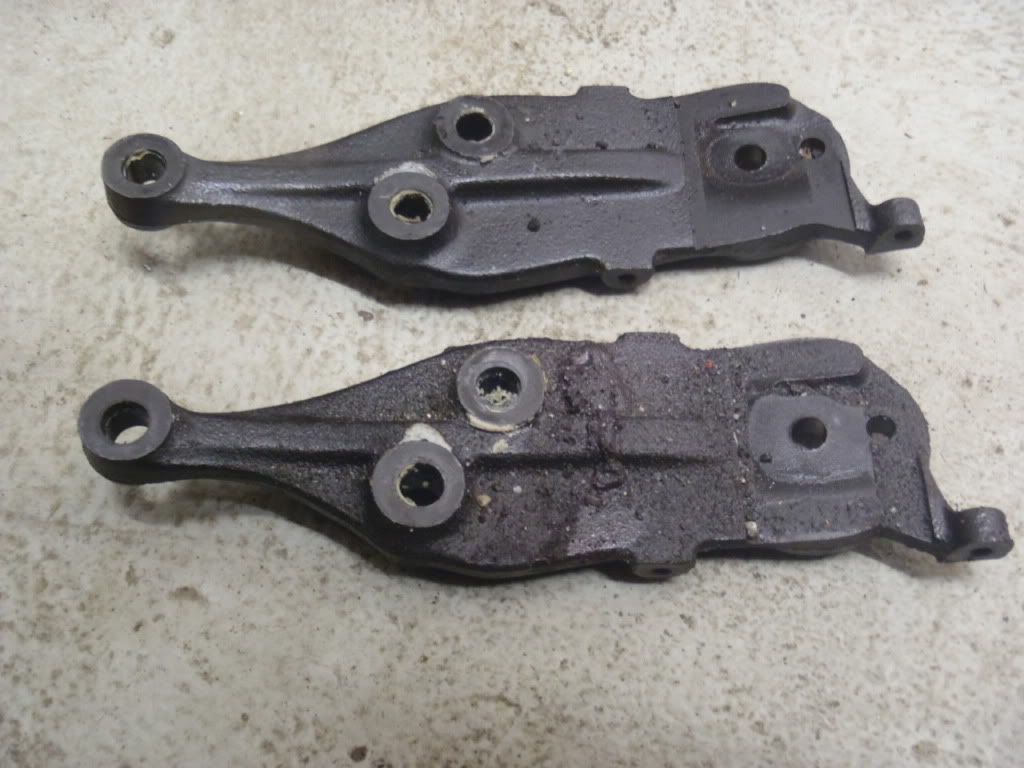
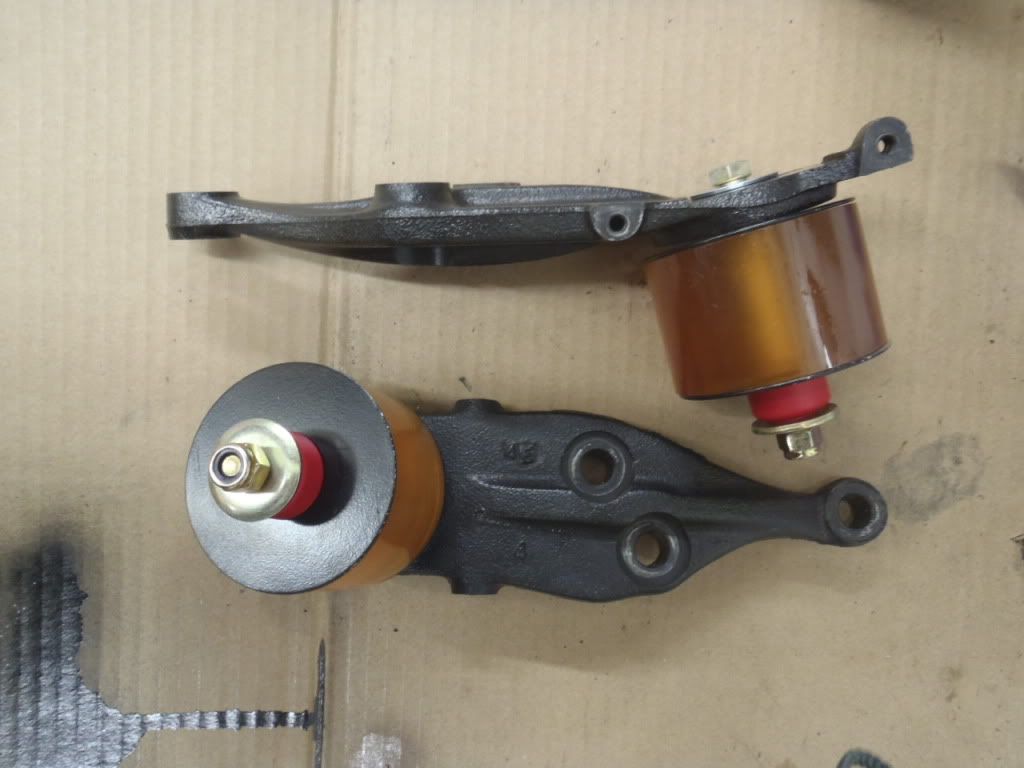
Since my car is a 93 I had to locate a steel motor mount to replace the aluminum one. Found one on the forum, thanks moconnor.
Here is just a before and after pic to show how dirty my mount was from the oil leak.
The one purchased from moconnor on top.
And all clean.
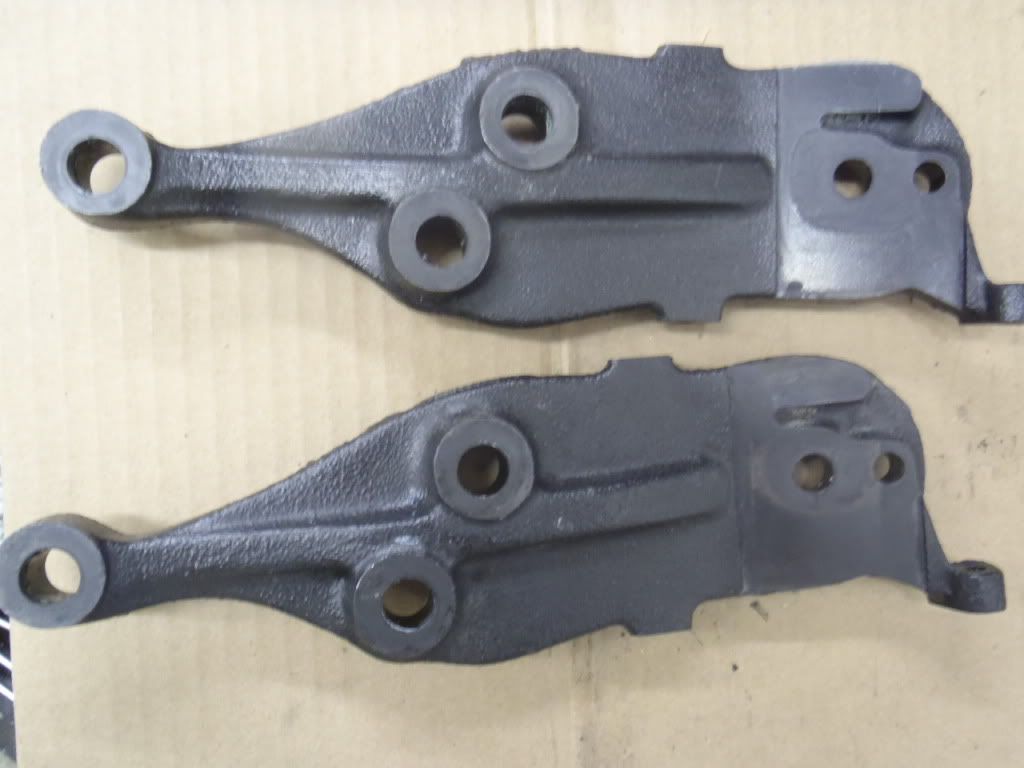
With the mounts installed
This weekend I plan on installing the oil pan, retorquing the tension bolts, and installing my super cool clutch .
.
After that, I will roll the car out of the garage put it back on jack stands and degrease the entire bottom of my car as it is covered in oil from the leaks and then put it back in the garage.
John
While I had the rats nest out I went simplified sequential. (In New York there is no more emissions testing for cars 1995 and older anymore) I installed Banzai block-off plates to remove the double throttle control, AWS, ACV, and all of the rest of the emissions equipment.
Here is a pic with everything removed.
This is my rats nest with pretty color coded hose so i didnt screw up installing the hoses when i did the silicone vacuum hose job 2 years ago. I just used paint marker when removing the old hoses from the car and when I installed the new hose I transfered the colors over. Made for a real easy install and no suprises later
.I re installed the rats nest and the UIM then hoisted the motor in the air to remove the oil pan. This is what the simplified sequential looks like installed. You can also see some of the block off plates in this picture.
Since my car is a 93 I had to locate a steel motor mount to replace the aluminum one. Found one on the forum, thanks moconnor
Here is just a before and after pic to show how dirty my mount was from the oil leak.
The one purchased from moconnor on top.
And all clean.
With the mounts installed
This weekend I plan on installing the oil pan, retorquing the tension bolts, and installing my super cool clutch
. After that, I will roll the car out of the garage put it back on jack stands and degrease the entire bottom of my car as it is covered in oil from the leaks and then put it back in the garage.
John

Thread Starter
Joined: Feb 2008
Posts: 2,979
Likes: 9
From: Long Island NY 11746
Update
^ Sorry Rich, I typed up the last post and made shure to say I purchased poly motor mounts from you, but then I rewrote a paragraph and forgot to put that back.
Over the last few weeks i had been busy with some other projects so progress was slow. I was still able to install a new OEM oilpan and banzai brace as well as install the poly motor mounts purchased from Goodfellafd3s..
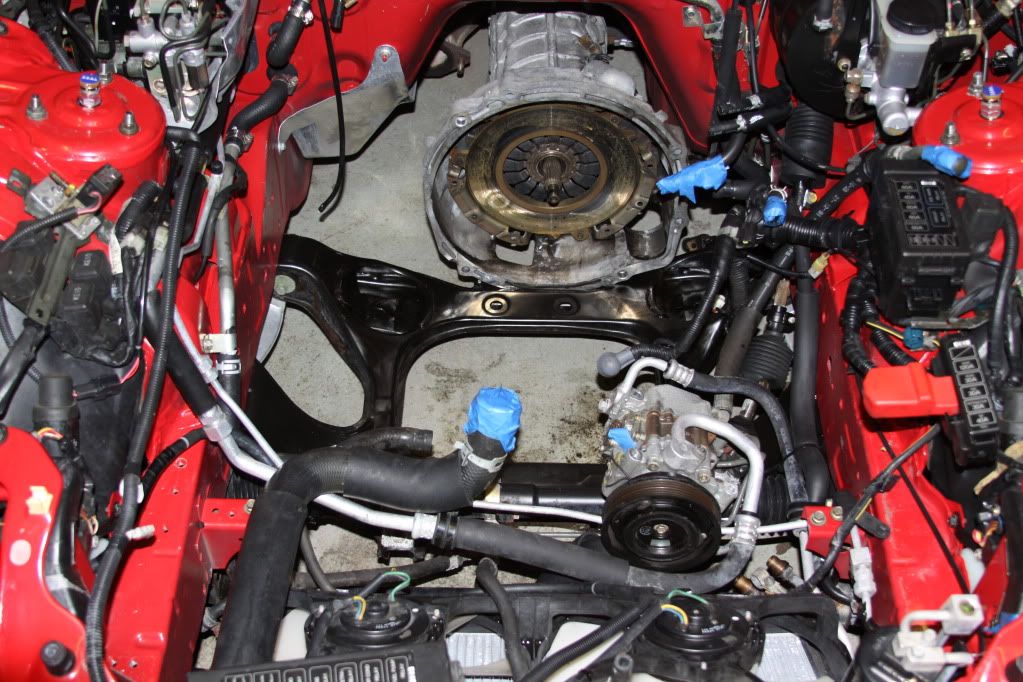
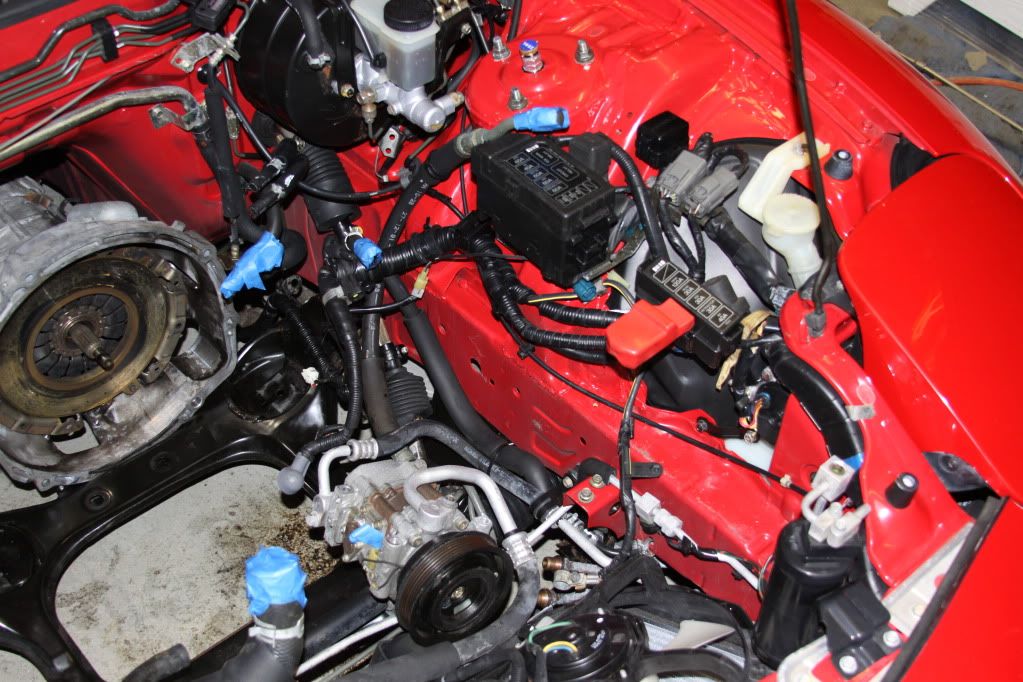
I also power washed my engine bay. I used castrol super clean and sprayed it on with a spray bottle and then used a pressure washer to clean off all of the dirt and oil in the engine bay and under neath the car. I am so happy with how clean the engine bay and chassis is. Just as a reminder this is what it looked like before
Before:
After:
I also took off the LIM to change the original paper gasket with a new metal one.
John
, I typed up the last post and made shure to say I purchased poly motor mounts from you, but then I rewrote a paragraph and forgot to put that back.Over the last few weeks i had been busy with some other projects so progress was slow. I was still able to install a new OEM oilpan and banzai brace as well as install the poly motor mounts purchased from Goodfellafd3s..
I also power washed my engine bay. I used castrol super clean and sprayed it on with a spray bottle and then used a pressure washer to clean off all of the dirt and oil in the engine bay and under neath the car. I am so happy with how clean the engine bay and chassis is. Just as a reminder this is what it looked like before
Before:
After:
I also took off the LIM to change the original paper gasket with a new metal one.
John
Thread Starter
Joined: Feb 2008
Posts: 2,979
Likes: 9
From: Long Island NY 11746
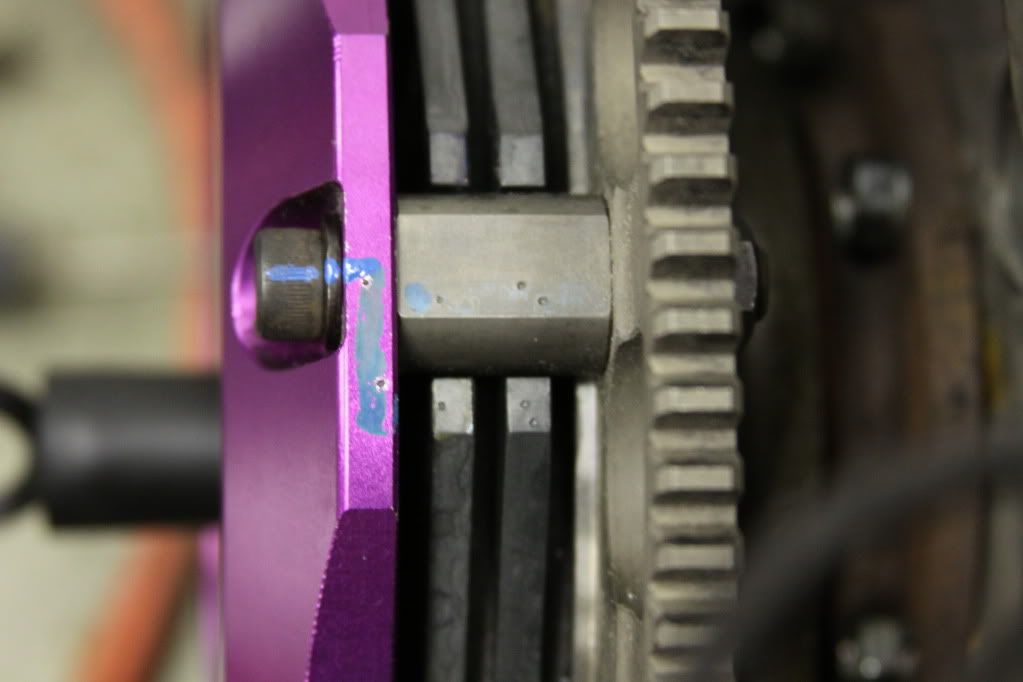
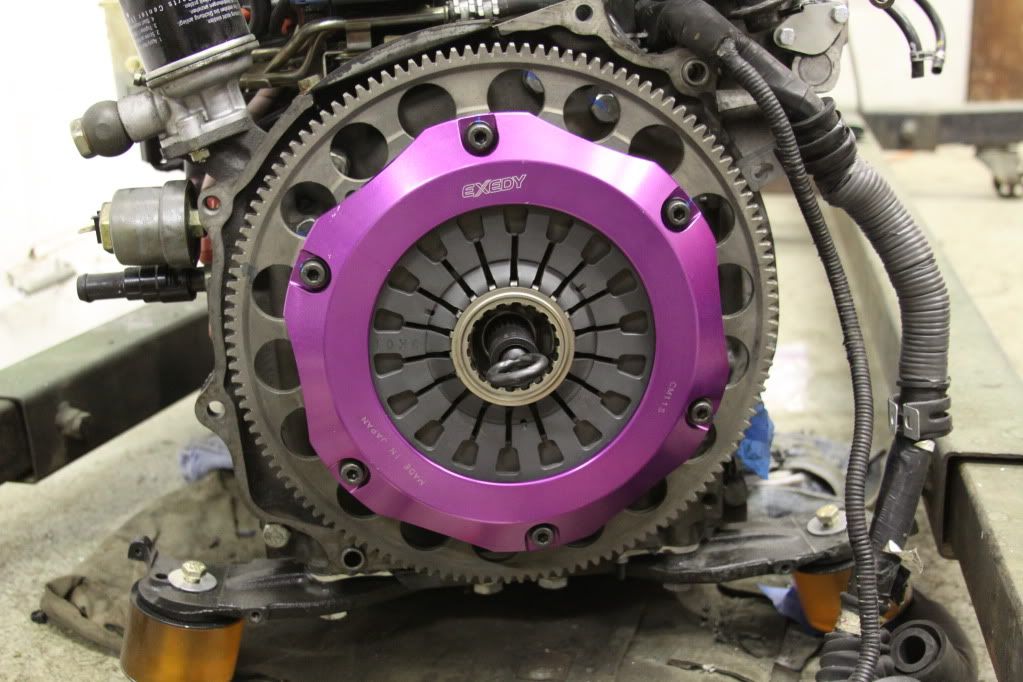
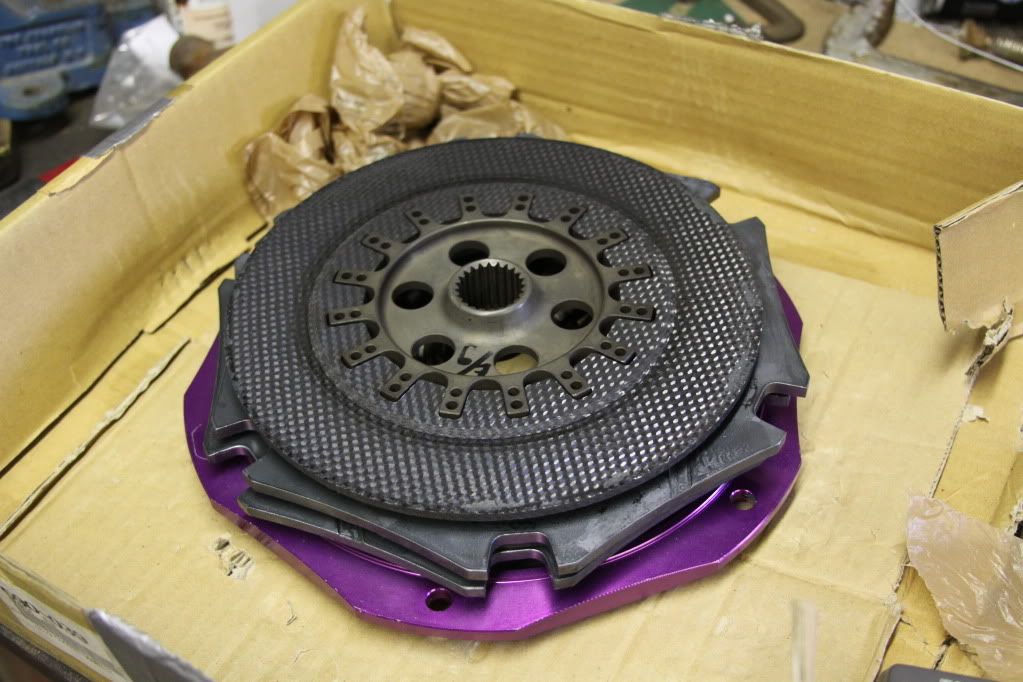
After that I installed my Exedy Compe-r carbon twin disk clutch.
After torquing
Everything is lined up properly
So that is about everything for now until I receive my BNR's.
John
After torquing
Everything is lined up properly
So that is about everything for now until I receive my BNR's.
John
Thread Starter
Joined: Feb 2008
Posts: 2,979
Likes: 9
From: Long Island NY 11746
^ Thanks, This weekend hopefully I can install my gauges and my wideband in the column mount gauge pod and drill out the exhaust manifold for my dual digital EGT gauges
John
John
Thread Starter
Joined: Feb 2008
Posts: 2,979
Likes: 9
From: Long Island NY 11746
^^ Thanks Ryan, the clutch is one of the things I am most excited about. Unfortunately no one will be able to see once it is installed. I am anxious to see how it performs. I definitely want to go with you guys down to deals gap. Maybe we can have a little fun since I now have a PFC and the car will be tuned by me .
.
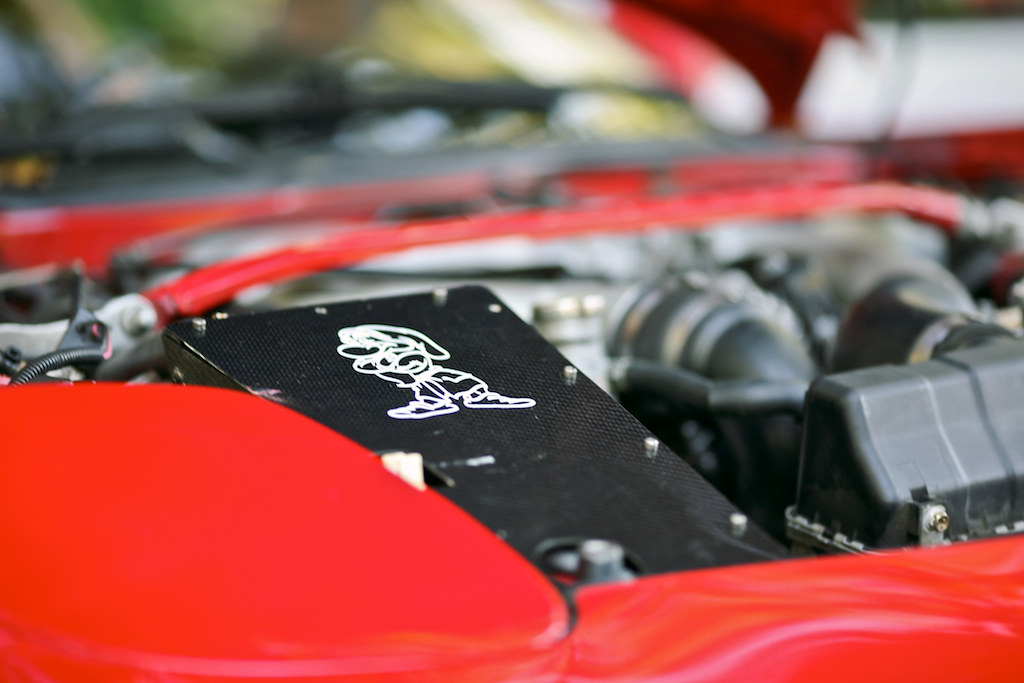
Here is another pic for you to droll over mmmmmm carbon
Turbo8, I covered the lines with blue painters tape you can see in the pics of the engine bay. I also covered the oil cooler lines as well but the tape was removed before the pic was taken. I did not cover the relays as they already have the factory plastic covers in place. When spraying on the degreaser I made sure to not spray the relay boxes as the castrol super clean is corossive to aluminum parts. When pressure washing I made sure to not spray directly onto the boxes. I am confident it will not be a problem.
Thanks for the comments.
John
. I am anxious to see how it performs. I definitely want to go with you guys down to deals gap. Maybe we can have a little fun since I now have a PFC and the car will be tuned by me.Here is another pic for you to droll over
mmmmmm carbonTurbo8, I covered the lines with blue painters tape you can see in the pics of the engine bay. I also covered the oil cooler lines as well but the tape was removed before the pic was taken. I did not cover the relays as they already have the factory plastic covers in place. When spraying on the degreaser I made sure to not spray the relay boxes as the castrol super clean is corossive to aluminum parts. When pressure washing I made sure to not spray directly onto the boxes. I am confident it will not be a problem.
Thanks for the comments.
John
^^ Thanks Ryan, the clutch is one of the things I am most excited about. Unfortunately no one will be able to see once it is installed. I am anxious to see how it performs. I definitely want to go with you guys down to deals gap. Maybe we can have a little fun since I now have a PFC and the car will be tuned by me.
. I am anxious to see how it performs. I definitely want to go with you guys down to deals gap. Maybe we can have a little fun since I now have a PFC and the car will be tuned by me.I have tuned my own car and I have been spending the past month fine tuning drive-ability issues and smoothing out all the quirks. Idle smoothness, cranking, cold idle, tip in stumbles crusing, ect. I feel that if you spend top dollar you can get a fantastic tune from a reputable tuner that will never need to be touched, but they only spend one day with your car... two tops. You drive your car all the time, in all different conditions and will encounter more variables than can bee seen on a dyno. If you have the knowledge you can spend as much time as you please to get it perfect.
For example, I went to a track day back in the Fall and my first run out I was experiencing serious hesitation issues coming out of some of the turns. It was so bad my instructor had me pit in. Had I not known enough about the software and some tuning background I would have been SOL and out of a full (paid) track day, but I was able to load up FC-Edit make some changes and drive around the parking lot to verify it was fixed and then I was able to get back on the track. The car ran flawlessly after that. (granted that particular issue was due to my own error in prior tuning sessions, but you never know when a problem may arise and you wont always have your tuner with you to check out the problem.)
Sorry for the rant
Now dont blow it up 
