93 VR parking lot find....


 10-13-14, 12:05 PM
#128
After many months of working on the car here and there. It was ready for some base. I traded work with a friend who paints cars for a living. He also does custom motorcycle painting on the side. Got me all fixed up with the painting side of it. All the door jams, trunk jam, you name it has be re-painted. The pictures do not do this thing justice. Whenever I get some time I'll take some more detailed close ups.


 08-01-15, 07:36 PM
#132
I should probably update
Hi. My name is GW and I never update my thread.  guess it's about that time. I'm still working on the red headed stepchild. At a turtles pace. Well let's be honest here, a turtle is faster. I'm spending way to much time on two wheels and driving things with propellers.
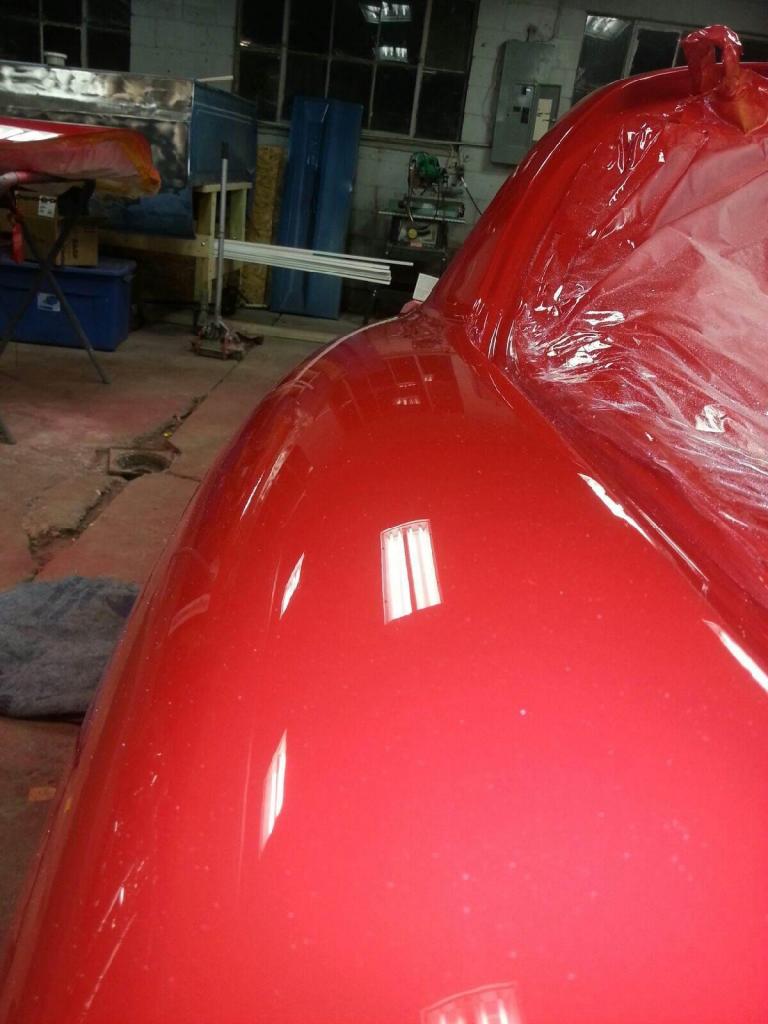
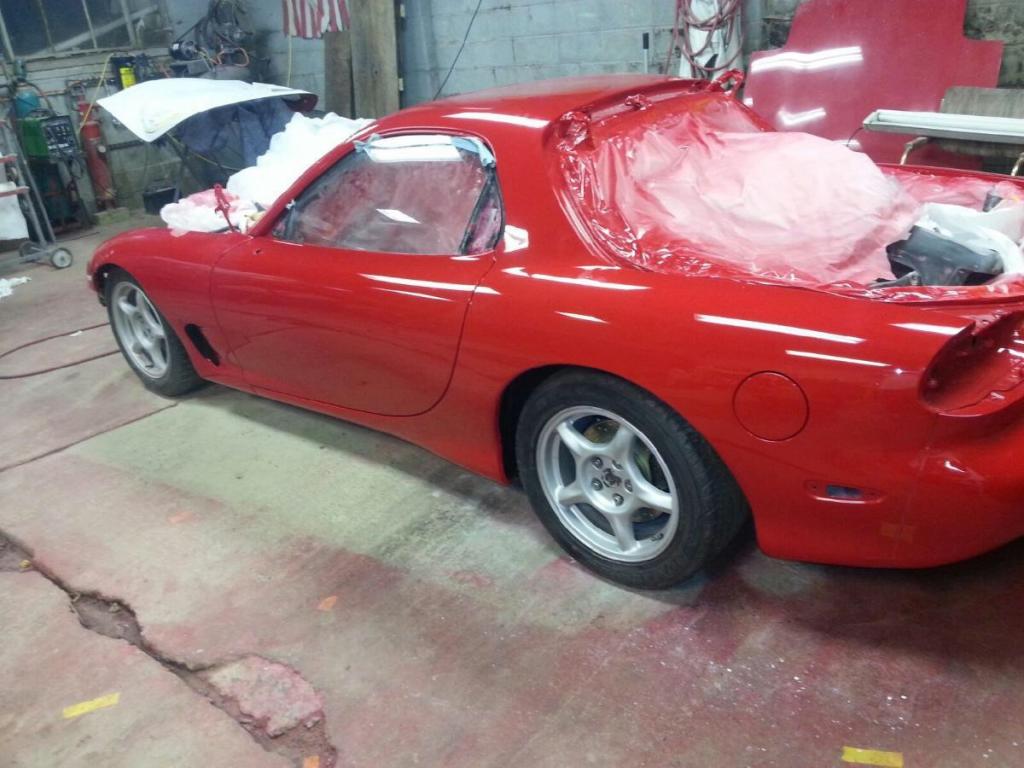
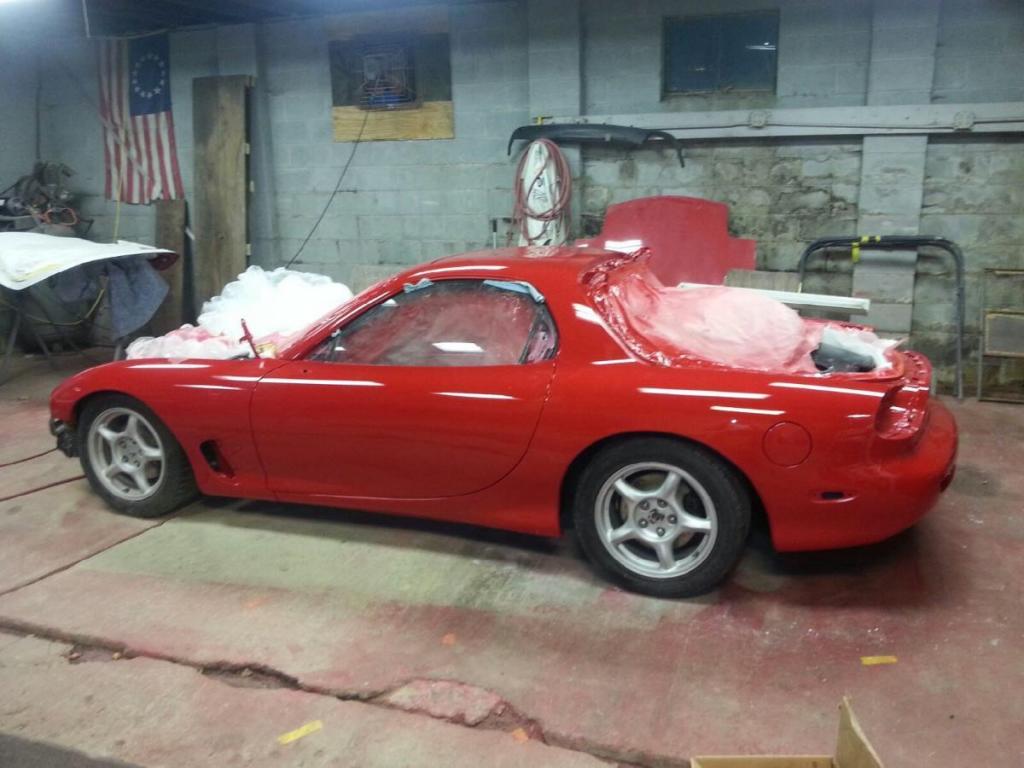
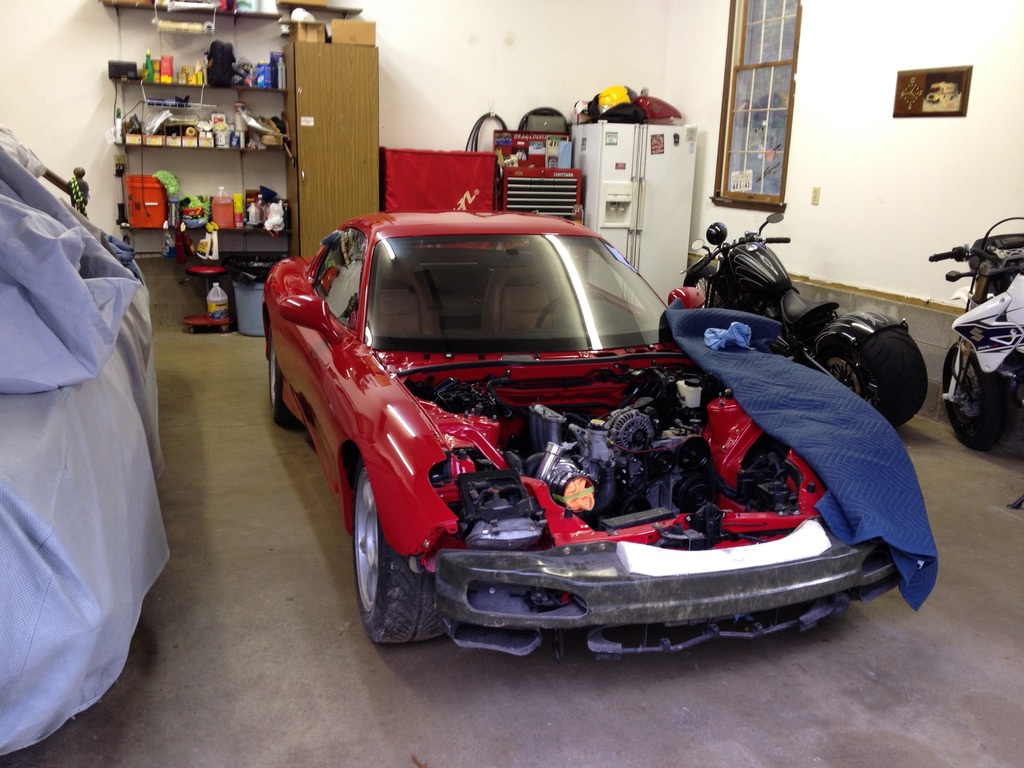
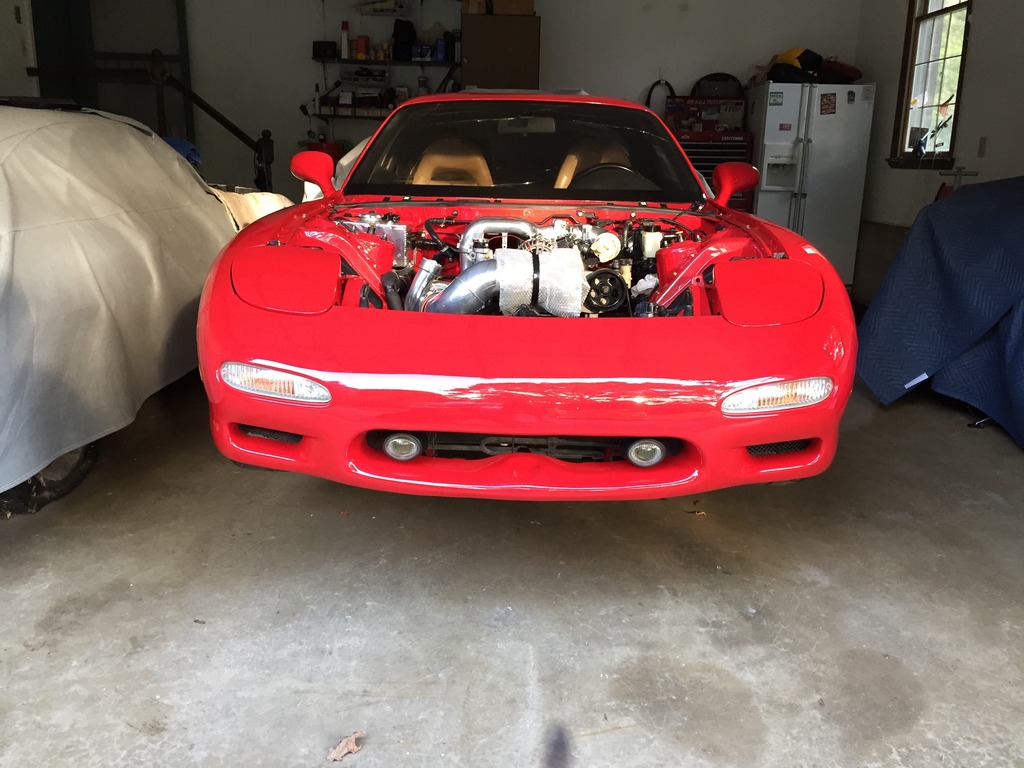
Hmmm... I left off with getting my car back from paint so I'll start there. I've been buffing the paint and I'm seriously glad I stayed with the VR color. It's not for everyone but I gotta say it's definitely for me. Hours in the garage with the buffer and the 3m cutting compound turned into days. I can get lost working on projects. Like many it's my escape. After I got the body squared away I went ahead and fitted my front bumper along with the headlight covers. As many of you already know getting everything lined up to match perfectly is a chore. My car never really fit that well from the get go. An I would imagine sitting out in that parking lot for ten plus years didn't help. I worked over this bumper so many times before paint it's unreal. Where the original front emblem sat there was a huge dip not to mention more rock chips then I could count. I supported the back with some flexible cloth and filled the holes for said emblem. A heat gun and a lot of massaging was all worth it in the end. To my surprise it came out great.
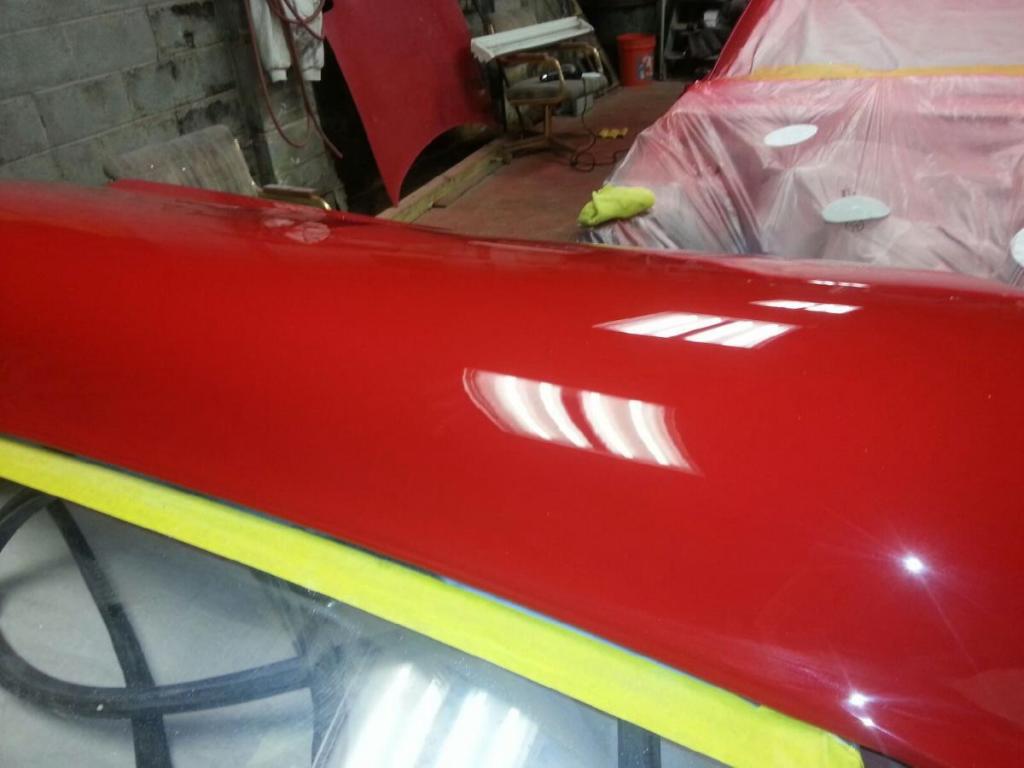
With the front bumper out of the way I turned to the rear bumper. If you look back you can see the quarter was damaged and the lower section was fitted with a replacement. Again hours of fitting to make it look factory, well better then factory. I installed my reverse lights, tail lights, front bumper lights. Which I also wet sanded and buffed with plastic polish.
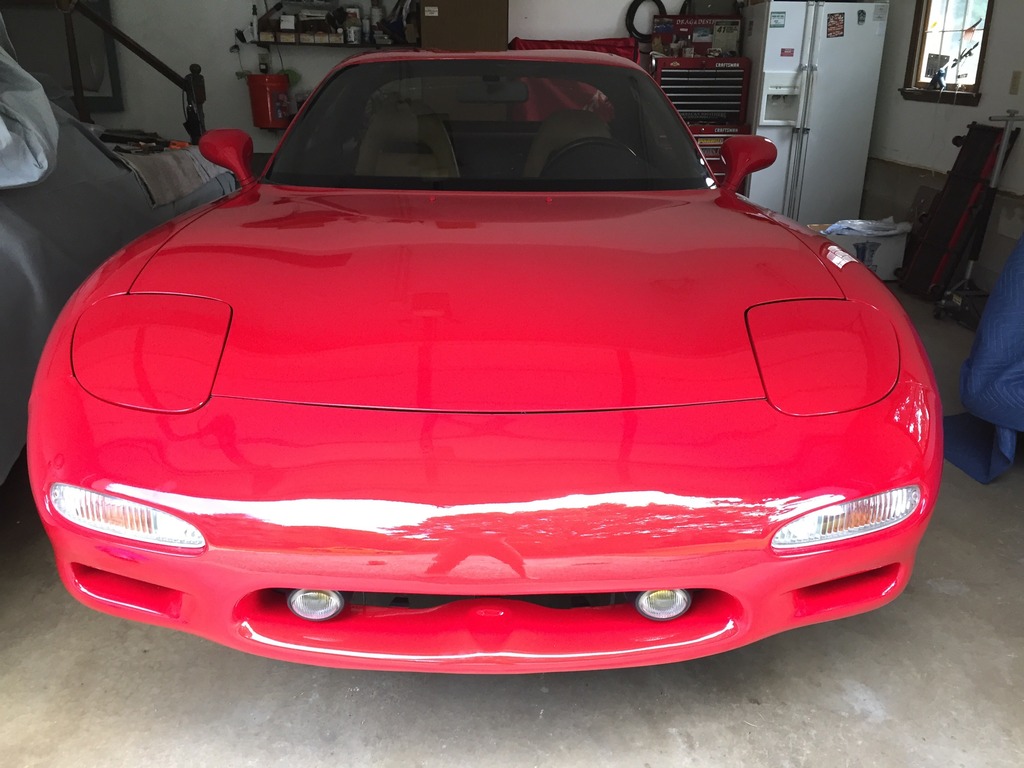
I dug out my hood, and while I was at it I put that on as well. At this point I started thinking to myself that I'm actually on the down hill slide. But let's get down to brass tacks. What good is all these words without the pictures .......
guess it's about that time. I'm still working on the red headed stepchild. At a turtles pace. Well let's be honest here, a turtle is faster. I'm spending way to much time on two wheels and driving things with propellers. Hmmm... I left off with getting my car back from paint so I'll start there. I've been buffing the paint and I'm seriously glad I stayed with the VR color. It's not for everyone but I gotta say it's definitely for me. Hours in the garage with the buffer and the 3m cutting compound turned into days. I can get lost working on projects. Like many it's my escape. After I got the body squared away I went ahead and fitted my front bumper along with the headlight covers. As many of you already know getting everything lined up to match perfectly is a chore. My car never really fit that well from the get go. An I would imagine sitting out in that parking lot for ten plus years didn't help. I worked over this bumper so many times before paint it's unreal. Where the original front emblem sat there was a huge dip not to mention more rock chips then I could count. I supported the back with some flexible cloth and filled the holes for said emblem. A heat gun and a lot of massaging was all worth it in the end. To my surprise it came out great.
With the front bumper out of the way I turned to the rear bumper. If you look back you can see the quarter was damaged and the lower section was fitted with a replacement. Again hours of fitting to make it look factory, well better then factory. I installed my reverse lights, tail lights, front bumper lights. Which I also wet sanded and buffed with plastic polish.
I dug out my hood, and while I was at it I put that on as well. At this point I started thinking to myself that I'm actually on the down hill slide. But let's get down to brass tacks. What good is all these words without the pictures .......
 08-01-15, 08:59 PM
#136
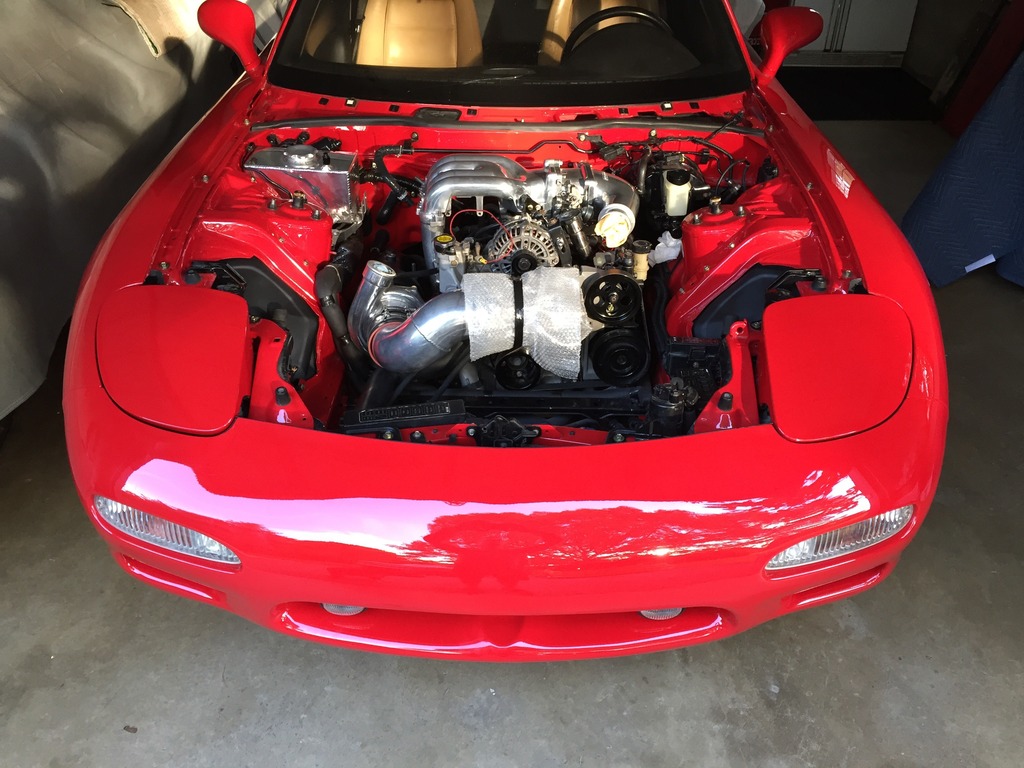
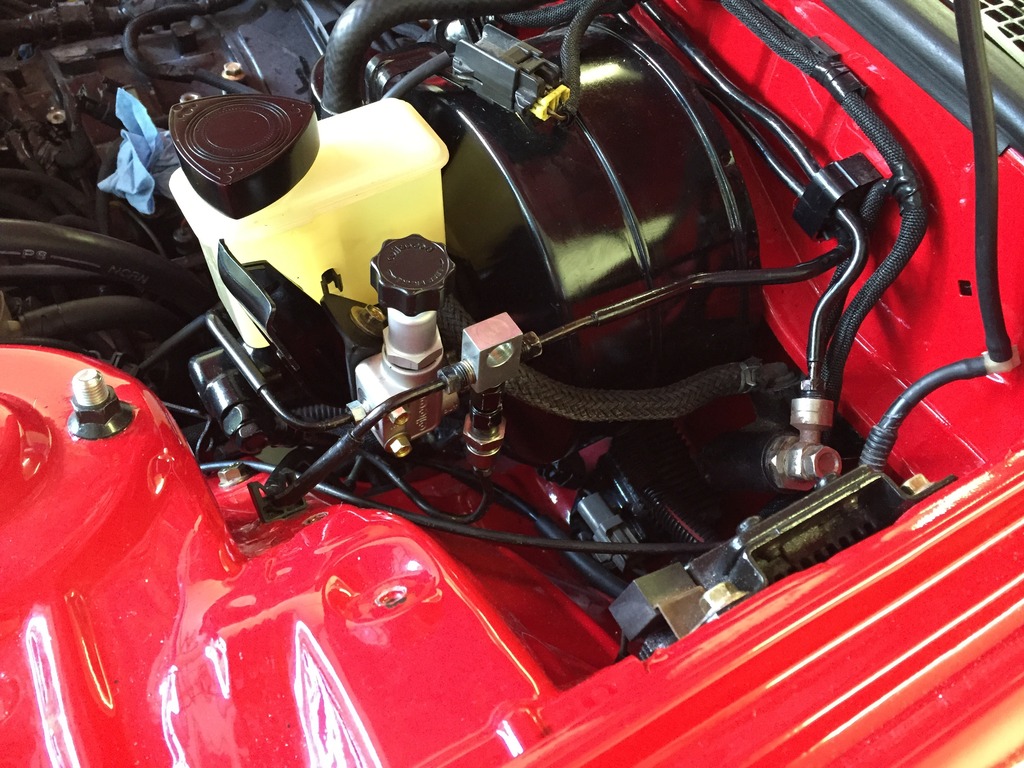
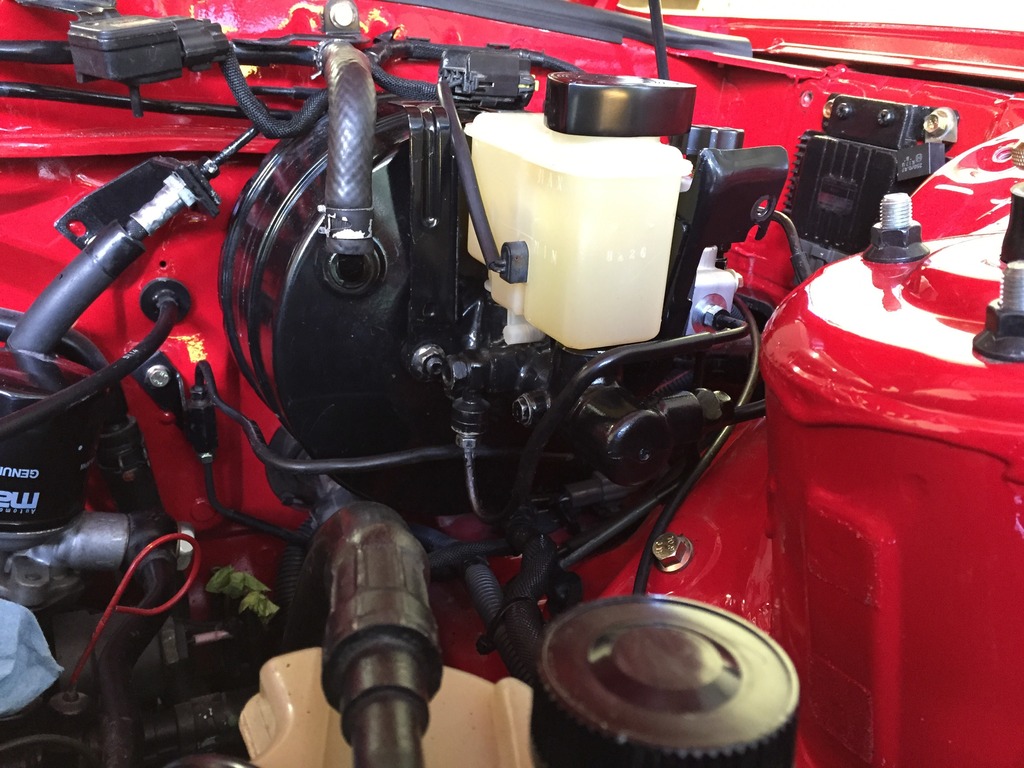
I decided awhile back that I wanted to do some sort of water injection. Pre~turbo is the way it fell. You may notice the tank mounted in the abs units place. An if you have been following pre-~turbo injection, I'm sure you know where the stuff came from. Engine bay real estate gets used up pretty quickly an even tho I'm not completely for removing the abs unit, it was a trade off. A necessary evil if you will. I've spent most of my years behind the well of vehicles without it and have trained my brain accordingly. This did present another problem, which entailed reworking my brake lines and installing a proportioning valve for the rear brakes. After looking how others did theirs and comparing the "kits" avalible I really didn't like any of them. Most seemed very protrusive with lines running every which way, zip tied down and looking very thrown together.
With that said, I went ahead and started on my own. Trying to remain as factory looking as possible and having the lines mimicking the factory routing. I took one of my now unused brake lines from the abs and after a million bends, reworked it from the front drivers side to the new brake "T" next to the master cylinder. I then reworked the drivers side into the "T". Trying to find a "T" in m10 x 1.00 double flare is near impossible. So I used one that had a -4 an male fitting and two m10 x 1.00 double flare females. This changed over to another -4 male / m10 x 1.00 double flare female. Making it my only adapter fitting. Then the issue I ran into came with the portioning valve. There was nothing avalible with a m10 x 1.00 double flare. After some searching I did find out that willwood does make one in m10 x 1.00 bubble flare. So instead of using multiple adapter fittings I took some of my leftover line and cut, bent, flared to make them work. I wound up with one side being the double flare and the other the bubble flare. This stopped me from having to use more adapters. I reused the fittings from my original line for the double flare side BUT I used fittings made for bubble flares on the proportioning valve side. The internal tapers are different and NOT interchangeable. I made a bracket to mount my proportioning valve tight to the side of the brake reservoir using the exsisting holes to secure everything. I bent my lines at tightly as possible to keep a clean factory look.
After I got all the lines and fittings reworked to my liking I then filled my brake system with dot 4. The clutch bleeding went smoothly. But then again my power bleeder tool probably helped. I moved to the rears and bled them without issue. So I jumped on the front to finish it up..... Or so I thought. I started bleeding the fronts like all the rest. Got fluid, zero air and a good stream. But no pressure. It would hold pressure with the brake pedal depressed for about a half second then release without taking your foot off the pedal. At first I figured there was just air in the master since I didn't bench bleed it. So I removed my lines and proceded to bench bleed it. Still nothing.
Last edited by gdub29e; 08-01-15 at 09:11 PM.
08-01-15, 09:06 PM
#137
So at this point I'm kinda stumped. I figured what the hell maybe the master cylinder is shot. You could feel it bypassing while you depressed the pedal. Along with a strange noise  I tore it out and took it to the workbench. Upon disassembling the mc and muttering how much I dislike brake fluid under my breath with a few carefully chosen words I discovered something. Turns out that a piece of plastic trash, which I'm assuming is the sealing plastic for the top of the new brake fluid can made its way into the front check valve. So when I would step on the pedal it would build pressure then bleed past the check valve. All cleaned out, new seals and back on the car. Working like a champ. Now I think about it I probably should of updated to the 929 mc. Oh well maybe next time. Pictures to follow tomorrow.
Oh and PS~ I didn't have one brake like leak anywhere.... Shocked the hell outta me because you know there is always one. But I'll take it.
I tore it out and took it to the workbench. Upon disassembling the mc and muttering how much I dislike brake fluid under my breath with a few carefully chosen words I discovered something. Turns out that a piece of plastic trash, which I'm assuming is the sealing plastic for the top of the new brake fluid can made its way into the front check valve. So when I would step on the pedal it would build pressure then bleed past the check valve. All cleaned out, new seals and back on the car. Working like a champ. Now I think about it I probably should of updated to the 929 mc. Oh well maybe next time. Pictures to follow tomorrow.Oh and PS~ I didn't have one brake like leak anywhere.... Shocked the hell outta me because you know there is always one. But I'll take it.
Last edited by gdub29e; 08-01-15 at 09:21 PM.
08-01-15, 09:37 PM
#139
Newbie

Join Date: Apr 2008
Location: Florida
Posts: 4
Likes: 0
Received 0 Likes
on
0 Posts
WOW man respect to you this is a Story book restoration project to say the least glade you stuck through with it in the tough times that passed. Incredible attention to detail simply amazing job cant wait to see some more shots and maybe a short walk around video at the end?
08-01-15, 09:47 PM
#140
Thanks guys 
2008 join date and I'm your first post... Man you got me feelin some kinda way  . Honored. I'll get to one eventually. Probably after I get it running and debugged.
WOW man respect to you this is a Story book restoration project to say the least glade you stuck through with it in the tough times that passed. Incredible attention to detail simply amazing job cant wait to see some more shots and maybe a short walk around video at the end?
. Honored. I'll get to one eventually. Probably after I get it running and debugged.
08-02-15, 10:57 AM
#141
Newbie
Join Date: Apr 2008
Location: Florida
Posts: 4
Likes: 0
Received 0 Likes
on
0 Posts
Ha yeah man I've been lurking in the shadows for quite sometime now just taking in as much information I can from everyone as I've been waiting to get into a FD myself but haven't had the right opportunity just yet but hopefully soon. But when I seen this it made me wish I had taken the chance I had a few years back when I went to look at one but I decided not to go with it because it to me had been destroyed with a nasty looking body kit. But yeah I saw this thread and felt like I needed to say how much I enjoyed this thread. Props to you and you sir are a motivation for me to get in the game sooner
08-02-15, 12:42 PM
#142
A few pictures of my brake line routing. I tried to keep the lines as tight and factory looking as possible. I will probably paint the portioning valve black to match my Red, Black and Polished theme.
I have also been toying around with a couple heat shield ideas. The peel and stick heat shielding never really appealed to me. An I've never seen it come out that well. ( wrinkles upon wrinkles). My idea originally was to only have a polished aluminum one coming off the lower intake manifold but I'm leaning towards adding an additional one on the other side. Two reasons for this. First, hopefully to help combat some of the heat coming off the turbo hot side that sits close to the tower. I'm not really interested in my freshly painted bay having discoloration and peeling around that area. An secondly, already known to many here, heat transfer to the lower intake.
Next week I should be getting a new windshield installed along with new window molding all the way around. Then I can reassemble my interior plastics.
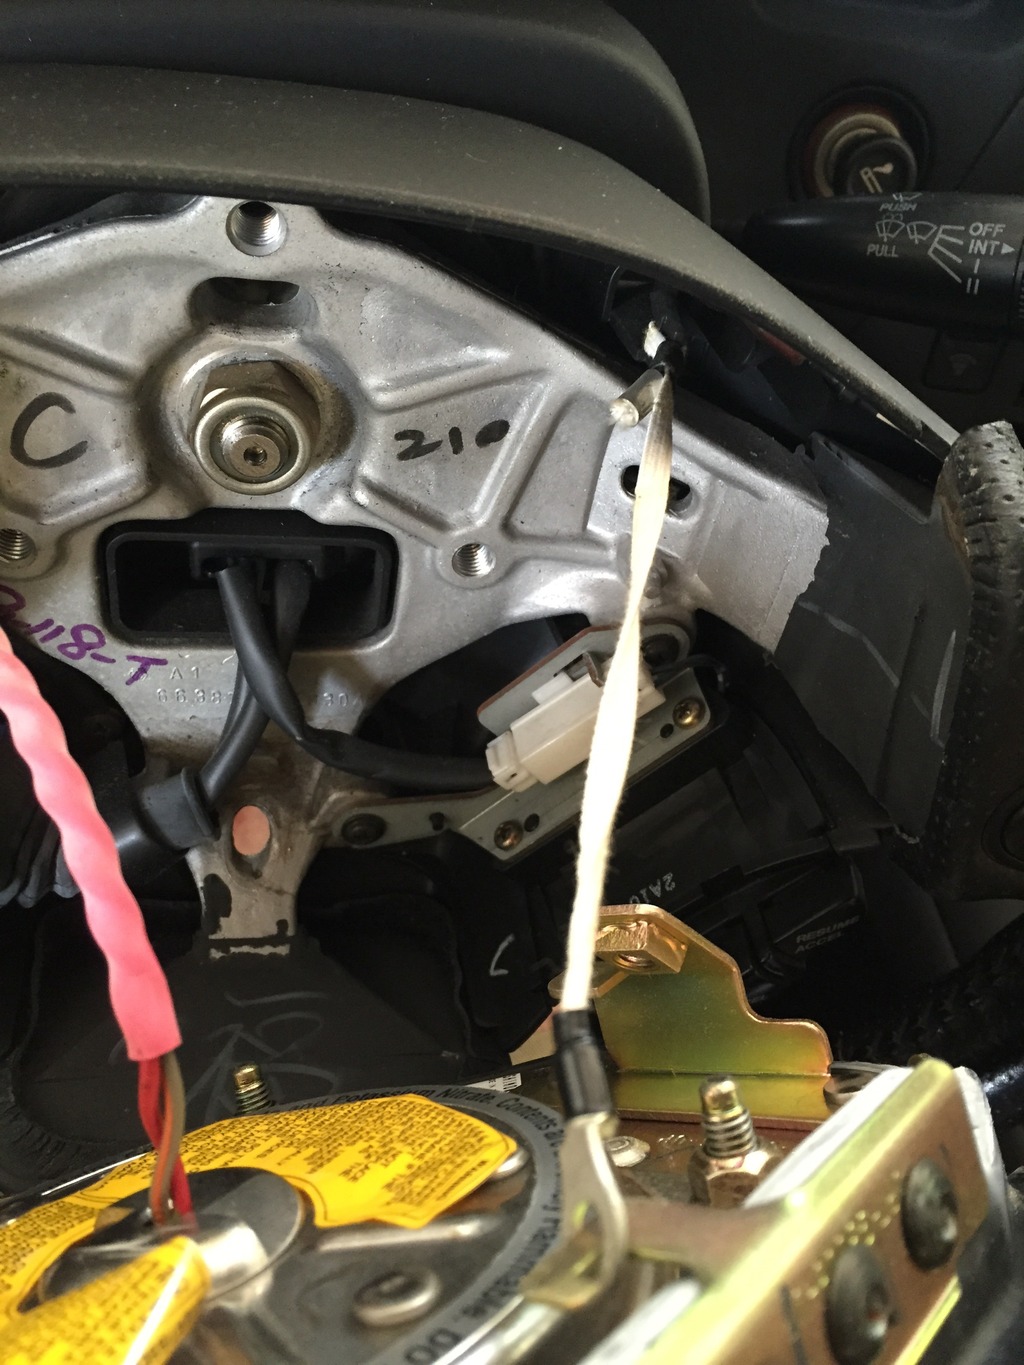
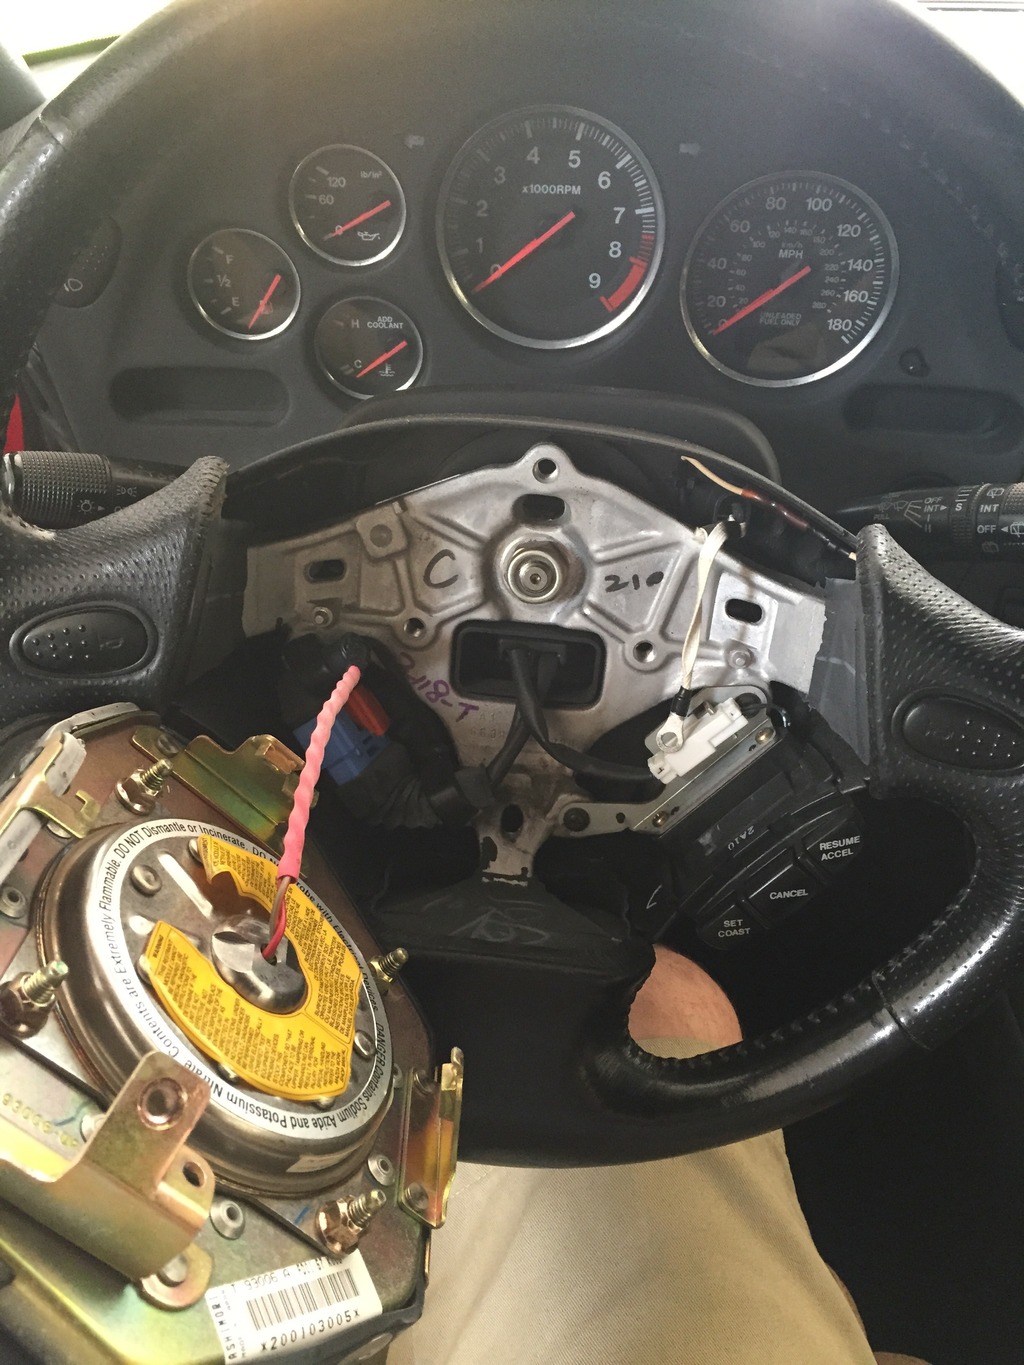
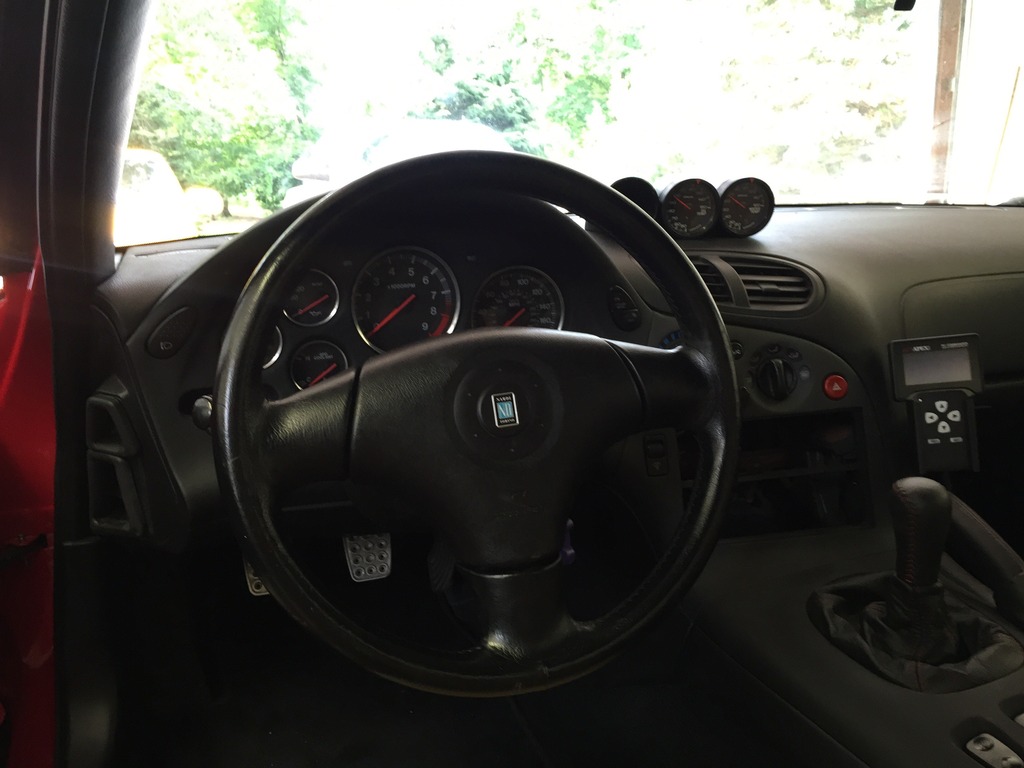
I did pick up a new steering wheel to round out my interior. The original one was pretty much shot from the suns uv. After my new windshield goes in I'm going to finally remove those terrible tan seats and put in my new ones which I think will complete the red and black interior. More on them later...
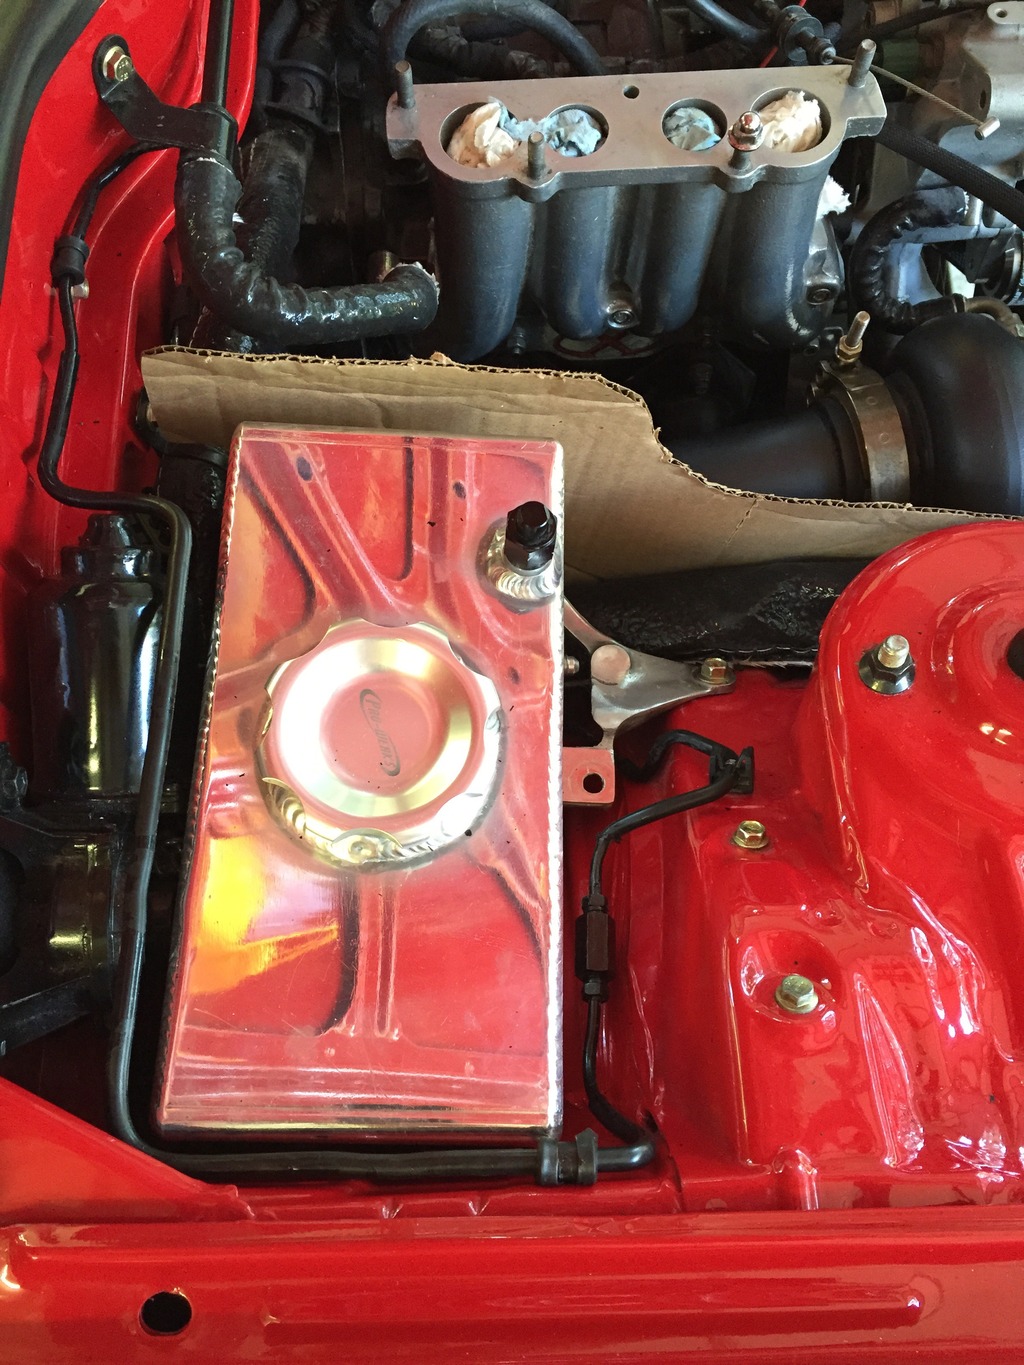
I have also been toying around with a couple heat shield ideas. The peel and stick heat shielding never really appealed to me. An I've never seen it come out that well. ( wrinkles upon wrinkles). My idea originally was to only have a polished aluminum one coming off the lower intake manifold but I'm leaning towards adding an additional one on the other side. Two reasons for this. First, hopefully to help combat some of the heat coming off the turbo hot side that sits close to the tower. I'm not really interested in my freshly painted bay having discoloration and peeling around that area. An secondly, already known to many here, heat transfer to the lower intake.
Next week I should be getting a new windshield installed along with new window molding all the way around. Then I can reassemble my interior plastics.
I did pick up a new steering wheel to round out my interior. The original one was pretty much shot from the suns uv. After my new windshield goes in I'm going to finally remove those terrible tan seats and put in my new ones which I think will complete the red and black interior. More on them later...
Last edited by gdub29e; 08-02-15 at 12:53 PM.
 08-03-15, 12:04 PM
#150
PS ~ thanks again for the rubber steering wheel plugs.