
Mississippi FD - 383CI Forged LS1 Stroker Build

Thread Starter
Joined: Apr 2009
Posts: 381
Likes: 27
From: Starkville, MS
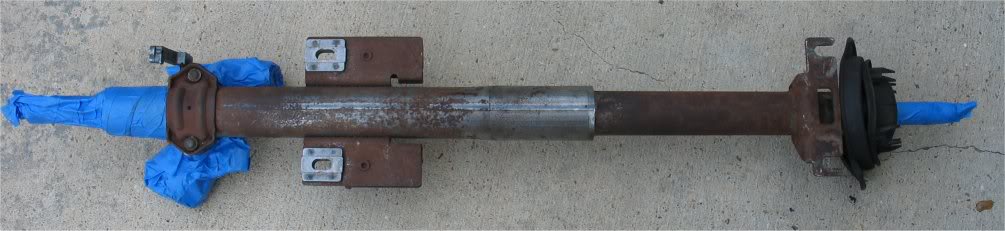
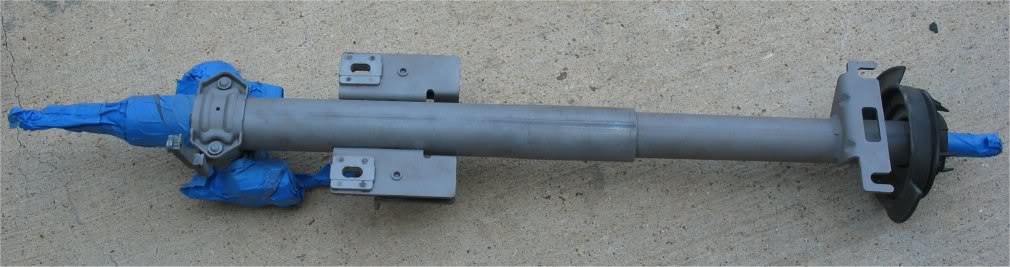
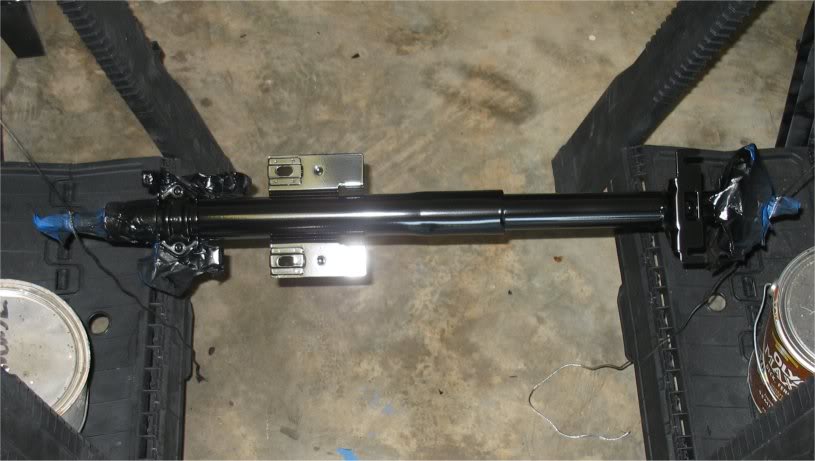
Be careful. Stuff like this turned my "5 month project" into a 2 year project. It will creep your project's scope like
nobody's business and while it's addictive, it will wear on your motivation to work on your car! Save yourselves!!! lol!
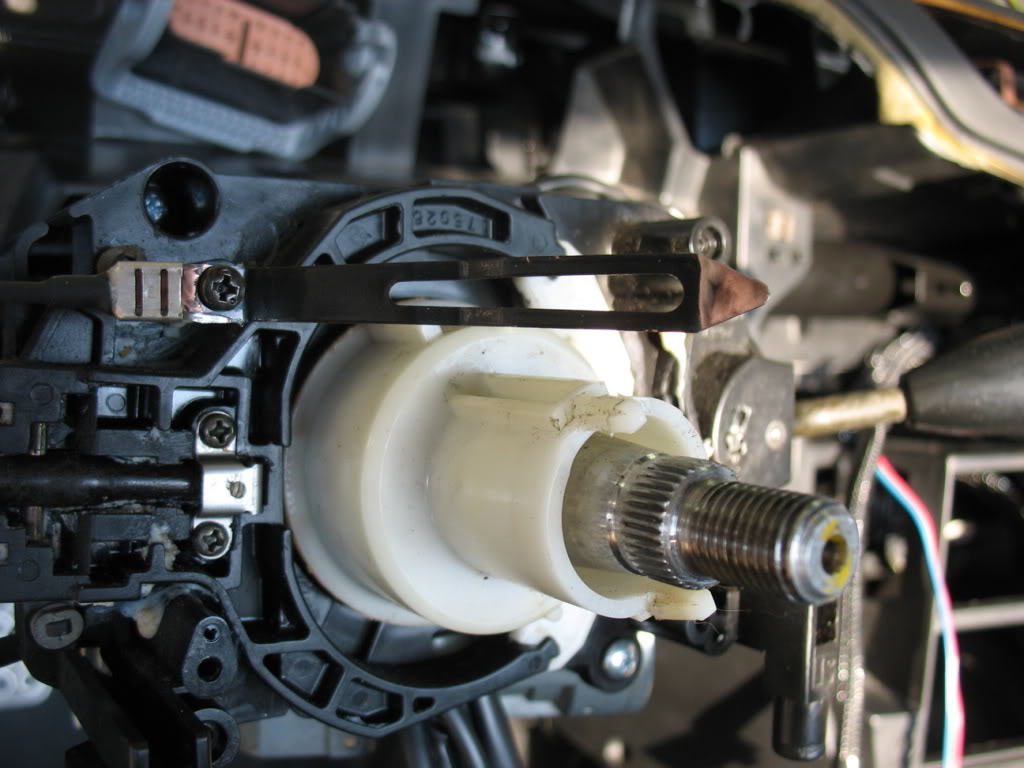
See, some of y'all might have thought I was kidding yesterday when I said "Now I'll have to do something about that stupid
rusty steering shaft"
sigh....
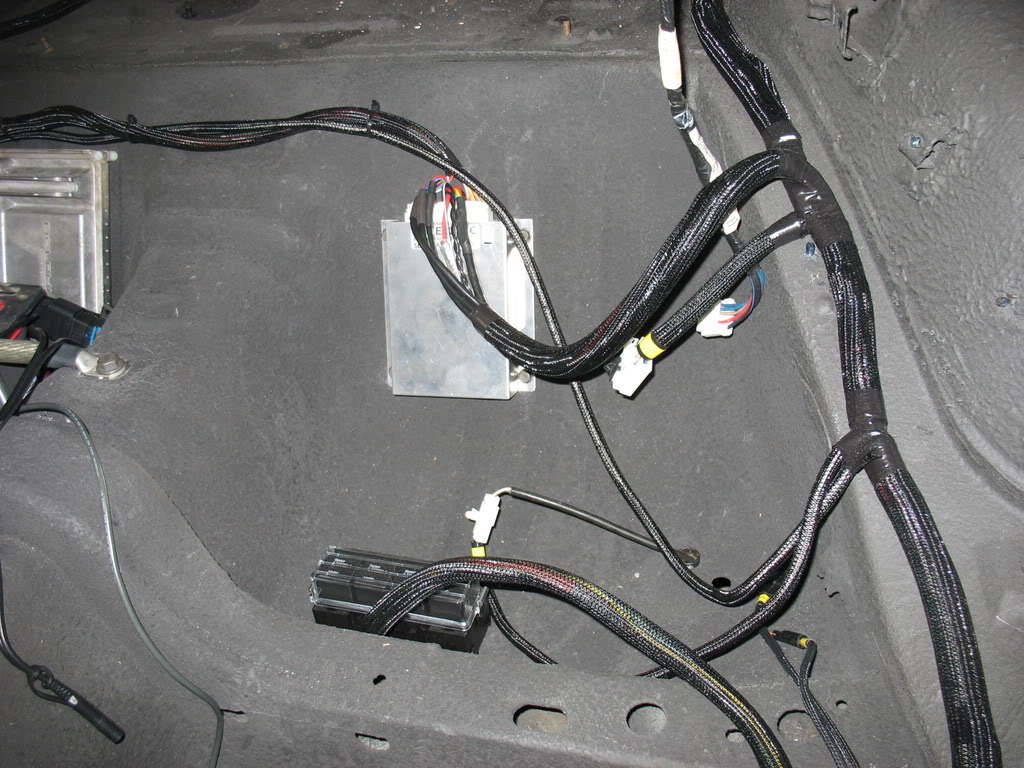
Did a little more work in the engine bay too.
Started by wrapping up my hood pop and throttle body cables in insulating sleeves because I've heard stories of people's
hood cables melting. Wrapped the throttle body cable just because it was looking rough
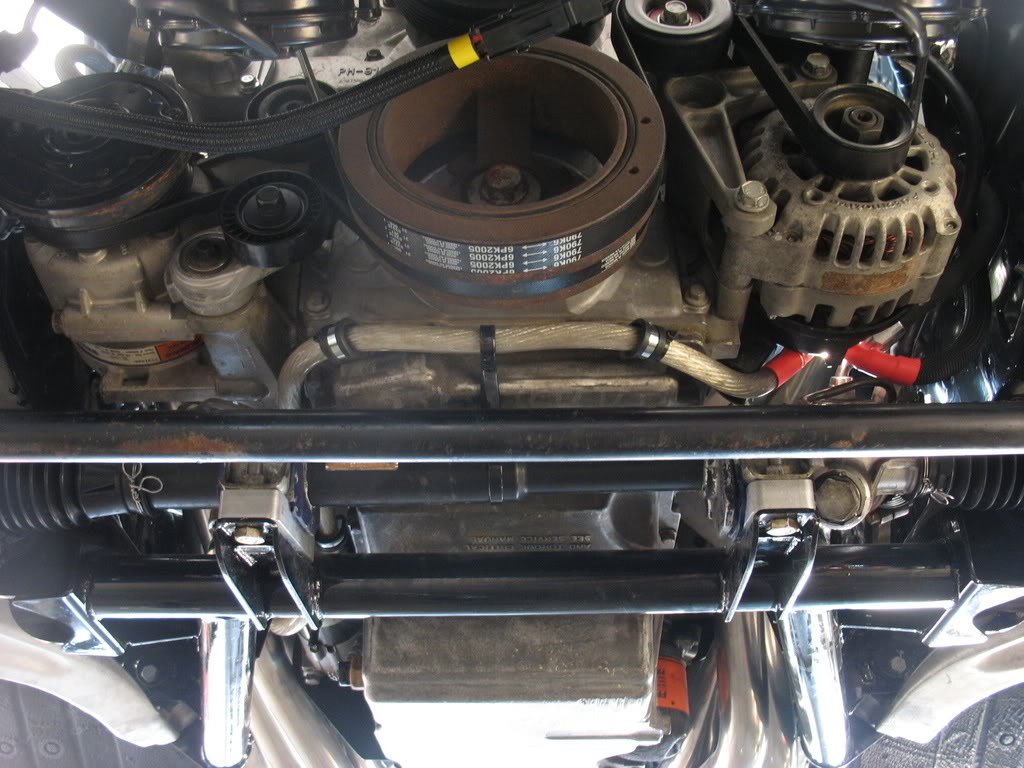
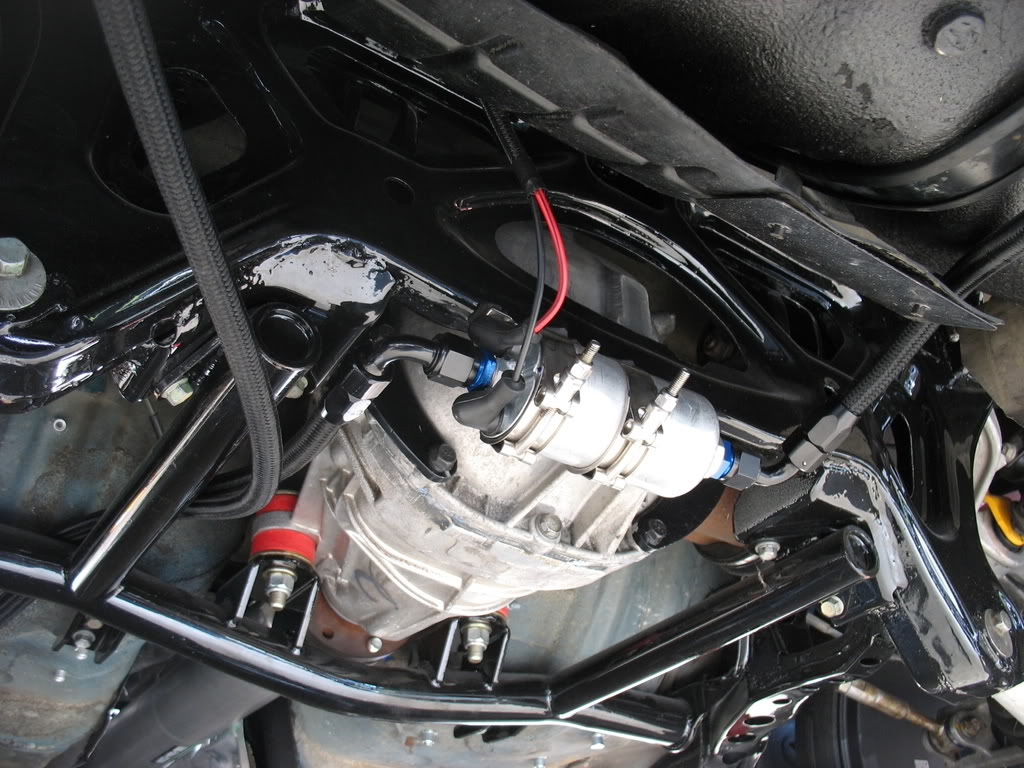
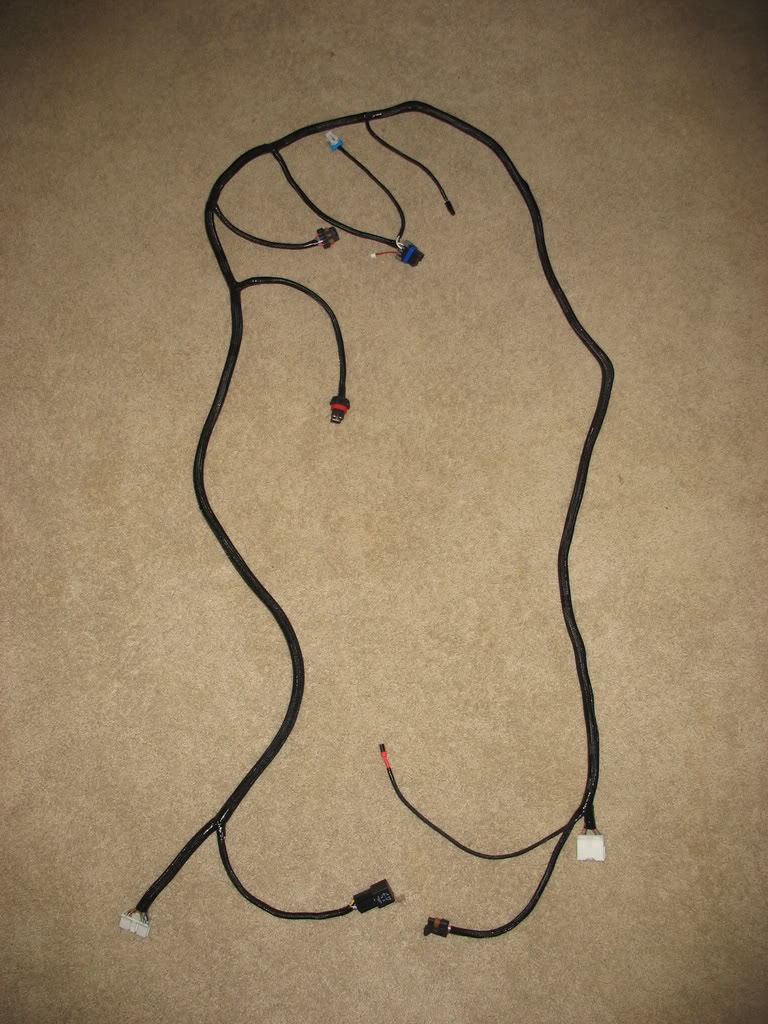
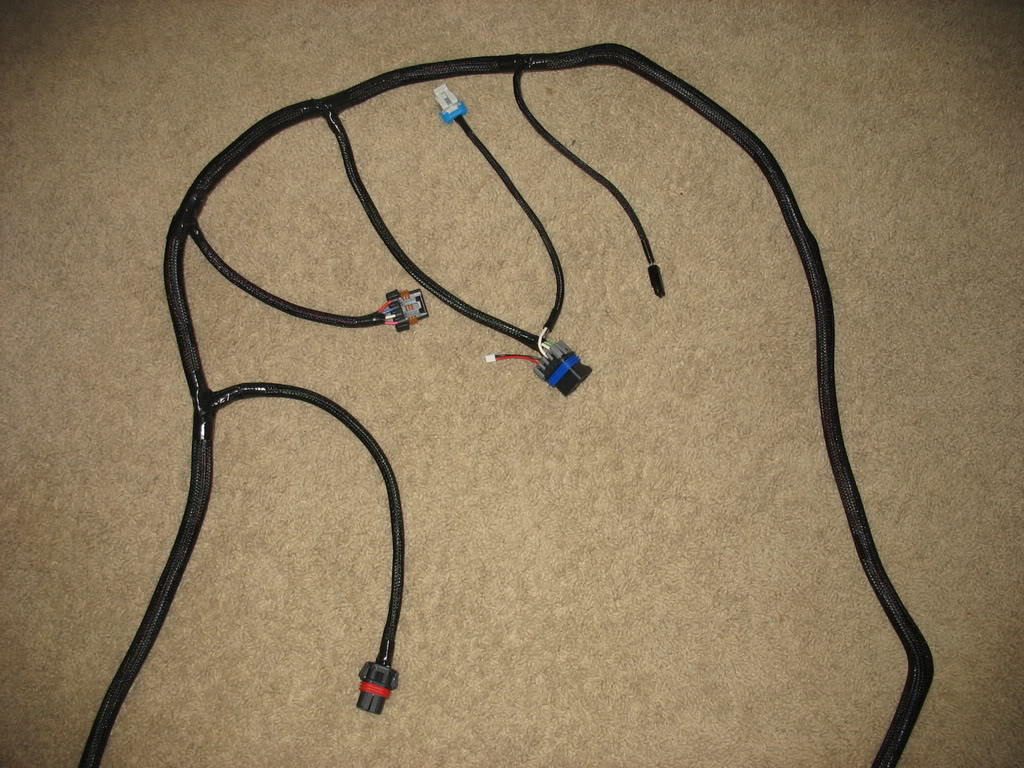
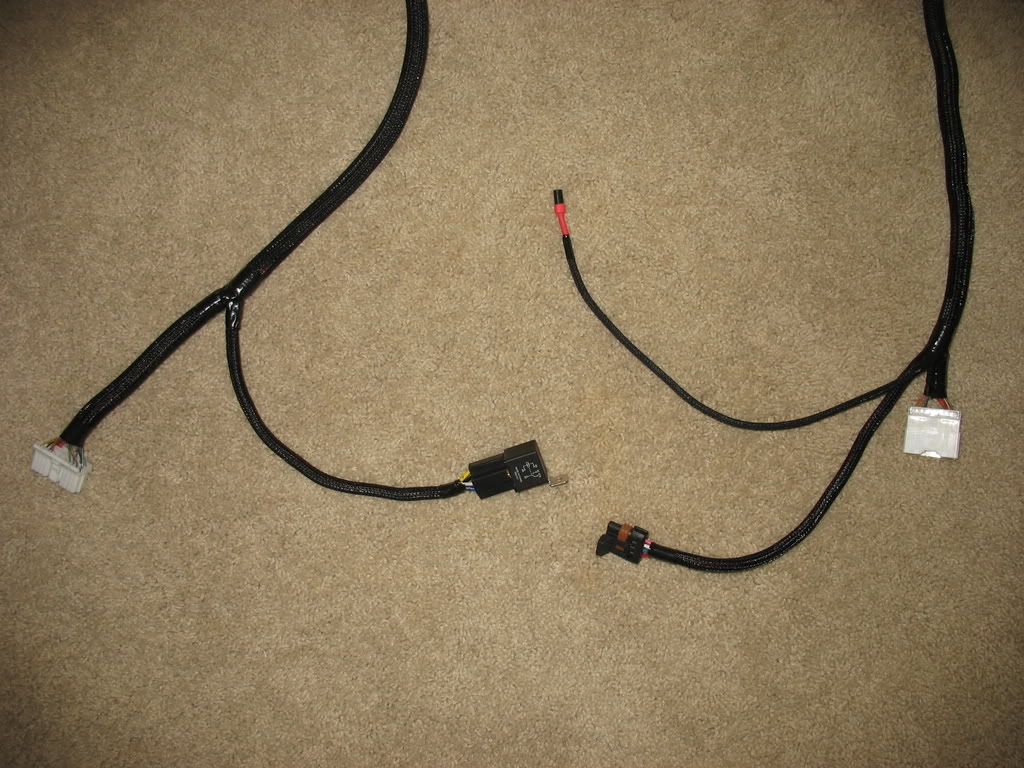
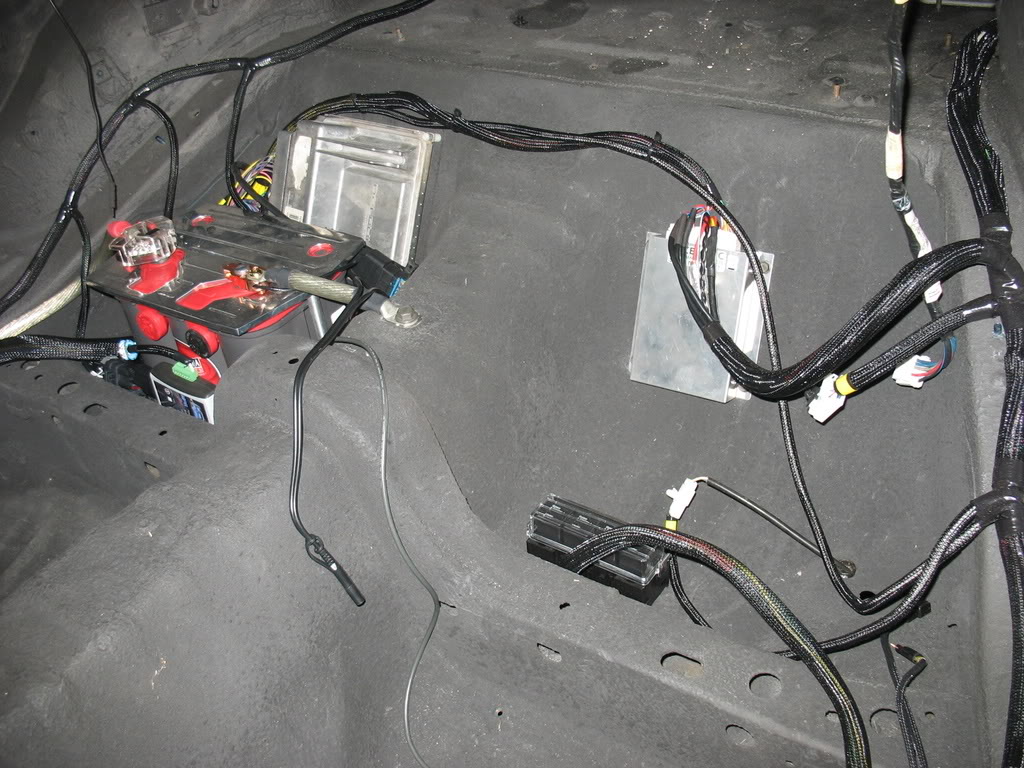
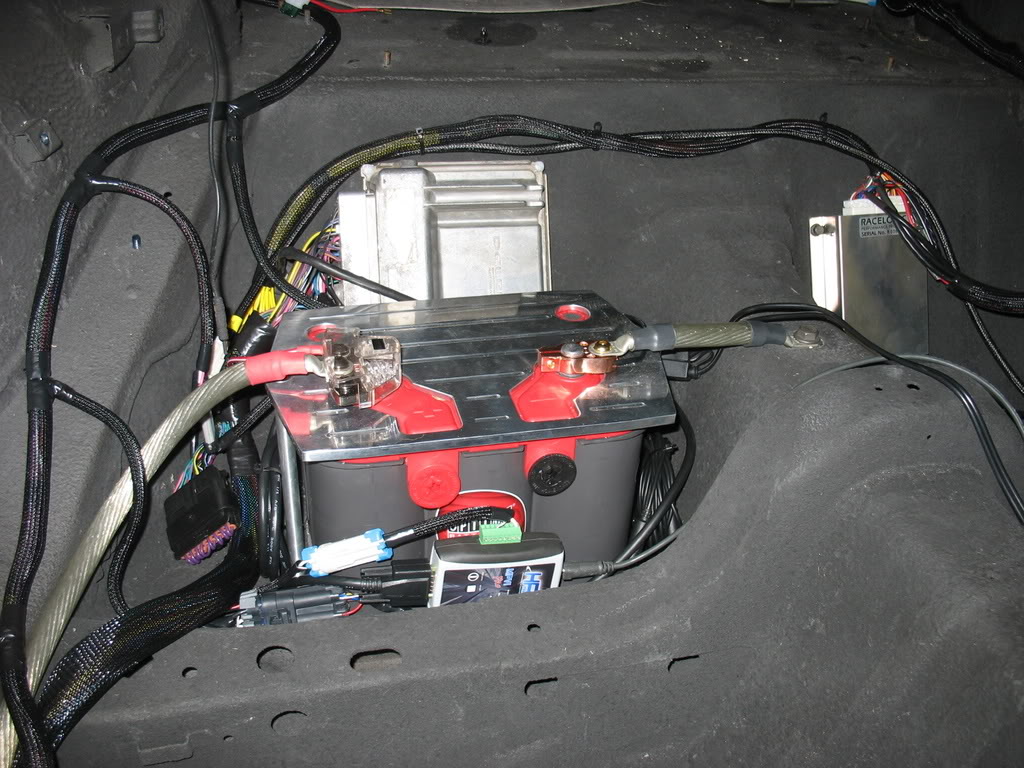
I went ahead and got all my main power lines made and run:
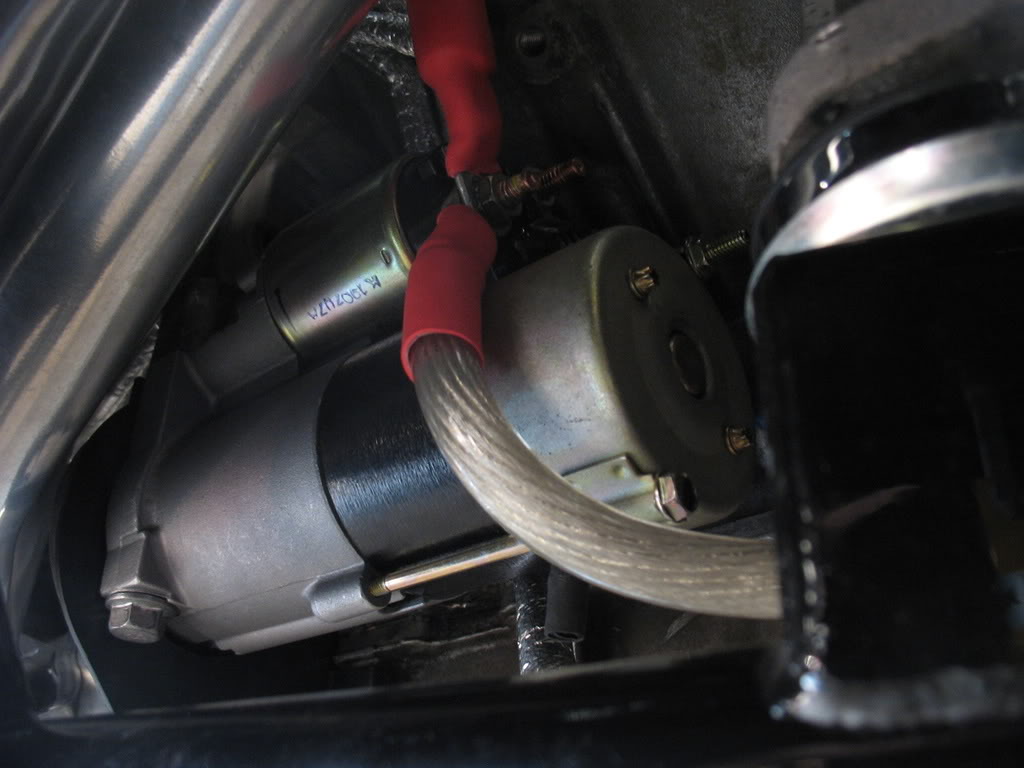
Starter - Input from Battery, Output to Alternator. I had a nice little starter blanket, but after working with it for a
while I decided I didn't want to use it since the outside reflective layer is highly conducting and I was worried having
live terminals so close to it.
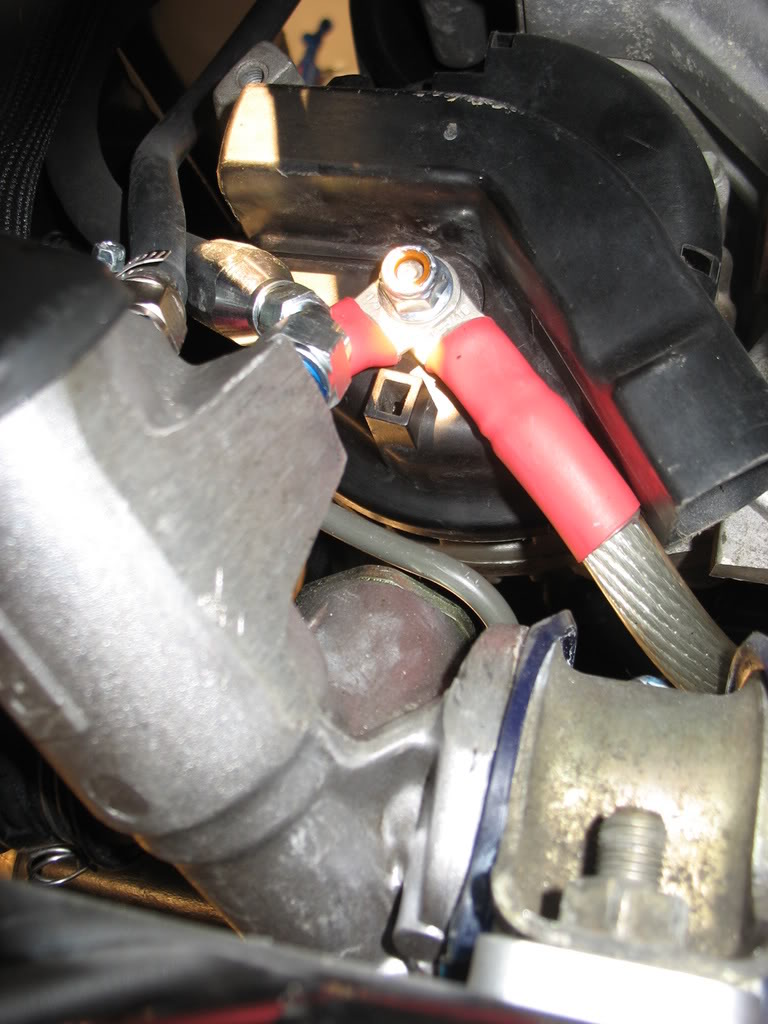
Alternator - Input from Starter, Output to Fuse Box.
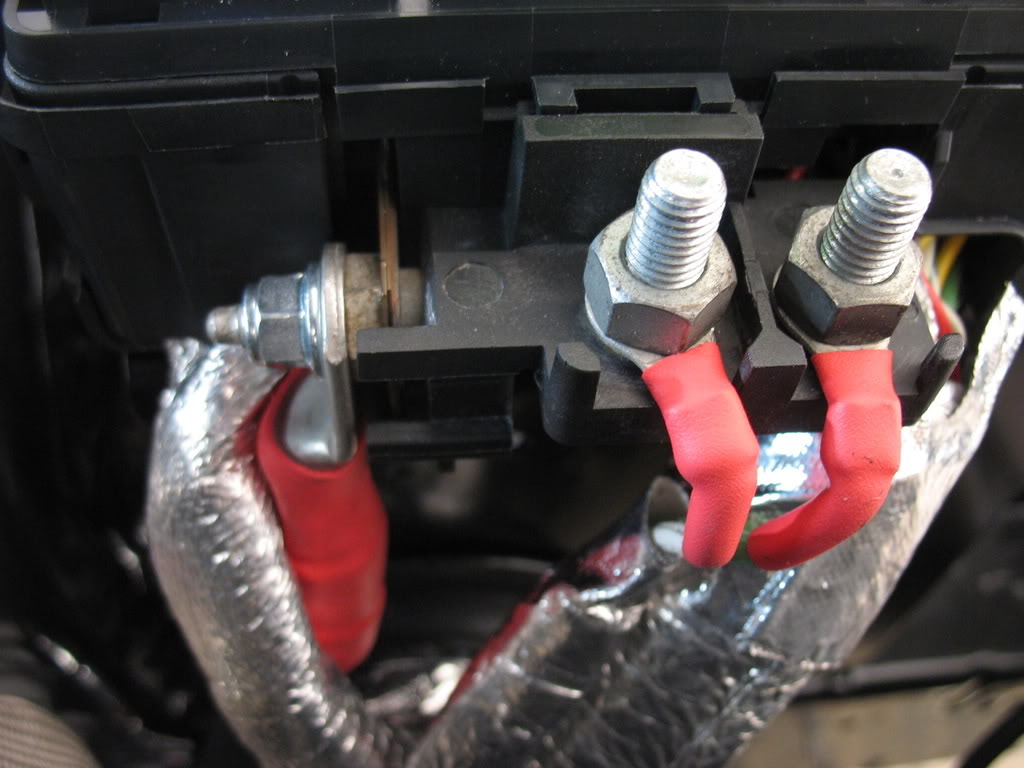
Fuse Box - Input from Alternator
The next section is another good example of why my build is taking as long as it is :P
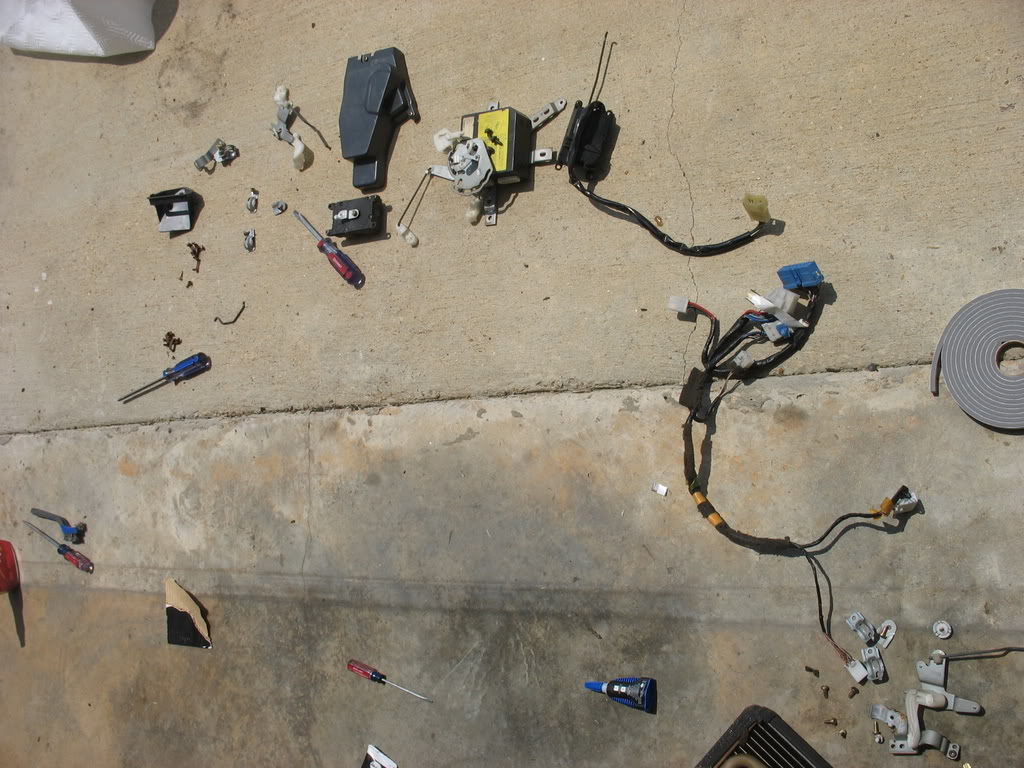
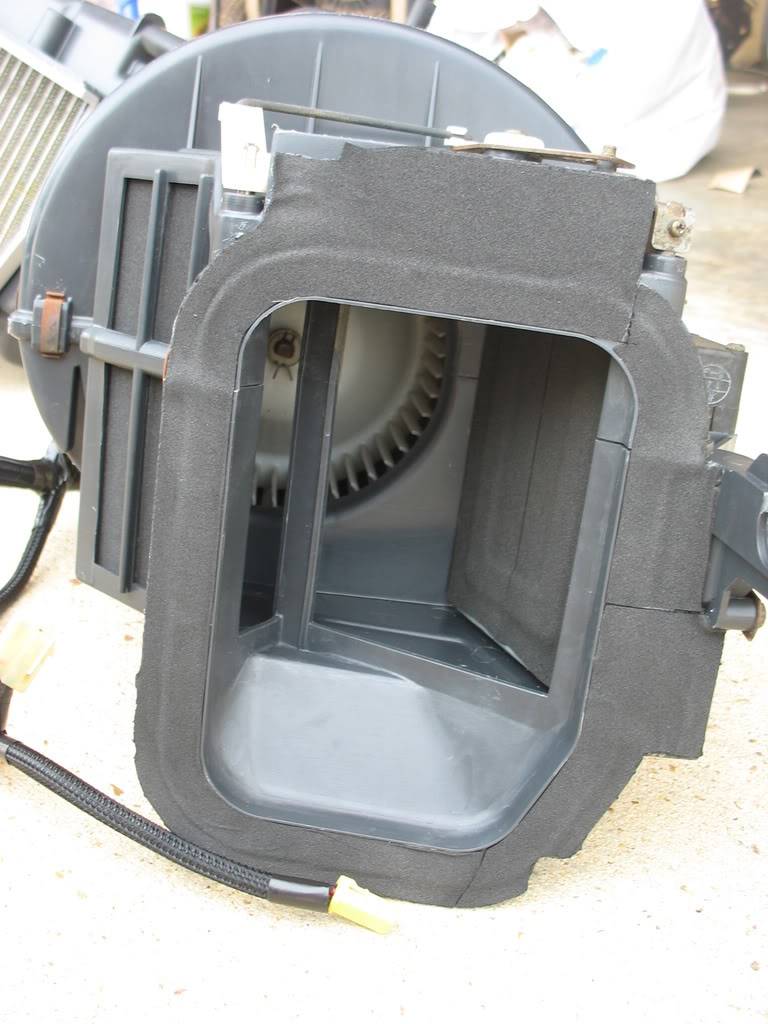
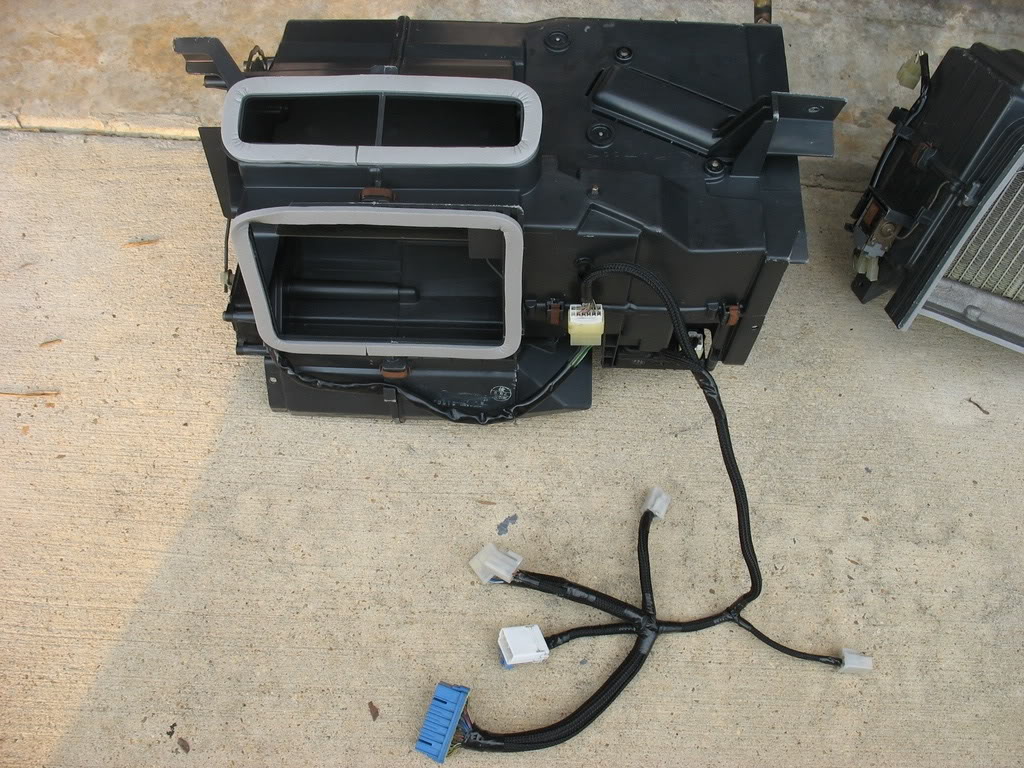
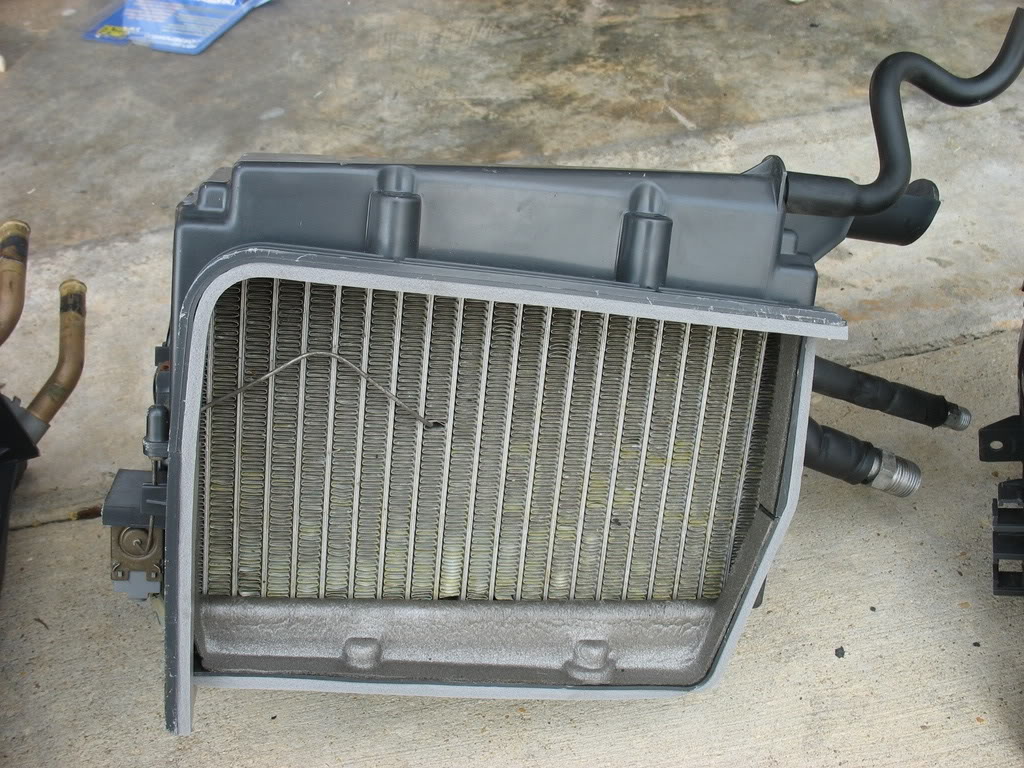
When I got my AC Evaporator, Blower Motor, and Heater Core boxes out of the attic I immediately remembered how dirty they
were. Views like this that show the buildup of 18 years of crap had me dreading the smell that would inevitably come out of
them once I had them reconnected
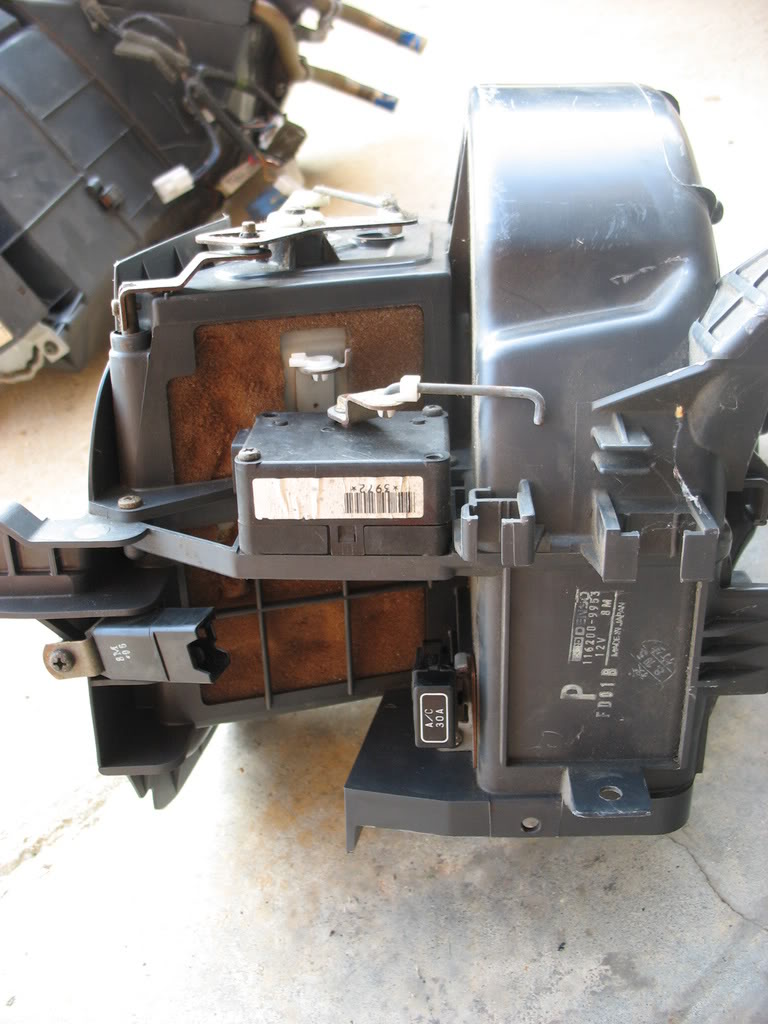
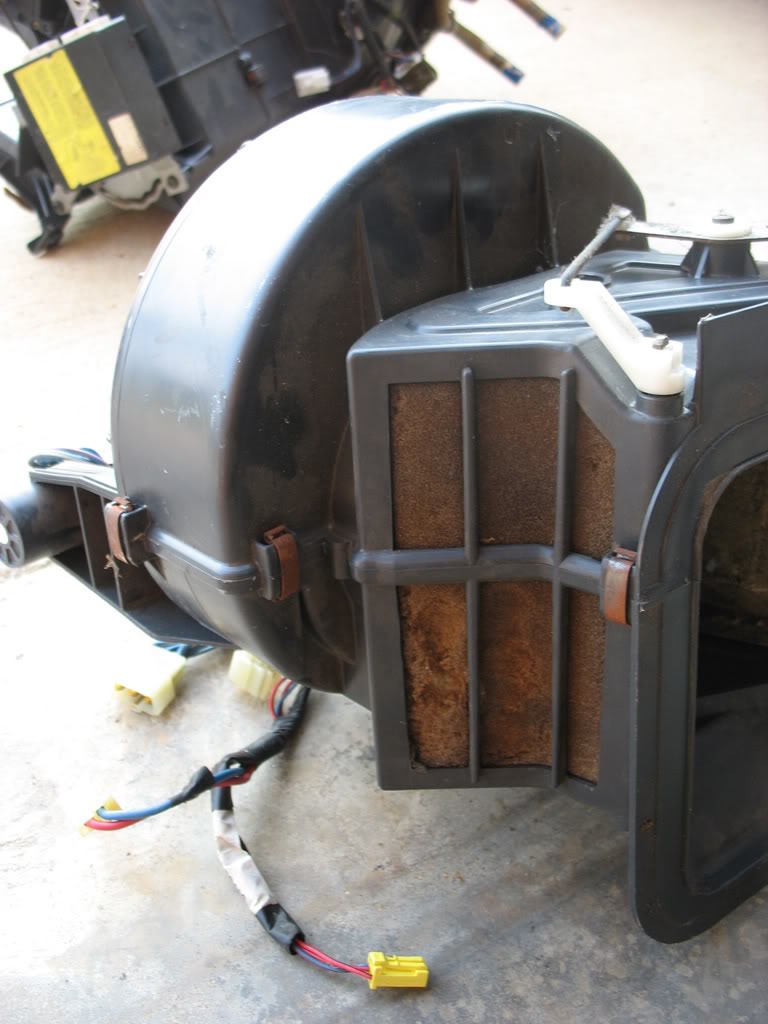
Sooo... I decided to do something about it and started disassembling everything for cleaning / refurbishing.
nobody's business and while it's addictive, it will wear on your motivation to work on your car! Save yourselves!!! lol!
See, some of y'all might have thought I was kidding yesterday when I said "Now I'll have to do something about that stupid
rusty steering shaft"
sigh....
Did a little more work in the engine bay too.
Started by wrapping up my hood pop and throttle body cables in insulating sleeves because I've heard stories of people's
hood cables melting. Wrapped the throttle body cable just because it was looking rough
I went ahead and got all my main power lines made and run:
Starter - Input from Battery, Output to Alternator. I had a nice little starter blanket, but after working with it for a
while I decided I didn't want to use it since the outside reflective layer is highly conducting and I was worried having
live terminals so close to it.
Alternator - Input from Starter, Output to Fuse Box.
Fuse Box - Input from Alternator
The next section is another good example of why my build is taking as long as it is :P
When I got my AC Evaporator, Blower Motor, and Heater Core boxes out of the attic I immediately remembered how dirty they
were. Views like this that show the buildup of 18 years of crap had me dreading the smell that would inevitably come out of
them once I had them reconnected
Sooo... I decided to do something about it and started disassembling everything for cleaning / refurbishing.
Thread Starter
Joined: Apr 2009
Posts: 381
Likes: 27
From: Starkville, MS


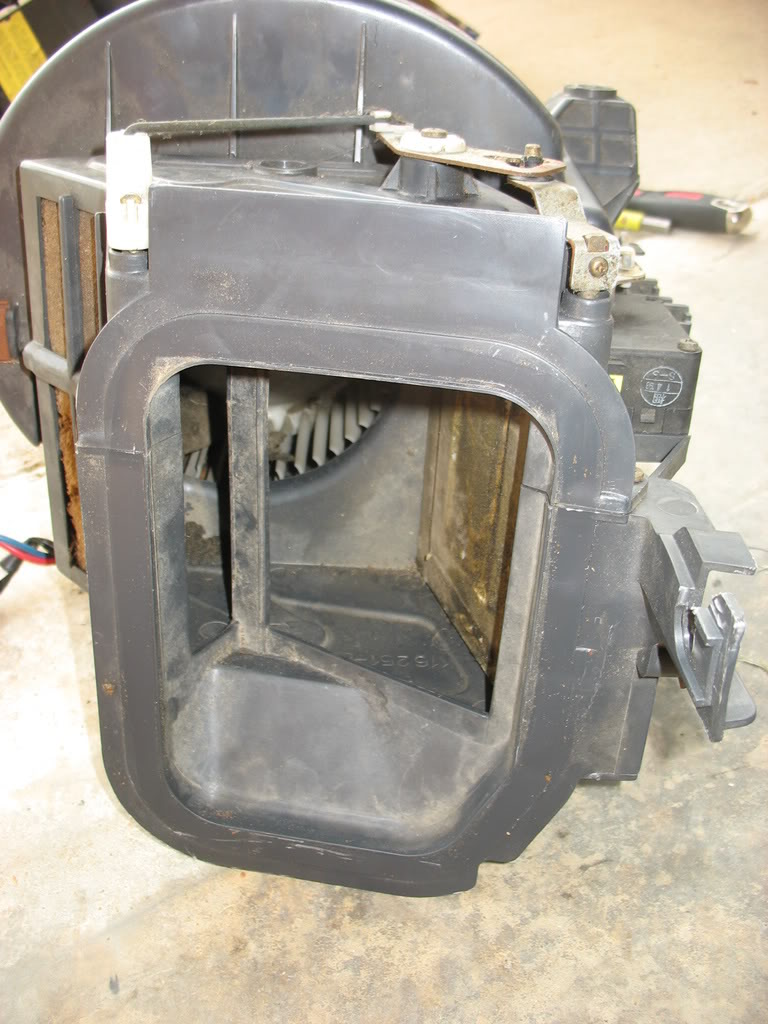
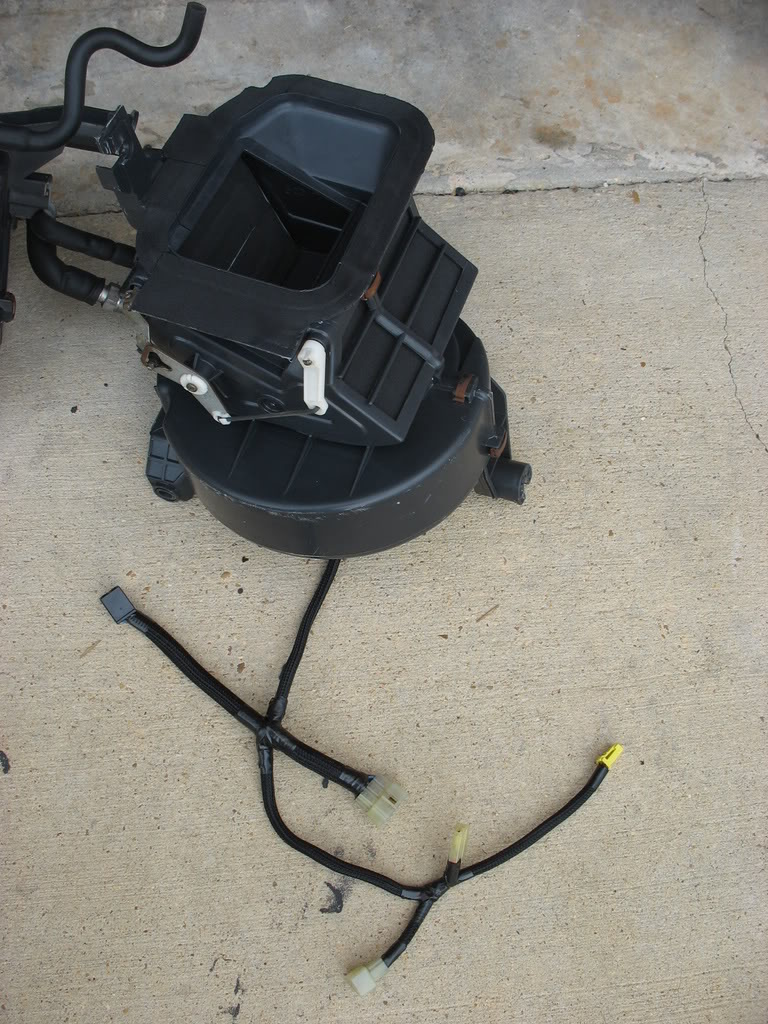
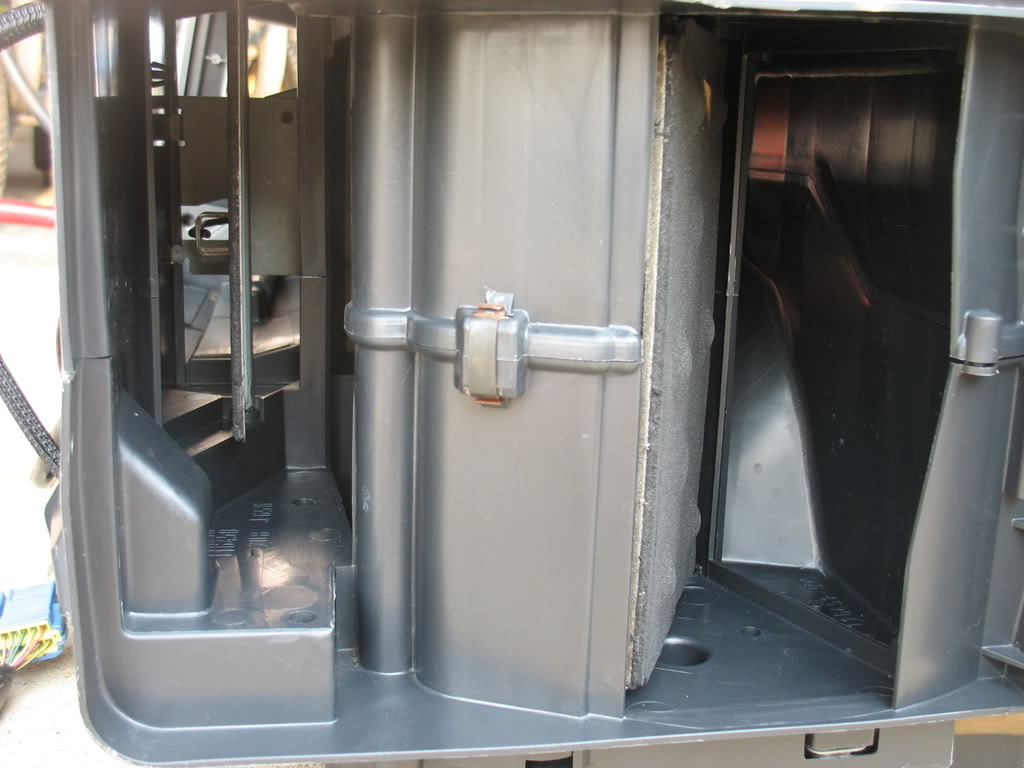
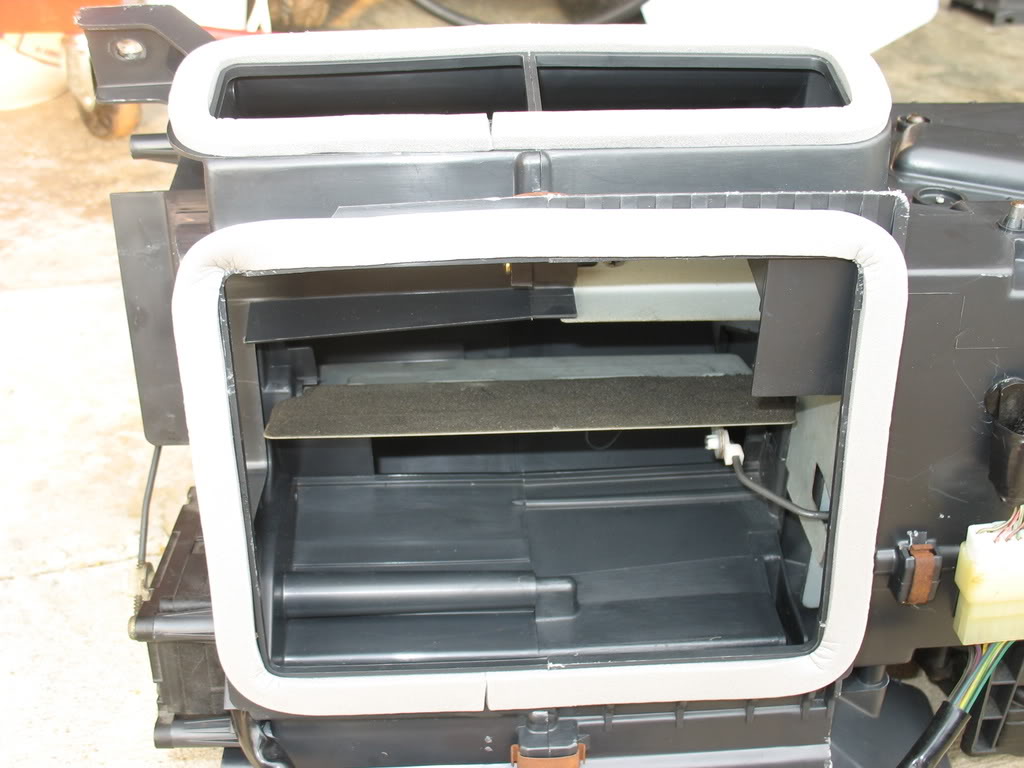
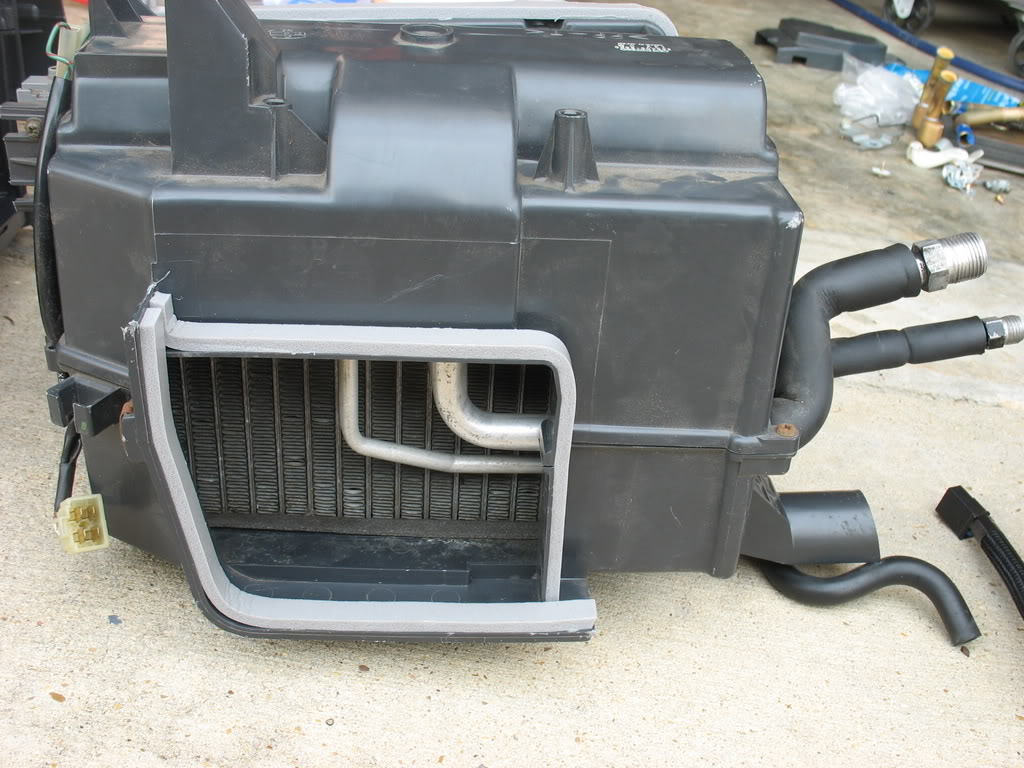
The airflow paddles inside the various boxes were really the worst part. The sealing foam is so old that it crumbles when
you touch it. The initial removal was a piece of cake because the foam part scraped off with minimal effort:
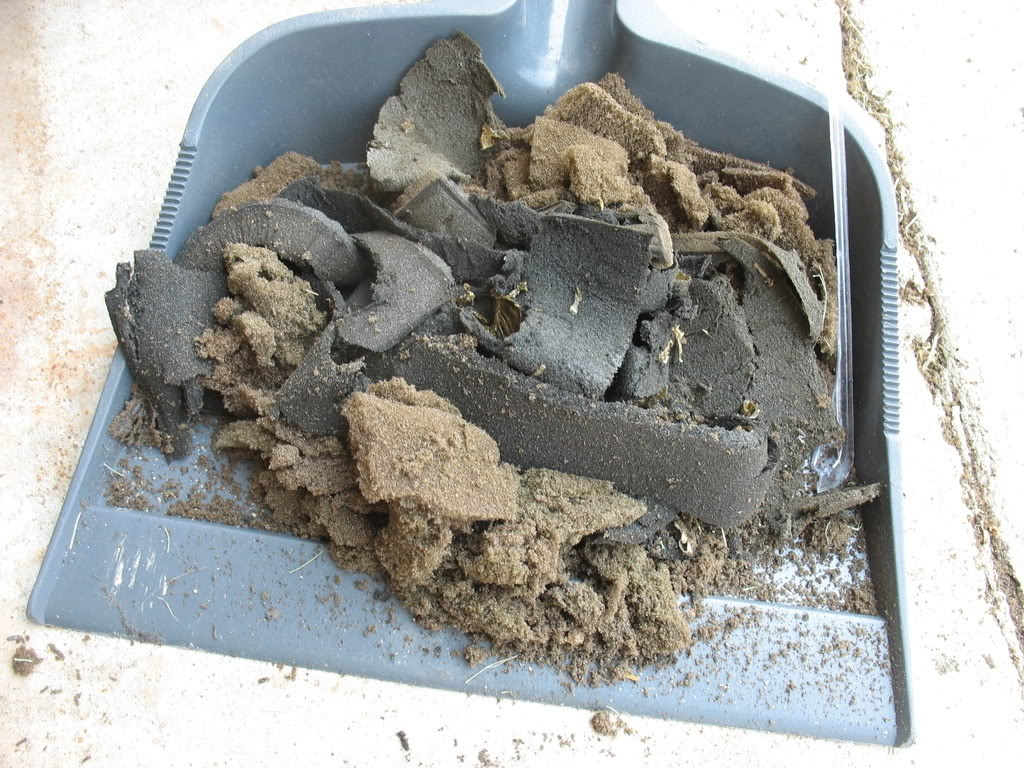
Just one of the many dustpan loads after sweeping up the paddle foam. Yuck!
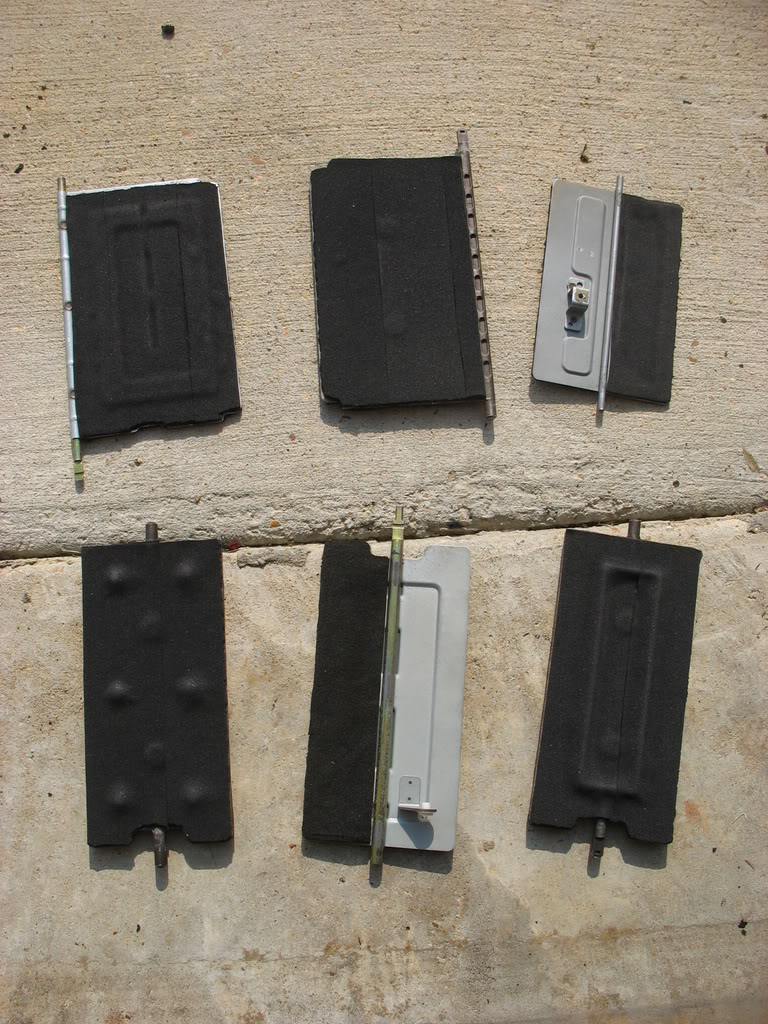
The adhesive used to hold the foam to the paddle, however, was a different story. I used a combination of Paint Stripper,
Goof off, and acetone to get them clean. It was a job, but in the end I succeeded and re-padded the paddles.
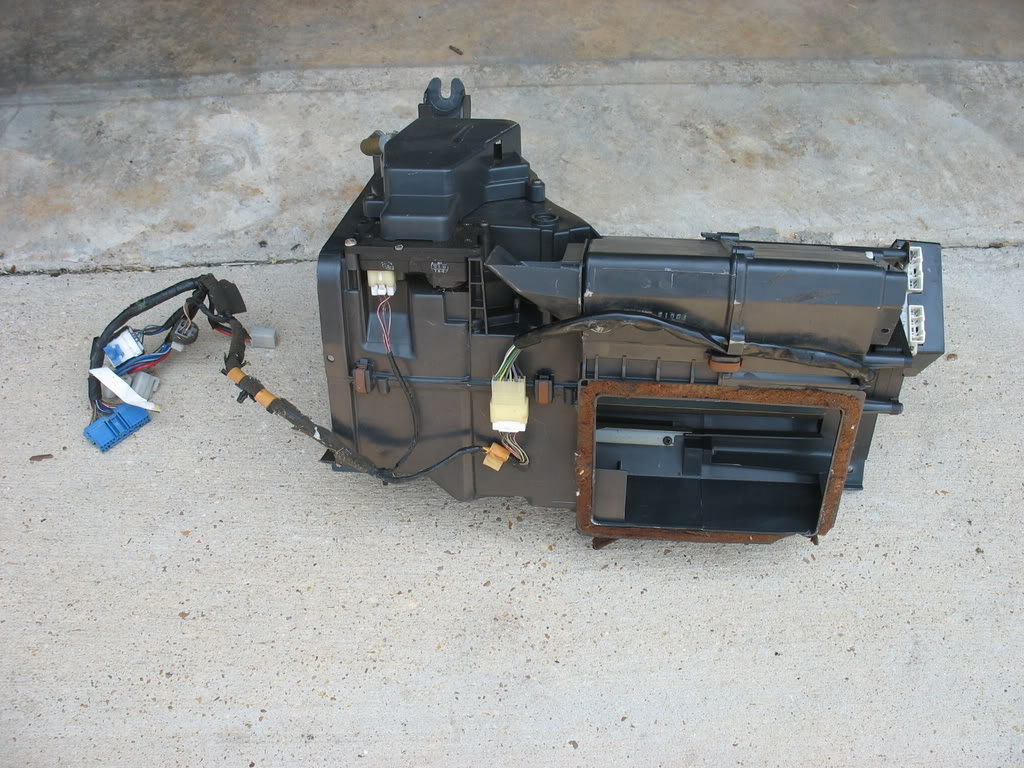
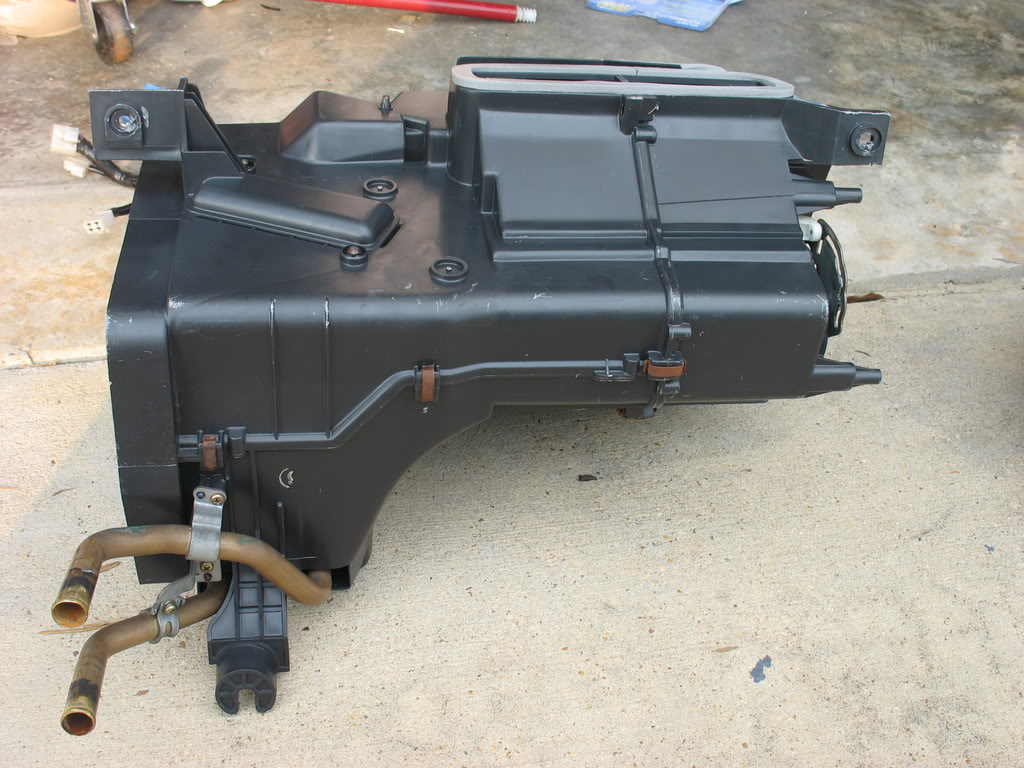
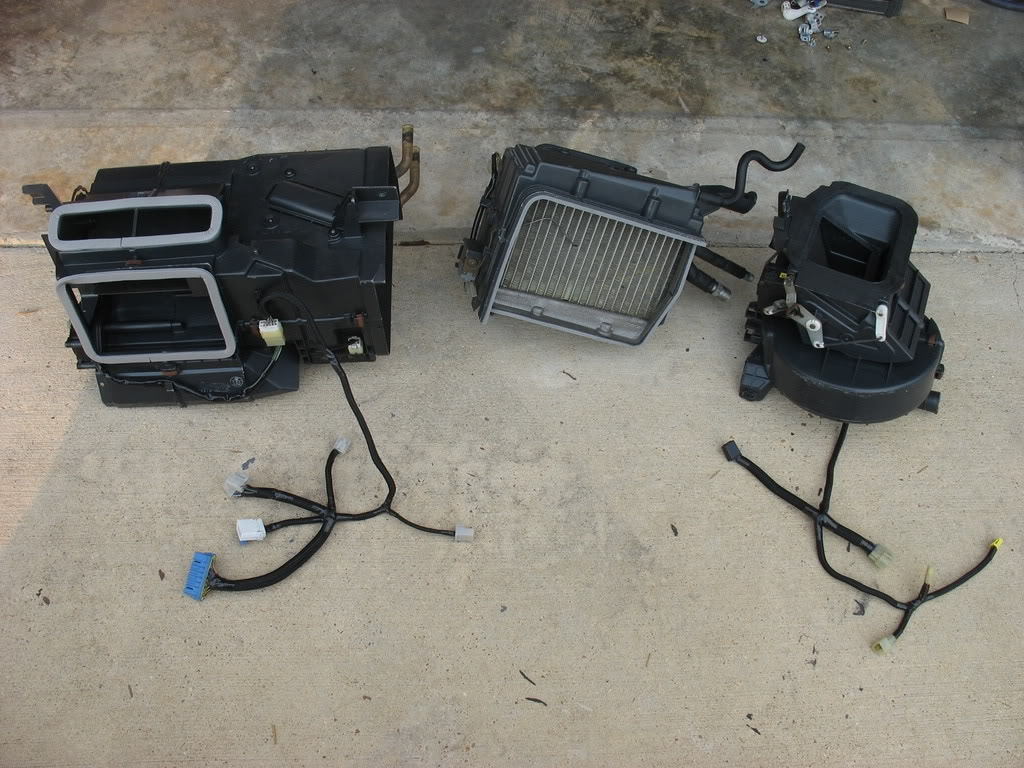
Keeping up with the parts (heater box)

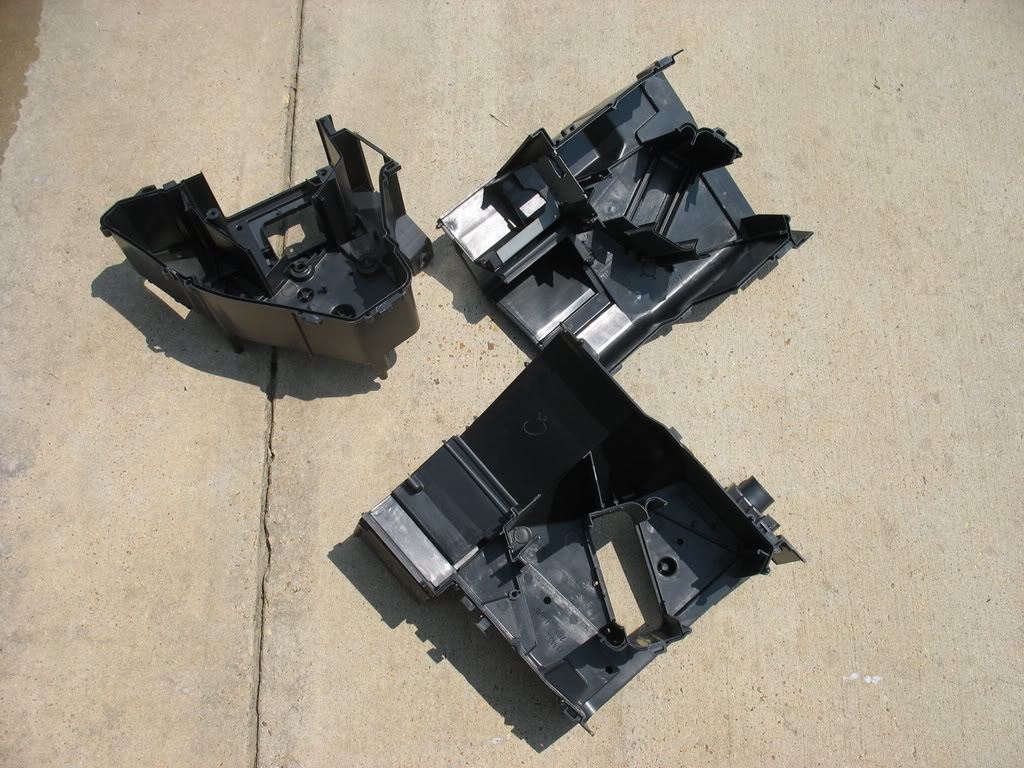
Heater box plastics
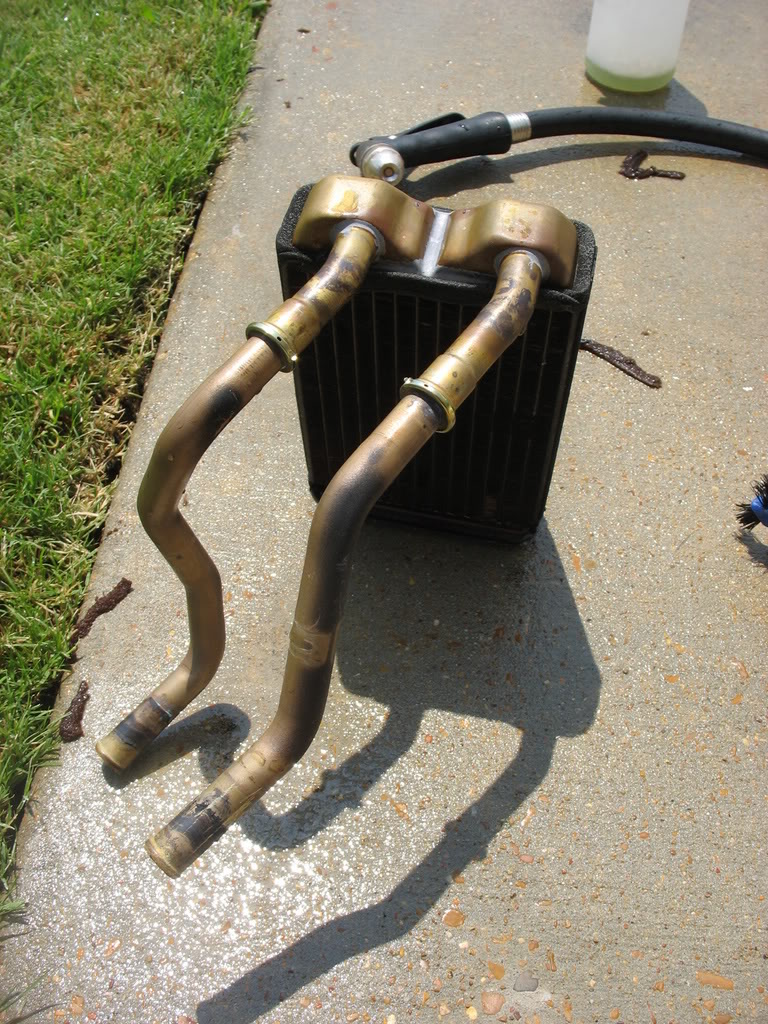
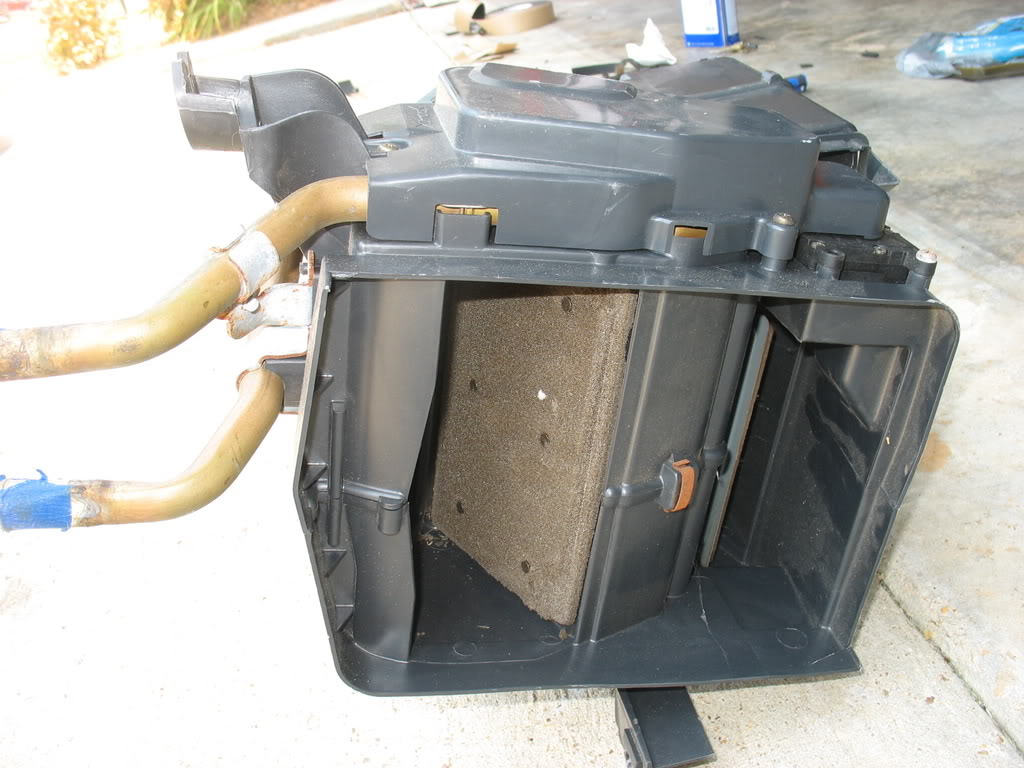
Cleaning up the heater core. Replaced the pipe-o-rings and clamps. Also purged the core with the garden hose from both
directions.
Thread Starter
Joined: Apr 2009
Posts: 381
Likes: 27
From: Starkville, MS
This weekend was filled with happy and one sad events.
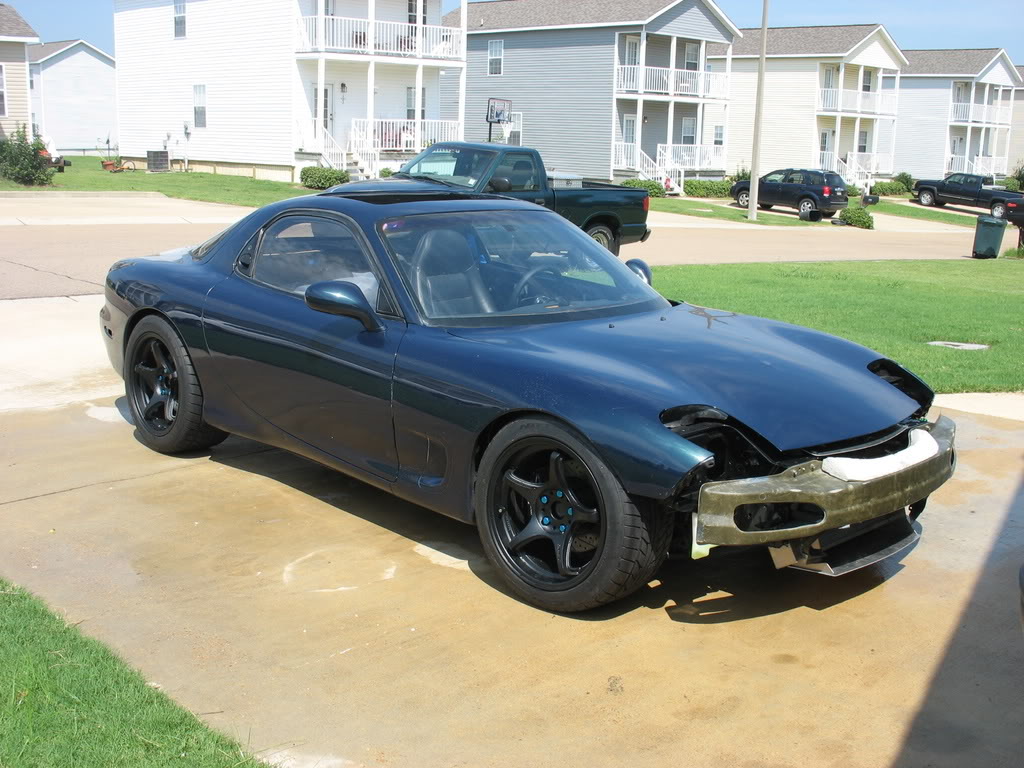
Sad because I had to chop up Kevin's work of art...
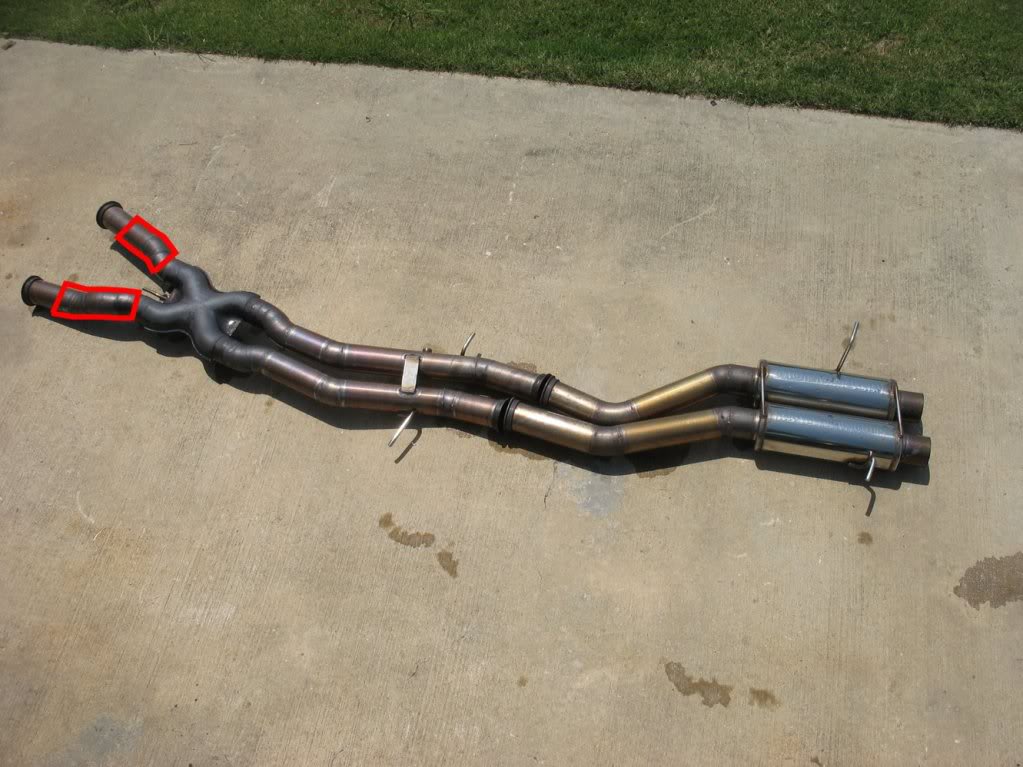
Because of differences in our engine mounts I had to chop out the sections circled in red. Afterwards I connected the V-band
+ Pipe stubs to the x-over with flex pipe:
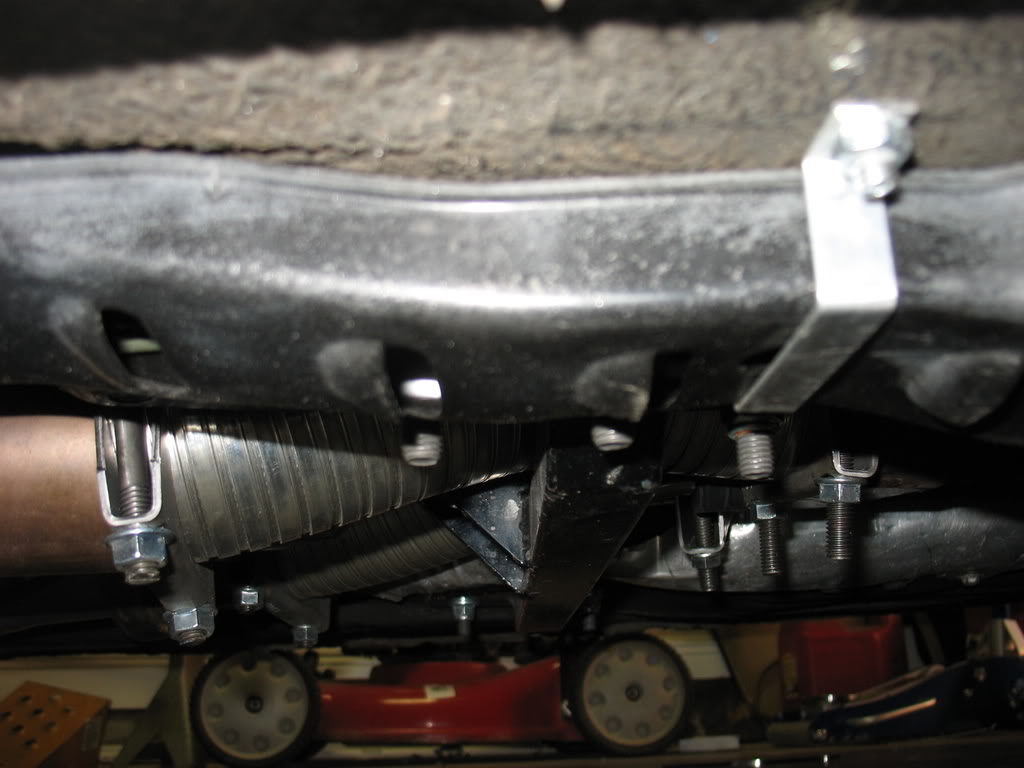
*Note* The flex pipe is only a temporary solution. I think it turned out really well, but it is only so I can dial in my
idle in my quiet neighborhood and take it to an exhaust shop in peace
Now... On to the happy events!
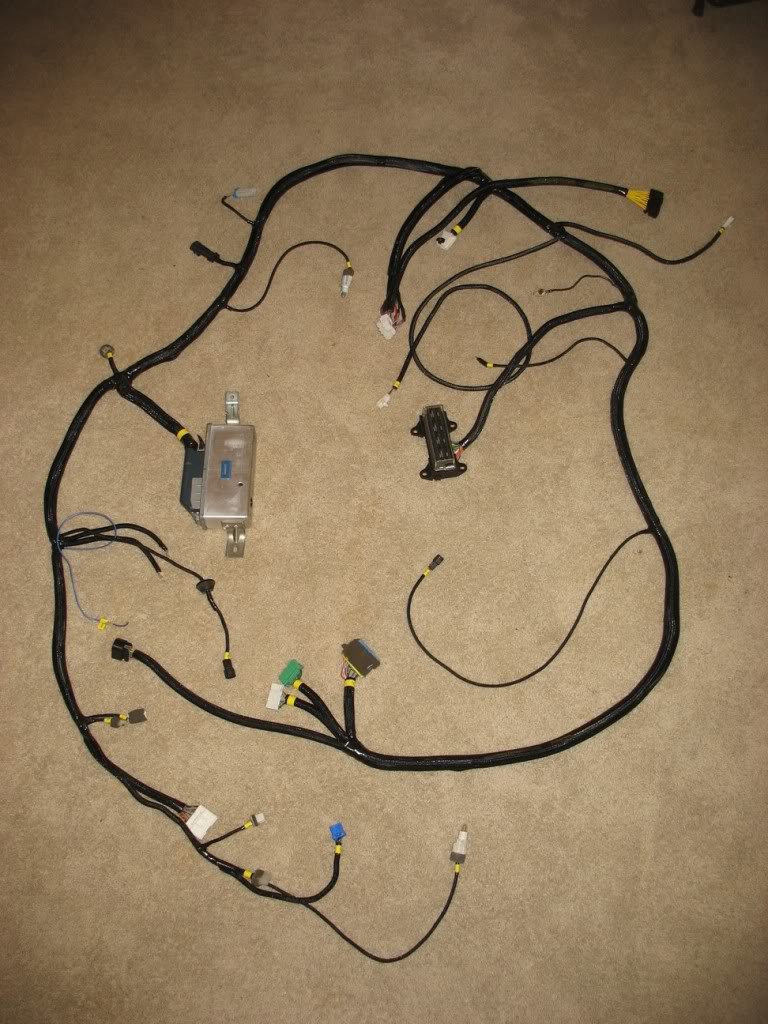
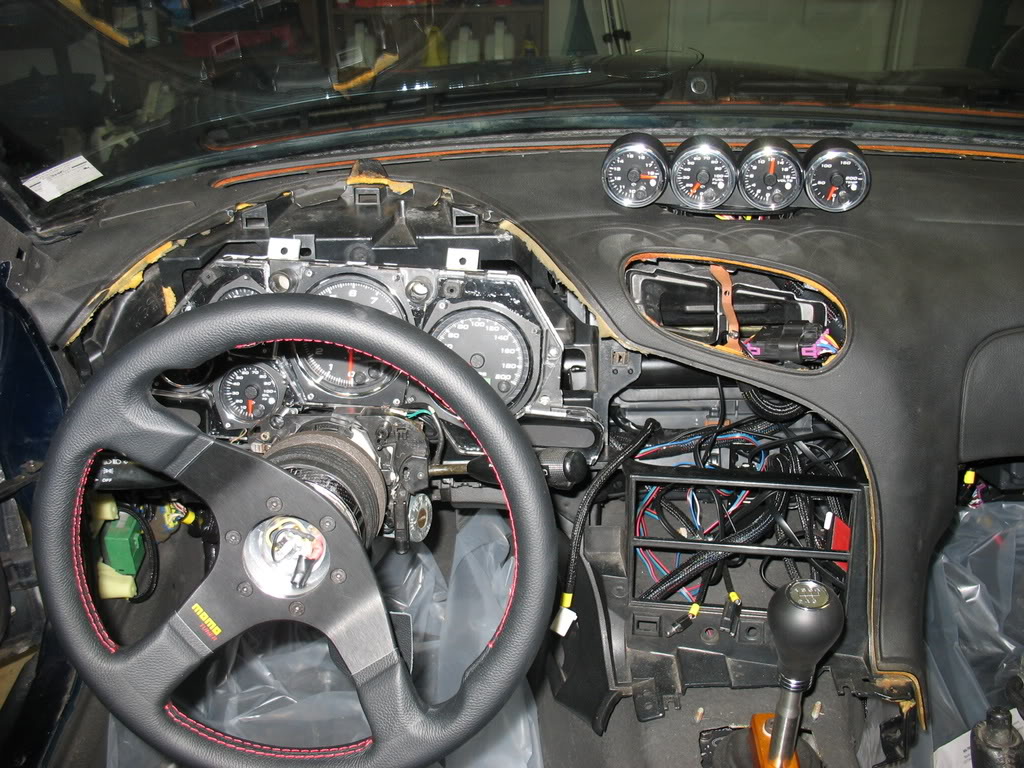
Finished my Dash Harness:
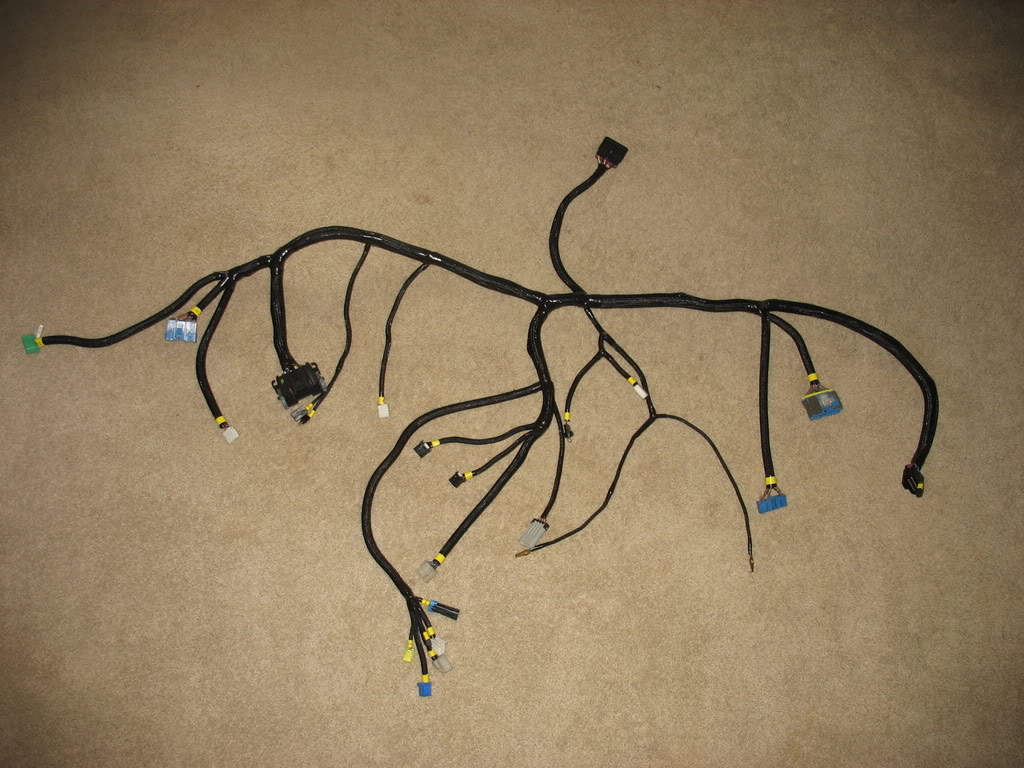
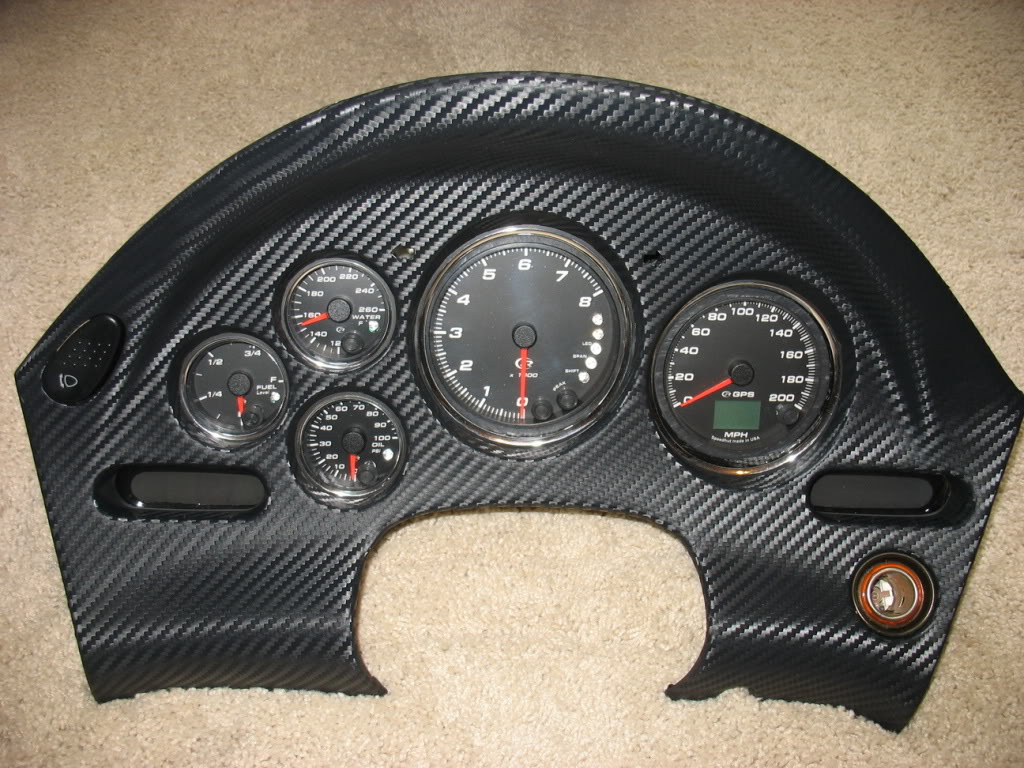
The biggest changes include a plug for my dash pod gauges and a plug for my new custom gauge cluster.
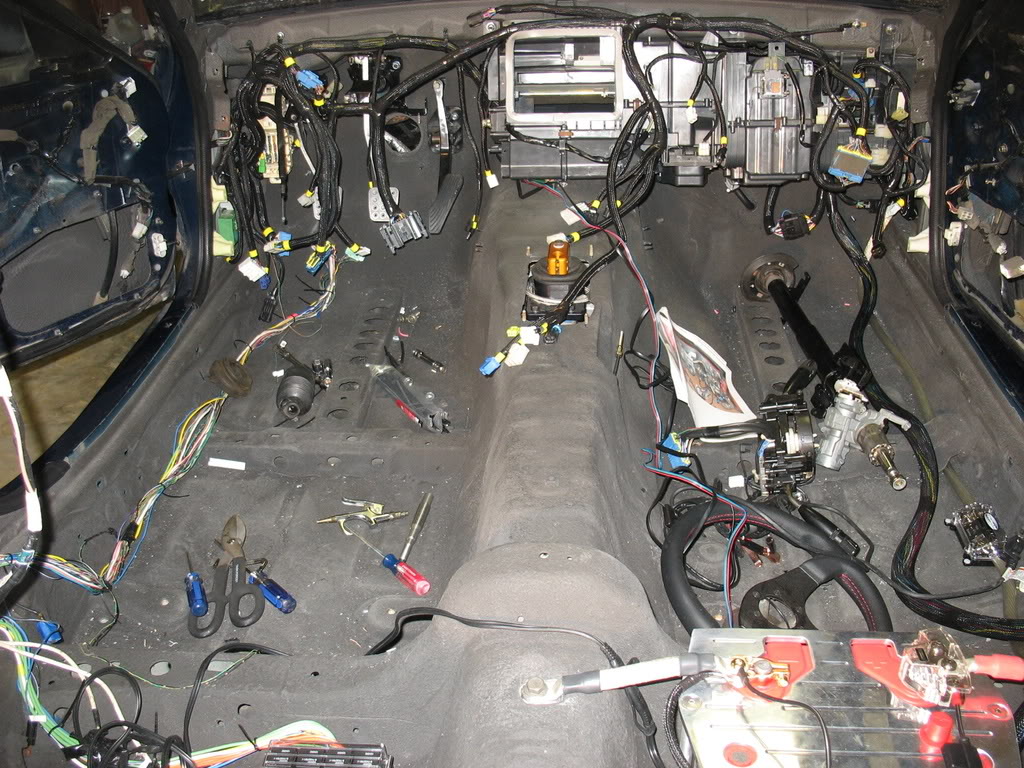
Started putting some of my harnesses back IN the car. Dash is actually in at the moment, but I'm a little behind on my
pictures (see below for an explanation!).

Grounding the ECU
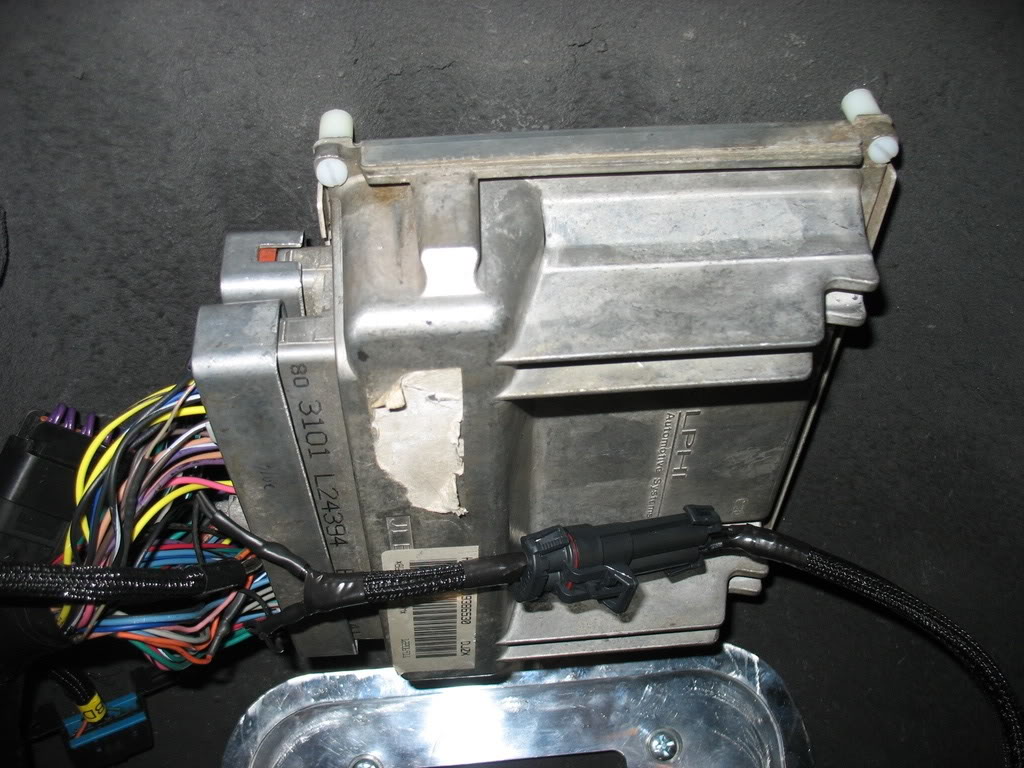
Ooooo! Nylon screws and spacers!
Finished wiring up my fuel pump:

Took rajeevx7's advice and replaced my expansion valve & o-rings. Good thing I did too because it looks like it had old R12
o-rings
And now... What I've really been up to!
LS1 RX7 Crank and Move
Yes sirs! My car has moved a total of ~10 ft under its own power!!! That makes it ~10ft total its moved under its own power
in > 2 years.
:chug:
Lane
Sad because I had to chop up Kevin's work of art...
Because of differences in our engine mounts I had to chop out the sections circled in red. Afterwards I connected the V-band
+ Pipe stubs to the x-over with flex pipe:
*Note* The flex pipe is only a temporary solution. I think it turned out really well, but it is only so I can dial in my
idle in my quiet neighborhood and take it to an exhaust shop in peace
Now... On to the happy events!
Finished my Dash Harness:
The biggest changes include a plug for my dash pod gauges and a plug for my new custom gauge cluster.
Started putting some of my harnesses back IN the car. Dash is actually in at the moment, but I'm a little behind on my
pictures (see below for an explanation!).
Grounding the ECU
Ooooo! Nylon screws and spacers!
Finished wiring up my fuel pump:
Took rajeevx7's advice and replaced my expansion valve & o-rings. Good thing I did too because it looks like it had old R12
o-rings
And now... What I've really been up to!
LS1 RX7 Crank and Move
Yes sirs! My car has moved a total of ~10 ft under its own power!!! That makes it ~10ft total its moved under its own power
in > 2 years.
:chug:
Lane
Thread Starter
Joined: Apr 2009
Posts: 381
Likes: 27
From: Starkville, MS
Thought I'd pop back in and give an update.
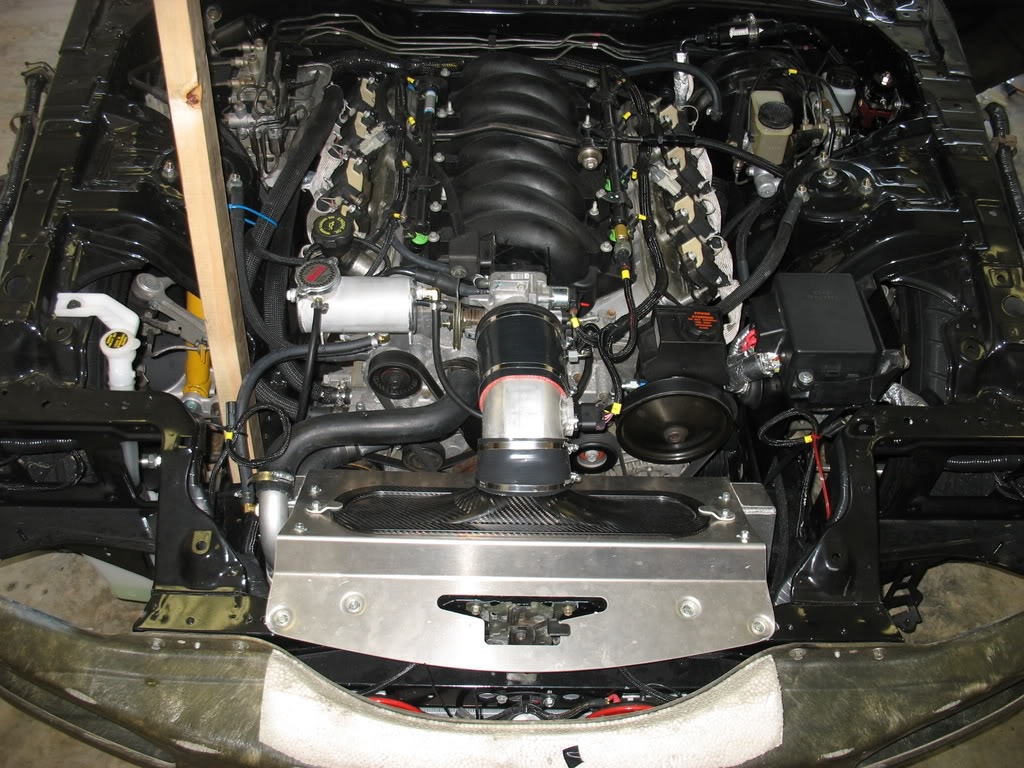
Engine bay. 95% complete. AC Lines will go in after paint when Pez finishes them. Heater lines are looped after my heater
core blew chunks, HID ballasts aren't mounted, and I've got to throw on my coil covers.
I've done a good bit of work diagnosing some weak spots in my tune. The biggest thing I've accomplished is that I used
HPTuner's compare function with a stock tune to determine that my mail order tune was still set for stock fuel injectors
when in fact I'm running SVO 42# green tops. Using Greg Banish's injector data I was able to correct the problem which
kicked my idle into near-perfect shape
My IAC counts are a little high ~ 100-120 and I have a little bit of backfire, so that's concerning, but so far I have been
unable to get it to go down using TB idle set screw + TPS and IAC resets.
Last weekend I installed my new LS7 card style MAF along with a new Samberg TB to intake adapter along with Hz/Airflow MAF
calibration table from zkeller who has similar hardware. This leads me to my biggest issue at the moment. Low load and rpm
acceleration falls on its face shortly after crank. From what I've seen though, it improves once the car has warmed up which
leads me to think the problem is during open loop operation. To isolate the problem I disabled the MAP and made the
necessary changes to force the PCM to run closed loop and only reference the VE table. Unfortunately that didn't help and
actually made it a tad worse since lifting would cause the engine to choke and one time around the block I clunked out (no
vacuum = holy crap my brakes don't work!). Right now I'm guessing it's a mix between an untuned VE table and an untuned MAF
table. Hopefully I'll be able to get some tuning time in after the car comes back from the shop.
While on the topic of paint, that's what I've mainly spent the last 2 weeks doing.I've been doing everything I can to make
the job easy on the painters and hopefully lower the price.

Here it is ready for paint. I've stripped the moldings and lined the interior with plastic in hopes that they won't
overspray any of it.
My wiring is now 99% complete. I only need to wire in my traction control control module and my dash pod gauges. Both should
be easy since the receiving plugs and wiring are in place. I just have to wire the gauges and control module to a mating
connector.
Finished rear harness with integrated aftermarket Alarm, Traction Control, Fuel Pump, Trunk Pop.
Finished floor harness with integrated aftermarket Wideband, Traction Control, Cruise Control, and HP Tuners
Engine bay. 95% complete. AC Lines will go in after paint when Pez finishes them. Heater lines are looped after my heater
core blew chunks, HID ballasts aren't mounted, and I've got to throw on my coil covers.
I've done a good bit of work diagnosing some weak spots in my tune. The biggest thing I've accomplished is that I used
HPTuner's compare function with a stock tune to determine that my mail order tune was still set for stock fuel injectors
when in fact I'm running SVO 42# green tops. Using Greg Banish's injector data I was able to correct the problem which
kicked my idle into near-perfect shape
My IAC counts are a little high ~ 100-120 and I have a little bit of backfire, so that's concerning, but so far I have been
unable to get it to go down using TB idle set screw + TPS and IAC resets.
Last weekend I installed my new LS7 card style MAF along with a new Samberg TB to intake adapter along with Hz/Airflow MAF
calibration table from zkeller who has similar hardware. This leads me to my biggest issue at the moment. Low load and rpm
acceleration falls on its face shortly after crank. From what I've seen though, it improves once the car has warmed up which
leads me to think the problem is during open loop operation. To isolate the problem I disabled the MAP and made the
necessary changes to force the PCM to run closed loop and only reference the VE table. Unfortunately that didn't help and
actually made it a tad worse since lifting would cause the engine to choke and one time around the block I clunked out (no
vacuum = holy crap my brakes don't work!). Right now I'm guessing it's a mix between an untuned VE table and an untuned MAF
table. Hopefully I'll be able to get some tuning time in after the car comes back from the shop.
While on the topic of paint, that's what I've mainly spent the last 2 weeks doing.I've been doing everything I can to make
the job easy on the painters and hopefully lower the price.
Here it is ready for paint. I've stripped the moldings and lined the interior with plastic in hopes that they won't
overspray any of it.
My wiring is now 99% complete. I only need to wire in my traction control control module and my dash pod gauges. Both should
be easy since the receiving plugs and wiring are in place. I just have to wire the gauges and control module to a mating
connector.
Finished rear harness with integrated aftermarket Alarm, Traction Control, Fuel Pump, Trunk Pop.
Finished floor harness with integrated aftermarket Wideband, Traction Control, Cruise Control, and HP Tuners
Thread Starter
Joined: Apr 2009
Posts: 381
Likes: 27
From: Starkville, MS
Passenger bay area. Looking crowded, but there's a lot jammed in there. Traction Control injector interface, Cruise Control
Wiring, HP Tuners interface, Battery, ECU, and a Innovate LC-1 wideband controller
A look at the Rear Harness connecting to the main traction control brain and a 4 relay box that controls my fuel pump, trunk
pop, and defroster circuits
Wiring up a clock contact so that my quick disconnect steering wheel's horn will still work.
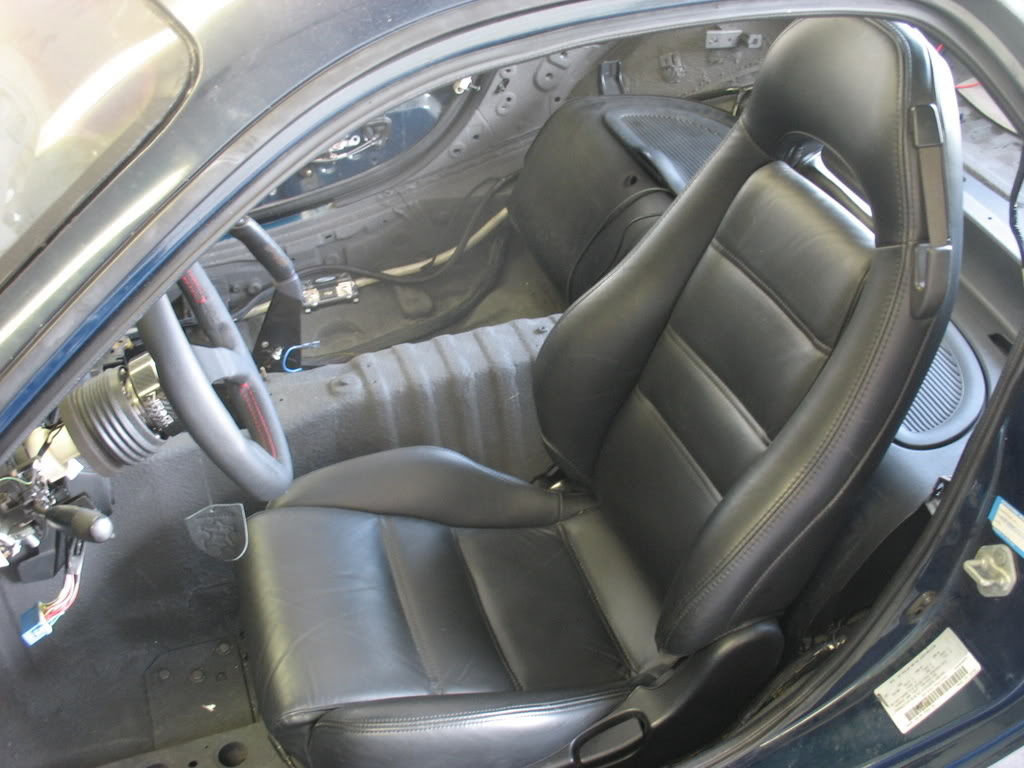
Some temporary interior in for testing

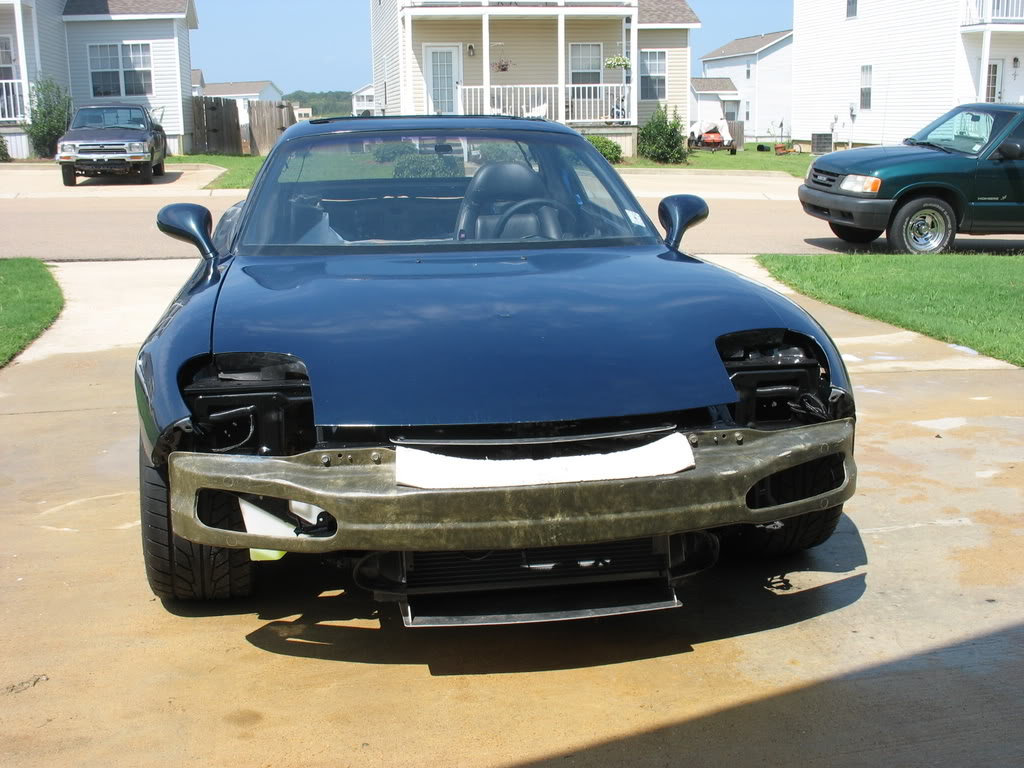
GOOD NEWS EVERYONE!
It's officially in the paint shop!
Thread Starter
Joined: Apr 2009
Posts: 381
Likes: 27
From: Starkville, MS
More good news that actually happened earlier this weekend!
I spent most of Sunday trying to sort out my boggy acceleration. I figured the best way to do this was to access as much of
my sensors as possible, so I started by finishing up the wiring for my 4 gauge dash pod (AFR, FP, Voltage, and IAT) and
mocked up my gauge cluster. I also wanted to try something a little different with my LS7 MAF, so I dissected a 2008 6.2L
LS3 Corvette rom (uses the same LS7 MAF) and got the MAF tables. After some mild conversions to fit the differing table
sizes between the LS3 and the LS1 I had another tune to try and uploaded it to my PCM. After I started the car and backed
it into the driveway I immediately noticed that my fuel pressure was 71 PSI!!! This was somewhat alarming because I had set
the fuel pressure to 59PSI at idle the first time I started my car. I had my gauge temporarily setup for the initial
calibration of my FPR and I figured it wouldn't change so I removed it so I wouldn't accidentally knock it around while I
was putting together my interior. Well, somewhere between bolting on my exhaust and fixing my fuel injector data (which
raised my idle rpm from ~500 to 800) my fuel pressure crept up 12 PSI. I don't really know what type of change the MAF table
made since the fuel pressure was obviously the ruling factor in my car's driveability.
Needless to say, my car runs much smoother now
Hooray for easy fixes!!!
Here's a shot I forgot to post that I took right before I fixed my fuel pressure problem. It shows all of my gauges
including a 4 gauge flyrx7 pod I've kept on the lowdown
Like many of you, I have a hard time sitting still, so while my car's in for paint I've been working on other projects.
First up is my interior. I've been working on wrapping my interior panels with 3M DINOC. So far I'm very impressed. With a
heat gun this stuff can basically conform to anything! When it cools down it's TOUGH too which is a big plus for me.
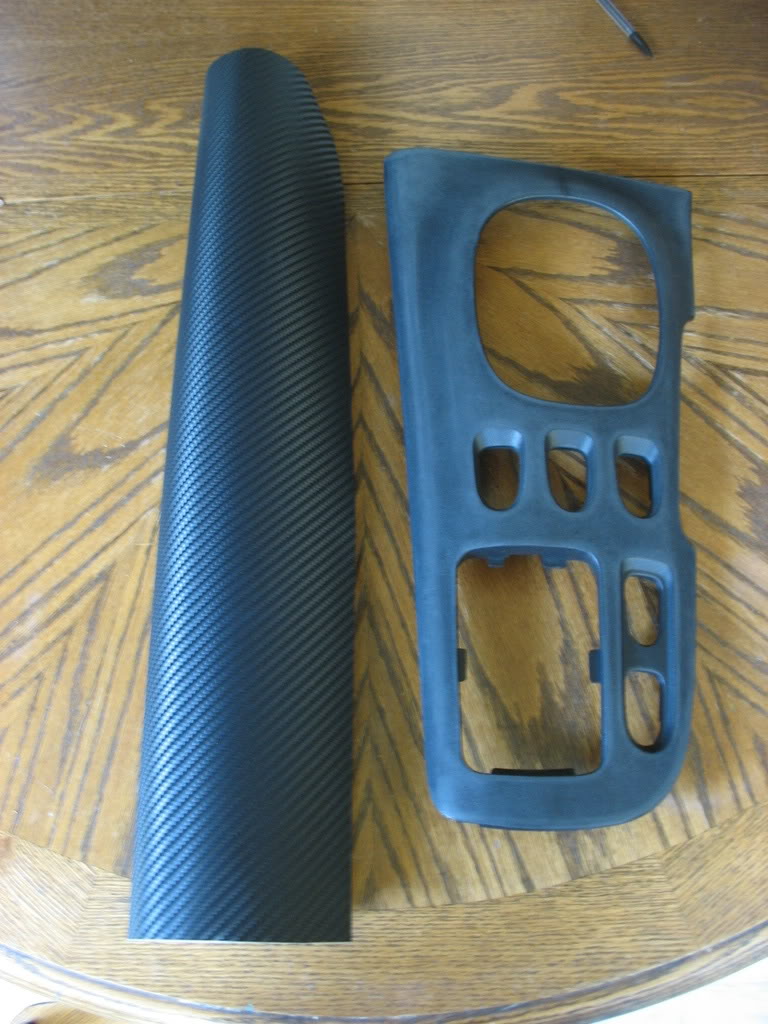
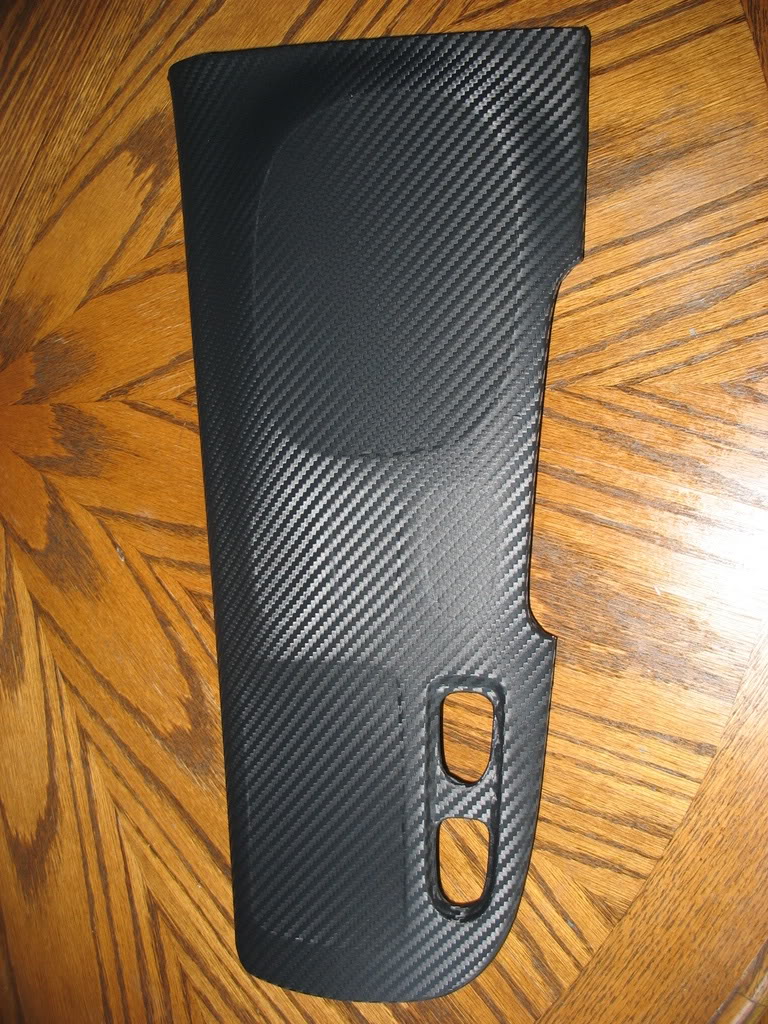

So far I've only got the shift surround and the climate control panel done. I believe the CC panel is going to be the
hardest panel I'll be doing. Not because of the shape but because of all the crap I had to remove including things that
weren't made to be removed like the status filters / screens.
This weekend I also epoxied and clear coated my garage floor.
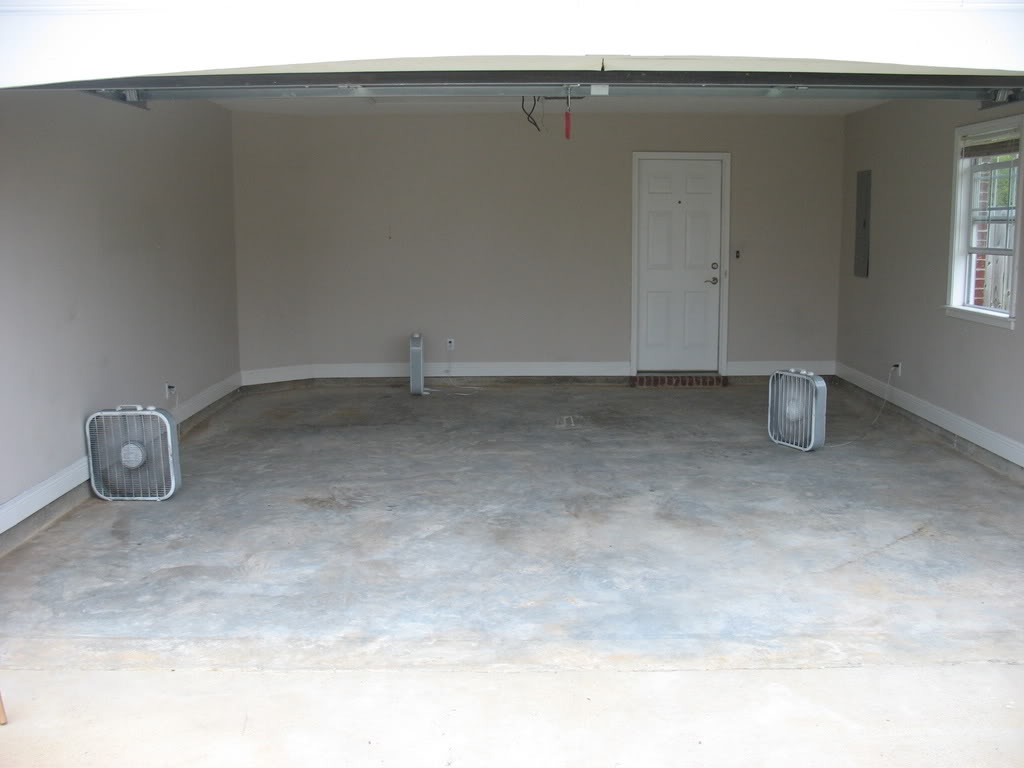
After degreasing and etching.
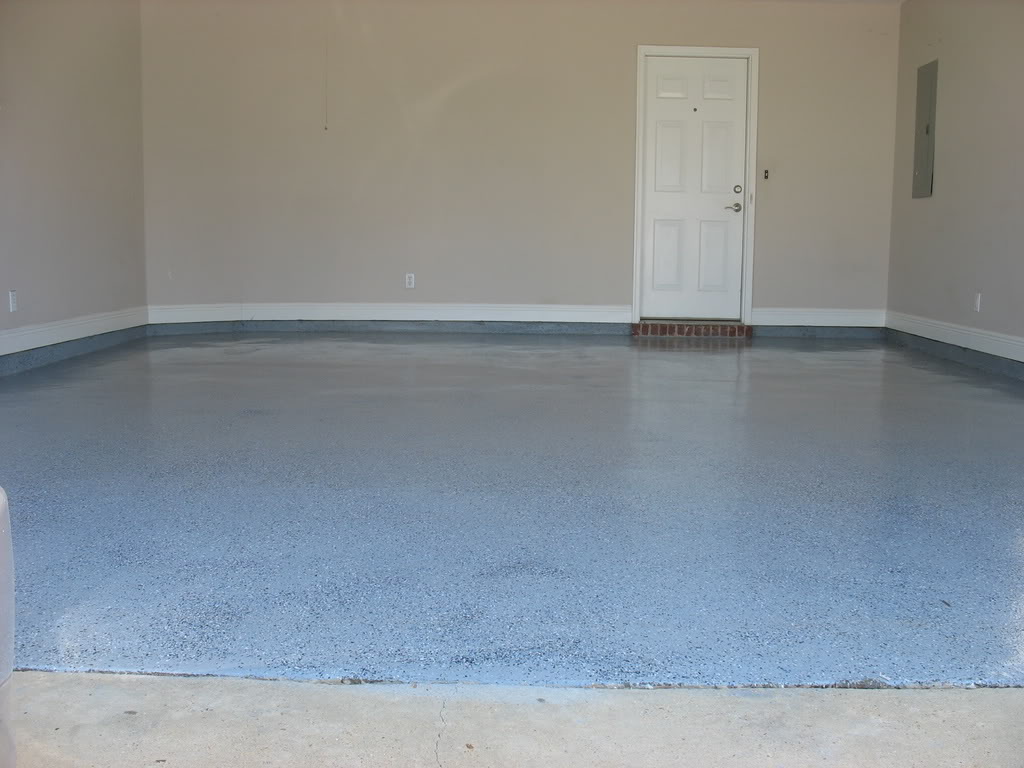
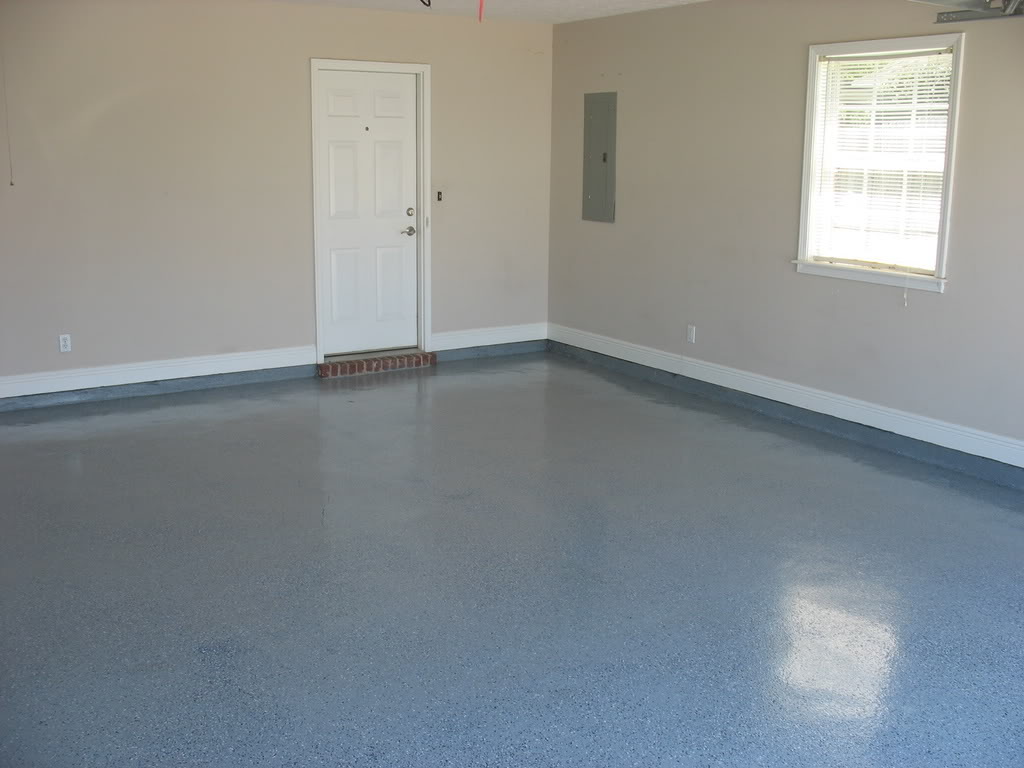
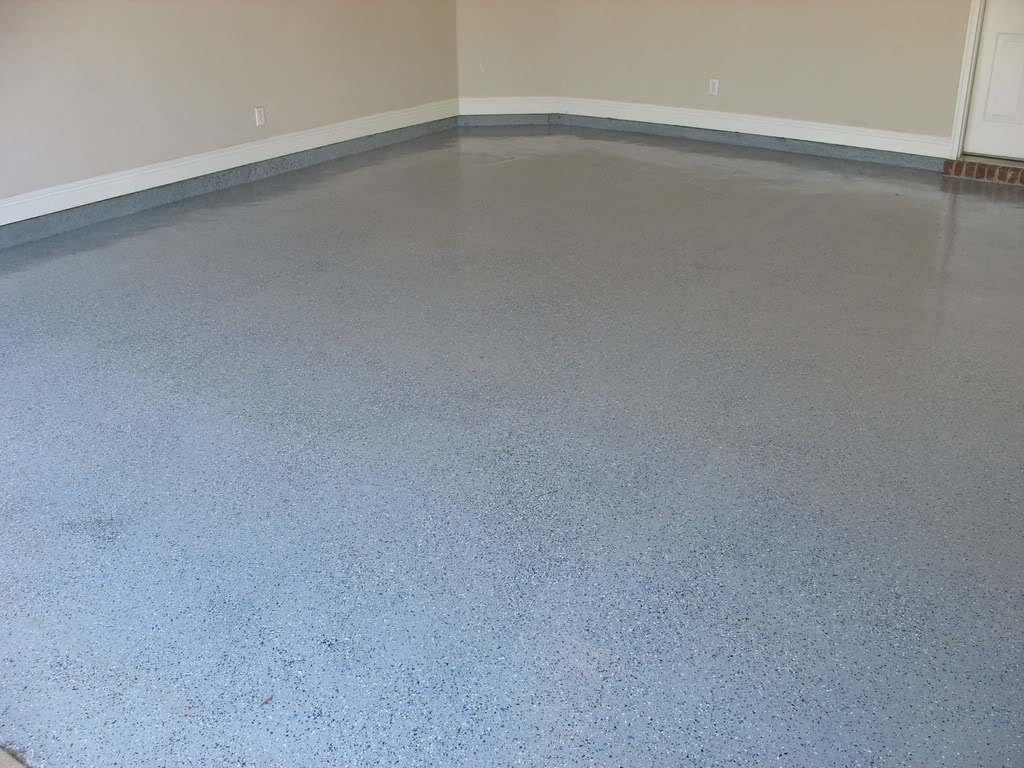
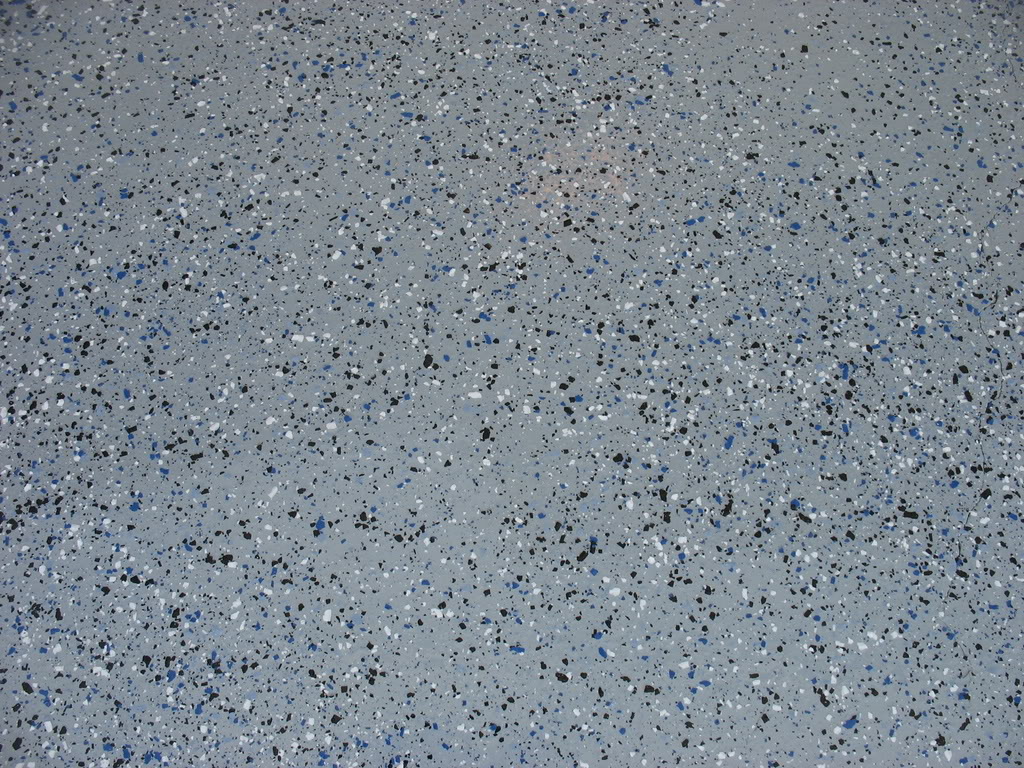
Painted and clear coated!
Lane
I spent most of Sunday trying to sort out my boggy acceleration. I figured the best way to do this was to access as much of
my sensors as possible, so I started by finishing up the wiring for my 4 gauge dash pod (AFR, FP, Voltage, and IAT) and
mocked up my gauge cluster. I also wanted to try something a little different with my LS7 MAF, so I dissected a 2008 6.2L
LS3 Corvette rom (uses the same LS7 MAF) and got the MAF tables. After some mild conversions to fit the differing table
sizes between the LS3 and the LS1 I had another tune to try and uploaded it to my PCM. After I started the car and backed
it into the driveway I immediately noticed that my fuel pressure was 71 PSI!!! This was somewhat alarming because I had set
the fuel pressure to 59PSI at idle the first time I started my car. I had my gauge temporarily setup for the initial
calibration of my FPR and I figured it wouldn't change so I removed it so I wouldn't accidentally knock it around while I
was putting together my interior. Well, somewhere between bolting on my exhaust and fixing my fuel injector data (which
raised my idle rpm from ~500 to 800) my fuel pressure crept up 12 PSI. I don't really know what type of change the MAF table
made since the fuel pressure was obviously the ruling factor in my car's driveability.
Needless to say, my car runs much smoother now
Hooray for easy fixes!!!
Here's a shot I forgot to post that I took right before I fixed my fuel pressure problem. It shows all of my gauges
including a 4 gauge flyrx7 pod I've kept on the lowdown
Like many of you, I have a hard time sitting still, so while my car's in for paint I've been working on other projects.
First up is my interior. I've been working on wrapping my interior panels with 3M DINOC. So far I'm very impressed. With a
heat gun this stuff can basically conform to anything! When it cools down it's TOUGH too which is a big plus for me.
So far I've only got the shift surround and the climate control panel done. I believe the CC panel is going to be the
hardest panel I'll be doing. Not because of the shape but because of all the crap I had to remove including things that
weren't made to be removed like the status filters / screens.
This weekend I also epoxied and clear coated my garage floor.
After degreasing and etching.
Painted and clear coated!
Lane
Thread Starter
Joined: Apr 2009
Posts: 381
Likes: 27
From: Starkville, MS
Still working on making my interior panels look pretty
Shaved the cruise control and odometer reset stalk hole with kitty hair and a little bit of body filler.
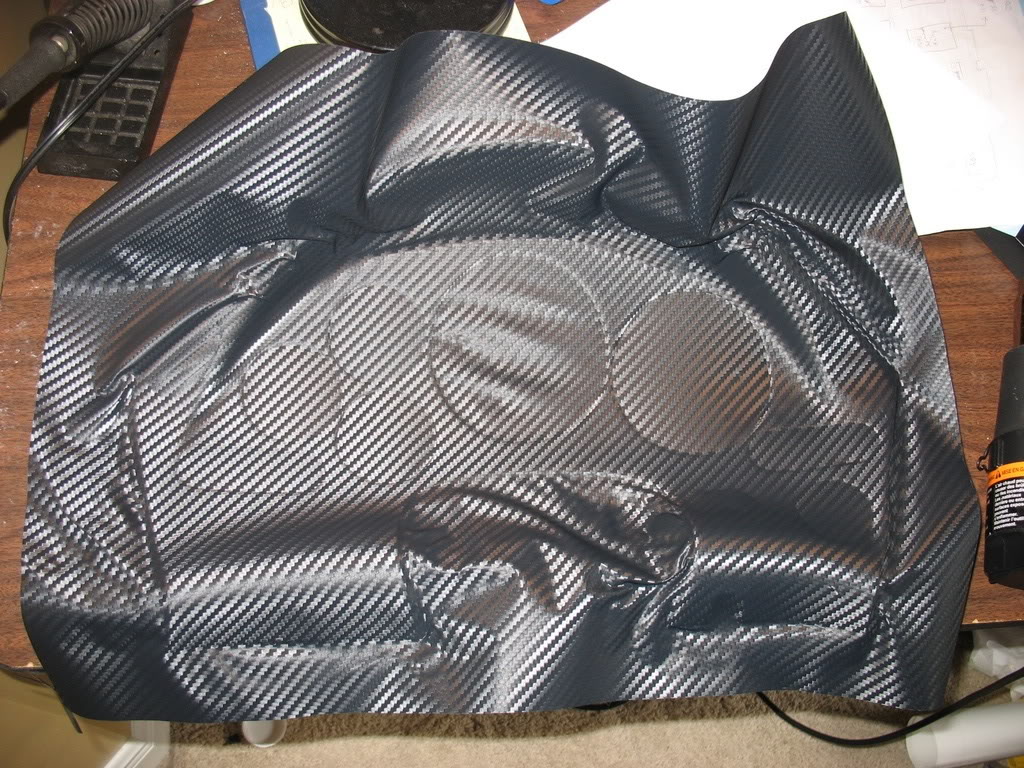
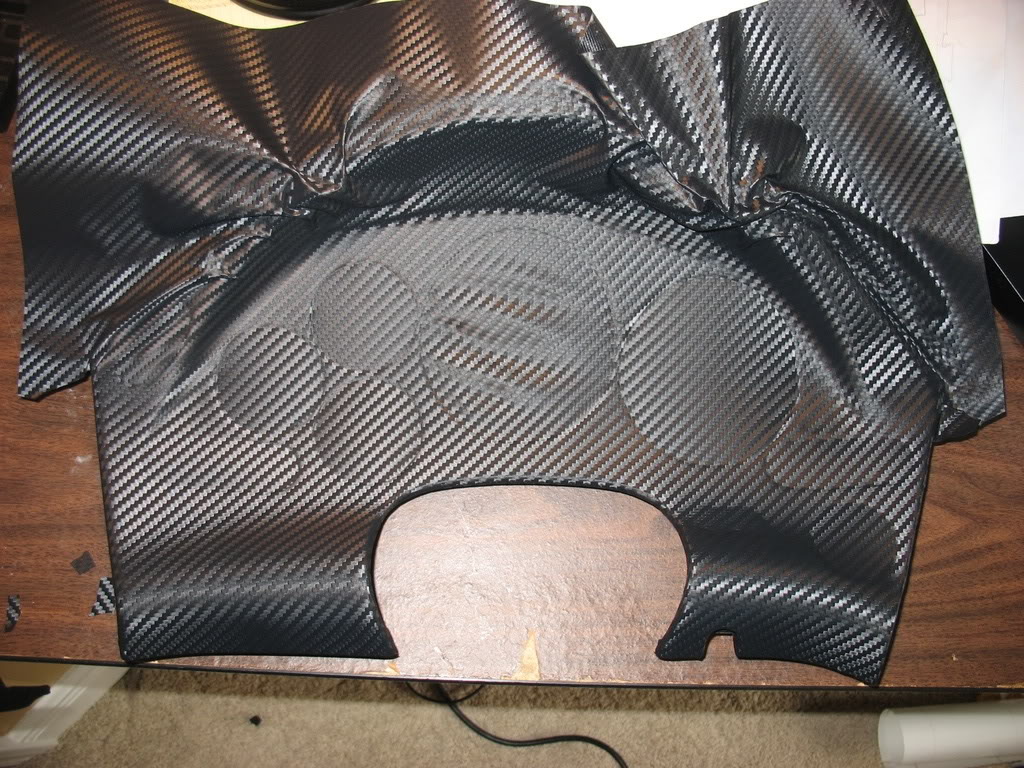

I'm not going to lie. The gauge cluster was a major PITA to wrap. The top was where I spent most of my time and in the end I
had to resort to making some cuts to make it sit down straight. All-in-all it was a 4 hour wrap. I would have definitely
paid someone to do it for me if they could have done a better job than me As it is, I'm going to keep it like it is and
if the cuts / misaligned pattern at the top of the piece where the hood attaches bothers me too much I'll try and re-wrap it
down the road.
Here's some small updates from the paint shop!
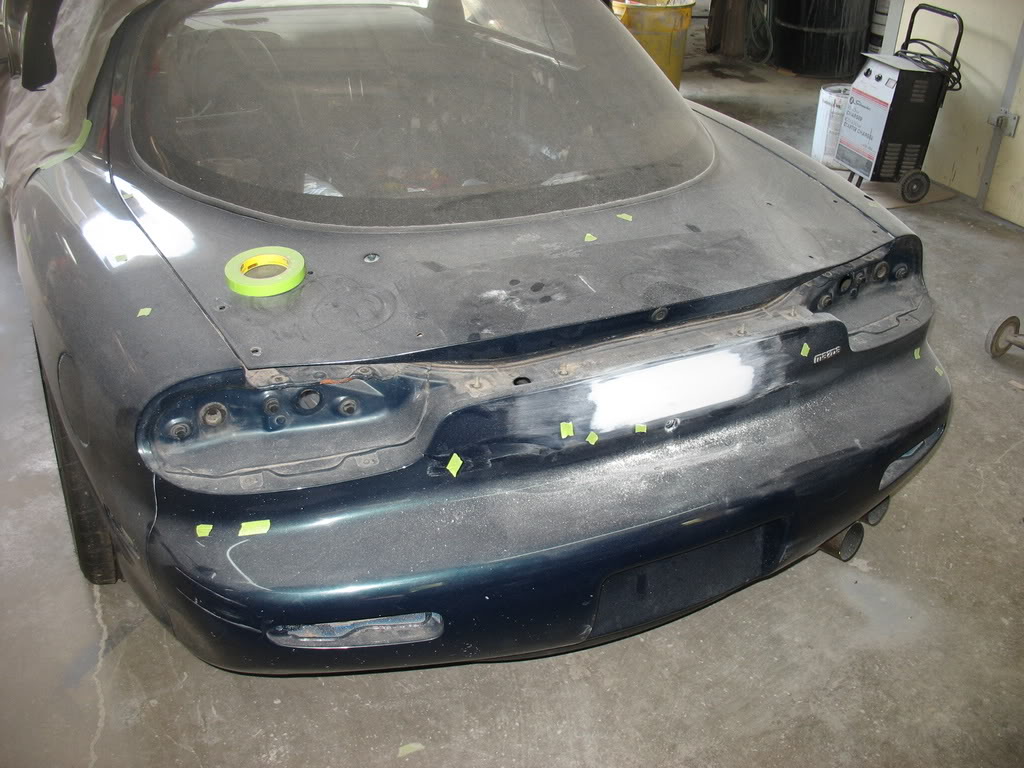
Rear emblem holes filled
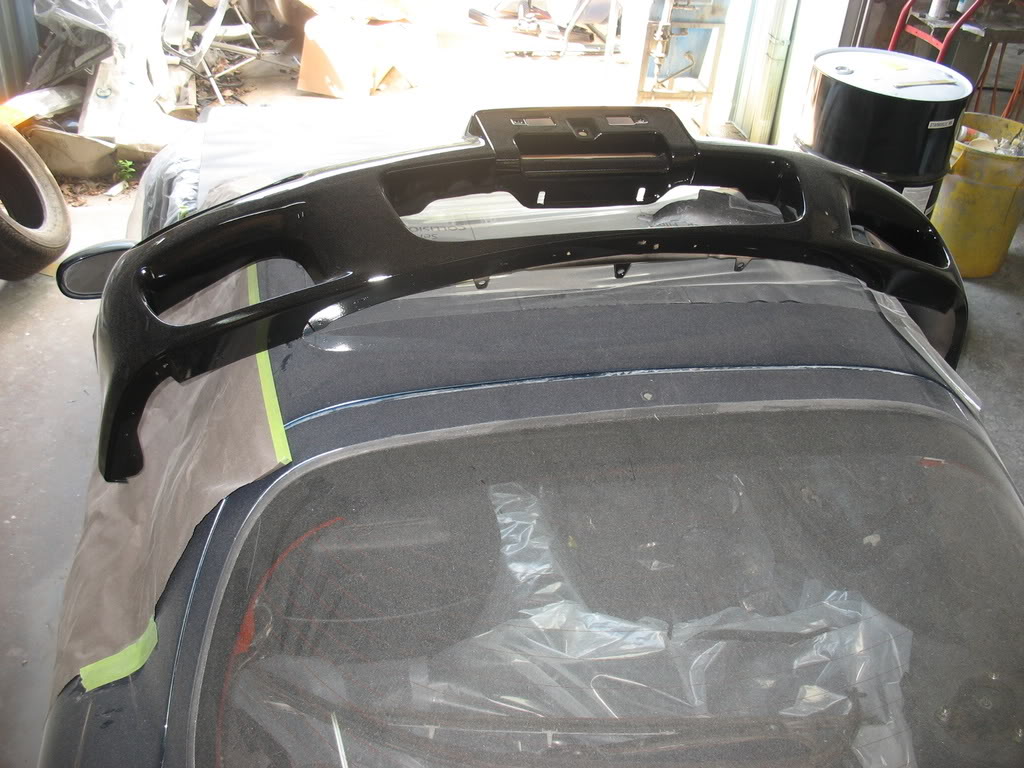
Front bumper is painted, but the filled emblem holes are showing so he's going to shoot it again
Another shot of the bumper. Looks good apart from the filled hole problem
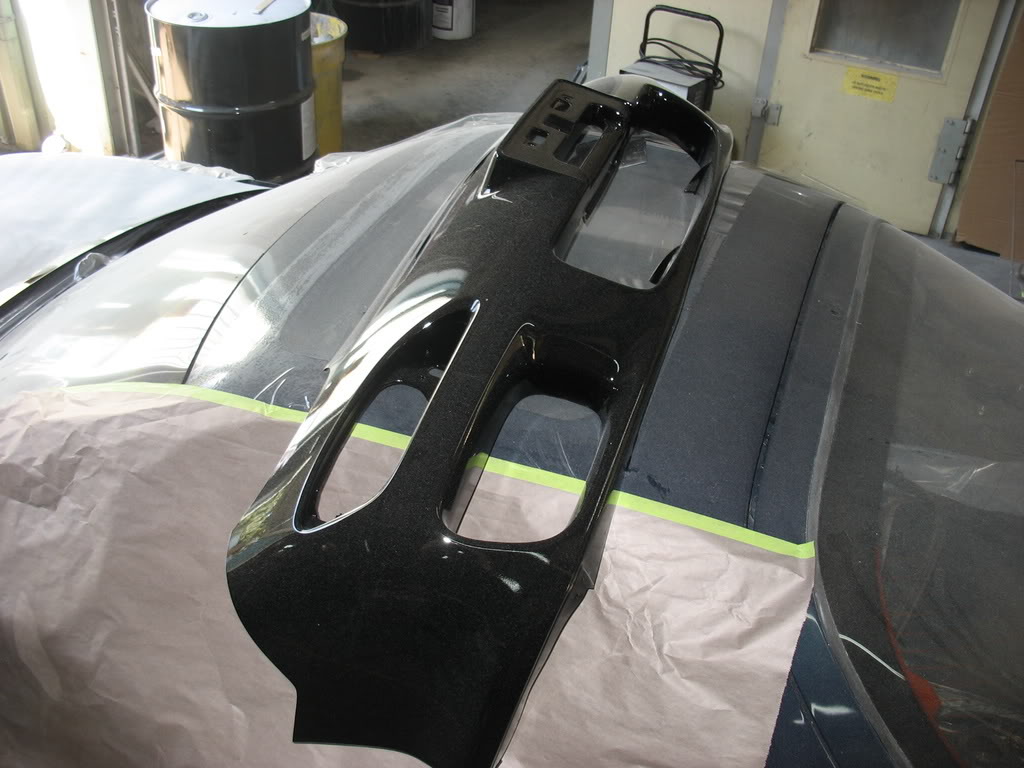
Front hood has been painted, but the painter said the clean coat didn't turn out perfect, so he's blocked it for another
shot
Shaved the cruise control and odometer reset stalk hole with kitty hair and a little bit of body filler.
I'm not going to lie. The gauge cluster was a major PITA to wrap. The top was where I spent most of my time and in the end I
had to resort to making some cuts to make it sit down straight. All-in-all it was a 4 hour wrap. I would have definitely
paid someone to do it for me if they could have done a better job than me
As it is, I'm going to keep it like it is and if the cuts / misaligned pattern at the top of the piece where the hood attaches bothers me too much I'll try and re-wrap it
down the road.
Here's some small updates from the paint shop!
Rear emblem holes filled
Front bumper is painted, but the filled emblem holes are showing so he's going to shoot it again
Another shot of the bumper. Looks good apart from the filled hole problem
Front hood has been painted, but the painter said the clean coat didn't turn out perfect, so he's blocked it for another
shot
Thread Starter
Joined: Apr 2009
Posts: 381
Likes: 27
From: Starkville, MS
Looks good. They filled my water jet holes and fixed a bump where the PO shut the hood on a big aftermarket TB.
Fenders aren't in the pictures but they're primed and ready for paint. The owner said they'll be done with my front bumper
tomorrow and I can pick them up and take them home if I want to.
Next steps are to remove the doors for prep and paint while also painting the jambs. Next he's going to do all the hatch
work and paint. Finally he's going to finish by painting the rear bumper, rear 1/4s and roof. I'm happy with the progress
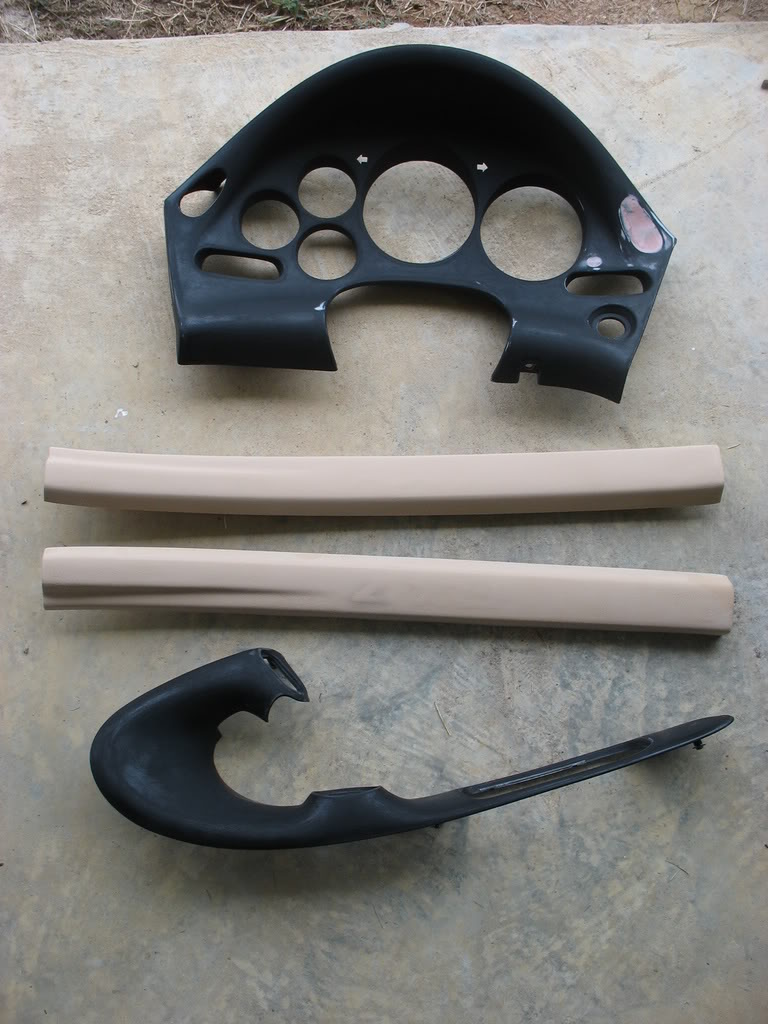
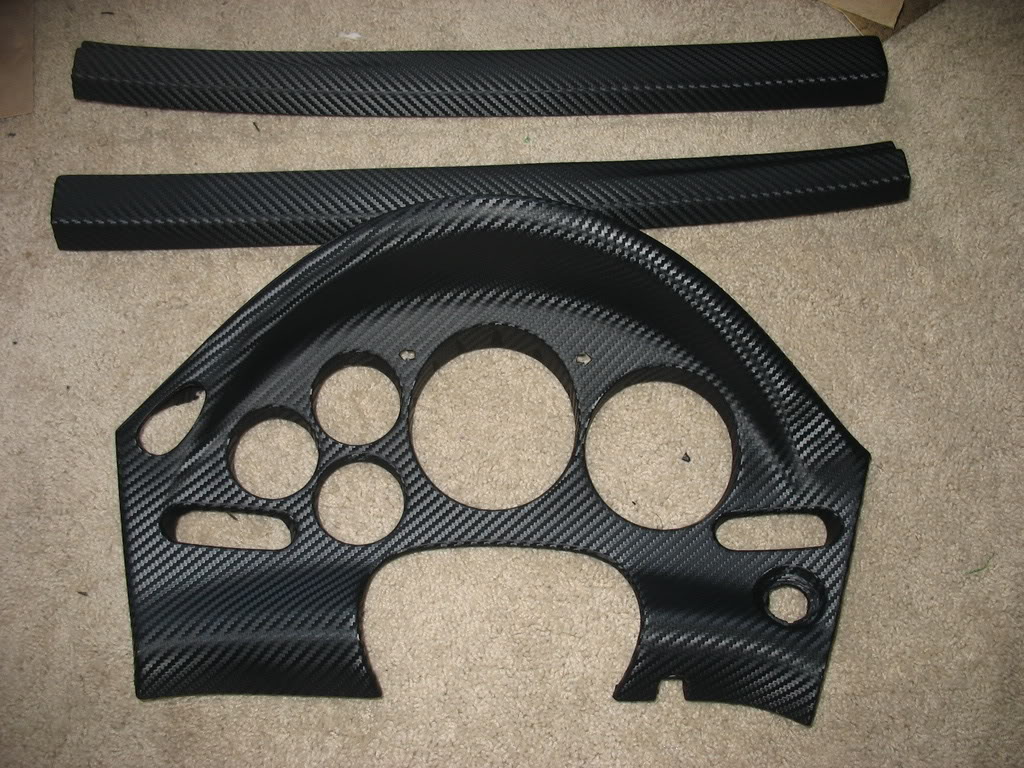
Just a little more Di-noc goodness for this update:
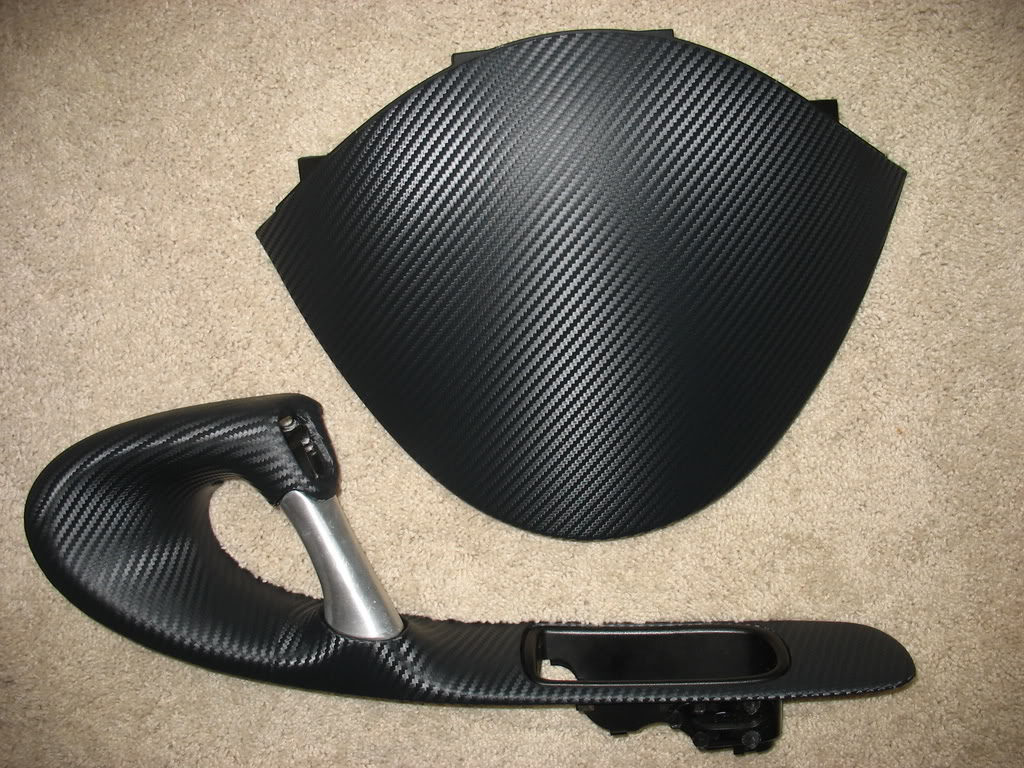
Cluster hood and passenger control panel + new aluminum SBG handle
I'm not sure if I want to leave it bare aluminum, powdercoat it black, wrap it in di-noc, or put the OEM cover on it...
This is pretty much what the final product is going to look like installed
Lane
Thread Starter
Joined: Apr 2009
Posts: 381
Likes: 27
From: Starkville, MS
MazdaSpeedDan & Karack. Haha! You guys are quick on the trigger!
Nah. I was completely honest with the owner when I started renting. I told him I wanted a storage unit to build a car in and I would not require much if any electricity. He told me he was cool with it as long as I didn't run a heater (it was January 2010 when I started) and didn't spill fuids anywhere. I didn't tell him about the painting though and it was a PITA to keep secret, but I managed somehow.
Nice! I'm hoping it will give me a kick in the pants as my FD's powerplant
Wow! Thanks for the excellent complement! I appreciate it.
Lane
Lane
Thread Starter
Joined: Apr 2009
Posts: 381
Likes: 27
From: Starkville, MS
I just noticed that the anotated harness thread I've made reference to in this thread points to another forum that may or may not work from this site, so I've officially moved it over as well:
New FD Annotated Harnesses (Front, Instrument, Dash, Rear, & Floor) + *Index*
Lane
New FD Annotated Harnesses (Front, Instrument, Dash, Rear, & Floor) + *Index*
Lane

Thread Starter
Joined: Apr 2009
Posts: 381
Likes: 27
From: Starkville, MS
Thanks Brent and Fortune!
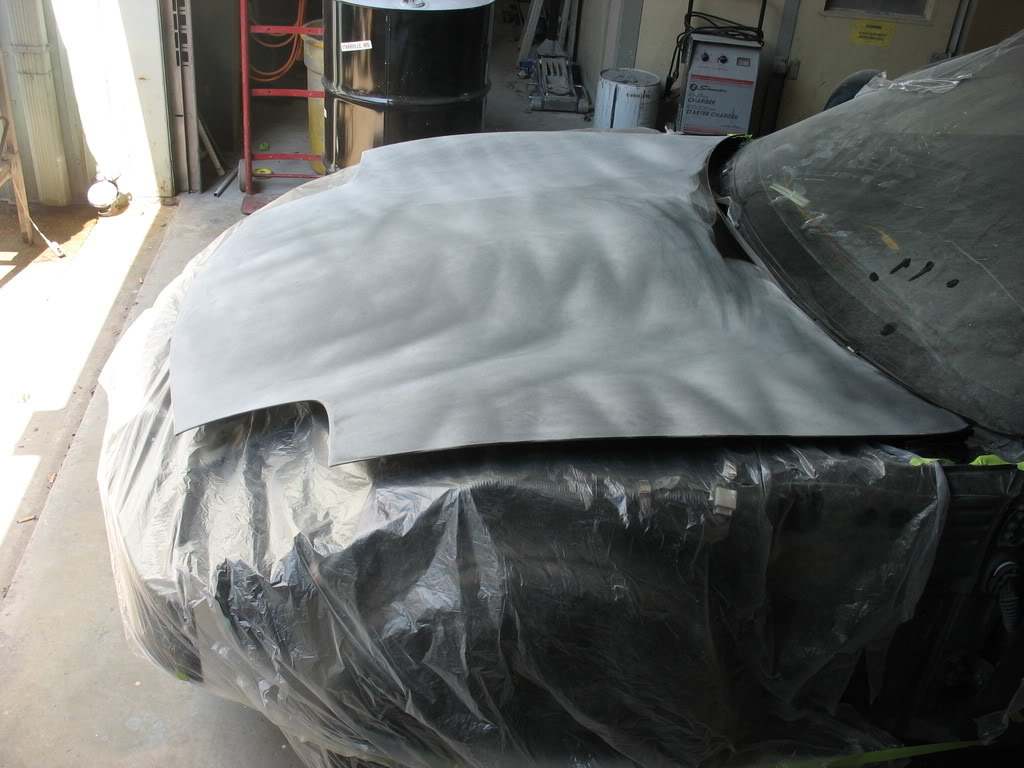
I managed to work on my headliner a little this weekend:
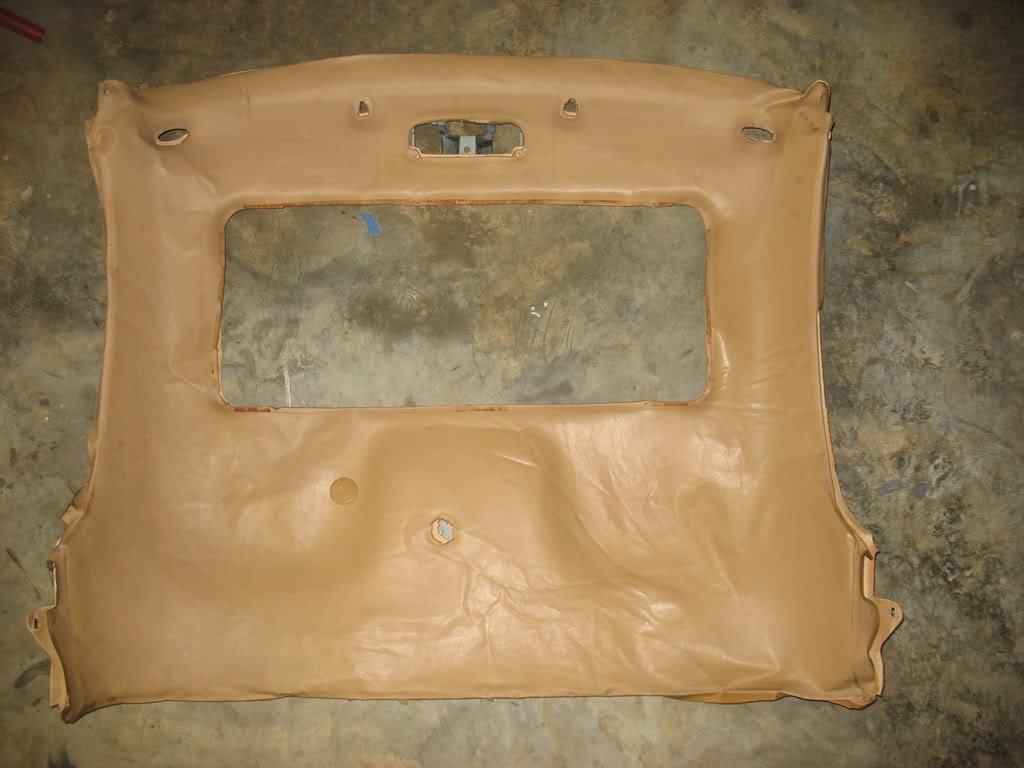
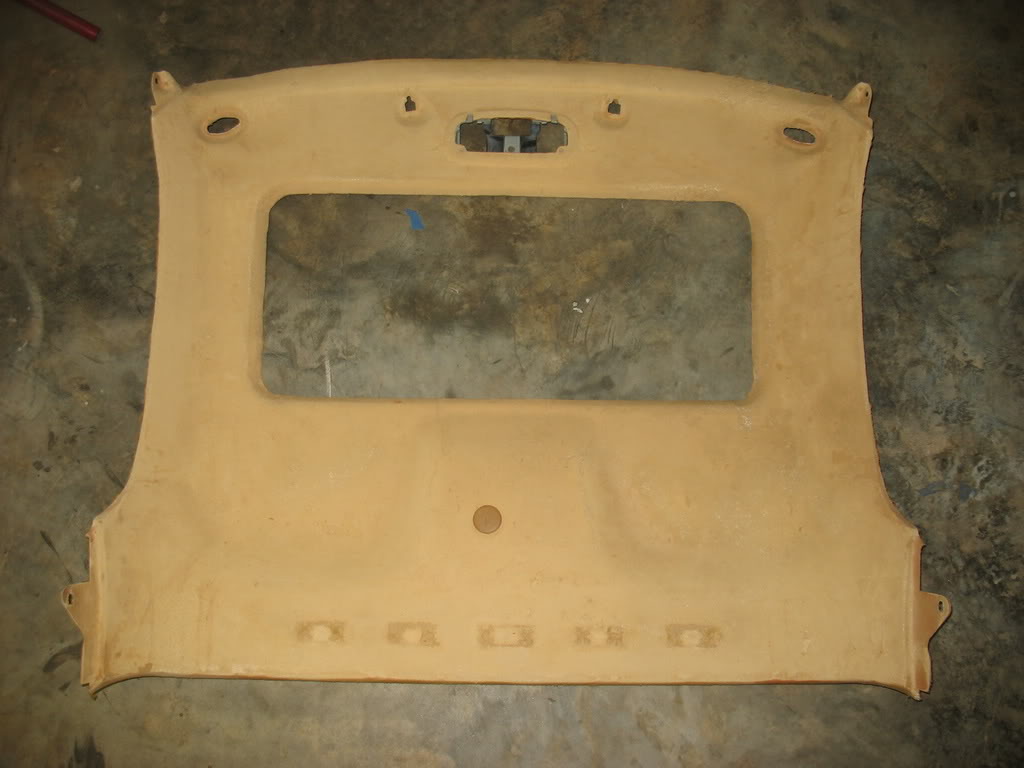
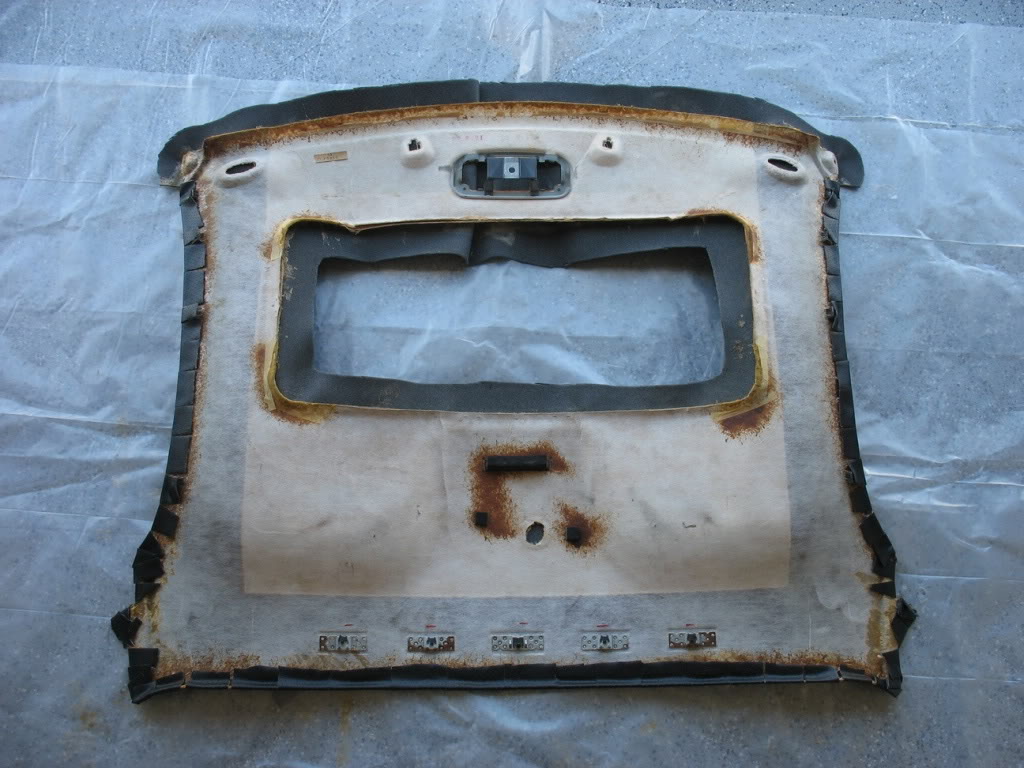
The headliner board seen here is just very thin fiberglass and it's been stripped of the stock tan vinyl
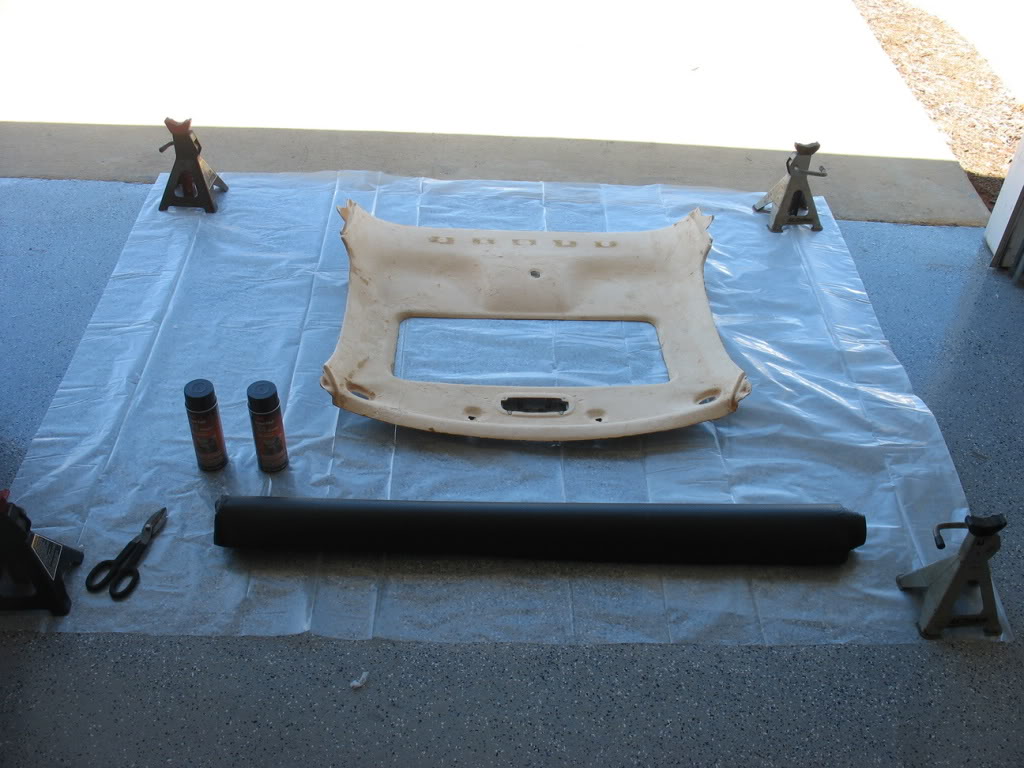
Work area.
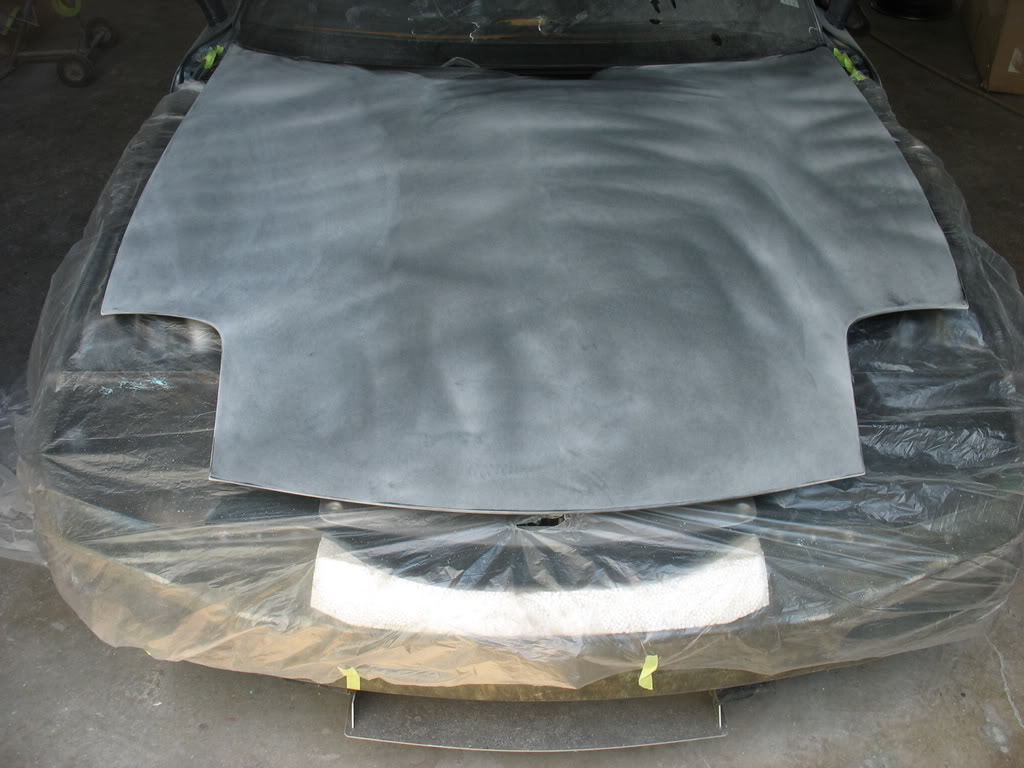
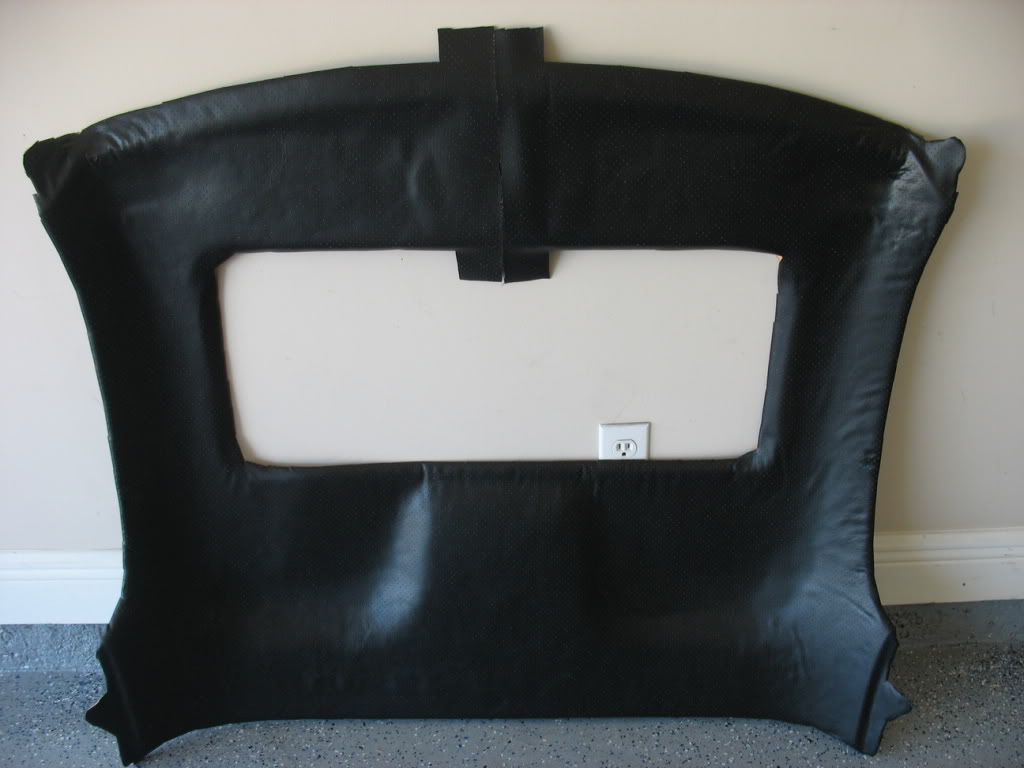
Here I am about 70% done. The process basically involved spraying down adhesive foam and smoothing out the foam backed vinyl to the contours of the headliner
On the backside of the headliner the vinyl is cut into flaps, pulled around the perimeter and glued to the back.
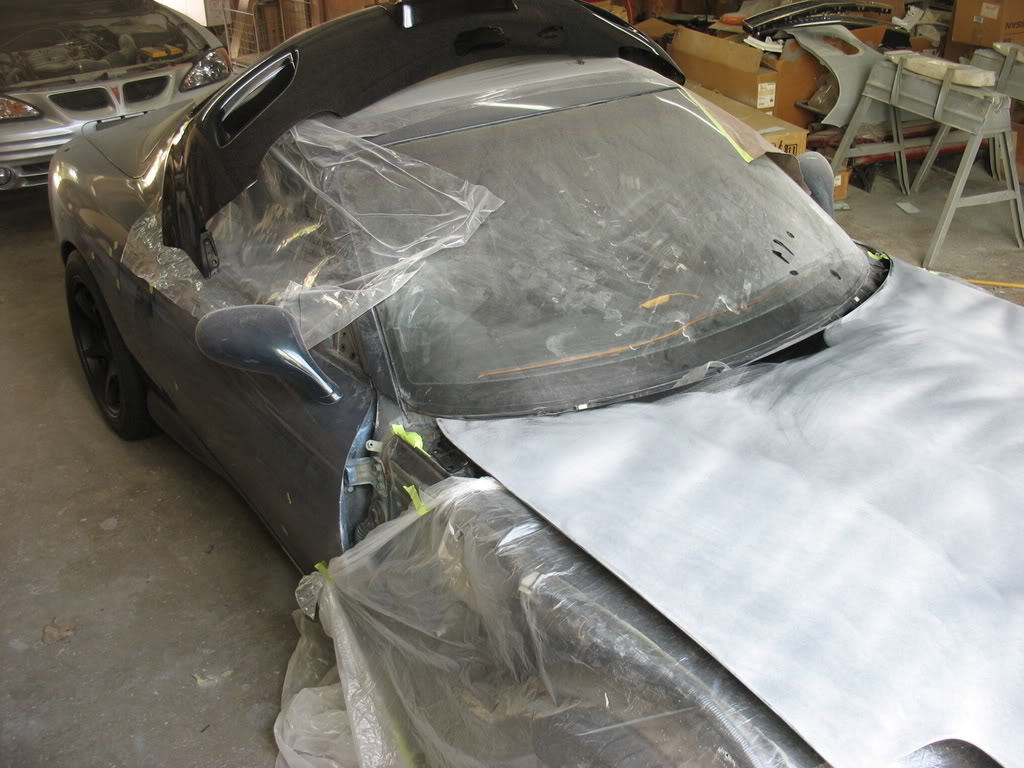
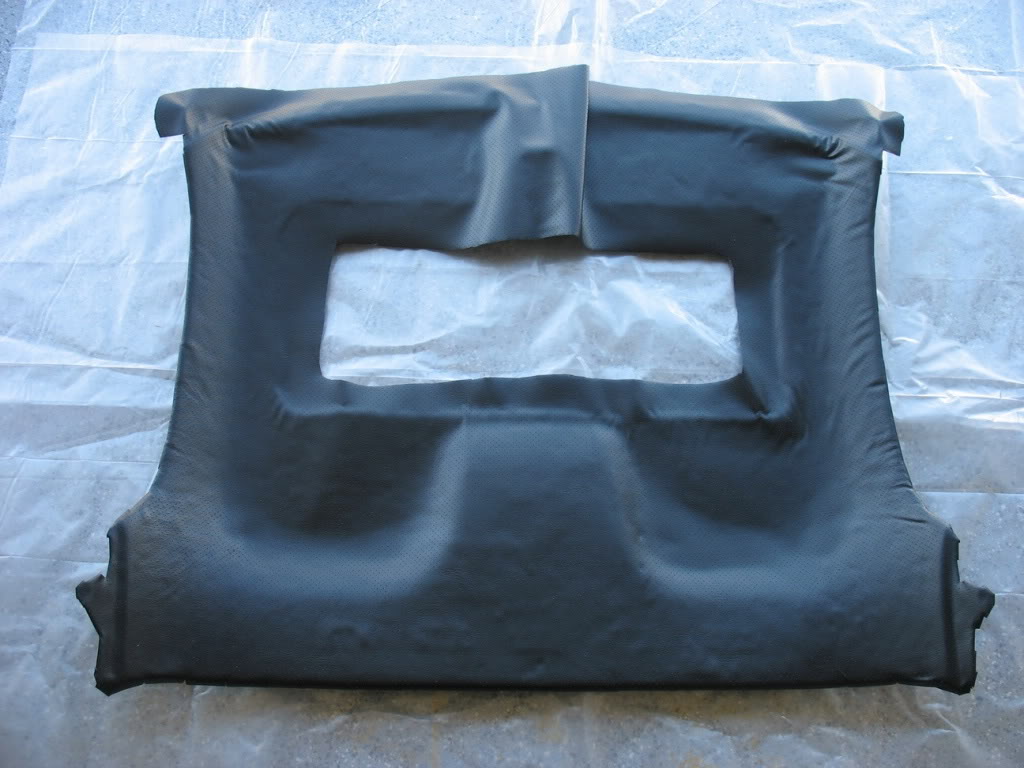
About 80% done. I'm waiting on some welt to finish the last seam (top middle) and I have yet to make the accessory cutouts. Oh yeah, it's perforated
Lane
I managed to work on my headliner a little this weekend:
The headliner board seen here is just very thin fiberglass and it's been stripped of the stock tan vinyl
Work area.
Here I am about 70% done. The process basically involved spraying down adhesive foam and smoothing out the foam backed vinyl to the contours of the headliner
On the backside of the headliner the vinyl is cut into flaps, pulled around the perimeter and glued to the back.
About 80% done. I'm waiting on some welt to finish the last seam (top middle) and I have yet to make the accessory cutouts. Oh yeah, it's perforated
Lane
Thread Starter
Joined: Apr 2009
Posts: 381
Likes: 27
From: Starkville, MS
Still, I may consider throwing in a Kirk cage down the road. I like the idea of having extra roof support and adding chassis rigidity. I'll just have to play it by ear.
Thanks for you nice words
Lane

Everything looks great...excpet for that headliner lol. Why did you piece it in the middle when it could have easily been done in one peice? U needed to back the vinyl with atleast some 1/8 inch foam to hide imperfections in the headliner board(like the back where those raised sections are).
-Austin
-Austin
Thread Starter
Joined: Apr 2009
Posts: 381
Likes: 27
From: Starkville, MS
Everything looks great...excpet for that headliner lol. Why did you piece it in the middle when it could have easily been done in one peice? U needed to back the vinyl with atleast some 1/8 inch foam to hide imperfections in the headliner board(like the back where those raised sections are).
-Austin
-Austin
The seam wasn't intentional and the vinyl I used was 1/8" foam backed. This is also my first attempt and upholstering anything.
You can see in my 70% done photo that I have a huge fold near the front end of the liner. The fold just kind of made it's way around the liner as I was contouring the vinyl trying to keep wrinkles from forming. It's something I could normally have dealt with on regular vinyl with the proper application of heat (like with my wrapped interior pieces covered previously), but this headliner material has foam backing that makes heating, stretching, and shrinking extremely difficult (for me). Personally, I couldn't get this material to shrink at all even with heat, which made wrinkle elimination very challenging (for me). This is what I was working with:
http://www.yourautotrim.com/vinauthead.html
And this is what I was using for adhesive:
http://www.amazon.com/Super-74-Foam-...7675368&sr=8-2
I don't know what other people use, but the 3M 74 stuff has like a 30 second window before it's seriously stuck. I was considering taking another crack at it, but the adhesive is so strong, it was pulling the headliner board apart, so I'll just have to make due with what I've got
Lane
PS - The last picture has a lot of wrinkles that aren't there when the headliner is laying down / relaxed. There are a few real ones, but it's such a weak support that it buckles under its own weight and the wrinkles (especially at the right side of the picture) pop up :\
Last edited by HalfSpec; Oct 3, 2011 at 08:23 PM.

Thread Starter
Joined: Apr 2009
Posts: 381
Likes: 27
From: Starkville, MS
Thanks Kevin and papsmagu. I really appreciate it when people who don't agree with the swap can look past it and appreciate the rest of my build. 
Hey Aaron.
I didn't use any adhesive at all. I did prep all the panels by using 100, 150, and 220 sandpaper, then I thoroughly degreased the panel with simple green. As long as there's no dirt/grease/grime on the surface of the panel and your hands are clean the built in DINOC adhesive will retain its tack even if you have to peel it up and re-apply many times like I did going around the top of my gauge cluster
Thanks for the complements on my work. I stop by your build thread regularly to take notes. Keep up the good work
Lane

Thanks Kevin and papsmagu. I really appreciate it when people who don't agree with the swap can look past it and appreciate the rest of my build.
Hey Aaron.
I didn't use any adhesive at all. I did prep all the panels by using 100, 150, and 220 sandpaper, then I thoroughly degreased the panel with simple green. As long as there's no dirt/grease/grime on the surface of the panel and your hands are clean the built in DINOC adhesive will retain its tack even if you have to peel it up and re-apply many times like I did going around the top of my gauge cluster
Thanks for the complements on my work. I stop by your build thread regularly to take notes. Keep up the good work
Lane
Thanks Lane!,
I'll make sure to do the same thing.. and i'll post pics of my results haha. DINOC ordered