When you click on links to various merchants on this site and make a purchase, this can result in this site earning a commission. Affiliate programs and affiliations include, but are not limited to, the eBay Partner Network.
I'm definitely glad the V8 is sitting in the car. After sleeping on it I woke up this morning and realized how excited I was about it. After all, its these challenges to add to our pride when it runs.
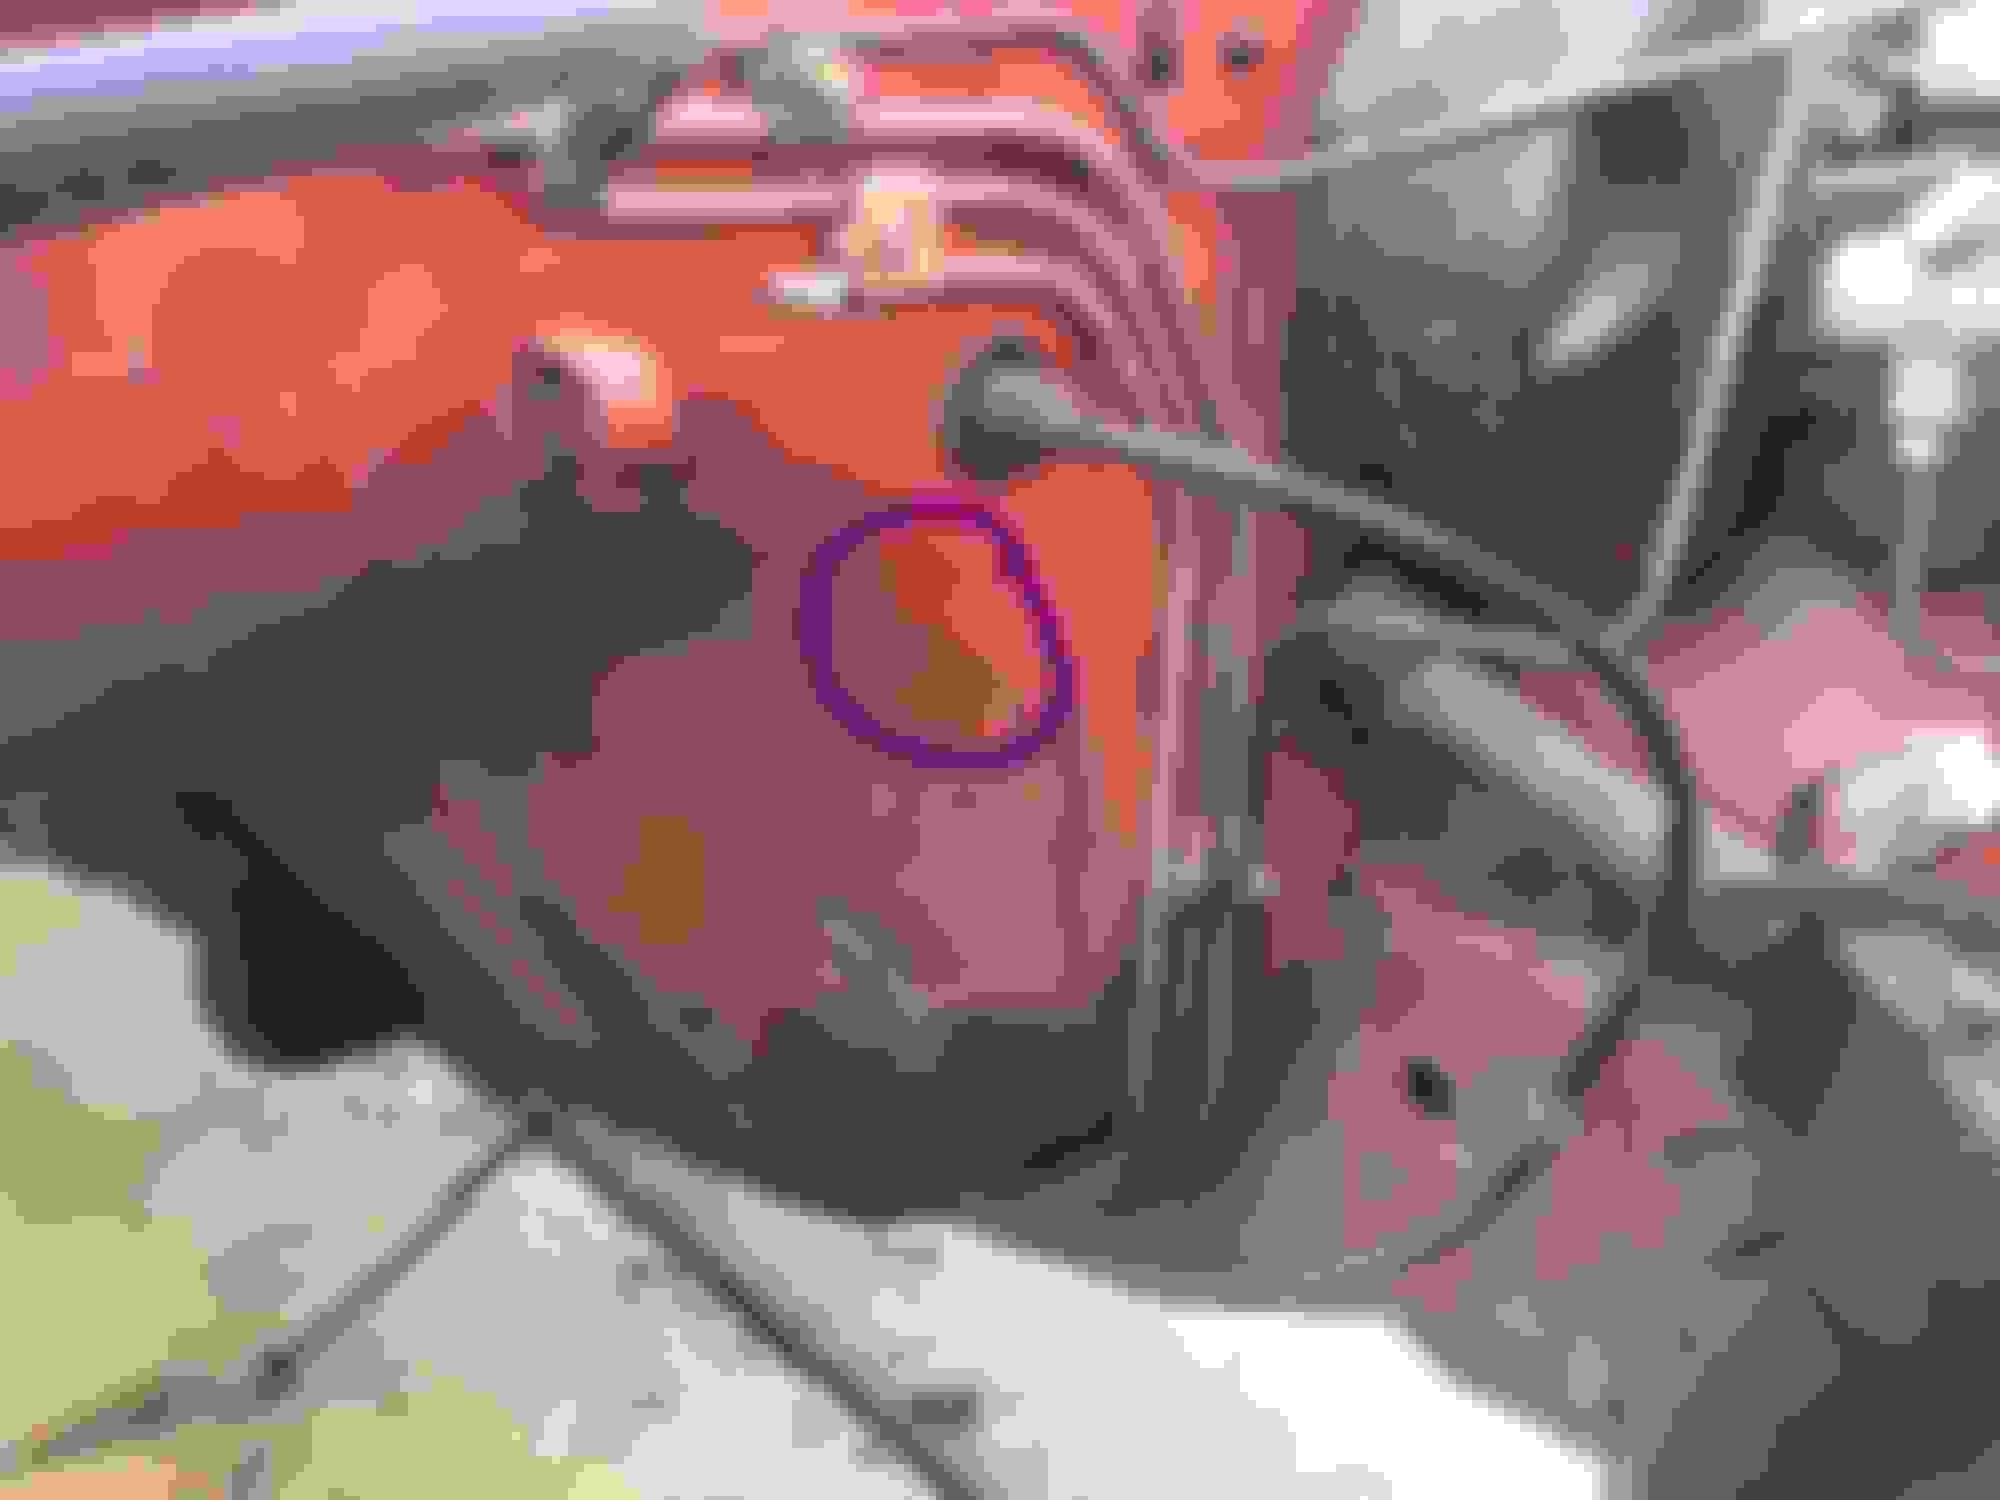
Here are couple of photos I took when I originally beat the firewall back on the left side. I circled the area where I'm currently making contact. Lowering the right side is definitely the better solution. It will shift the contact point towards the radius that leads into the transmission tunnel and lower it some as well. It also shifts the exhaust manifold/header away from the steering box.
My idea on lowering the right side is to oval out the engine mounts them selves (where the cross pin connects the mounts to the brackets). I figure if screw the mount up it will be less expensive and easier to replace. Hopefully Sunday I will have time to play around with it.
So I didn�t really get to do much with the seven over the last week. I spent a few minutes looking at the mounting problem and found that my oil pan is sitting on the sub frame already. So shimming the engine up on the driver side will likely be my only choice. I also wonder how I�m going to fit the shifter in the car with the fact the transmission is already up against the floor boards. I�ll have to revisit that after the engine sits semi level.
I did spent some time yesterday going through the wiring. I�m very tempted to gut the RX-7 wiring in the engine bay. There are such few wires needed and where I need to make connections it would almost be easier just to run my own wires. I am hesitant, however, I don�t want to over complicate things at this time. I just want to drive the damn car.
The transmission tilted and sitting against the floor board.
I tucked the wiring harness on my car. I basically just have the headlight, marker light, turn signals, and marker lights left from the stock engine bay harness
see that hump in the tunnel, i my case it hat to be cut off.
my headers hit it.
also i removed the 3 tubes and run new hose under the car
i'm glad to see your on the way to the road
Today I partially pulled the engine out enough to recess the firewall some more. I got a good 3/16-1/4" out of it. I then moved to ovaling the right engine mount to drop the engine on the right side. I was planning on shimming the left side quite a bit, but when I set the engine in it fit a lot better. It now clears the firewall, and sits more level now. And somehow now clears the subframe, but barely, maybe a 1/8".
I put the upper intake on to see if it clears the hood, but it doesn't. I can shut the hood so it must be just right there.
So I'm not sure if I will leave it the way it is, or shim up the left a little more.
Im also thinking I'm going to have to go with the stock manifolds. There just doesn't seem to be anyway to make them fit. The #6 pipe where the CARB number is hits the steering box big time. The stock manifold clear it by over an inch.
On a Mustang site I found someone who made the same mistake I did and purchased brand new headers from BBK only to have them not fit. Same problem, #6 tube hits the steering box.
He ultimately found that MAC headers #6 tube curves inwards and clears the box. So I'm searching Craigslist and EBay for set that's hopefully used. A new pair will cost over $200. Maybe I get lucky and someone will have a ceramic pair and will trade strait across.
How much do you think my BBK headers are worth now that I took them out of the box and played around with them?
see that hump in the tunnel, i my case it hat to be cut off.
my headers hit it.
also i removed the 3 tubes and run new hose under the car
i'm glad to see your on the way to the road
I did cut that hump off the tunnel (for the original cross member). I think in your case you used long tube headers, correct? There doesn't seem to be any emission legal long tubes on the market.
As for the fuel lines, I might have to do something about that because the stock manifolds hit them. That's an easy fix comparatively.
Here�s a quick weekend update.First, I sold the BBK headers on Saturday. I got $150 for them like I was hoping for. So my loss on them was about $50. The new MAC headers should be here tomorrow. I�ll see if they can fit sometime during the week. In terms of making actual progress on the car, not too much was made this week. I drank a little too much Friday night so Saturday was kind of a loss. And today I mostly discovered new expenses and obstacles.
I was spinning the SMOG pump for the 5.0 around by hand and found it locking up occasionally. So I started taking it apart and found out its completely shot. The vanes are disintegrated and the housing is cracked. I think I answered my question on what that black crap was in the air injection valve. So I�ll have to buy a new smog pump to pass emissions. It might cost me close to $200. I played around with the fuel tank a little. I discovered the sending unit resistor is no good. I might be able to repair it but it will end up costing me money too.
I�m still really hesitant on using the 12A tank because of the lack of internal baffles that the EFI engine more-or-less needs. I don�t think any of those aftermarket retrofit pump modules will work out. The only flat spot on the top of the tank to mount it to has a baffle plate sitting underneath it. So I have two options the way I see it. Option #1: Keep looking for a 13B tank for an �84-�85 and modify the spare tire well. This would be the preferred route.Option #2: Screw it and use the tank I have and hope it doesn�t stall when I make hard turns to the left. When I was doing some research today I found this on RX7 club site.
I like the idea of this surge tank and might have research this a little more. There�s an Edelbrock pump that has a similar set up. But I�m not sure how the surge tank purges the extra fuel when it gets full. Does the high pressure side just absorb it?
So the Mack headers fit. Or at least they almost due. Going to have to reshape the #6 tube a little to clear the steering box. And I am going to have to run custom fuel lines. That's okay with me though.
So the Mack headers fit. Or at least they almost due. Going to have to reshape the #6 tube a little to clear the steering box. And I am going to have to run custom fuel lines. That's okay with me though.
Among the goodies are fuel pumps, filters and fittings to take care of the under car portion of the fuel system. I went with a Walbro GSL394 inline pump. Or at least I hope it is, because it doesn’t say Walbro on it. It has a TI Automotive logo on it, is this a fake? Hopefully it isn’t, I bought from a website claiming to be the official US distributor.
Is this a fake?
The plan is to run a single pump and to use the stock hard-lines. I am currently cleaning up the fuel tank and painting it. I’ll gets some new hoses to plumb the tank to the car. The main fuel line will go into the clear plastic low pressure pre-filter. It will then move on to the fuel pump through a 5-16 barb fitting. It exist the pump and will goes straight into an AN-6 post filter. I bought a hardline adapter to adapt the 5/16” line into an AN-6 fitting. I know the seven’s line is metric, but I’m told there very close to a 5/16” and can modify the fitting enough to get it to work.
5/16 to AN-6 Hard-Liner Adaptor
I haven’t decided on what style high pressure flex hose I want to use. It will either be Earl’s steel braided or vapor lock hose. I’m leaning towards the steel braided because I think it looks cool and I’ve always wanted to play around with them and AN fitting. To secure the low pressure connections I bought these EFI style hose clamps on Amazon for $17. I don’t care for the look of the standard auto parts hose clamps and they don’t clamp hoses evenly like these will. It gives it that OEM style look.
In the goody bag are also adaptors for the Ford proprietary fitting to convert to an AN-6 fitting.
In the engine bay I plan to connect the engine to the car down at the lower right front of the engine. From there I’ll run through a flexible hose to a steel hardline that follows the right frame rail, over the top of the bulk head and then down beneath the master cylinder. I’m going to have to move and modify the stock fuel lines, however, because the headers hit the fuel lines. To move the fuel lines as far away from the exhaust as I can, I plan on stacking them up somehow and placing an exhaust heat shield over them. I probably won’t get too much done here over the next couple of months. I’m headed to Austin for the F1 race next week and then I have to help the wife finish the landscaping project we started in the spring.
Last edited by Yolo7; Oct 14, 2017 at 11:03 PM.
Reason: Correct a formatting issue
Looks like TI automotive bought walbro. So it should be legit. FWIW I just did my first drift event on my car with the stock fuel hard lines and my in tank setup and it did fine
A little update on how things are going. The last couple of weeks I have been tinkering around with the fuel system. I�m working on a bracket for the fuel pump. I am mounting it wear the OE pump was located but in a north-south configuration. I was going to mount the post filter there too, but I�m short on space, so I will move it to under the hood on the right frame rail. As part of the pump bracket I am trying to find an easy way to make protective shield like the OE pump had. We�ll find out of if this comes to fruition. I am also tinker around with the fuel lines where they come up into the engine bay. As you recall the fuel lines had to be moved because the headers contacted them. I think I have found a good way to overlay the return and EVAP line over the brake line and pressure line. It�s difficult to describe so I�ll wait to do so until I have some photos to reference.My current goal is get my hands on some parts. I�m taking the whole week of Thanksgiving off, so I want to have all the materials I need to accomplish the following.
Complete fuel system (ex. Wiring)
Modify and reinstall LH header.
Work on mounting engine accessories.
Today I stopped by the junk yard to look at a fairly fresh �83. I came up on a fuel sending unit that has a good resistor. But the rust and varnish build up is bad. So I think I�ll swap the resistor rather than try to clean and put this infectious part in my tank.I also came across something pretty cool that I hope will be compatible with the engine swap. This car had a strut brace that I haven�t seen before. I couldn�t resist so I went ahead an picked it up. If it clears the distributor I might be in luck.
I�ll keep you all posted.
Last edited by Yolo7; Nov 4, 2017 at 08:57 PM.
Reason: add photos
A little more progress made today. I swapped the resistor for the fuel sending unit over to my sender. The tab that mounts the resistor to the plate snapped off. So I soldered a wire between the two. The ground connection was also no good, so I added a wire there as well.
I plumbed up the fuel tank and was going to install it. But when I grabbed the straps they looked like they needed cleaning and some paint. So I did just that.
I've also about finalized my Summit order for the fuel system and clutch line. I'll probably place the order this week. It looks like another $300 plus expense. Ill spend some time this week searching for a alternator bracket.
The nasty looking sending unit from the junk yard. The wire I soldered to secure a good ground. The new resistor in place.
A couple of quick teaser photos. I�ll post In more detail over the weekend, but I�ve been spending time working on the fuel system. It�s been a grind and progress has been slow, but it�s coming out okay.
you mentioned searching for an alternator bracket?
what is wrong with the one on the setup right now,..did you find one?..
You can use a 3rd gen alt(Ford) with the 1st gen bracket,it just requires some trimming on the cast.