
How in tarnation do you install Superpro bushings in the stock toe link?

Thread Starter


Joined: Mar 2001
Posts: 30,818
Likes: 656
From: FL-->NJ/NYC again!
The superpro toe link bushings have these mushroomed end caps that makes them pretty much impossible to install.....the bushing ends are larger in diameter than the toe link bores.
The trailing arms gave me zero issues, but I wasted way too much time on the toe links today......does anyone have any experience with this? I don't really feel like admitting defeat, it's pretty rare that anything FD related gives me trouble like this
The trailing arms gave me zero issues, but I wasted way too much time on the toe links today......does anyone have any experience with this? I don't really feel like admitting defeat, it's pretty rare that anything FD related gives me trouble like this
LOL,
Rich I put them in with a visegrip and it took no kidding 30 minutes per bushing as the dammed things just as you thought you had them in they would literally FLY out. Which is a **** off when you have to clean them and regrease them if they touch the ground (or anything dirty).
basically take a vise some steel scraps. Using the plates to ensure a flat push push them in ever so gently it takes many many tries and don't be afraid to come back out even 10 times it is all about patience. There were the longest bushings for me to install also btw.
Thread Starter
Joined: Mar 2001
Posts: 30,818
Likes: 656
From: FL-->NJ/NYC again!
I'm thinking of getting some pvc pipe in the proper diameter that will help keep the mushroomed ends from canting to one side and popping out, if that makes sense.
Dradon, I'm not sure I really understand what you're describing.....
Here is what I was talking about. You can also "guide" the part itself as you are screwing in the vice ever so slowly sometimes it just needs (the part) that extra little move to get the mushroom in right for it not to pop out.
Here is the most ghetto picture of what I am talking about. Wish I had the skills of Damian D-H, I was actually planning on doing a writeup of the complete bushing install but the damn thing took so much work to get it like I wanted that I had no time to do the writeup.
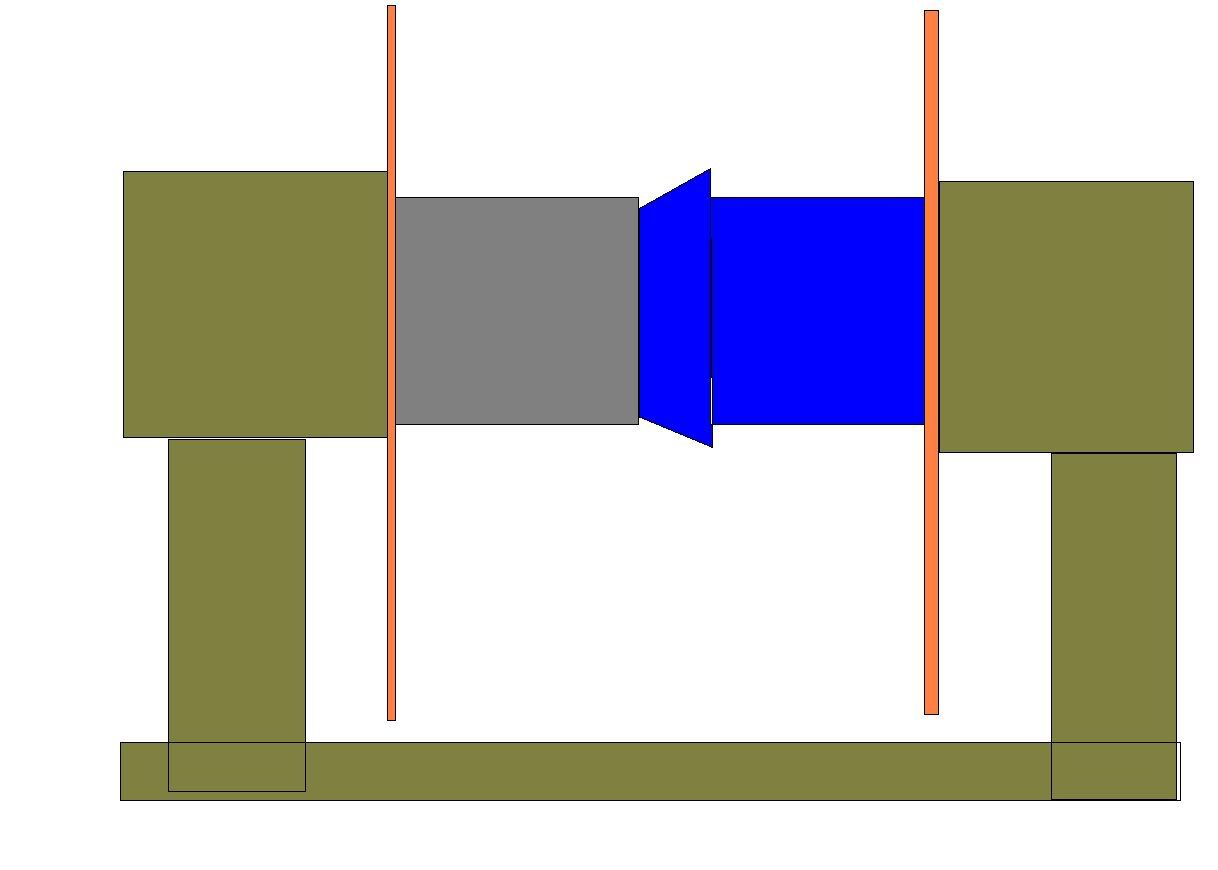
Here is the most ghetto picture of what I am talking about. Wish I had the skills of Damian D-H, I was actually planning on doing a writeup of the complete bushing install but the damn thing took so much work to get it like I wanted that I had no time to do the writeup.

I think the SuperPro diff bushings are like that too. I don't even want to think what my mechanic at Vista Brake in Vista, CA went through to install them. Those guys were great.
Thread Starter
Joined: Mar 2001
Posts: 30,818
Likes: 656
From: FL-->NJ/NYC again!
Dradon, thanks for posting those pics. I was doing exactly as you describe with no dice. I'll probably take them to a local machine shop and start recommending the heim joint links and arms.....this set is for my dad and is a (very) late father's day present 
Trending Topics
Thread Starter
Joined: Mar 2001
Posts: 30,818
Likes: 656
From: FL-->NJ/NYC again!
I just received a helpful reply back from Superpro:
Good Morning,
I am sorry to hear you are having difficulties. These bushes have been installed many times so it can be done!!
If the bush won’t press in, then the easiest alternative is to try ‘pulling’ the bush through. This is quite a low tech solution. A reasonably long bolt nut and 2 washers larger in diameter than the bush & the housing can be used to pull the bush into the housing using a couple of spanners.
Pass one washer over the bolt, pass the bush over the bolt then place the bolt through the housing securing it in place with the other washer & nut. Gradually tighten the nut on the bolt so the bush is pulled into the housing.
A small amount of the grease supplied with the kit around the outside of the bush will help the process. The bush can deform quite drastically during this process – however as the bolt, nut & washers contain everything it will have no alternative but to be pulled into the housing. Once you have gone as far as you can on the bolt, the final few mm should be no problem to push into place. The bush will then pop back to its original shape – this is an inherent property of the material.
Please remember to use plenty of the grease supplied down the bore of the bush before the steel tube is inserted. This is an important part of the assembly process and is pivotal to delivering the performance results SuperPro offers.
I hope this is OK? Please let me know how you get on.
Thanks
Richard
Richard Fearn
General Manager
SuperPro Europe Ltd
Tel +44 (0)1823 690281
Fax: +44 (0) 1823 698109
Web: www.superpro.eu.com
I didn't even think of that. Long bolt washers on the two sides instead of the plates in my illustration and then just use you impact to pull it in by tightening the non bushing side that would have been ultra easy.
How did you guys even get the stock toe link bushings out?? I got the outer small bushings out with a few sockets, but the bigger inner bushings I couldn't. I cut off the flange, but I just couldn't hold the toe link to get the bushings out. Is there a specific socket size that's perfect for this?
i pancaked my bushings between 2 steel plates and it worked very well.. if the bushing goes in croocked tilt the top steel plate to apply more pressure to the higher side of the bushing..
Thread Starter
Joined: Mar 2001
Posts: 30,818
Likes: 656
From: FL-->NJ/NYC again!
How did you guys even get the stock toe link bushings out?? I got the outer small bushings out with a few sockets, but the bigger inner bushings I couldn't. I cut off the flange, but I just couldn't hold the toe link to get the bushings out. Is there a specific socket size that's perfect for this?
I was happy to have solved that problem, then ran into my next problem, thus the need to start this thread

I'm pretty sure I know how I'm going to solve this though......thin length of PVC pipe just larger than the mushroomed end of the bushing, should help guide it in and prevent it from canting to one side
Good luck.
I actually used a ball joint tool set with a few of the same cylindrical rings, but none close to the same size as the lip. Guess I have to search for one!
I actually searched through a bunch of PVC fittings and pipes that I have laying around and couldn't find a size that's close to the lip.
I actually used a ball joint tool set with a few of the same cylindrical rings, but none close to the same size as the lip. Guess I have to search for one!
I actually searched through a bunch of PVC fittings and pipes that I have laying around and couldn't find a size that's close to the lip.
To take the oem one out I have to say I cheated. My friend has all the machining equipment I could dream of so when we had nothing to take it out he conveniently took a piece of "scrap" metal tubing put in on the lathe and machined it to the precise size we needed. Myself not being in that field or having any expertise of the sort seeing that machinery work and the end result I was talking about it for days hehe. I used a press to get all the bushings out btw.
I talked to my brother, and the way he removed his bushings from his 91 MR2 turbo, was with a blow torch. He removed the trailing arms from the vehicle and lit the bushing on fire, until they just fell out.
The one thing I still cannot understand is how to install the new bushings? The whole socket, washer and bolt method sounds simple, but I still dont understand how it suppose to work exactly. Does anybody have any detailed write up including a lot of pictures so I can understand how this supposed to work? btw I already read the max cooper method but im still slightly confused
The one thing I still cannot understand is how to install the new bushings? The whole socket, washer and bolt method sounds simple, but I still dont understand how it suppose to work exactly. Does anybody have any detailed write up including a lot of pictures so I can understand how this supposed to work? btw I already read the max cooper method but im still slightly confused
Thread Starter
Joined: Mar 2001
Posts: 30,818
Likes: 656
From: FL-->NJ/NYC again!
I measured the exact length of the bushings, then cut the tubes with an air saw.
Upon tightening in the vice, the tubes were destroyed as they basically slipped over the toe link bore, but they allowed the bushing (helped with some grease) to install about 90% of the way. I then was able to use a conventional press to get them the rest of the way in.
I also greased the metal sleeves liberally before inserting, and even this was a pain in the freaking a$$. The bushings were such an uber-tight fit (there's a HS girlie joke in here somewhere) that they moved inward a bit, making the inner bore small enough that the metal inserts didn't want to go in nicely.
After this I used some monster wrenches to break free the jam nuts after soaking them in PB blast. I cleaned up the threads with carb cleaner and slicked them up with anti-seize. An un-named source told me that after going through the torture of installing these bushings, he realized that the jam nuts were seized. He used a torch in an effort to loosen them, and melted the bushings! Not a fun day for him

I can honestly say that I'd rather port an engine than go through this again, I hope my dad enjoys his F*&U{ing father's day present

Here's a look at the rat bastards all done (apologies for the poor quality pic):
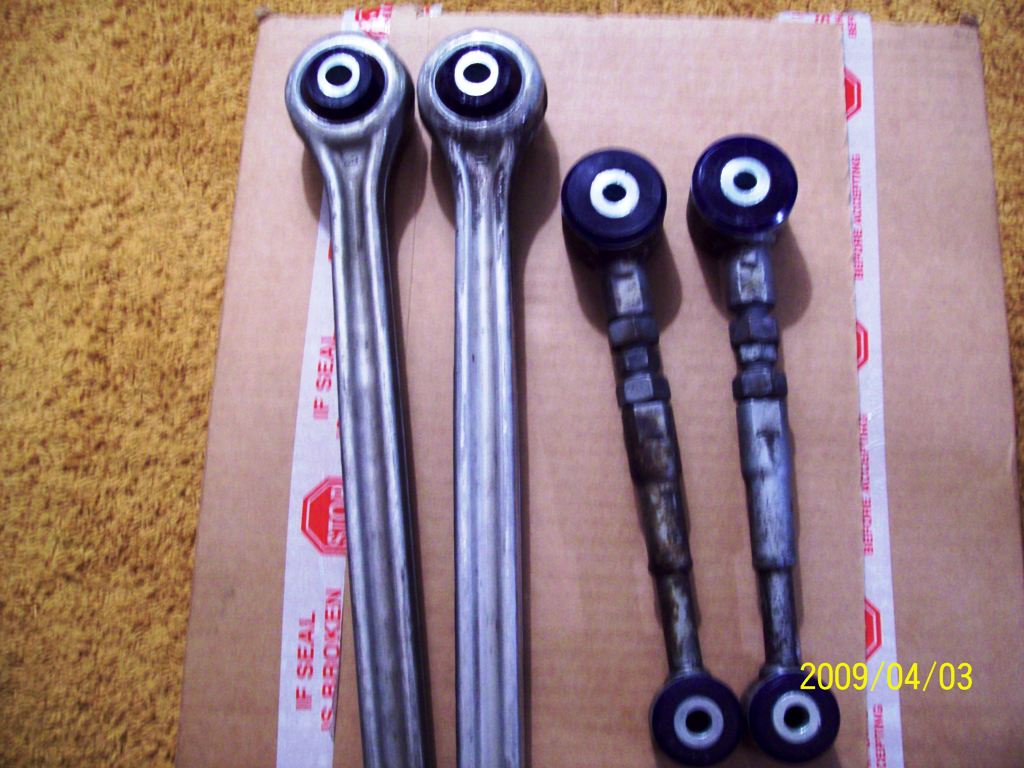
Last edited by GoodfellaFD3S; Apr 4, 2009 at 12:27 AM.
I was actually able to remove the old bushings with a blow torch, but I was unable to remove the metal sleeve that was left over in all the bushings. Honestly if I could do it all over again, I would have just removed the toe link and trailing arms from the car, brought them to a local shop, and had them pressed out, and back in.
Were these the hardest bushings to do from the complete SuperPro bushing kit? I'm planning on doing mine very soon and just wanted to get a heads up on the pain in the a$$ bushings 
Thread Starter
Joined: Mar 2001
Posts: 30,818
Likes: 656
From: FL-->NJ/NYC again!
I paid my buddy at the now-closed Gotham Racing to do all my other bushings and pillow *****. IMO it was worth it, b/c I'd rather spend that time porting or building, something I'm much more efficient at. Steep learning curve with these things
But yes I think the toe link ones are the absolute worst. By comparison the trailing arms were a breeze.
But yes I think the toe link ones are the absolute worst. By comparison the trailing arms were a breeze.
Thread Starter
Joined: Mar 2001
Posts: 30,818
Likes: 656
From: FL-->NJ/NYC again!
for the toe links, yes. trailing arms and all others typically done with a press.
Gotham? I havent been really involved since 2003, so hard for me to say. Basically got too big too quickly combined with personality conflicts.
Last edited by GoodfellaFD3S; Jun 9, 2011 at 07:25 PM.
We're talking about the ones with the flanged ends, right? Pretty much just get an cut-off wheel and be verrrry careful and cut slits on each side of the flanged end, then pry it up and start prying back and forth till the metal gets weak and rips off. Then you'll be able to press them out.
Let me know when you do them, Juan.
Let me know when you do them, Juan.

