
Pressure Testing Rebuilt Engine

Thread Starter
Rotary Freak
Joined: Aug 2001
Posts: 2,267
Likes: 3
Pressure Testing Rebuilt Engine
-------------------------------------------------------------------------------------------------
NOTE: Rather than blatantly SPAM you about our new Cooling System Pressure Tester (CSPT), I thought it better to subtly SPAM you with an informational post about how to pressure test your freshly rebuilt engine to ensure the coolant seals are properly installed, as well as verify the integrity of other parts of the system.
-------------------------------------------------------------------------------------------------
For many years, we have been testing the integrity of water seal installation with a pressure gauge fixture. It was just a rough-cut aluminum plate but did the job just fine despite being homely. Now, we have some nicer waterjetted production-quality CSPT tools, which will soon be available on our web site. Great tool to verify your freshly built engine is assembled properly at least in the article of being air/water tight. After assembly, we plug up all the cooling system openings, mount the CSPT, pump up the pressure to 20 PSI or so and leave it to sit overnight. Major leaks you can find right away by following the hiss of escaping air with a stethoscope. Minor leakage over time is more tricky with just air pressure, but you can also fill the cooling system with water or coolant, pressurize it with air, and the leak will be obvious by the puddle that develops. Operational coolant pressure is typically 0.9 BAR or about 13 PSI. We generally test the engines at 20 PSI for 12+ hours, but even a couple hours is fine. Every once in a while, you find that you pinched a water seal or that a rotor housing coolant passage plug was not properly installed. Finding problems at this point is sooooooooooo much better than finding out after installing the engine in the car and attempting to run it!

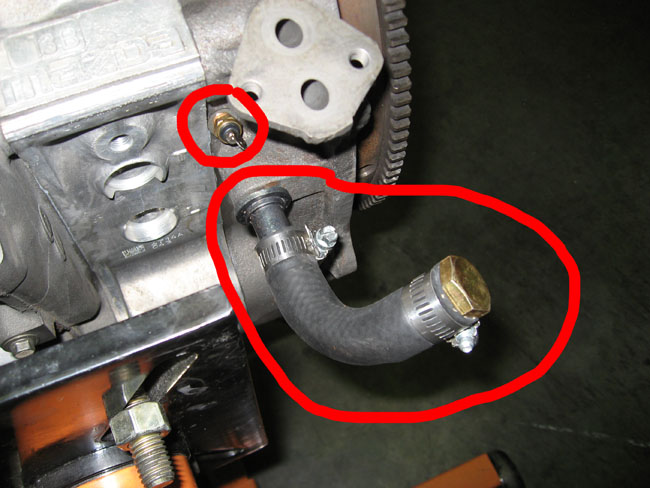
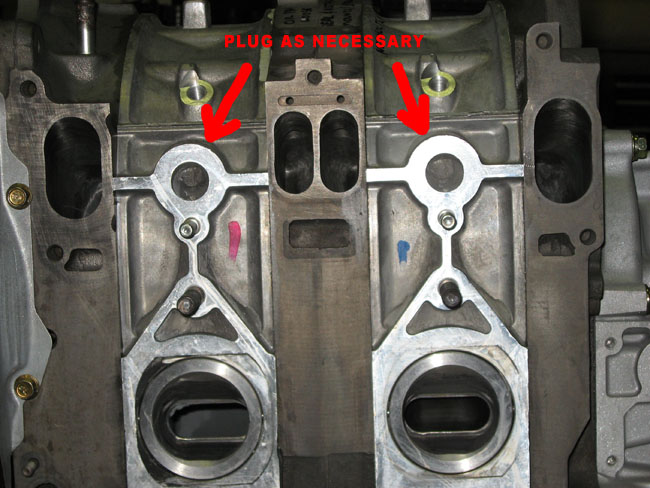
The parts of the cooling system that need to be plugged are shown below. Not all engines are the same. The rotor housings, for example, sometimes have open coolant passages, which feed the manifold with coolant (often for the turbo). If you miss anything, it will be really obvious by the hissing air.
If you are wondering about price and availability, the CSPT tool is not quite available yet because I am waiting on the 130 gauges I have on order. But the aluminum bodies are already waterjetted, the gaskets cut and valves in-stock. As soon as the gauges arrive, we will be ready to ship. No firm pricing at this point, but I expect it to be under $70. That includes the assembled tool and fasteners, but not the block-offs for the other cooling system openings.
NOTE: Rather than blatantly SPAM you about our new Cooling System Pressure Tester (CSPT), I thought it better to subtly SPAM you with an informational post about how to pressure test your freshly rebuilt engine to ensure the coolant seals are properly installed, as well as verify the integrity of other parts of the system.
-------------------------------------------------------------------------------------------------
For many years, we have been testing the integrity of water seal installation with a pressure gauge fixture. It was just a rough-cut aluminum plate but did the job just fine despite being homely. Now, we have some nicer waterjetted production-quality CSPT tools, which will soon be available on our web site. Great tool to verify your freshly built engine is assembled properly at least in the article of being air/water tight. After assembly, we plug up all the cooling system openings, mount the CSPT, pump up the pressure to 20 PSI or so and leave it to sit overnight. Major leaks you can find right away by following the hiss of escaping air with a stethoscope. Minor leakage over time is more tricky with just air pressure, but you can also fill the cooling system with water or coolant, pressurize it with air, and the leak will be obvious by the puddle that develops. Operational coolant pressure is typically 0.9 BAR or about 13 PSI. We generally test the engines at 20 PSI for 12+ hours, but even a couple hours is fine. Every once in a while, you find that you pinched a water seal or that a rotor housing coolant passage plug was not properly installed. Finding problems at this point is sooooooooooo much better than finding out after installing the engine in the car and attempting to run it!
The parts of the cooling system that need to be plugged are shown below. Not all engines are the same. The rotor housings, for example, sometimes have open coolant passages, which feed the manifold with coolant (often for the turbo). If you miss anything, it will be really obvious by the hissing air.
If you are wondering about price and availability, the CSPT tool is not quite available yet because I am waiting on the 130 gauges I have on order. But the aluminum bodies are already waterjetted, the gaskets cut and valves in-stock. As soon as the gauges arrive, we will be ready to ship. No firm pricing at this point, but I expect it to be under $70. That includes the assembled tool and fasteners, but not the block-offs for the other cooling system openings.


Thread Starter
Rotary Freak
Joined: Aug 2001
Posts: 2,267
Likes: 3
Thanks. We try to make products you can't find elsewhere. Rob has been pressure testing engine cooling systems for probably 20 years or more with his original tool, so we know the value of it. I am a bit surprised that other builders don't do something similar but stranger things have been known to happen. It just occured to me one day that I had not seen the tool elsewhere and perhaps we should offer it along with all the other special tools we sell. So here we are.
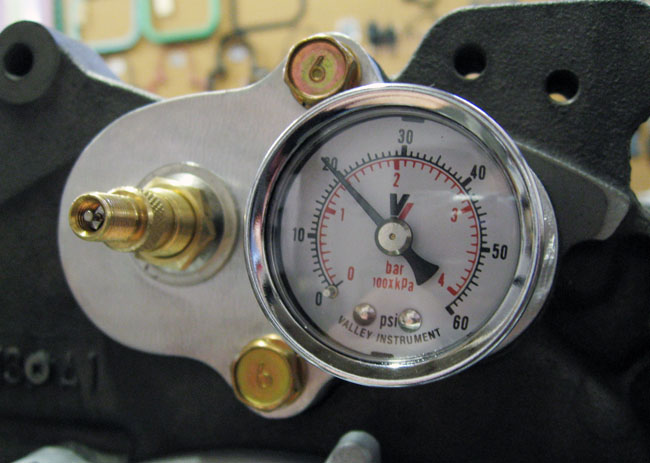
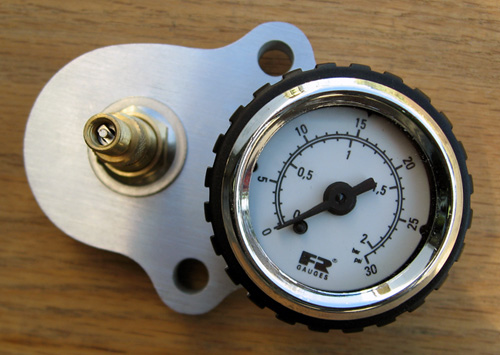
The production gauges just showed up today, so I should have these things ready to go by the end of the week. Unlike the pictures above, the gauge reads 0-30 PSI, so the resolution is better and it is less likely that someone will overpressurize the cooling system, thinking they are supposed to max out the gauge pressure.
The production gauges just showed up today, so I should have these things ready to go by the end of the week. Unlike the pictures above, the gauge reads 0-30 PSI, so the resolution is better and it is less likely that someone will overpressurize the cooling system, thinking they are supposed to max out the gauge pressure.
Thread Starter
Rotary Freak
Joined: Aug 2001
Posts: 2,267
Likes: 3
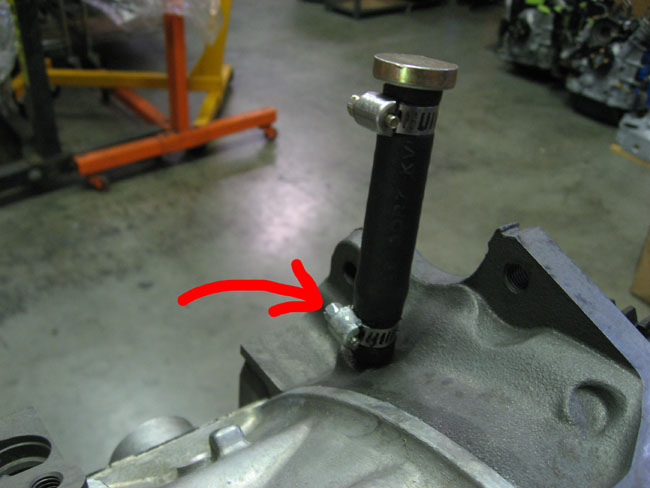
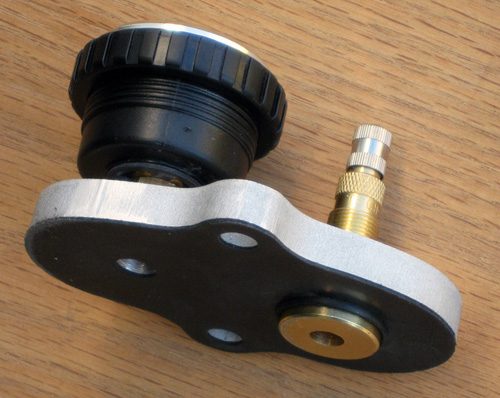
Here are new pictures of the tester with the production gauge. I think the 0-30 range offers better resolution and avoids the temptation to overpressurize the cooling system just because the gauge reads that high. The final picture shows how this premium valve stem is designed to be easily disassembled for adding water, if you want to do a wet-test.

Trending Topics
Thread Starter
Rotary Freak
Joined: Aug 2001
Posts: 2,267
Likes: 3
Now available to purchase here --> https://www.pineappleracing.com/inde...ROD&ProdID=142
Former Site Sponsor
Joined: Feb 2004
Posts: 1,052
Likes: 0
From: Tacoma WA
Hey Look aty this one... We have had this shown in our Overhaul video for the last 4 or 5 years..
http://www.atkinsrotary.com/store/cu...cat=568&page=1
http://www.atkinsrotary.com/store/cu...cat=568&page=1
Thread Starter
Rotary Freak
Joined: Aug 2001
Posts: 2,267
Likes: 3
Hey Look aty this one... We have had this shown in our Overhaul video for the last 4 or 5 years..
http://www.atkinsrotary.com/store/cu...cat=568&page=1
http://www.atkinsrotary.com/store/cu...cat=568&page=1
Thread Starter
Rotary Freak
Joined: Aug 2001
Posts: 2,267
Likes: 3
Forgot to mention that we have added another free video to RebuildingRotaryEngines.com on how to use this tool: http://www.rebuildingrotaryengines.c...sure-test-tool.
Forgot to mention that we have added another free video to RebuildingRotaryEngines.com on how to use this tool: http://www.rebuildingrotaryengines.c...sure-test-tool.
I was looking at the Rx8 rotor video and was suprised at the side seal to corner seal clearence. Rob claimed the factory spec was .002-.006. Thats the same specs for older 13b Fc- Fd engines. I thought Mazda gave more clearence for the side seals cause of the extra expansion the side seals get from traveling over the side exhaust?
Thread Starter
Rotary Freak
Joined: Aug 2001
Posts: 2,267
Likes: 3
I was looking at the Rx8 rotor video and was suprised at the side seal to corner seal clearence. Rob claimed the factory spec was .002-.006. Thats the same specs for older 13b Fc- Fd engines. I thought Mazda gave more clearence for the side seals cause of the extra expansion the side seals get from traveling over the side exhaust?

Thread
Thread Starter
Forum
Replies
Last Post
trickster
2nd Generation Specific (1986-1992)
25
Jul 1, 2023 04:40 PM