
Darin's FB ITGT FB build

Thread Starter
Joined: Mar 2009
Posts: 489
Likes: 0
From: Winnipeg, Manitoba
They are made from misc. off the shelf pieces and can be purchased from your own sources.
Afco aluminum swaged tubes from Jegs with Teflon rod ends and misalignment bushings from barnes4wd dot com.
Afco aluminum swaged tubes from Jegs with Teflon rod ends and misalignment bushings from barnes4wd dot com.
Last edited by nofords; Jan 31, 2010 at 08:22 AM. Reason: grammer and spelling
Thread Starter
Joined: Mar 2009
Posts: 489
Likes: 0
From: Winnipeg, Manitoba
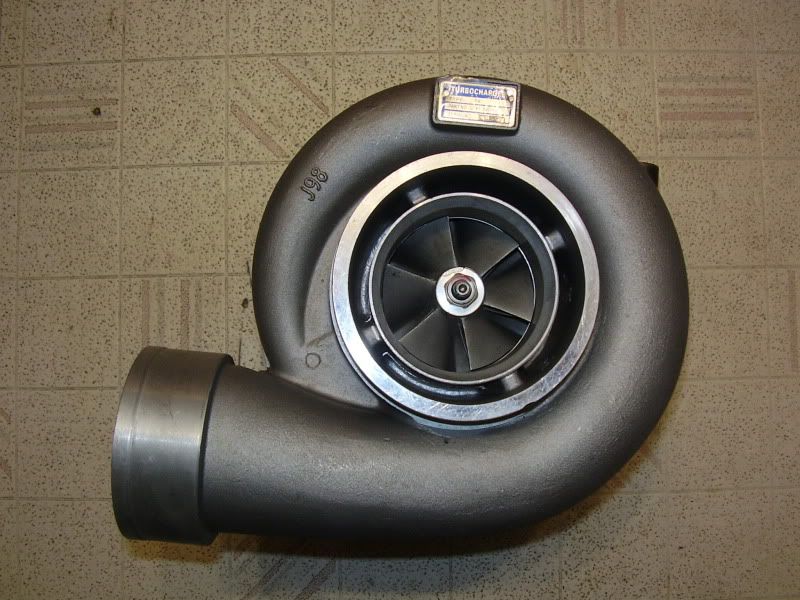
Yay! Turbo!
Sorry for the delay in updates for those who are following the build. I've been at a stand still waiting for backordered parts to come in.
I did get my turbo! Looks a lot bigger in person than it does on the internet when i bought it! If my calcs are close, this should spool at 'round 3500 - 3750 rpm. That is where I want to be when I come out of the corners so hopefully this works!
Pics:
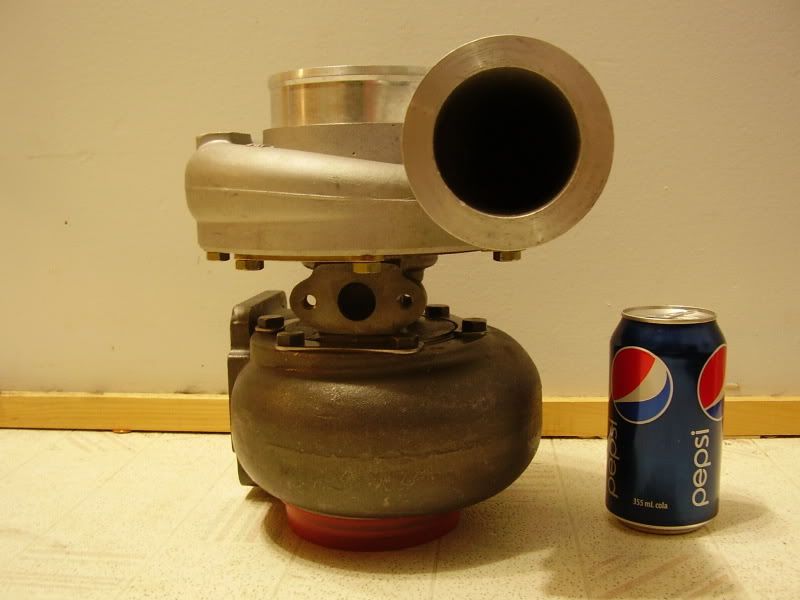
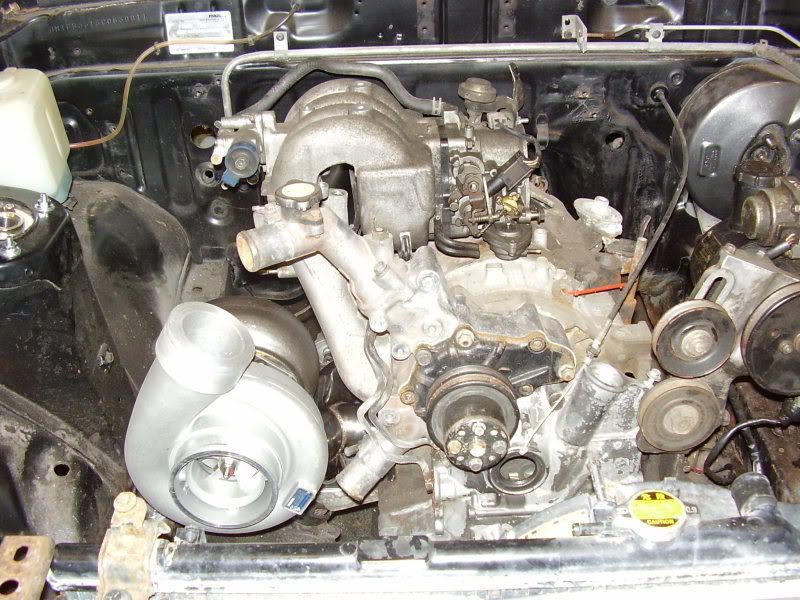
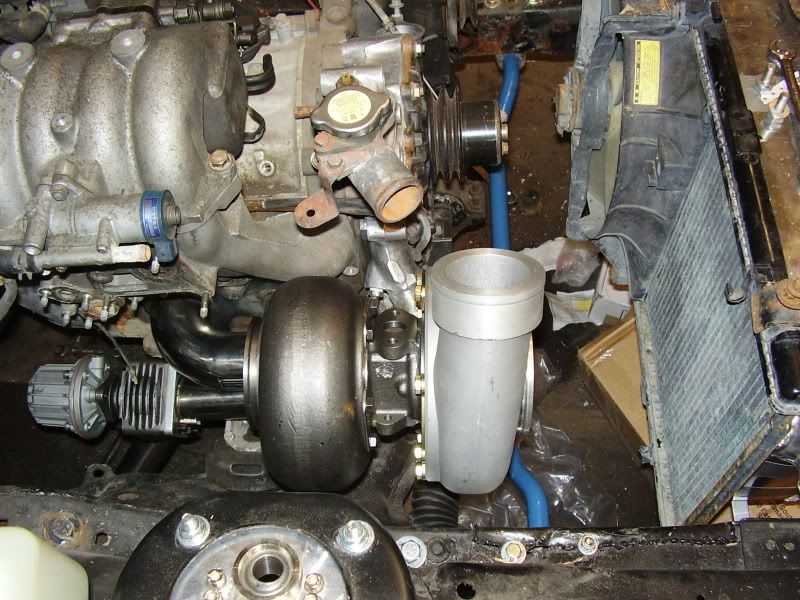
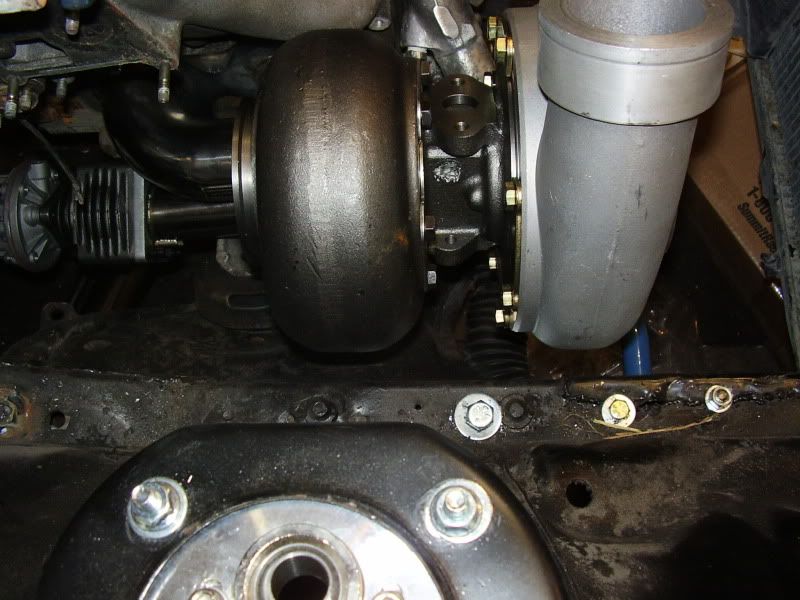
P.S. Nevermind the bad patch at the front (and the multiple holes that go with it!). the whole horn will be replaced. right now, I'm just mocking everything up. The engine and tranny will come out again and I will finish weld and dress everything!
I did get my turbo! Looks a lot bigger in person than it does on the internet when i bought it! If my calcs are close, this should spool at 'round 3500 - 3750 rpm. That is where I want to be when I come out of the corners so hopefully this works!
Pics:
P.S. Nevermind the bad patch at the front (and the multiple holes that go with it!). the whole horn will be replaced. right now, I'm just mocking everything up. The engine and tranny will come out again and I will finish weld and dress everything!
Last edited by nofords; Feb 8, 2010 at 07:21 PM.
the Appleton Don
Joined: Dec 2005
Posts: 58
Likes: 1
From: the jungle
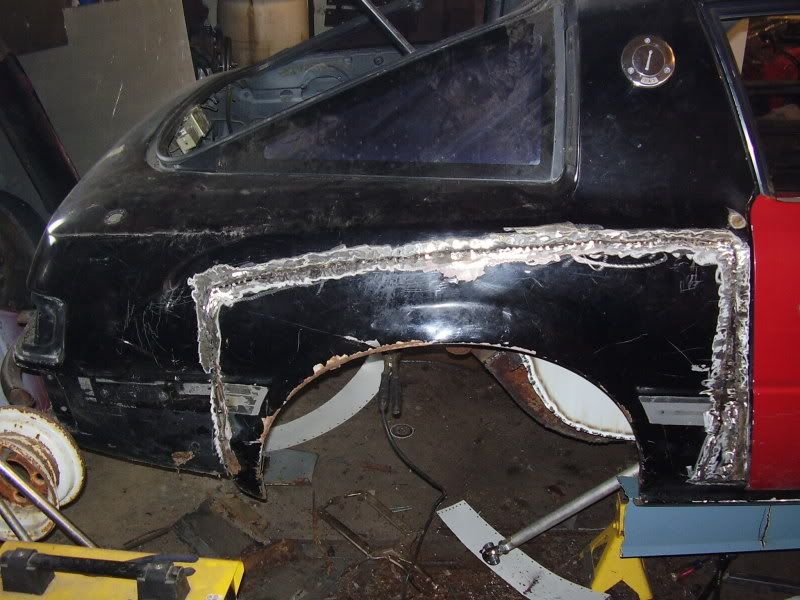
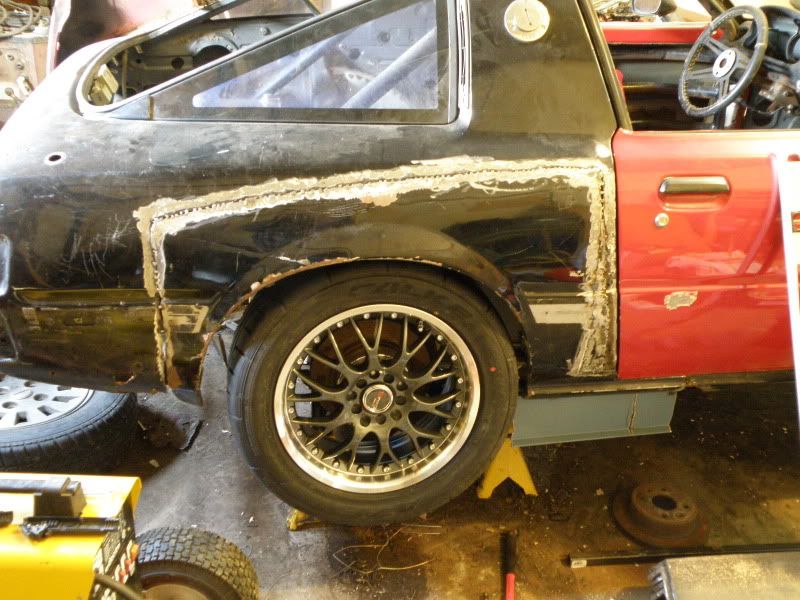
Fixed the passenger rear quarter today.
In case someone didn't know, a driver (left) front fender fixes the rear passenger's (right) side and the front passenger (right) fender fixes the rear driver's (left) side. All body lines match. Just have it tacked for now. Need to finish weld and grind flush. Gives about 8" matching rocker panel behind and under the door! Oh, and due to the curvature of the fender, you get about 1" of automatic fender flare that looks 100% stock!
In case someone didn't know, a driver (left) front fender fixes the rear passenger's (right) side and the front passenger (right) fender fixes the rear driver's (left) side. All body lines match. Just have it tacked for now. Need to finish weld and grind flush. Gives about 8" matching rocker panel behind and under the door! Oh, and due to the curvature of the fender, you get about 1" of automatic fender flare that looks 100% stock!

not sure how i missed this, for so long, but i really dig it. i especially like the underlying diamond in the rough theme it has.
my first question is what do you plan to run for fuel lines?
my first question is what do you plan to run for fuel lines?
Thread Starter
Joined: Mar 2009
Posts: 489
Likes: 0
From: Winnipeg, Manitoba
I haven't fully decided yet. I would like to use braided lines for their simplicity of routing but I can't quite yet justify the retardedly expensive nature for them and their fittings. At this time, I my decision is to use 3/8" and 1/2" hardlines and figure out what to do at the rails later. I have a Aeromotive FPR that uses o-ringed -AN fittings that I will have to convert back to hardline. That is the only thing that really irks me right now!
_______________________________________
Sorry for the long awaited updates for those who are following this thread. I have been battling illness and working 14-16hr shifts, 7 days/wk at my job since mid January. Also have been waiting for backordered parts to arrive. I have a crate of parts to pick up at the depot so I will be all gun-ho again shortly.
Another development for me is that I have the chance to acquire a 2 post hoist which will make life easier for me. If I do get it, I am going to install it before continuing on my project.
Cheers,
Darin
Thread Starter
Joined: Mar 2009
Posts: 489
Likes: 0
From: Winnipeg, Manitoba
Yay! Parts!
Finally some of my backordered parts are starting to trickle in!
Remember when I said measure twice, cut once? Well I need to take my own advice. I tried to use a long arm link at the top of the pumpkin but I fear it may not work. I may still try it if I can't locate a super short link locally.
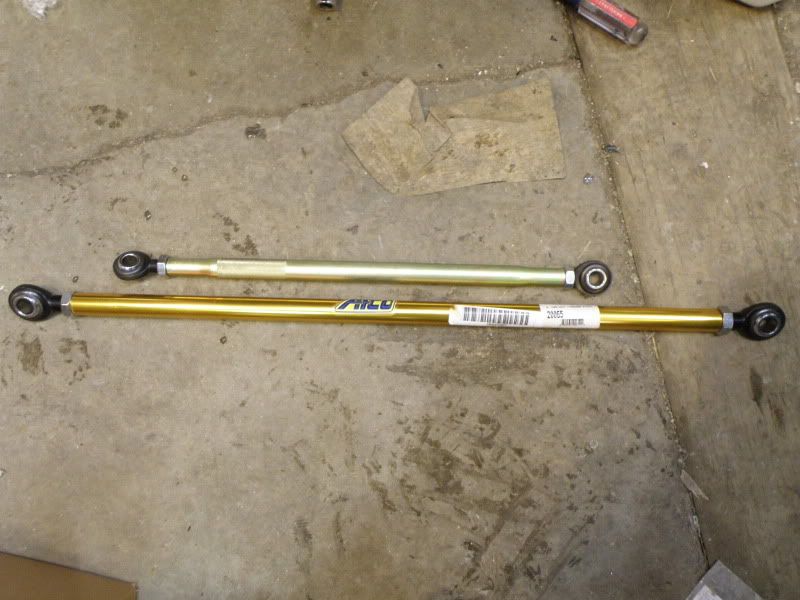
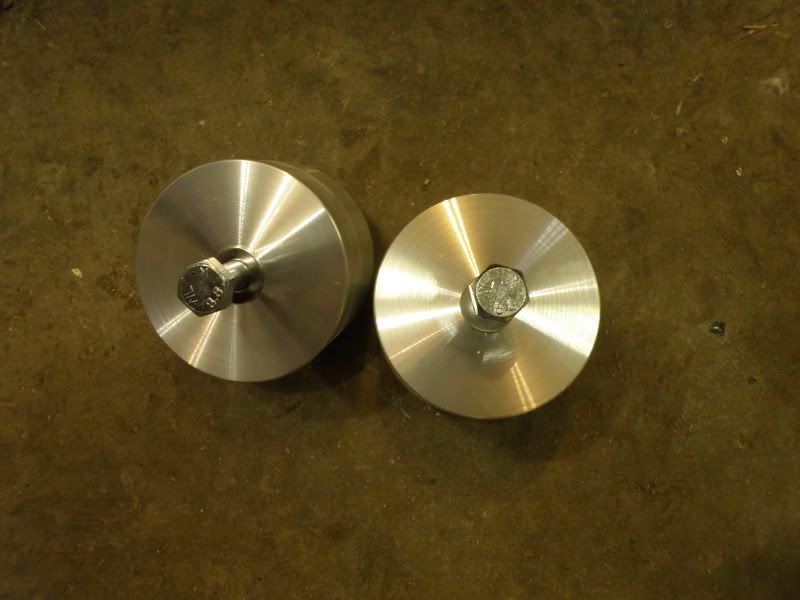
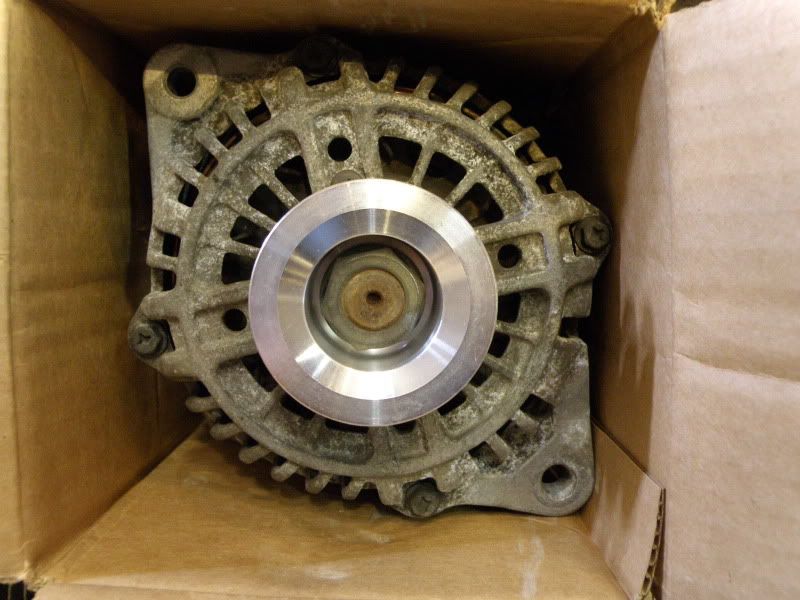
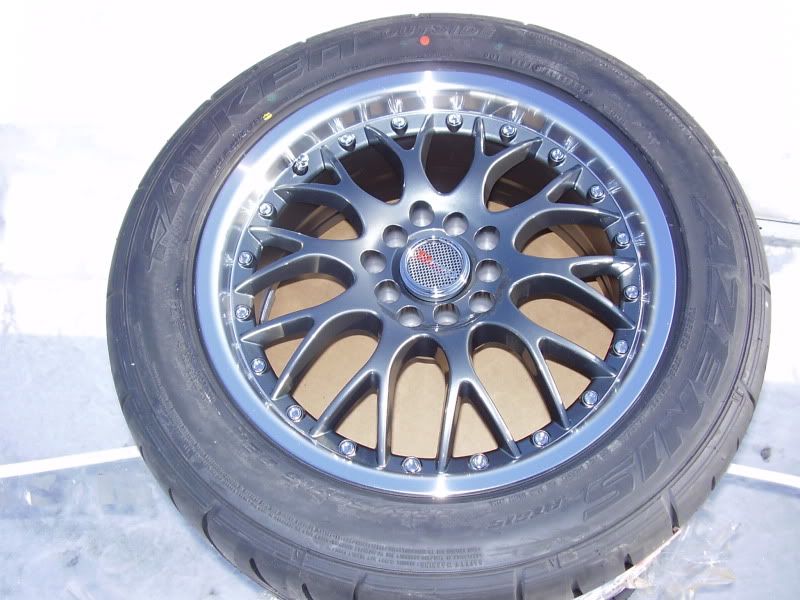
Here are some photos of the parts:
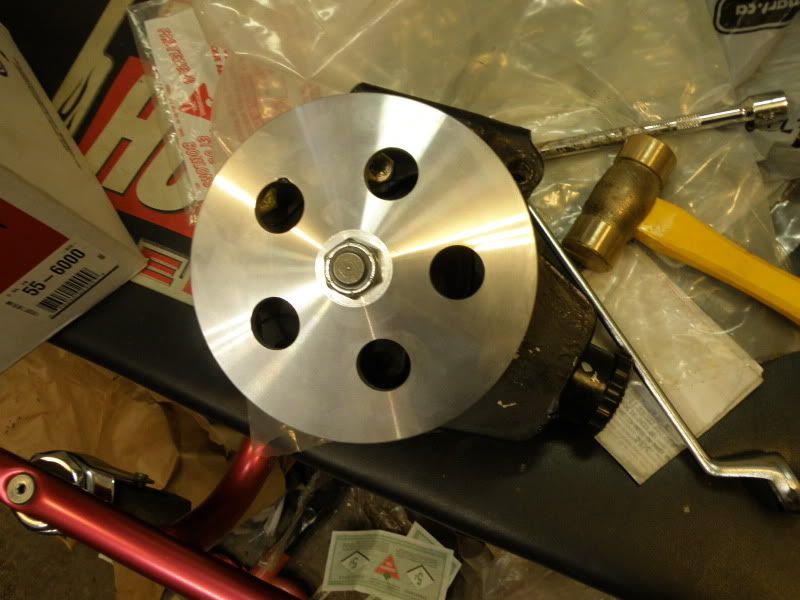
Early 70's SBC pump with under drive pulley
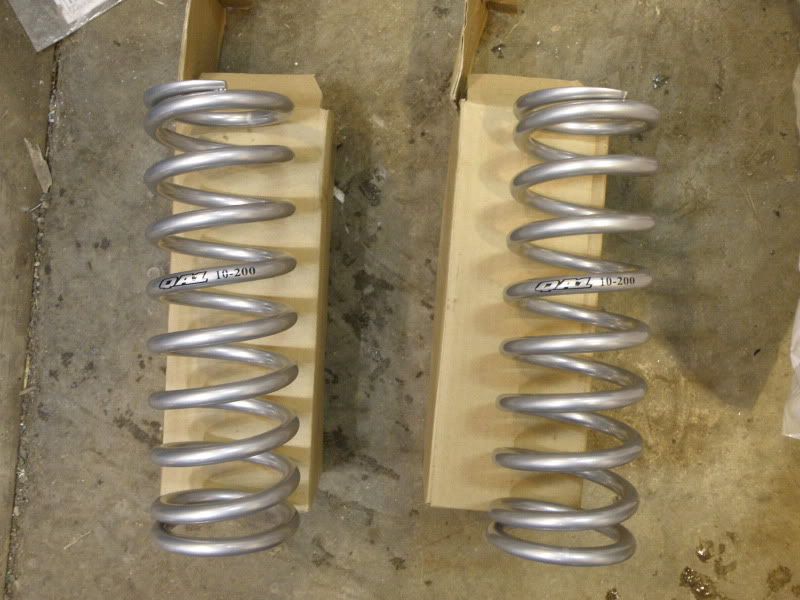
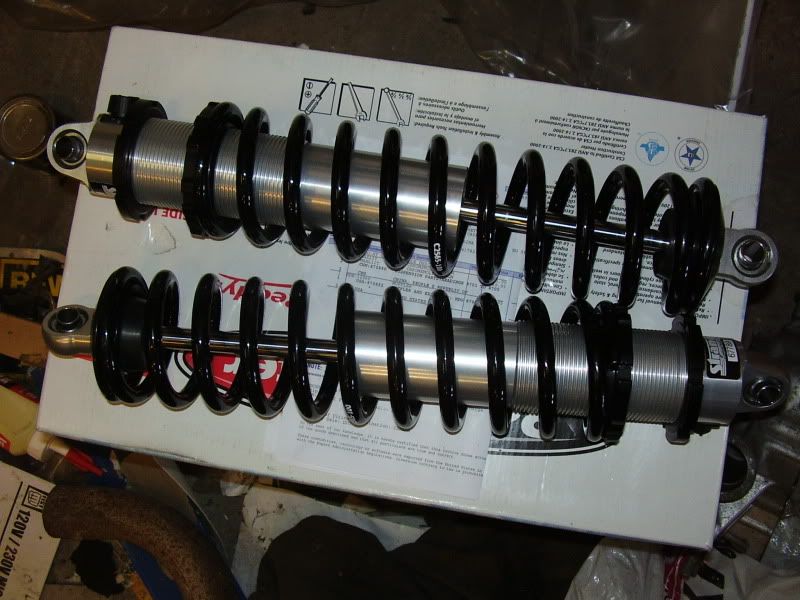
200# Front QA-1 springs to go on my FC coil overs.
my two links with chromoly rod ends
solid engine mounts
Japan2LA FD Alternator and Pulley
New rims/tires

Strange Engineering rear coil-overs
In the box:
16" electric fan, oil cooler, various hoses/fittings, atkins rebuild kit

Wow! It's like Christmas!
Also Looks like I will be getting the hoist!. I can't wait!
Remember when I said measure twice, cut once? Well I need to take my own advice. I tried to use a long arm link at the top of the pumpkin but I fear it may not work. I may still try it if I can't locate a super short link locally.
Here are some photos of the parts:
Early 70's SBC pump with under drive pulley
200# Front QA-1 springs to go on my FC coil overs.
my two links with chromoly rod ends
solid engine mounts
Japan2LA FD Alternator and Pulley
New rims/tires
Strange Engineering rear coil-overs
In the box:
16" electric fan, oil cooler, various hoses/fittings, atkins rebuild kit
Wow! It's like Christmas!
Also Looks like I will be getting the hoist!. I can't wait!


Senior Member
Joined: Jul 2003
Posts: 408
Likes: 1
From: Edmonton, AB, Canada
Is your Fuel pressure regulator a dual inlet model? If so, the method I used was to cut the ends off S5 rails and weld on AN-6 fittings. I used a Y fitting to take the supply line and run both rails in parallel. From the rails, one line to each inlet of the FPR and then the return line out the bottom. I used a new AN-8 (1/2") aluminum hard line for the pressure line and I used the stock supply line as the return. You have to use some braided steel as nothing else will allow for engine movement and still survive the heat of the engine bay with a turbo. With my fuel cell, two feed pumps, surge tank, aeromotive Tsunami pump and all the adapters and rail work I wound up spending about $800 on braided and hard lines. A better option would have been a simple in-cell surge tank and pump (which I may just do this year to reduce the risk of fire)
Cheers,
-Trent
Cheers,
-Trent
Thread Starter
Joined: Mar 2009
Posts: 489
Likes: 0
From: Winnipeg, Manitoba
What turbo manifold are you using?
That's a hefty turbo
Is your Fuel pressure regulator a dual inlet model? If so, the method I used was to cut the ends off S5 rails and weld on AN-6 fittings. I used a Y fitting to take the supply line and run both rails in parallel. From the rails, one line to each inlet of the FPR and then the return line out the bottom. I used a new AN-8 (1/2") aluminum hard line for the pressure line and I used the stock supply line as the return. You have to use some braided steel as nothing else will allow for engine movement and still survive the heat of the engine bay with a turbo. With my fuel cell, two feed pumps, surge tank, aeromotive Tsunami pump and all the adapters and rail work I wound up spending about $800 on braided and hard lines. A better option would have been a simple in-cell surge tank and pump (which I may just do this year to reduce the risk of fire)
I am planning on using dual whine-bros but we shall see. For the price, I may just go to an Aeromotive A1000 pump.
Thread Starter
Joined: Mar 2009
Posts: 489
Likes: 0
From: Winnipeg, Manitoba
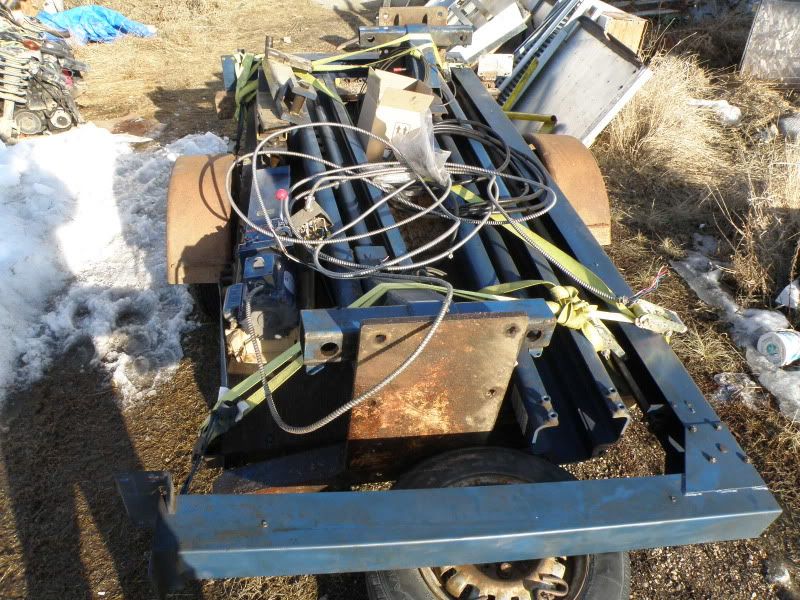
Hoist!
Look what followed me home!
Rotary 7000lb 2 post hoist. Works. Needs an o-ring at the bottom of one of the lines where it passes thru the steel post, but even then, it doesn't really leak. Am going to install it tomorrow!
Rotary 7000lb 2 post hoist. Works. Needs an o-ring at the bottom of one of the lines where it passes thru the steel post, but even then, it doesn't really leak. Am going to install it tomorrow!
Thread Starter
Joined: Mar 2009
Posts: 489
Likes: 0
From: Winnipeg, Manitoba
Updates!
Built a megasquirt for the engine...took me a few evenings.
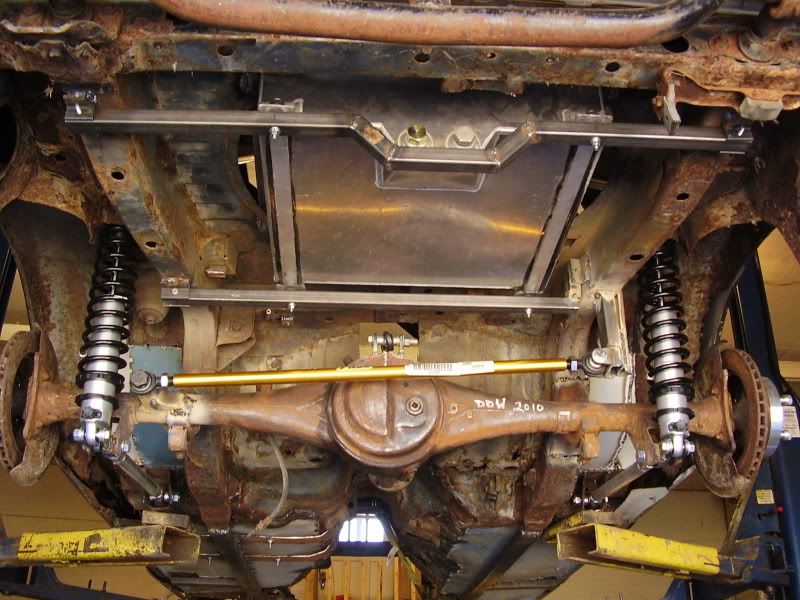
Got my rear end located and all mocked up. I need to finalize my coil-overs so I can dial in my weight and ride height.
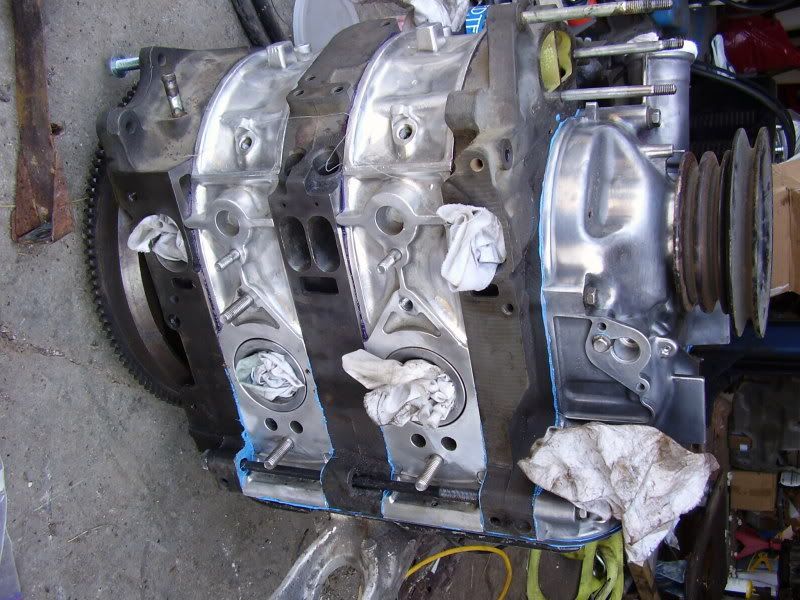
Got my monster port race engine assembled. I'm using 93+ parts where i can but they are S4 rotors and irons with a 93 oiling system. Most of you know what is involved so I won't go into detail. It has cavernous ports tho!!
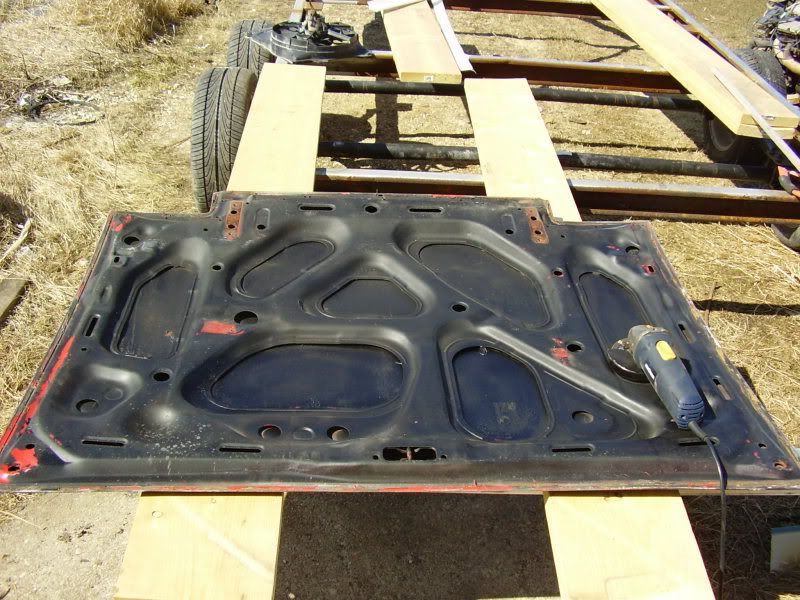
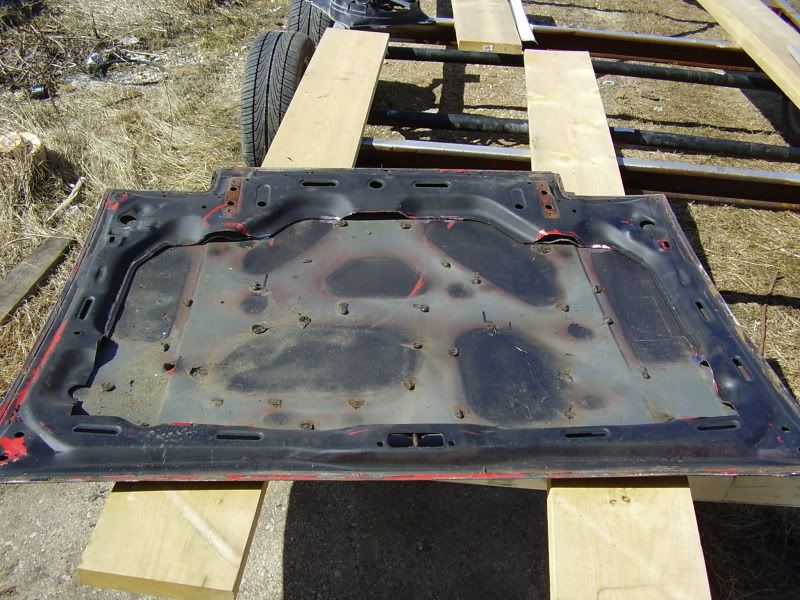
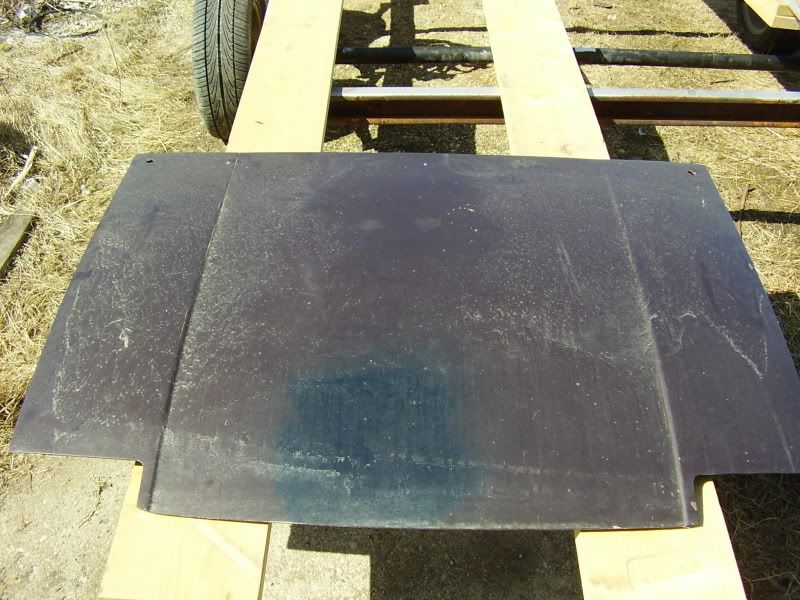
Started work on my hood. I have found with one of my race team members is that there is a great deal of air coming into the engine bay trying to cool the rad. The problem is that there is nowhere for the air to go. It hits the fire wall and either goes under the car or pushes up the hood. I did a steel vented hood on the other car and it dropped the coolant temps by 50degF and oil by 30degF. This car, I am going with a different approach however maintaining the same principal.
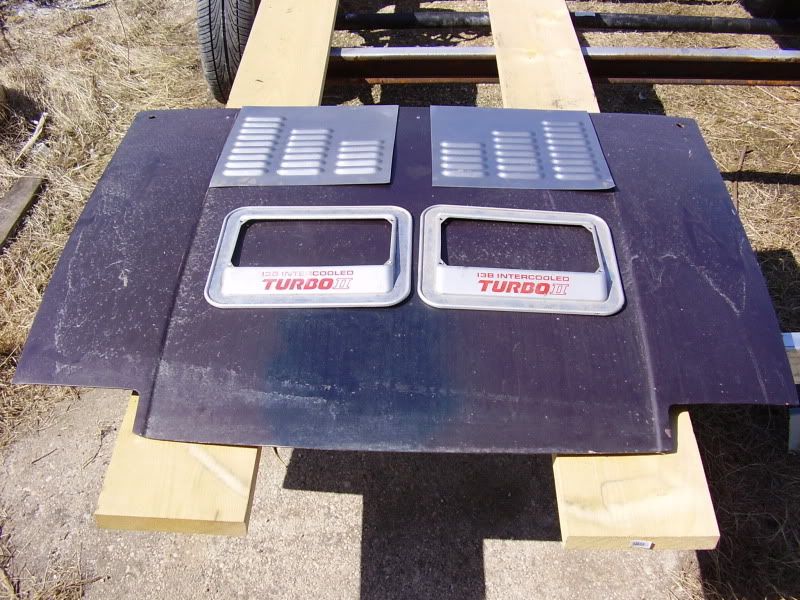
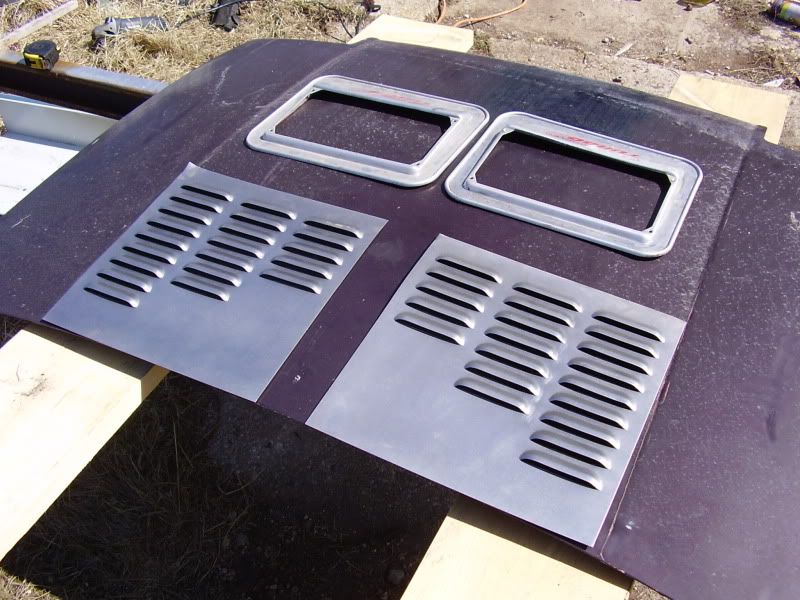
More to come soon! This car has to be operational and on the track May 29, 2010. It's going to be a push but I hope I can make it.
Got my rear end located and all mocked up. I need to finalize my coil-overs so I can dial in my weight and ride height.
Got my monster port race engine assembled. I'm using 93+ parts where i can but they are S4 rotors and irons with a 93 oiling system. Most of you know what is involved so I won't go into detail. It has cavernous ports tho!!
Started work on my hood. I have found with one of my race team members is that there is a great deal of air coming into the engine bay trying to cool the rad. The problem is that there is nowhere for the air to go. It hits the fire wall and either goes under the car or pushes up the hood. I did a steel vented hood on the other car and it dropped the coolant temps by 50degF and oil by 30degF. This car, I am going with a different approach however maintaining the same principal.
More to come soon! This car has to be operational and on the track May 29, 2010. It's going to be a push but I hope I can make it.
Senior Member
Joined: Jul 2003
Posts: 408
Likes: 1
From: Edmonton, AB, Canada
Make certain you reinforce the panhard link support on your chassis. I've seen mounts bend pretty quick when the car is driven in anger. I'd suggest triangulating it the chassis.
-Trent
-Trent
Old [Sch|F]ool


Joined: May 2001
Posts: 12,880
Likes: 577
From: Cleveland, Ohio, USA
It's braced to the opposite side framerail now, which is braced to the forwardmost part of the space tire well. Since there's no kill like overkill, I'll probably add a gusset here and there.
Of course, I still HAVE the stock floor and stock tank.
Thread Starter
Joined: Mar 2009
Posts: 489
Likes: 0
From: Winnipeg, Manitoba
The panhard rod braces will be reinforced. I have a slight problem with my tank mount as it is exactly center on my rod bracket. I don't like the idea of eccentric loading. Currently, I have the drop bracket welded to the downtube of the cage (through the frame and the floor) and welded top/bottom of the frame and then a 1.5x1.5x0.25 angle welded on the back both legs welded to the bracket extending from the top of the shock tower to the bottom of the drop bracket.
I haven't fully gusseted my chassis yet. Making my way there as i go.
I haven't fully gusseted my chassis yet. Making my way there as i go.
Thread Starter
Joined: Mar 2009
Posts: 489
Likes: 0
From: Winnipeg, Manitoba
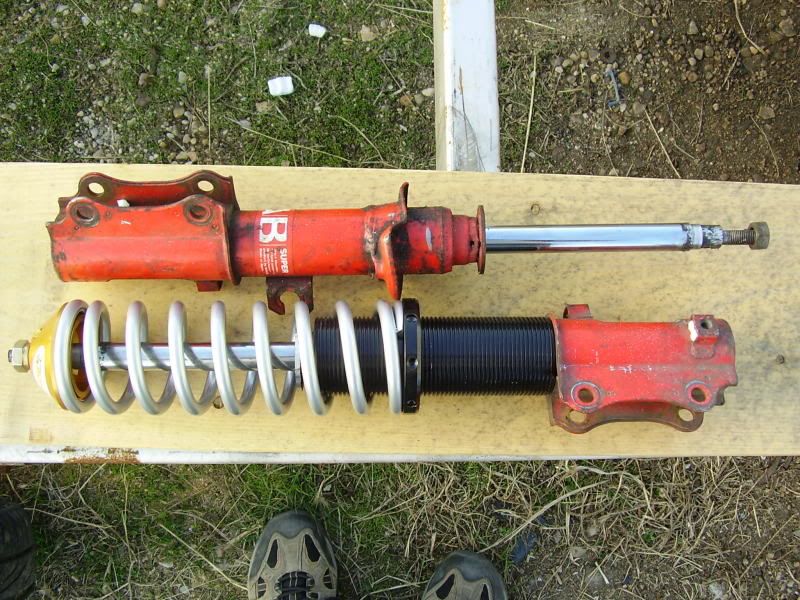
Home Made Coil-Overs
KYB AGX Shocks - $92/side new (i have used ones in the pic)
A1 Racing Products Coil Over Bits - $45/side
QA1 Springs - $30/side
Total: $167/side $334 for the front
A1 Racing Products Coil Over Bits - $45/side
QA1 Springs - $30/side
Total: $167/side $334 for the front
I'm working on the exact same thing right now, but with Illuminas. I'm sourcing parts at the moment and A1 was one of the places on the list. Which parts did you use? Right now I'm looking at the following from A1:
COK12460-B8 - perch $12.87
COK12455 - 2" body sleeve $18.40
COK12470 - top $12.54
It looks like you used the same top that I've listed. If you did, would you please tell me what the hole diameter is? I've asked A1 as well.
Going by memory right now, I believe the Illumina's shaft is .864. What size the the AGX?
Thread Starter
Joined: Mar 2009
Posts: 489
Likes: 0
From: Winnipeg, Manitoba
I'm working on the exact same thing right now, but with Illuminas. I'm sourcing parts at the moment and A1 was one of the places on the list. Which parts did you use? Right now I'm looking at the following from A1:
COK12460-B8 - perch $12.87
COK12455 - 2" body sleeve $18.40
COK12470 - top $12.54
It looks like you used the same top that I've listed. If you did, would you please tell me what the hole diameter is? I've asked A1 as well.
Going by memory right now, I believe the Illumina's shaft is .864. What size the the AGX?
The using the hat "fits most strut applications" works as a general rule and there is plenty of meat there for massaging.
Thread Starter
Joined: Mar 2009
Posts: 489
Likes: 0
From: Winnipeg, Manitoba
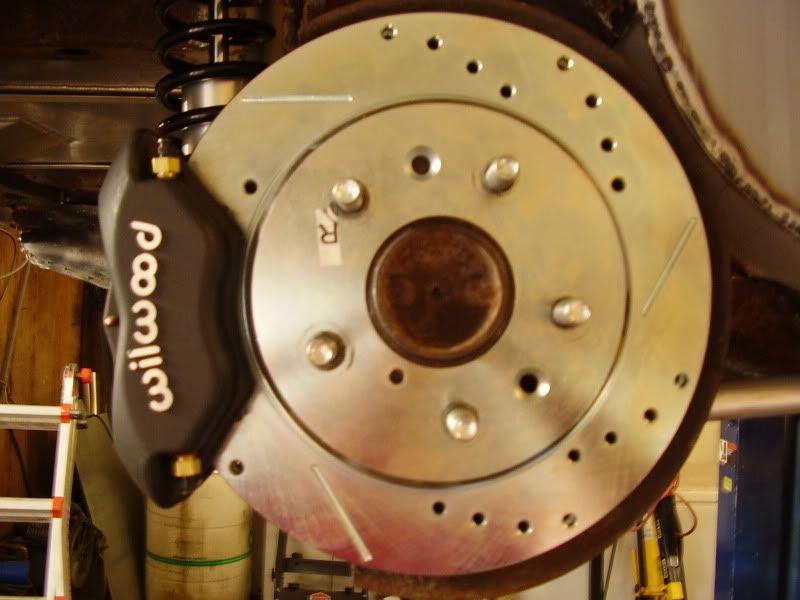
Rear Brakes
Not too much to add today. I have my other shock complete and will install both of them tomorrow.
I have my rear brakes done too. Wilwood four pot calipers in the rear. Yes, I will be running a wilwood proportioning valve to control them. The rotors are generic drilled slotted rotors, stock 2nd gen diameter, vented.
I have my rear brakes done too. Wilwood four pot calipers in the rear. Yes, I will be running a wilwood proportioning valve to control them. The rotors are generic drilled slotted rotors, stock 2nd gen diameter, vented.
Thread Starter
Joined: Mar 2009
Posts: 489
Likes: 0
From: Winnipeg, Manitoba
Well, I don't know. The consensus around the road race people 'round here is "spring 'em light and shock 'em hard"
With this motto in mind, I chose the 150's in the rear and 200's in the front. I am running the strange 10way in the back and AGX's up front. Both currently set to maximum even tho the car hasn't been on the ground much!
Racing beat has their springs at 145F 110R. My teammate runs those with Illumas and the car handles fairly decent.
If I were auto-xin' i would have put them in the 350-400 range.
That is my thoughts!
Lives on the Forum
Joined: Jun 2004
Posts: 11,359
Likes: 14
From: Grand Rapids Michigan
I run under the theory of "spring it light and use stiff swaybars", but even so I run 275/150 and usually get criticized for using spring rates that are too low by others that haven't raced against me. Most autocrossers seem to go with 400/200 or so, but I wanted something I could daily drive with, but still kill Miatas at the events. So far, so good. 
I don't really know the capabilites of the shocks you are using, but I have to wonder....
Anyway, it's not like swapping out springs later is a big deal if you find they are too light. And who know, maybe you'll find that its exactly what you want. I'll be interested in your findings...
I don't really know the capabilites of the shocks you are using, but I have to wonder....
Anyway, it's not like swapping out springs later is a big deal if you find they are too light. And who know, maybe you'll find that its exactly what you want. I'll be interested in your findings...