
new to the Rx-4

Joined: Feb 2001
Posts: 29,798
Likes: 128
From: London, Ontario, Canada

Thread Starter
Joined: Oct 2007
Posts: 871
Likes: 0
From: Fort St John B.C. Canada
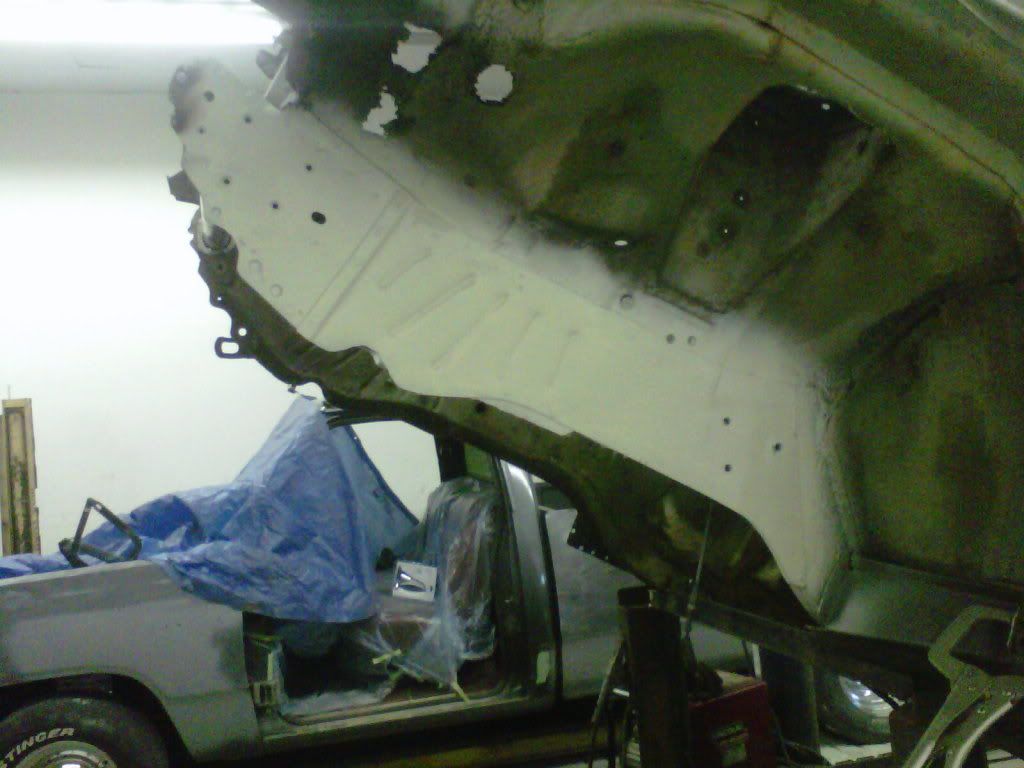
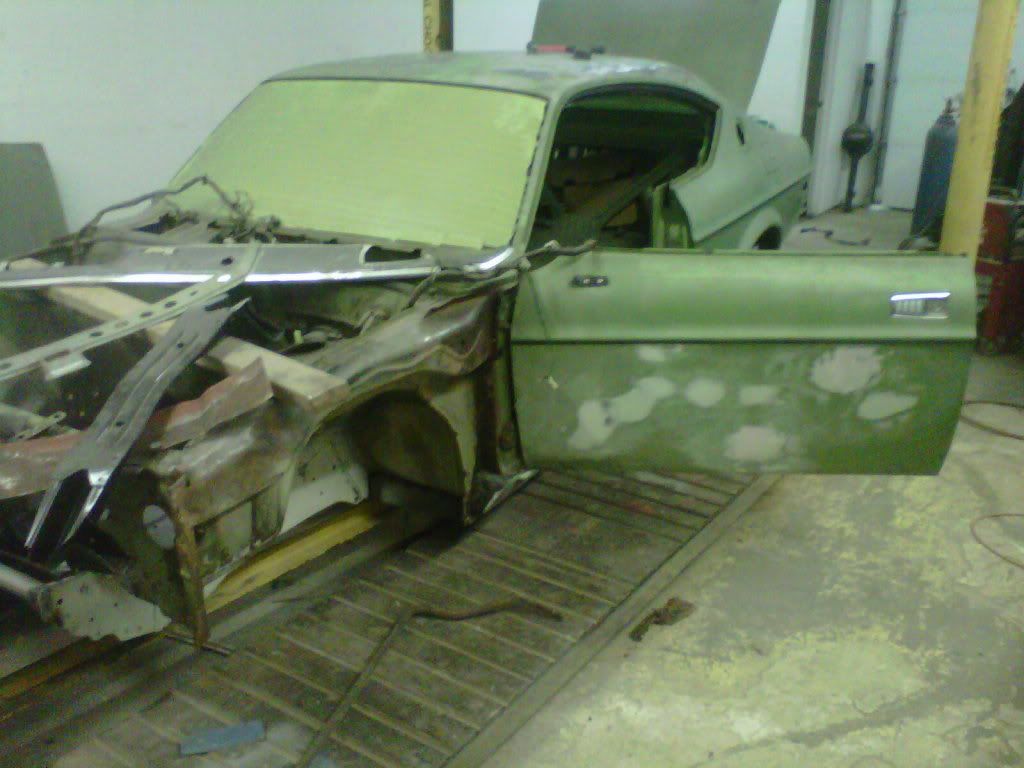
I figured on the weekend while the front suspension is out I might as well take it home disassemble it and clean everything up. I thought it would be fairly quick....... I was wrong.
It has taken forever with the grinding and sanding and grinding and sanding then cleaning and rubbing and sanding and grinding has worn my fingers down an inch.
I have one side done and painted now I just have the other side to do........
Finished product is looking good can't wait to put it together tomorrow

Banned. I got OWNED!!!
Joined: Sep 2010
Posts: 104
Likes: 0
From: japan
Banned. I got OWNED!!!
Joined: Sep 2010
Posts: 104
Likes: 0
From: japan
when will the death penalty be introduced for leaving a mazda rotary to rot and die?
www.kagoshimaenglish.com/rx4.htm
www.kagoshimaenglish.com/rx4.htm
Thread Starter
Joined: Oct 2007
Posts: 871
Likes: 0
From: Fort St John B.C. Canada
Havent had a chance to get down to the body shop in a while but they have called me and all the metal work is done by friday! Definatly looking forward to seeing her all rust and dent free.
Now I just have to come to a conclusion on the color. I am going to have him paint the engine bay before it comes home
Now I just have to come to a conclusion on the color. I am going to have him paint the engine bay before it comes home

I am going to paint the engine bays of any car I build from now on a white or other very light color- Huge difference when working under the hood. Just pick one that is acceptable against your exterior selection, so its not too contrasting. You'll not regret it.
Thread Starter
Joined: Oct 2007
Posts: 871
Likes: 0
From: Fort St John B.C. Canada
OK definatley not going to be home anytime soon..
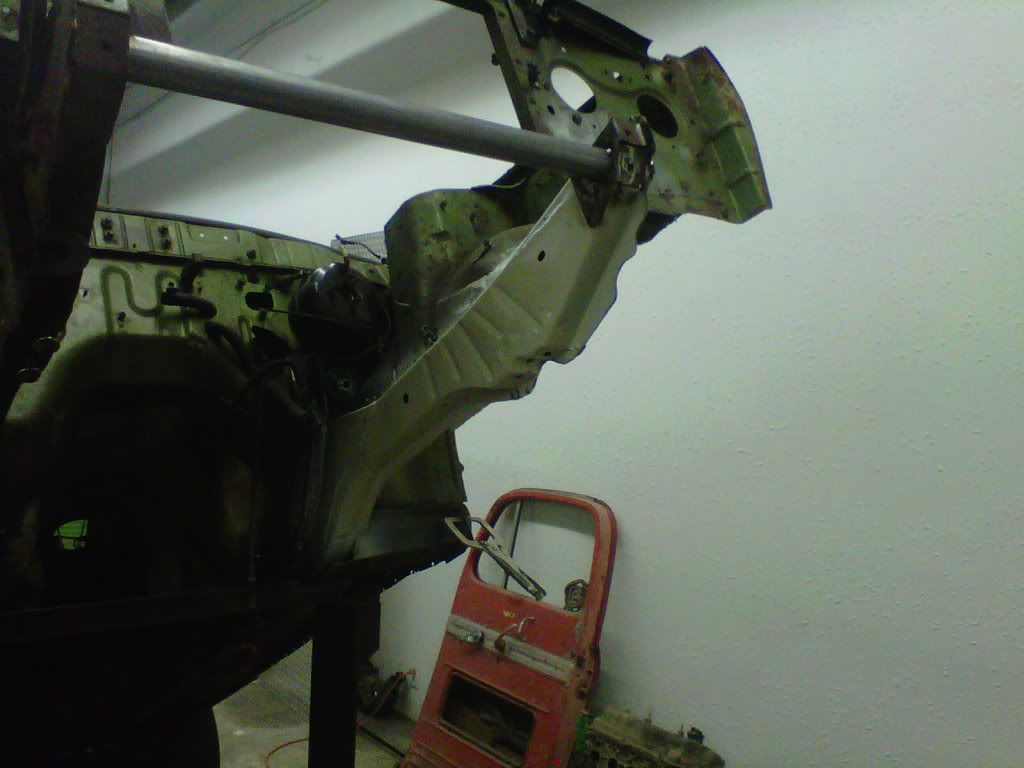
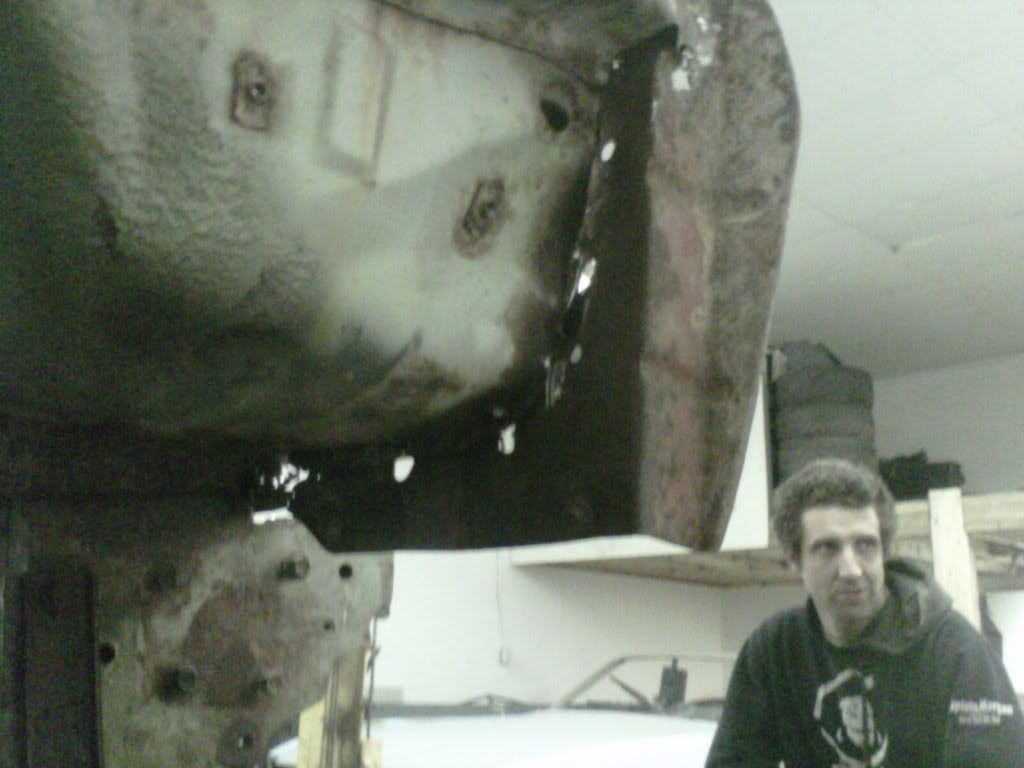
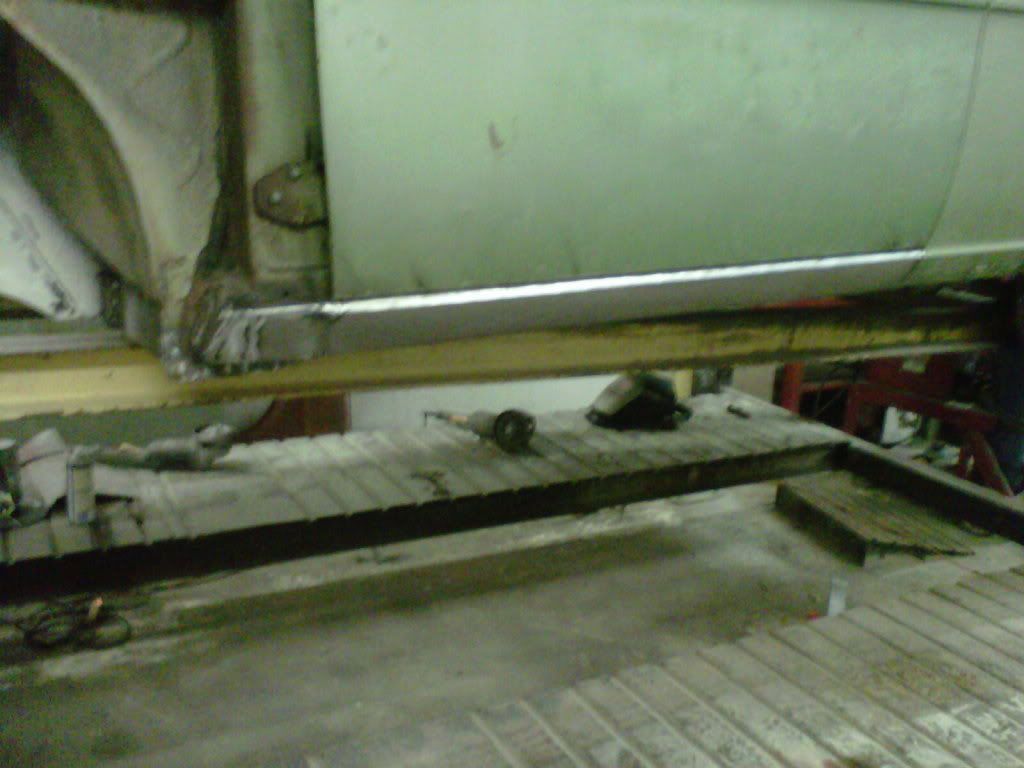
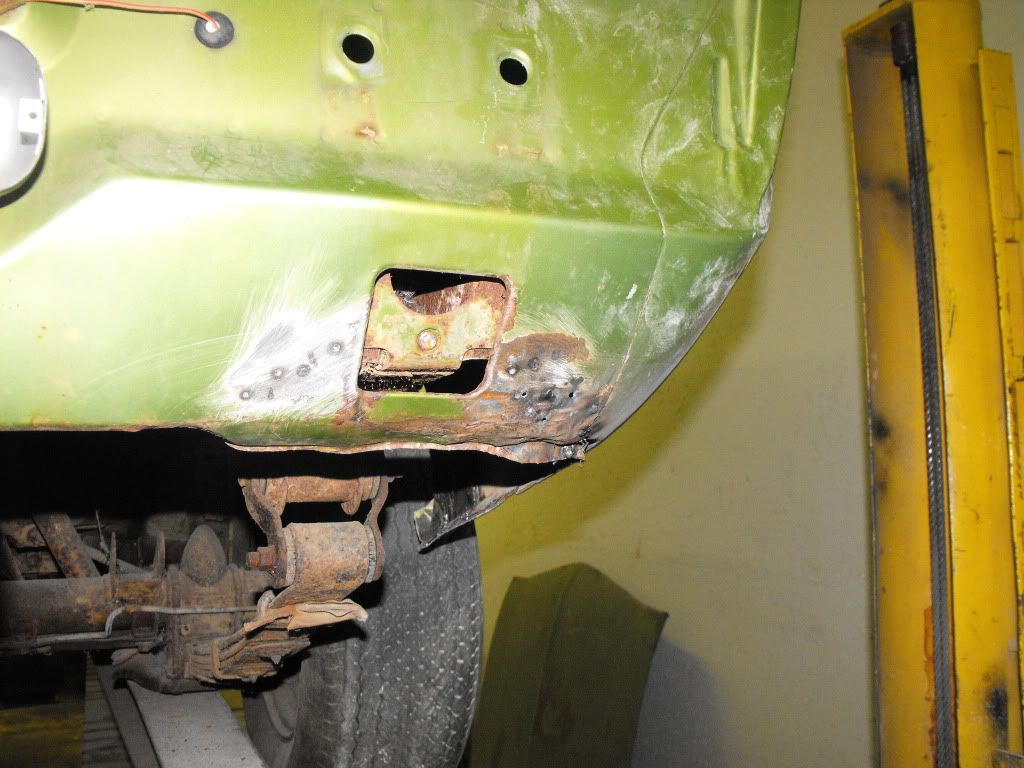
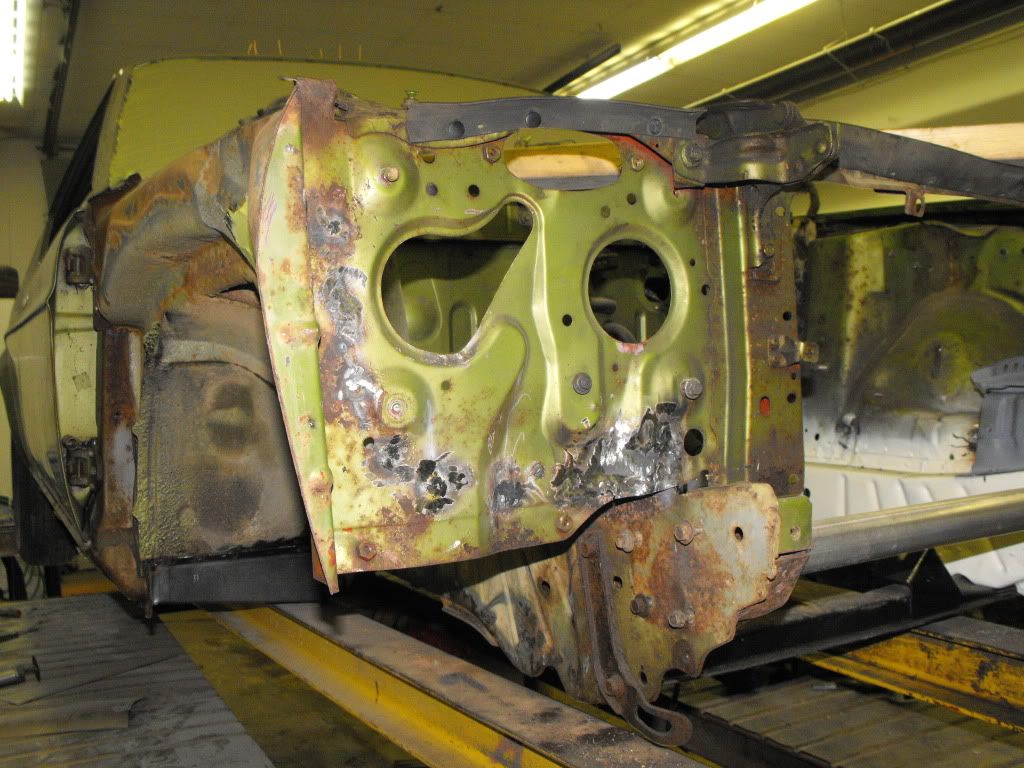
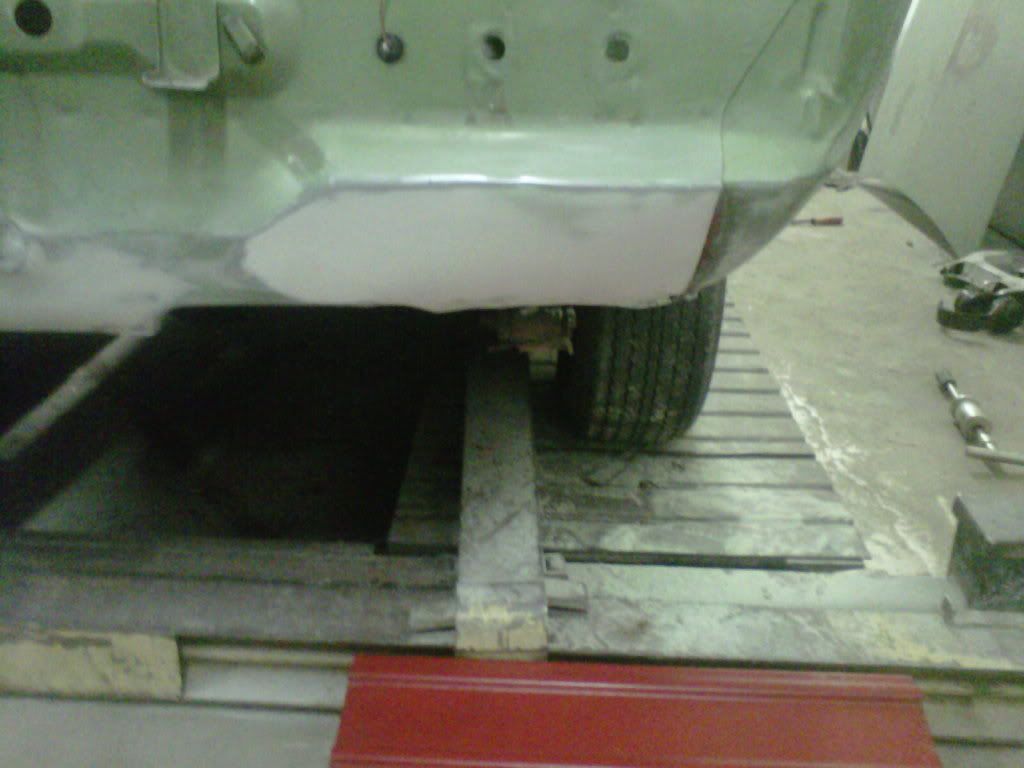
Rocker is all welded in and looks good... went to blast the engine copartment and found some od shotty body work we have to fix. looks like this car took a small impact on the front passenger side the spot welds where the inner fender apron meets the frame rail was pulled apart from each other and a small patch was put in and bondoed.
The frame is straight and true but we have to drop the fender down to match, it is fixable so thats where we are right now.. i forgot to get pics while I was there yesterday
Thread Starter
Joined: Oct 2007
Posts: 871
Likes: 0
From: Fort St John B.C. Canada
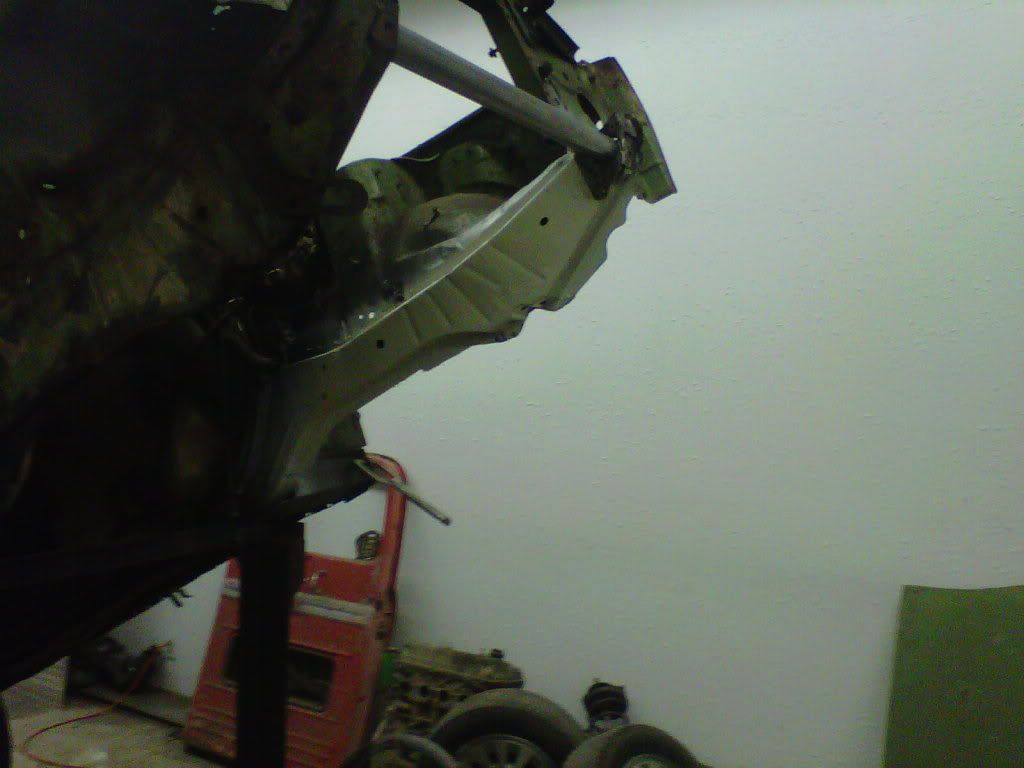
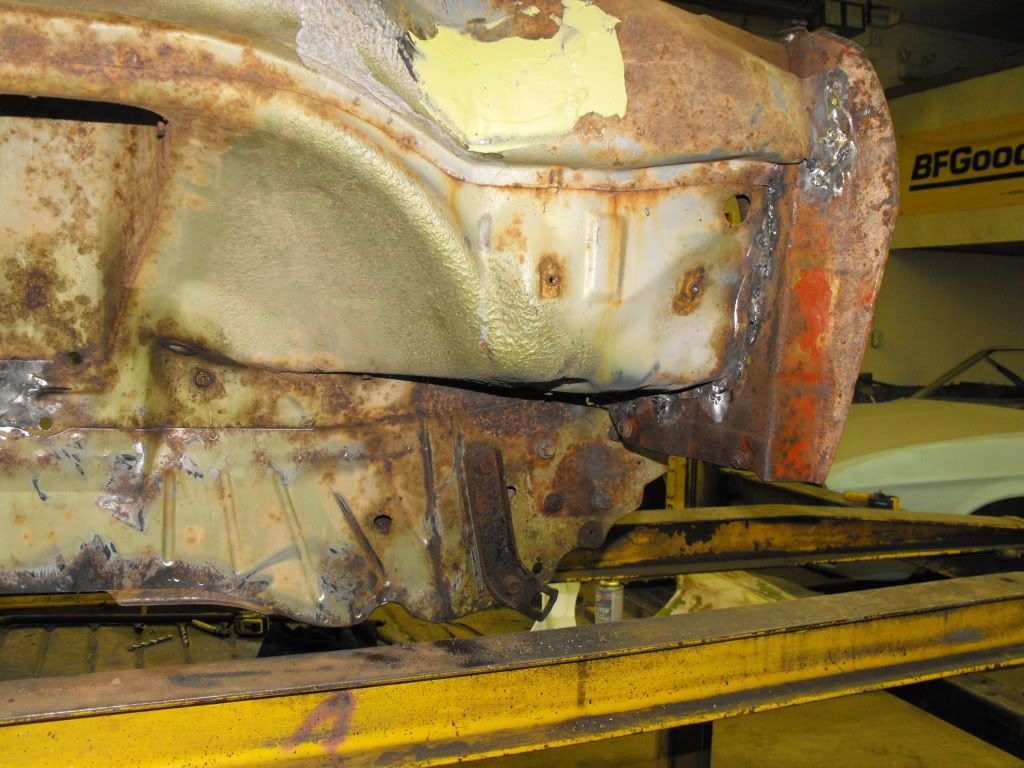
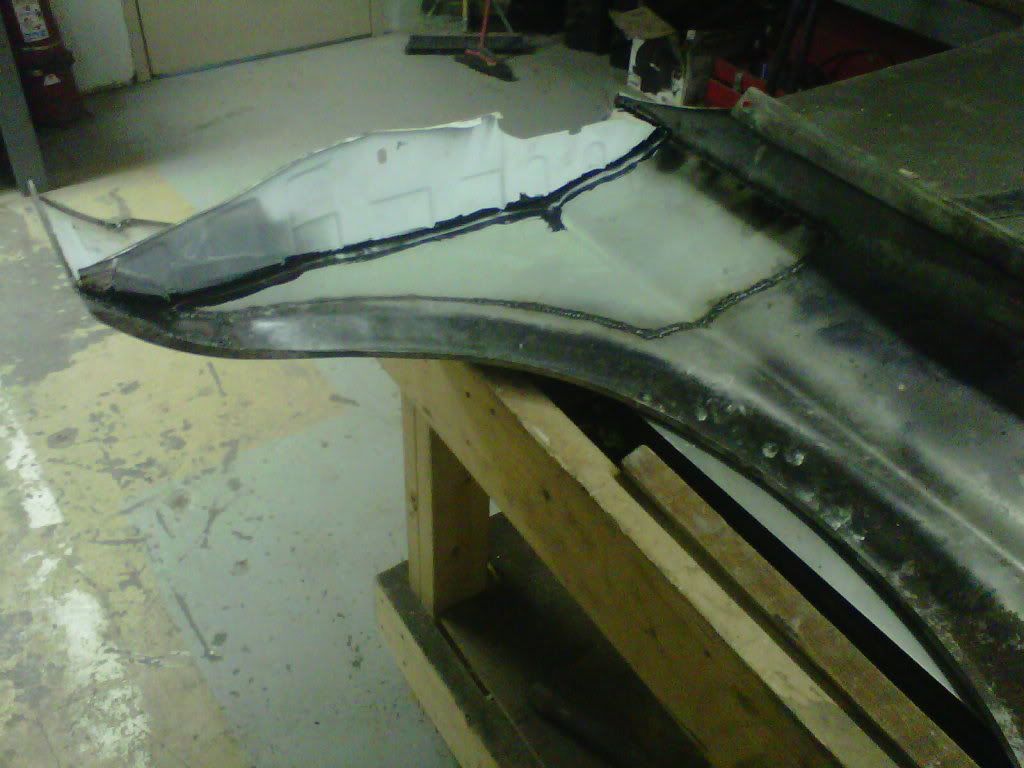
OK a couple crappy cell phone pics on the fixing of the accident damage I spoke of earlier. You can see where the spot welds were taken out and the inner fender has been lowered down back to the stock location... they pulled out a crease, reformed the metal and squared everything up.
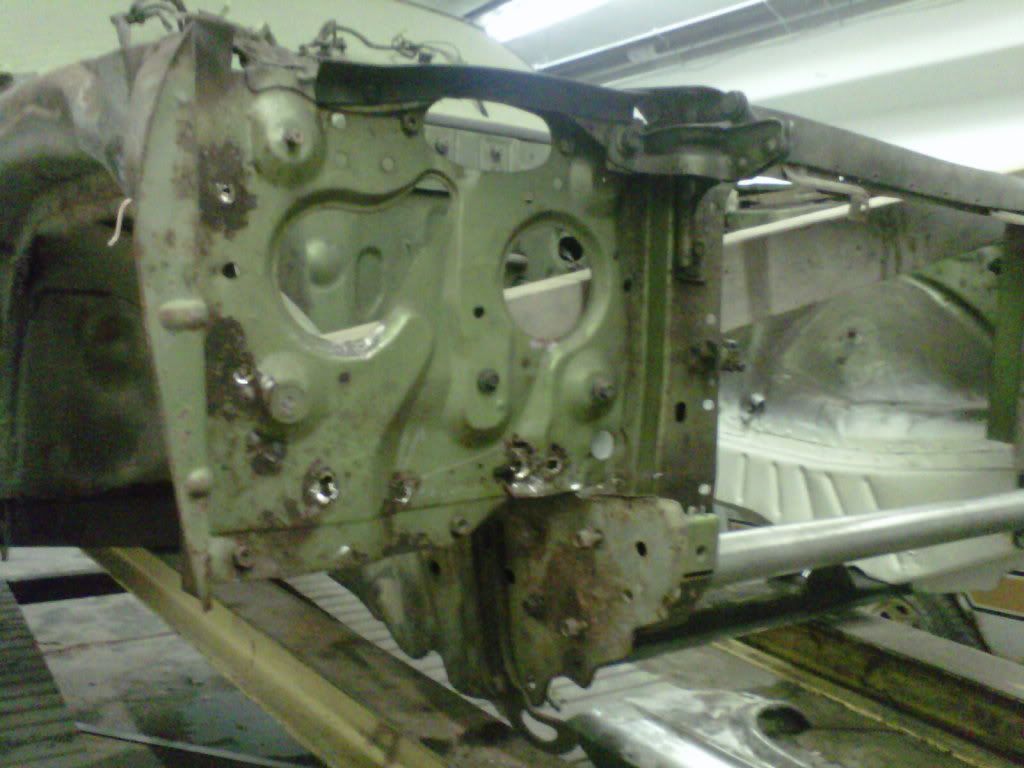
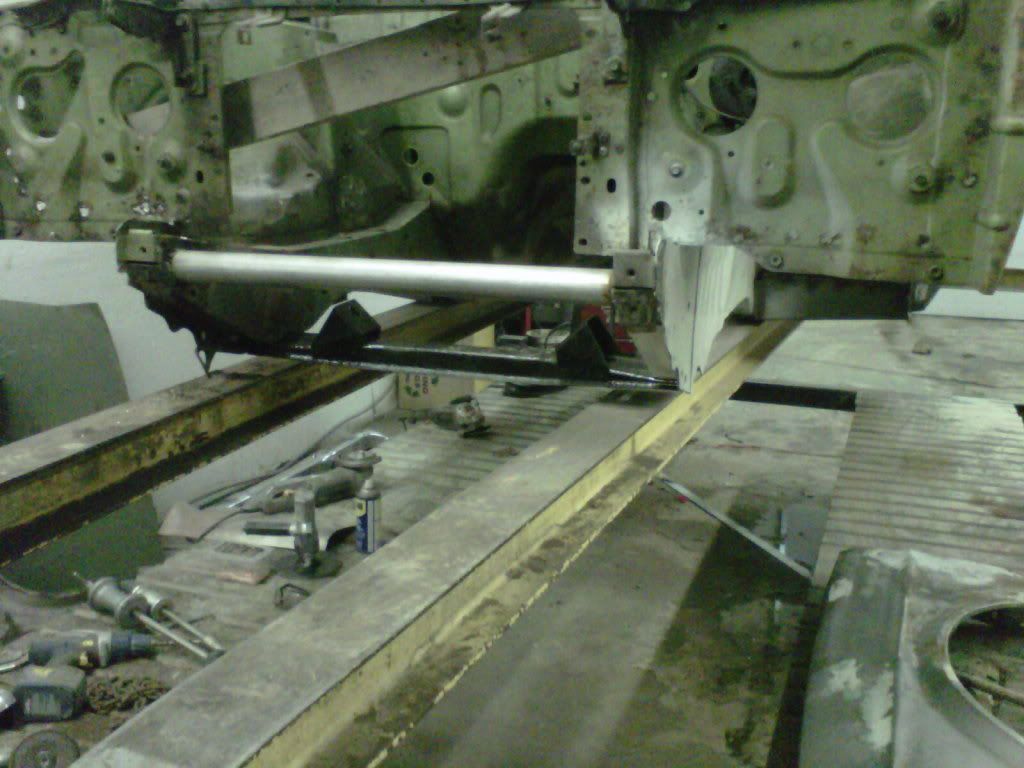
And a sign of good thigs to come is a little RE-assembly.. the blasted and painted engine crossmember has been reinstalled to make sure everything is where it should be
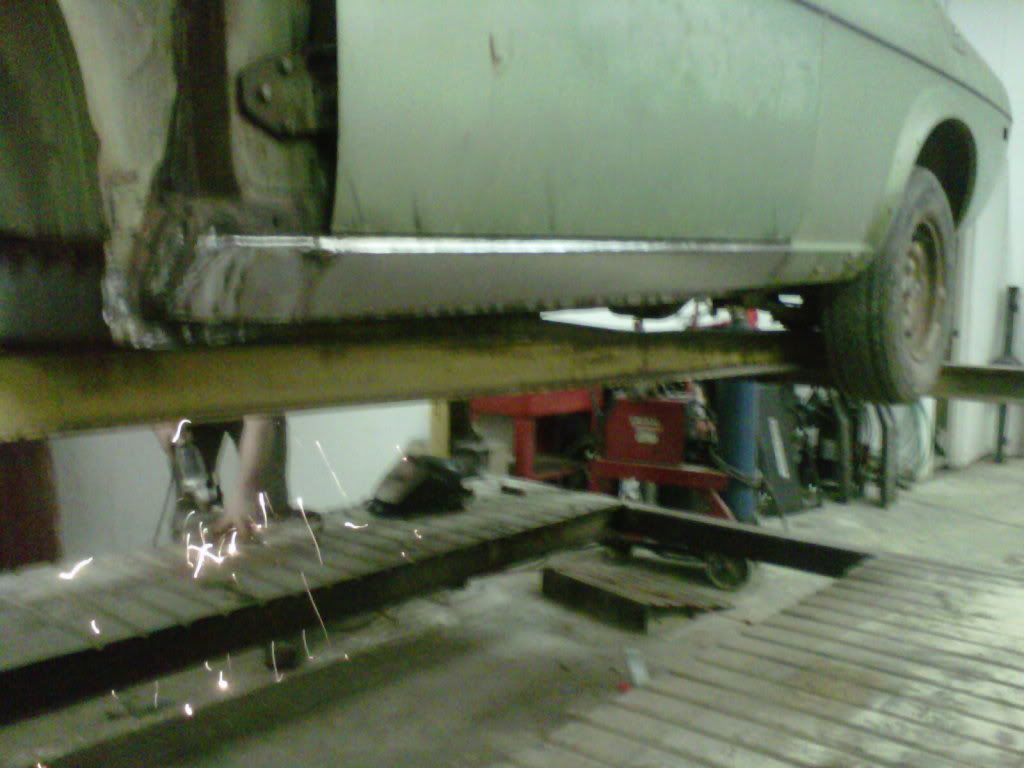
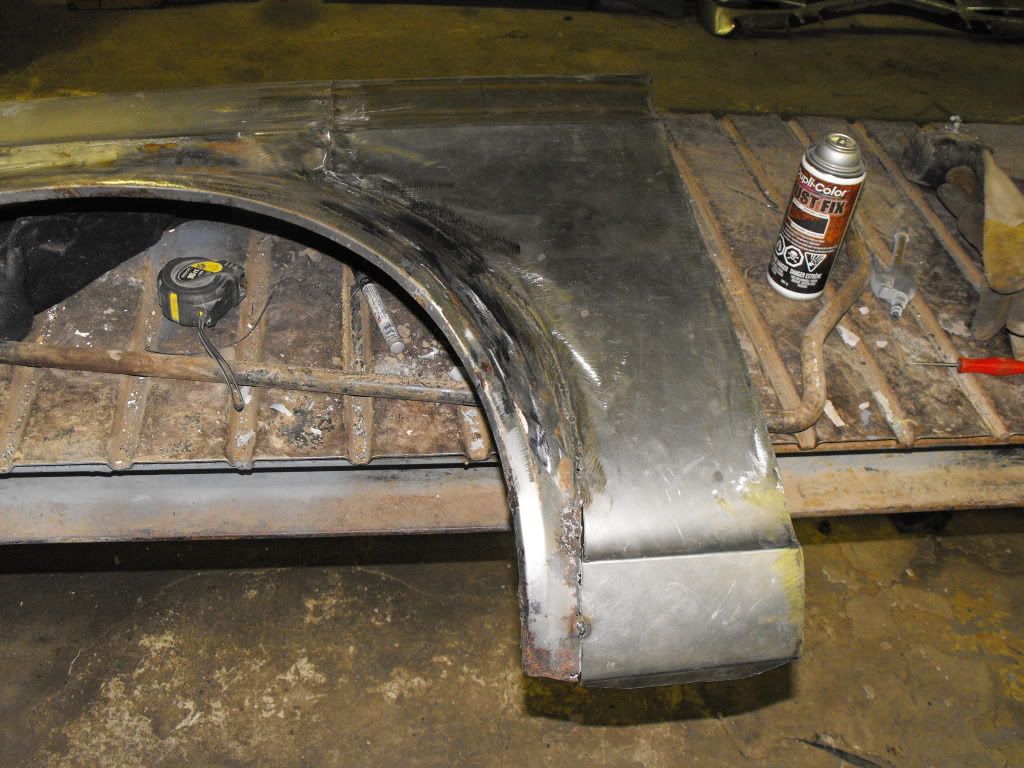
New rocker was welded in and formed to original looking.
Little rust hole was cut out and a new patch is being built from the passenger rear quarter
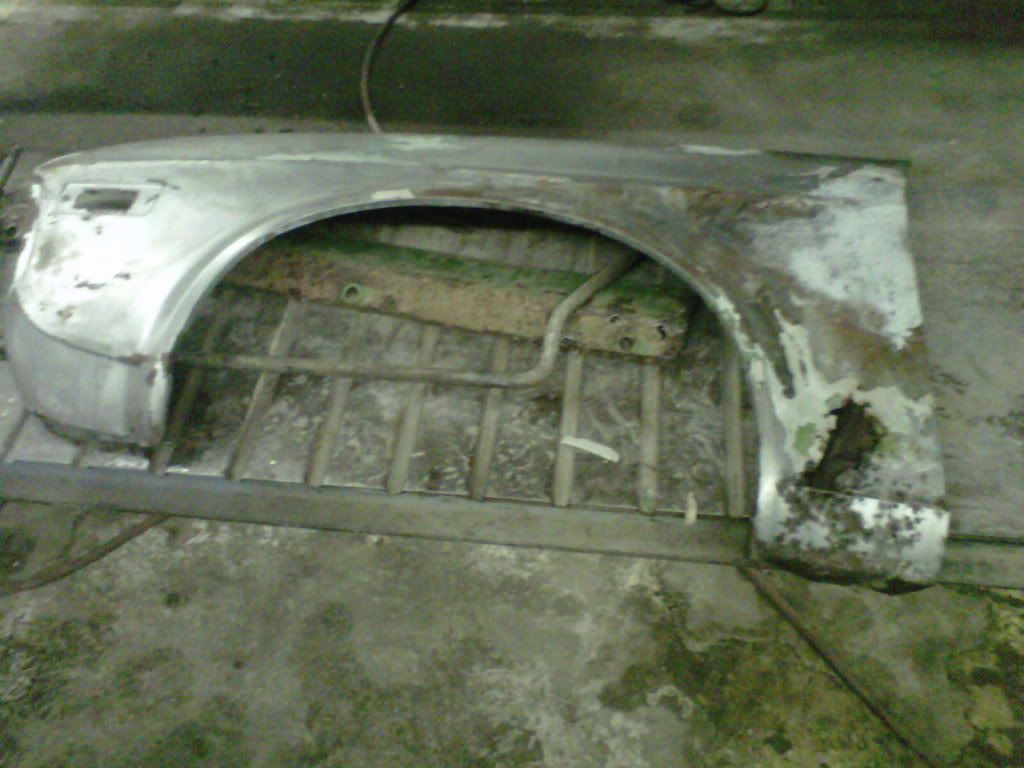
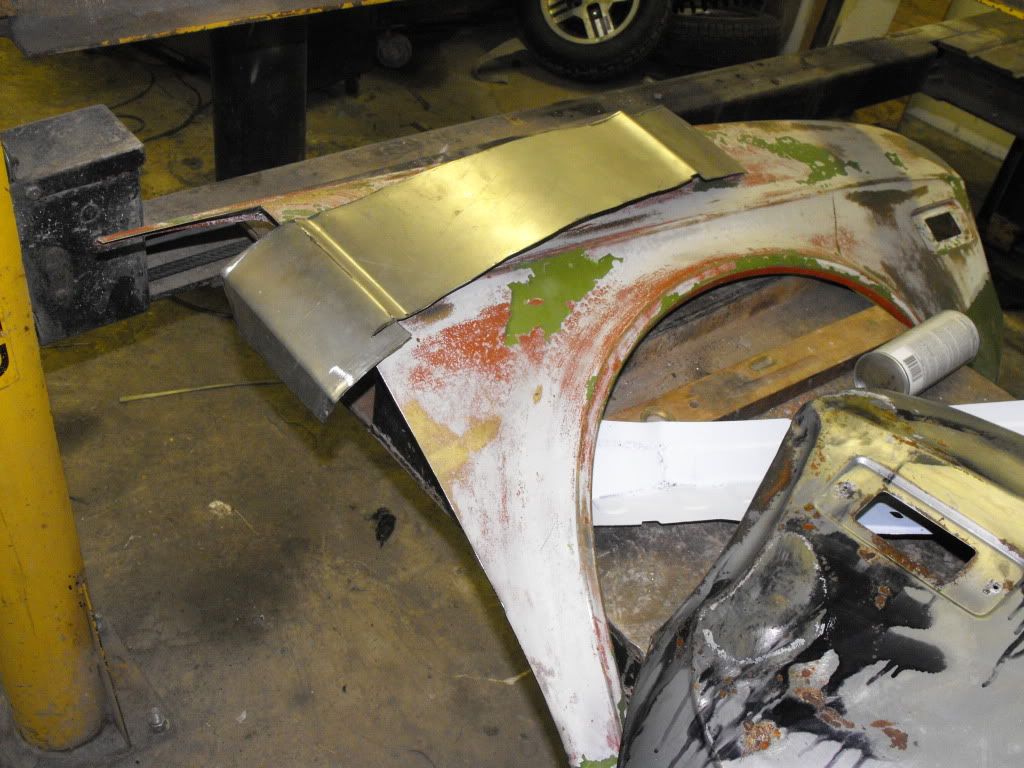
And finally the fenders out of the dip tank.. obviously from the accident it was in, the passenger side fender was replace at one point cuz it use to be red.
And a sign of good thigs to come is a little RE-assembly.. the blasted and painted engine crossmember has been reinstalled to make sure everything is where it should be
New rocker was welded in and formed to original looking.
Little rust hole was cut out and a new patch is being built from the passenger rear quarter
And finally the fenders out of the dip tank.. obviously from the accident it was in, the passenger side fender was replace at one point cuz it use to be red.
Thread Starter
Joined: Oct 2007
Posts: 871
Likes: 0
From: Fort St John B.C. Canada
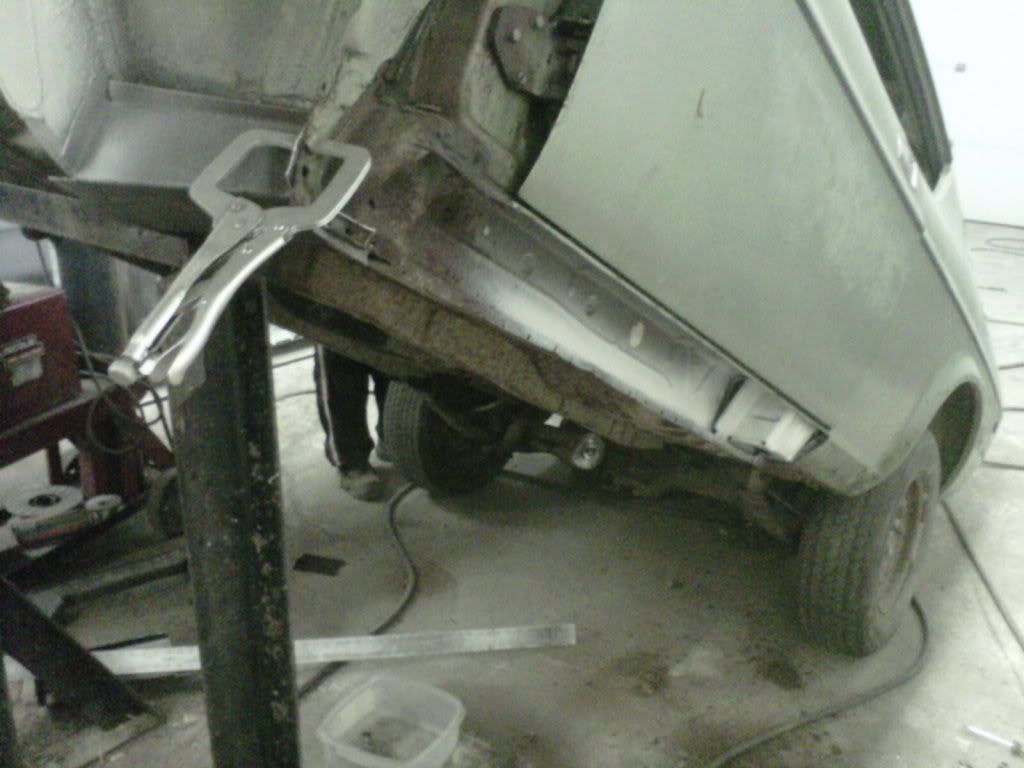
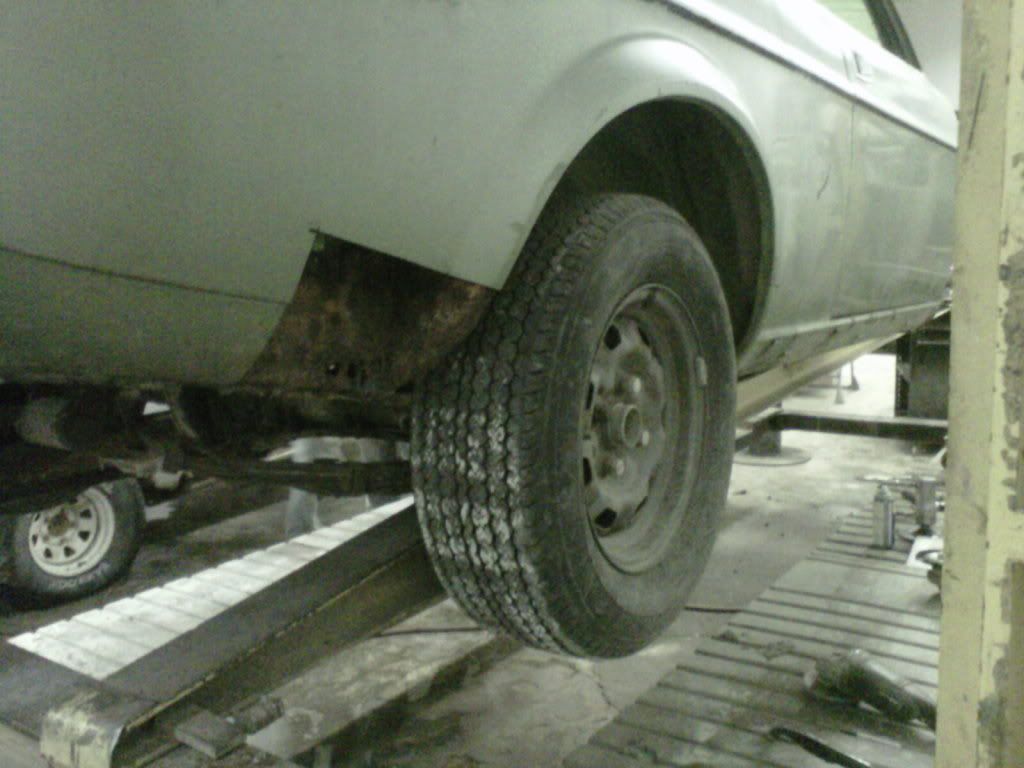
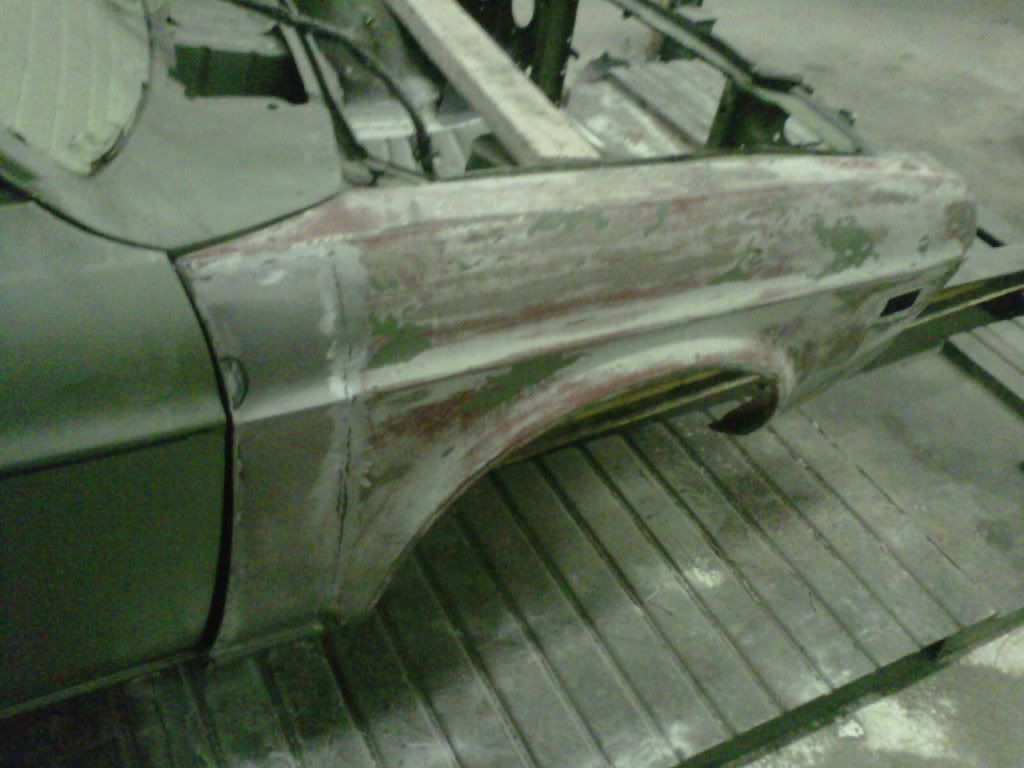
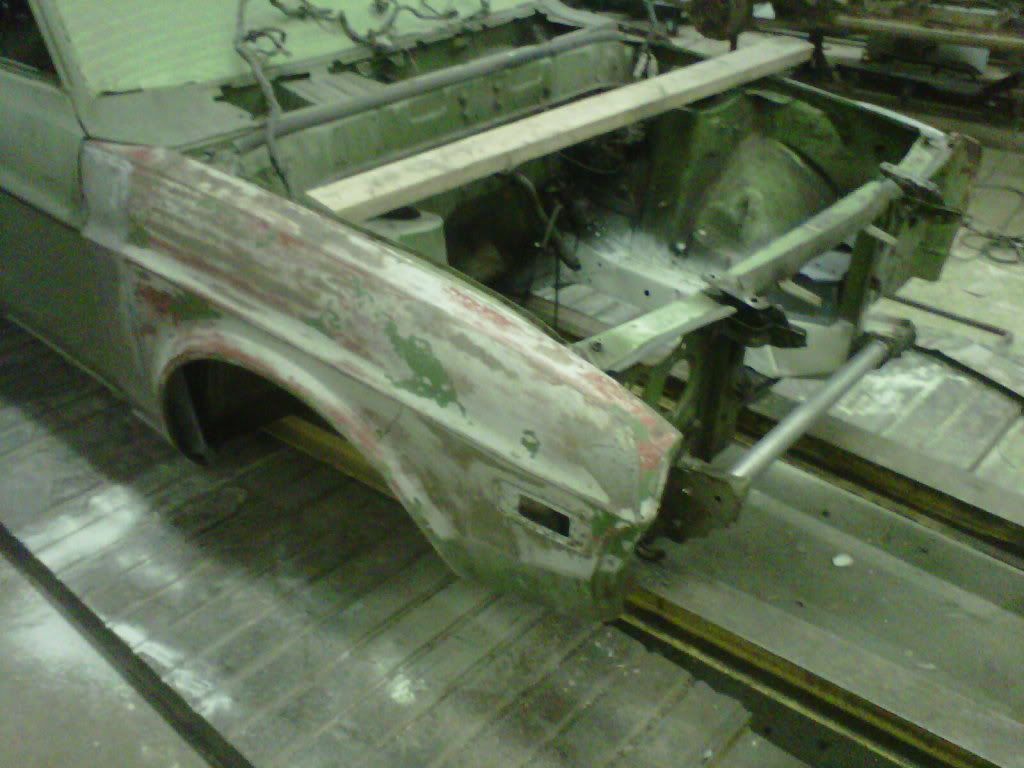
Went down to the body shop for some pleasent surprises... looks like the car is over the hill and is now starting to go together instead of come apart.
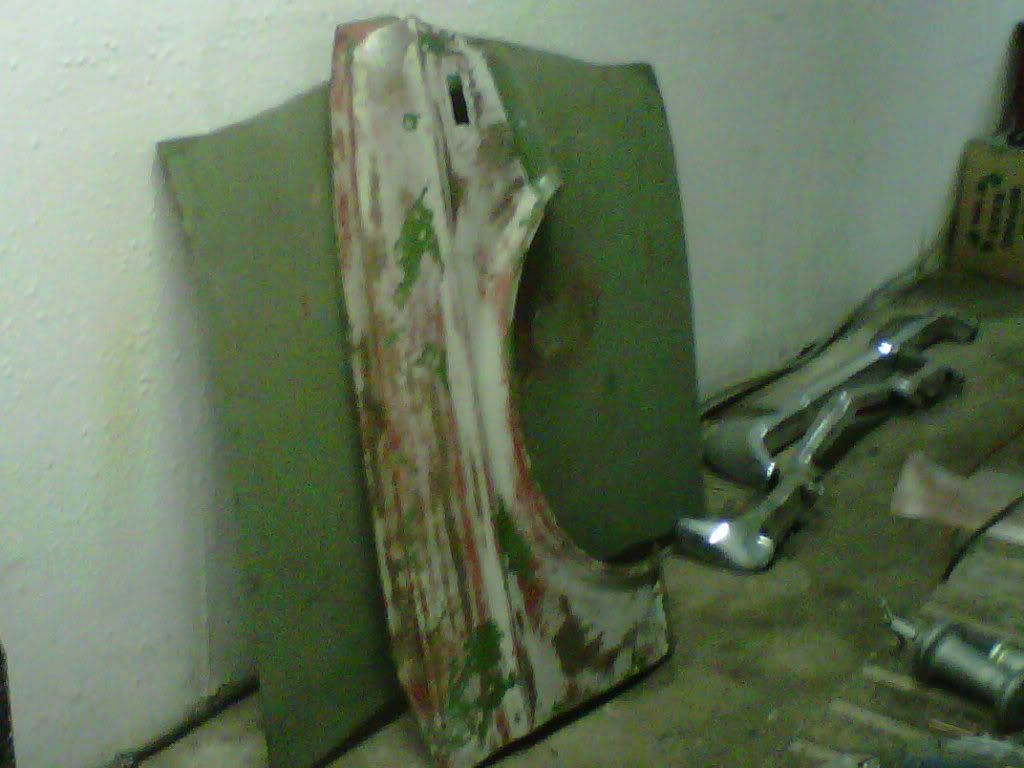
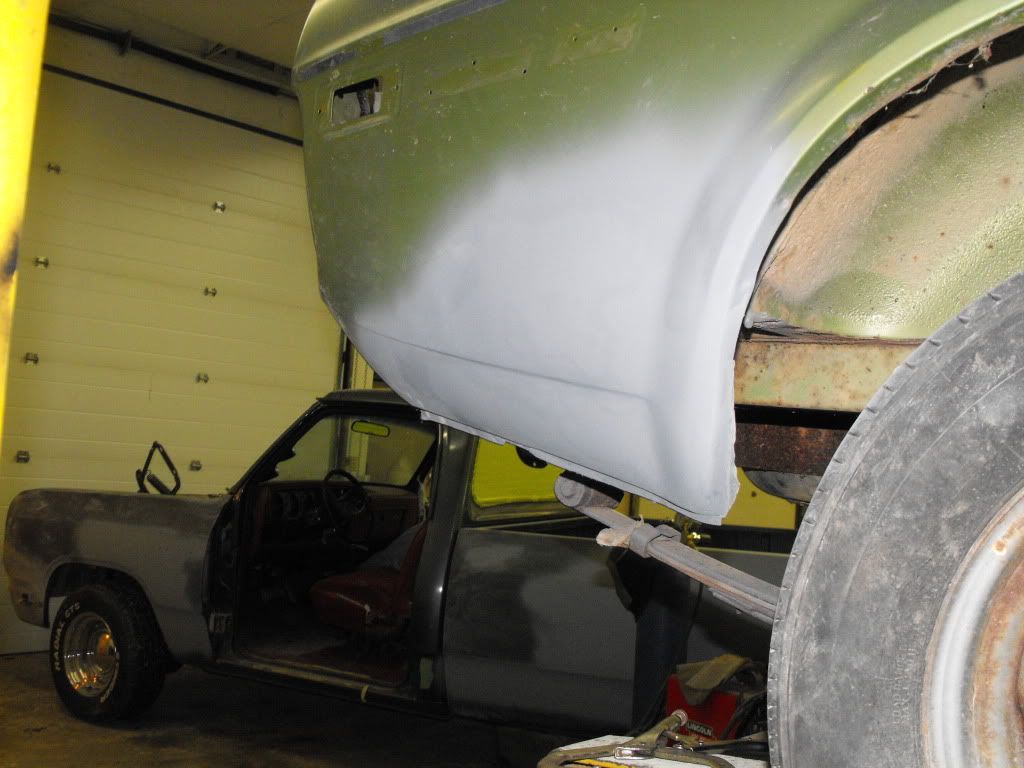
This is what I saw when I got there. Drivers fender on and fixed.. not fully finished but on its way

Passenger fender had some rust in the support in the back so it was cut out and in the process of being re made
The Rear patch that was cut out in the back was filled in and primed.. all body lines match up great
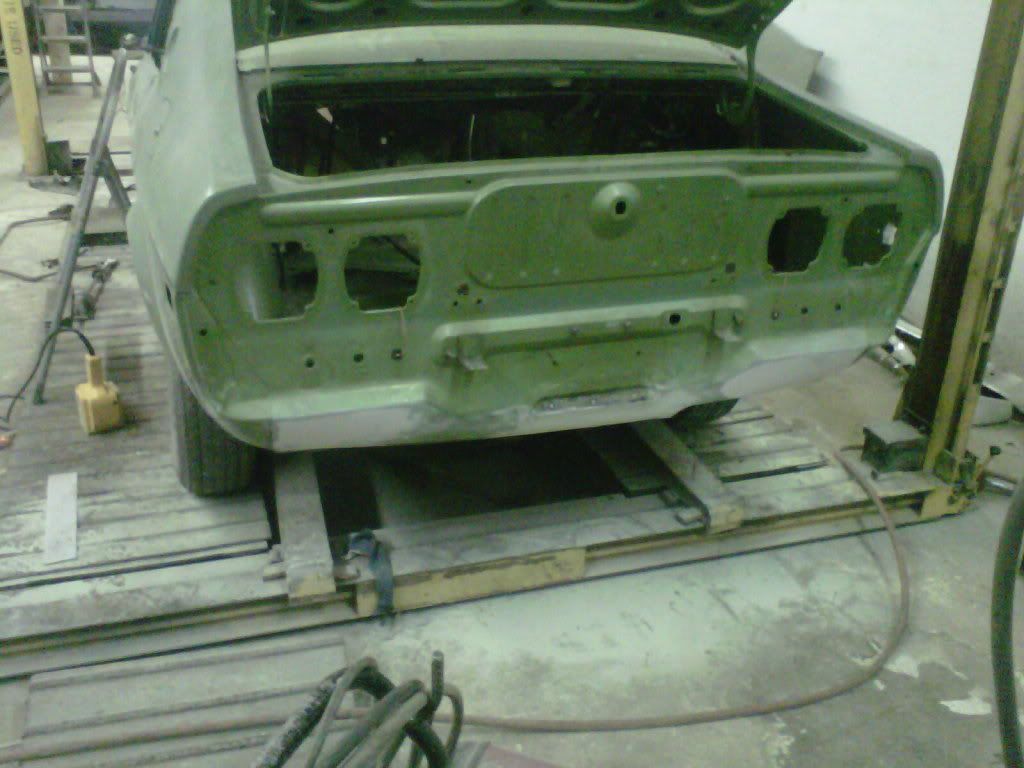
Started to pull the dents and crinkles from the rear lower valance, the bumperette holes will be filled in too, before done
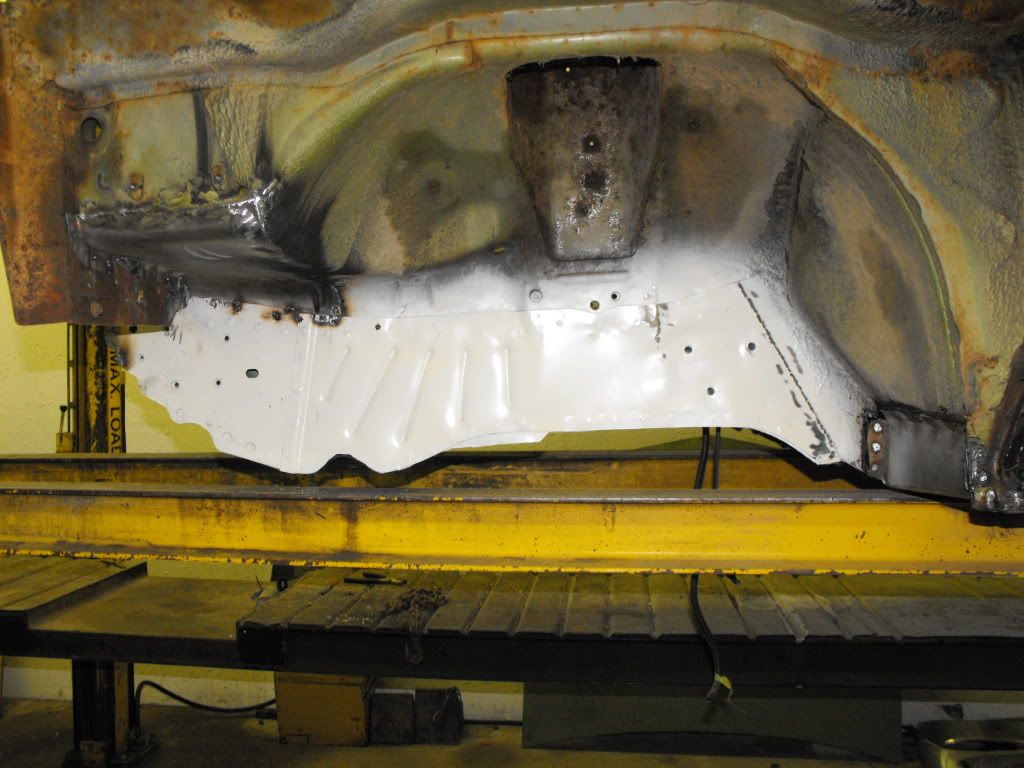
The inner apron has been straightend and brought back down to the original location and rewelded in all square
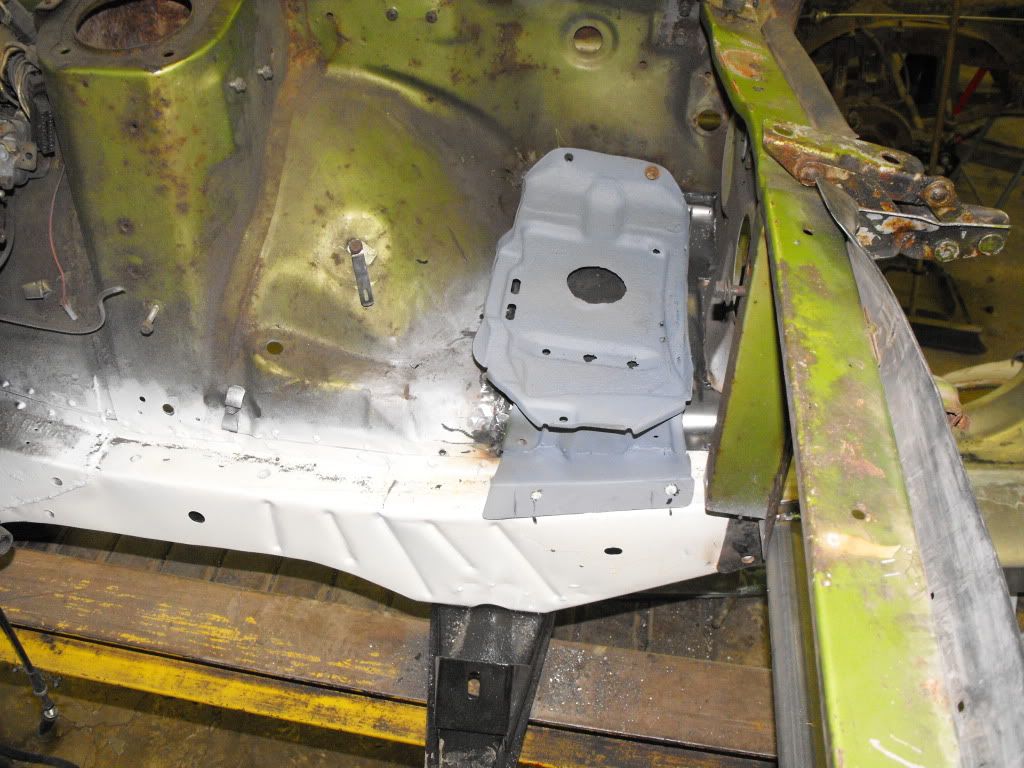
New battery trey support has been welded in as well as the tourque boxes on both sides in front of the rockers
The actual battery trey was almost completely remade from scratch and is being test fitted onto the new frame and battery support
Needless to say I am gettin pretty excited about the progress being made now that most of the fabbing is done.. looks like now we can concentrate on some surface rust and minor dent removal then we can splash some paint.
This is what I saw when I got there. Drivers fender on and fixed.. not fully finished but on its way
Passenger fender had some rust in the support in the back so it was cut out and in the process of being re made
The Rear patch that was cut out in the back was filled in and primed.. all body lines match up great
Started to pull the dents and crinkles from the rear lower valance, the bumperette holes will be filled in too, before done
The inner apron has been straightend and brought back down to the original location and rewelded in all square
New battery trey support has been welded in as well as the tourque boxes on both sides in front of the rockers
The actual battery trey was almost completely remade from scratch and is being test fitted onto the new frame and battery support
Needless to say I am gettin pretty excited about the progress being made now that most of the fabbing is done.. looks like now we can concentrate on some surface rust and minor dent removal then we can splash some paint.
Thread Starter
Joined: Oct 2007
Posts: 871
Likes: 0
From: Fort St John B.C. Canada
I will be looking at doing something like that when I put a motor in the car.. I may use that spot for some MSD boxes if intercooler piping gets in the way of putting a battery there
Joined: Feb 2001
Posts: 29,798
Likes: 128
From: London, Ontario, Canada
Can you post a pic of the shop can and what kind of tools he has available?
I'm guessing at a minimum: sheet metal brake, English wheel, shrinker/stretcher then the basics.
Quality work so far.
I'm guessing at a minimum: sheet metal brake, English wheel, shrinker/stretcher then the basics.
Quality work so far.
Thread Starter
Joined: Oct 2007
Posts: 871
Likes: 0
From: Fort St John B.C. Canada
Actually he has only a metal break, welder, hand tools and blasting cabinet/equipment and paint booth. he must have a shrinker too cuz the shruk the roof to give it some strength back.
he started his career in hand making panels for airplanes and rstoring them. he told me he makes pretty much everything by hand and I have to take his word for it as I havent seen anything fancy in his small shop.
he started his career in hand making panels for airplanes and rstoring them. he told me he makes pretty much everything by hand and I have to take his word for it as I havent seen anything fancy in his small shop.
If I were you, I will install a dummy motor/tranny and turbo/piping prior to painting the engine bay and car. at least this way, you already know where they will sit and not scratch the paint. Just my $0.02.
Thread Starter
Joined: Oct 2007
Posts: 871
Likes: 0
From: Fort St John B.C. Canada
Yeah I am kinda having that problem right now.... I dont know whether to paint it now or wait until i mock everything in place.. I have a GSLSE block I could use to mock a block in but I am planning on a TII motor setup or Cosmo but I dont have everything to do a complete mock up.
Just install a blown motor/tranny with no internals for test fitting along with the brake system, suspension and what not. Intercooling piping to F/I and exhaust is the easy part (shouldnt mesh up the paint if careful).
Thread Starter
Joined: Oct 2007
Posts: 871
Likes: 0
From: Fort St John B.C. Canada
I think i am just going to get him to prime it all, then mock everything I need to into place then when i know I have everything then take it back for paint.
prob the best way to go about it.. and the most wallet friendly lol
prob the best way to go about it.. and the most wallet friendly lol
Thread Starter
Joined: Oct 2007
Posts: 871
Likes: 0
From: Fort St John B.C. Canada
Ok stopped by the body shop again this morning..
The back of the drivers fender getting sealed and finished
Passenger side fender just sitting on the car with the new piece and support welded on
And in the back the bumperette holes have been filled in and welded up
The back of the drivers fender getting sealed and finished
Passenger side fender just sitting on the car with the new piece and support welded on
And in the back the bumperette holes have been filled in and welded up
Thread Starter
Joined: Oct 2007
Posts: 871
Likes: 0
From: Fort St John B.C. Canada
Couple more from the weekend.
Door is getting smothed out
Rear bumperetts have been deleted and the holes filled in
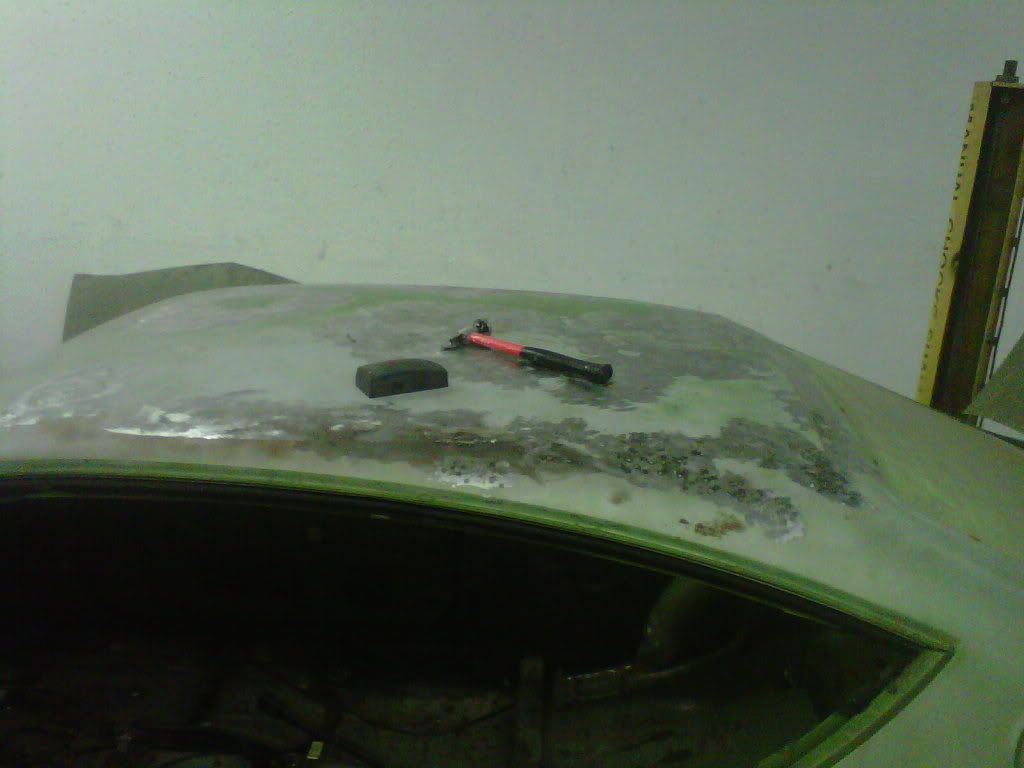
And the roof is dent free and all the strength has been added back to the entire roof
Door is getting smothed out
Rear bumperetts have been deleted and the holes filled in
And the roof is dent free and all the strength has been added back to the entire roof
Thread Starter
Joined: Oct 2007
Posts: 871
Likes: 0
From: Fort St John B.C. Canada
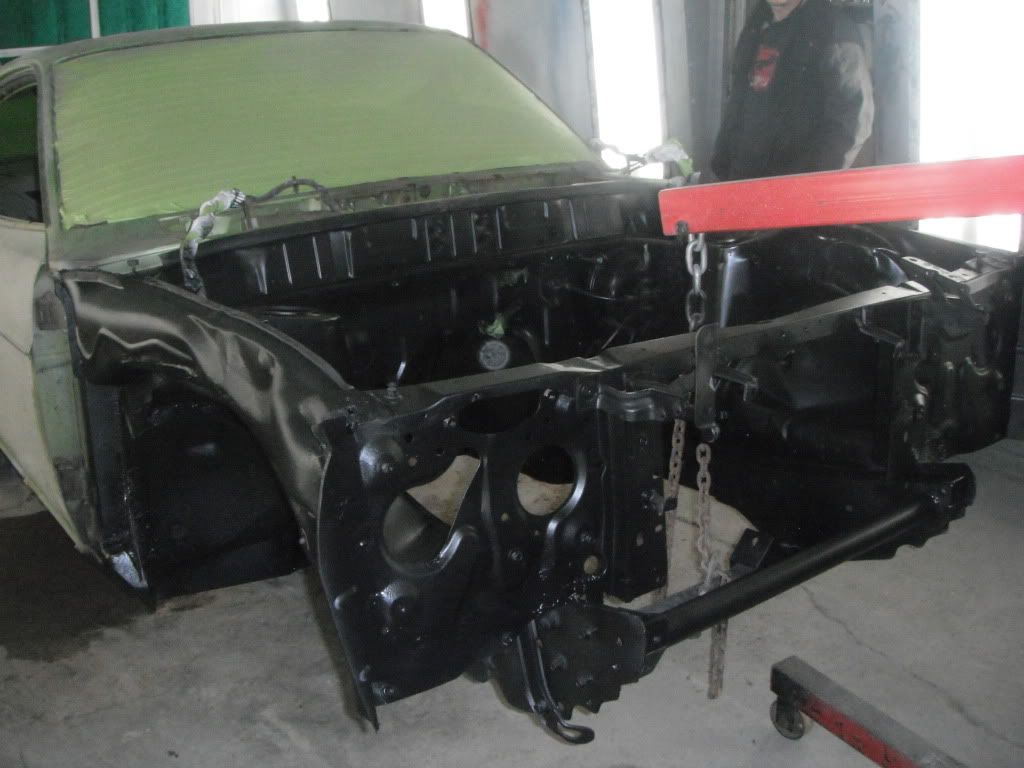
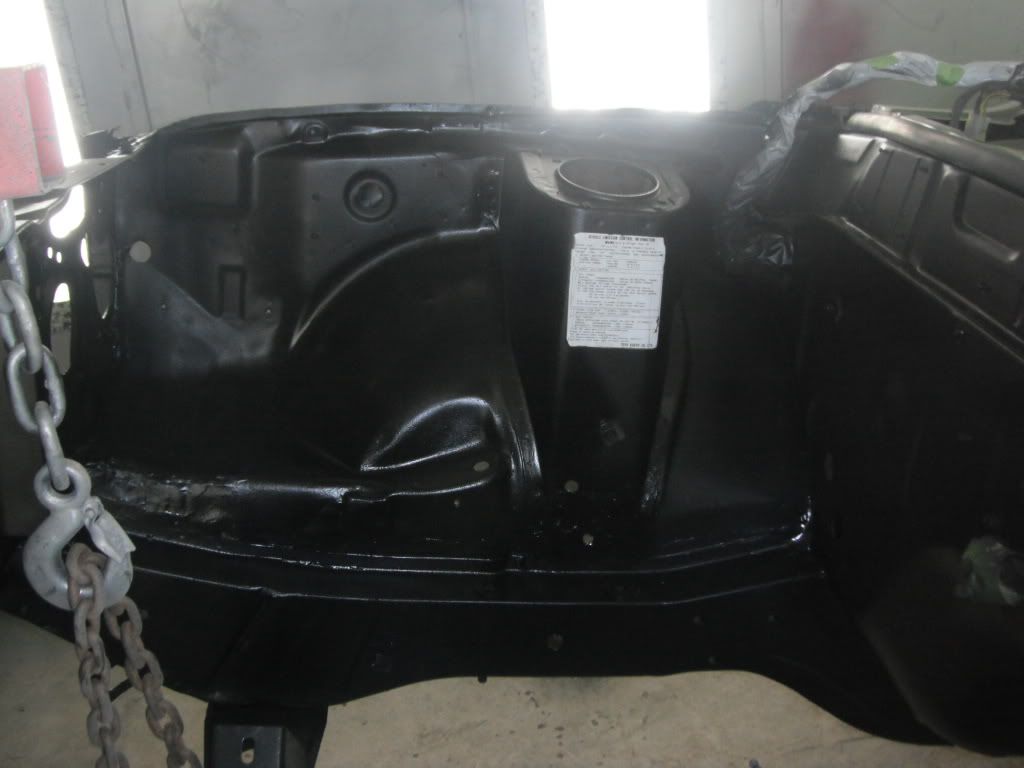
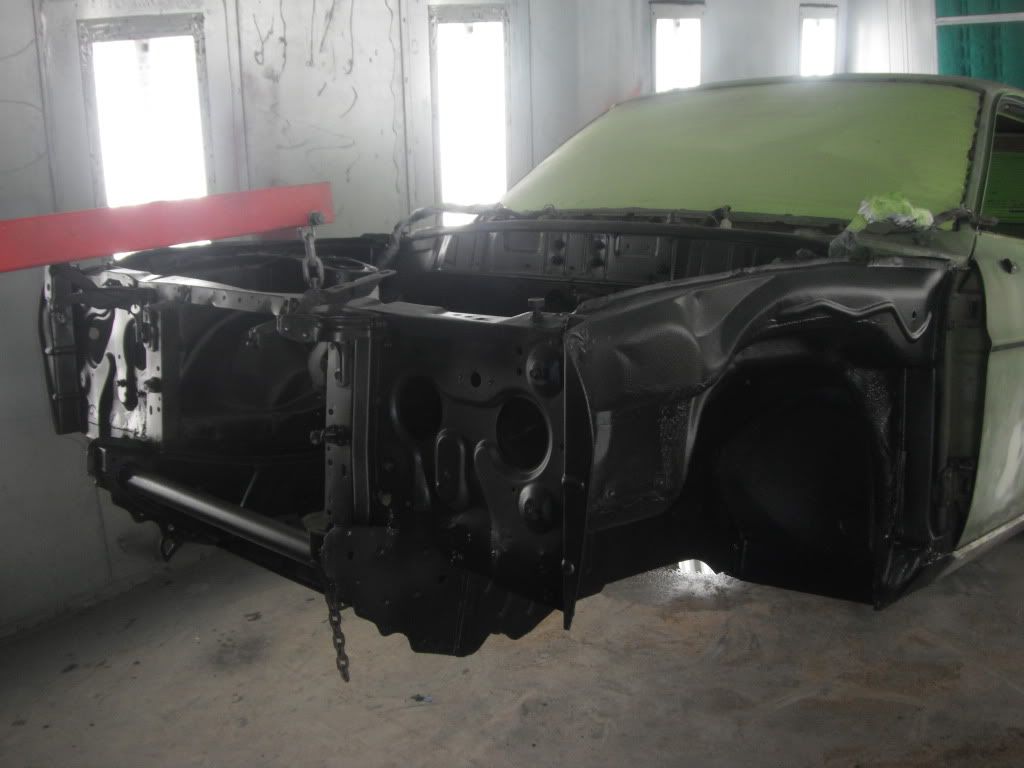
OK so the car is getting closer to being completed.. front end has been sand blasted.... small holes that showed up were replaced and the front end was sprayed black for now. Heres some pics of the completed front end.
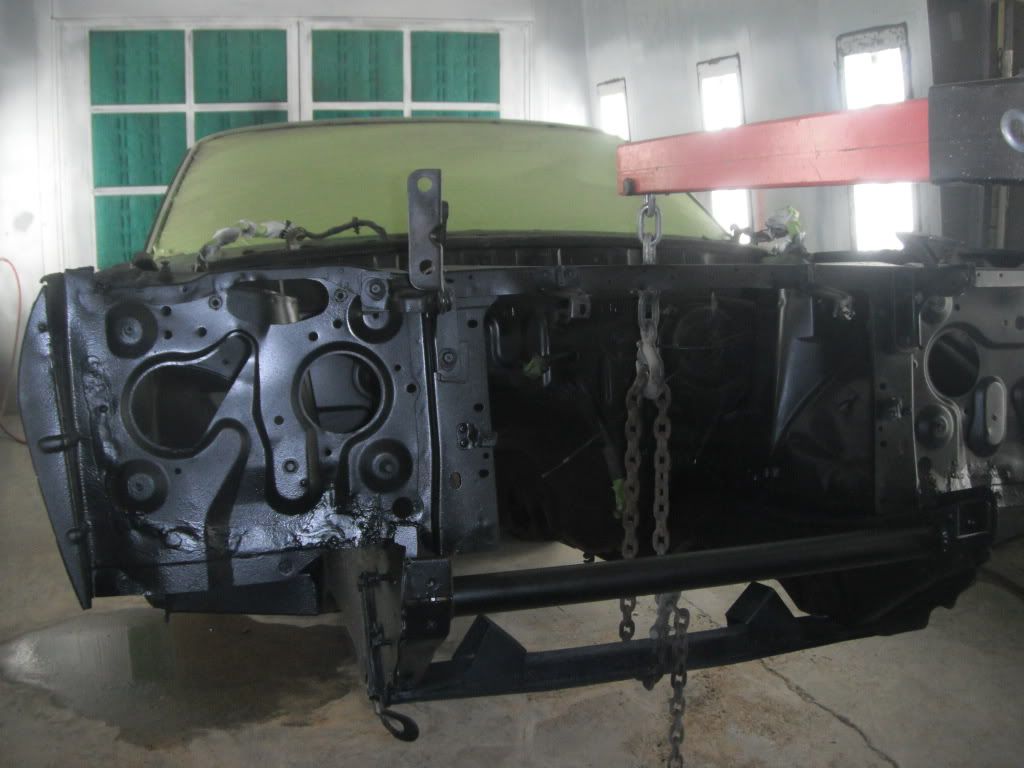
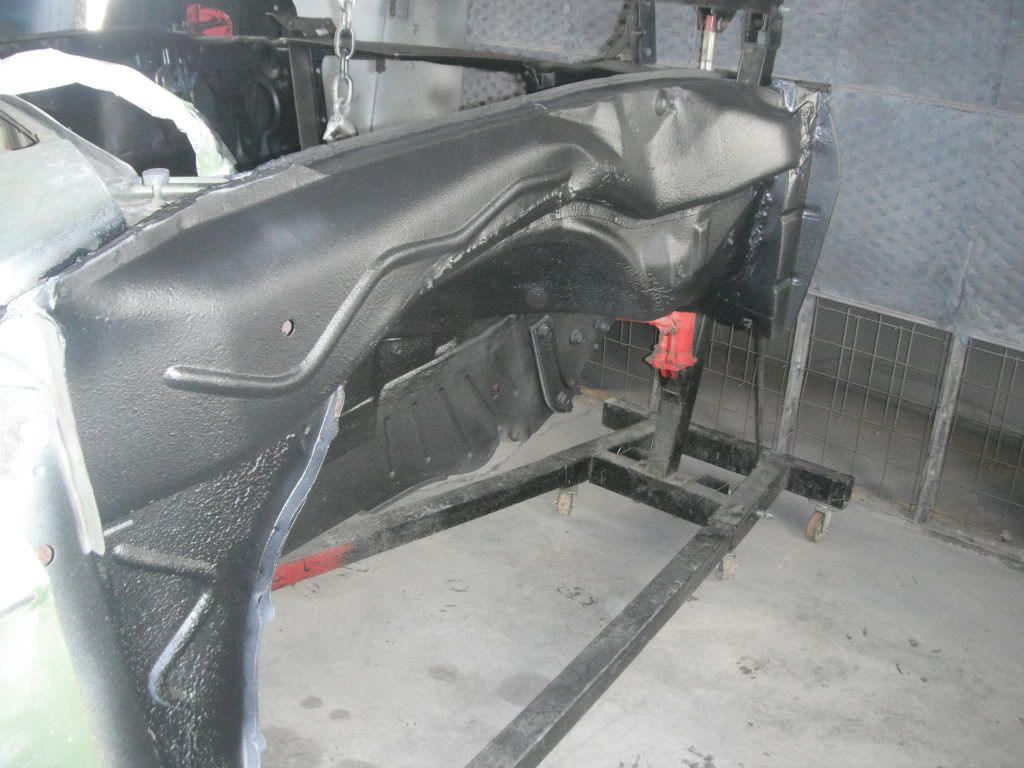
A little more work on the roof to get it all smothed out now that it has its strength back. You can now give the roof a good hit without it wanting to cave in
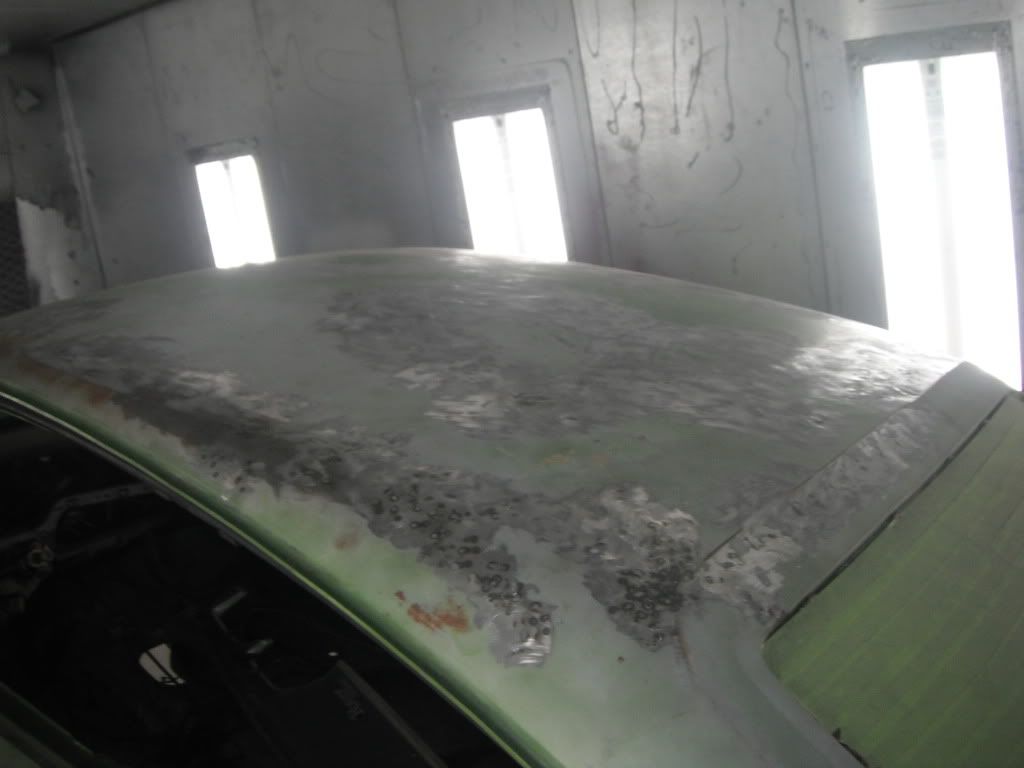
A little more work on the roof to get it all smothed out now that it has its strength back. You can now give the roof a good hit without it wanting to cave in