When you click on links to various merchants on this site and make a purchase, this can result in this site earning a commission. Affiliate programs and affiliations include, but are not limited to, the eBay Partner Network.
you can get the windshield from safe lite. tell them that you need a glass for a 1975 ford courier truck
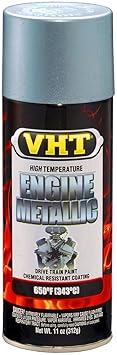
Thank you I will contact them once she is painted and ready.
Isn't that the antenna hole? Not that you need it.
lol I might make another hole near it .
Originally Posted by Jeff20B
That looks like a flux core.
You should cut the piece of steel slightly bigger than the hole and hold it up under. The heat will be more spread out.
Also get some weld through paint which will prevent lots of the balling up on the surface.
Use a lower or lowest heat setting and .30 wire. As for wire speed, that is up to your skill and your machine.
Maybe get a thicker piece of steel as well. Bend the edge 90 degrees so it can fit up in there easier and be stronger. Then once it's in place, maybe weld a new piece of thin stuff above it to bring the height up to the original fender. Then you'll require less mud.
Keep the welds and heat spread out so they don't shrink the area down too much. Do a little at a time.
Thank you for the advise, i will put it to use . thank you again.
Sorry no picture. The aluminum I've used was 1/8" or thicker.
You just place the aluminum flat against the weld zone. Aluminum is conductive, but won't stick to steel, so it makes filling air gaps no problem too. For your fender weld you would need a helper to hold the block or plate, wearing welding gloves, spanning the joint pressed firmly against the backside of the edge of the body hole and patch plate.
thank you I will pick up a piece of aluminum or brass this weekend.
What kind of welder do you have? What settings are you using? Maybe forum folks can help you dial it in.
I figured you would have a scrap of aluminum sitting around. A copper, brass or aluminum backer will make all of your steel welding go a lot easier. If you have to buy a piece for backing, Copper or Brass is most versatile because you could use it to weld aluminum, but aluminum is most common and works great as a backer for steel. Get what is easiest to find, they all work to make the type of welding you're doing easier.
Have fun and good luck.
Thank you for the advise the welder is a cheap one from harbour freight is a mig welder.
Do you have their 90A AC welder? A welder with DC output would be better, but several reviews of the AC welder indicate that upgrading the ground clamp to copper and changing the welding wire to Lincoln 0.030" or 0.035" flux core wire corrected the poor welding characteristics.
Here's a review, "I have been a professional welder for 35 years and I bought this welder last week for my shop. Out of the box, it welded ok but, could be better. So here are some small upgrades that I made and recommend- that will take this welder to a whole new level. First, do yourself a favor and replace the cheap metal negative ground clamp with a serious copper negative ground clamp for $13 at HF. This small upgrade made a world of difference in the quality of weld and will give a few more amps to the project. Next, throw away the HF Flux Core wire that comes with the machine and buy some Lincoln
.030 or .035 FC wire. This produced some awesome welds that really impressed me on � inch material with no problem at all!! The machine did not come with a .035 torch tip but, I was able to use the .030 tip with the .035 wire and it worked great! I would highly recommend this welder to a beginner or professional for a cost that cant be beat! Hope this was helpful.
BOTTOM LINE Yes, I would recommend this to a friend"
speaking of welders, I would shy away from the HB welders, I've read way too many horror stories about them and looking at them they look and feel cheaply built, I would look for a used Hobart, Auto Arc, Miller, Lincoln or century
My first mig welder was a millermatic 210 built for production, I had it about 5 years, maybe used it a total of 2 hours of actual welding, I've had lincoln, miller and hobart (dont ask lol)
After doing my unnecessary R&D over the years, I realised that I mostly do my own exhaust systems, small brackets and remove broken studs and ended up with late 90s mig welder auto arc 120 (130 amps mfg by Hobart) that I picked up on cl for $100 that needed a mig gun and it came with a old bottle and regulator,
I sold the regulator & bottle for a $100, I called Miller looking for a gun and they let me know the part number which was the same part number that comes in the new Miller 140, I went on eBay and purchased replica mig gun from the biggest welding supplier online for $65 and man am I impressed how great this thing works, It doesn't miss a beat.
Here is a picture of my welder set up, The cart and bottle I kept from one of my tig welders I purchased for the unnecessary R&D days
Do you have their 90A AC welder? A welder with DC output would be better, but several reviews of the AC welder indicate that upgrading the ground clamp to copper and changing the welding wire to Lincoln 0.030" or 0.035" flux core wire corrected the poor welding characteristics.
Here's a review, "I have been a professional welder for 35 years and I bought this welder last week for my shop. Out of the box, it welded ok but, could be better. So here are some small upgrades that I made and recommend- that will take this welder to a whole new level. First, do yourself a favor and replace the cheap metal negative ground clamp with a serious copper negative ground clamp for $13 at HF. This small upgrade made a world of difference in the quality of weld and will give a few more amps to the project. Next, throw away the HF Flux Core wire that comes with the machine and buy some Lincoln
.030 or .035 FC wire. This produced some awesome welds that really impressed me on � inch material with no problem at all!! The machine did not come with a .035 torch tip but, I was able to use the .030 tip with the .035 wire and it worked great! I would highly recommend this welder to a beginner or professional for a cost that cant be beat! Hope this was helpful.
BOTTOM LINE Yes, I would recommend this to a friend"
Cool good to know ill go ahead and get the correct wire this weekend. Thanks again
Ok thanks to Nick who is a great friend, he told me about changing the electronics on the ignition, he gided me through text and even send me a link to rewire the system and this is what i got so far. Any comments are welcome.....i have NOT connected the battery and those connectors and wires will be trplaced once i get the OK that they are correct.
Last edited by Medevack1; Jul 18, 2015 at 05:08 PM.
What erick31876 said. You were attempting to weld the patch to further rust. You need to cut all the rust out before you even think of welding in a patch. What you see is typically only 30% of the actual rust.
If you are using flux core, stop. Don't go any further.
Run gas, C25 or "autoweld". 0.023 wire, on about 50A. PRACTICE on some scraps to get the wire speed set.
Well over the weekend I managed to power wash the engine bay scrubbed all up and under, also scored a Racing Beat manifold and a Holly 600. Time for some more weekend work.
Update: So im waiting for thw goodies to arrive in the mean time I managed to get the engine bay a little nicer and try out more welding, the original hinges of the battery compartment were totally corroded and broken, so I looked around the shop and found an old piano hinge.
If you haven't already, you should binge watch all of Aaron Cake's videos. Skilled fabricator. Lots of great ideas of how to do things and what to use. Even if a topic doesn't interest you, watch it anyway, you'll still come away with some sound advice about something you never thought of.
If you haven't already, you should binge watch all of Aaron Cake's videos. Skilled fabricator. Lots of great ideas of how to do things and what to use. Even if a topic doesn't interest you, watch it anyway, you'll still come away with some sound advice about something you never thought of.
Awesome thank you are his Videos on YouTube?
The engine bay looks great, what silver paint did you use for the engine. I'm looking for something similar, but everything I try looks different
Is that the cast coat silver, or the universal silver. I used the cast coat silver and it looks different than yours looks, maybe it looks different because of the pictures
Is that the cast coat silver, or the universal silver. I used the cast coat silver and it looks different than yours looks, maybe it looks different because of the pictures
Update: well today I got it started for the 1st time in 15yrs lol fresh plugs, fresh oil, New Gas, ignition swap, only problem she won't stay running (idle) with out external fuel assistance im guessing is the nikki carb so I have a holley 600 and a racing beat manifold