FC EGI Project


Thread Starter
Senior Member
Joined: Feb 2007
Posts: 368
Likes: 0
From: Surrey, England
FC EGI Project
Well i may aswell get this up here as this has turned into abit of a project!!! Short versionis that i started build a custon twin exhaust for the car finished it off when to fire up the car and the water in the system had all turned to oil! seals had gone. No im in the process of rebuilding this while i wait to get my 20B FD back.
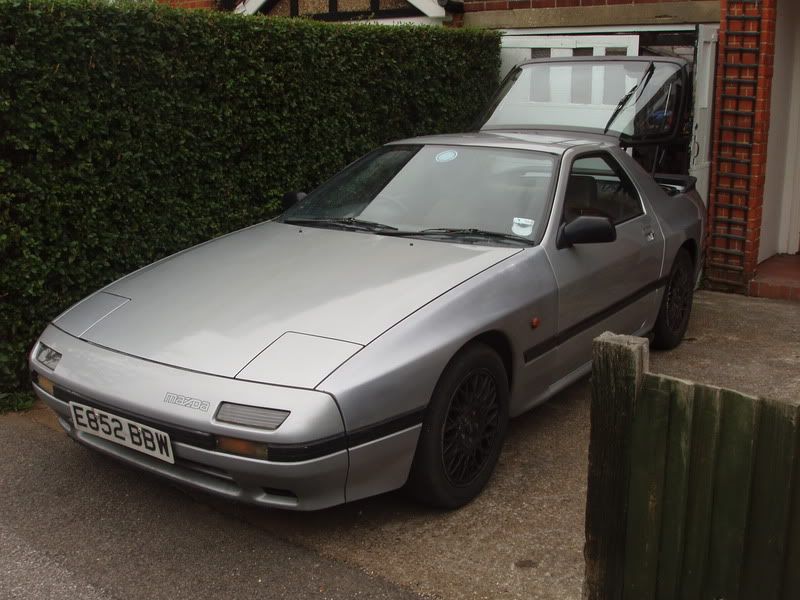
Pic of the car when i first picked it up
Replaced the wheels with FD ones

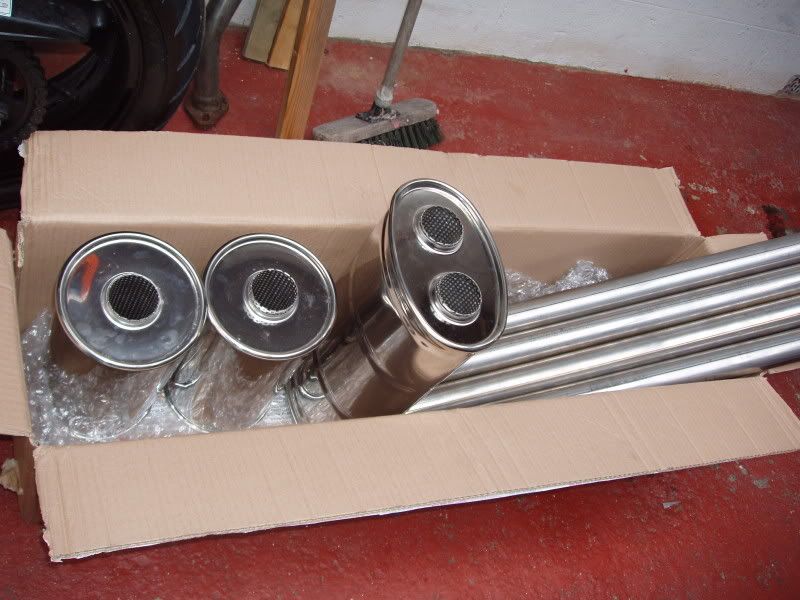
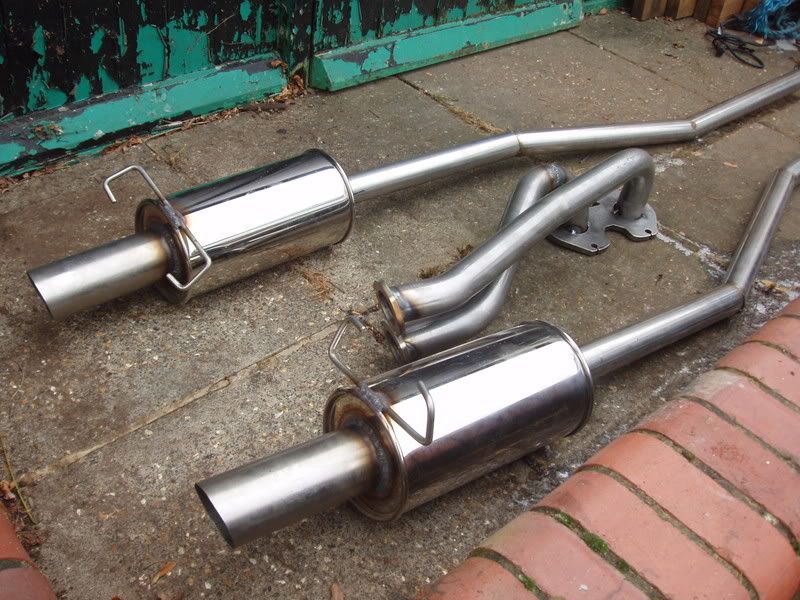
Exhaust bits
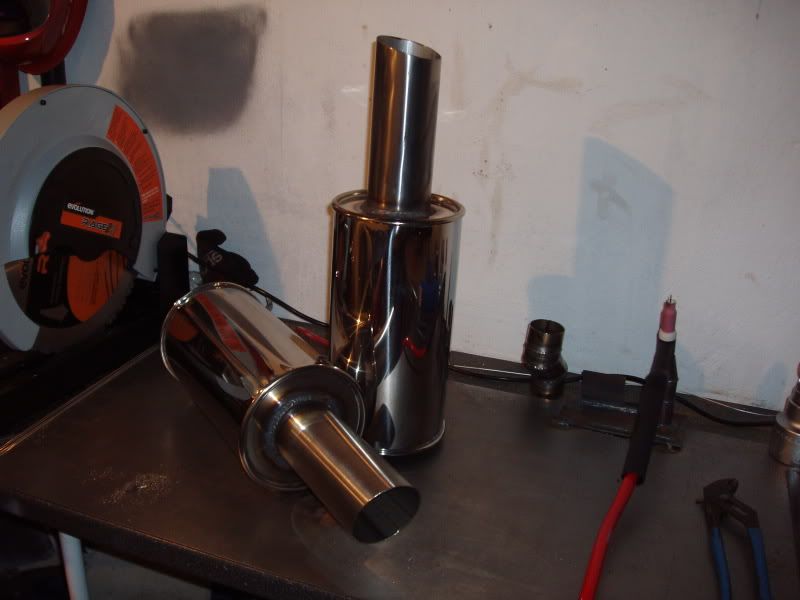
mid box made:
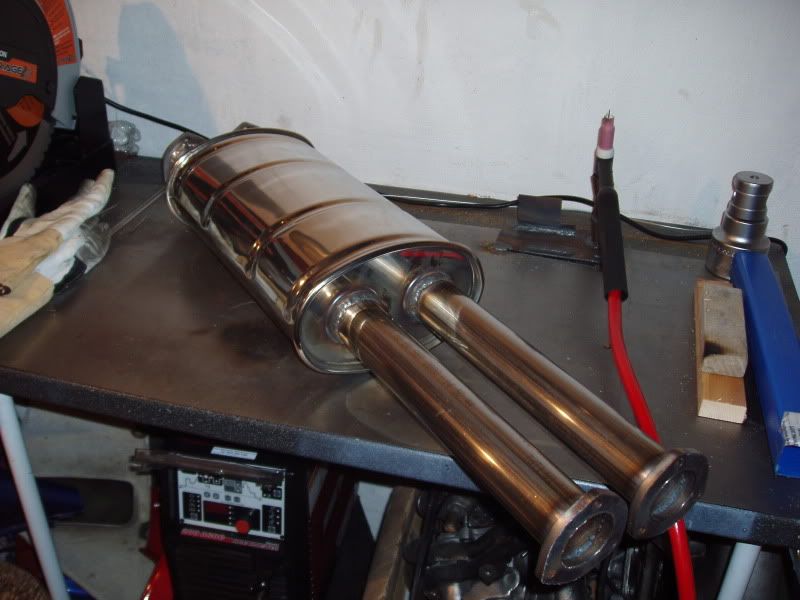
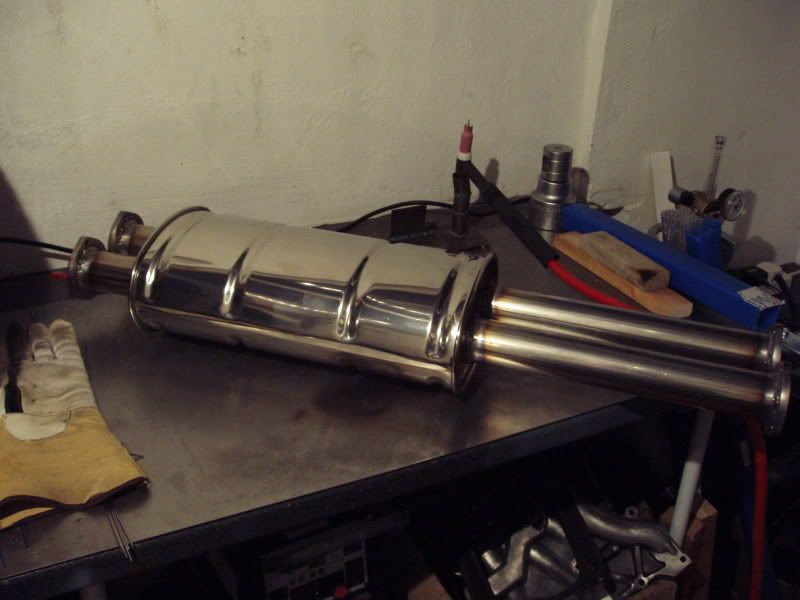
rear mufflers
mocked up rear sections
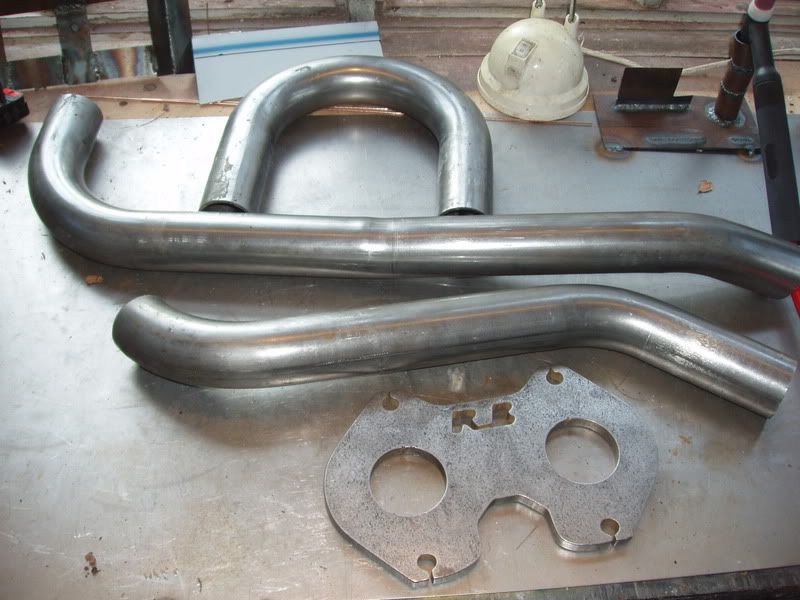
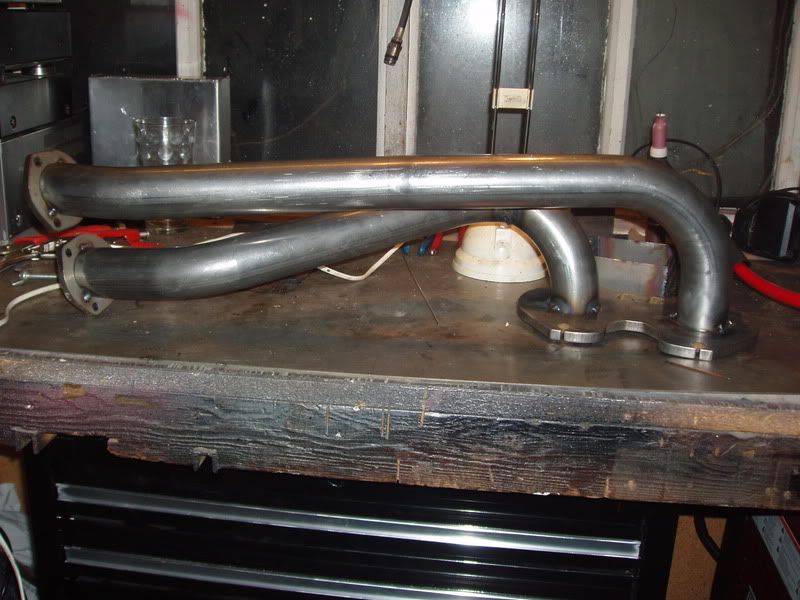
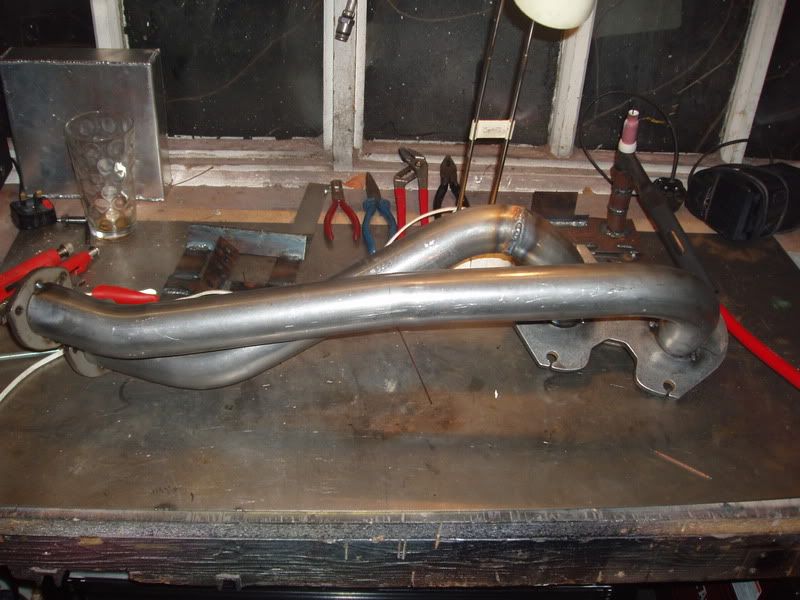
Manifold bits
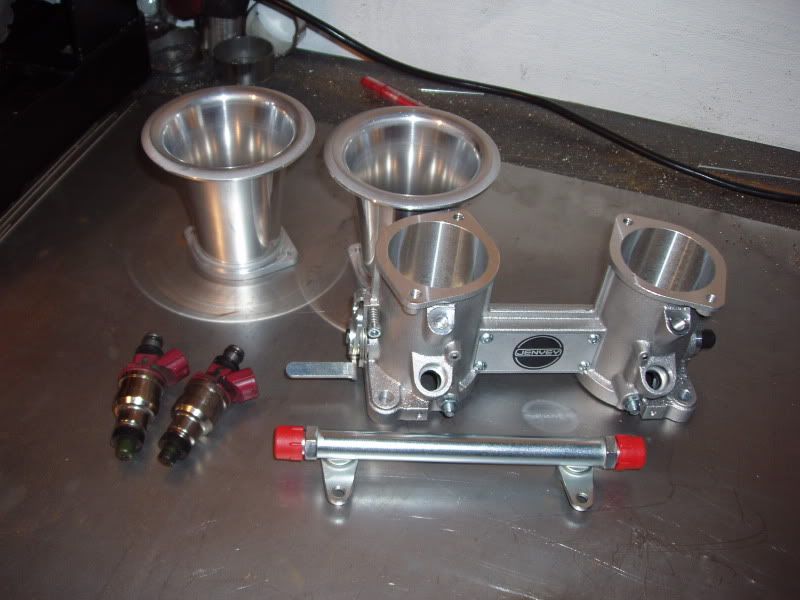
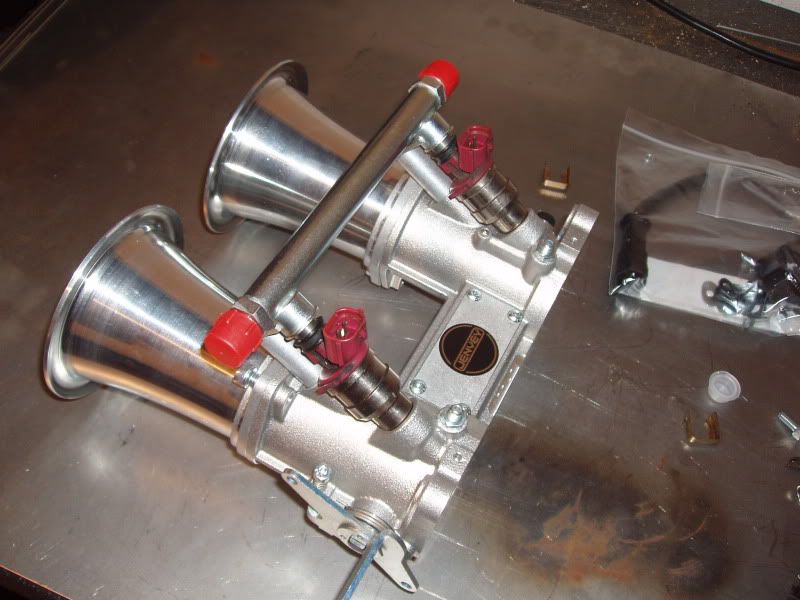
And 50mm throttle bodies
Pic of the car when i first picked it up
Replaced the wheels with FD ones
Exhaust bits
mid box made:
rear mufflers
mocked up rear sections
Manifold bits
And 50mm throttle bodies
Thread Starter
Senior Member
Joined: Feb 2007
Posts: 368
Likes: 0
From: Surrey, England
The manifold is thick guage mild steel but has been coated so it doesn't rust. The rest is 304 stainless.
As for the porting yes a large street port that i did that yesterday! left the Aux ports alone and just did the primary and secondaries.
The wheeks are all the same but you have just given me an idea
As for the porting yes a large street port that i did that yesterday! left the Aux ports alone and just did the primary and secondaries.
The wheeks are all the same but you have just given me an idea


Trending Topics
Thread Starter
Senior Member
Joined: Feb 2007
Posts: 368
Likes: 0
From: Surrey, England
Thread Starter
Senior Member
Joined: Feb 2007
Posts: 368
Likes: 0
From: Surrey, England
Here are a few more for those intrested:
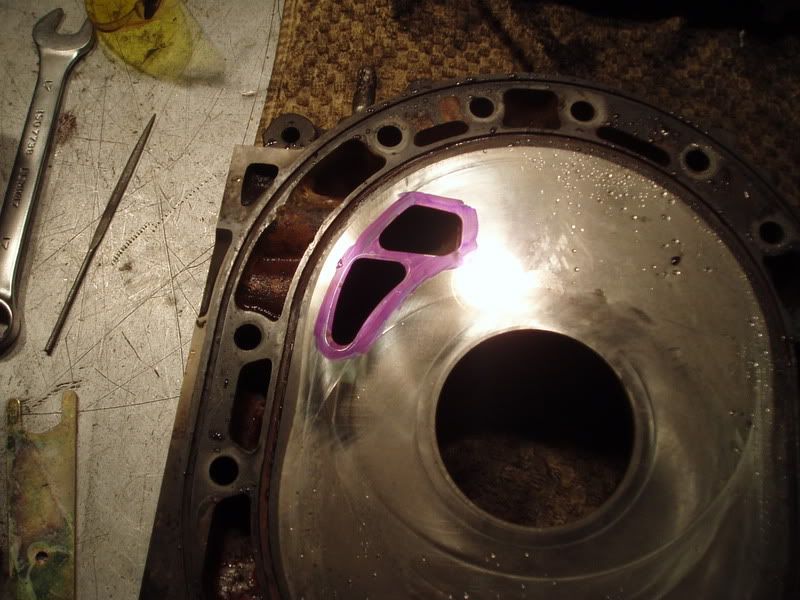
You can see here the increased size of the ports scribed in the ink
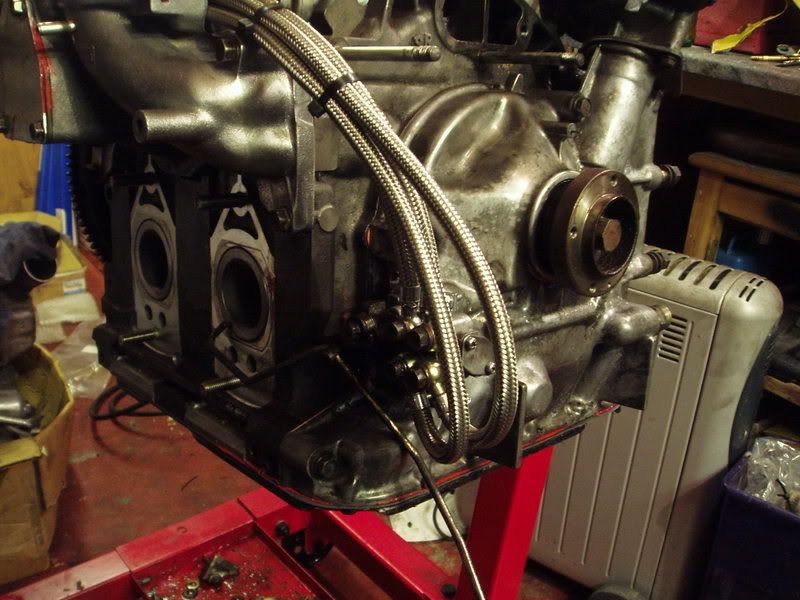
The new hosing to the various actuators / ports
She is all but back together now except the wideband A/F meter which should turn up on tuesday. DAM YOU WEEKEND!!!!!
You can see here the increased size of the ports scribed in the ink
The new hosing to the various actuators / ports
She is all but back together now except the wideband A/F meter which should turn up on tuesday. DAM YOU WEEKEND!!!!!
Thread Starter
Senior Member
Joined: Feb 2007
Posts: 368
Likes: 0
From: Surrey, England
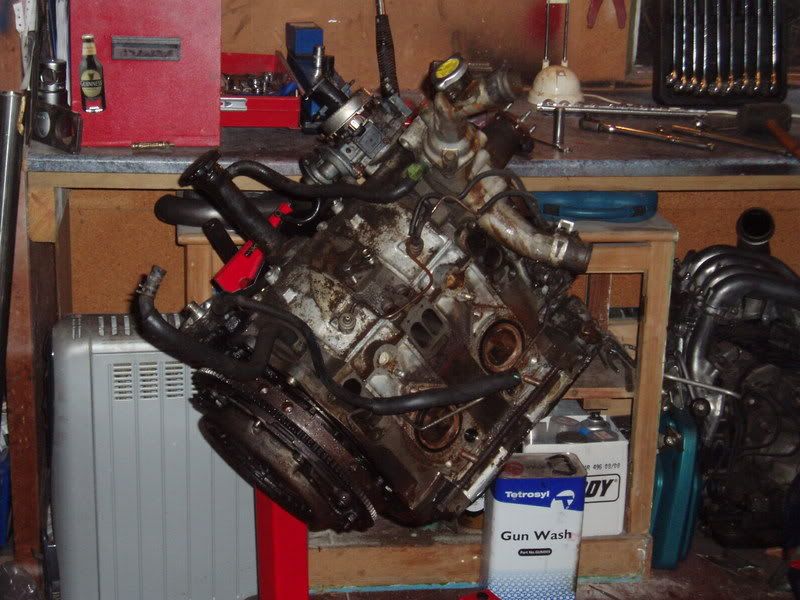
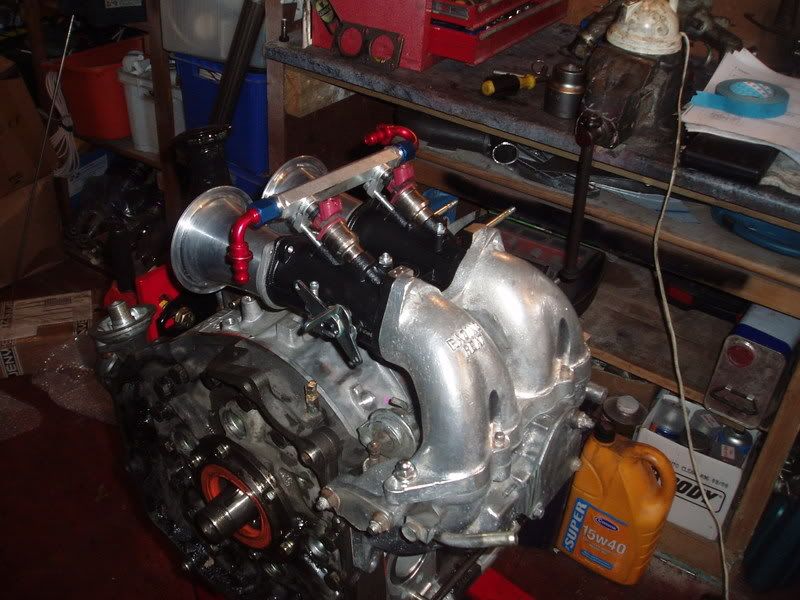
Well the lump is back in. Just a matter of some wiring to play with, sort out the fuel lines and hopefully we'll be running again.
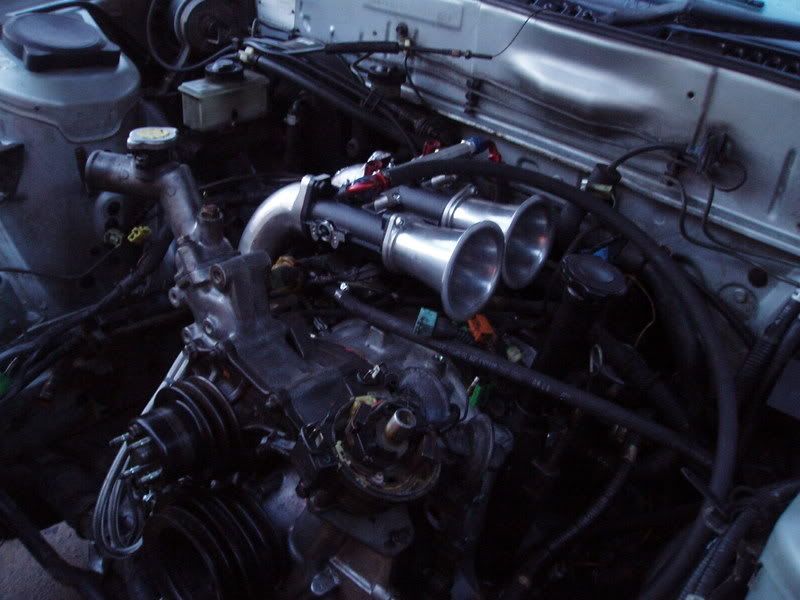
Few of the engine in. The throttle bodies look a little more purpose full now

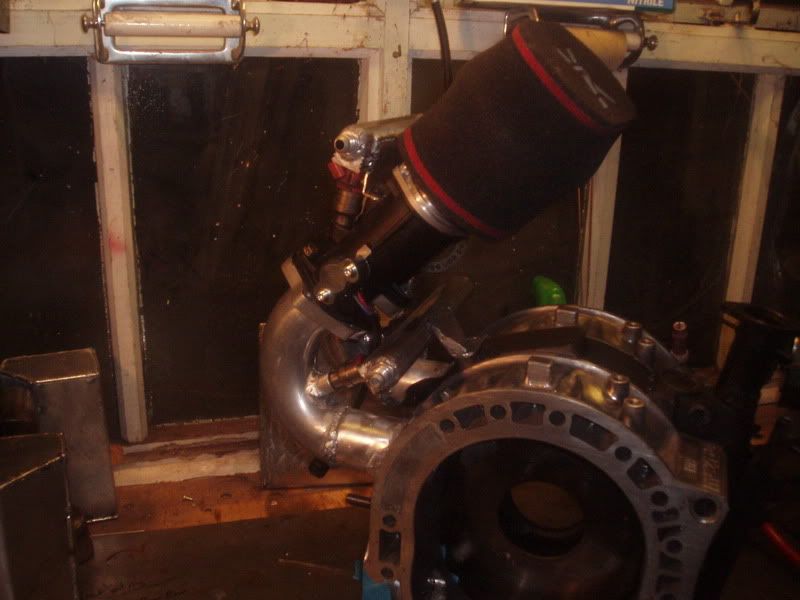
With the filter on
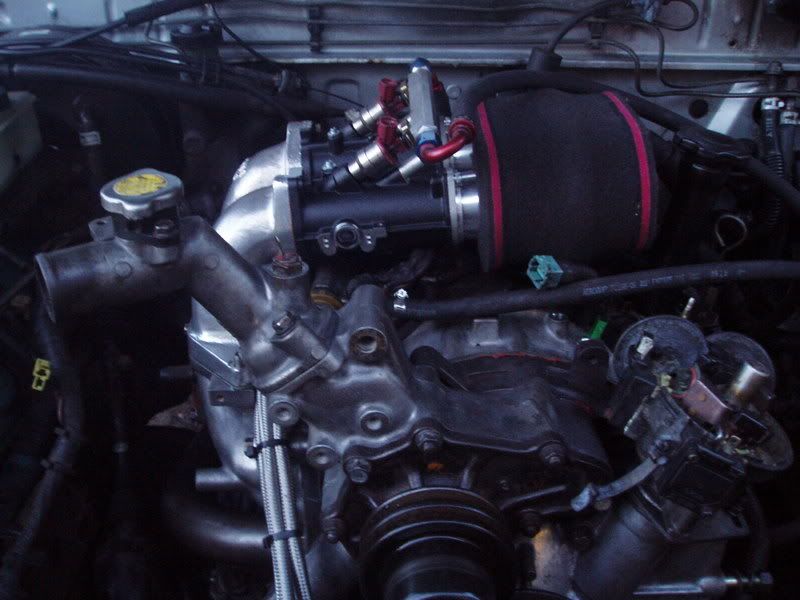
Few of the engine in. The throttle bodies look a little more purpose full now
With the filter on
Thread Starter
Senior Member
Joined: Feb 2007
Posts: 368
Likes: 0
From: Surrey, England
Well we're nearly there!!!! Few issues in the throttle linkage department but should have the multipoint linkage adaptor tomorrow to sort that out. The injetor clips in the EGI are Square and the turbo II top feed injector plugs are rounded so need to wait for those to turn up too!!!
Next job while i'm waiting...

Next job while i'm waiting...
Thread Starter
Senior Member
Joined: Feb 2007
Posts: 368
Likes: 0
From: Surrey, England
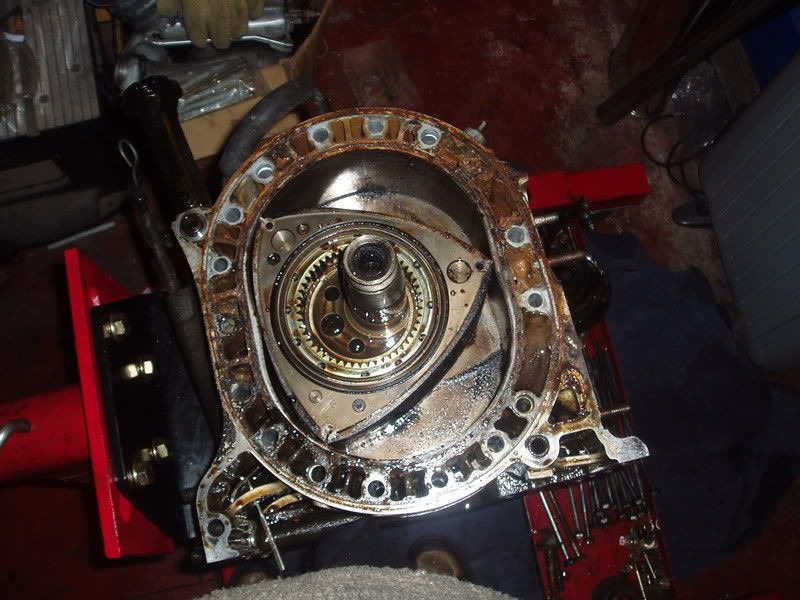
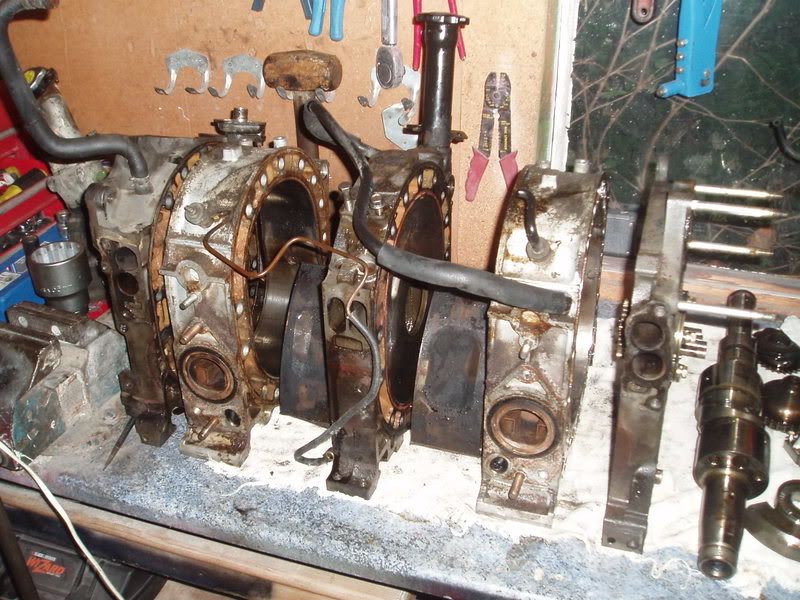
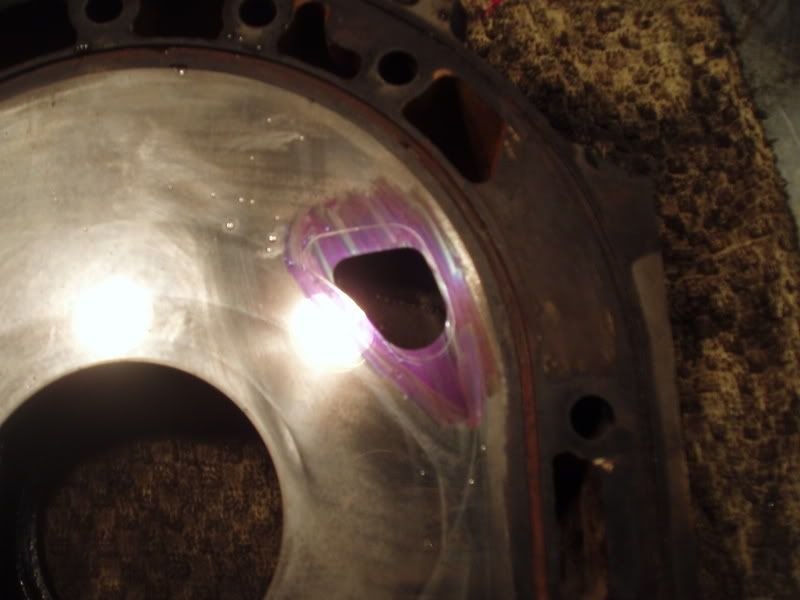
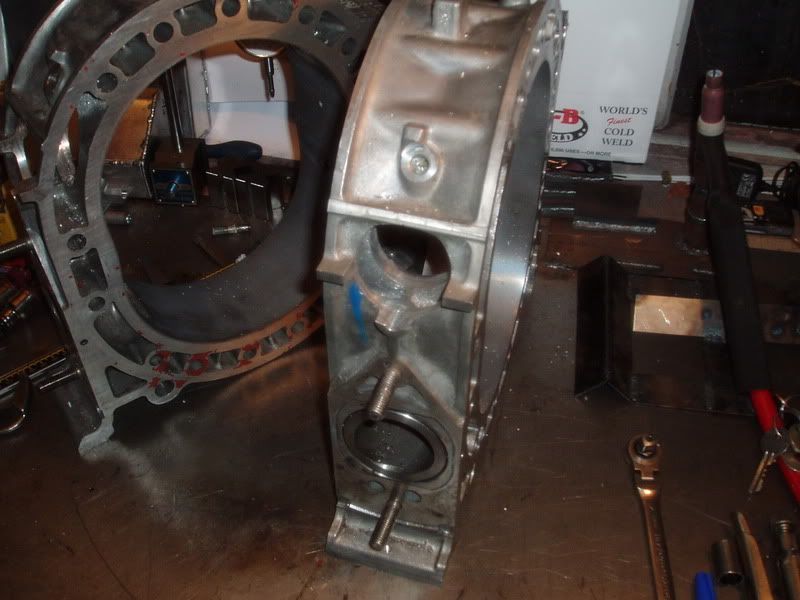
The engine had to come back out as the inter plate had a huge split in it (through form water ways to the Eshaft so not visable). Anyway ii swaped the plates out for a set of 4 port TII ones which i had intended to bridge port them. After a few conversations with people i decided instead i would do this.
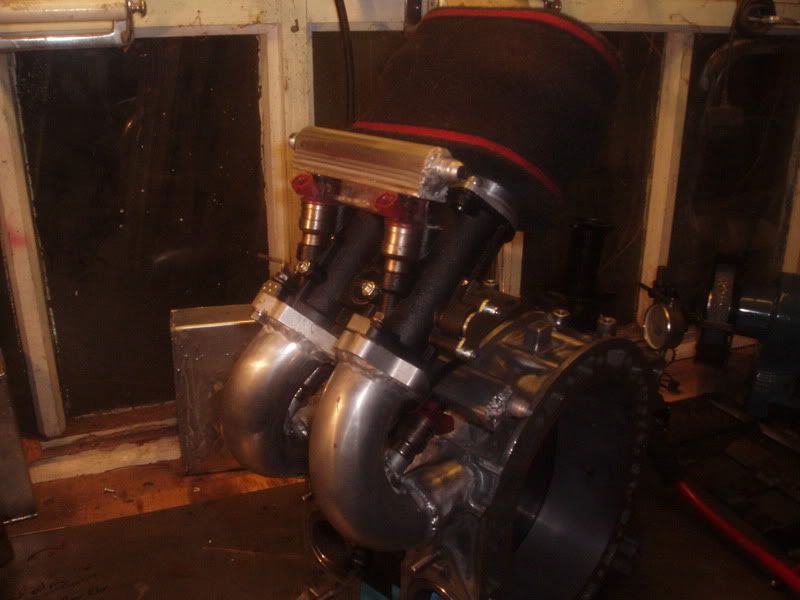
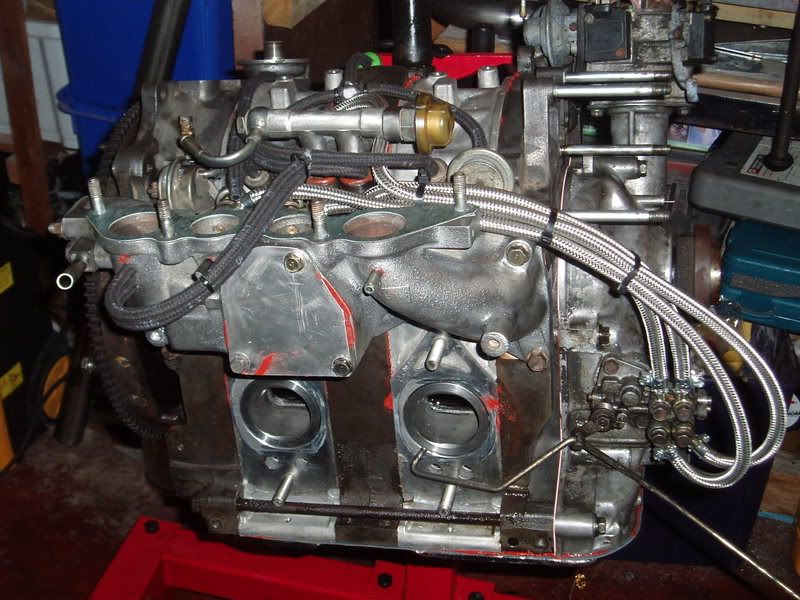
Then i looked at the fueling. In house made Billet fuel rails and 4x TII top feeds.
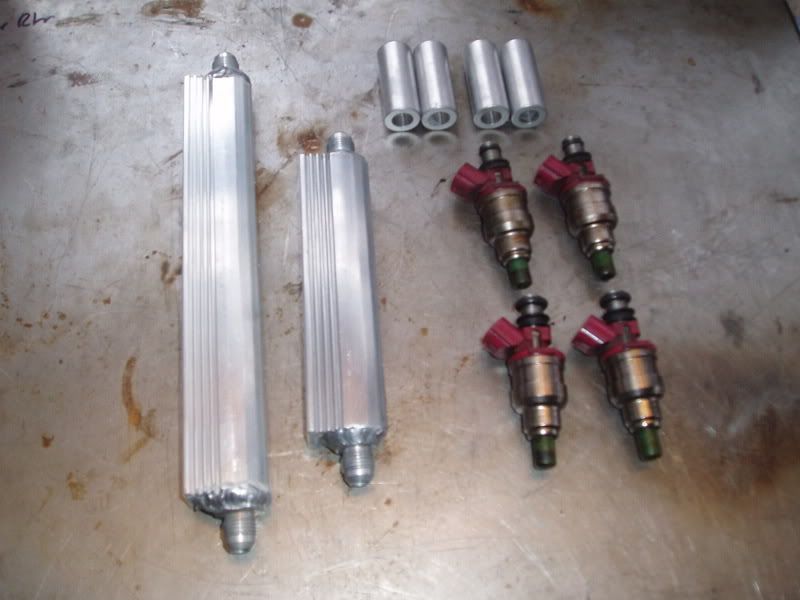
Then i looked at the fueling. In house made Billet fuel rails and 4x TII top feeds.
Thread Starter
Senior Member
Joined: Feb 2007
Posts: 368
Likes: 0
From: Surrey, England
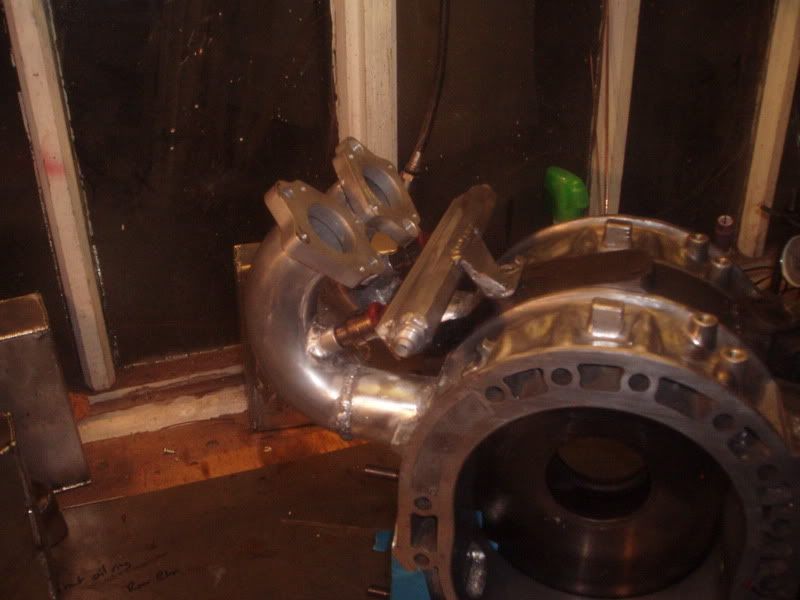
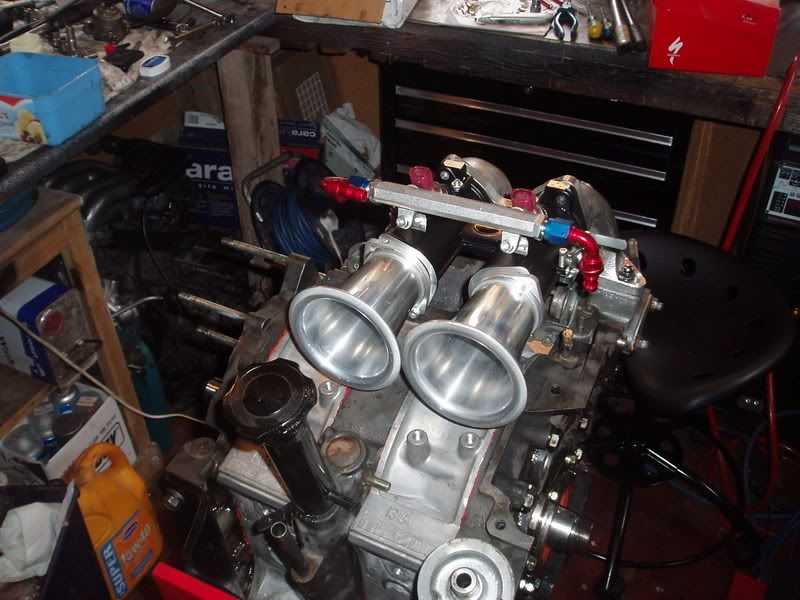
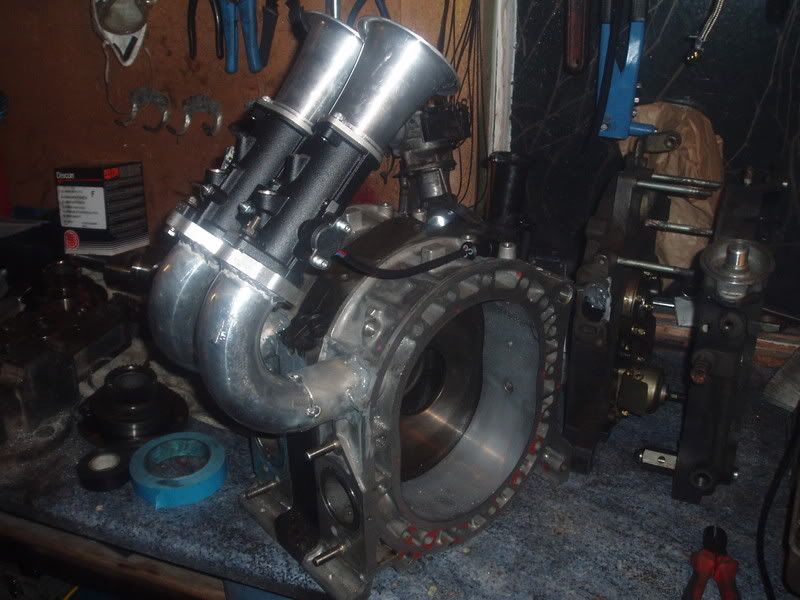
HA HA HA the beginings of the Peripherals. Nicely mocked up. Few more trims to make then tomorrow will weld it up. Sort the ports inside then can get the lil beast back togther.
Thread Starter
Senior Member
Joined: Feb 2007
Posts: 368
Likes: 0
From: Surrey, England

i like it. 
i've got two questions though:
1. did you do calculations for the runner length or is it simply the result of the materials you had to work with?
2. i see the tack-welds for the mockup, but do you plan to use flanges at the interface between manifold and port runners or are you going to use rubber/silicone couplers?
Thread Starter
Senior Member
Joined: Feb 2007
Posts: 368
Likes: 0
From: Surrey, England
The runner length was kinda of work with what had but loosely based on mazdas old factory port design.
As for the tack welds they will be fully welded inplace at the point no flanges or rubber couplers.
As for the tack welds they will be fully welded inplace at the point no flanges or rubber couplers.
Thread Starter
Senior Member
Joined: Feb 2007
Posts: 368
Likes: 0
From: Surrey, England
Will keep you posted. Should only be a few days until this is running
The 2 inlet pipes are not attached to each other but are welded to the rotor housings. At the top of the bends there is are 2 seperate flanges which the ITBs will be bolted to. So the rotor housings are completely individual still.... i hope that makes sense