
Wet Sanding Tail Lights - Good idea? How?

Thread Starter
Joined: Jun 2003
Posts: 4,022
Likes: 24
From: Avondale, AZ
Wet Sanding Tail Lights - Good idea? How?
Have some scratches in my tail lights that I want to get rid of.... I found this on some random forum... wondering what you guys think or if anyone has done it before?
Get some 1000, 1500, and 2000 grit sanding paper... you can also get 3000, but 2000 should be fine. Also get some Plast-X by meguiars. Wet sand it with soap/water mixture starting with the 1000 and sand it till you can't feel too much of the scratch. Then dry it off. Should look really cloudy like you just screwed up. Then move on to the 1500 in the opposite direction. (if you were sanding vertically, now do it horizontally) Once again let it dry and sand with the 2000 the same direction as the 1000. Do the same if you decide to get 3000 too, but you shouldn't need it. Once sanding is done it should all feel really smooth. No get a microfiber cloth and put some Plast-X on the towel and in a circular motion apply the paste. Use pressure, but not too much as you can break the taillight. Do it a couple of time... till you get what you want. Once you are happy; put some of the paste on the taillight and with your fingers give it another "waxing." Then just add some quick detailer spray on it and call it a day.
Some notes:
- Let your sanding paper get really wet, so soak it for a couple minutes (like 7)
- Use new water/soap for each grit.
It'll come out better than new... seriously. I did this to my tails and bumper lights and the 3rd brake light.... what a difference! Hope this helps man!
****
Opinions? Suggestions?
Thanks

Full Member
Joined: Dec 2003
Posts: 225
Likes: 0
From: Great Neck, NY
it is a good idea but what seried\what year of taillights. I have a 95 which for some reason came with the standard block tailights but with faint circles. when i took them apart they had raise circled on the face of the lens. only trying to insert some useful interesting info to make the point that you should post the year/series. great post. since have upgraded to 99s.

Trending Topics
Thread Starter
Joined: Jun 2003
Posts: 4,022
Likes: 24
From: Avondale, AZ
Man, you really have to put some elbow grease into that polishing compound. I didn't press hard enough the first time and it looked like *** so I re-did the polish and used quite a bit of force... and these are my results.
Notice the first pic, the deep scratch by the amber light..... and then look at the final two pics... that scratch was deep enough for me to catch my nail on and this took it all out, I am very, very pleased with the outcome....
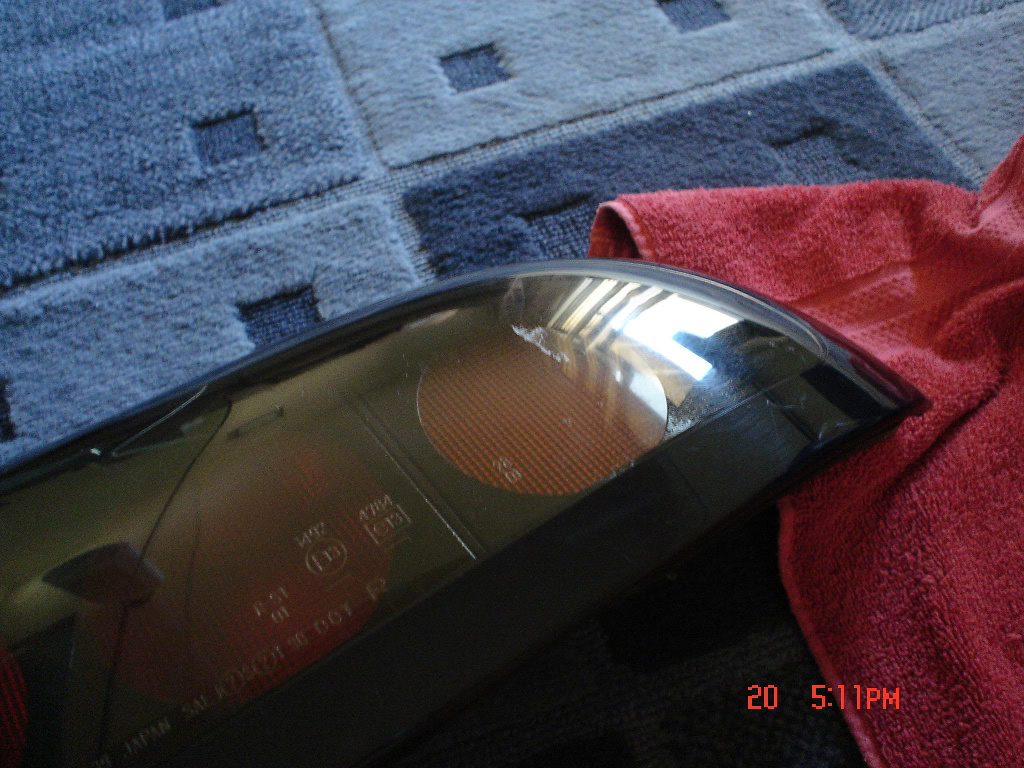
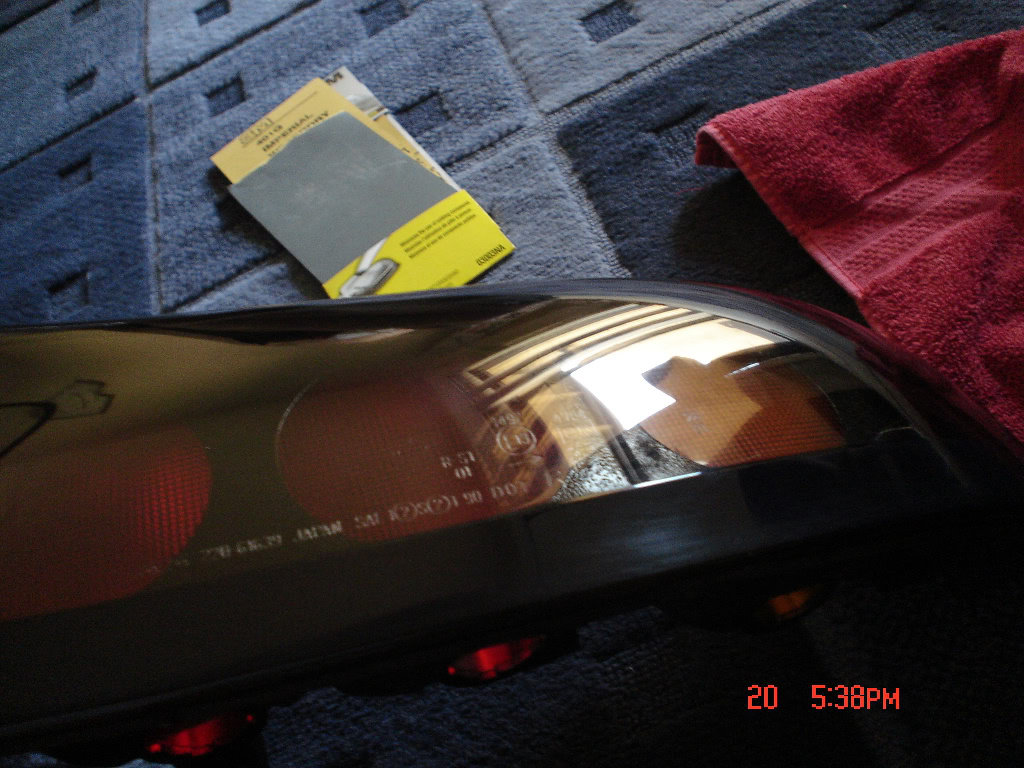

Notice the first pic, the deep scratch by the amber light..... and then look at the final two pics... that scratch was deep enough for me to catch my nail on and this took it all out, I am very, very pleased with the outcome....
Thread Starter
Joined: Jun 2003
Posts: 4,022
Likes: 24
From: Avondale, AZ
You don't need to wet sand them. There is a kit sold at Auto Zone for about $10 for plastic polishing.
It comes with a drill attachment and the pads have the compound right on them. Mist the tailight with a bit of water and just buff with your drill. I have done it to a few tails and headlights too. They look great afterwards. I find it easier to take them off the car and just sit and do them in your lap. If I remember the name of the kit I will post it later.
It comes with a drill attachment and the pads have the compound right on them. Mist the tailight with a bit of water and just buff with your drill. I have done it to a few tails and headlights too. They look great afterwards. I find it easier to take them off the car and just sit and do them in your lap. If I remember the name of the kit I will post it later.

Banned. I got OWNED!!!
Joined: Sep 2003
Posts: 2,030
Likes: 0
From: new jersey
u shouldnt sand the tails because they are smoked from factory and if u sand enough the tails will start to look more purplish or fades black. i usually just rub and buff lightly w compound
Thread Starter
Joined: Jun 2003
Posts: 4,022
Likes: 24
From: Avondale, AZ
I can always re-smoke them, but thanks. I'll deal with the fading if it happens... that scratch was nasty looking.

Junior Member
Joined: Sep 2007
Posts: 8
Likes: 0
From: Saratoga CA
Marvelous Hedonist
Joined: Oct 2007
Posts: 761
Likes: 0
From: Old-Town BrightTown, CO
Here is my method of restoring the tails, its for an S4, but you could use the same method for the S5 and FD's. It would be easier actually.
https://www.rx7club.com/2nd-generation-non-technical-pictures-198/s4-tail-light-restoration-746933/
I found the fine grit paper in the model section of a local hobby store.
https://www.rx7club.com/2nd-generation-non-technical-pictures-198/s4-tail-light-restoration-746933/
I found the fine grit paper in the model section of a local hobby store.
yeah 2000 grit isn't so great. i tried this on my front indicators before then following with plastic polish. its definitely not 100%. not worth it imo. better to have a scratch or 2 than having a haze.. i would just use polishing compound , nothing as harse as sandpaper. 3000 grit sounds promising though


Senior Member
Joined: Apr 2003
Posts: 372
Likes: 0
From: Ft.Bragg NC
Well i have a 2gen but with the flash to pass i wet sanded it then buff it and it looked better then new if u know how to work it then go all for it but if now take it slow thats all i have to say
Thread Starter
Joined: Jun 2003
Posts: 4,022
Likes: 24
From: Avondale, AZ
This was my first attempt ever at wet sanding anything, the lights turned out really good. I actually have the other light left to do... I'll try and take some better before/after pics to give you guys better results along with a walkthrough or more pics... but it's actually pretty easy if you read my first post.
Joined: Mar 2005
Posts: 231
Likes: 0
From: Californian refugee taking shelter in Texas

Thread
Thread Starter
Forum
Replies
Last Post
fastsaab
New Member RX-7 Technical
5
Aug 19, 2015 11:42 AM
brake, center, davidholmesiii, hazing, light, lights, mazda, plastic, polish, rear, restore, rx7, sand, sanding, scratch, supraforums, tail, taillights, wet, wetsanding