
how did you paint your breaks red


Thread Starter
Full Member
Joined: May 2010
Posts: 132
Likes: 0
From: Calgary
how did you paint your breaks red
just looking for some info on painting breaks red from those guys who have done it.
did you just pull them off wrap up the insides real good and tape off where the lines come into the breaks spray them then throw them back on the car?
any info is great thanks
-zyph3r
did you just pull them off wrap up the insides real good and tape off where the lines come into the breaks spray them then throw them back on the car?
any info is great thanks
-zyph3r
You don't have to remove the brakes but it does make it easier. Just make sure you mask the surrounding area. Painting it with a brush is better than the spray. You won’t see the brush strokes. The spray can chip or flake off. Also, getting a 2 stage system is better than a 1 part system.

Joined: Oct 2005
Posts: 1,899
Likes: 4
From: Willamette Valley, OR
Remove them from car.
Cap the fluid ports.
Clean in parts washer or use a degreaser.
Sand blast if available. If not use sand paper to rough up the surface prior to coating.
Dust the surface off.
Clean again with acetone.
Wipe with tack cloth.
Coat with Self-Etching Primer. (I use Duplicolor products.)
Coat with brake caliper paint or Wheel paint. Local auto parts store should have this.
Coat with clear caliper or Wheel paint.
Let cure and re install.
I have used this method on several cars now.
Started a few years back and still clean as good as new.
Paint has minimal fade with the clear on it.
Very few chips also.
Good luck!
-Robert.
Joined: Oct 2005
Posts: 1,899
Likes: 4
From: Willamette Valley, OR
Here's how I did it..  (link below)
Though I should have painted in between the Mazda lettering.
https://www.rx7club.com/build-thread...2/#post9562987
btw you spelled brakes wrong
(link below) Though I should have painted in between the Mazda lettering.
https://www.rx7club.com/build-thread...2/#post9562987
btw you spelled brakes wrong
Trending Topics


What the Hell?
Joined: Jul 2011
Posts: 96
Likes: 0
From: Houston, TX
^ Nice mahjik. I like your way better, the less work I have to do....the happier I am. But I do question the longevity of the paint job compared to taking them off and doing a good cleaning before a complete paint and clearcoat finish.
That was done in 2003 and they look just as good today. I also painted my backup set (which is obviously not on the car). The quality is no different. The main difference is getting paint safely in areas you can't with them installed. However, you can't really see those areas anyway if you are just doing it for appearances.As far as clearcoat, I wouldn't bother. If you use the right paint, it will last.

Can Post Only in New Member Section
Joined: Sep 2014
Posts: 4
Likes: 0
From: Dubai
A friend of mine on the Focus site did this on his Focus SVT.
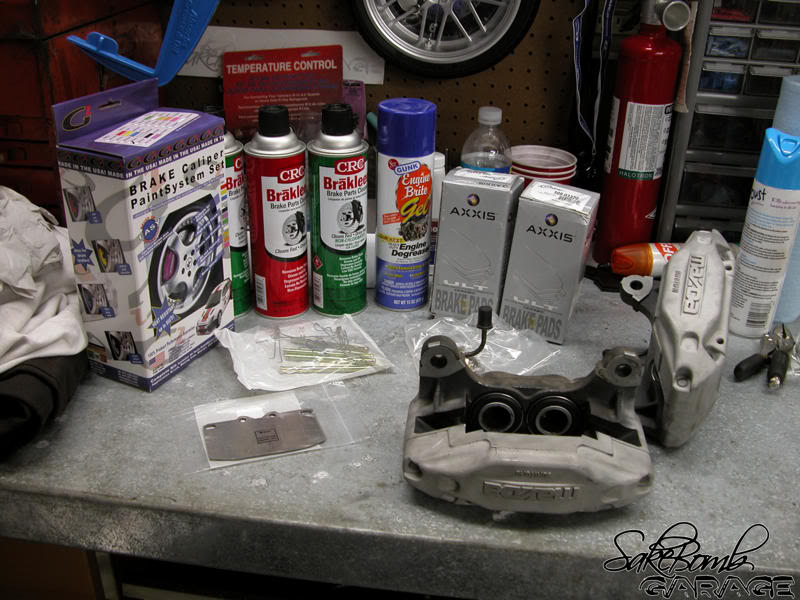
Materials needed:
Caliper painting kit
wire brush
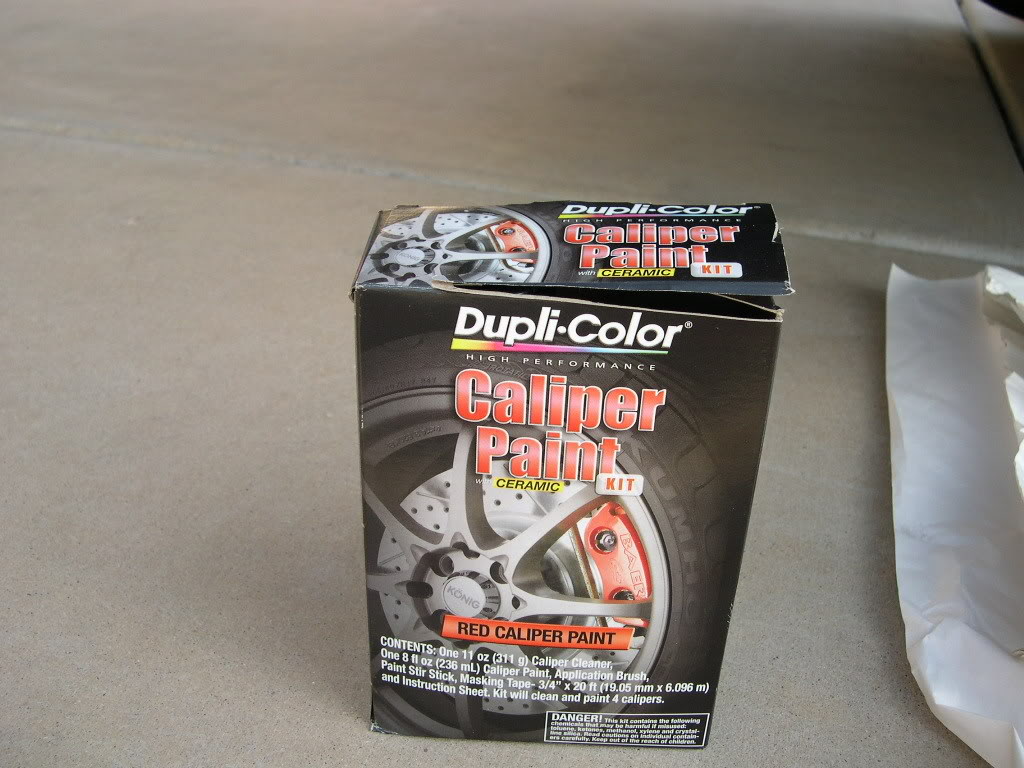
This is a detailed how-to on painting brakes, specifically brake calipers. The product demonstrated is the commonly used Duplicolor Caliper Paint Ceramic Kit available at most auto workshops.
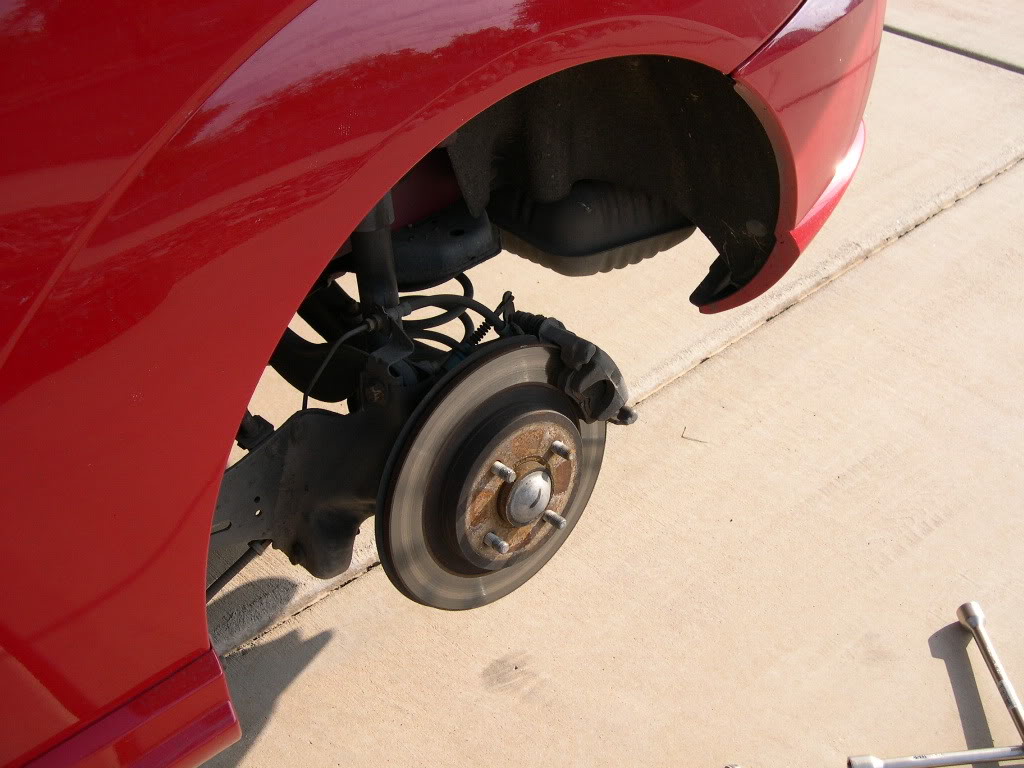
The first step is to securely jack and support your car. Then remove the tires/wheels. It is best t work on either one side at a time, or both fronts then both backs. If you are comfortable and have the needed equipment, it is possible to do all four brakes at once.
Front
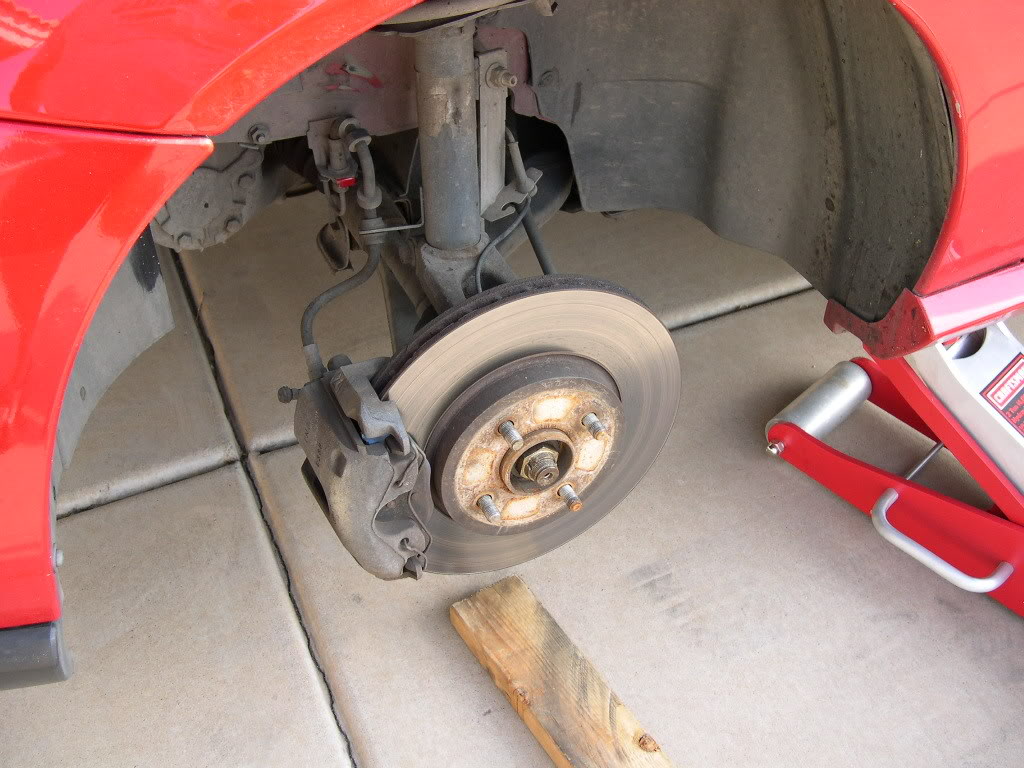
Back
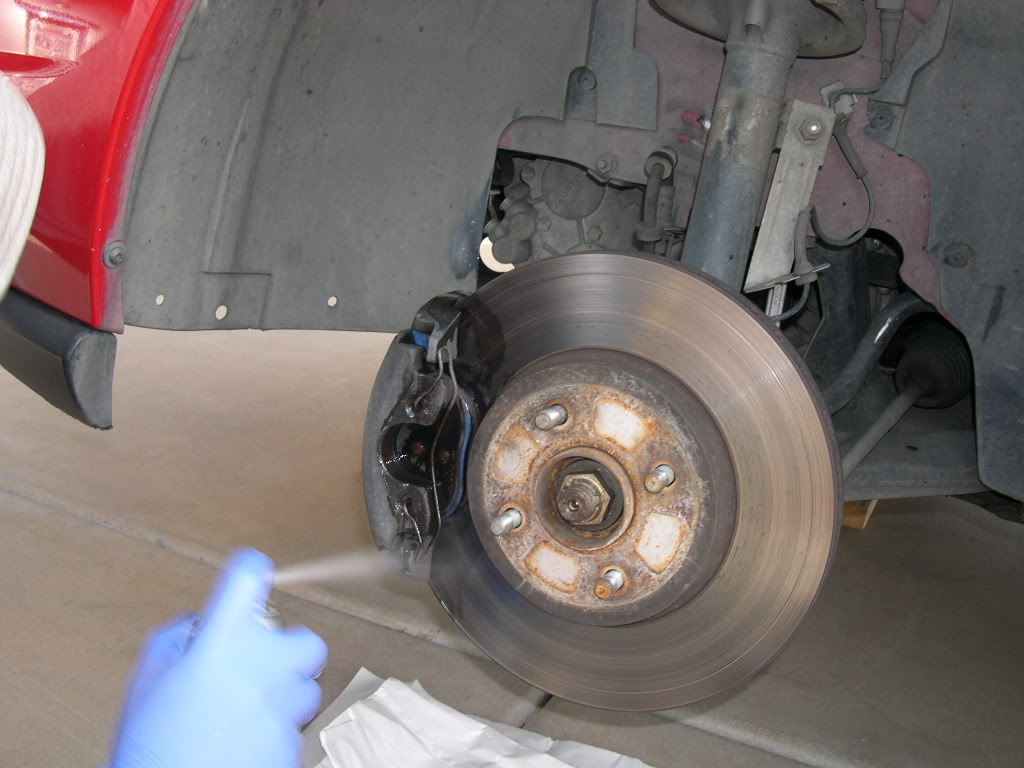
The first step is to spray down the brakes with the supplied brake cleaner. Normally I would recommend using a paining prep product, however, the supplied brake cleaner is designed to perform this function.

After the initial spray of cleaner, use a wire brush, such as stainless steel or brass, as the firm metal bristles will help break away hard surface corrosion.
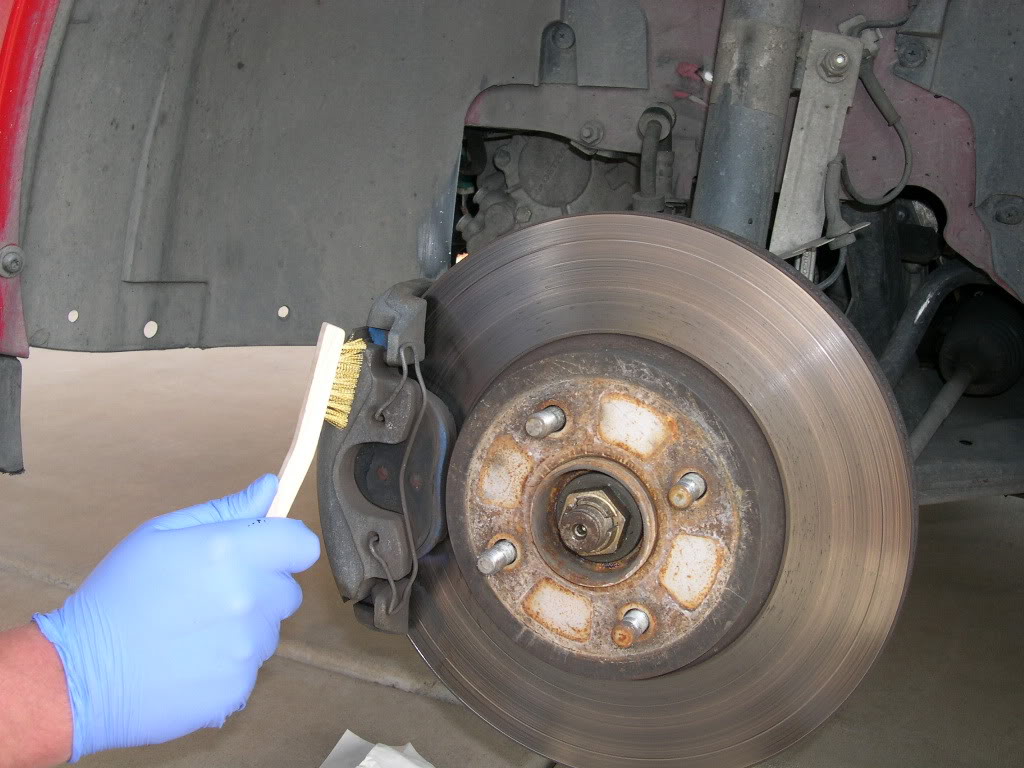
After brushing thoroughly, use the cleaner again to get any last bits of contamination off the brakes.
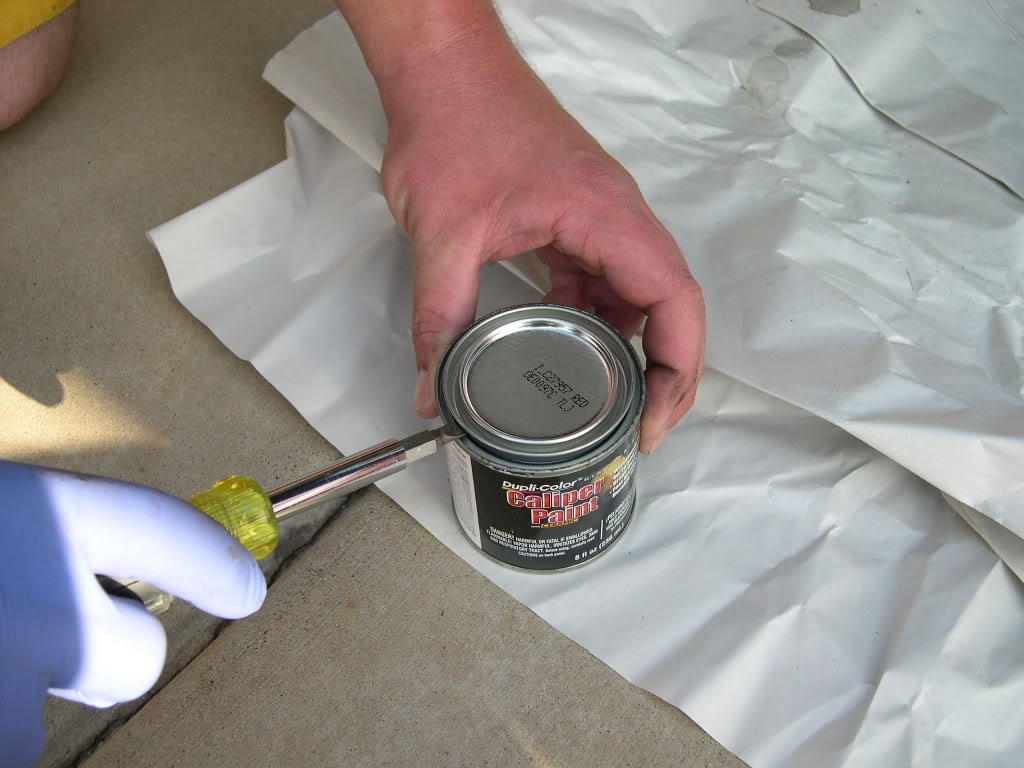
After you have shaken the supplied can of caliper paint for a few minutes, use a flat head screw driver to pry the can open, working slowly prying gently around the entire rim of the can. Any flat head screw driver that fits will work; you don’t have to use a $30 electrician’s 10-in-1 screwdriver -like I did.
Use the supplied stirring stick to mix the paint even further, do not discard.
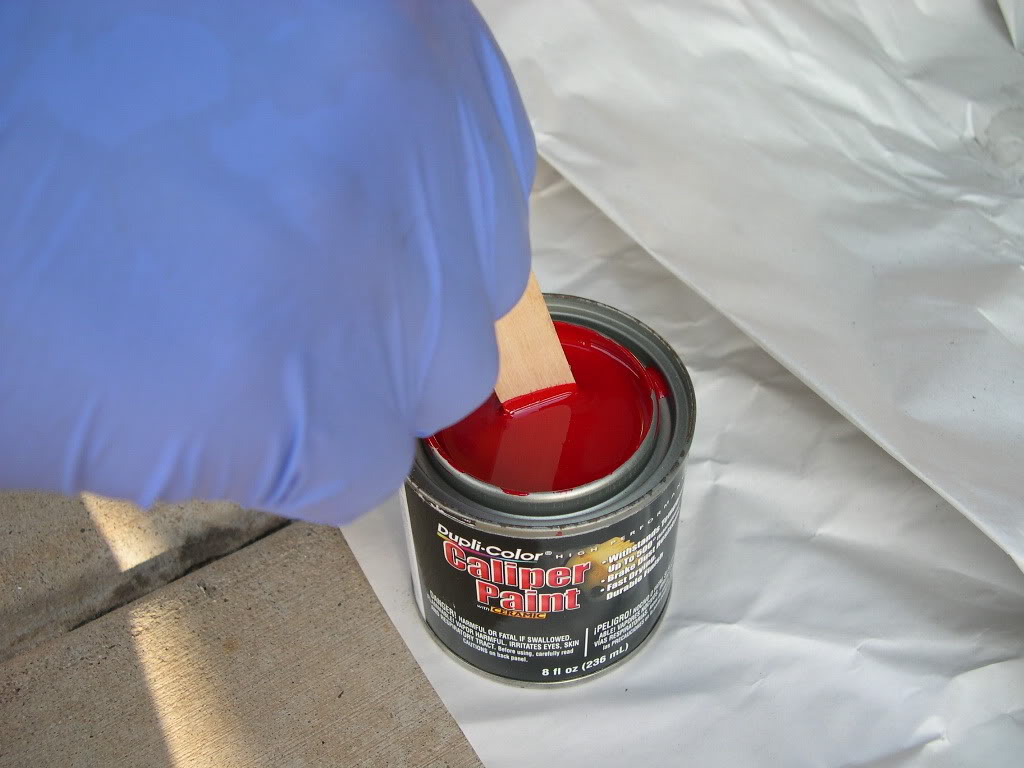
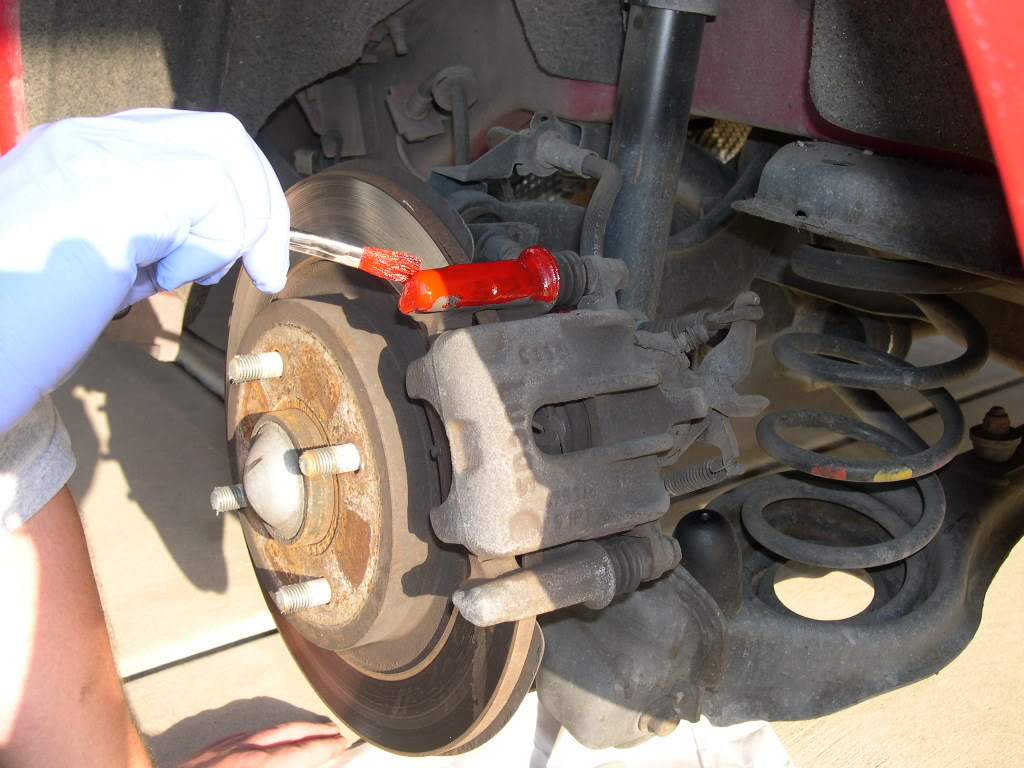
Now it is time to begin painting. You can either use the supplied paint brush, which is very low quality, or you can opt for a higher quality artist type brush. Work slowly, starting near the top and working your way down. Try to cover as much as you can, being careful not to get paint on anything you don’t want painted. The best approach is to take your time and not rush the job.
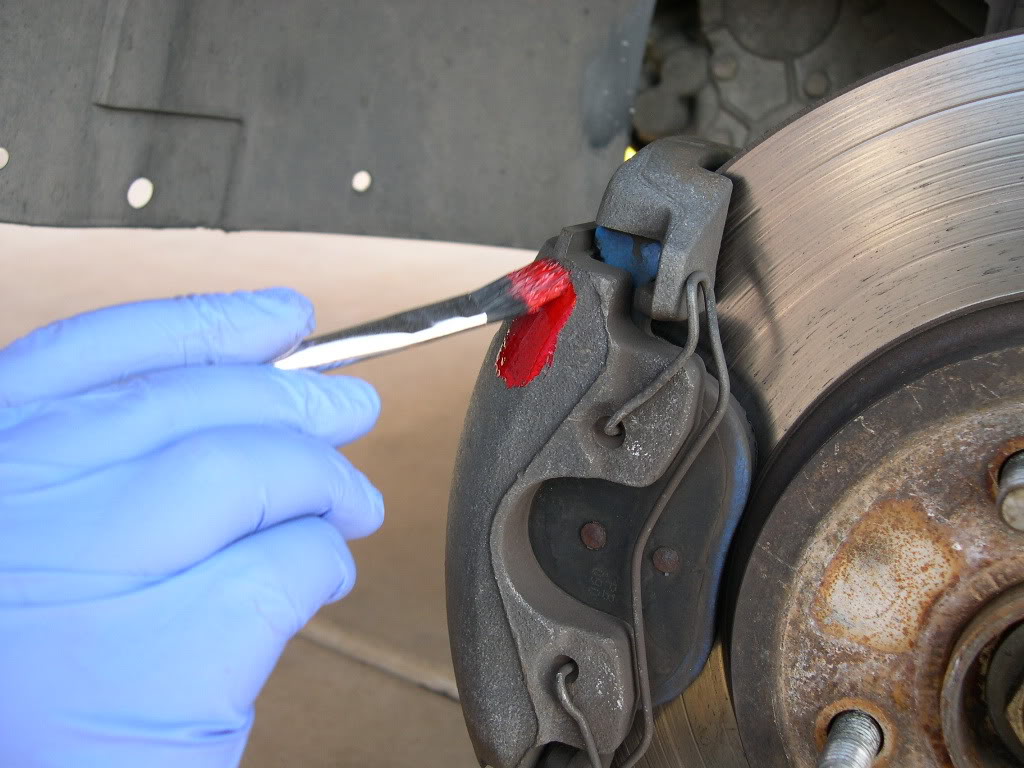
Your first coat should be light. Subsequent coats can be heavier, but never heavy. This is about what your caliper should look like after the first coat.

While you wait for the first caliper to dry, start the next repeat the same cleaning and painting procedure for the rear calipers, provided you have four wheel disk brakes and not rear drum brakes. Painted rear drums look horrible, unless they are painted black.
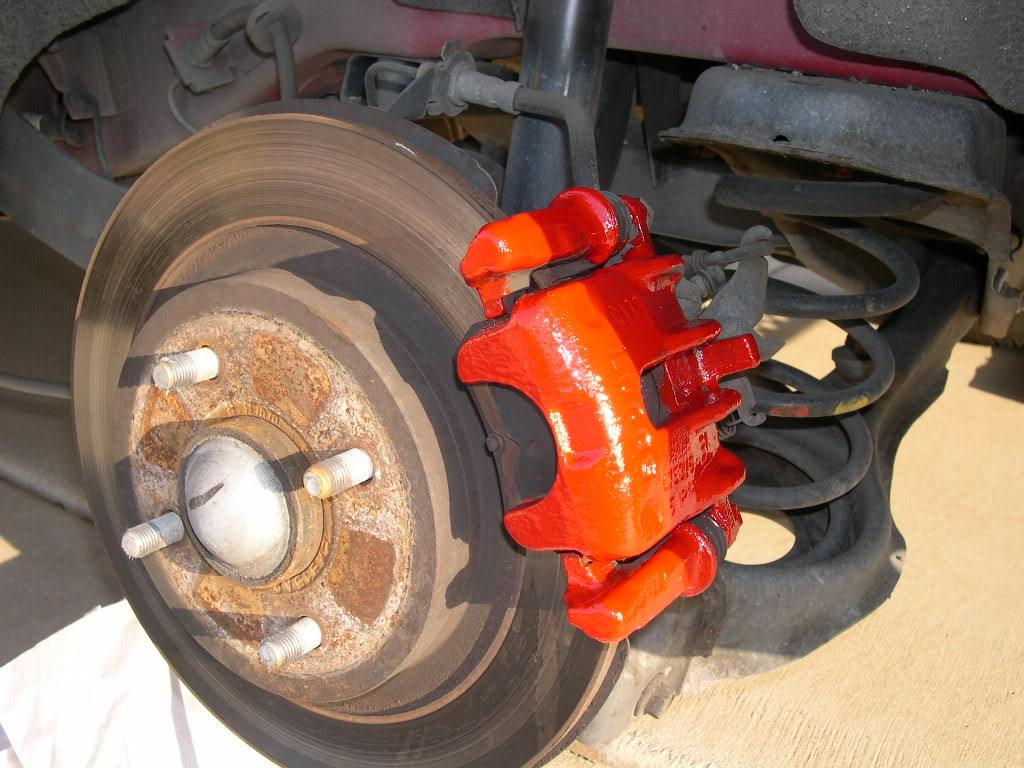
After a few coats, this is what your calipers should look like. It is recommended to use at least 4 coats.
Atif Naser
Materials needed:
Caliper painting kit
wire brush
This is a detailed how-to on painting brakes, specifically brake calipers. The product demonstrated is the commonly used Duplicolor Caliper Paint Ceramic Kit available at most auto workshops.
The first step is to securely jack and support your car. Then remove the tires/wheels. It is best t work on either one side at a time, or both fronts then both backs. If you are comfortable and have the needed equipment, it is possible to do all four brakes at once.
Front
Back
The first step is to spray down the brakes with the supplied brake cleaner. Normally I would recommend using a paining prep product, however, the supplied brake cleaner is designed to perform this function.
After the initial spray of cleaner, use a wire brush, such as stainless steel or brass, as the firm metal bristles will help break away hard surface corrosion.
After brushing thoroughly, use the cleaner again to get any last bits of contamination off the brakes.
After you have shaken the supplied can of caliper paint for a few minutes, use a flat head screw driver to pry the can open, working slowly prying gently around the entire rim of the can. Any flat head screw driver that fits will work; you don’t have to use a $30 electrician’s 10-in-1 screwdriver -like I did.
Use the supplied stirring stick to mix the paint even further, do not discard.
Now it is time to begin painting. You can either use the supplied paint brush, which is very low quality, or you can opt for a higher quality artist type brush. Work slowly, starting near the top and working your way down. Try to cover as much as you can, being careful not to get paint on anything you don’t want painted. The best approach is to take your time and not rush the job.
Your first coat should be light. Subsequent coats can be heavier, but never heavy. This is about what your caliper should look like after the first coat.
While you wait for the first caliper to dry, start the next repeat the same cleaning and painting procedure for the rear calipers, provided you have four wheel disk brakes and not rear drum brakes. Painted rear drums look horrible, unless they are painted black.
After a few coats, this is what your calipers should look like. It is recommended to use at least 4 coats.
Atif Naser
thank you for the step by step.
I think its more suited for newer or aluminum calipers.
Some sandpaper or a wire brush to smooth out that rough cast would have made them look a little better, they are pretty rough looking as is , at least in that last picture
I think its more suited for newer or aluminum calipers.
Some sandpaper or a wire brush to smooth out that rough cast would have made them look a little better, they are pretty rough looking as is , at least in that last picture

Thread
Thread Starter
Forum
Replies
Last Post
rx8volks
Canadian Forum
0
Sep 1, 2015 11:02 PM
rx8volks
Canadian Forum
0
Sep 1, 2015 10:46 PM