
A Basic Tear Down, Port and Rebuild (what to look for and how to)

Thread Starter
Passing life by
Joined: Feb 2005
Posts: 4,028
Likes: 2
From: Scotland, USA
A basic tear down port rebuild for you who have wondered what to look for
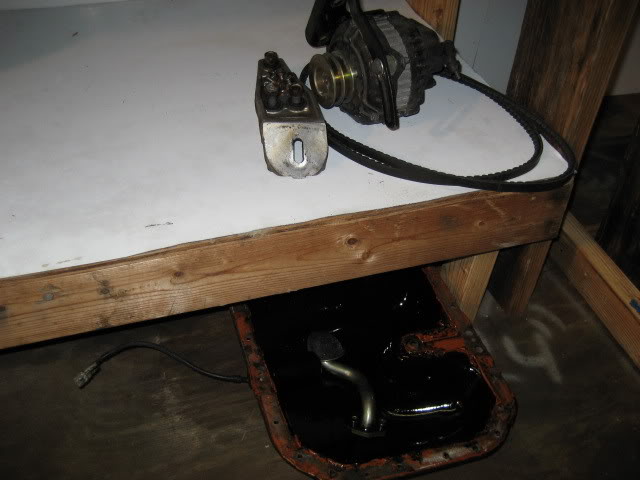
This particular motor was brought to me due to leaking oil from rear rotor. It was just built and only started and ran for maybe 10 minutes. So let�s tear in and see if we can find what the issue is, and welcome to my clean room.
Throw our subject on the stand
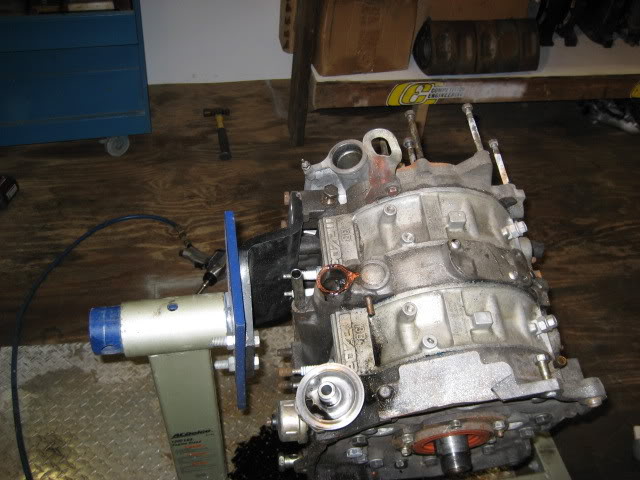
Start by removing the front pulley
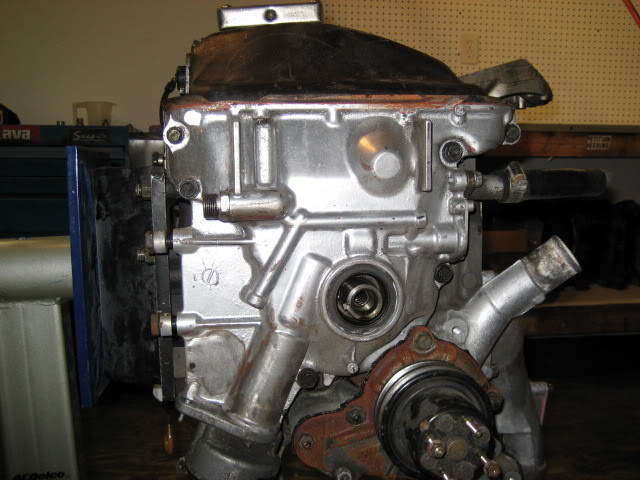
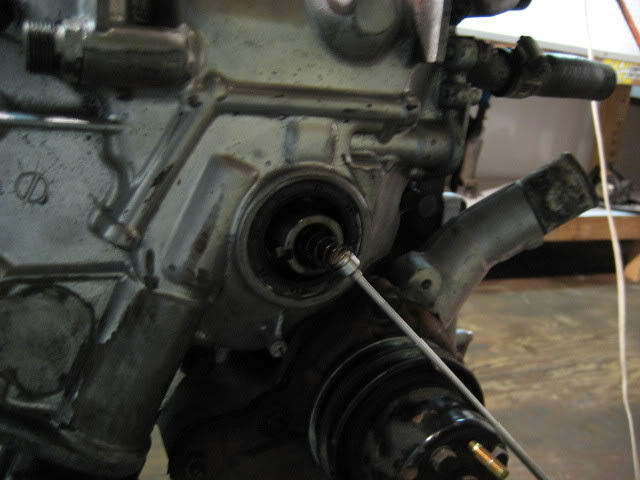
And don�t forget the spring in the eccentric shaft
Flip back over and pull our pan
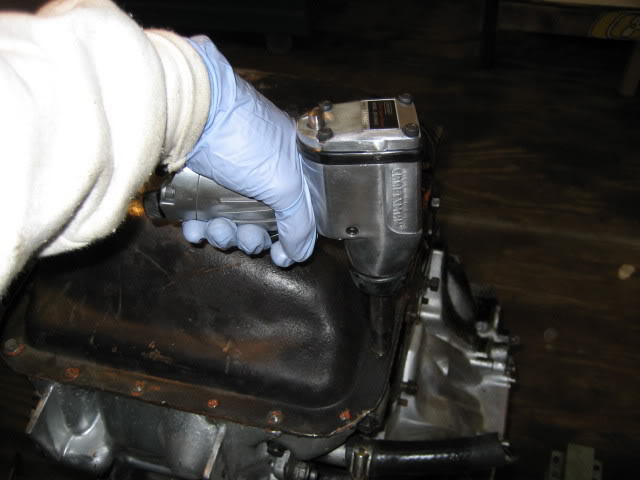
Put your parts aside
Pull the cover and start going to town
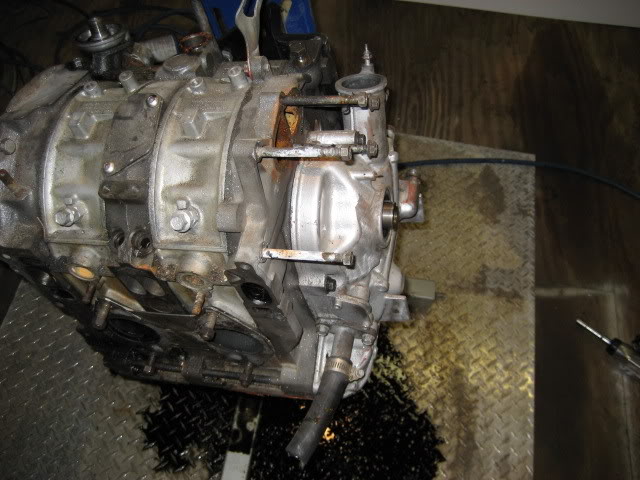
This motor was supposedly a half bridge port motor. Unfortunately as you will see who ever ported this Iron was very bad. This motor will need some work and reported.

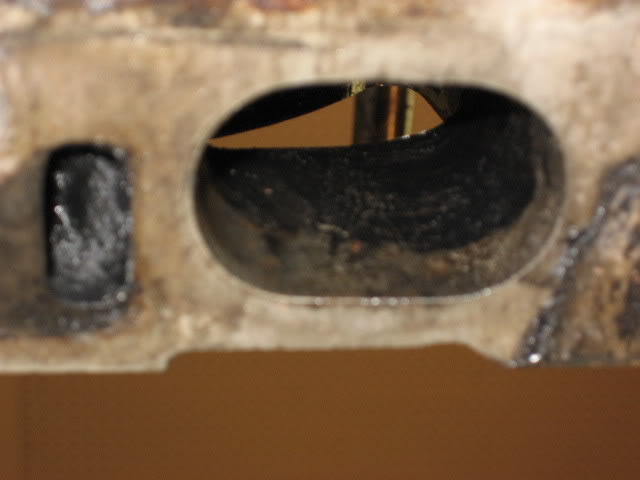
You can see there cut is uneven and there bit jumped around on the iron
They left the OEM port the untouched even the runner portion.
When the owner of this motor purchased the Iron off the forum he received this setup. The INT iron was also an s4 NA iron stock port unsuspectingly shipped to the owner of this motor. I feel bad this is border line scamming done to this guy. So I will make it right for him.
Throw our subject on the stand
Start by removing the front pulley
And don�t forget the spring in the eccentric shaft
Flip back over and pull our pan
Put your parts aside
Pull the cover and start going to town
This motor was supposedly a half bridge port motor. Unfortunately as you will see who ever ported this Iron was very bad. This motor will need some work and reported.
You can see there cut is uneven and there bit jumped around on the iron
They left the OEM port the untouched even the runner portion.
When the owner of this motor purchased the Iron off the forum he received this setup. The INT iron was also an s4 NA iron stock port unsuspectingly shipped to the owner of this motor. I feel bad this is border line scamming done to this guy. So I will make it right for him.
Thread Starter
Passing life by
Joined: Feb 2005
Posts: 4,028
Likes: 2
From: Scotland, USA
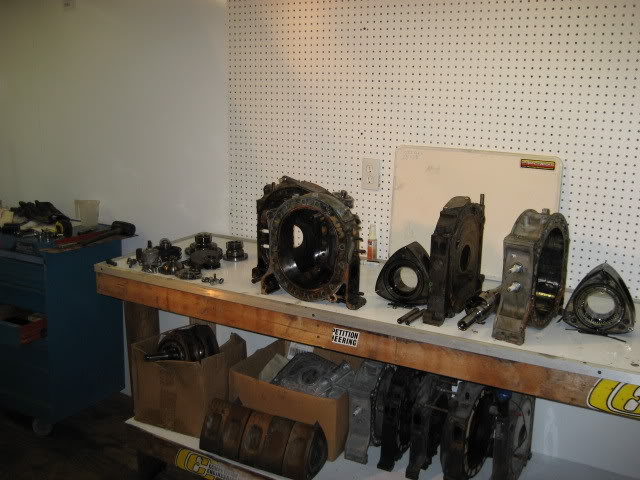
This is the important part of my build. One of the most important keys to building a quality motor that lasts is having very clean parts. Making sure we inspect and use premo quality clean parts will insure us a long lasting strong build. Now we have our dissembled parts on our table ready for clean inspection.
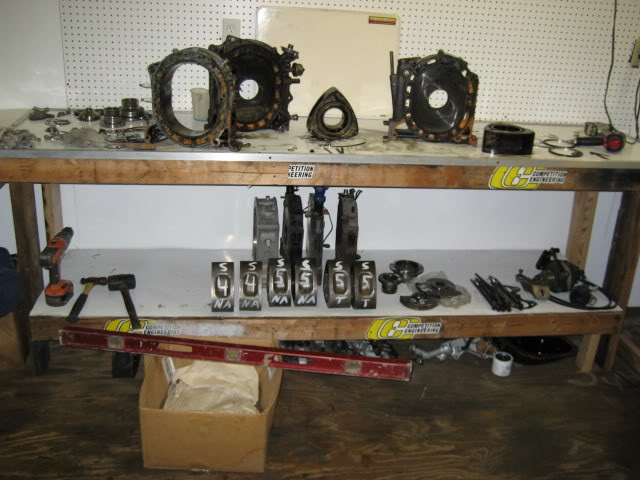
Now that we understand we must have clean parts me scrubbing them in the parts cleaner for hours is absolutely pointless. There is no humanly possible way you could achieve the quality of cleanliness we desire by doing this. In time saving and redundancy saving techniques we need to clean select items for visual inspection. As we brake down our seals we separate them for cleaning in the parts cleaner and clean hard items only enough to inspect them. Remember there is no point in thoroughly trying to clean something at this point that would be pointless we only need to know what we are working with
Seeing we are so cleanly oriented in this thread after the items are moved off the bench and separated clean the inspection table.
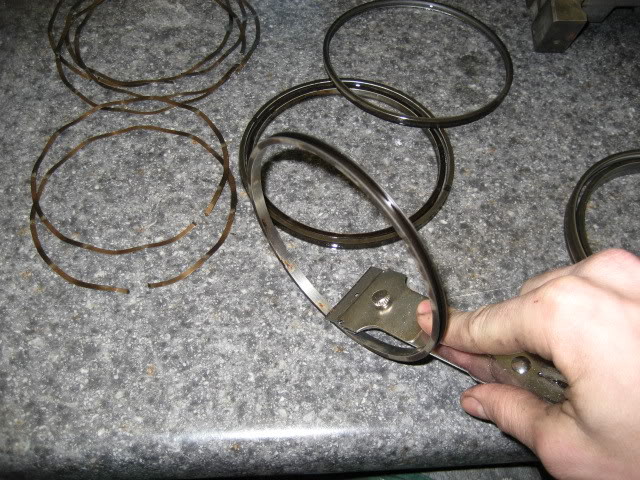
Now our control rings are ready. After you have wiped them down well if there is any carbon stuck in the corners you can remove them with a pick as shown.
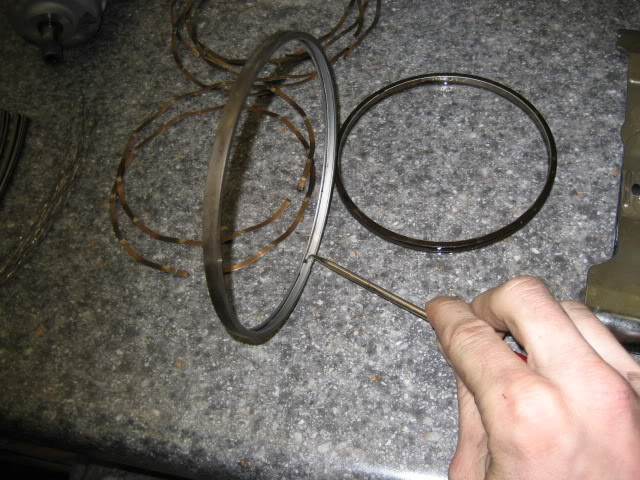
For some reason if you can�t scrub the carbon off the ring as this motor was burning oil the control area was very packed with carbon. You can very carefully use a razor on the outside to scrape the carbon off.
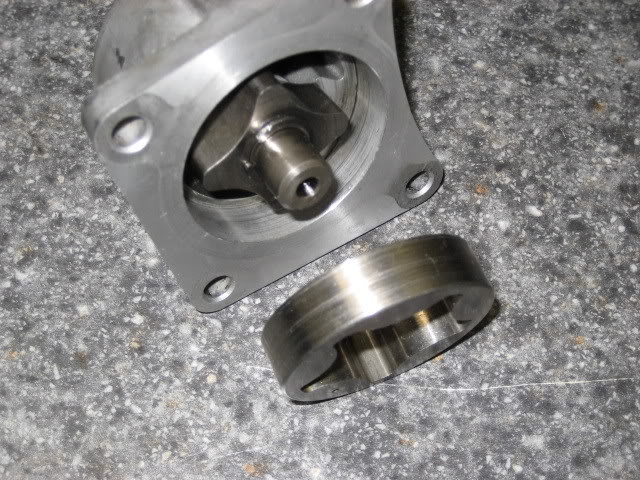
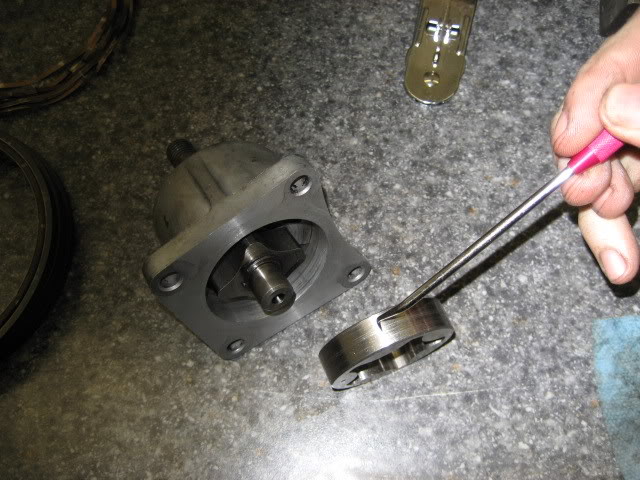
We received our pump from the parts cleaner; remember we only need to clean parts enough to inspect them. We can clearly see right away this pump is going to be trash. The scoring on the wheel and the housing immediately fail my visual inspection so there will be no need to tearing the pump down to thoroughly inspect the pump.
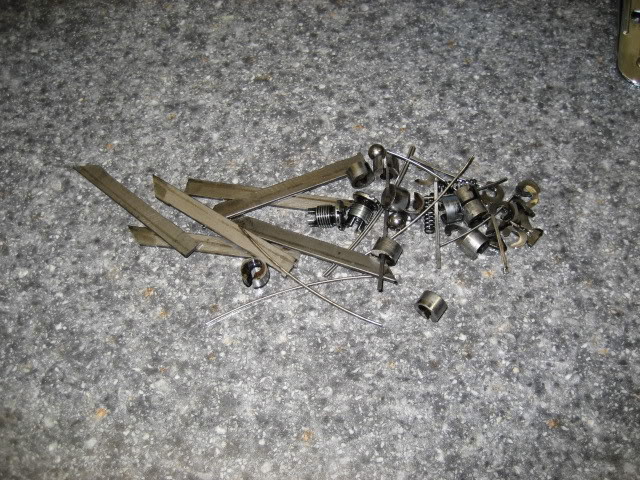
So we don�t lose the little seals we clean them in a little cup
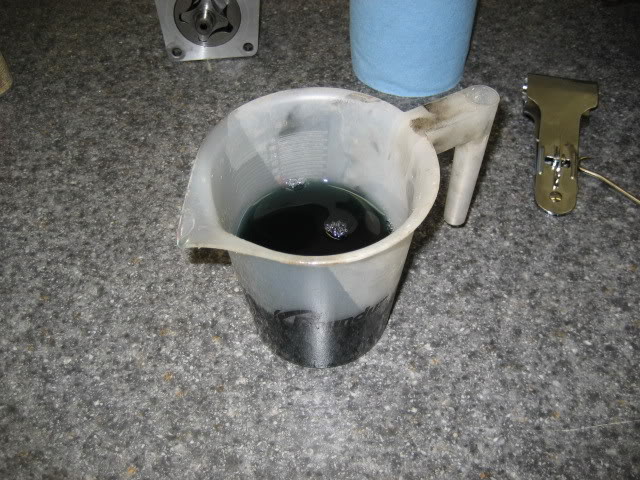
Dump them out.
Now we lightly clean the rotors in order to give them a visual inspection.
This grove seems to be a little burred up but could be fixed with some 320grit sand paper and a file.
This groove looks good
This groove is clearly damaged
This grove clearly shows abnormal scaring and warping. This should tip us off to pay close attention to the seals. The scaring also appears to be new meaning it happened in the amount of time the motor was ran.

After the visual inspection 1 rotor clearly fails our visual test and will be omitted from the build and no further inspections will occur to it.
I am tired so will continue this thread tomorrow and the findings of why the motor failed and what else was destroyed from the failure.
Now that we understand we must have clean parts me scrubbing them in the parts cleaner for hours is absolutely pointless. There is no humanly possible way you could achieve the quality of cleanliness we desire by doing this. In time saving and redundancy saving techniques we need to clean select items for visual inspection. As we brake down our seals we separate them for cleaning in the parts cleaner and clean hard items only enough to inspect them. Remember there is no point in thoroughly trying to clean something at this point that would be pointless we only need to know what we are working with
Seeing we are so cleanly oriented in this thread after the items are moved off the bench and separated clean the inspection table.
Now our control rings are ready. After you have wiped them down well if there is any carbon stuck in the corners you can remove them with a pick as shown.
For some reason if you can�t scrub the carbon off the ring as this motor was burning oil the control area was very packed with carbon. You can very carefully use a razor on the outside to scrape the carbon off.
We received our pump from the parts cleaner; remember we only need to clean parts enough to inspect them. We can clearly see right away this pump is going to be trash. The scoring on the wheel and the housing immediately fail my visual inspection so there will be no need to tearing the pump down to thoroughly inspect the pump.
So we don�t lose the little seals we clean them in a little cup
Dump them out.
Now we lightly clean the rotors in order to give them a visual inspection.
This grove seems to be a little burred up but could be fixed with some 320grit sand paper and a file.
This groove looks good
This groove is clearly damaged
This grove clearly shows abnormal scaring and warping. This should tip us off to pay close attention to the seals. The scaring also appears to be new meaning it happened in the amount of time the motor was ran.
After the visual inspection 1 rotor clearly fails our visual test and will be omitted from the build and no further inspections will occur to it.
I am tired so will continue this thread tomorrow and the findings of why the motor failed and what else was destroyed from the failure.

Joined: Feb 2001
Posts: 29,798
Likes: 128
From: London, Ontario, Canada
Originally Posted by iceblue
This motor was supposedly a half bridge port motor. Unfortunately as you will see who ever ported this Iron was very bad. This motor will need some work and reported.
You can see there cut is uneven and there bit jumped around on the iron
You can see there cut is uneven and there bit jumped around on the iron

Thread Starter
Passing life by
Joined: Feb 2005
Posts: 4,028
Likes: 2
From: Scotland, USA
Continuing we will start by inspecting our good rotors rotor bearing.
We can visually see this bearing is no good as it fails my criteria for visual inspection and will be omitted as well.
Now we shall move onto your smaller items of the puzzle for inspection. The owner of this block used RA seals and I am severely disappointed as they have caused server damage to some of the motor however the seals are perfect. Later on I will touch more on the seals.
Rear stationary gear. This bearing also fails my visual test and will need replacing.
Front stationary gear. This bearing also fails my visual test and will need to be replaced.
Now inspect the front assembly thrust plates and bearings.
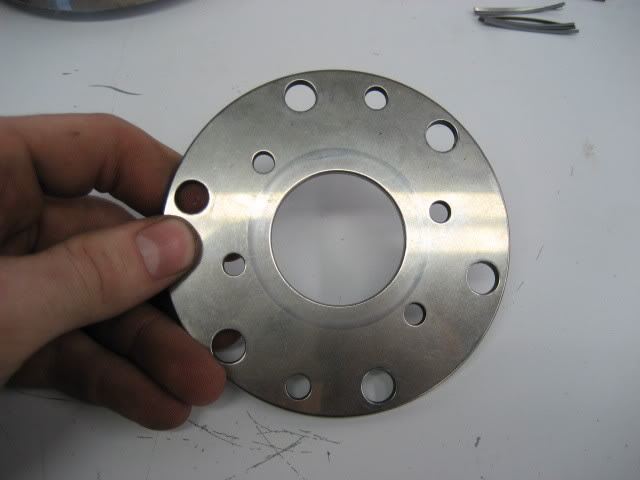
All of these plates pass with flying colors except the front thrust plate. There is a slight pressure indention in the plate were the bearing fell down. The damage is not measurable by a pic and will be able to be used if flipped over against the CW. New ones are only a couple dollars however.
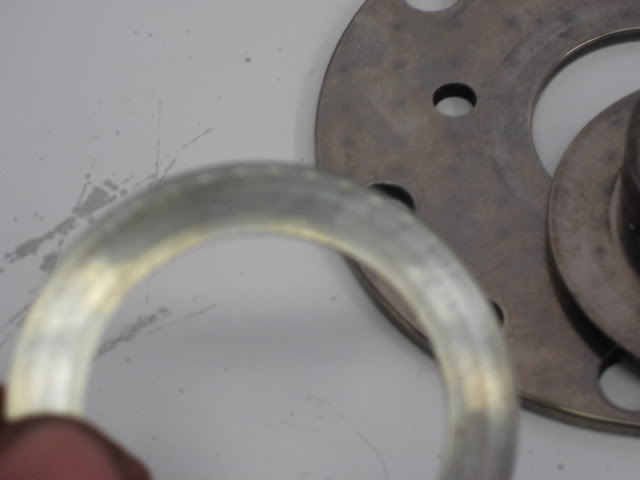
This bearing looks fine
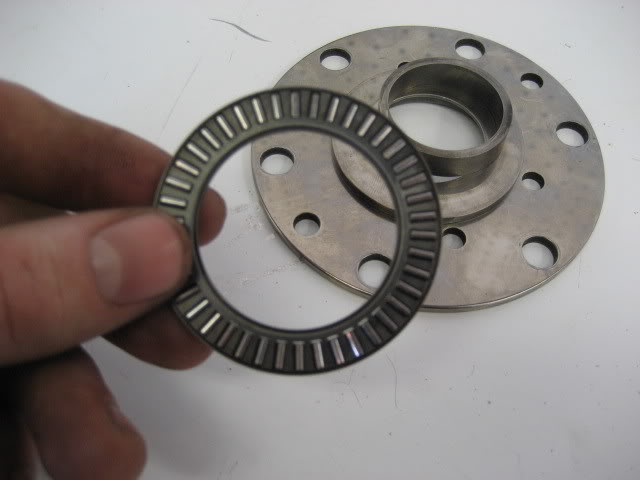
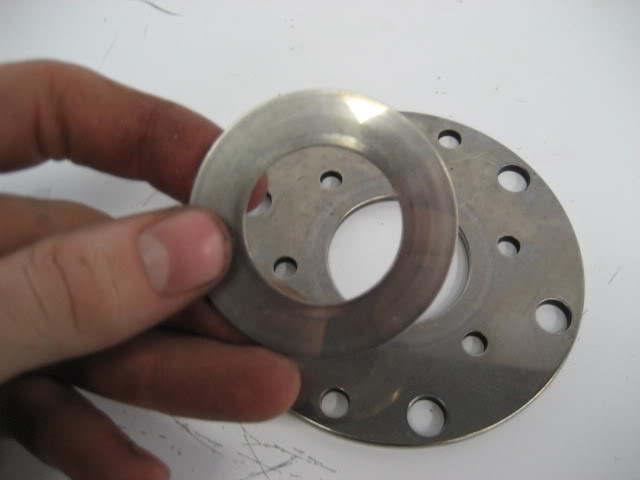
However this one is much damaged.
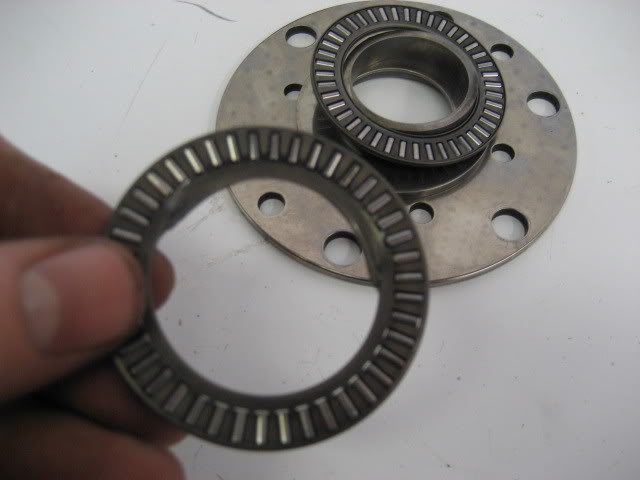
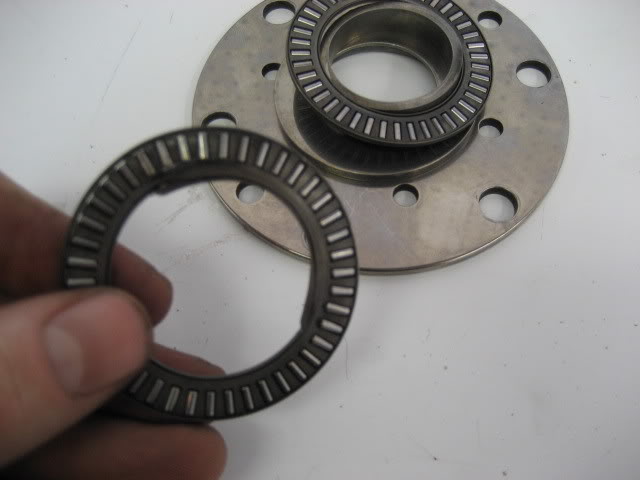
So what happened to this motor? The end play was not inspected and the motor was not TQ properly. This added play and angle is what caused the rear oil leak as no other faults were found in the rear.
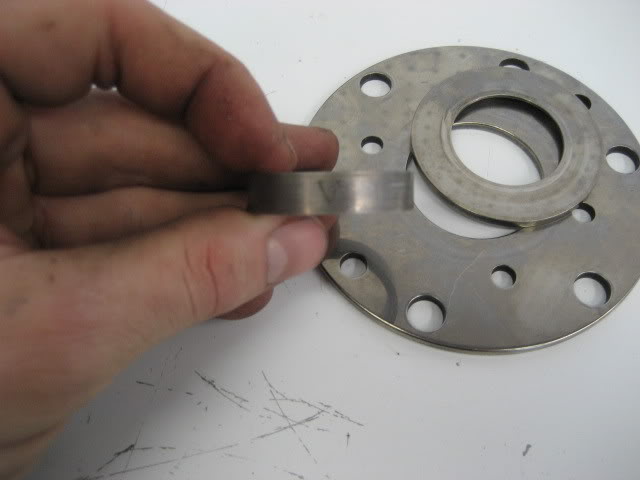
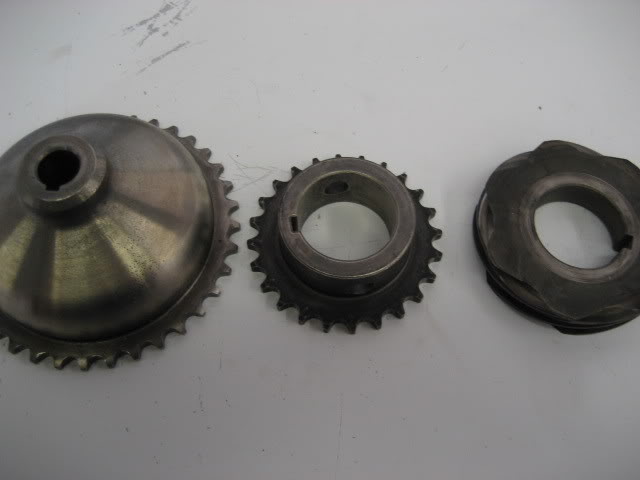
Inspect the stationary gear teeth
Inspecting the drive gears only consists of looking for broken teeth chipped teeth hooking teeth or there noticeable marks of wear.
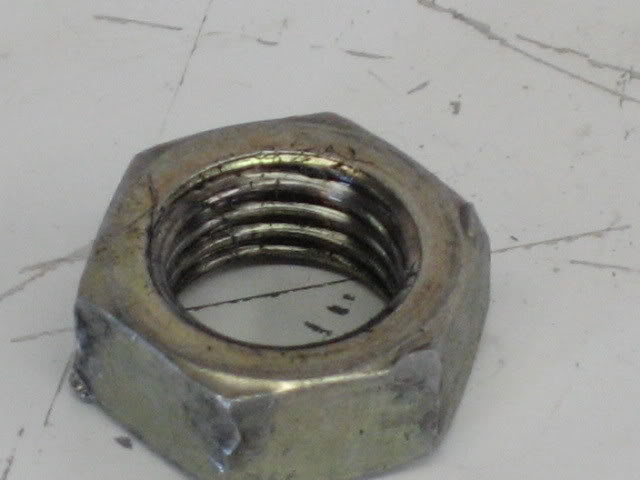
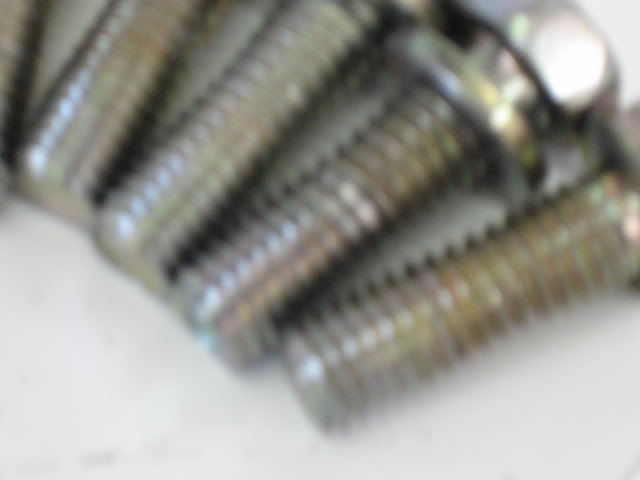
Now let�s inspect the bolts. Here is the oil gear nut and notice the burring of the threads if you can see. This bolt will not be reused.
Oil pump bolts
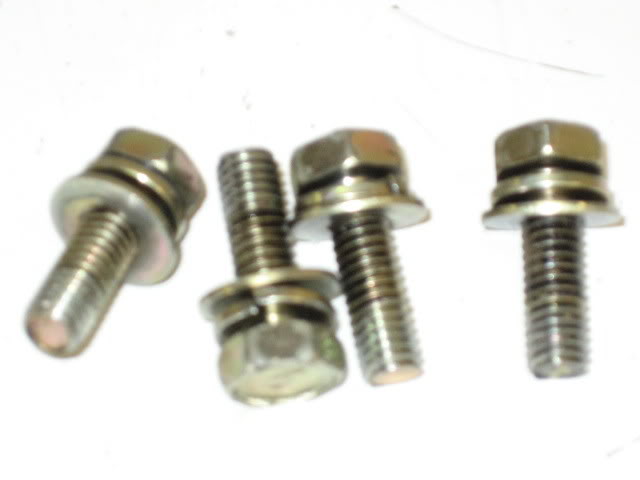
Stationary gear bolts.
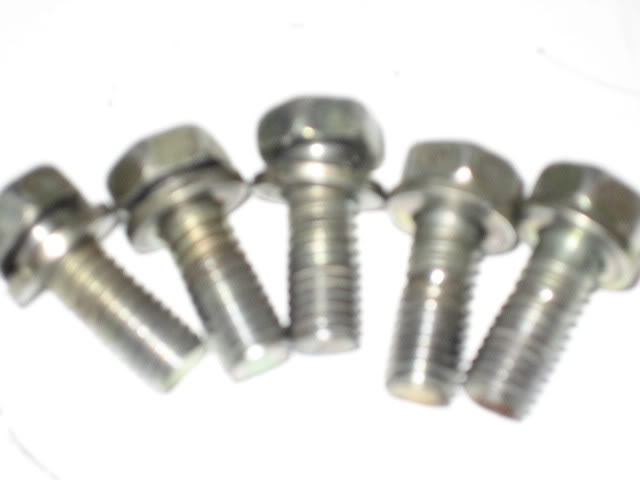
Closer inspection shows bad threads these bolts will be replaced.
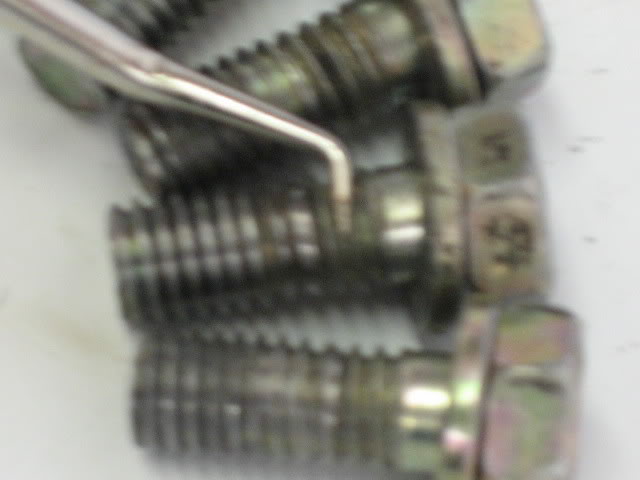
Next gear
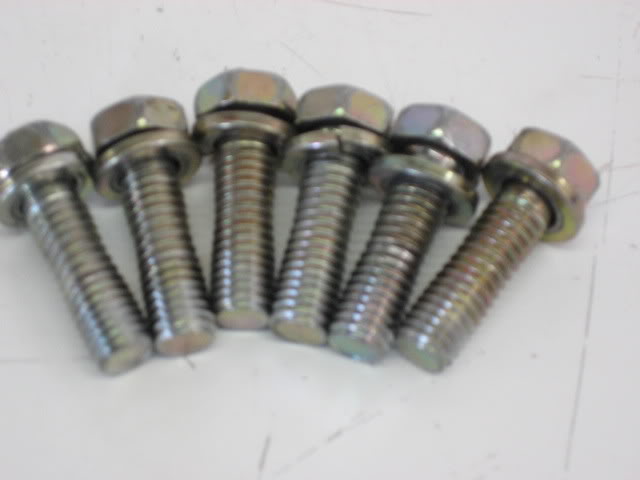
And these bolts are also bad and will not be used. Why are these bolts bad? Over TQ into dirty threads.
We can visually see this bearing is no good as it fails my criteria for visual inspection and will be omitted as well.
Now we shall move onto your smaller items of the puzzle for inspection. The owner of this block used RA seals and I am severely disappointed as they have caused server damage to some of the motor however the seals are perfect. Later on I will touch more on the seals.
Rear stationary gear. This bearing also fails my visual test and will need replacing.
Front stationary gear. This bearing also fails my visual test and will need to be replaced.
Now inspect the front assembly thrust plates and bearings.
All of these plates pass with flying colors except the front thrust plate. There is a slight pressure indention in the plate were the bearing fell down. The damage is not measurable by a pic and will be able to be used if flipped over against the CW. New ones are only a couple dollars however.
This bearing looks fine
However this one is much damaged.
So what happened to this motor? The end play was not inspected and the motor was not TQ properly. This added play and angle is what caused the rear oil leak as no other faults were found in the rear.
Inspect the stationary gear teeth
Inspecting the drive gears only consists of looking for broken teeth chipped teeth hooking teeth or there noticeable marks of wear.
Now let�s inspect the bolts. Here is the oil gear nut and notice the burring of the threads if you can see. This bolt will not be reused.
Oil pump bolts
Stationary gear bolts.
Closer inspection shows bad threads these bolts will be replaced.
Next gear
And these bolts are also bad and will not be used. Why are these bolts bad? Over TQ into dirty threads.
Trending Topics
Thread Starter
Passing life by
Joined: Feb 2005
Posts: 4,028
Likes: 2
From: Scotland, USA
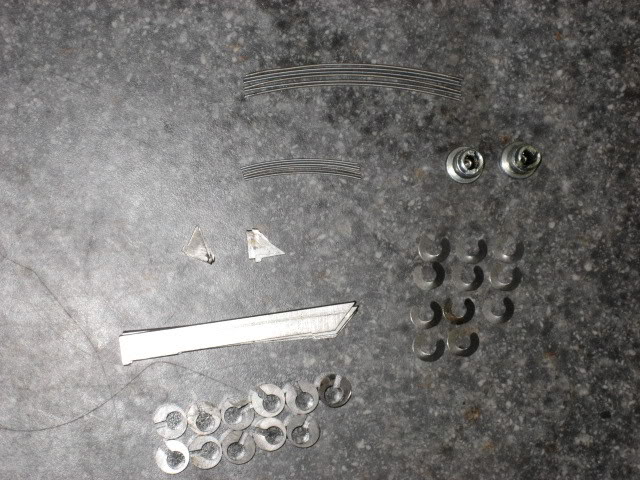
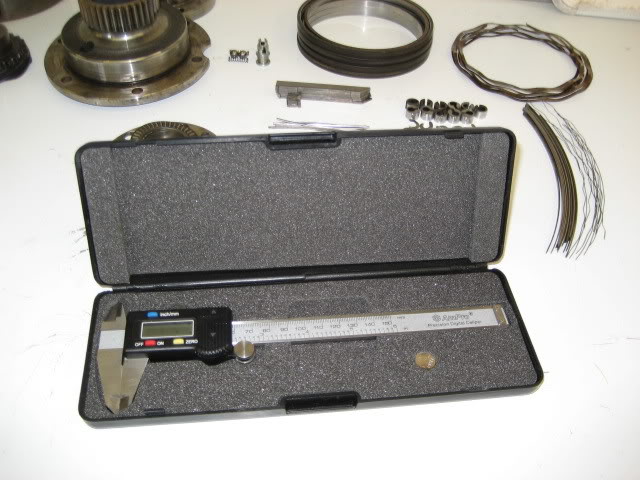
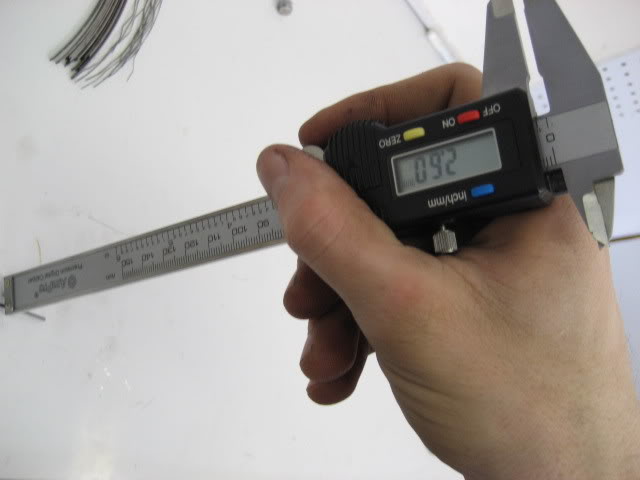
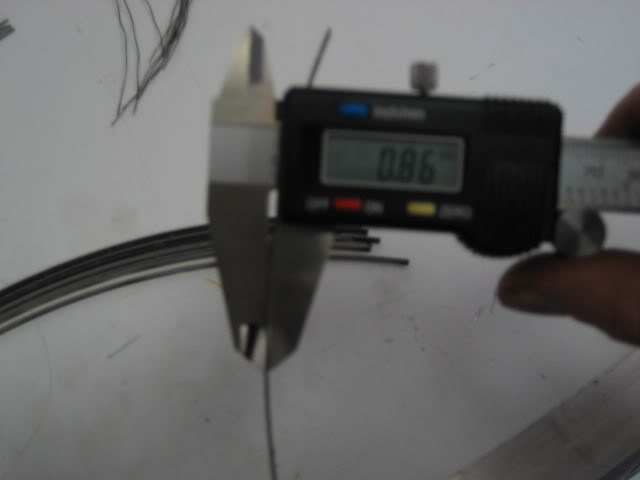
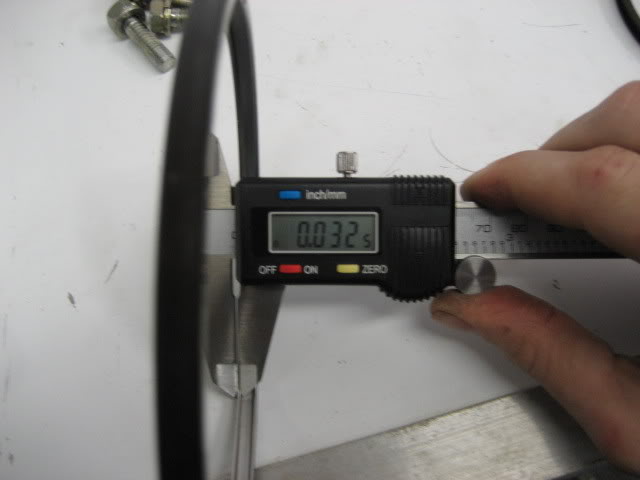
Now moving onto smaller inspections. Since we will not be needing bore measurements all we need is our calipers.
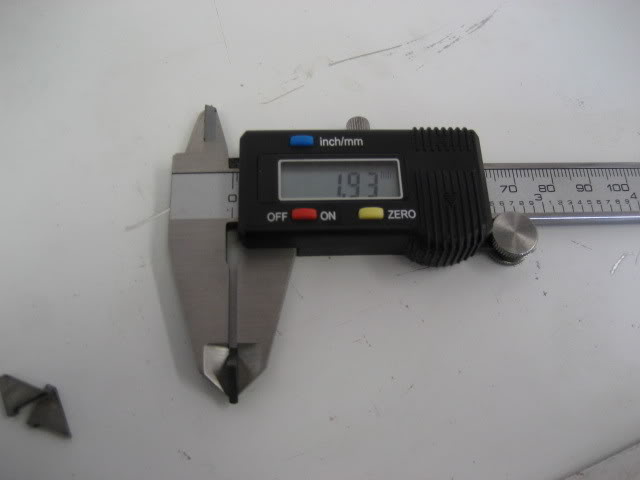
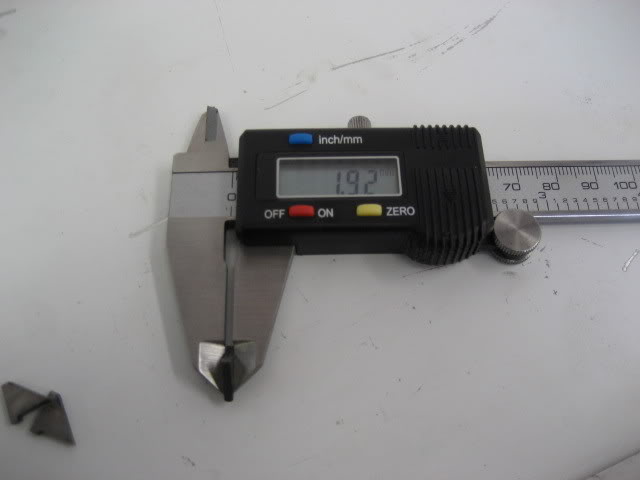
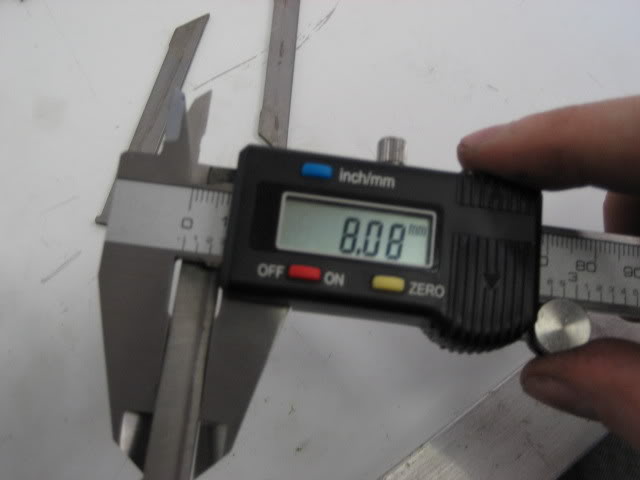
Onto the apex seals. I am disappointed because every seal was at the very limit of maximum range in width and height from the FSM. The online FSM does not offer values for height where the Haynes does so use this for reference.
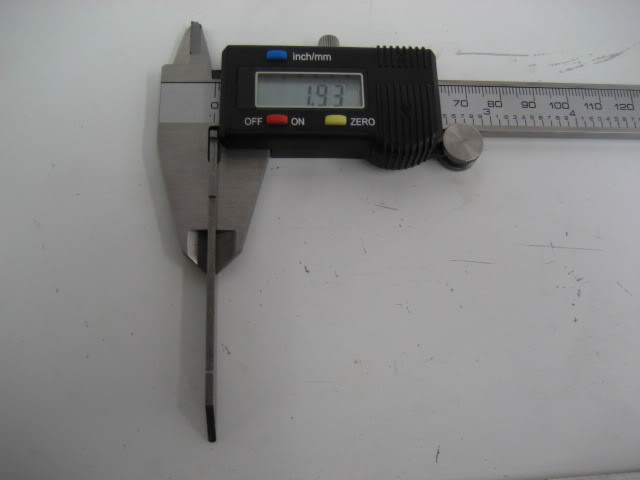

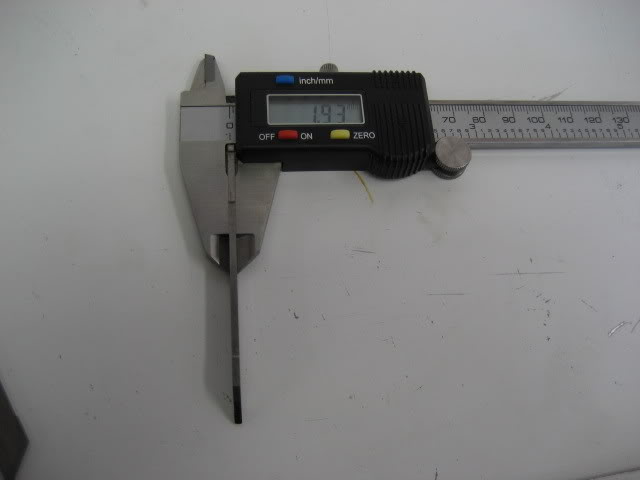
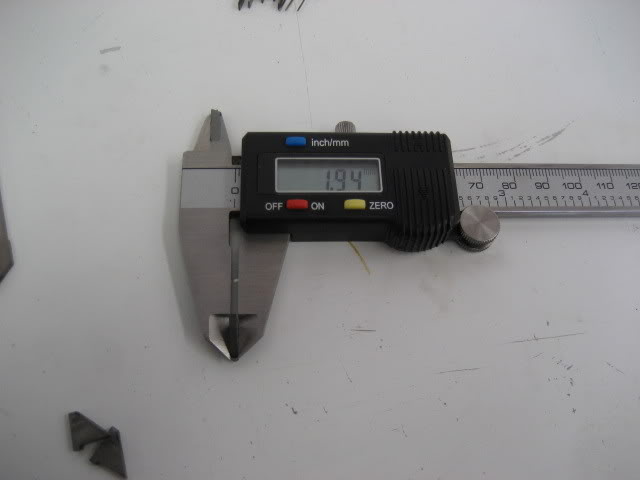
Apex warpage was perfect however.
Check the spring heights. Only 2 springs in my test showed concern remember though they were brand new 10 minutes ago.

Onto the apex seals. I am disappointed because every seal was at the very limit of maximum range in width and height from the FSM. The online FSM does not offer values for height where the Haynes does so use this for reference.
Apex warpage was perfect however.
Check the spring heights. Only 2 springs in my test showed concern remember though they were brand new 10 minutes ago.
Thread Starter
Passing life by
Joined: Feb 2005
Posts: 4,028
Likes: 2
From: Scotland, USA
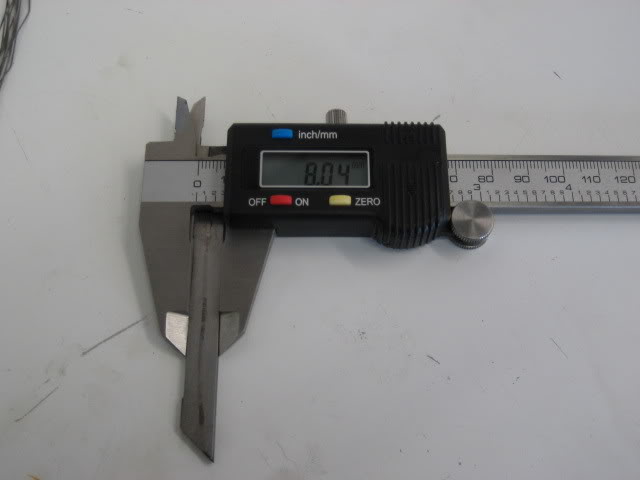
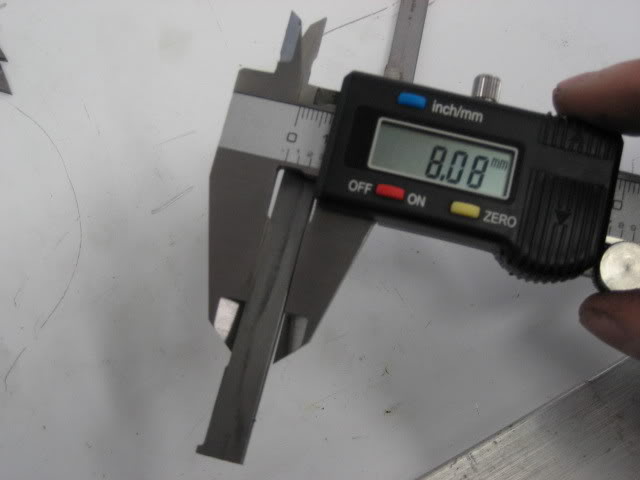
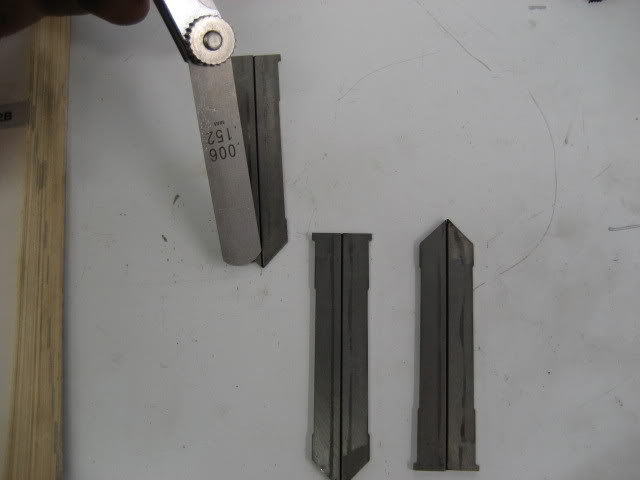
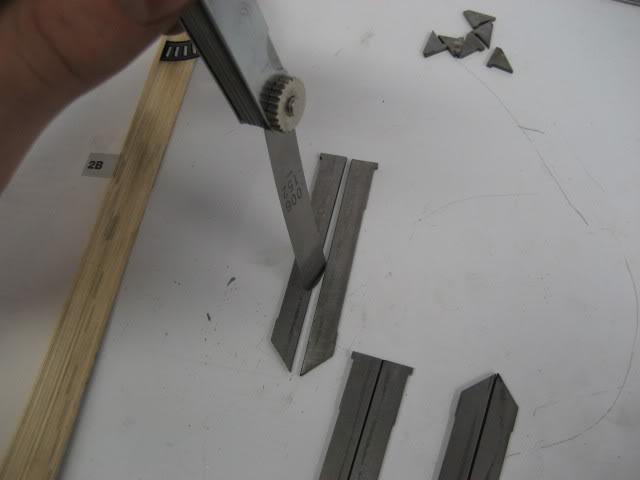
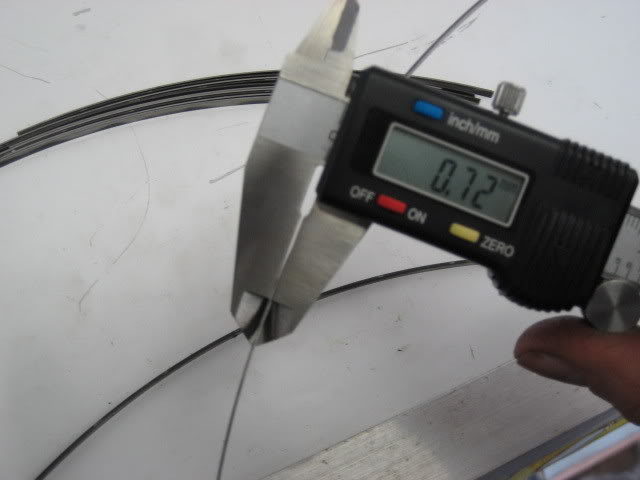
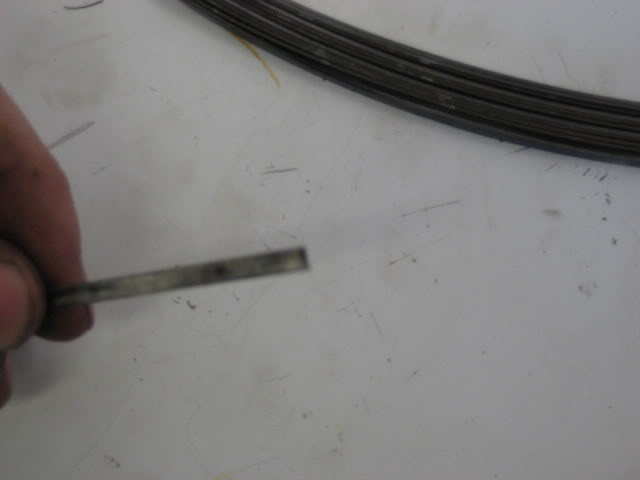
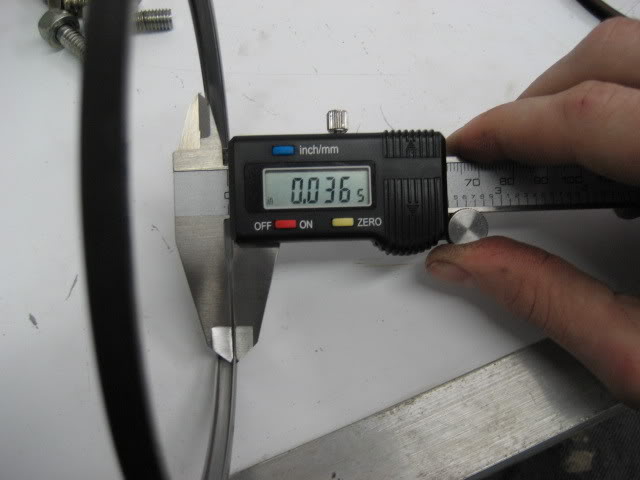
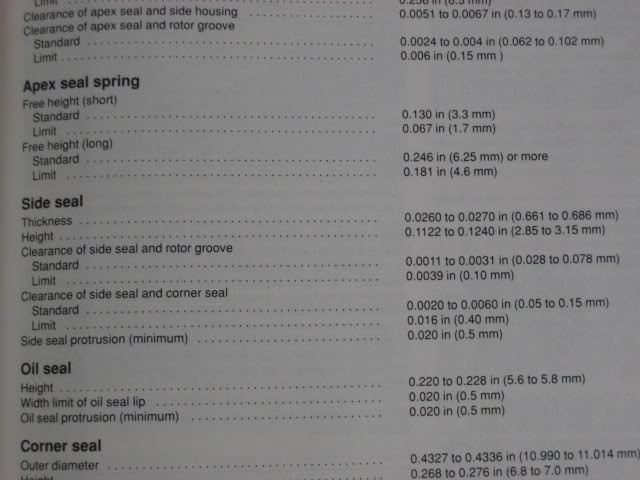
Side seals were also RA and are my extreme disappointment. In height the seal is perfect. However the width of the seal is bad these are brand new seals that were not lapped enough and are beyond the factory specs of useable. The only option would be to hand send them or lap them more and how accurate is your hand over 12 seals.
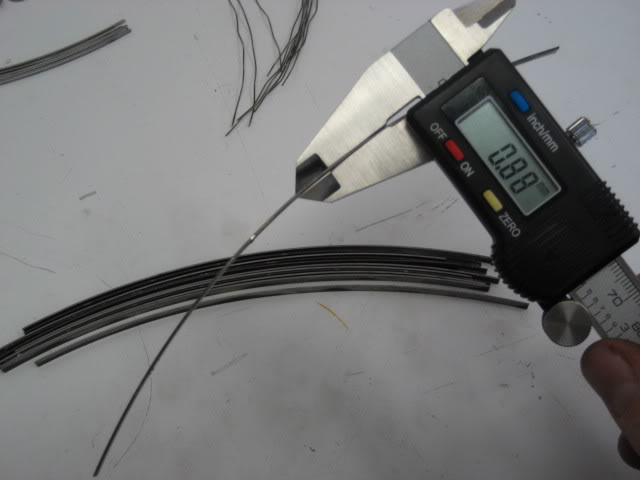

This seal appears to be bad lol it is broken!
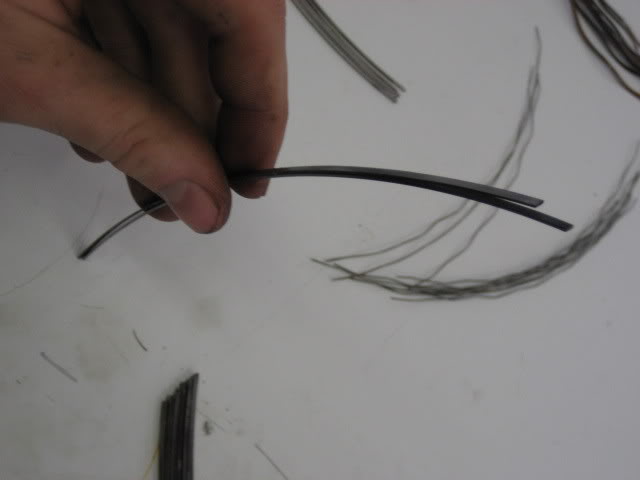
Oil control rings were great also.
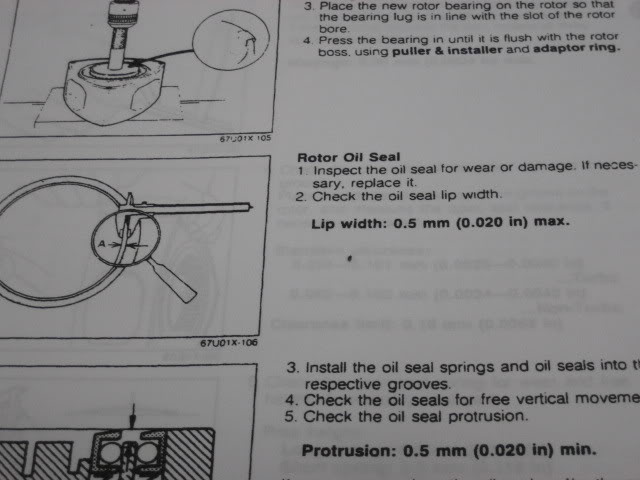
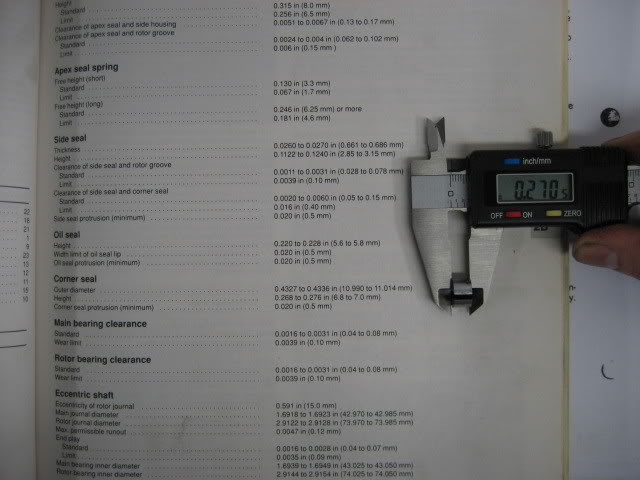
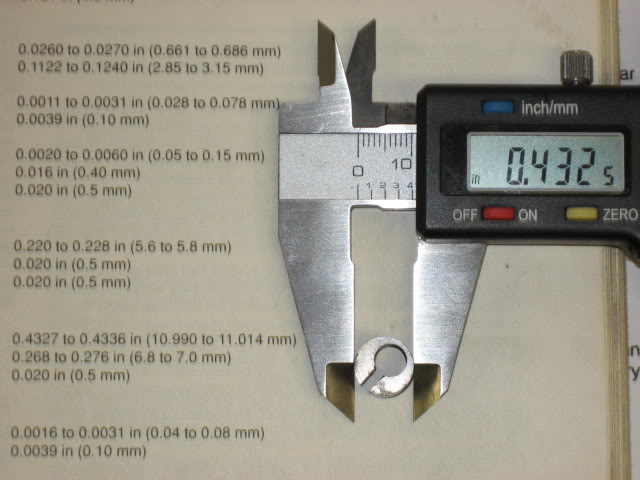
On corner seal again the FSM has a few more tests available.
All the side seals test great.
This seal appears to be bad lol it is broken!
Oil control rings were great also.
On corner seal again the FSM has a few more tests available.
All the side seals test great.
Thread Starter
Passing life by
Joined: Feb 2005
Posts: 4,028
Likes: 2
From: Scotland, USA
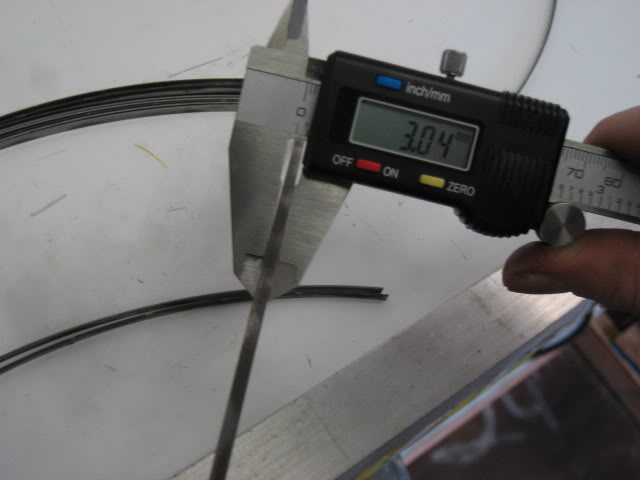
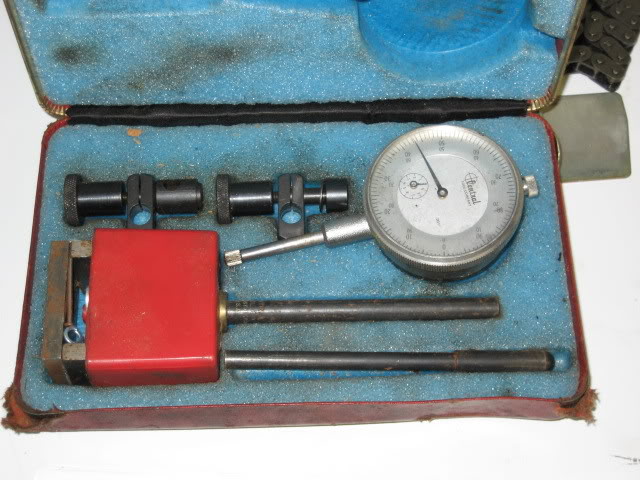
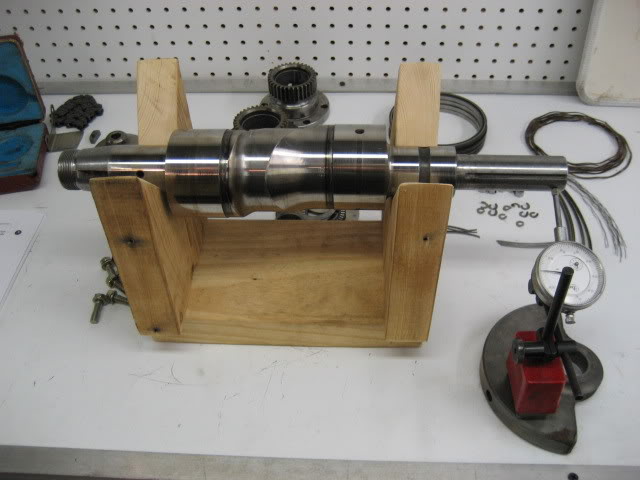
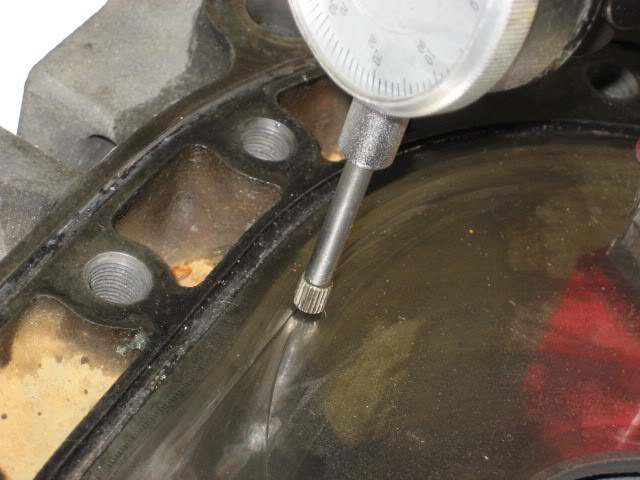
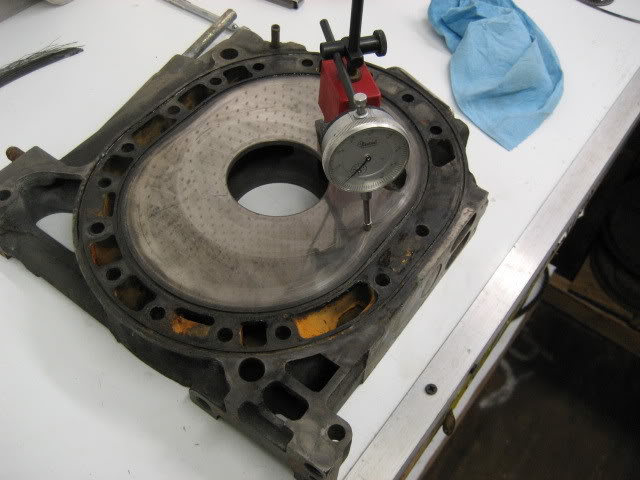
Now a little more testing will be needed. For this we need our dial indicator.
First off is our E shaft. We will check this for warpage and scaring. I built a V block stand specially for 13b E shafts. And our readings were good.
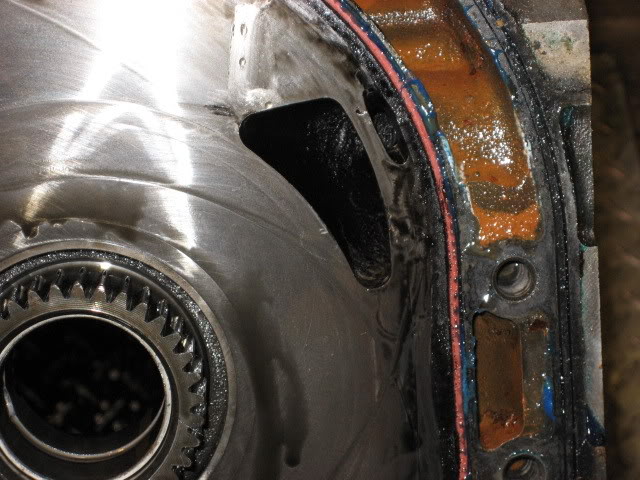
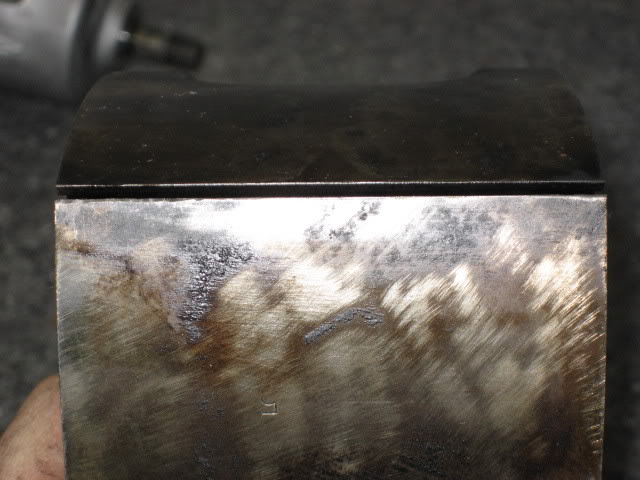
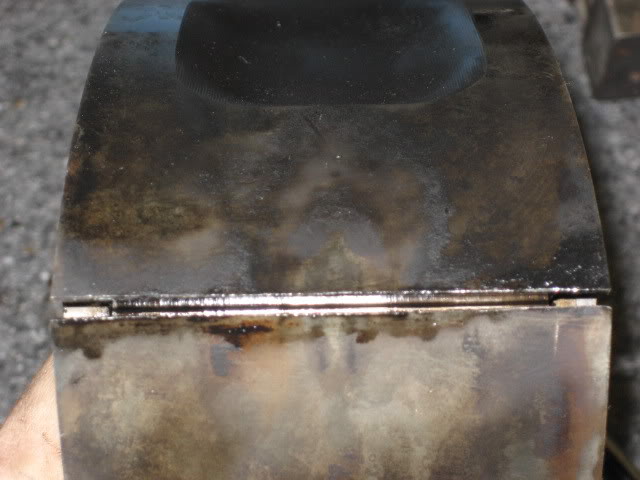
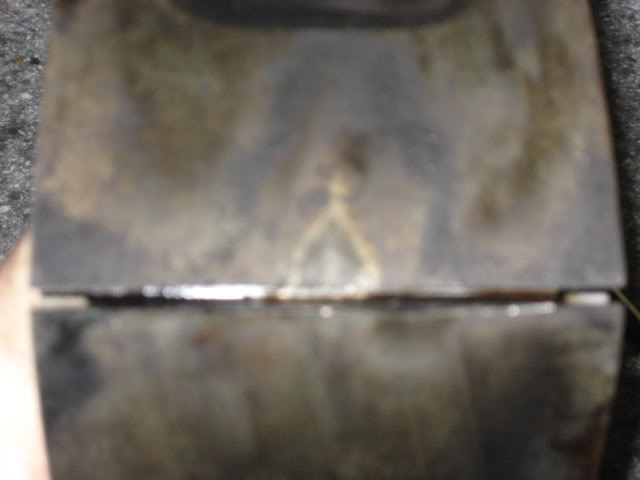
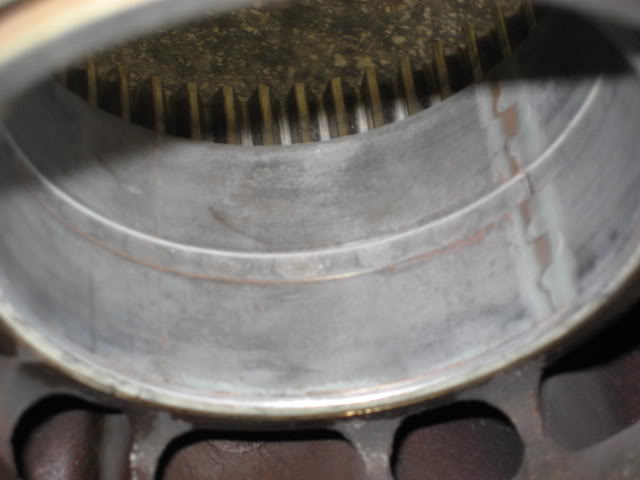
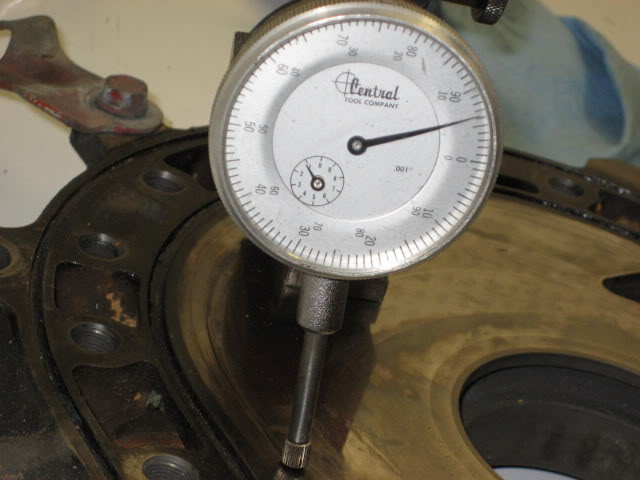
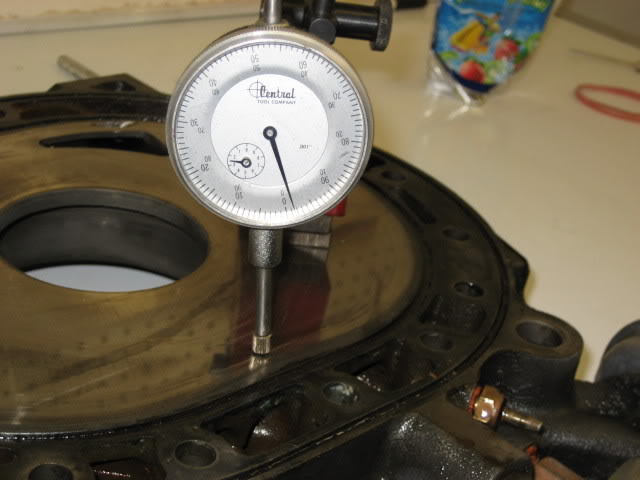
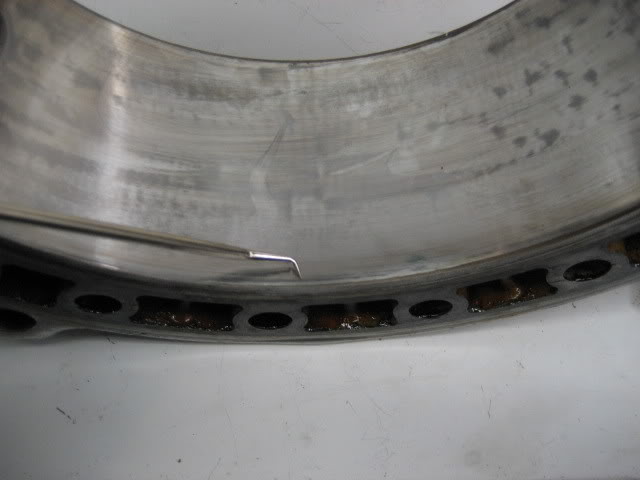
Now the front Iron and WTF happened here! We are seeing over .005in in step wear in one spot. That means out new crappy ported bridge iron is now unusable after less then 10 minutes of idle time! The off centered and unstabilized support now from the crushed thrust bearing caused the rotor to angle and grove heavily into the iron destroying it! This is also now telling us why we had the oil leak in the rear.
The rest of our iron test great.
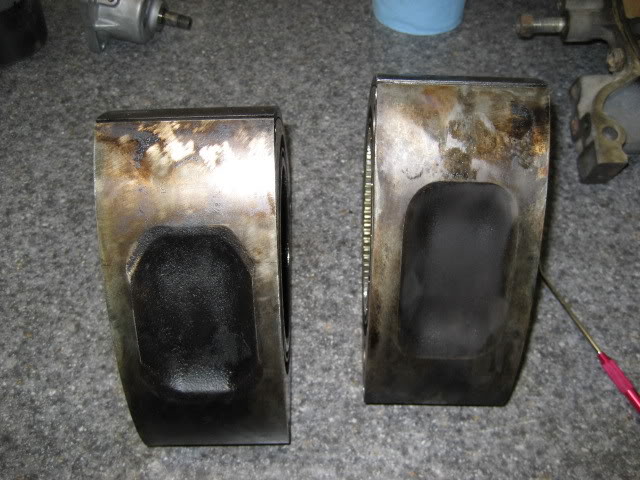
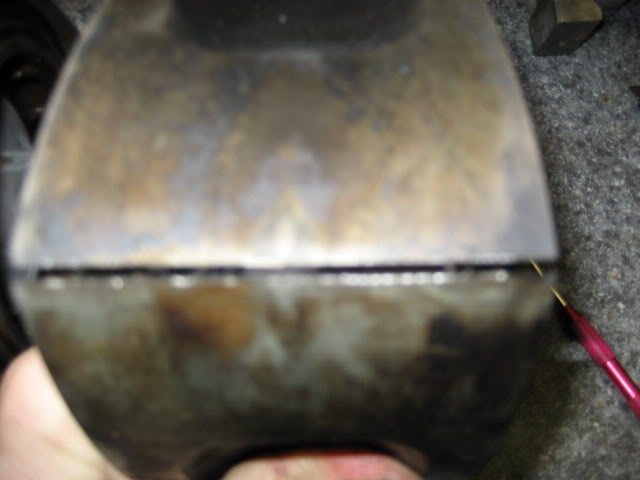
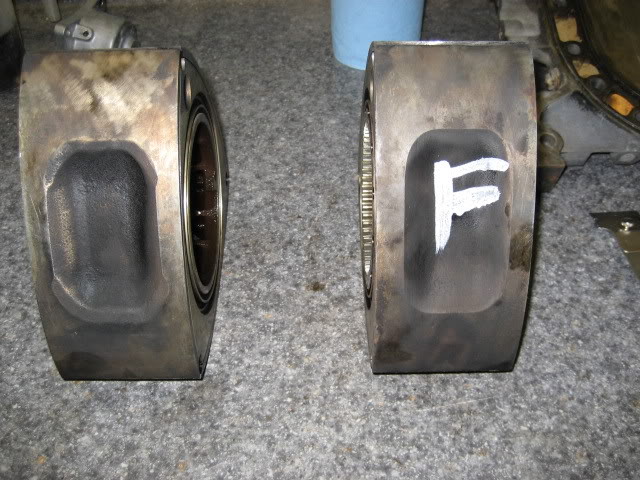
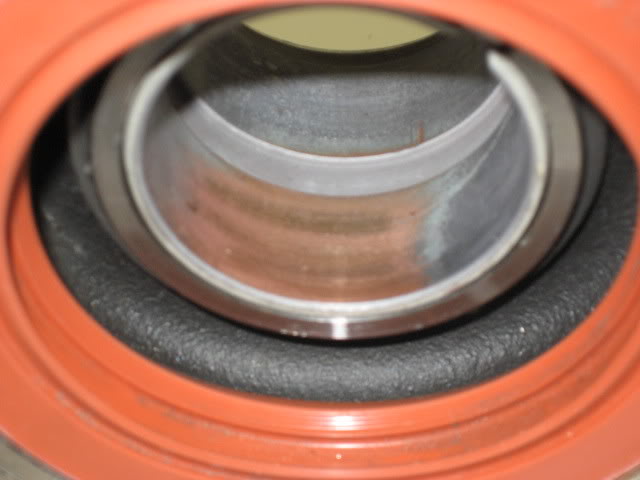
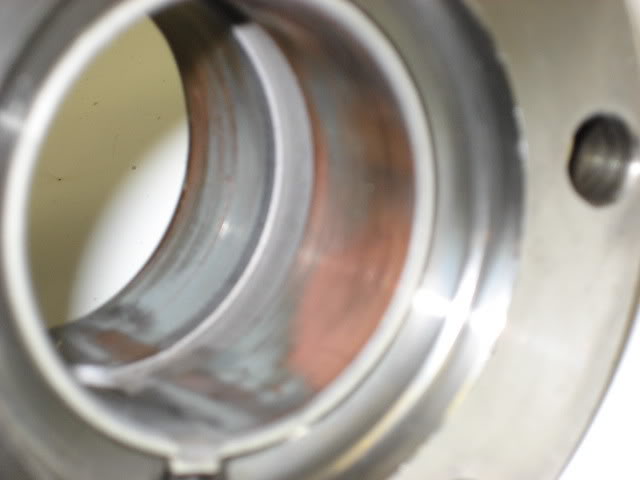
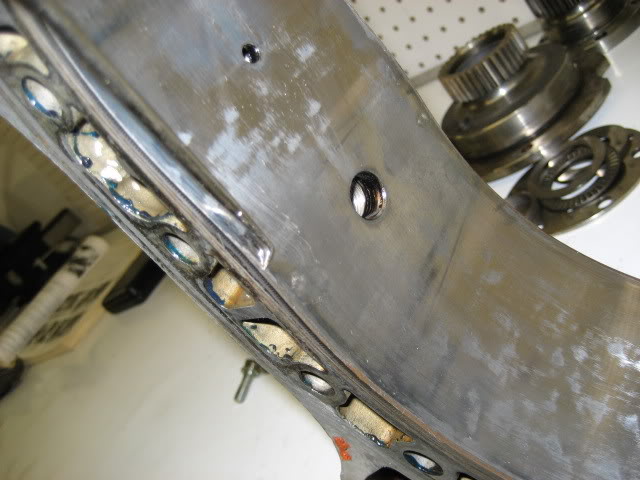
The housings are out of my spec as I use only new ones. Since this is a rebuild for a faulty build and the owner is in to deep to spring for housings we will inspect these ones for use but no warranty can be provided. They do not appear horribly bad. There is some chrome wear but no flaking and very minimal scaring in non high risk zones. The scoring is pointed out with a pic and on the lower edge and upper and right side edge there is noticeable wearing where chrome is cut away but evenly cleanly and no scoring to catch the seal but will hurt compression slightly. The wear grove is .003in wide.

I bet by now you are looking at some of the parts and going wtf being as we talked bout being so clean. Remember I said we only want to clean off the parts enough to inspect the. As you can see many parts failed and think of the time wasted cleaning them for a failed part. Now that we know what we are working with we can proceed, depending on where the owner wants to go with new parts will dictate some of this. The useable parts if lapped will go out for lapping then the irons will be tanked for 24hrs at a machine shop then glass beaded to like new condition then ultrasonically cleaned. The rotors get tanked and ready to go from there. This method is the only way to achieve a quality part by my standards and will produce a much stronger motor then I or someone hand cleaning them. This thread will continue with the clean and build when the owner decides on parts and shipment is received in mail.
First off is our E shaft. We will check this for warpage and scaring. I built a V block stand specially for 13b E shafts. And our readings were good.
Now the front Iron and WTF happened here! We are seeing over .005in in step wear in one spot. That means out new crappy ported bridge iron is now unusable after less then 10 minutes of idle time! The off centered and unstabilized support now from the crushed thrust bearing caused the rotor to angle and grove heavily into the iron destroying it! This is also now telling us why we had the oil leak in the rear.
The rest of our iron test great.
The housings are out of my spec as I use only new ones. Since this is a rebuild for a faulty build and the owner is in to deep to spring for housings we will inspect these ones for use but no warranty can be provided. They do not appear horribly bad. There is some chrome wear but no flaking and very minimal scaring in non high risk zones. The scoring is pointed out with a pic and on the lower edge and upper and right side edge there is noticeable wearing where chrome is cut away but evenly cleanly and no scoring to catch the seal but will hurt compression slightly. The wear grove is .003in wide.
I bet by now you are looking at some of the parts and going wtf being as we talked bout being so clean. Remember I said we only want to clean off the parts enough to inspect the. As you can see many parts failed and think of the time wasted cleaning them for a failed part. Now that we know what we are working with we can proceed, depending on where the owner wants to go with new parts will dictate some of this. The useable parts if lapped will go out for lapping then the irons will be tanked for 24hrs at a machine shop then glass beaded to like new condition then ultrasonically cleaned. The rotors get tanked and ready to go from there. This method is the only way to achieve a quality part by my standards and will produce a much stronger motor then I or someone hand cleaning them. This thread will continue with the clean and build when the owner decides on parts and shipment is received in mail.


the wear on those housings is quite odd, did he have RA seals in it by chance?
and you mentioned this engine was burning oil from the rear rotor correct? if so you are still missing something, i guarantee the end play is not causing an oil burning issue but you can ignore that if you wish.
what is wrong with the rotor bearing on the good rotor? just curious, it looks perfectly fine to me.
Originally Posted by Karack
the wear on those housings is quite odd, did he have RA seals in it by chance?
and you mentioned this engine was burning oil from the rear rotor correct? if so you are still missing something, i guarantee the end play is not causing an oil burning issue but you can ignore that if you wish.
what is wrong with the rotor bearing on the good rotor? just curious, it looks perfectly fine to me.
and you mentioned this engine was burning oil from the rear rotor correct? if so you are still missing something, i guarantee the end play is not causing an oil burning issue but you can ignore that if you wish.
what is wrong with the rotor bearing on the good rotor? just curious, it looks perfectly fine to me.
Thread Starter
Passing life by
Joined: Feb 2005
Posts: 4,028
Likes: 2
From: Scotland, USA
Originally Posted by Karack
the wear on those housings is quite odd, did he have RA seals in it by chance?
Originally Posted by Karack
and you mentioned this engine was burning oil from the rear rotor correct? if so you are still missing something, i guarantee the end play is not causing an oil burning issue but you can ignore that if you wish.
Originally Posted by Karack
what is wrong with the rotor bearing on the good rotor? just curious, it looks perfectly fine to me.

Joined: Oct 2003
Posts: 11,576
Likes: 27
From: Morristown, TN (east of Knoxville)
I also disagree with your statement that the end play and step wear was causing the oil burning.
Props to you for taking the time to make a thread like this.
What everyone needs to realize is that there is no set way of doing a build. Each experienced builder has their own way of doing things...inspection, cleaning, porting, etc. Some builders will use stuff that others won't, and vice versa. I agree with pretty much everything you've said in your writeup, with the exception that step wear makes an iron unuseable. And the one rotor bearing with the hairline stripe of copper showing through, that's useable in my book depending on the customers budget. Industry standard is <20% copper showing. Original bearings in decent shape are generally superior to new bearings...new bearings require many heat cycles to strengthen, and an easier breakin. They are also FAR more likely to spin in the future than original installed ones.
Also you should add that the improper assembly of the front stack was what caused the endplay issue, AND what destroyed the bearings and oilpump.
Thread Starter
Passing life by
Joined: Feb 2005
Posts: 4,028
Likes: 2
From: Scotland, USA
Thx for post Kevin. I greatly agree that there is no one way of building and there are many builders in the world and everyone has there own experience believes and so on. The bottom line is we all have something to learn every day and here to suit one person�s needs and another person to suit another person�s need.
If one person learns something from this thread and I learn something from this thread then my goal was accomplished!
If one person learns something from this thread and I learn something from this thread then my goal was accomplished!
Thread Starter
Passing life by
Joined: Feb 2005
Posts: 4,028
Likes: 2
From: Scotland, USA
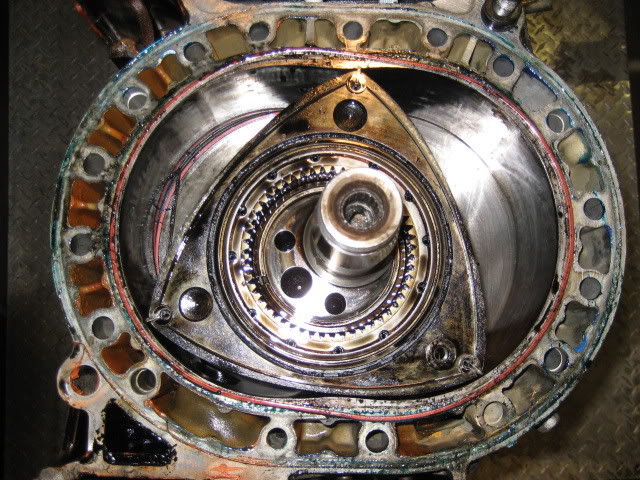
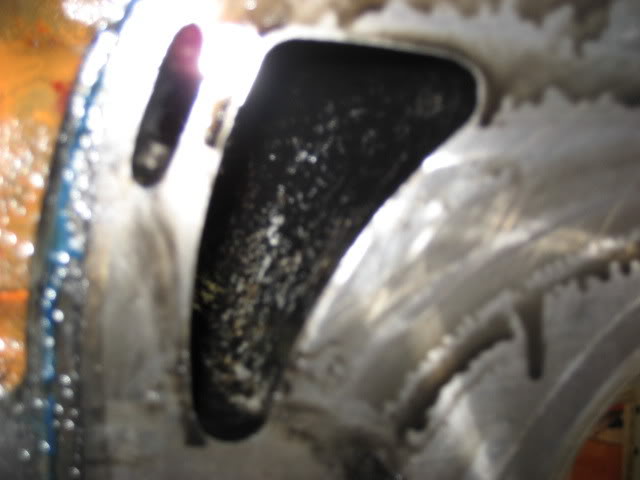
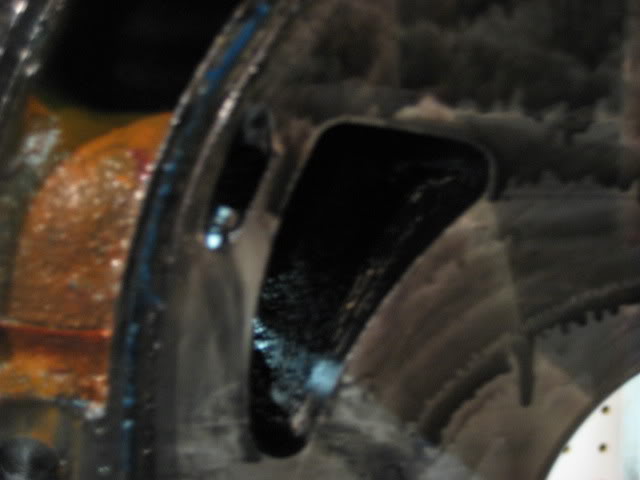
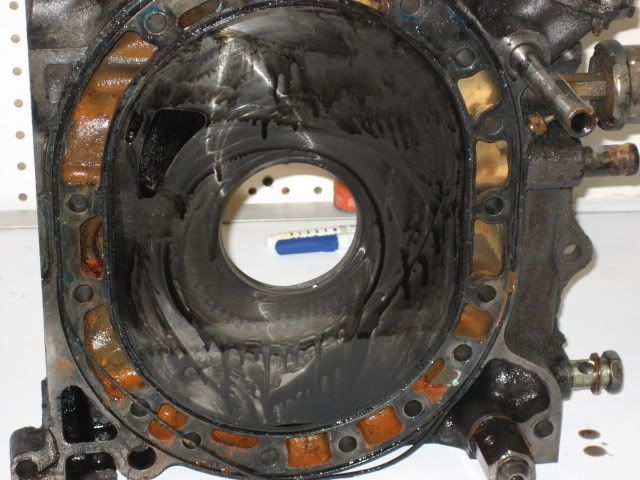
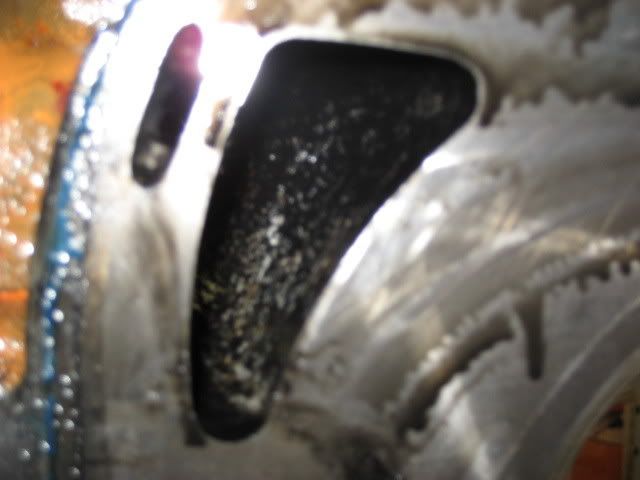
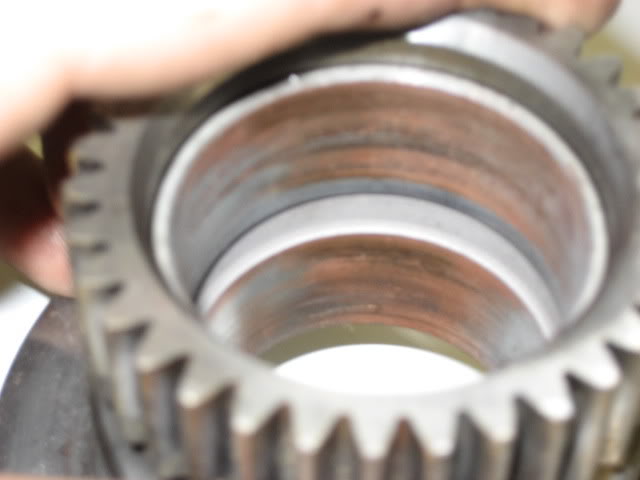
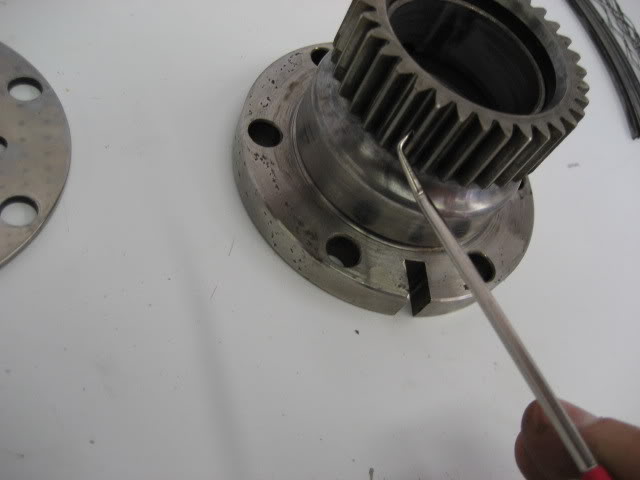
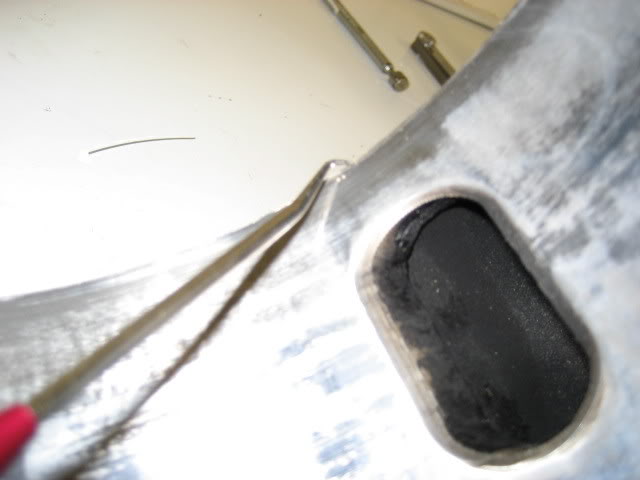
WOW I feel kinda like an idiot and how badly I over looked the issue, I expected it to be more complex and over looked the obvious. If you look at the fist pic into the motor you will notice that a corner seal was left out of the motor on build! Well if we are missing a corner seal we have an oil leak. WALA our oil issue is solved!
The reason that pic was taken was because of the mystery bolt on top of the rotor that was an intake manifold bolt dropped down the intake by the owner.
The reason that pic was taken was because of the mystery bolt on top of the rotor that was an intake manifold bolt dropped down the intake by the owner.
a missing corner seal?
doubtful it would even last 5 minutes of run time, and a missing corner seal won't cause an oil burning issue since it holds compression not lubrication. i have lost corner seals during disassembly before but i know an engine won't last for long without one so i dismiss it until i find out where it disappeared to since they like to fall out during rotor removal during teardown.
just trying to help you not nitpick but try looking at the oil control seal spring installed directions, if they were installed backwards then the retainers can spin in the rotors and leak oil internally.
Joined: Oct 2003
Posts: 11,576
Likes: 27
From: Morristown, TN (east of Knoxville)
Man, I dont know...that would be next to impossible, even for a first time builder. A spring, sure...a whole seal? Nah.
They have a tendency to stick to the iron, especially when the iron is oil soaked like yours was. The oil pulls the seals right out with the iron. When you move the iron off the engine, the seal will slide off and fall somewhere, perhaps into a coolant passage, onto the floor, into your boot, whatever, and then roll under the bench or toolbox or something.
An engine with no cornerseal would have VERY poor compression, hard time starting, a strongly pulsating idle/vacuum, and a lot of crankcase pressure from compression pushing past the oil rings. I'm not sure I'd say it would cause the oil to come OUT though.
I had a real clusterfuck of an oil burner myself recently. It was a halfbridge 3mm FD. Guy said it had 10psi of crankcase pressure and would blow the dipstick off as soon as it cranked up. He brought it back and I went back through it, and found the front rotor soaked in oil but for no reason.
Rebuilt it and test ran it on my stand, and it did the same thing. With the engine on the stand, I pulled the intake and pressurized the oil passages with compressed air, and could hear gurgling inside and oil spraying into the intake port but couldnt see where it was coming from. I pulled it back apart and went over the rotor with a maginifying glass, still nothing. I cleaned it up and taped off both sides, cut a small slit in the tape and put the air gun into it. Then I found the problem. KNow what it was?
My rotor miller had took one slot down an extra few thousandths, just enough to weaken the "floor" of the apex slot. After it got heated up and the seal/spring put some pressure on it, it broke through, and caused a crack in the corners between the "floor" and 'walls" of the slot. Letting oil out, and compression in.
That was a first for me, and something I've never heard tell of to this day from any builder.
Thread Starter
Passing life by
Joined: Feb 2005
Posts: 4,028
Likes: 2
From: Scotland, USA
You guys help me then. I am still baffled on it. Karak I specifically checked the control spring just for that and I saw no error. I am still scratching my head this motor had an extremely hard time starting and running and had about zero oil pressure. I am not saying there is never the human error element and I missed it just im stumped.
RR - You know there is always that possibility I scanned my entire shop floor benches many times and I can not find the missing corner seal. My thought on it was ehh when he stopped by and played with the rotor maybe he left it in pocket hand or something. Because if it�s in my shop a mouse stole that sucker. The spring is also missing.
RR - You know there is always that possibility I scanned my entire shop floor benches many times and I can not find the missing corner seal. My thought on it was ehh when he stopped by and played with the rotor maybe he left it in pocket hand or something. Because if it�s in my shop a mouse stole that sucker. The spring is also missing.
Joined: Oct 2003
Posts: 11,576
Likes: 27
From: Morristown, TN (east of Knoxville)
Other than side step wear at 3 and 9 oclock positions on the irons, is there any other wear? scratches? swirl marks near the center (where the oil rings ride)? Crap in the oil, from the damaged thrust bearing, can make swirl marks and wear the irons, giving oil a path around the ring. Letting a porting bit skip into the oil control ring path can do the same thing. I once saw a set of irons with significant step wear all around the oil ring path, in the shape of a football, and it caused heavy smoke. I dont know what caused the wear to begin with, it was a fairly low mile 20b.
Shitty porting like that could have caused the stock hollow cornerseal to break and fall into the port, then get picked back up and thrown out the exhaust. So I guess it's possible, but still unlikely, that the cornerseal was gone before teardown.
Shitty porting like that could have caused the stock hollow cornerseal to break and fall into the port, then get picked back up and thrown out the exhaust. So I guess it's possible, but still unlikely, that the cornerseal was gone before teardown.