
A Basic Tear Down, Port and Rebuild (what to look for and how to)

Originally Posted by iceblue
new seals have less the 10 minutes of idle time they are not seated the corner seals came out of another motor the rotors were mix matched and hard parts failed inspection. Seating them in original places is worthless at this point.
well he does have a point, regardless of run time i always stamp the rotors before removing them from the engine for orientation purposes and place out a piece of paper to lay all the seals on in order so when inspecting them you can point to where they originated from for further inspection if there is damage to the seals.
to elaborate on the corner seal plugs, some companies that make the strips like Rotary Aviation, the rubber they use burns up in the engine so finding that they all disappeared is not uncommon.
Full Member
Joined: Mar 2006
Posts: 110
Likes: 0
From: CINCINNATI
great thread,whoever rebuilt that engine needs to have his rotary pass revoked.Ive torn down engines with 60k plus that were not that dirty,that much crap in there after 10 min!!heres a pic of a carbon locked motor,with 117,000 miles and there isn't much diffrence between the two,there are some shady people out there,good shot on the tear down,your clean room looks like mine.ok my engine has a bit more carbon but still!! a clean engines a happy engine
I wish I was driving!
Joined: Dec 2001
Posts: 5,241
Likes: 84
From: BC, Canada
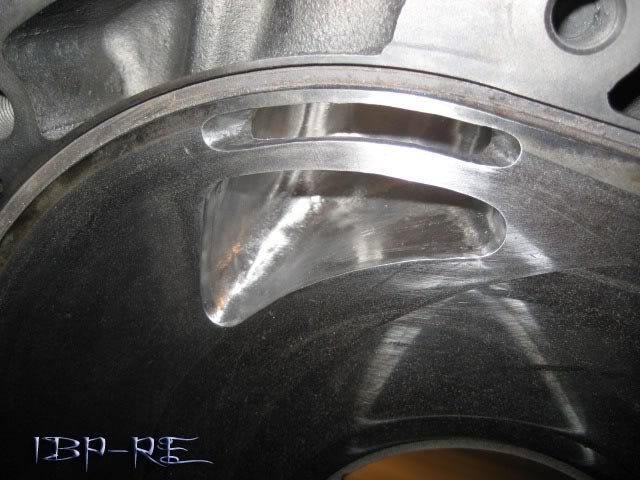
I disagree on the "copper showing equals a bad bearing". The bearings in our engines are copper with a babbitt coating. For those not in the know, a babbitt is a soft white metal alloy coating on a bearing surface. It wears away very readily, often simply from friction against the oil film.
If a bearing contacts the eccentric shaft, whether the babbitt surface remains or otherwise, the bearing will run onto the eccentric shaft and seize.
I test a bearing with a dial bore gauge, in several locations. If the clearance is within factory specs, I leave it alone.
When was the last time someone has seen an engine failure that can be attributed to "copper showing" on a used bearing? Pretty damn hard to name even ONE example, but you can list countless examples of new bearings failing.
For racing, if you're not touching the eccentric shaft, you increase clearance well beyond the factory specs and up the oil pressure by scraping away the babbitt surface, and the polishing the copper on a lathe. These practices easily allow for 10,000 rpms endurance without bearing failure, so where's the aid in babbitt presence?
In almost all circumstances, the bearings do NOT need to be replaced, regardless of the presence of copper.
Thread Starter
Passing life by
Joined: Feb 2005
Posts: 4,028
Likes: 2
From: Scotland, USA
There was no need to stamp the rotors I have plenty of room in my clean room to organize and lay the parts out and know where they go not to mention the rotors were mix matched it would be pointless for me to keep everything in order. As well considering the fact I would under any other circumstances then this one NEVER reuse seals so again pointless for me. The owner has also decided to go ahead and go with OEM seals cryogenic treated.
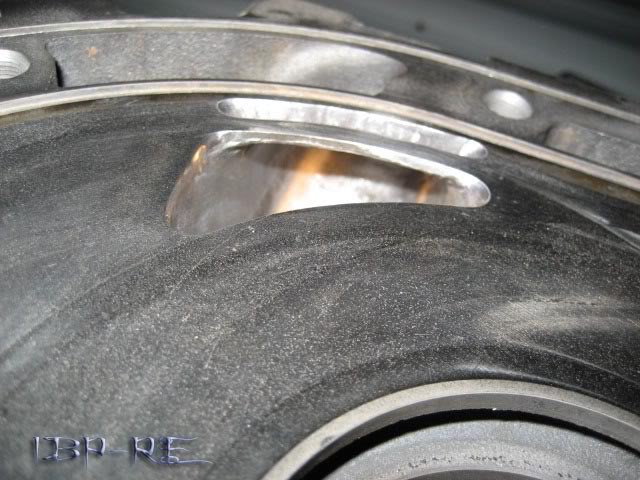
If copper is showing that means the bearing has been in contact with the E shaft plain and simple. This means the oil is NOT doing it job period. Either increase the pump and or oil pressure or don�t over rev it. If there is contact I reconsider using it, this is how I build engines end of story.
At the time the owner built this motor he was just a little unfamiliar with other series parts and didn�t take enough time is all.

Full Member
Joined: Mar 2006
Posts: 55
Likes: 0
From: phoenix
I disagree on the "copper showing equals a bad bearing". The bearings in our engines are copper with a babbitt coating. For those not in the know, a babbitt is a soft white metal alloy coating on a bearing surface. It wears away very readily, often simply from friction against the oil film.

Joined: Oct 2003
Posts: 11,576
Likes: 27
From: Morristown, TN (east of Knoxville)
This is why it's recommended to change your oil soon after starting a rebuild, depending on the parts content of the engine. Some builders recommend 30 minutes of idle then oilchange, some 50 miles then oilchange. Most of my builds utilize used bearings, so it is not a big deal to me.


Thread Starter
Passing life by
Joined: Feb 2005
Posts: 4,028
Likes: 2
From: Scotland, USA
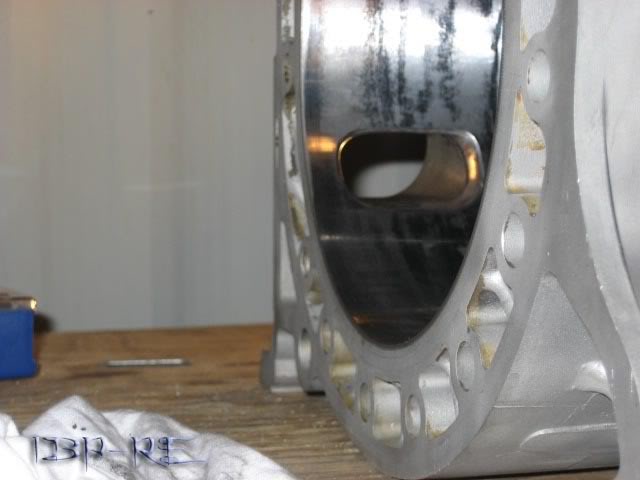
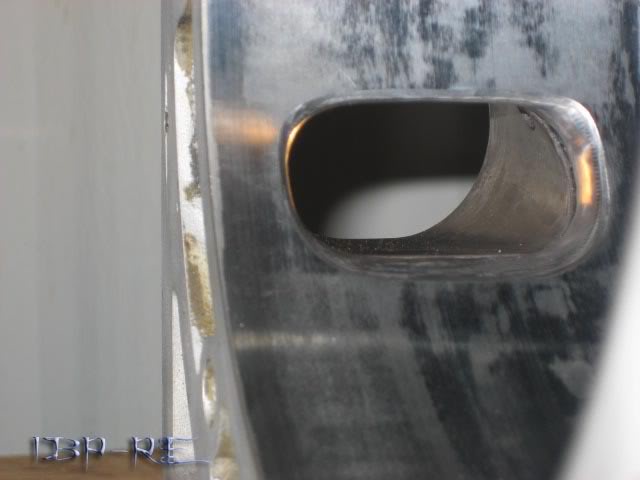
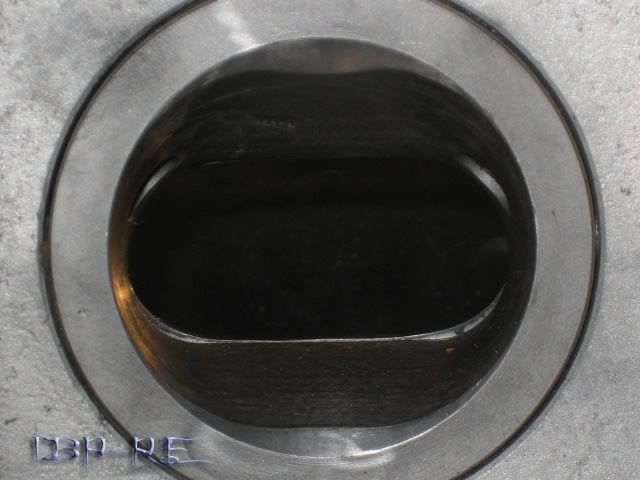
Will I have ruled out the possibility of a corner seal I really thing it got lost some where :-/. I think the money is best gambled on an oil seal, I fear I won�t be able to solve it this time of exactly why, I was hoping to for you guys.
It will be at least 1 week for parts.
The owner didn�t listen again ;-) and he ordered a new Atkins soft seal kit with side seals and springs and solid corners with 3window stat bearings and OEM rotor Barings. Then went and ordered the new RA super seals. He has this notion that they put them in air planes so they must be uber :-P. My engine studs are also delayed shipping got screwed up.
Thread Starter
Passing life by
Joined: Feb 2005
Posts: 4,028
Likes: 2
From: Scotland, USA
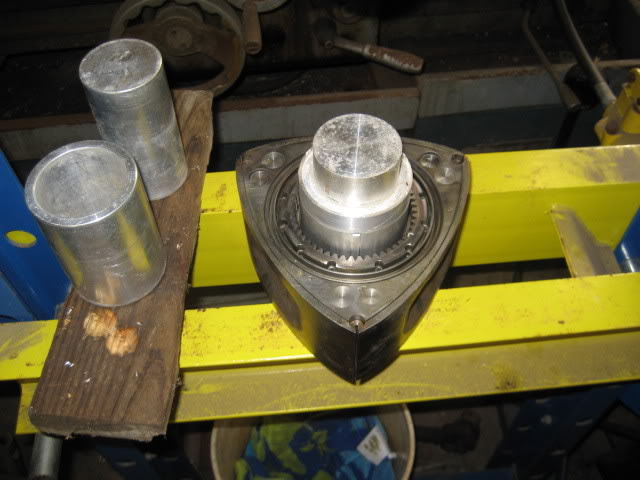
Here are some updates for you guys. Sorry for the delay waiting on parts for ever and the machine shop was very long time on returning my parts after beading and bathing. Here is the bearings going in for you with new OEM bearings and RB 3 window bearing. I will post the rest when I finish BP the motor and then the build. Be just a few more days really busy over here.


Thread Starter
Passing life by
Joined: Feb 2005
Posts: 4,028
Likes: 2
From: Scotland, USA
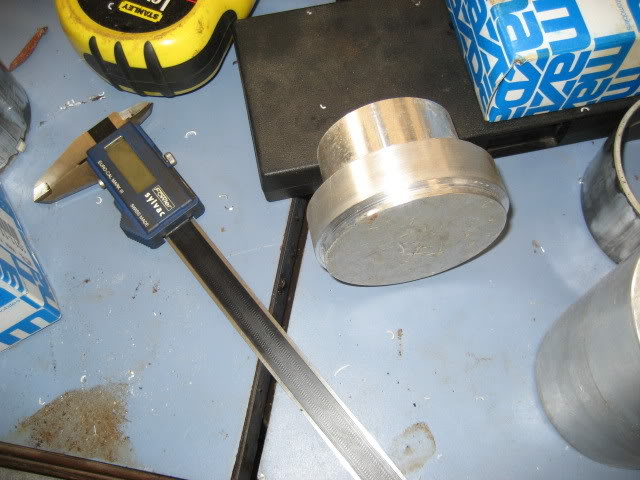
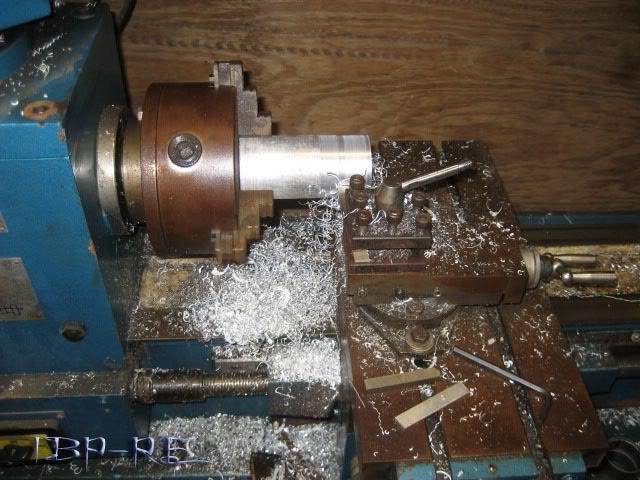
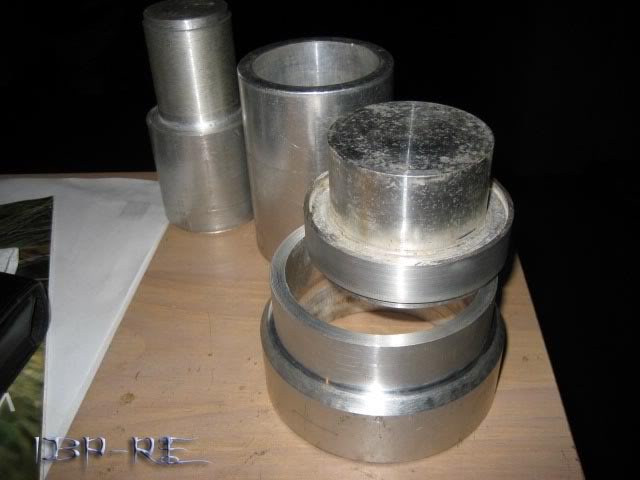
A little about the bearing tool, the tool used for pressing in the bearings was a custom one I built on the lathe far bettor engineered then the factory one.
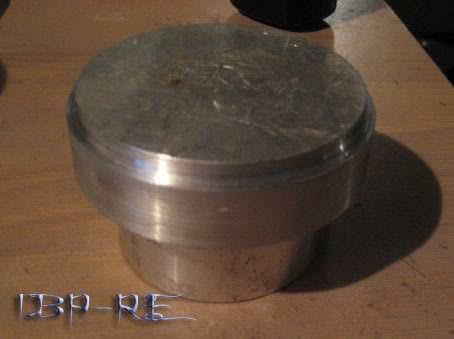
Couple pics of when I was turning it down on the lathe,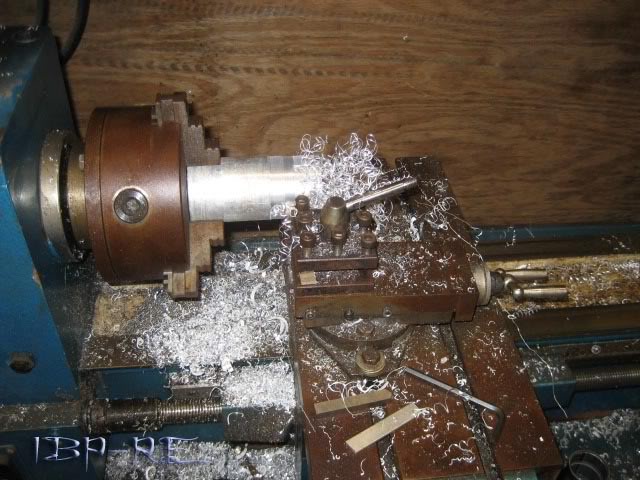
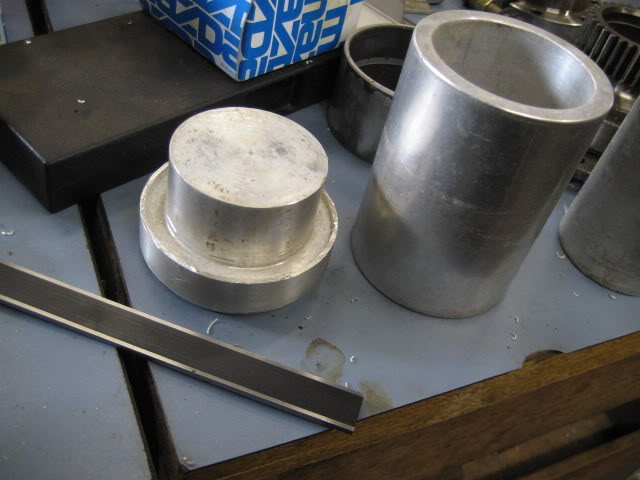
Now about the tool, here is the tool stacked
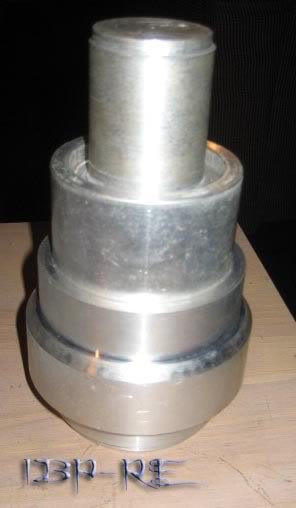
All of the pieces are machine to slip together and utilize for storing and a guiding tool together for the press. There are also several ways to use the tool.
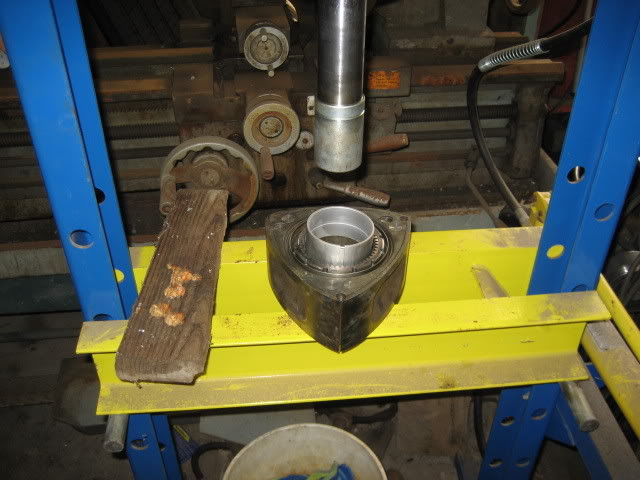
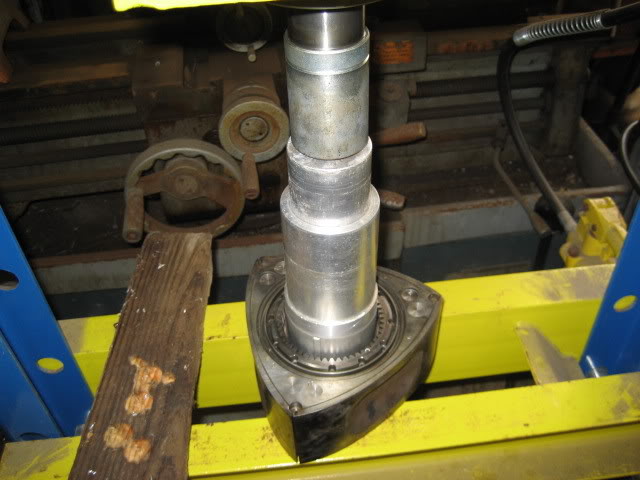
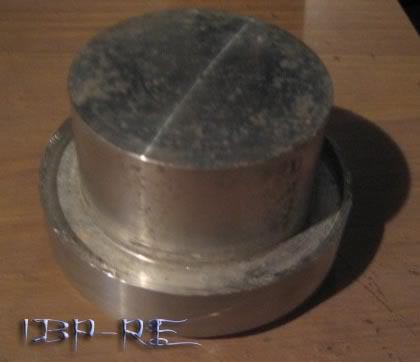
The inner cylinder here is used for pressing the stationary gears in and out. One side of the cylinder pushes the bearing out, flip the item over and it seats the bearing. The out portion is shown here
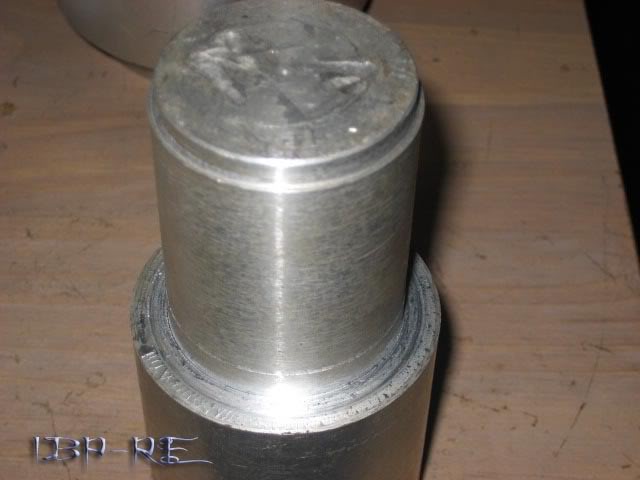
This side is 2 steeped as the inner step seats inside of the bearing to prevent the tool from walking and even the pressure across the bearing. The second step catches the gear at the exact moment the bearing is freed and falls thru. I also use this side to start the bearing in. Now on the other side we see the seat portion
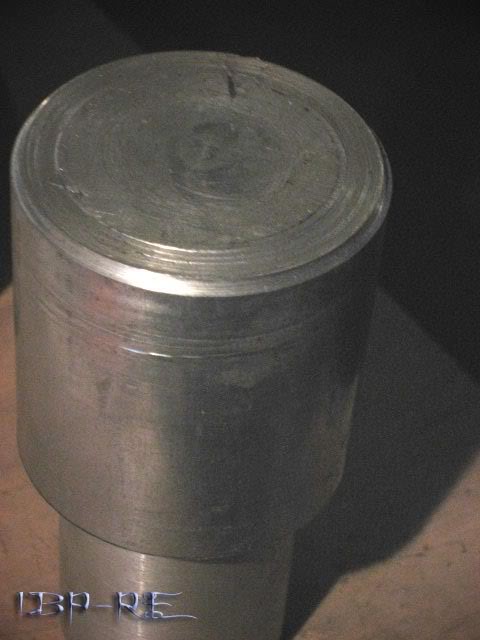
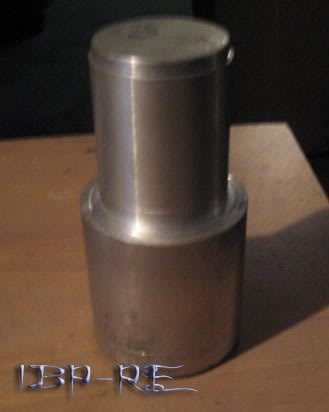
This side is 2 stepped as well if you look closely there is a half thousandth machine step in the middle then a second machined grove. The second machined groove is designed to clear the bevel in the front stationary gear. The inner groove is designed to perfectly seat the bearing flush into the gear. Here is a far shot of the inner sleeve and bearing tool.
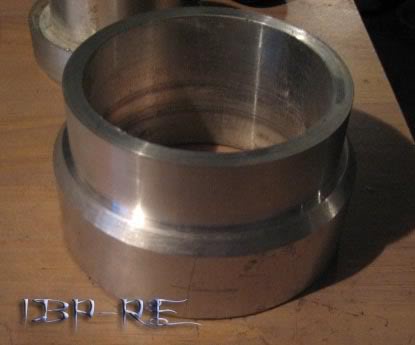
This portion is the rotor bearing extractor tool
The inner portion is machine grooved to seat inside the bearing to prevent wobbling while the outside is machined to slide perfectly thru the rotor. Flip the tool up to look at it as it would be seated on the bearing
You see another machined grove this grove seats the guide collar or slip sleeve. When the collar is in place the stationary gear puller is machined in the middle to perfectly slip inside to give the press a perfect contacting surface of force applied to your work, the assembled tool shown here.
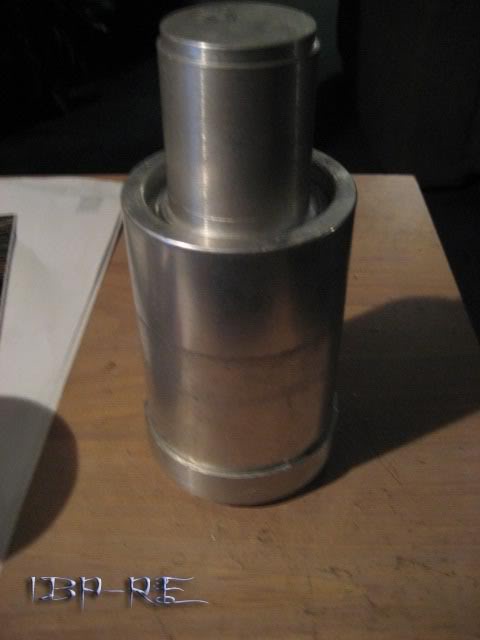
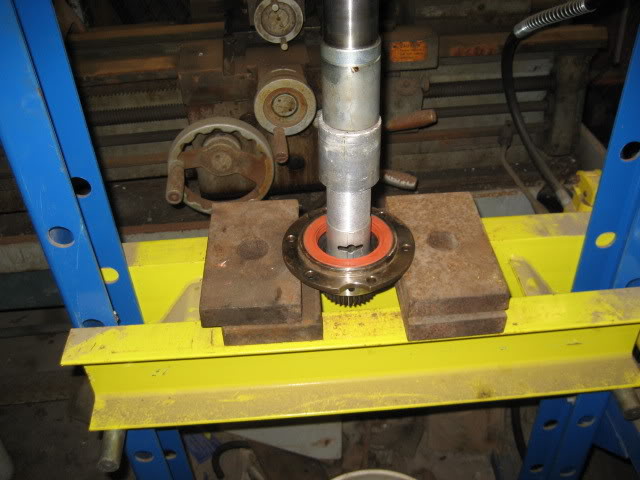
This tool is used to seating the rotor bearing
I use the extractor tool to start the bearing after that this tool is used to ensure a perfect seat.
This is machined the same way as the stationary gear seat tool and the rotor bearing extractor tool seats upside down into the seat tool like this
The tool finish assembly looks like this

And there you have it an IBP bearing tool.
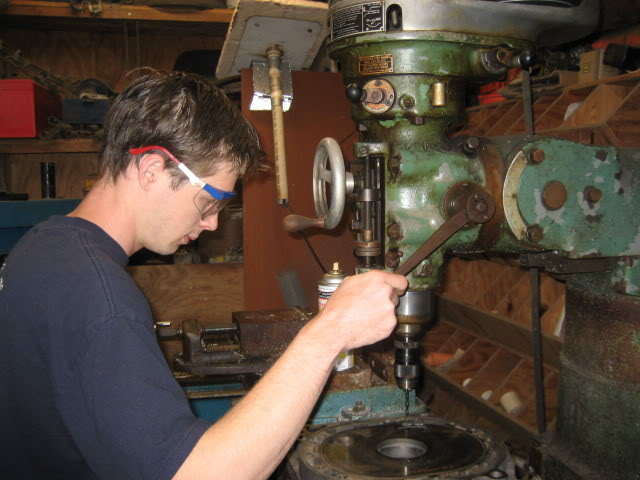
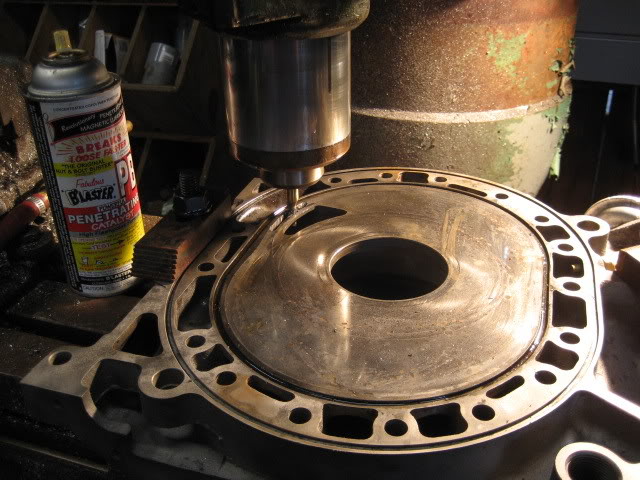
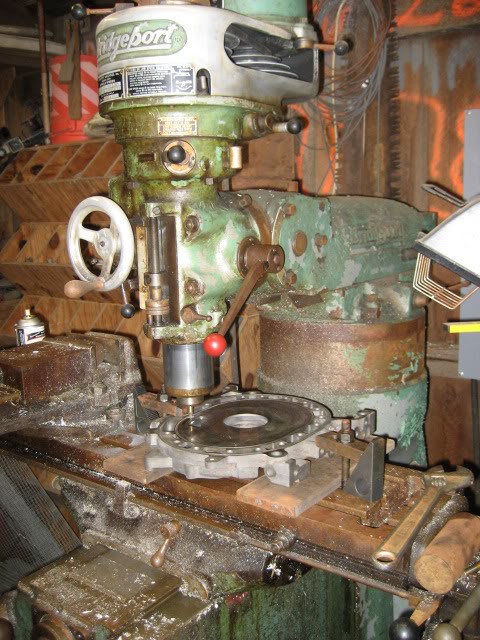
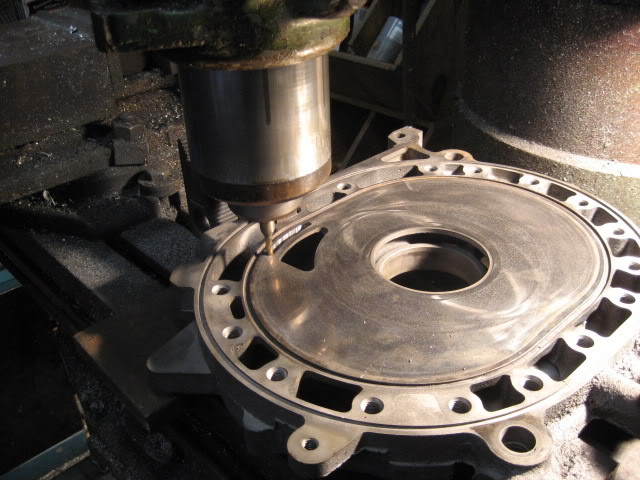
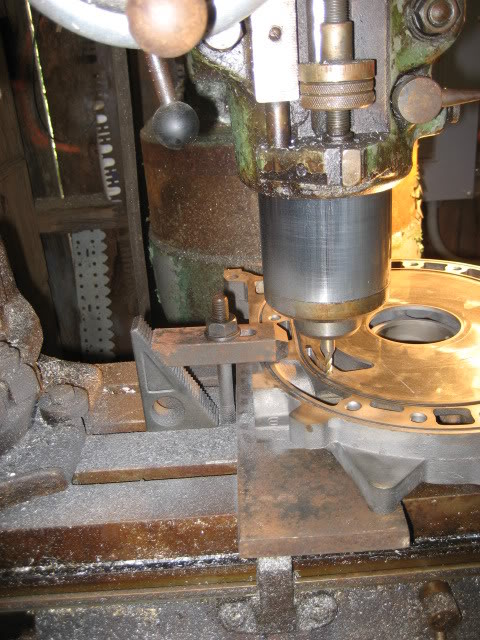
An aluminum tube shank was also machined for this motors front cover .175in with a .086in drill bit.
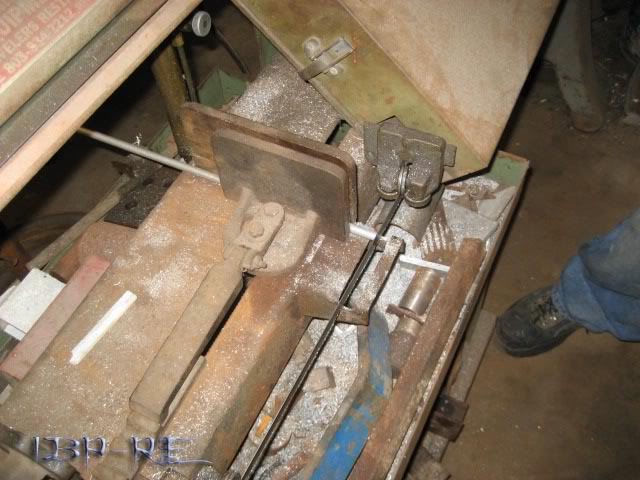

Couple pics of when I was turning it down on the lathe,
Now about the tool, here is the tool stacked
All of the pieces are machine to slip together and utilize for storing and a guiding tool together for the press. There are also several ways to use the tool.
The inner cylinder here is used for pressing the stationary gears in and out. One side of the cylinder pushes the bearing out, flip the item over and it seats the bearing. The out portion is shown here
This side is 2 steeped as the inner step seats inside of the bearing to prevent the tool from walking and even the pressure across the bearing. The second step catches the gear at the exact moment the bearing is freed and falls thru. I also use this side to start the bearing in. Now on the other side we see the seat portion
This side is 2 stepped as well if you look closely there is a half thousandth machine step in the middle then a second machined grove. The second machined groove is designed to clear the bevel in the front stationary gear. The inner groove is designed to perfectly seat the bearing flush into the gear. Here is a far shot of the inner sleeve and bearing tool.
This portion is the rotor bearing extractor tool
The inner portion is machine grooved to seat inside the bearing to prevent wobbling while the outside is machined to slide perfectly thru the rotor. Flip the tool up to look at it as it would be seated on the bearing
You see another machined grove this grove seats the guide collar or slip sleeve. When the collar is in place the stationary gear puller is machined in the middle to perfectly slip inside to give the press a perfect contacting surface of force applied to your work, the assembled tool shown here.
This tool is used to seating the rotor bearing
I use the extractor tool to start the bearing after that this tool is used to ensure a perfect seat.
This is machined the same way as the stationary gear seat tool and the rotor bearing extractor tool seats upside down into the seat tool like this
The tool finish assembly looks like this
And there you have it an IBP bearing tool.
An aluminum tube shank was also machined for this motors front cover .175in with a .086in drill bit.
Very detailed thread! Soon enough I will be pulling my T2 block apart for porting and rebuild. This thread has shown me a lot about the finer details needed to be checked out when rebuilding. This thread is a must in the archives when its done.


 Thanks to everyone that contributed on it. It help noobs like me on how a rebuilt is done and what really is involved
Rotary Enthusiast
Joined: Feb 2004
Posts: 1,225
Likes: 0
From: Freeport, Maine
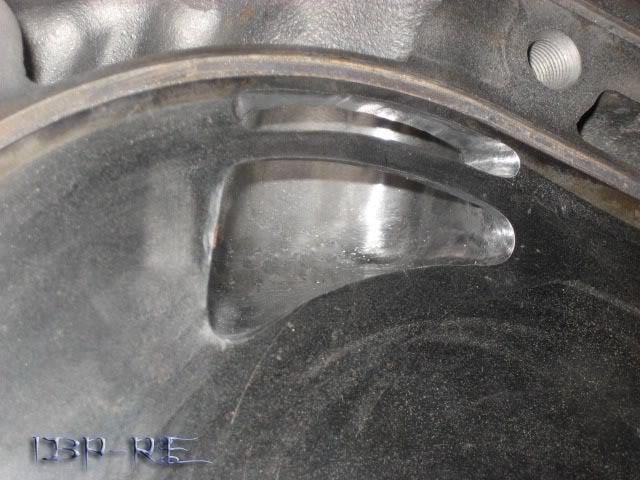
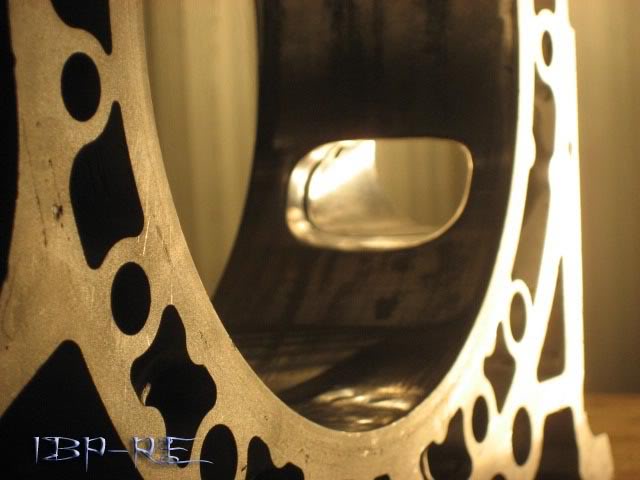
nice looking cut, too bad you didn't have a prototrak controller on the bridgeport then you could program it to make the cut so you wouldn't have to sit there and play with both the x and y axis to make the cut. It looks great though man, i'm a machinist my self and I think i would use a dremel/die grinder, but next time I have a junk iron sitting around i'll make a cut on the bridgeport and see what happens. Great thread by the way

Lives on the Forum
Joined: Feb 2001
Posts: 26,664
Likes: 23
From: n
Nice thread...
I would love to buy one of your bearing tools, but it looks too damn heavy to ship to Hawaii.
Did you figure out the oil burning culprit?
I would put money it's the soft oil control o-ring.
If there is a small nick in it, it'll leak a lot of oil.
If the oil control o-ring isn't lubricated (i.e. motor oil or Vasoline) on initial installtion, it can stick and abrade in a jiffy.
If you still have the o-rings still around, check them for smoothness or any nicks or cuts in them.
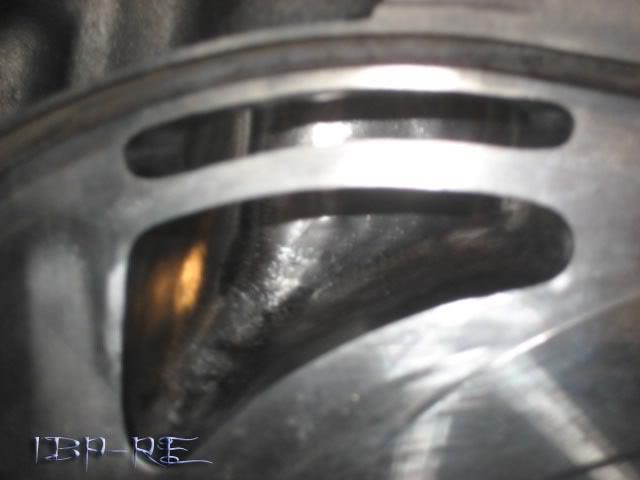
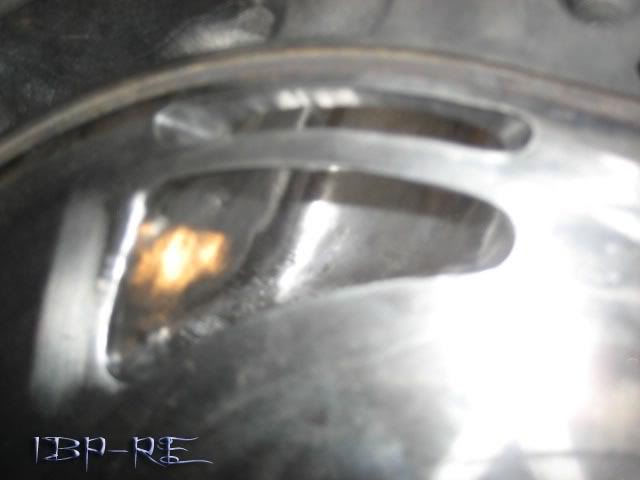
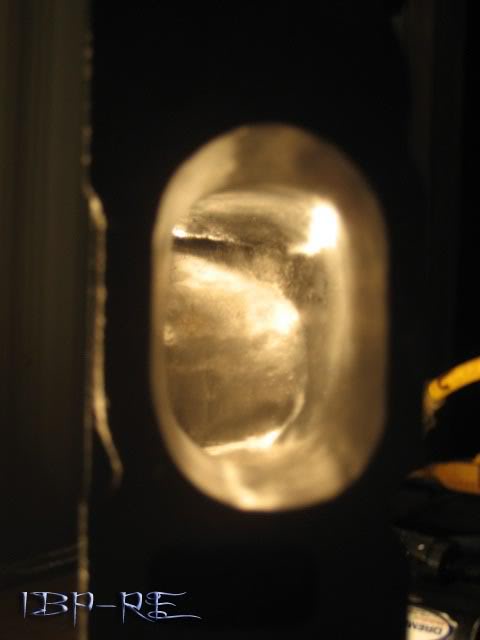
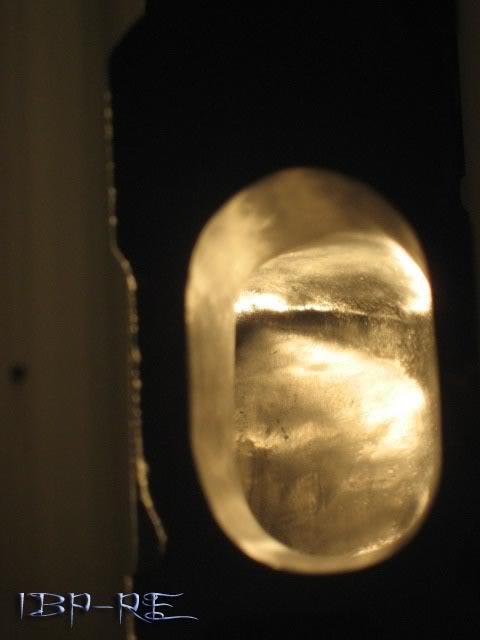
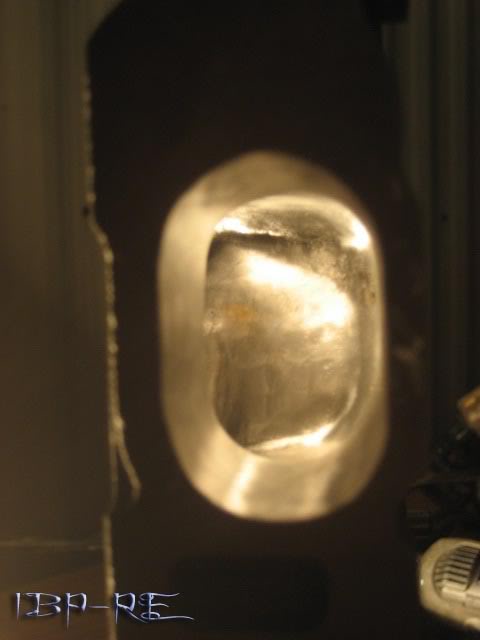
I would've thrown that questionable bearing out myself.
It has a "weird" wear on the lip of the groove.
That's not normal wear.
Bearings are cheap, so I would recommend to replace it.
Hard part is the tools and labor - I don't think iceblue has that problem.
-Ted
I would love to buy one of your bearing tools, but it looks too damn heavy to ship to Hawaii.
Did you figure out the oil burning culprit?
I would put money it's the soft oil control o-ring.
If there is a small nick in it, it'll leak a lot of oil.
If the oil control o-ring isn't lubricated (i.e. motor oil or Vasoline) on initial installtion, it can stick and abrade in a jiffy.
If you still have the o-rings still around, check them for smoothness or any nicks or cuts in them.
I would've thrown that questionable bearing out myself.
It has a "weird" wear on the lip of the groove.
That's not normal wear.
Bearings are cheap, so I would recommend to replace it.
Hard part is the tools and labor - I don't think iceblue has that problem.
-Ted
Thread Starter
Passing life by
Joined: Feb 2005
Posts: 4,028
Likes: 2
From: Scotland, USA
Originally Posted by RETed
Nice thread...
I would love to buy one of your bearing tools, but it looks too damn heavy to ship to Hawaii.
Did you figure out the oil burning culprit?
I would put money it's the soft oil control o-ring.
If there is a small nick in it, it'll leak a lot of oil.
If the oil control o-ring isn't lubricated (i.e. motor oil or Vasoline) on initial installtion, it can stick and abrade in a jiffy.
If you still have the o-rings still around, check them for smoothness or any nicks or cuts in them.
I would've thrown that questionable bearing out myself.
It has a "weird" wear on the lip of the groove.
That's not normal wear.
Bearings are cheap, so I would recommend to replace it.
Hard part is the tools and labor - I don't think iceblue has that problem.
-Ted
No I did not solve the oil leak. I was originally leaning at the end play because it wasn't just off. The play caused an off axis walk to the crank as teh bearing was smooched so hard it never spun it walked the crank and thus grooved the iron with the side seal edge in the front. As you know if your off a little in the front you are off alto more in the rear, thus I suspected the angled caused the rear oil control ring to not seat. Upon inspection of the orings one inner does have a nick but I suspected I did it during removal. Again this is suspecting and no hard evidence.
You are right that bearing was not wearing normally. As well it was on the trashed rotor. The oil system was upgraded accordingly for this motor.
Dom_C Thank you much sir, I am far from a machinist but I love doing what I do. computerized mills cost lots and lots of chedda, maybe one day.