
Exhaust Control Valve


Thread Starter
Joined: Jan 2007
Posts: 1,000
Likes: 0
From: st. louis
Exhaust Control Valve
I just realized that i have access to a full machine shop at school so i figured i would make my own exhaust control valve as opposed to buying apex'i's valve. Furthermore, apexi's valve is not quite big enough. The valve fits in 4" od pipe.
The motivation for building this is that my exhaust is to loud to drive around on the street. The current plan is to build 2 of the valves. I will drill 4 1/2" holes in each of the valves. This is equivalent to a 1" diameter pipe (similar to the diameter of most silencers). I will space the valves a foot apart or so. This should have the effect of having a chambered muffler. Hopefully it should shut things up sufficiently to make the car streetable. I will link the two valves together and control it with some sort of throttle cable or use a wastegate actuator to open it.
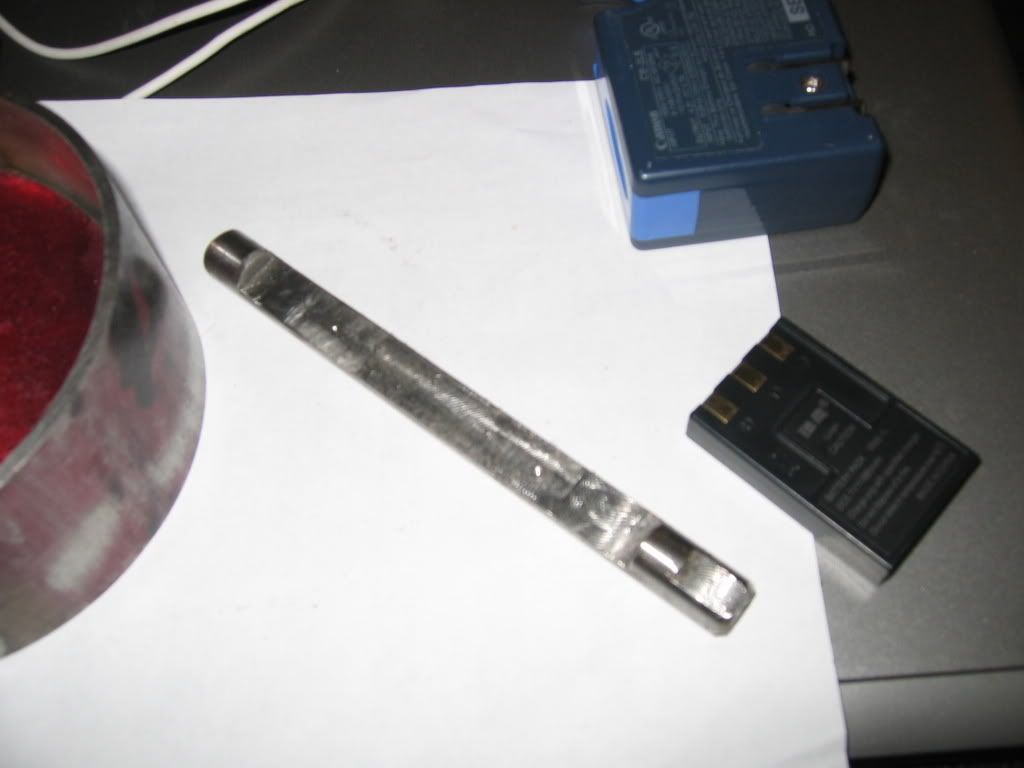
Mockup of the valve assembly. The piece of stainless pipe is just a chunk of scrap used to mockup.
Parts
The endcap and the spacer will be welded to the pipe. I need to cut an oring groove in the shaft to seal the exhaust passage.
For the throttle cable i am going to use the **** controlled nonlocking throttle cable from mcmaster.

I am still undecided on the orings. I am looking for a 1/2" od oring with the appropriate temperature range. I found an oring that is ok upto 450F. Im not sure if that will be enough. EGTs are around 1000F preturbo at cruise. It should be considerably cooler post turbo and after passing through the downpipe and through my center muffler. Any input on this?
I have not had a chance to build the second shaft or design the linkage.
The motivation for building this is that my exhaust is to loud to drive around on the street. The current plan is to build 2 of the valves. I will drill 4 1/2" holes in each of the valves. This is equivalent to a 1" diameter pipe (similar to the diameter of most silencers). I will space the valves a foot apart or so. This should have the effect of having a chambered muffler. Hopefully it should shut things up sufficiently to make the car streetable. I will link the two valves together and control it with some sort of throttle cable or use a wastegate actuator to open it.
Mockup of the valve assembly. The piece of stainless pipe is just a chunk of scrap used to mockup.
Parts
The endcap and the spacer will be welded to the pipe. I need to cut an oring groove in the shaft to seal the exhaust passage.
For the throttle cable i am going to use the **** controlled nonlocking throttle cable from mcmaster.
I am still undecided on the orings. I am looking for a 1/2" od oring with the appropriate temperature range. I found an oring that is ok upto 450F. Im not sure if that will be enough. EGTs are around 1000F preturbo at cruise. It should be considerably cooler post turbo and after passing through the downpipe and through my center muffler. Any input on this?
I have not had a chance to build the second shaft or design the linkage.
Last edited by wackaloo13; Dec 13, 2008 at 04:07 AM.


I feel you may have gotten slightly off track even though your idea is very good. Having worked in a machine shop for 20 yrs I have a bit of advice. Weld the shaft supports to the exhaust pipe before installing or finish sizing the holes. This will allow you to machine the hole very close to the size of the shaft, eliminating the need for an o-ring, and maintaining proper alignment. Use an indicator to ensure you are centered over the pipe.
One could also size said holes for a bronze, oilite, or graphite impregnated bronze bushing (readily available from McMaster). This would allow a very low clearance of say .002"
One could also size said holes for a bronze, oilite, or graphite impregnated bronze bushing (readily available from McMaster). This would allow a very low clearance of say .002"
Thread Starter
Joined: Jan 2007
Posts: 1,000
Likes: 0
From: st. louis
What should the clearance be so that i could just use a slip fit with no bushing? I milled the first shaft to .01" under the support diameter. It is a pretty tight fit.
This is purely my opinion, but the stainless on stainless (shaft in the bushing/support) in the hot, ugly, non lubricated environment of an exhaust system is way less than ideal. You could drill, ream, and bush those holes (preferably after assembly) all in a Bridgeport if you have access to one.
That said. I'm sure it would work fine for quite some time as you have it designed. I feel you could get away with less than .010". Maybe .005"? Too loose and it might rattle along with leaking exhaust. You might be surprised how much .010" clearance might leak at cruise.
Even with .010" clearance I bet the alignment is off after welding. I'm not trying to rain on your parade here, just being honest. Keeping it all straight while tacking and then welding is a lot harder than it seems even if you use a shaft to hold them in position. You can increase your odds by using a shaft that fits tighter than the one you will run, closer to .500" (if that's your hole size). But still, I don't know. Iffy at best.
Here's a high temp, self lubing bushing. It's good to 700*, has a 1/16" wall (you would need a .625" dia. hole), and comes flanged or straight. The length is easily modified if you have access to a shop. Search "bronze bushings" then select "high temp".
http://www.mcmaster.com/
http://www.mcmaster.com/
Trending Topics
sweet project...
heres and idea if this does not work, apex-i Active tail silencer. it goes at the end of the tail that is spring loaded, it closed with low load and opens up with high load to flow freely.
http://www.autocarparts.com/part/list/1591/
heres and idea if this does not work, apex-i Active tail silencer. it goes at the end of the tail that is spring loaded, it closed with low load and opens up with high load to flow freely.
http://www.autocarparts.com/part/list/1591/
Thread Starter
Joined: Jan 2007
Posts: 1,000
Likes: 0
From: st. louis
I thought about one of those active tailpipe silencers. Only issue is that they dont offer one big enough. I run 4" piping to a 5" magnaflow tip. I guess if it comes to it i can change the tip to something that will fit the 105mm version of the active tailpipe silencer.
What did they cost? about three bucks?  They will need a precise, finish reamed hole to press into. Don't use a drilled hole. If they squeeze up, they can be reamed open also.
You will most definitely have to finish ream the holes after assembly to run the tight clearance of those bushings. Wait, I forgot the shaft is under. Still would be a good idea though. Find the most experienced guy you can in that shop you have access to and ask for his input. I can probably help as I have a lot of time off around the upcoming holidays. PM if interested.
Once again, I'm not trying to pick, but............ even machining after assembly, I'm concerned about function, with that thin walled pipe, after being welded into the system. I'm beginning to think a fairly thick walled, sturdy pipe is in order. 1/8" at least, if not greater, for just the bit at the mechanism.
They will need a precise, finish reamed hole to press into. Don't use a drilled hole. If they squeeze up, they can be reamed open also.You will most definitely have to finish ream the holes after assembly to run the tight clearance of those bushings. Wait, I forgot the shaft is under. Still would be a good idea though. Find the most experienced guy you can in that shop you have access to and ask for his input. I can probably help as I have a lot of time off around the upcoming holidays. PM if interested.
Once again, I'm not trying to pick, but............ even machining after assembly, I'm concerned about function, with that thin walled pipe, after being welded into the system. I'm beginning to think a fairly thick walled, sturdy pipe is in order. 1/8" at least, if not greater, for just the bit at the mechanism.
Thread Starter
Joined: Jan 2007
Posts: 1,000
Likes: 0
From: st. louis
I initially thought about using thicker piping around the mechanism but I have never had any issues of warpage when tigging the piping. If it becomes an issue, I will probably switch to some schedule 10 piping which has a .12 wall thickness or buy a plate and cut the parts from that.
Thread Starter
Joined: Jan 2007
Posts: 1,000
Likes: 0
From: st. louis
just got everything assembled for testing. on the final version of this i am going to use a much heavier pipe. I cant firmly clamp the pipe without it deforming alot. Some schedule 10 piping should work. Hopefully that tubing will actually be round. I do not want to have to use schedule 40. That stuff is really expensive
Thread Starter
Joined: Jan 2007
Posts: 1,000
Likes: 0
From: st. louis
tested it tonight after wasting an hour getting the car to start in 25 degree weather. that thing HATES the cold. anyway, i disconnected my rear muffler so it was running only through the center muffler and then the valve assembly. It was pretty rowdy with the valves open. Unfortunately the front valve decided to vibrate itself loose so that it was stuck open. With the rear valve closed it was considerably quieter (i would say half as 30-40% reduction in volume. As soon as the valve opens past 1/3 of the way it sound like it is more or less entirely open. I did all the testing at idle. The pitch of the sound was much higher with the valve closed....kinda sounded like a honda with a fart can  . i think that with the rear muffler inline after it, it should sound much better.
I am going to pick up some 4" schedule 10 piping tomorrow and hopefully get to fabricating the final part this weekend.
. i think that with the rear muffler inline after it, it should sound much better.I am going to pick up some 4" schedule 10 piping tomorrow and hopefully get to fabricating the final part this weekend.
Thread Starter
Joined: Jan 2007
Posts: 1,000
Likes: 0
From: st. louis
Progress:
With a piece of scrap shaft, everything is aligned alright
Evidently the notched shaft bent when i cut the notch for the plate. How should i go about cutting this without warping the shaft? When i cut it i used a 5/8" endmill and made sure to keep the end mill cool with coolant.
With a piece of scrap shaft, everything is aligned alright
Evidently the notched shaft bent when i cut the notch for the plate. How should i go about cutting this without warping the shaft? When i cut it i used a 5/8" endmill and made sure to keep the end mill cool with coolant.
Joined: Apr 2002
Posts: 4,232
Likes: 0
From: Rotaryland, New Hampshire
just bend it back with an arbor press
as for why it bent? i couldn't tell you. If it was me making it id be holding it lengthwise in softjaws taking as light of cuts as i had patience for
as for why it bent? i couldn't tell you. If it was me making it id be holding it lengthwise in softjaws taking as light of cuts as i had patience for
Yeah. Try to save it by bending it back. Some heat might help. Maybe moving/adding screws further out on the valve to help pull it back.
It bent because of stresses in the drawn rod, there from the rolling operation to make it a sized, drawn bar. When you milled half of them away, the others were free to do their thing. Square stock will do the same thing if you mill half way through it. "Stabilized" bar stock can be had that will eliminate or minimize the effect.
It bent because of stresses in the drawn rod, there from the rolling operation to make it a sized, drawn bar. When you milled half of them away, the others were free to do their thing. Square stock will do the same thing if you mill half way through it. "Stabilized" bar stock can be had that will eliminate or minimize the effect.
Thread Starter
Joined: Jan 2007
Posts: 1,000
Likes: 0
From: st. louis
No i didnt forget about this.
I managed to get the shaft to not bend.... just mill out the otherside of it and no issues.
Im pretty happy wiht how it all turned out, i had some issues with drilling the bearing holes but that was all fixed with a brandnew drill bit. The other thing i should have done was to weld everything first then mount and ream the bearings. I had a small issue witht hte bearing holes deforming a bit when i was welding close to them.
Got it finished and installed. I forgot to take a picture of the assembly before i welded everything up. But here is a photo installed.
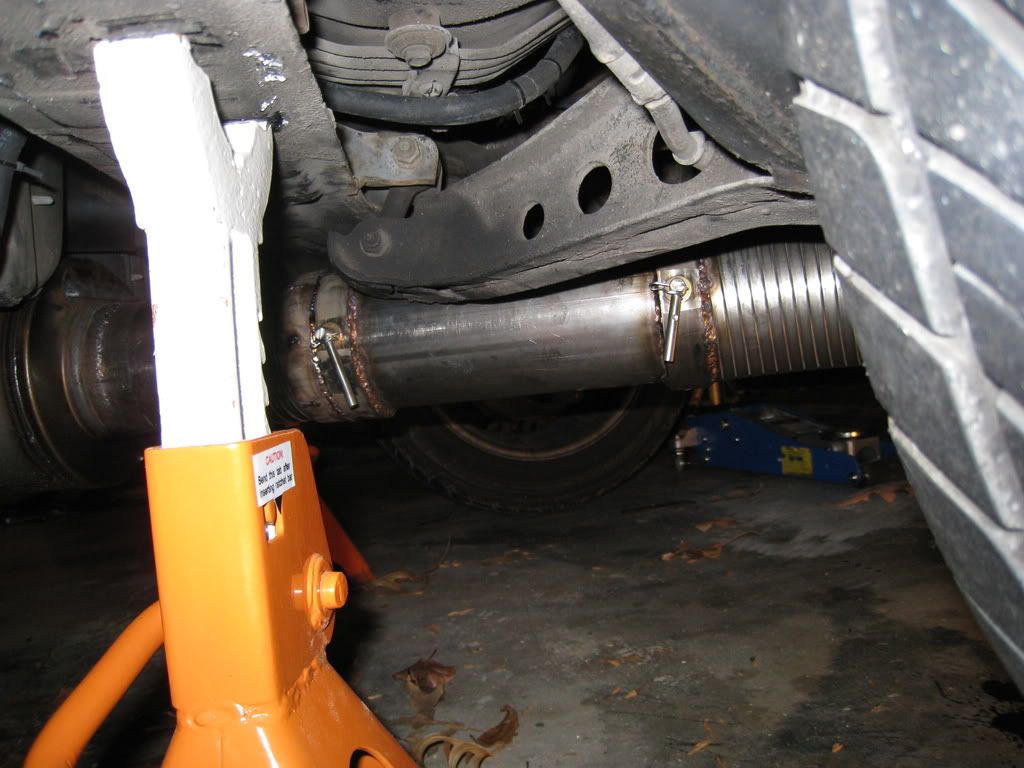
i made a video but the sound isnt all that great
it works fairly well, you can hear the sound get quieter when each plate is closed. I still need to attach some vareity of actuator.
I'll take a few more photos when i take it out to weld ont he actuator assembly.
I managed to get the shaft to not bend.... just mill out the otherside of it and no issues.
Im pretty happy wiht how it all turned out, i had some issues with drilling the bearing holes but that was all fixed with a brandnew drill bit. The other thing i should have done was to weld everything first then mount and ream the bearings. I had a small issue witht hte bearing holes deforming a bit when i was welding close to them.
Got it finished and installed. I forgot to take a picture of the assembly before i welded everything up. But here is a photo installed.
i made a video but the sound isnt all that great
it works fairly well, you can hear the sound get quieter when each plate is closed. I still need to attach some vareity of actuator.
I'll take a few more photos when i take it out to weld ont he actuator assembly.
Thread Starter
Joined: Jan 2007
Posts: 1,000
Likes: 0
From: st. louis
http://www.youtube.com/watch?v=ObbBBpxBelY
the video clip kinda sucks, but you can hear the change in volume/pitch. i need to find a spl meter to quantify the results
the video clip kinda sucks, but you can hear the change in volume/pitch. i need to find a spl meter to quantify the results