
T04R build


T04R build
This project is mostly "done," or as done as a modified old car can be. The main thing I am working on now is straight up restoration, replacing interior parts and other little old car stuff.
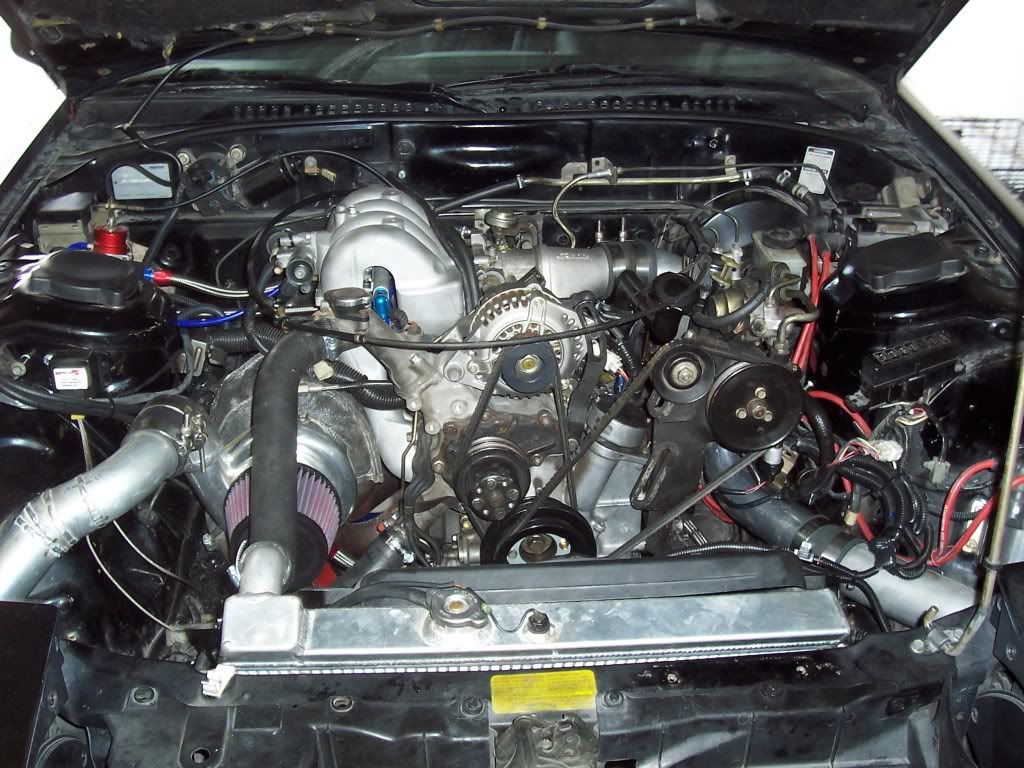
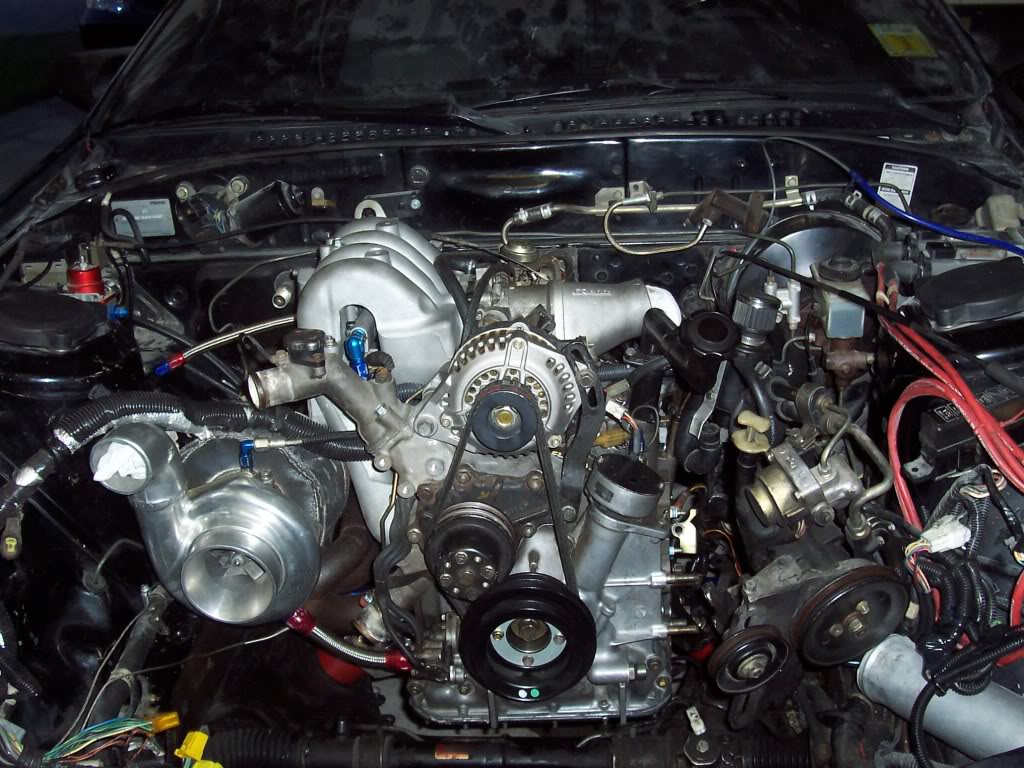
engine bay shot:
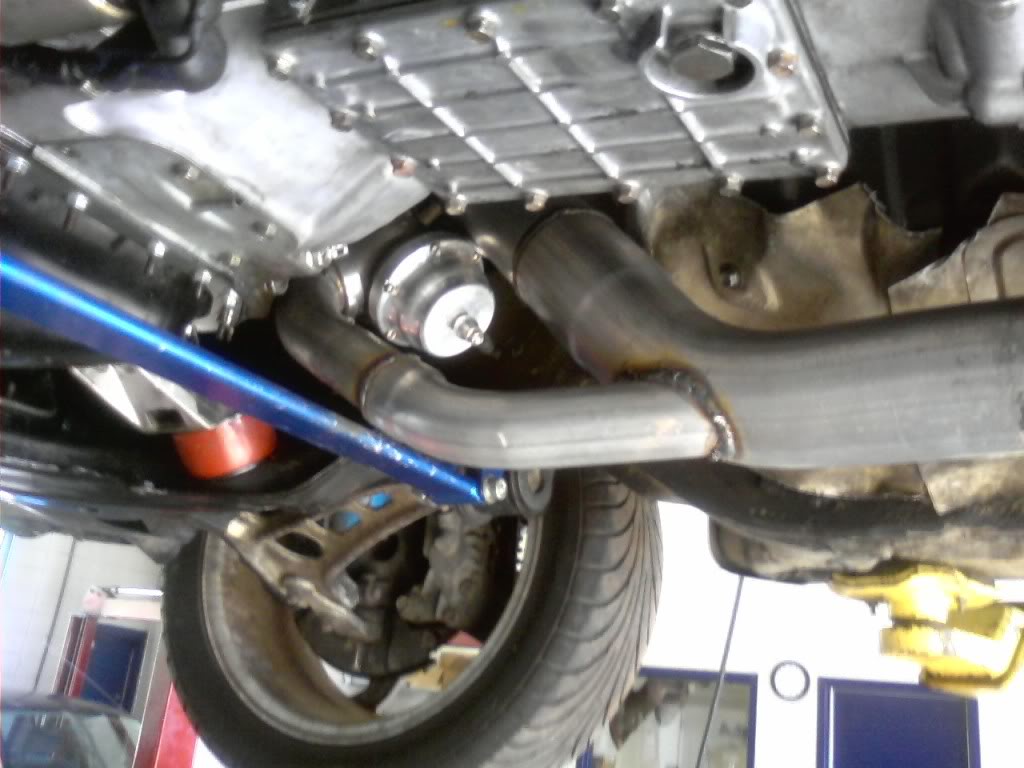
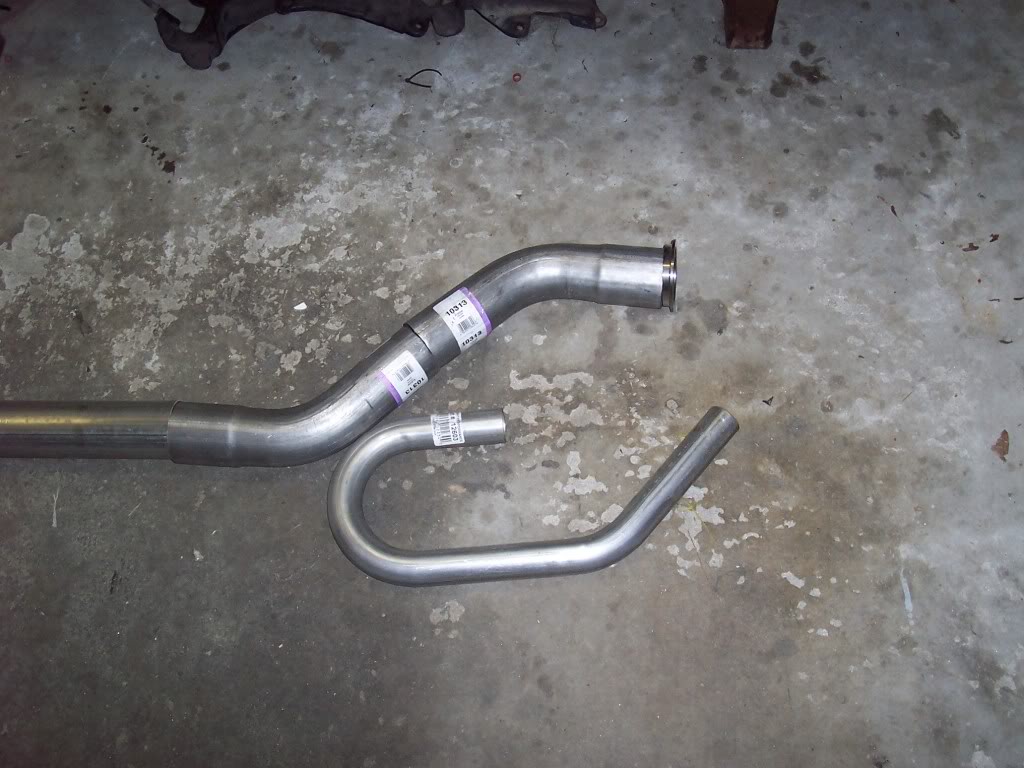
custom downpipe:
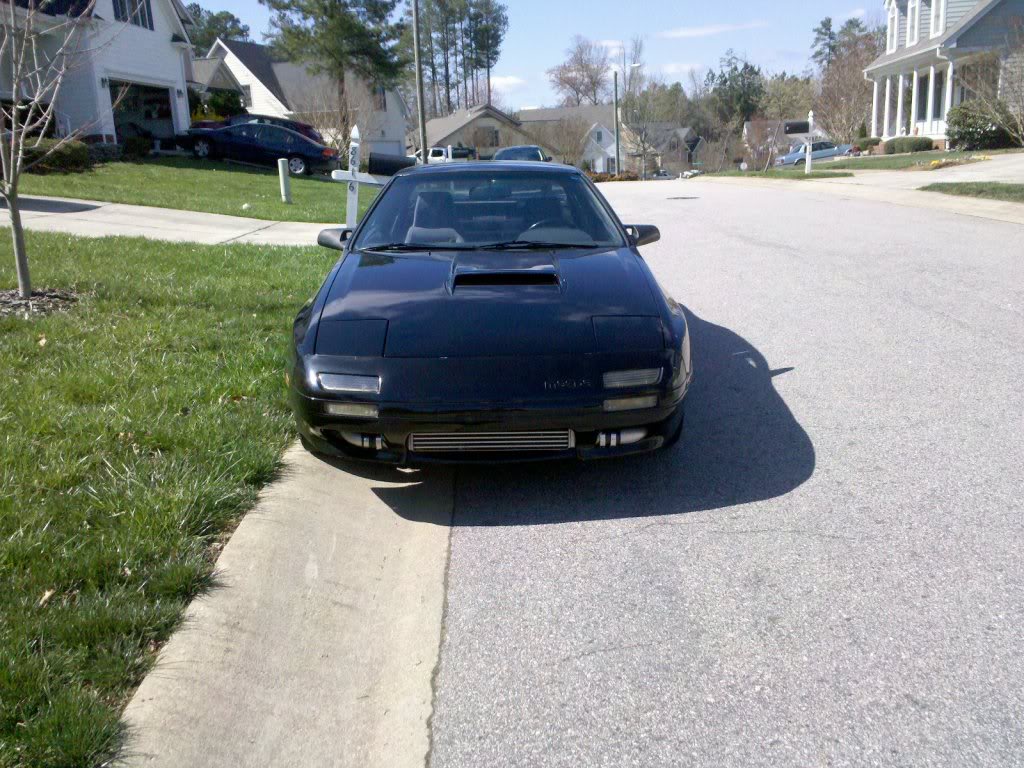
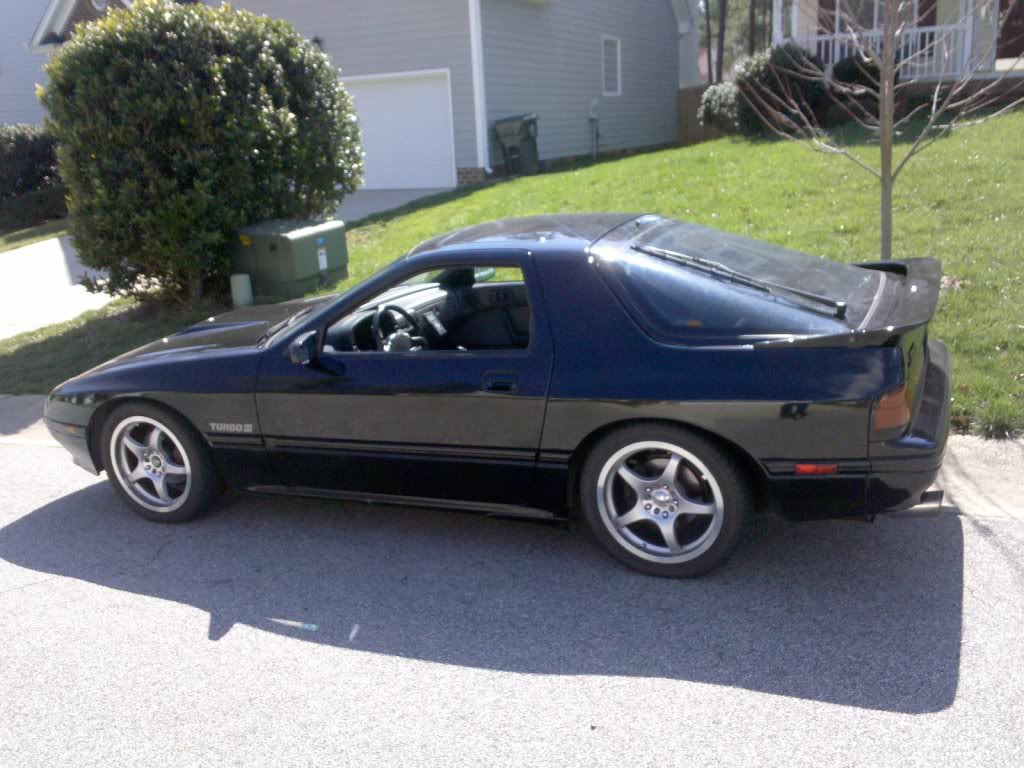
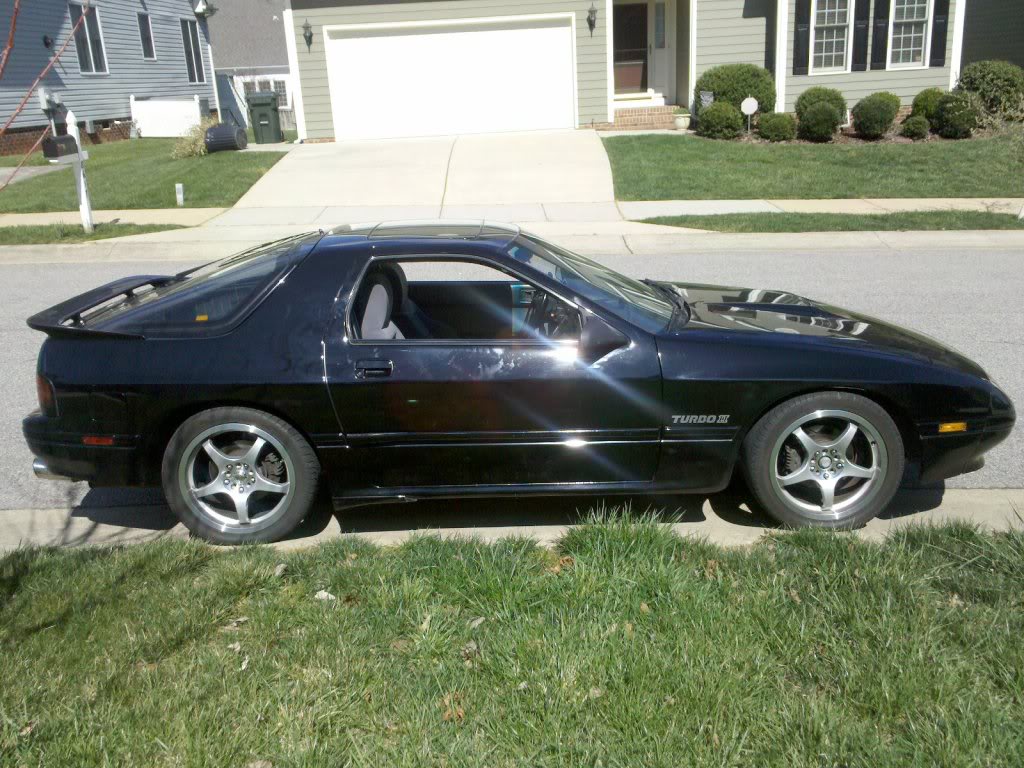
This is a 1988 T2, it is not a conversion. The full mod list is ginormous, but basically it's street ported engine with a T04R/T67 turbo and all the supporting stuff plus suspension mods. Any questions just ask. I haven't dyno'd the current setup but the old one did 386rwhp uncorrected on a dynojet, I suspect the current setup may have a little more than that depending on weather conditions.
engine bay shot:
custom downpipe:
This is a 1988 T2, it is not a conversion. The full mod list is ginormous, but basically it's street ported engine with a T04R/T67 turbo and all the supporting stuff plus suspension mods. Any questions just ask. I haven't dyno'd the current setup but the old one did 386rwhp uncorrected on a dynojet, I suspect the current setup may have a little more than that depending on weather conditions.
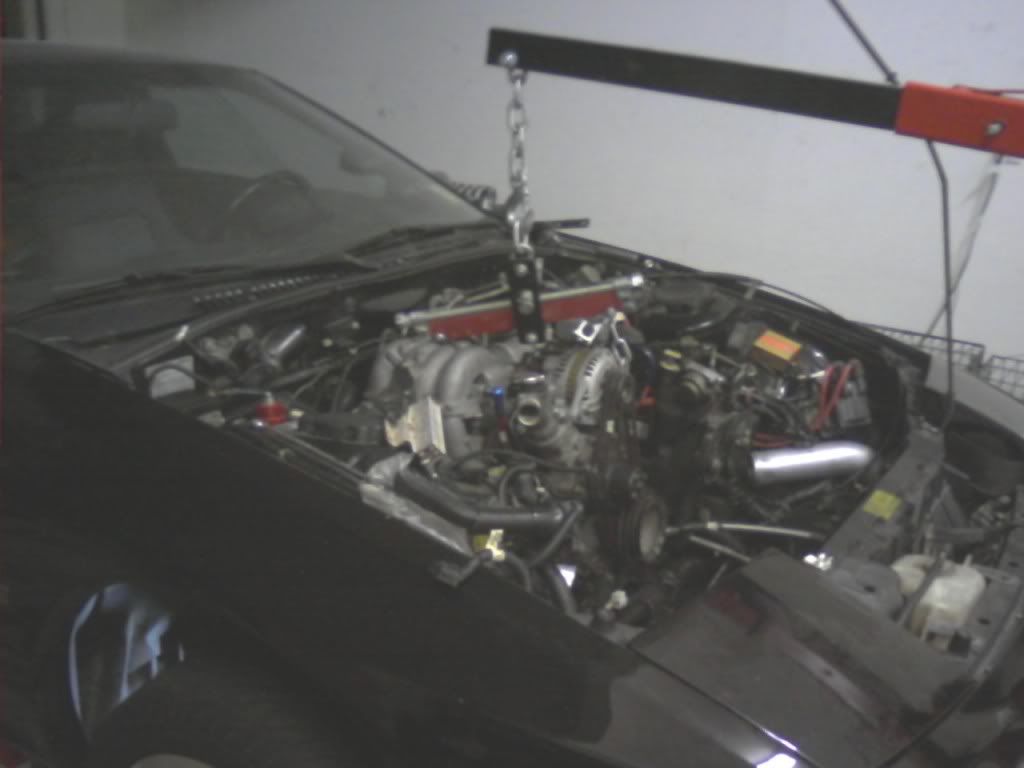
Here are pics I found of the buildup (mostly phone pics), which mostly went down last year.
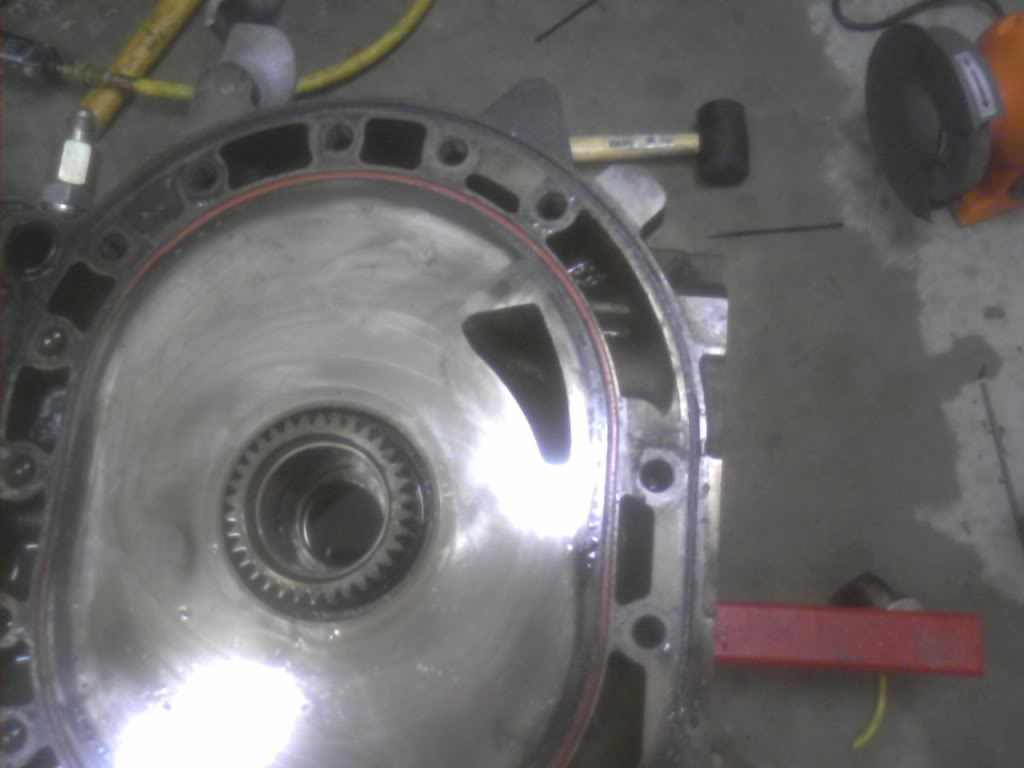
Here I am pulling the old motor out for teardown and inspection. Due to a MAP sensor problem and a bad fan clutch, the engine had experienced both detonation and overheating. I wanted to inspect everything and rebuild.
Inspection
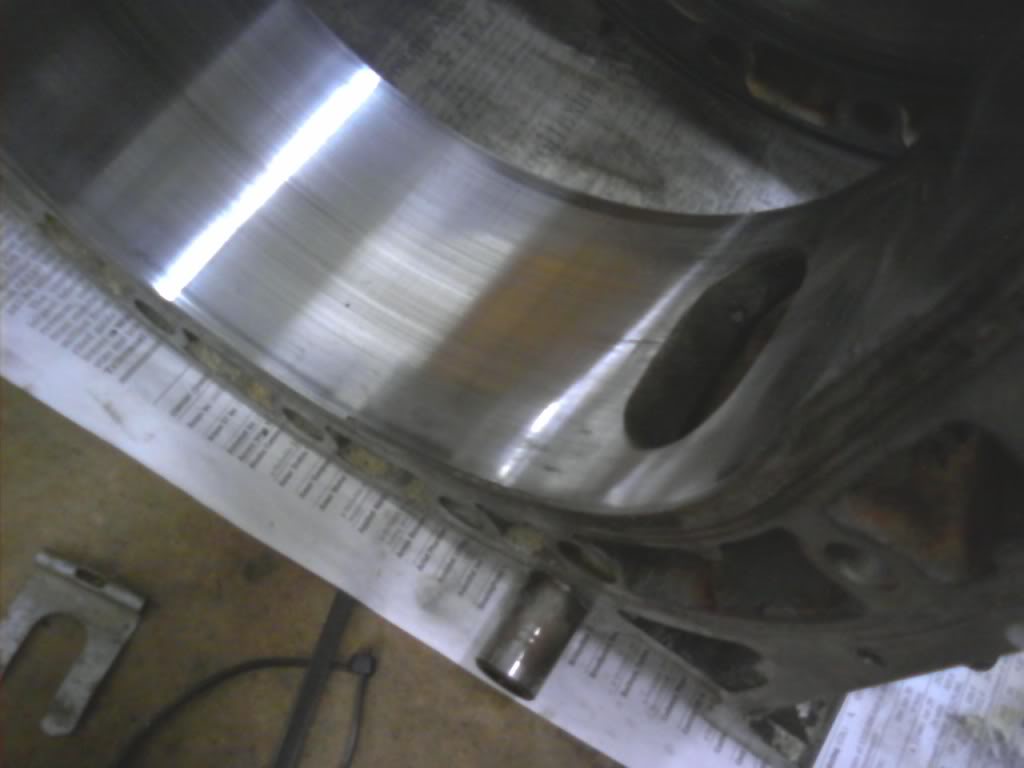
The rear rotor housing had significant edge wear, you can barely see it here:
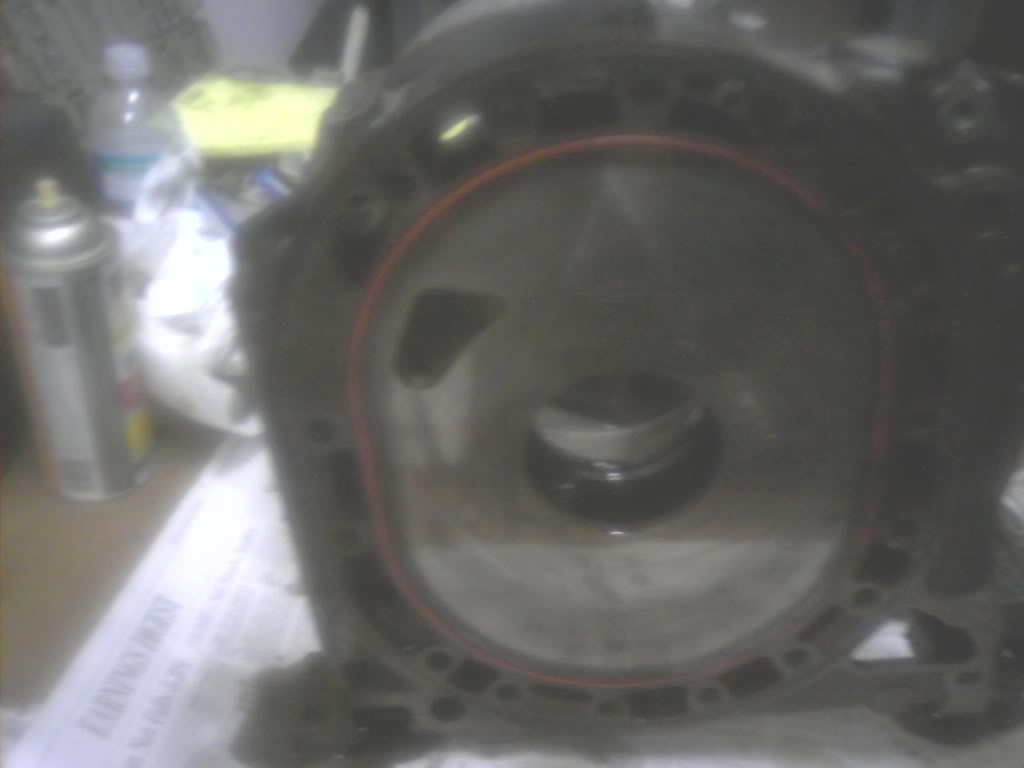
Side housings looked ok at first:
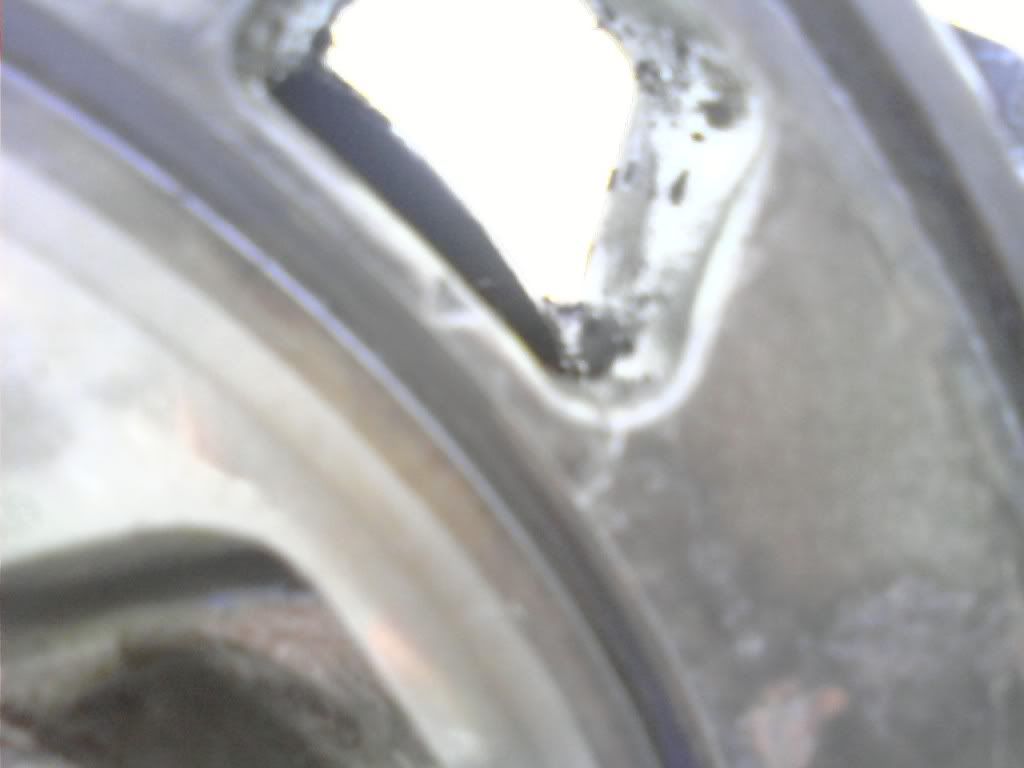
But it turns out that there was a chip (but not complete break) in the water o-ring groove, probably due to the overheating.
So I sourced good condition used parts. I got some low mileage Jspec s5 turbo irons and also converted to s5 intake manifolds because the ports are already matched properly. The only thing I kept housing-wise from the old motor was one rotor housing. Here are the rotors and eccentric shaft laid out on the bench:
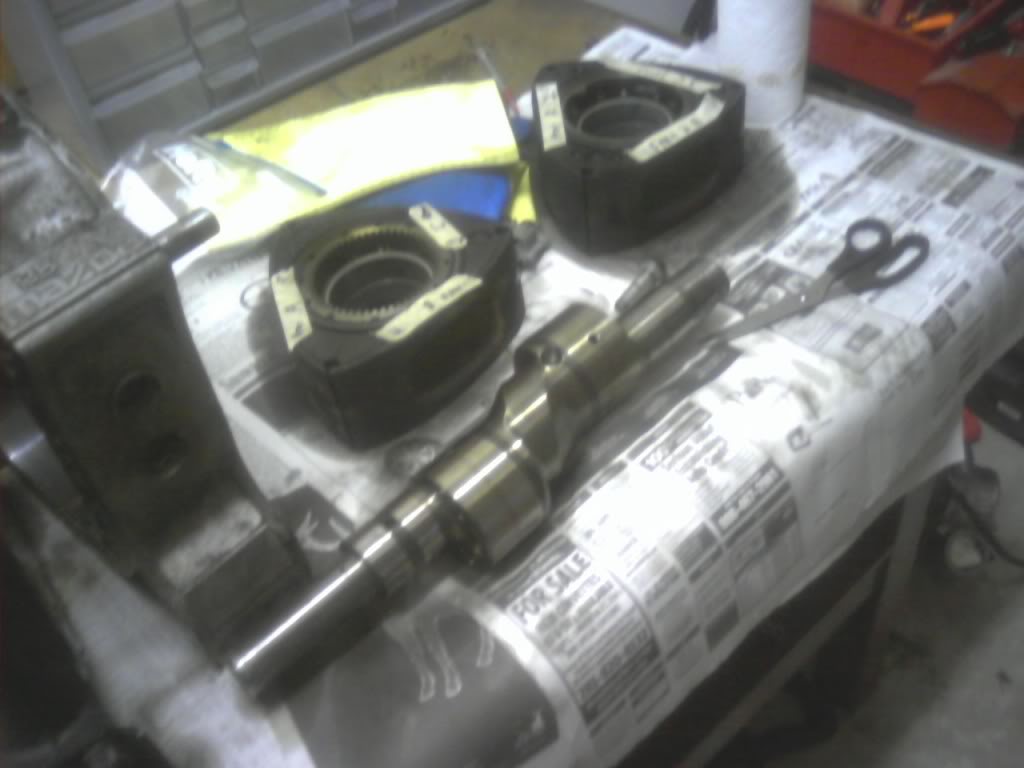
The RA Super 2mm seals were good despite the detonation, and were actually reused. Side seals and corner seals were barely in spec so I chose to replace them.
Here I am pulling the old motor out for teardown and inspection. Due to a MAP sensor problem and a bad fan clutch, the engine had experienced both detonation and overheating. I wanted to inspect everything and rebuild.
Inspection
The rear rotor housing had significant edge wear, you can barely see it here:
Side housings looked ok at first:
But it turns out that there was a chip (but not complete break) in the water o-ring groove, probably due to the overheating.
So I sourced good condition used parts. I got some low mileage Jspec s5 turbo irons and also converted to s5 intake manifolds because the ports are already matched properly. The only thing I kept housing-wise from the old motor was one rotor housing. Here are the rotors and eccentric shaft laid out on the bench:
The RA Super 2mm seals were good despite the detonation, and were actually reused. Side seals and corner seals were barely in spec so I chose to replace them.
Assembly
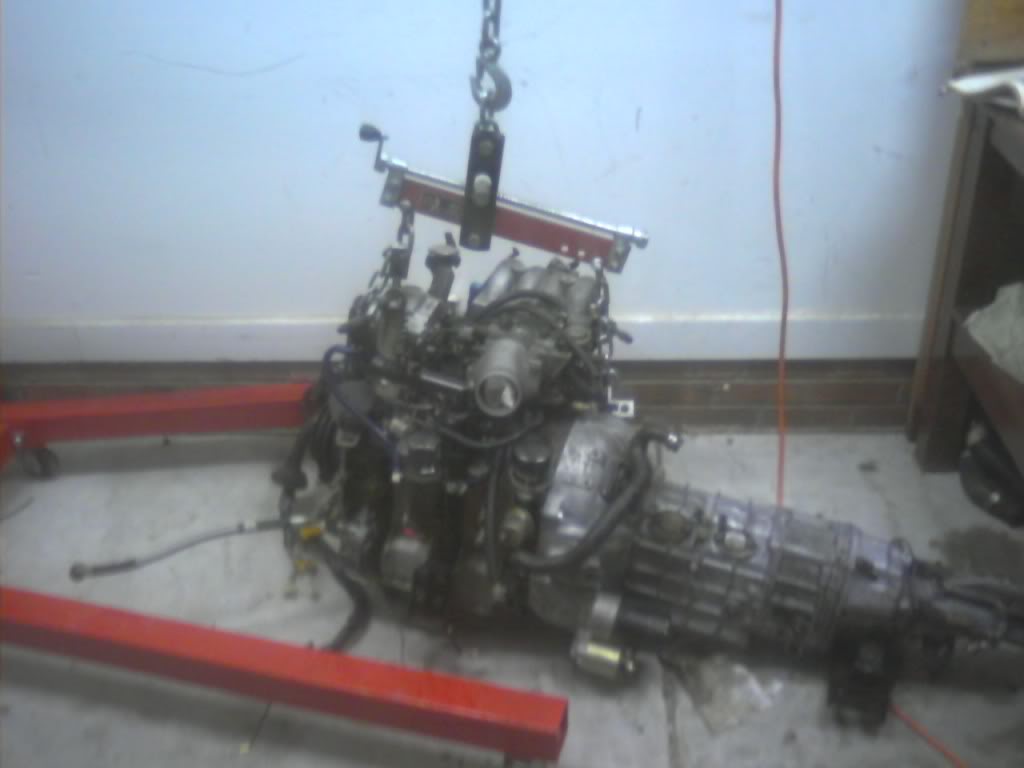
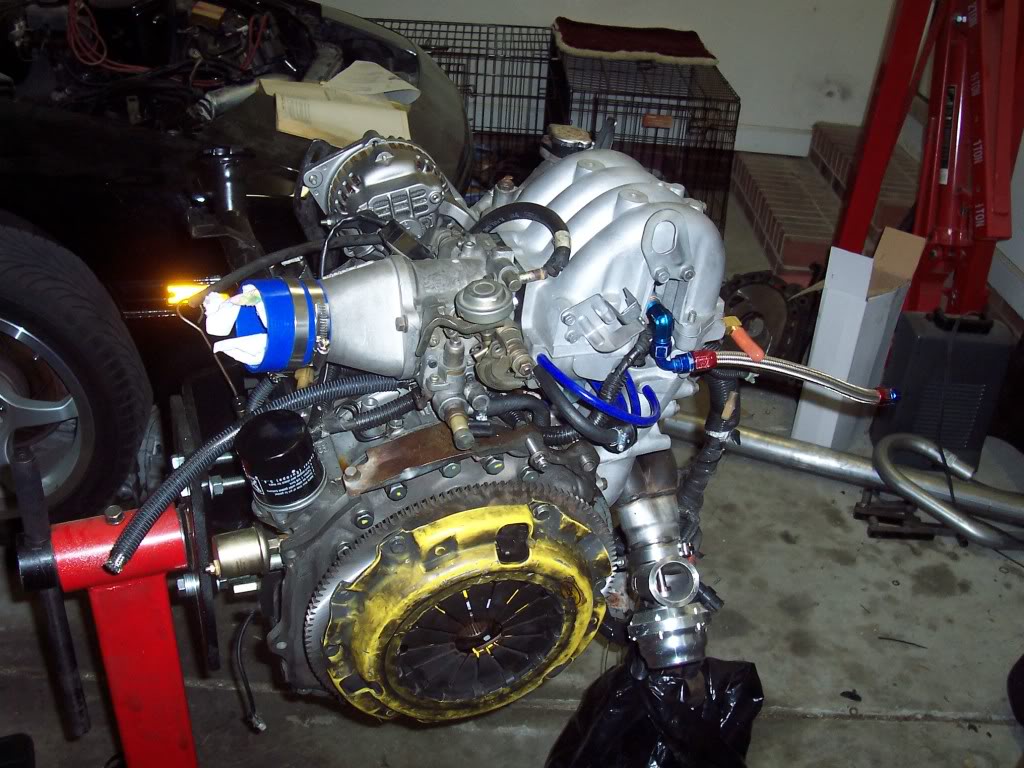
I only have one pic of me stacking the engine:
The turbo manifold is supposedly an FD Feed manifold, I got a good deal on it. I had that Tial wastegate flange and custom wastegate merge collector welded on to it. I replaced the crank pulley and hub with new ones from Mazda so that the timing marks would be 100% correct. I had to fab up that oil return line, which is a pain in the ***. Here's pics of the block with no real accessories:

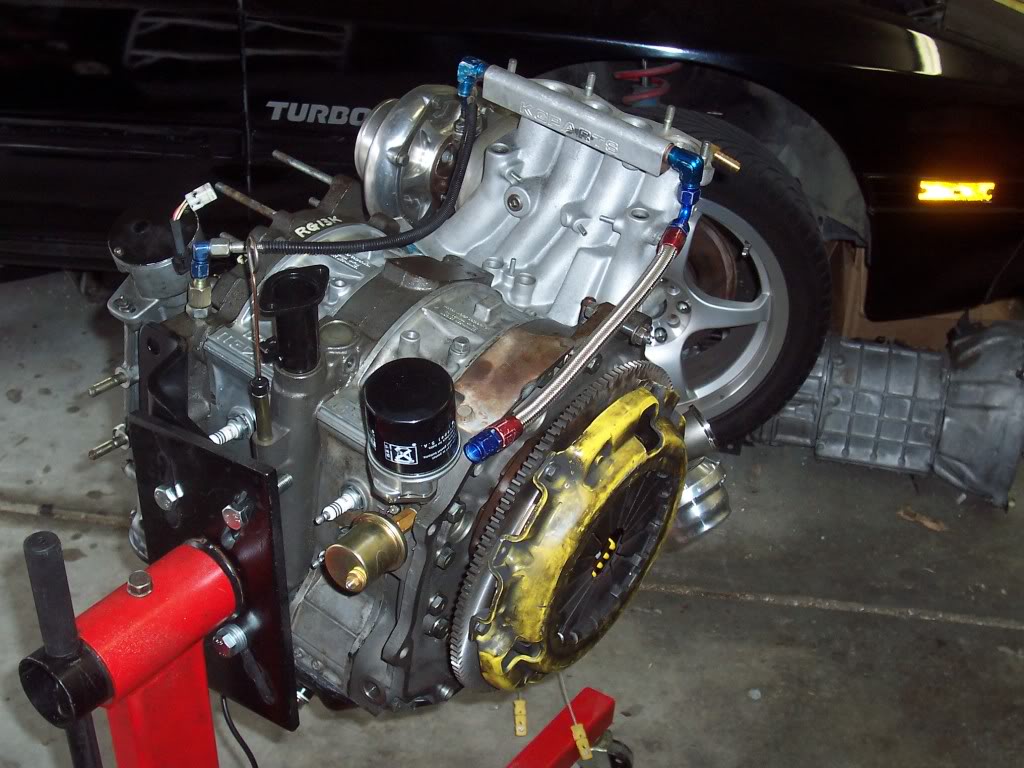
I had already upgraded the fuel system on a previous build, so here I am working on the vacuum routing:
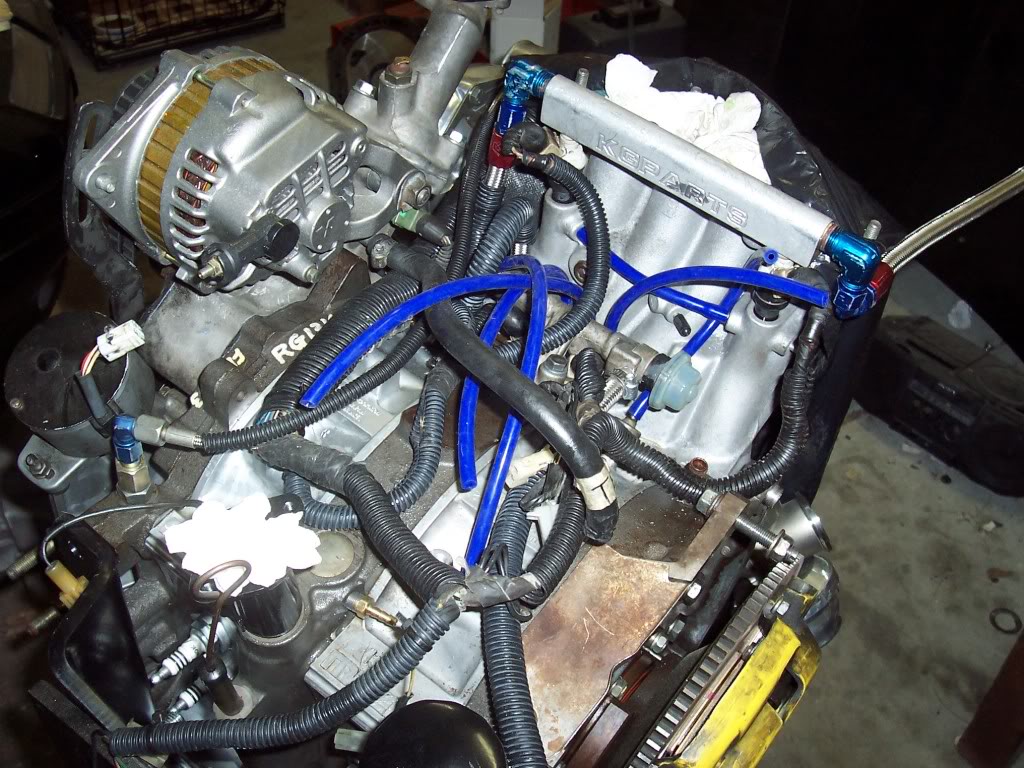
longblock mostly assembled:
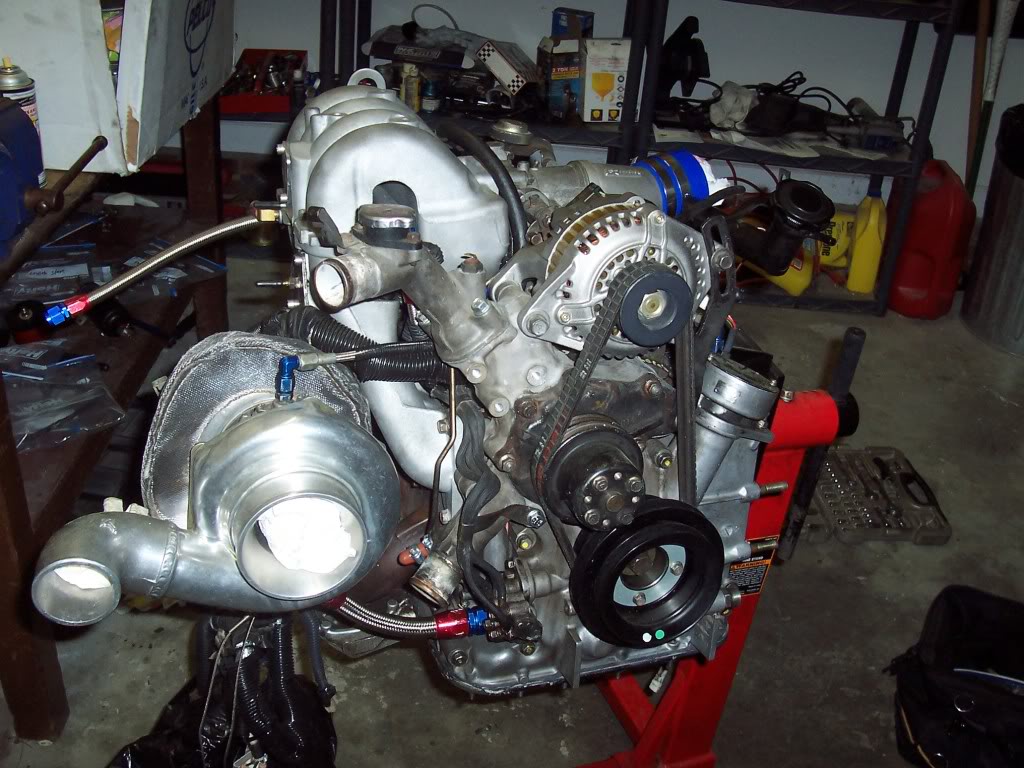
visualizing the custom downpipe and wastegate recirculation:
engine back in car:
I only have one pic of me stacking the engine:
The turbo manifold is supposedly an FD Feed manifold, I got a good deal on it. I had that Tial wastegate flange and custom wastegate merge collector welded on to it. I replaced the crank pulley and hub with new ones from Mazda so that the timing marks would be 100% correct. I had to fab up that oil return line, which is a pain in the ***. Here's pics of the block with no real accessories:
I had already upgraded the fuel system on a previous build, so here I am working on the vacuum routing:
longblock mostly assembled:
visualizing the custom downpipe and wastegate recirculation:
engine back in car:
custom electric fan brackets, thanks Aaron Cake for the Pontiac fan idea

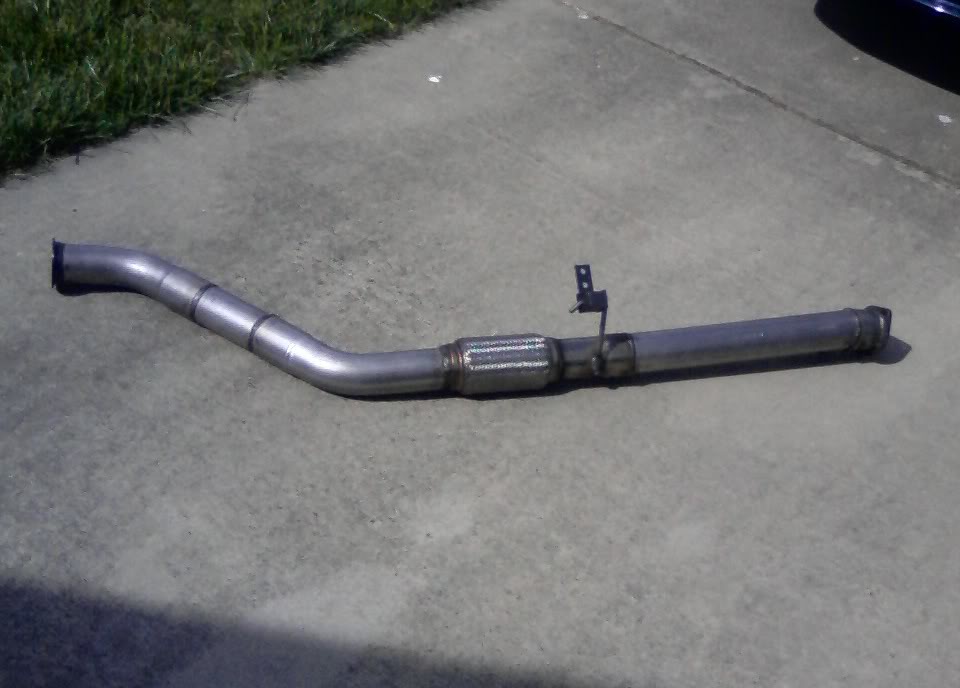
downpipe mostly done:
Tuning
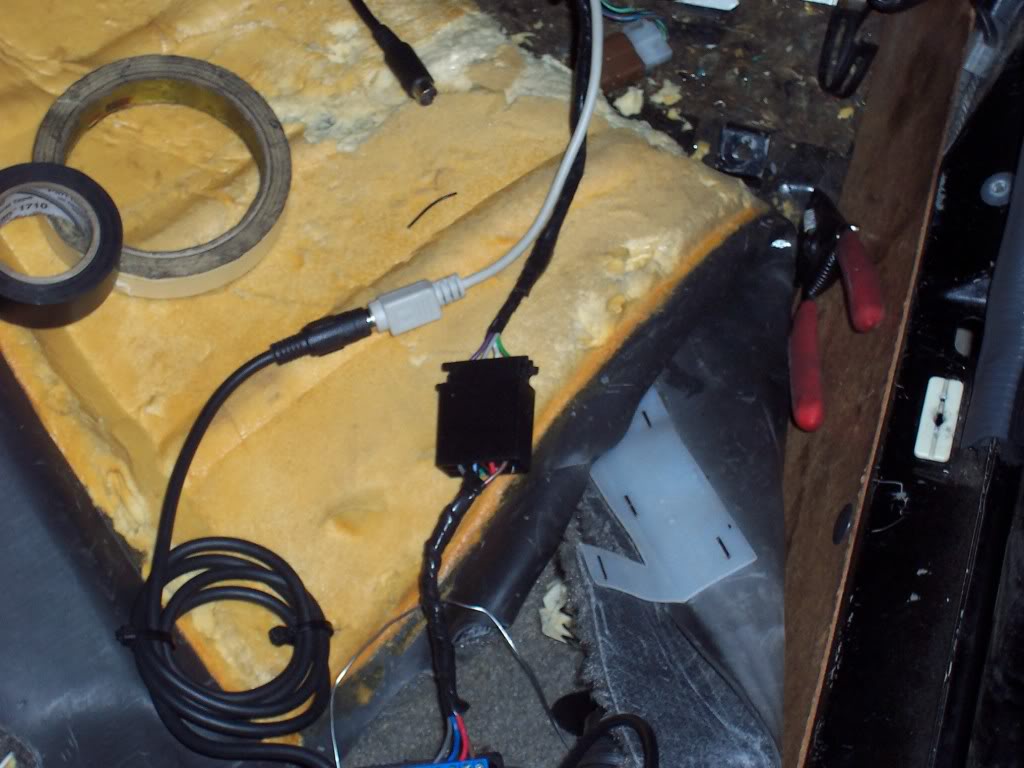
running wires for the Datalogit to connect to the Power FC:
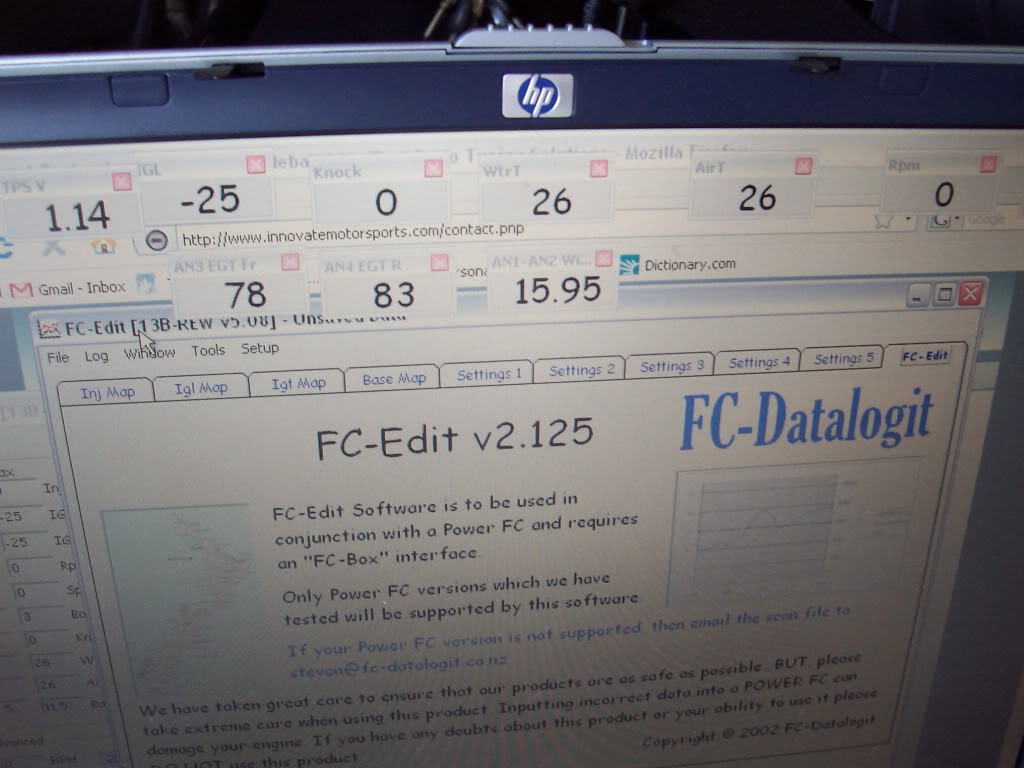
cranking and idle tuning:
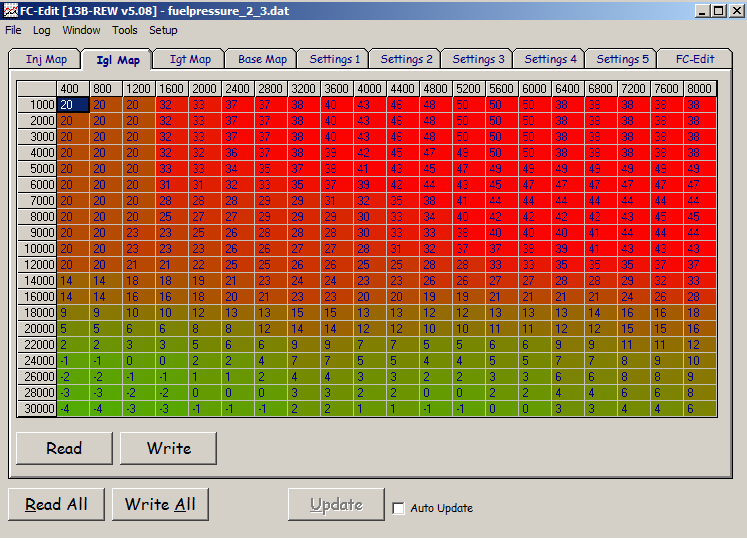
working on the timing map:
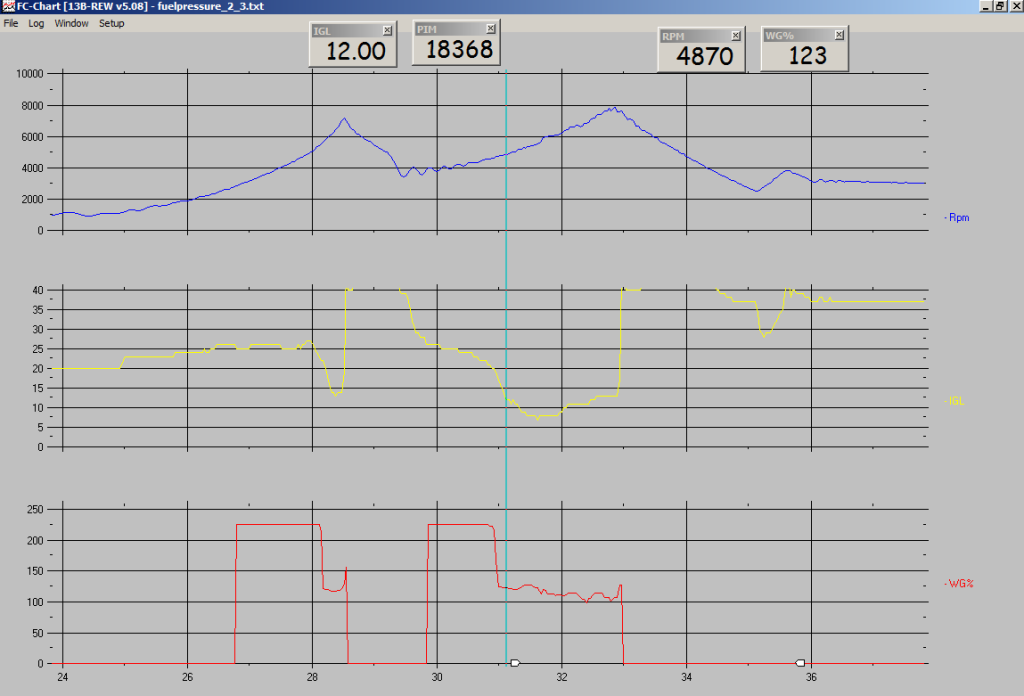
tuning boost control and timing:
Car turned out pretty well so far, especially with the help I've gotten from people along the way (mostly welding and helping with the engine hoist). It did take me about 1500 miles to debug a lot of stupid stuff. I've got about 2500 miles on the motor now, it's been running almost a year.
downpipe mostly done:
Tuning
running wires for the Datalogit to connect to the Power FC:
cranking and idle tuning:
working on the timing map:
tuning boost control and timing:
Car turned out pretty well so far, especially with the help I've gotten from people along the way (mostly welding and helping with the engine hoist). It did take me about 1500 miles to debug a lot of stupid stuff. I've got about 2500 miles on the motor now, it's been running almost a year.
Trending Topics
the interior is intentionally very stock looking. All it has is a Power FC commander and a wideband gauge mounted on the steering column. I am basically restoring the interior with new OEM parts as the budget allows. I already replaced the door handle and door lock cylinder with brand new parts. I've replaced multiple interior plastic pieces and fixed most of the stupid interior electrical problems.
Looking great dude. So your last motor didnt blow BUT you tore it down due to an overheat? Did you suspect water seal failure ( smoke, ect)?
I feel you on the whole restoring thing...I have slowly been trying to replace interior plastics and what not. It is kinda pricey BUT looks so nice with new items.
I can't wait to see what the dyno gets you and btw AWESOME job on your downpipe. Very impressive!!
I feel you on the whole restoring thing...I have slowly been trying to replace interior plastics and what not. It is kinda pricey BUT looks so nice with new items.
I can't wait to see what the dyno gets you and btw AWESOME job on your downpipe. Very impressive!!
The Big Ugly!
Joined: May 2009
Posts: 867
Likes: 0
From: Fredericksburg, Va
Looking great dude. So your last motor didnt blow BUT you tore it down due to an overheat? Did you suspect water seal failure ( smoke, ect)?I feel you on the whole restoring thing...I have slowly been trying to replace interior plastics and what not. It is kinda pricey BUT looks so nice with new items. I can't wait to see what the dyno gets you and btw AWESOME job on your downpipe. Very impressive!!
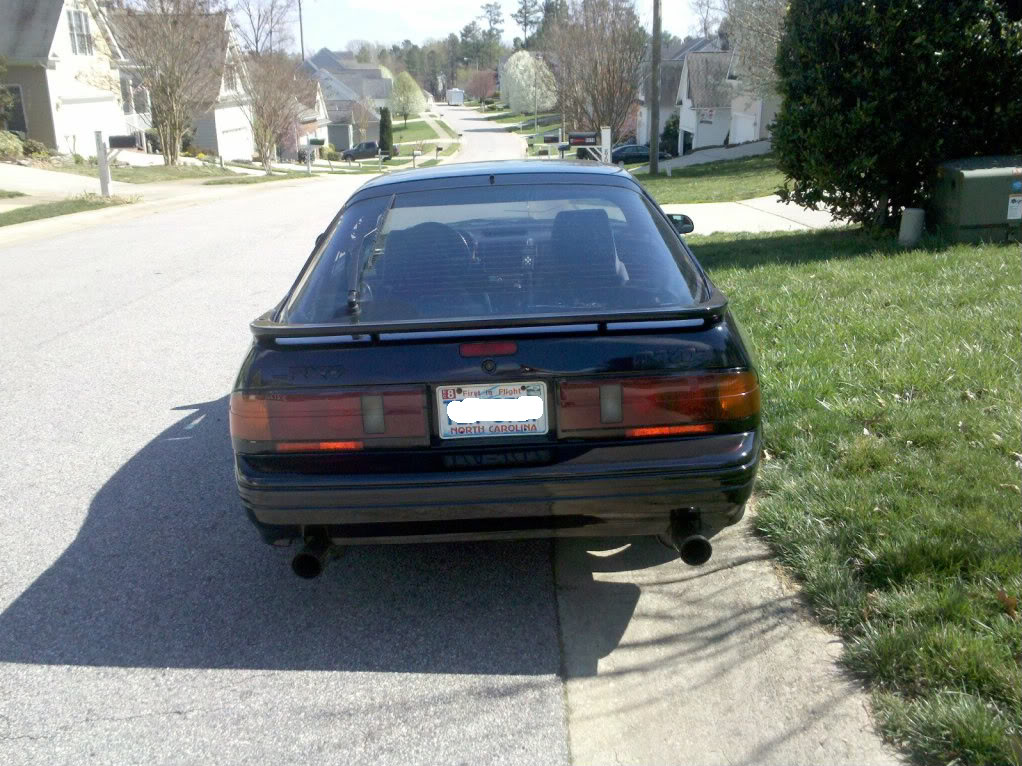
I can't take all the credit for the downpipe. I knew how I wanted it to look, and I did most of the mocking up and measuring, but then my trusted welding shop did the rest. I was planning to do the welding myself, but the money I was going to spend on a welding setup went to engine internals. It turned out really well for the total amount of money I have into it... less than $200 due to some hookups I have with local vendors and the use of aluminized steel as opposed to stainless. And it bolts right to my RB catback. I decided to recirculate the wastegate this time around because I got sick of worrying about cops. You can still clearly hear the wastegate open though.
Are you using s4 TII rotors?
Interesting FPR location. Don't think I've seen anyone else with that spot.
Does it run? Vids please. No Idling or walk around vids either. 
Where is your Charcoal Canister? What did you do with crankcase (umm, eccentric-case) ventilation? Any internal Oil Mods? What other mods have you done to the car? What controls the Wastegate? PFC?
Where is your Charcoal Canister? What did you do with crankcase (umm, eccentric-case) ventilation? Any internal Oil Mods? What other mods have you done to the car? What controls the Wastegate? PFC?
 I've been meaning to make a video for a long time, I just keep forgetting honestly. I need to have someone in the car to take the video and I need to remember to do it. To answer your other questions, the charcoal canister is gone and the hard line is open to the atmosphere. The PCV valve is gone and the the two breather ports connect to a catch can which is vented to atmosphere.
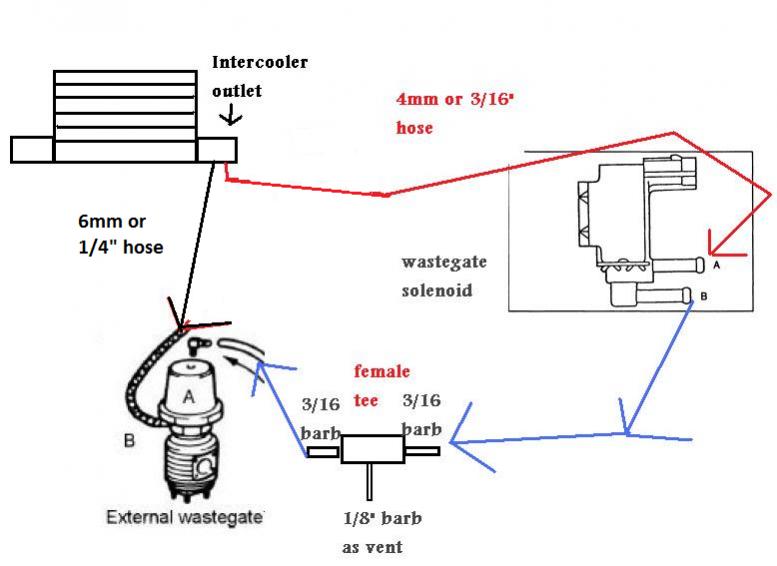

The wastegate is controlled by the Power FC using an OEM FD 2 port boost control solenoid (which is very similar to the s5 solenoid). As far as I know I'm the only one who has that setup. It's not hard to set up really, you just need a Datalogit box to enable it properly. And I like being able to log exactly what the solenoid is doing in terms of duty cycle % so I can compare it to my boost and rpm curves. I also like that it sees the same MAP reading used to calculate fuel and spark, plus the integration with the overboost fuel cut.
you can also control an internal wastegate, either by hooking up a 2 port solenoid as a bleeder (stock s5 style) or an inexpensive 3 port solenoid in "interrupt" style just like most external controllers (Profec, AVCR, etc). Or you can use a 3 port solenoid on the top port of an external gate (instead of the 2 port + vent system I used), or a 3 port solenoid to the side port just like an internal gate. There are a gazillion ways to do it. All the Power FC does is drive a solenoid, it doesn't know how the plumbing is configured. All I did was trick the Power FC into thinking I have sequential twins hooked up, and it controls boost just fine.
I'm looking at the diagram and I'm a bit confused. I must be misunderstanding something. The wastegate has the hose running to it direct from the high pressure outlet of the IC. So, it opens at whatever psi the spring is for right? If that is correct, then how does the solenoid control the boost? Won't the wastegate just open regardless if it's there or not?
I'm still learning, I must be missing something here.
I'm still learning, I must be missing something here.
the solenoid meters pressurized air to the top port to work against the spring and the pressure applied through the side port. The design of the diaphragm chamber gives the pressure through the top port mechanical advantage. If you look through routing diagrams of most external electronic boost controllers they will use some variation of this plumbing.
You can run a separate source to the side port, or you can run one source that supplies air to both the side port and the solenoid. There are many ways to do it, and they all have different effects on the solenoid duty required to achieve a particular boost level.
You can run a separate source to the side port, or you can run one source that supplies air to both the side port and the solenoid. There are many ways to do it, and they all have different effects on the solenoid duty required to achieve a particular boost level.
Bored, so here's a list of all the engine related stuff I have that I can think of:
Shortblock
-- s4 rotors and rotor housings (Pineapple Racing EP3A porting template used), OEM corner and side seals with RA Super 2mm apex seals.
-- s5 irons with large street port
-- s4 front cover and OMP
-- McMaster-Carr inner coolant seals
-- Banzai Racing oil pan brace
Turbo and Manifolds etc
-- s5 turbo LIM, UIM. Greddy TB elbow
-- s4 throttlebody
-- Feed single turbo long runner stainless manifold, Tial 44mm wastegate
-- Garrett T04R turbo, 1.00 A/R turbine housing
-- Greddy 3 row FMIC with custom piping to retain factory powersteering
-- Custom downpipe connecting to RB 3" catback
Electronics
-- HKS Twin Power ignition with four BUR9EQ plugs and Magnecore wires
-- FD Power FC used with 87 turbo harness and Banzai adapter kit
-- Triumph open element/fast acting IAT sensor, similar in design to the GM IAT but with the same resistance sweep as the FD factory sensor
-- Innovate LC1 wideband with XD-16 gauge
-- Custom electronic boost control system using Power FC and factory FD wastegate solenoid
-- Datalogit Power FC laptop interface
-- FJO dual EGT signal converter for Datalogit logging of EGTs on each rotor
-- All major sensors (except the CAS) have been replaced with brand new units
MAN you have really got the datalogit figured out Ray! I still havent even began to get my hands wet besides basic Map Watch and your usual data logging.
Did you ever get your 2nd gen datalogit manual finished?
SOOO the main advantage of the WG solenoid is to moniter duty cycles/ parimeters of other systems correct?
Did you ever get your 2nd gen datalogit manual finished?
SOOO the main advantage of the WG solenoid is to moniter duty cycles/ parimeters of other systems correct?
It's been done. I just made a small update to it. It was originally hosted on some geocities link, but geocities is dead now. Banzai Racing was supposed to host it but they haven't gotten back to me. You actually just reminded me to get in contact with them about it again.
Just to clarify: you can use almost any boost control solenoid out there (including your typical 3 port design), I just chose to use an OEM FD one as an experiment. There are a few advantages to using the PFC for boost control. For one, it saves money. You don't have to buy an external boost controller. It saves space because you don't have another box to hook up, and you can use the Commander to switch boost settings. It relies on the same MAP reading that is used for calculating fuel and spark, so you don't have another gauge that will disagree. I actually use the Commander as my sole boost gauge, which is nice because it has the peak/hold functionality. I didn't want a mechanical gauge, the ECU, and the boost controller all reading differently. That's just annoying.
And as you can see, almost all annoying modified rotary hassles and driveability quirks have been mitigated or completely eliminated on this setup. I don't premix (call me lazy--and what if somebody else drives it and forgets to premix?). The idle is smooth at 900rpm with only small fluctuations during cold and hot start. My electric fan is fully controlled by the Power FC and requires no driver input, plus the idle speed increases when the fan comes on. I don't have to hit the gas pedal to get it to start and it never floods even if it only runs for 10 seconds. Not only is that annoying, but what if somebody else needs to move the car? Careful tuning of cranking fuel and timing advance took care of those problems. It's pretty good about not stalling on deceleration due to retaining the BAC valve and the dashpot. I don't do any kind of AI for 16-17psi. What if I (or someone else driving) turn the system off or run it empty by accident? I just run less timing advance. It may cost me a little power, but so what? I put 93 octane gas into it and go--as hassle free (or hassle minimizing) as you can get for a car this old and this modified. Around here I guess that's an unusual way of doing things, but when you've been driving Rx-7's for 6 years you start wanting as "normal" of a car as possible. My daily driver is an Infiniti Q45 which gives me no trouble, and I started to miss that.
Back to the boost control: now as you've seen in that screenshot, you can actually log the solenoid duty. That's something that really isn't possible on any external controller except the AVC-R, and with the AVC-R it's very clunky to do. The duty curve tells you how the closed loop logic is reacting to changes in the boost curve, especially through the different gears. It also tells you exactly when the wastegate is opening and it tells you how the control logic changes as you start adjusting the settings. Finally, it is integrated with the overboost fuel cut logic so if **** hits the fan you've got fuel cut as a last resort.
I have two settings: normal weather and very cold weather (usually sub 40 degrees F outside). Or you can just do high and low boost.
SOOO the main advantage of the WG solenoid is to moniter duty cycles/ parimeters of other systems correct?
And as you can see, almost all annoying modified rotary hassles and driveability quirks have been mitigated or completely eliminated on this setup. I don't premix (call me lazy--and what if somebody else drives it and forgets to premix?). The idle is smooth at 900rpm with only small fluctuations during cold and hot start. My electric fan is fully controlled by the Power FC and requires no driver input, plus the idle speed increases when the fan comes on. I don't have to hit the gas pedal to get it to start and it never floods even if it only runs for 10 seconds. Not only is that annoying, but what if somebody else needs to move the car? Careful tuning of cranking fuel and timing advance took care of those problems. It's pretty good about not stalling on deceleration due to retaining the BAC valve and the dashpot. I don't do any kind of AI for 16-17psi. What if I (or someone else driving) turn the system off or run it empty by accident? I just run less timing advance. It may cost me a little power, but so what? I put 93 octane gas into it and go--as hassle free (or hassle minimizing) as you can get for a car this old and this modified. Around here I guess that's an unusual way of doing things, but when you've been driving Rx-7's for 6 years you start wanting as "normal" of a car as possible. My daily driver is an Infiniti Q45 which gives me no trouble, and I started to miss that.
Back to the boost control: now as you've seen in that screenshot, you can actually log the solenoid duty. That's something that really isn't possible on any external controller except the AVC-R, and with the AVC-R it's very clunky to do. The duty curve tells you how the closed loop logic is reacting to changes in the boost curve, especially through the different gears. It also tells you exactly when the wastegate is opening and it tells you how the control logic changes as you start adjusting the settings. Finally, it is integrated with the overboost fuel cut logic so if **** hits the fan you've got fuel cut as a last resort.
I have two settings: normal weather and very cold weather (usually sub 40 degrees F outside). Or you can just do high and low boost.