
Rotary Knight Revival: Finally going turbo!

Rotary Knight Revival: Finally going turbo!
Hello Everyone,
My name is Alex Franceschi (that's pronounced "fran-ces-chi"). I've been on this forum for ages (formerly known as a_drift), but have been away and/or lurking for a long time. My car, a 1991 Mazda RX7 Non-turbo (automatic converted to manual swap). I've had this car for over 10 years. It's always been on the back burner in my life. I have been drifting for roughly 12 years. This car taught me a lot about driving, especially driving a low powered car. While this car sat patiently waiting, I got my B.S. and M.S. in Mechanical Engineering at UCLA, went to work for Honda R&D in Columbus, Ohio as a test engineer in Electronic Stability Control (I know, complete opposite of the concept of drifting), then took a year off last year to travel through South America and Europe with my girlfriend and now relocated to the west coast. Sounds quite ridiculous I know, I have no right to be complaining that my car isn't done yet lol. But now I'm settling down and figured it's time to finally finish this project once and for all! I'll be recording most of my progress on here and on YouTube. I'd love some feedback and tips along the way as I try to re-learn everything about rotaries that I may or may not have forgotten after all these years. I will be driving the car at both drift and time attack events. After the rigorous drivers training I used to do at Honda, I've grown fond of learning how to actually drive fast, and it turns out I'm not too bad (but I ain't great either lol).
As she sits now:
Engine:
+ Stock S5 NA
+ Turbo catback exhaust (obnoxiously loud, will fix)
Drivetrain:
+ Turbo flywheel and Stage 2 Competition Clutch
+ Turbo Transmission
+ Kaaz Super-Q 2 Way LSD
Suspension:
+ Fortune Auto 500 series coilovers
+ DTSS eliminators
+ PBM solid bushings for the diff, sub-frame and their rear toe arms
+ Ground Control camber arm
+ JTP knuckles
+ Mazdatrix super angle kit (will be removing in exchange for supernow bump steer kit)
+ Energy Suspension Poly bushings on front control arm and both Fr/Rr sway bar bushings
Brakes:
+ Stock (will upgrade pads/rotors for track driving, but don't know what yet)
Future Plans:
+ Finish turbo 2 swap (I have a rebuilt motor from Chips Motorsports out of Detroit already)
+ Power goals are minimal, 250 whp (I've learn to drive with less than 150 whp, this is plenty for me to have fun in)
+ Stock reliability and ease of use are my goals!
+ Rtek ecu
+ FMIC
+ Port wastegate
+ Downpipe and highflow cat
+ New wheels/tires
+ Proper Suspension alignment, ride height and settings (not the "form > function" philosophy of most drifters, I prefer "function >/= form")
+ Add necessary gauges to monitor vital engine parameters (boost, oil temp/press, etc.)
+ Add Data Acquisition for track driving: wheel speeds, lat/long-g, steering angle, throttle angle, rpm, vehicle speed, and perhaps vehicle yaw angle (this will be a tricky one but in time I'm sure I'll figure it out)
+ New bumper and side skirts
+ New paint (finally!)
+ Proper roll cage and safety equipment
Intro Video:
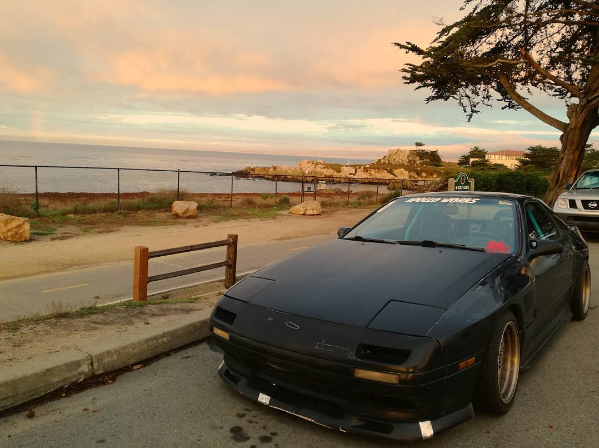
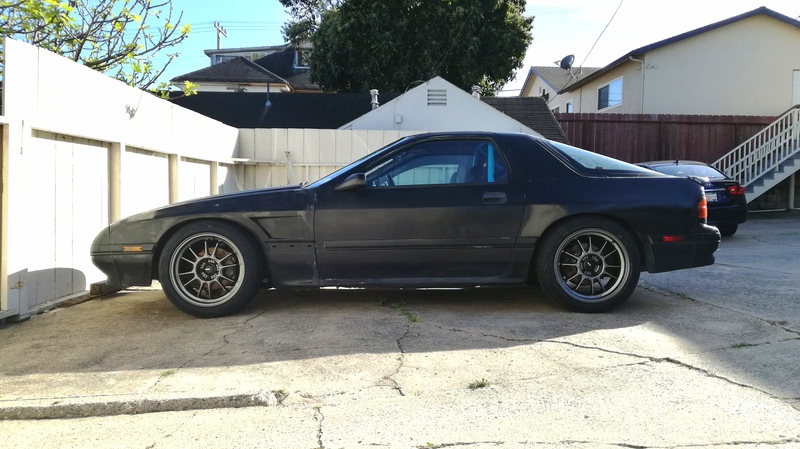
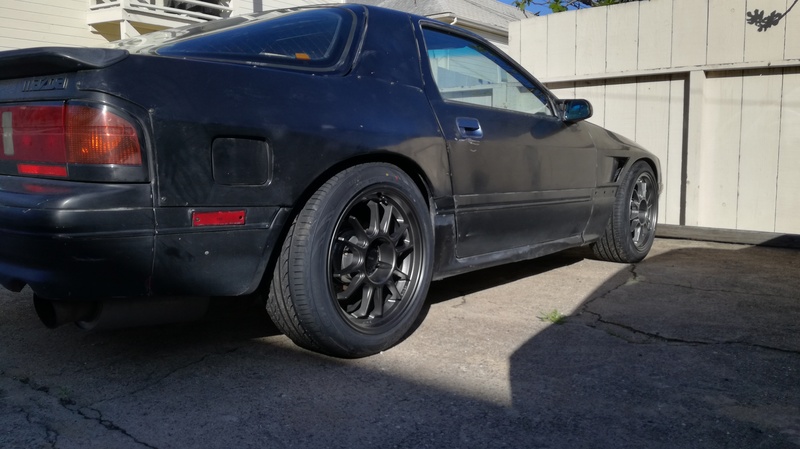
Exterior, it ain't pretty, but that'll change:
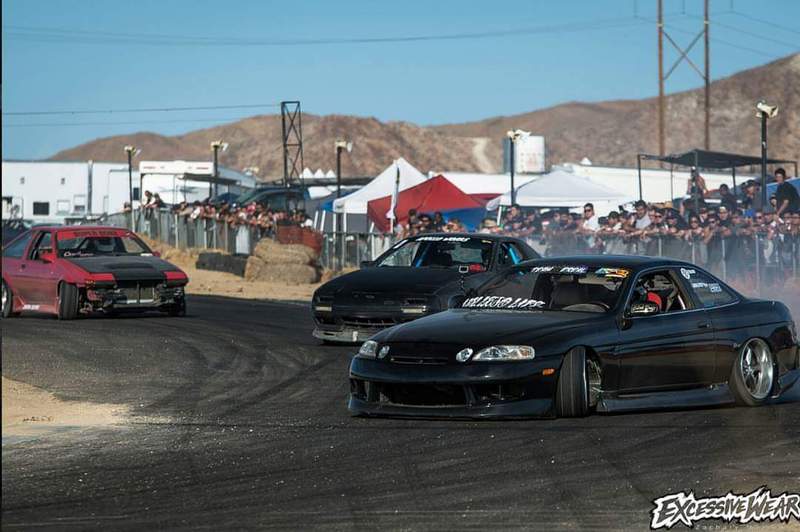
Driving the slowest car at Super D Matsuri with my best friends from High School after starting together 10 years ago:
My name is Alex Franceschi (that's pronounced "fran-ces-chi"). I've been on this forum for ages (formerly known as a_drift), but have been away and/or lurking for a long time. My car, a 1991 Mazda RX7 Non-turbo (automatic converted to manual swap). I've had this car for over 10 years. It's always been on the back burner in my life. I have been drifting for roughly 12 years. This car taught me a lot about driving, especially driving a low powered car. While this car sat patiently waiting, I got my B.S. and M.S. in Mechanical Engineering at UCLA, went to work for Honda R&D in Columbus, Ohio as a test engineer in Electronic Stability Control (I know, complete opposite of the concept of drifting), then took a year off last year to travel through South America and Europe with my girlfriend and now relocated to the west coast. Sounds quite ridiculous I know, I have no right to be complaining that my car isn't done yet lol. But now I'm settling down and figured it's time to finally finish this project once and for all! I'll be recording most of my progress on here and on YouTube. I'd love some feedback and tips along the way as I try to re-learn everything about rotaries that I may or may not have forgotten after all these years. I will be driving the car at both drift and time attack events. After the rigorous drivers training I used to do at Honda, I've grown fond of learning how to actually drive fast, and it turns out I'm not too bad (but I ain't great either lol).
As she sits now:
Engine:
+ Stock S5 NA
+ Turbo catback exhaust (obnoxiously loud, will fix)
Drivetrain:
+ Turbo flywheel and Stage 2 Competition Clutch
+ Turbo Transmission
+ Kaaz Super-Q 2 Way LSD
Suspension:
+ Fortune Auto 500 series coilovers
+ DTSS eliminators
+ PBM solid bushings for the diff, sub-frame and their rear toe arms
+ Ground Control camber arm
+ JTP knuckles
+ Mazdatrix super angle kit (will be removing in exchange for supernow bump steer kit)
+ Energy Suspension Poly bushings on front control arm and both Fr/Rr sway bar bushings
Brakes:
+ Stock (will upgrade pads/rotors for track driving, but don't know what yet)
Future Plans:
+ Finish turbo 2 swap (I have a rebuilt motor from Chips Motorsports out of Detroit already)
+ Power goals are minimal, 250 whp (I've learn to drive with less than 150 whp, this is plenty for me to have fun in)
+ Stock reliability and ease of use are my goals!
+ Rtek ecu
+ FMIC
+ Port wastegate
+ Downpipe and highflow cat
+ New wheels/tires
+ Proper Suspension alignment, ride height and settings (not the "form > function" philosophy of most drifters, I prefer "function >/= form")
+ Add necessary gauges to monitor vital engine parameters (boost, oil temp/press, etc.)
+ Add Data Acquisition for track driving: wheel speeds, lat/long-g, steering angle, throttle angle, rpm, vehicle speed, and perhaps vehicle yaw angle (this will be a tricky one but in time I'm sure I'll figure it out)
+ New bumper and side skirts
+ New paint (finally!)
+ Proper roll cage and safety equipment
Intro Video:
Exterior, it ain't pretty, but that'll change:

Driving the slowest car at Super D Matsuri with my best friends from High School after starting together 10 years ago:

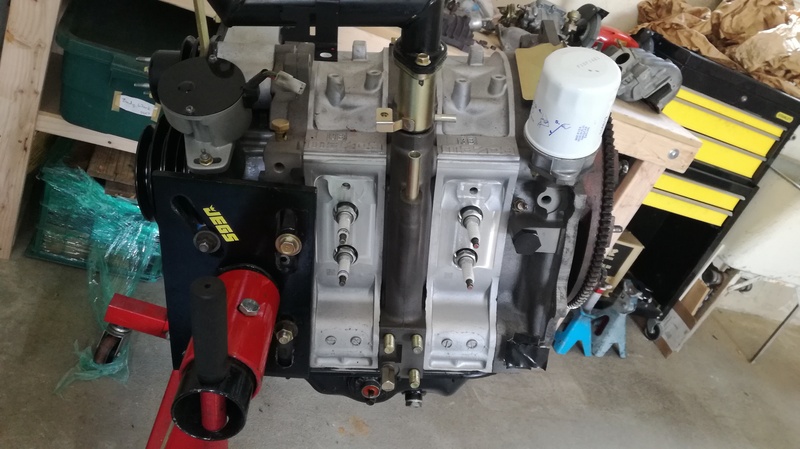
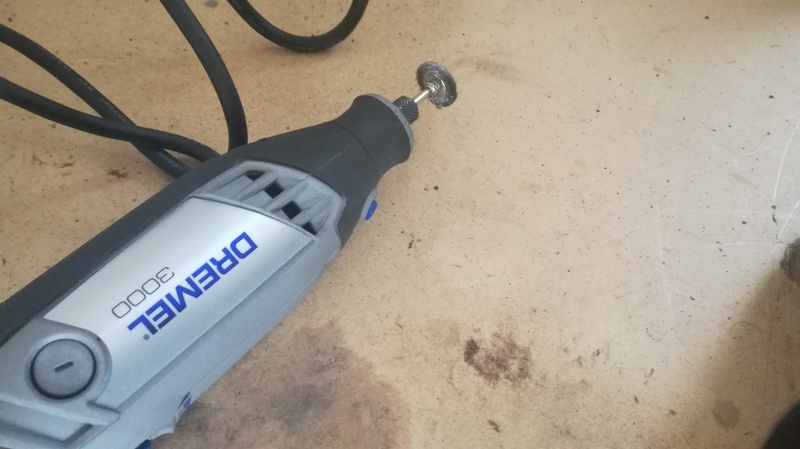
Cleaning Manifolds
Here's a glimpse of the motor. The short block is so clean, I have to clean all the accessories to match. To save money, I'm doing everything by hand, but if I had extra cash I would get them soda blasted.
UIM Before
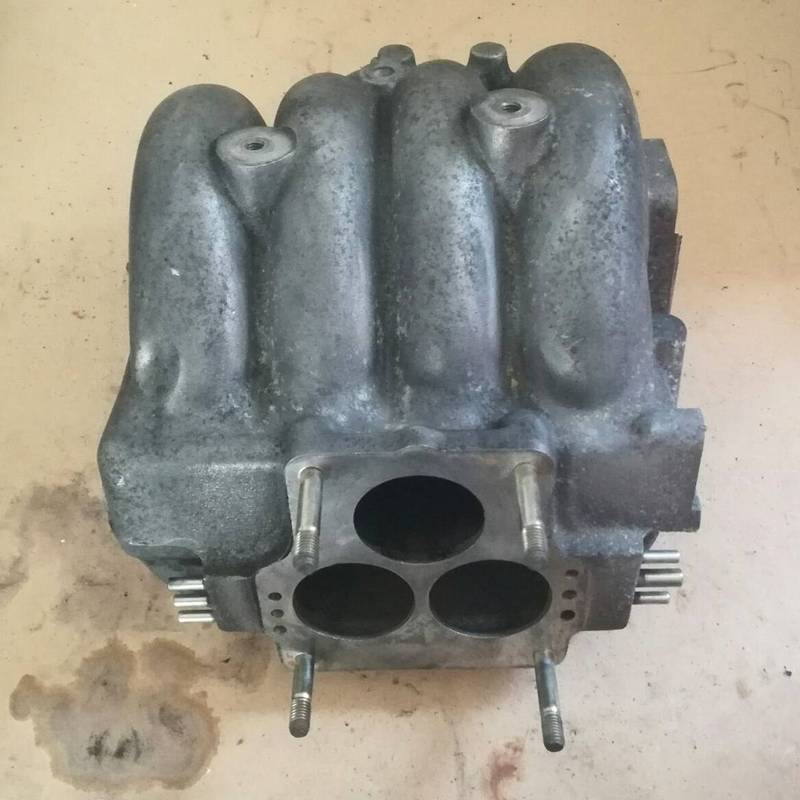
UIM After

Exhaust Manifold Before

During
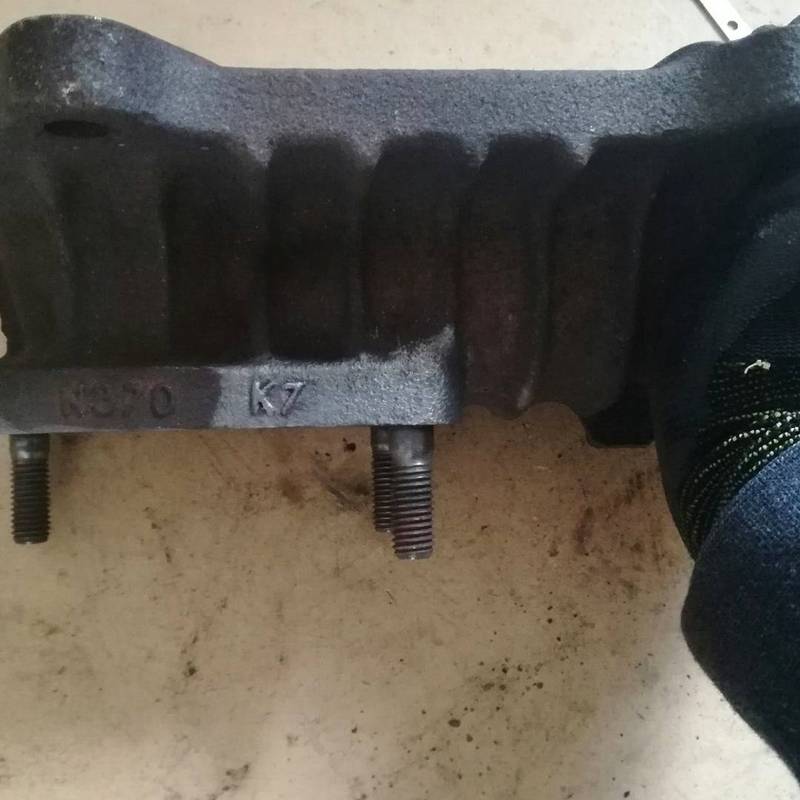
After
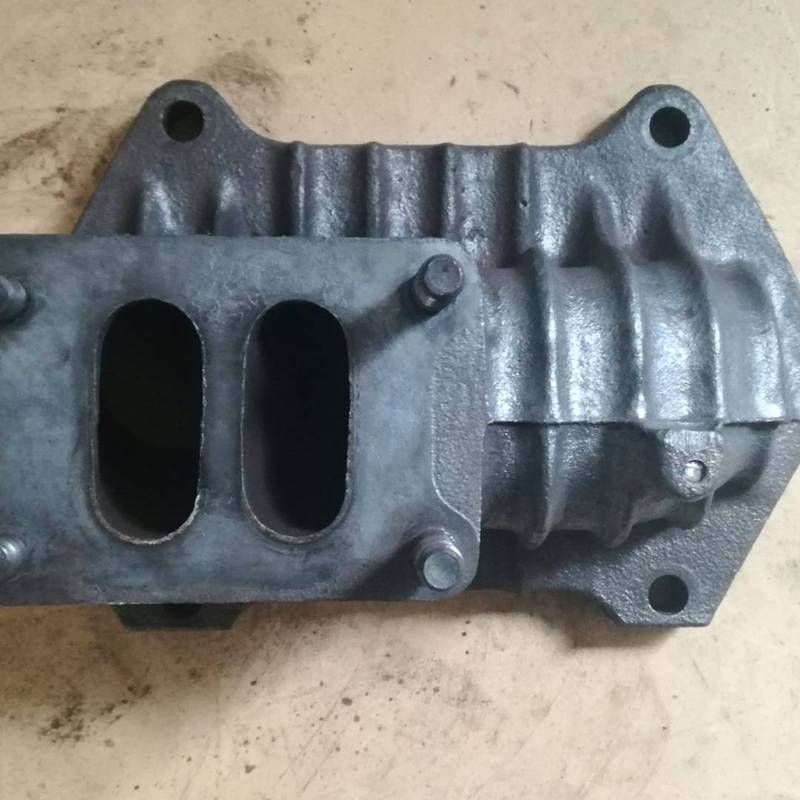
I simply used Purple Power and a wire brush to clean the UIM and LIM (forgot to snap a picture). For the exhaust manifold I used my dremel and the small wire wheel that's included. This worked like a charm and I'll be buying some more wheels to clean some other rusted cast iron parts.

Super Now Tie Rod Installation
After having my the heim joints go bad on my tie rod ends from my Mazdatrix super angle kit, I decided it was time to change things up. Originally, I was hoping I could go back to stock tie rod ends because, well, they're cheap! However, I quickly remembered I need 1) bump steer correction and 2) the stock rod ends interfere with the brake rotor because I have JTP knuckles installed...ask me how I know lol.
I made a "How-to" video for any beginners out there on the tie rod end replacement, but I also compare the difference between the Super Now units and the Mazdatrix units. Keep in mind they aren't exactly the same because the Mazdatrix units are for the super angle kit. Go straight to 2:10 if you just want to see the comparison of the parts.
I'll be making another video later on how to actually measure and adjust the bump steer. But before I do that I need to set the ride height and get a proper alignment done.
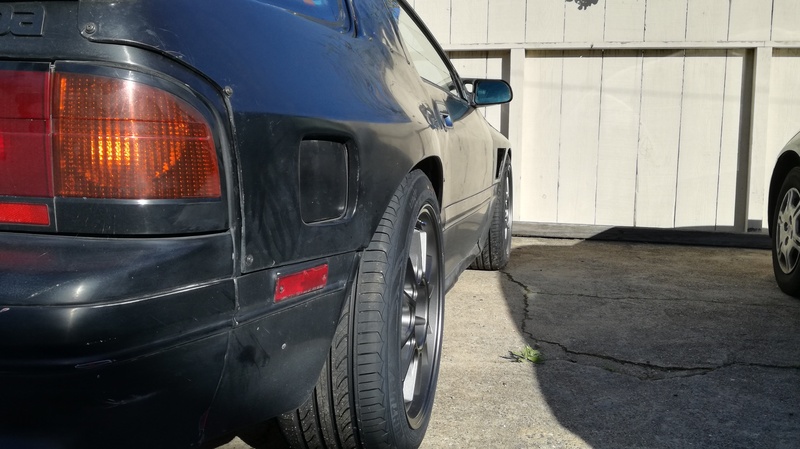
New Wheels!
A lightweight AND affordable wheel: The new Konig Hypergram. Got them from discount tire direct for $176/wheel. However, I think they're sold out right now because I double checked the site and they're gone. Great deal for a lightweight wheel (~17.5lbs/wheel).
FR:
17x9, +25mm offset, 235/45/17 tire, +20mm wide front fenders
RR:
17x9, -5mm effective offset (installed 30mm spacer on +25mm wheel), 235/45/17 tire, +30mm wide rear over fenders
FR:
17x9, +25mm offset, 235/45/17 tire, +20mm wide front fenders
RR:
17x9, -5mm effective offset (installed 30mm spacer on +25mm wheel), 235/45/17 tire, +30mm wide rear over fenders


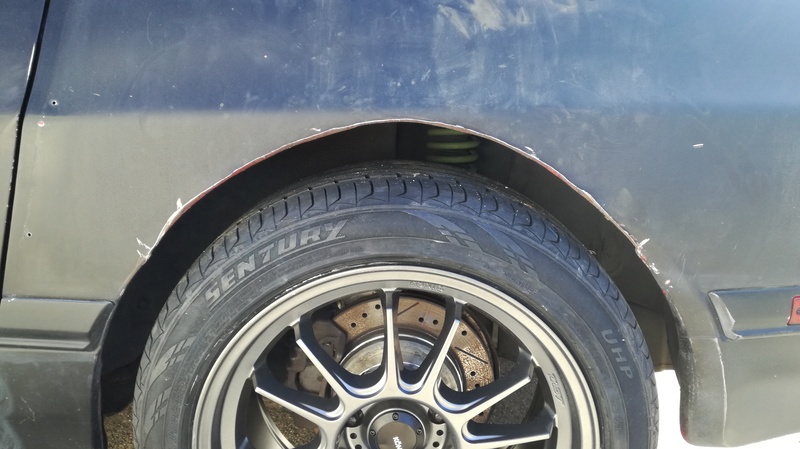
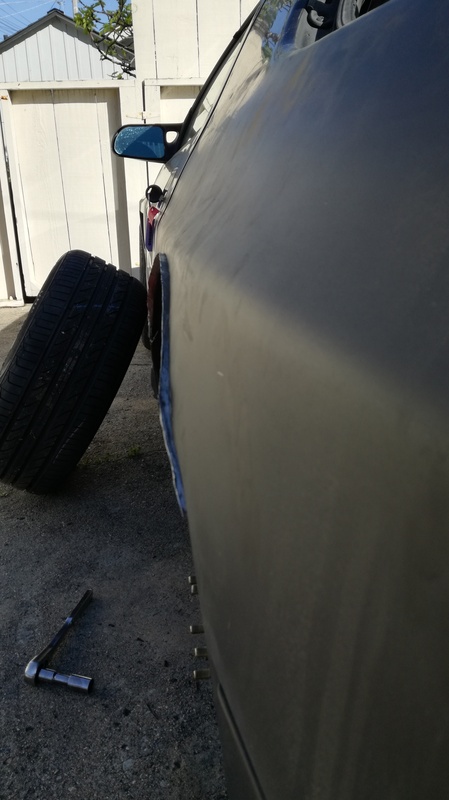
Fixing Old Mistakes
So, the first time I cut my rear quarters I was too conservative and didn't cut enough material. However, when I had 16's it wasn't that big of a deal. Now that I am running a much bigger wheel/tire. It's time to make a little more room. I couldn't finish completely because I need to buy some sealant tomorrow. I'll make a video of the other side so people can see how I did this without having to weld or have ugly cuts.


dont kill the cones

Joined: Dec 2004
Posts: 361
Likes: 1
From: Kennewick, WA
Big fan of what's going on here, I really like the idea video logging your build. A little critique of your video, you don't really need to show taking you lugs off or putting jack stands under the car. I know its for the dummies that don't really follow all the rules or know it all, but if there here on a car forum my guess it they know/don't care how to follow the basic procedures. Also is there anything special about your block? I follow chipsmotorsport on FB and the stuff he builds is insane. For sure one of the best in the game.
Big fan of what's going on here, I really like the idea video logging your build. A little critique of your video, you don't really need to show taking you lugs off or putting jack stands under the car. I know its for the dummies that don't really follow all the rules or know it all, but if there here on a car forum my guess it they know/don't care how to follow the basic procedures. Also is there anything special about your block? I follow chipsmotorsport on FB and the stuff he builds is insane. For sure one of the best in the game.
As for my motor. Unlike most people I actually asked to keep it all stock lol. He did do some minor durability mods, but no porting or lightened rotors. I may be a rare breed, but I enjoy running the motor stock. I've just had way better luck for reliability that way, and I enjoy doing all the suspension work more than anything else. I'm debating if I want to run emissions or not on this motor. I haven't decided yet.
Trending Topics
Installing Rear Over Fenders, no welding!
So, I remember someone doing this on the forum awhile back. I think it was on a 1st gen. I simply adapted that method to the FC. Using this method I don't need to weld the two layers of sheet metal together, or end up with some funky hack job. Comes out pretty clean for basic tools. And, I know, my rear quarter is destroyed, hence the overs. Oh I wish I could go back to that day and not smack that damn tire...
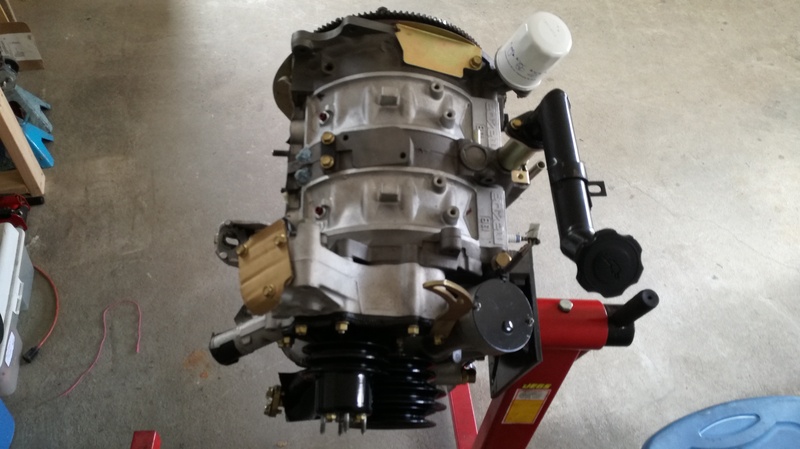
Quick walk around of motor
Just a quick walk around of the motor, got my gasket kit today and will start assembly this week. Still have some parts/hardware I'm waiting on, but I'll put together what I can this weekend.
The Throttle Body Modification
Decided to make a how-to video of the classic TII throttle body mod. I also created a separate thread for anyone who may want to do this in the future
(https://www.rx7club.com/2nd-generati.../#post12170752)
(https://www.rx7club.com/2nd-generati.../#post12170752)
Long Block Assembled
After receiving my fuel injectors from RC Engineering along with some other parts, I was finally able to put the long block together. I still have a few quirks to figure out, but it's actually looking like a motor!
P.S. You gotta show me your build.

Nice! That's alright. My car was basically stock for the first 8 years I owned it lol. The best investment is seat time! I used to only run cut springs in my teenage days. Come a long way since then.
Installed New Aero! Dzus Quick Release Fasteners for Front Bumper
Hi Everyone,
Over the weekend I was able to finally install my new aero from shine auto (front bumper and sideskirts). I used the Dzus quick release 1/4 turn fasteners for easy access on the track. Love these little guys! Check out the vid + pics and let me know what you think. I've got some more updates I want to do to the aero, but that'll be for another day.
Over the weekend I was able to finally install my new aero from shine auto (front bumper and sideskirts). I used the Dzus quick release 1/4 turn fasteners for easy access on the track. Love these little guys! Check out the vid + pics and let me know what you think. I've got some more updates I want to do to the aero, but that'll be for another day.
A twist in the build plot
So, here's some interesting news. As I open the old box I had the JDM ECU sitting in, I realize the guys who sold me the motor actually sent me an FD ECU! I had no idea at the time. When the motor arrived I stuck the ECU in a box, forgot about it and this is the first time I've seen it in 2.5 years. Anybody need a JDM FD ecu? lol


Too much time on my hands today...
I tried to combine all of the best resources I've come across for vacuum routing diagrams on emissions delete and turbo supporting mods, and decided to make my own. It was fun at first, like playing with a coloring book, but that ended fast lol.
Broke my turbo...
So, I was attempting to finish the rebuild of my turbo today. I had a few obnoxious battles, but for the most part I was making good progress. Until it came time to clock the turbo. As I put the turbo onto the motor to get an idea of where I need to clock it, I freaking dropped the CHRA and this happened...
(Notice the giant piece of aluminum from the backplate)

Needless to say I was rather disappointed and upset at myself for such a stupid mistake. This must be where the tears come in when the say "I put my blood, sweat and tears into that thing..." lol
Additionally, I found this nice crack inside the turbine housing that I did not notice until it came time to start rebuilding this thing. So now I sit here wondering what do I do next? Get another used S5 turbo, or get something new? Do I even want to bother with old parts anymore? Such a pain in the *** they can be. Anywho, this puts a wrench in my plans for a short while.

(Notice the giant piece of aluminum from the backplate)
Needless to say I was rather disappointed and upset at myself for such a stupid mistake. This must be where the tears come in when the say "I put my blood, sweat and tears into that thing..." lol
Additionally, I found this nice crack inside the turbine housing that I did not notice until it came time to start rebuilding this thing. So now I sit here wondering what do I do next? Get another used S5 turbo, or get something new? Do I even want to bother with old parts anymore? Such a pain in the *** they can be. Anywho, this puts a wrench in my plans for a short while.
Fuel Pump Voltage Testing
As I still recover from the loss of my turbo, I decided to move forward with other parts of the car. Before I install the walbro fuel pump I wanted to test how much voltage drops to the fuel pump. So, I made a little video of how I did it.
In short, there was about a 0.5 V drop across the harness. This was at a light electrical load with no lights on, no radio, no ac/heater/fan, etc. I may do another test later to see how much voltage drops with all these systems on.
In short, there was about a 0.5 V drop across the harness. This was at a light electrical load with no lights on, no radio, no ac/heater/fan, etc. I may do another test later to see how much voltage drops with all these systems on.

Full Member
Joined: Oct 2004
Posts: 87
Likes: 0
From: Tustin, CA
Dunno if you saw this over on the classifieds.
https://www.rx7club.com/2nd-generati...5-oem-1113698/
https://www.rx7club.com/2nd-generati...5-oem-1113698/
Dunno if you saw this over on the classifieds.
https://www.rx7club.com/2nd-generati...5-oem-1113698/
https://www.rx7club.com/2nd-generati...5-oem-1113698/
 Can't wait to finally get this turbo on the motor and start putting it in the car!