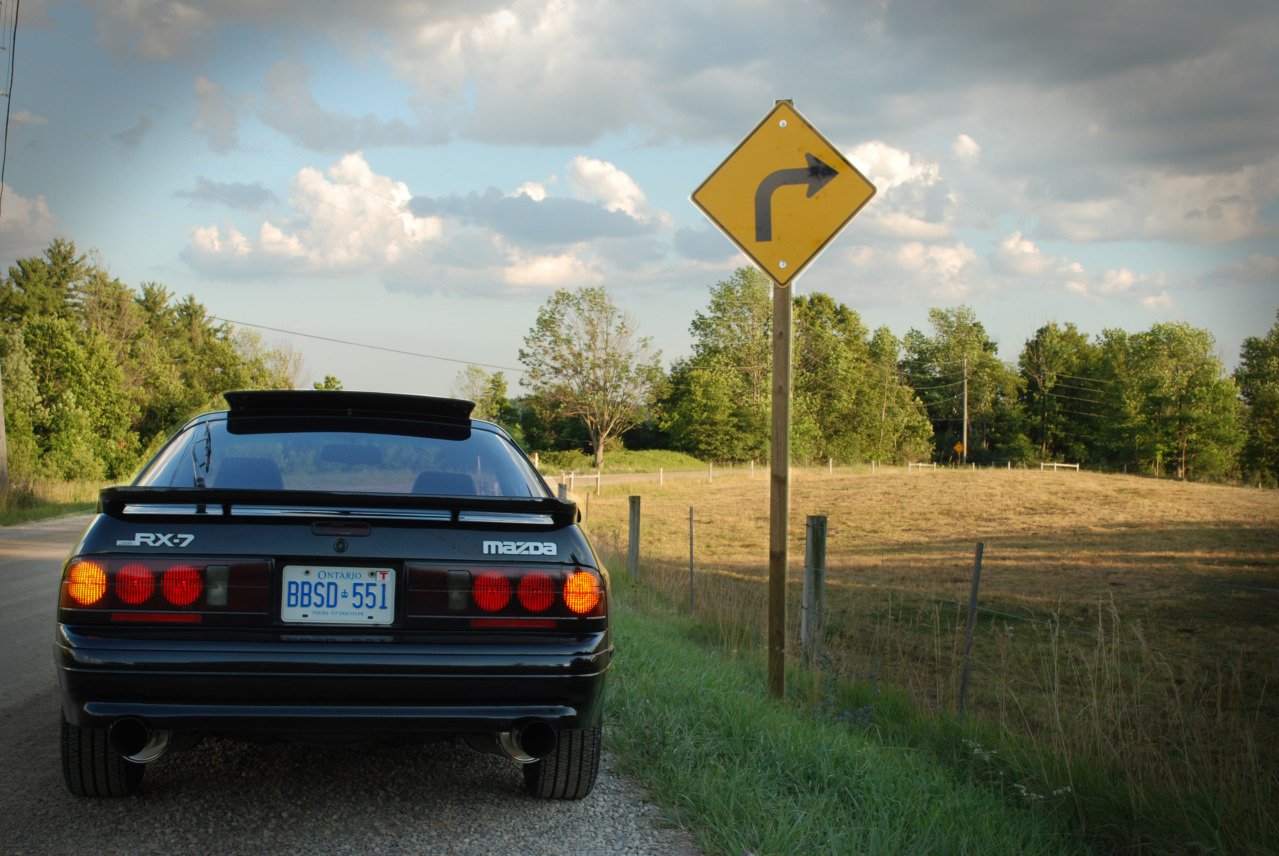
From N/A to Turbo: My new Turbo II


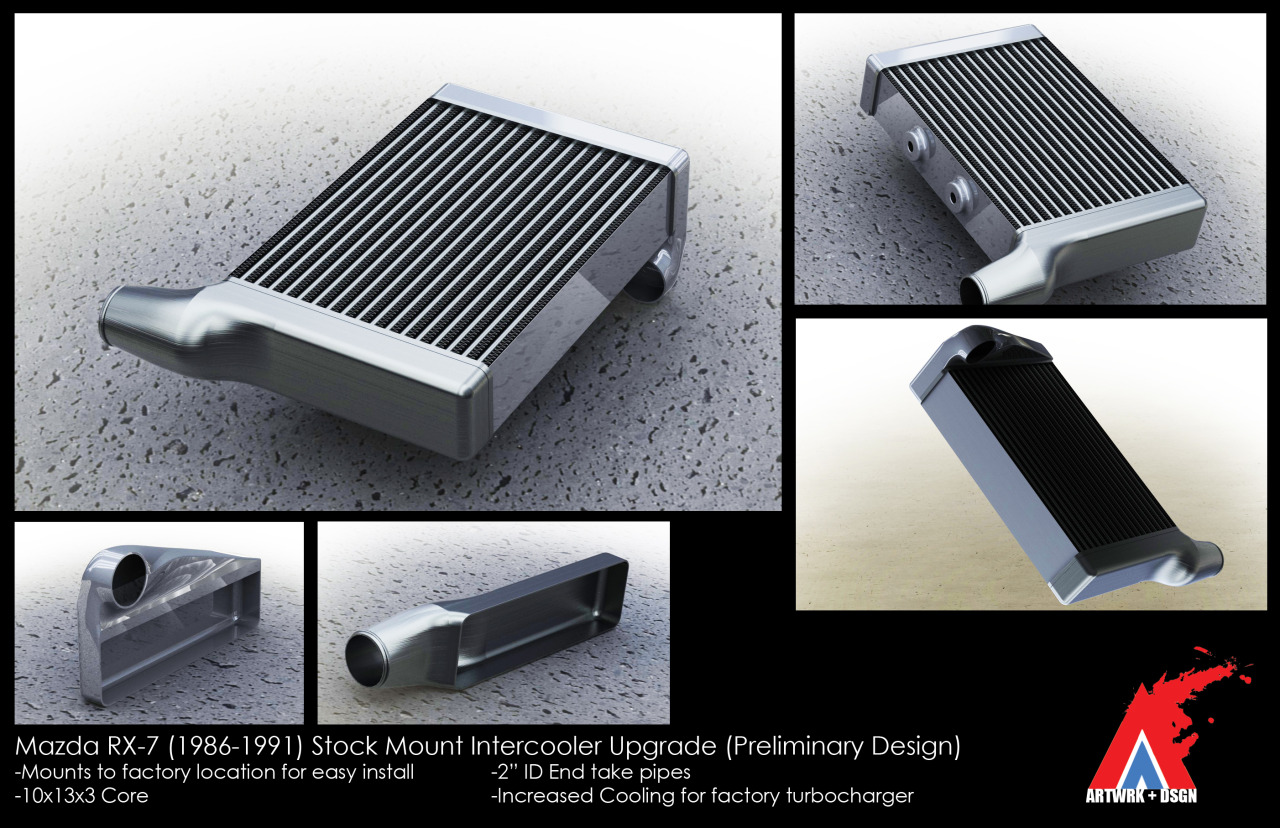
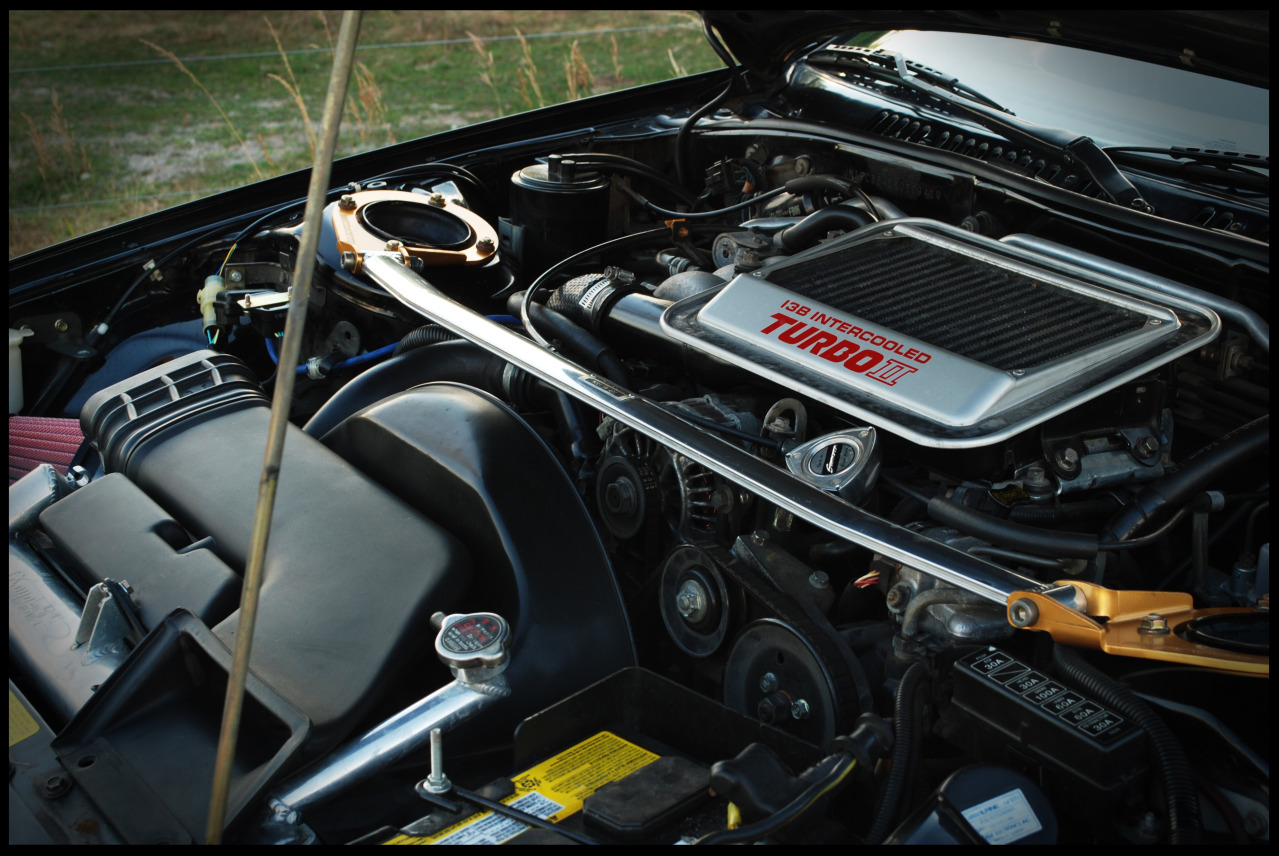
Small project I'm starting. Because I have no intentions of upgrading the factory turbo, I'm doing more "preventative maintenance" mods rather than big power upgrades. One thing I've been trying to source is an upgrade for my intercooler. I know ARC still offers an upgraded top mount, but at $1200+ that's quite steep.
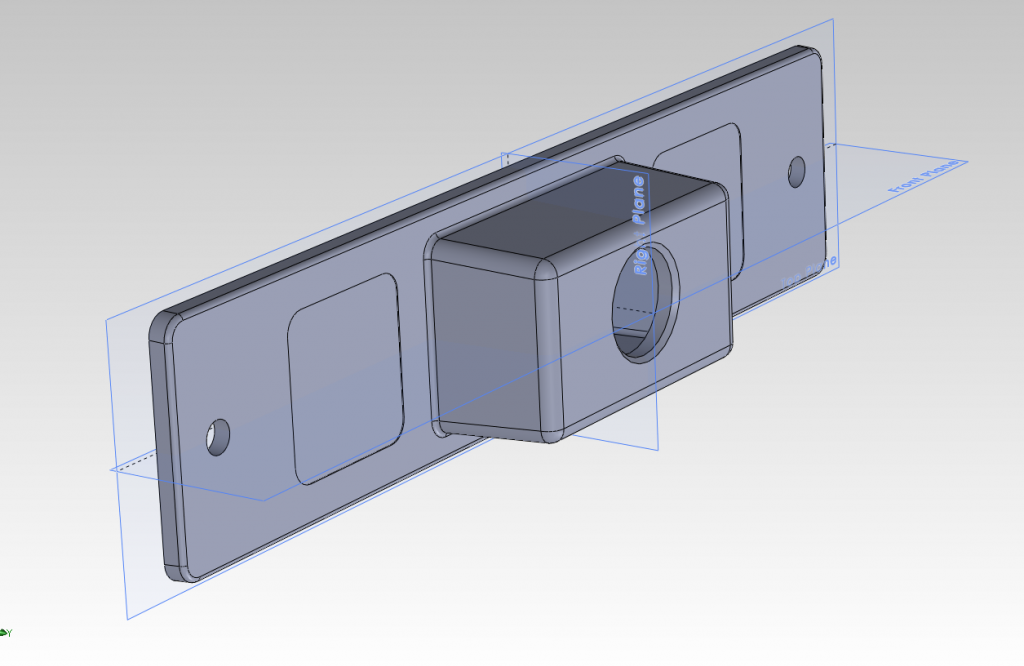
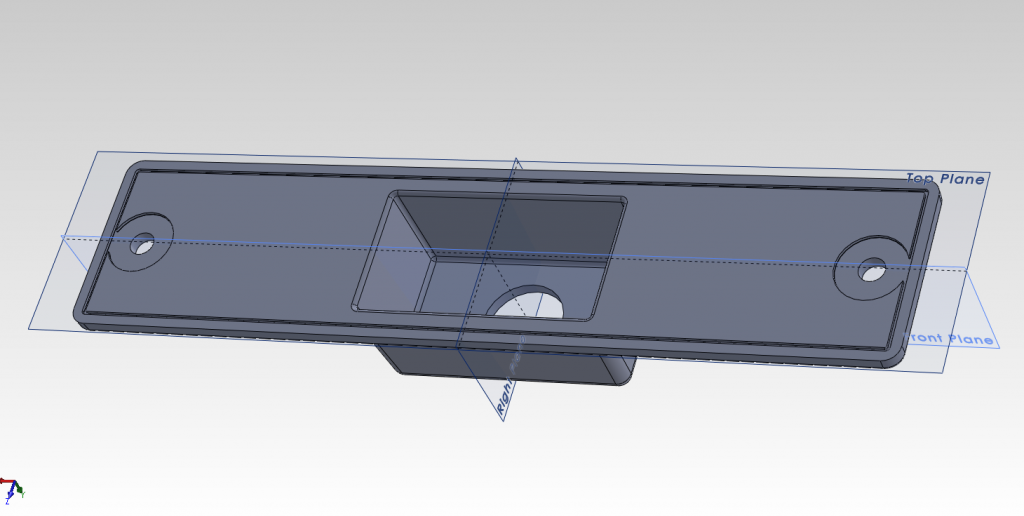
So, I'm taking a leap of faith to try and design my own. It is based slightly off the now discontinued HKS TMIC. I will be using this thread as progress since it is part of my build. Any comments or constructive criticism is more than welcome!
So, I'm taking a leap of faith to try and design my own. It is based slightly off the now discontinued HKS TMIC. I will be using this thread as progress since it is part of my build. Any comments or constructive criticism is more than welcome!
I love it! I've long thought of upgrading the stock top mount as well. My power goals won't necessitate a front mount, but I think there is room for improvement in the top mount.
I think there might be room for improvement in the end tank design on the outlet. The trick will be in not blocking access to the oil filter.
Good luck, and keep us up to date on the newest project.
I think there might be room for improvement in the end tank design on the outlet. The trick will be in not blocking access to the oil filter.
Good luck, and keep us up to date on the newest project.
Last edited by JerryLH3; Apr 26, 2012 at 08:01 PM.

Joined: May 2006
Posts: 3,881
Likes: 3
From: Jacksonville, Tampa & Tallahassee
I love it! I've long thought of upgrading the stock top mount as well. My power goals won't necessitate a front mount, but I think there is room for improvement in the top mount.
I think there might be room for improvement in the end tank design on the outlet. The trick will be in not blocking access to the oil filter.
Good luck, and keep us up to date on the newest project.
I think there might be room for improvement in the end tank design on the outlet. The trick will be in not blocking access to the oil filter.
Good luck, and keep us up to date on the newest project.
As far as blocking the oil filter, how hard is it to remove 2 screw clamps when its time to change the oil? It's far more work to remove the undertray on my girlfriend's Solara, lol.
I remember that intercooler. If I remember correctly, that was a stock core.
And you are correct. Removing an intercooler isn't that difficult if needed to change the oil filter. It'd be even easier if there is no power steering.
And you are correct. Removing an intercooler isn't that difficult if needed to change the oil filter. It'd be even easier if there is no power steering.
DJ, have you considered adding a Greddy elbow or a Rising RPM intake tube to redo the endtank design?
http://risingrpm.com/products/produc...let_duct_b.asp
The core could then be turned 90* and possibly allow for better airflow through the intercooler. I don't have access to modeling software at the moment, but I could throw something together in Paint if what I said was unclear.
http://risingrpm.com/products/produc...let_duct_b.asp
The core could then be turned 90* and possibly allow for better airflow through the intercooler. I don't have access to modeling software at the moment, but I could throw something together in Paint if what I said was unclear.
This might actually make more sense.
I was doing more research regarding the HKS TMIC, and it does require the specific throttle body inlet duct. Designing it wouldn't be difficult, but manufacturing it would be costly. So, I think it would make more sense to design something for product which already exist, stay tuned!
I was doing more research regarding the HKS TMIC, and it does require the specific throttle body inlet duct. Designing it wouldn't be difficult, but manufacturing it would be costly. So, I think it would make more sense to design something for product which already exist, stay tuned!


Little Update.
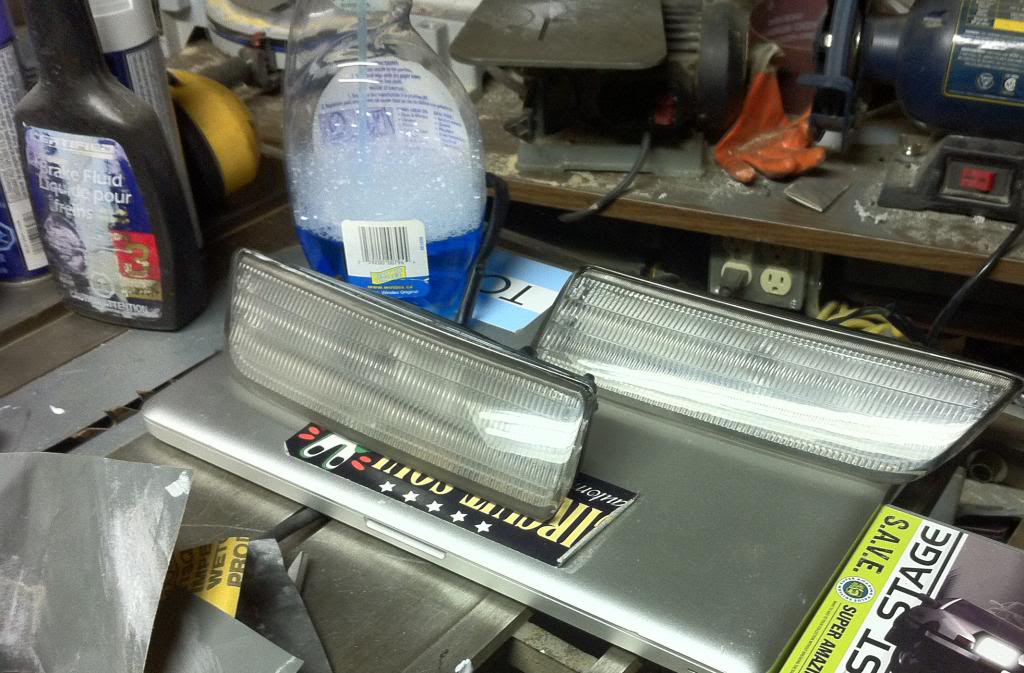
Earlier on in the thread I was discussing the issue of the Japanese side markers not meeting up with the US housing. So, I've designed a housing which will mate the Japanese lens, but still keep the US bulb and wire. I will be getting the part machined, and then create a mold to recast in a durable plastic.
Earlier on in the thread I was discussing the issue of the Japanese side markers not meeting up with the US housing. So, I've designed a housing which will mate the Japanese lens, but still keep the US bulb and wire. I will be getting the part machined, and then create a mold to recast in a durable plastic.