
my stuff


Pretty awesome drifting, just wish the camera was better... my ears were killing during some of the footage lol
Still, I would like to see a dyno sheet when you're all done and get a solid tune
Still, I would like to see a dyno sheet when you're all done and get a solid tune


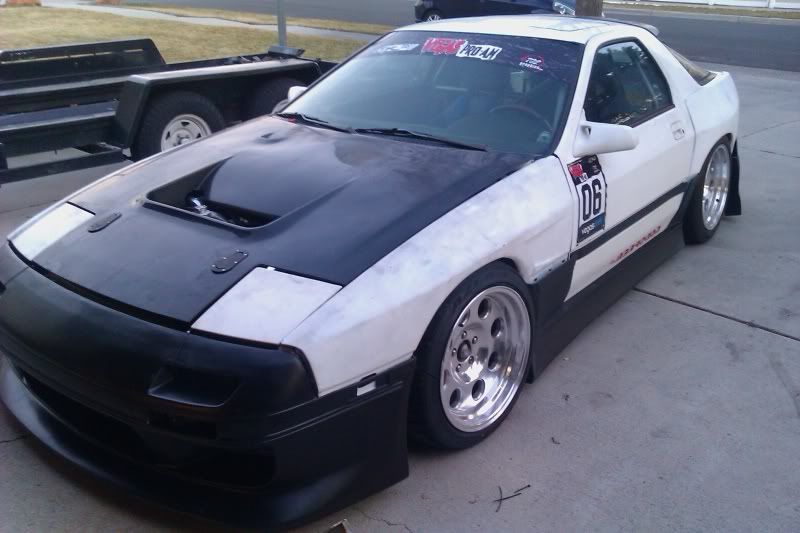
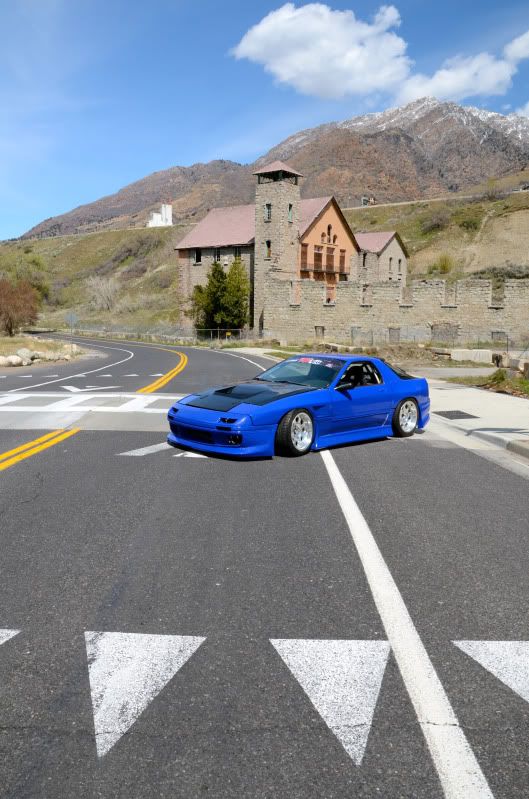
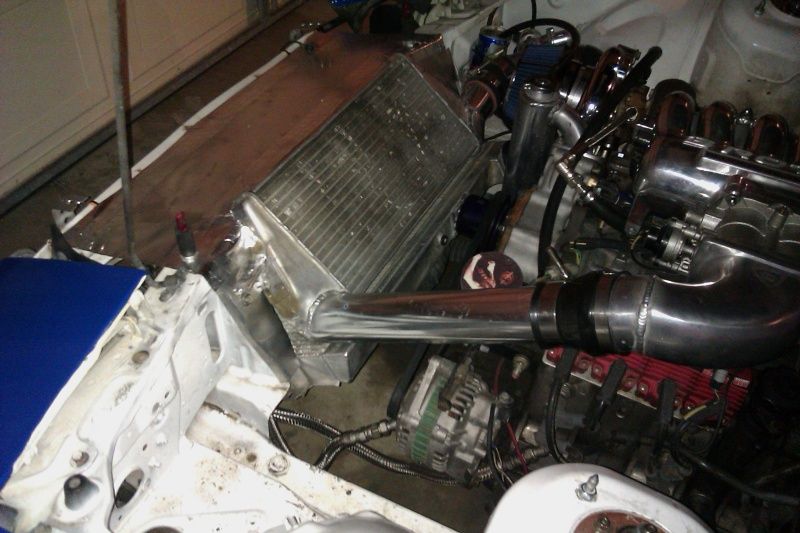
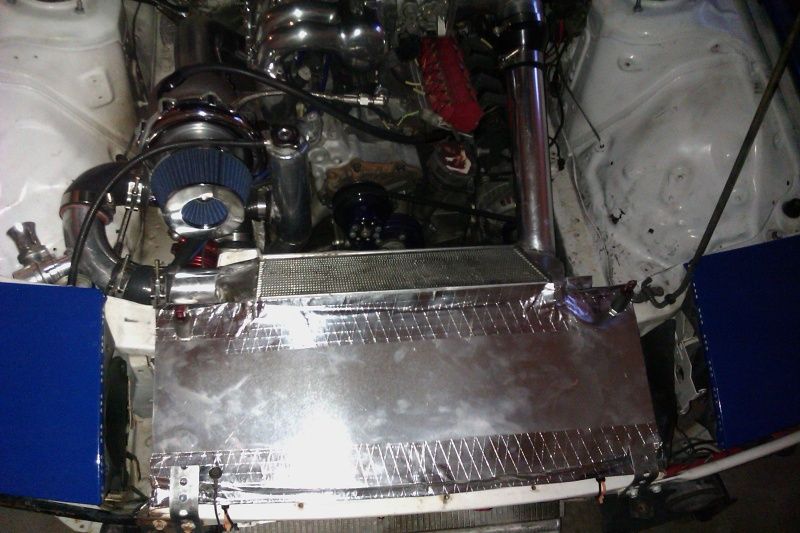
aero finally came in so i can start on the beauty/body work.
(aero is from hotline and fits very very well. this pic is of it just set on the car, no mounting done yet)
have a few drift events under the belt with the new setup. still ironing out problems but its seasoning well.
last weekend i had a few set backs. blew the heater core coolant port cap.
had an off course that netted in losing exhaust hangers. took exhaust off and ran open dp for rest of the event. was amazing sounding.
backing up my driveway though, the dp flange caught on a raised lip in my cement sidewalk and it wadded the dp up, so that needs to be rebuilt.
list of other things needed:
mr2 pump bracket built and pump plumbed and installed
redo rotor 3 coil mount
floor mount the seat
repair and reinforce broken intercooler mounting tab
build bash bars
find second job


If you don't mind me asking how did you order from HOTLINE? All I see is a 'store website coming soon' on their site. Also what did the kit run you cost wise?
+1 Vote for a blue hood.
+1 Vote for a blue hood.
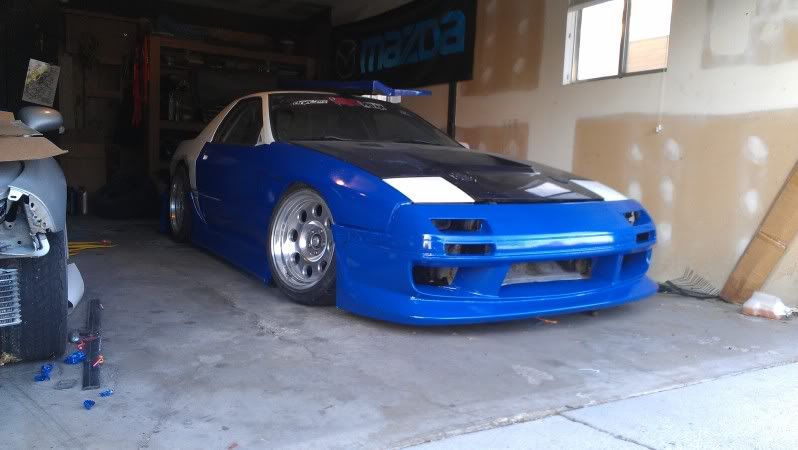
the blue is vinyl i bought from art supply store
i just messaged justin on FB
i just messaged justin on FB
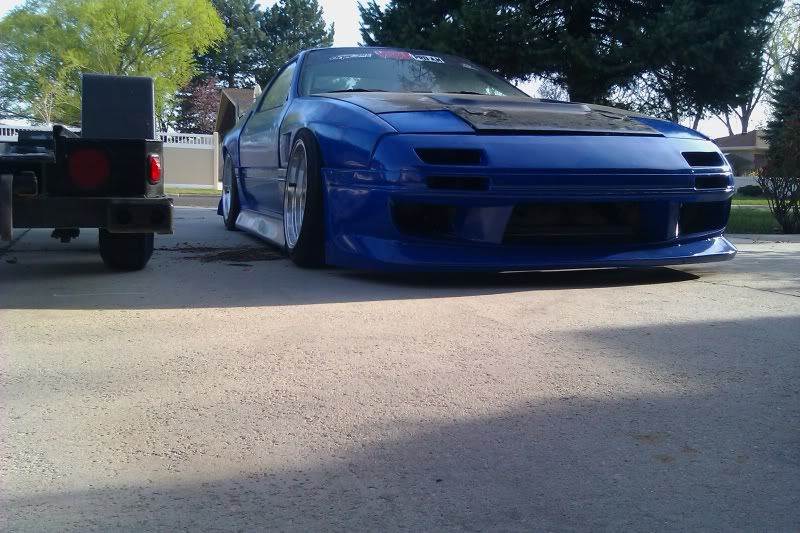
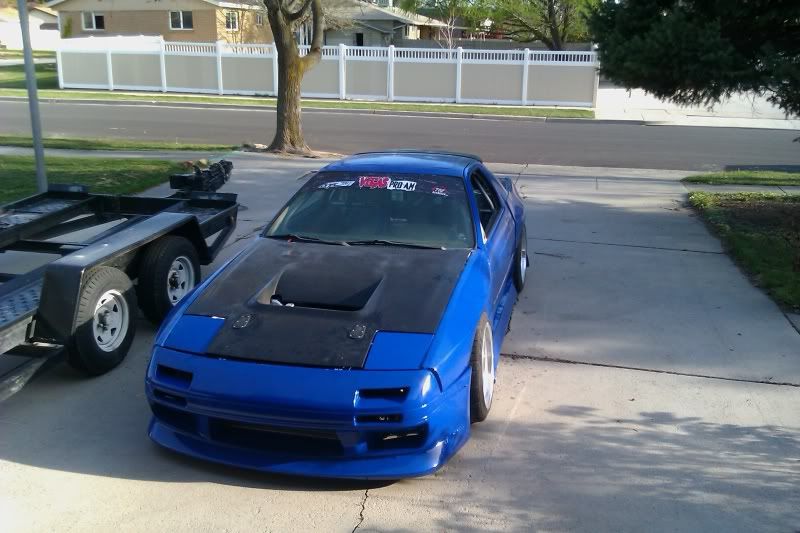
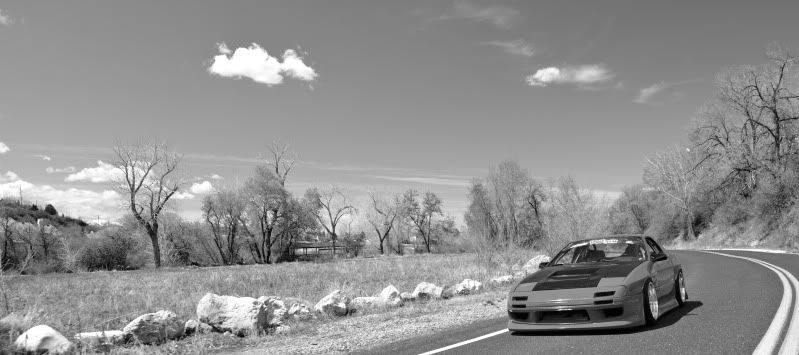
had a photoshoot yesterday, these are some of the preliminary shots.
this car is so brutal on the streets.. twice i had to stop and reattach body panels

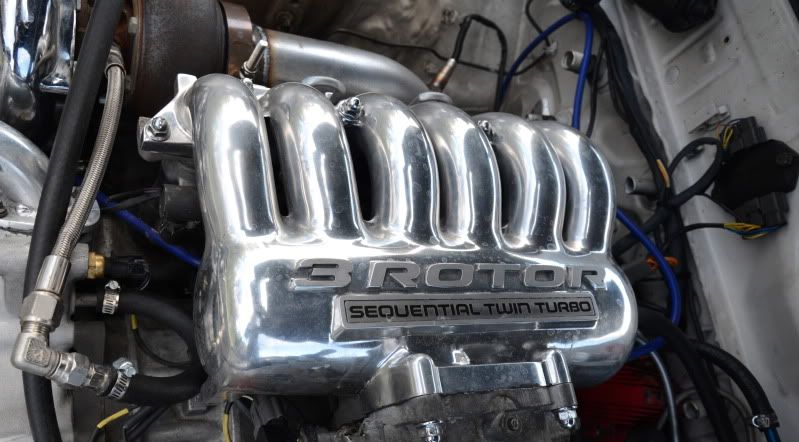
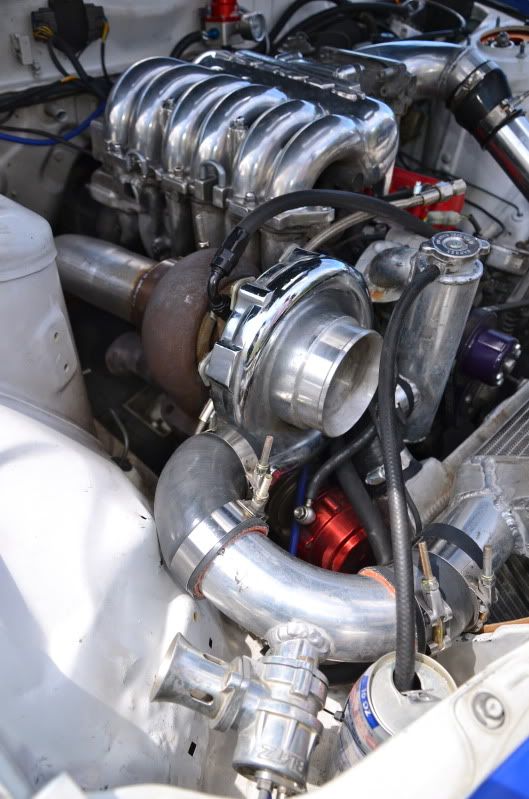
the engine doesnt really look pretty anymore but thats ok. this is a track car. no garage queen here.
this car is so brutal on the streets.. twice i had to stop and reattach body panels
the engine doesnt really look pretty anymore but thats ok. this is a track car. no garage queen here.
so with a newfound power and super lowness something happened. i killed the clutches in my diff. the chassis has over 200k on it and im sure still the same oil that was poured in it by some cute japanese girl that was 19 at the time.
after a few embarrassing moments of high centered car or 400hp and not able to even do a doughnut, i had enough. my internal conflicts were great though. weld the stock diff? rebuild it? install an expensive kaaz unit?
i decided to rebuild/shim it. after looking for a bit i couldnt really find a write up so i decided to go about learning and fixing it up myself. ive never been inside a clutch type diff before but here is what i learned.
i used this write up to ease my diff removal
http://www.norotors.com/index.php?topic=3272.0
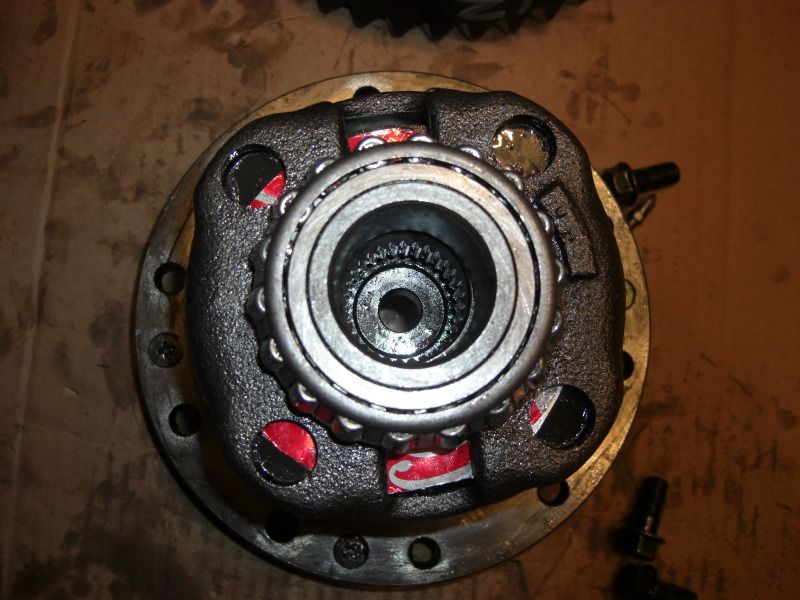
after diff is out of the car, and you pull the cartridge out of the case, you will have this oily mess on your kitchen table

take note of a key feature; alignment marks of some sort
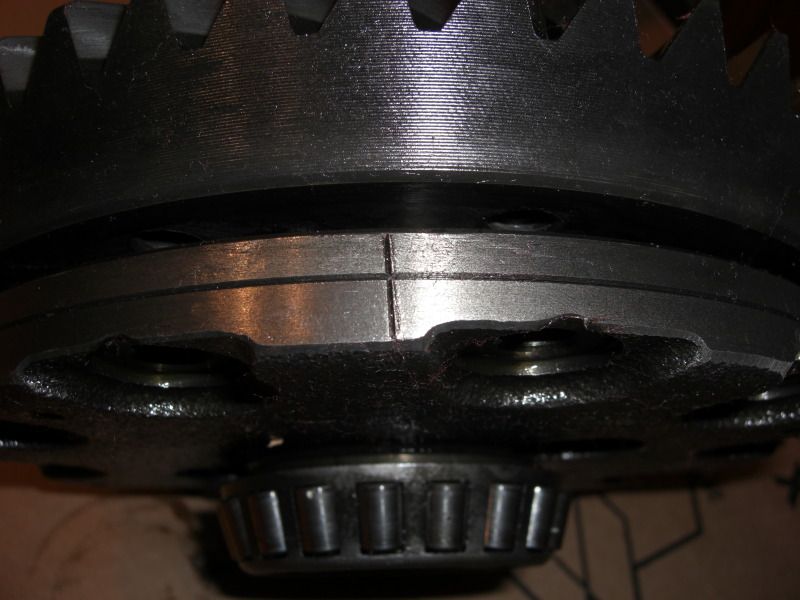
take off the ring gear and expose these little bastard screws that hold the diff together. make sure to use the correct size screw driver, the screws will strip easily. also a trick i learned is to put a pair of vice grips on two opposing ends of the diff. this will keep it from spreading open and make it easier to remove the screws; do this when re-installing screws too, or you can use a bench vice.
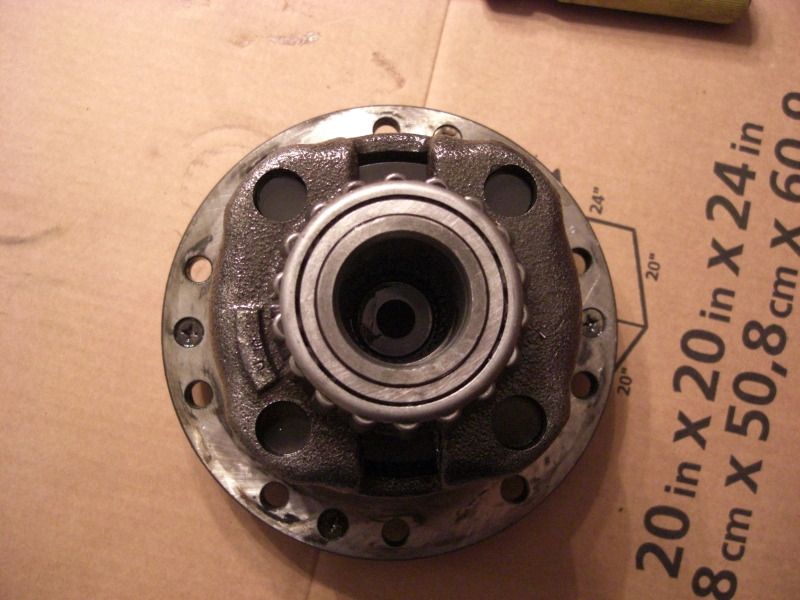
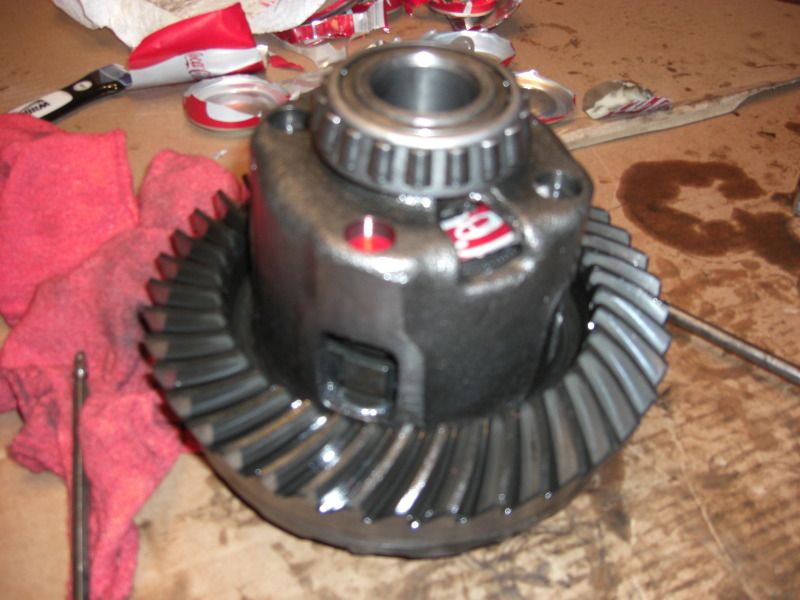
first peering inside
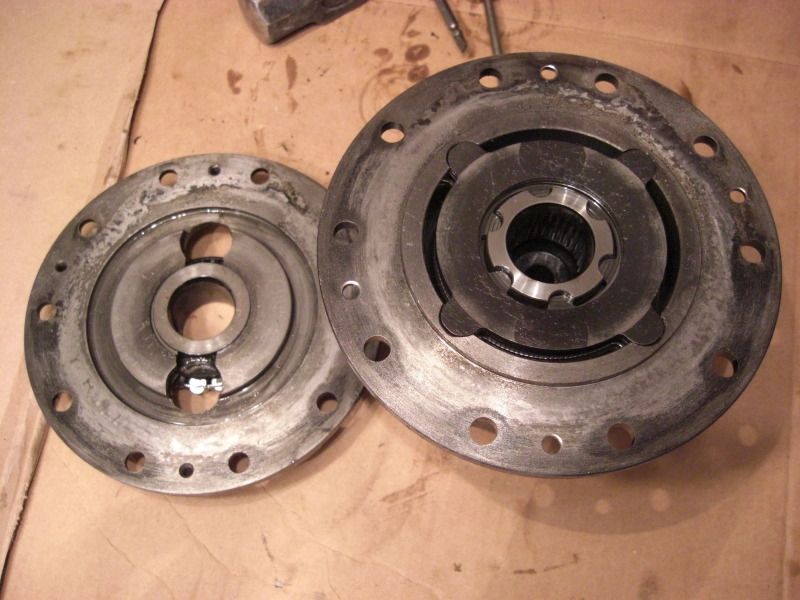
clutch pack out of cartridge
make sure to pay attention to how the stack goes. dont want to redo this sloppy messy job because you put something in backwards
check out how torn up these things are
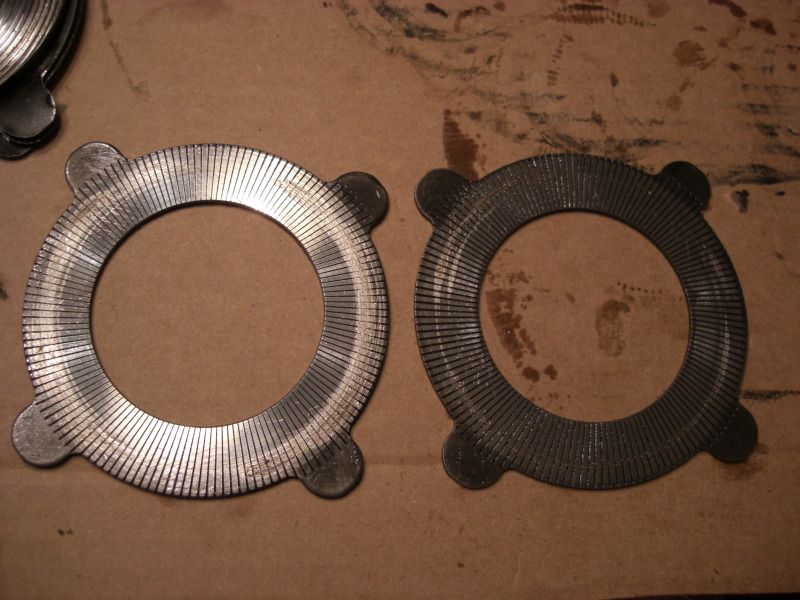
the springs show wear too. i just put the worn spring in the center of the two other not worn springs.

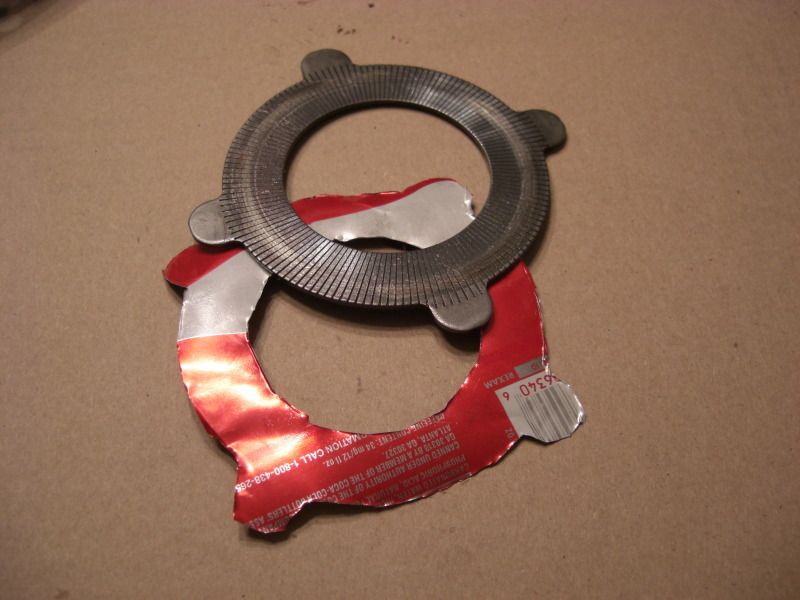
i also slammed a few cokes so i could build some shims
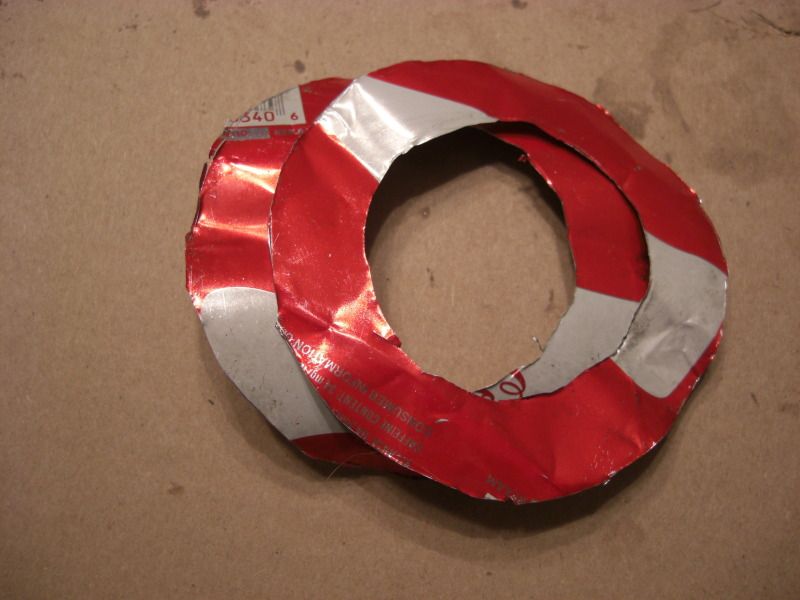
first design were these; i made 4 total
but after the reinstallation kept buggering up, i clipped off the ears and it made it an easier job to put together. the shims go on the outsides of the clutch pack, between the springs and cartridge
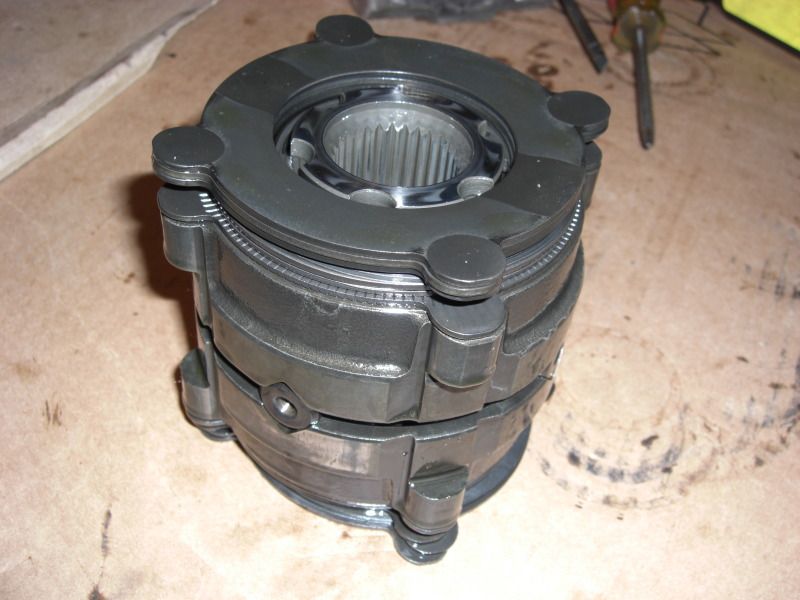
reinstalled
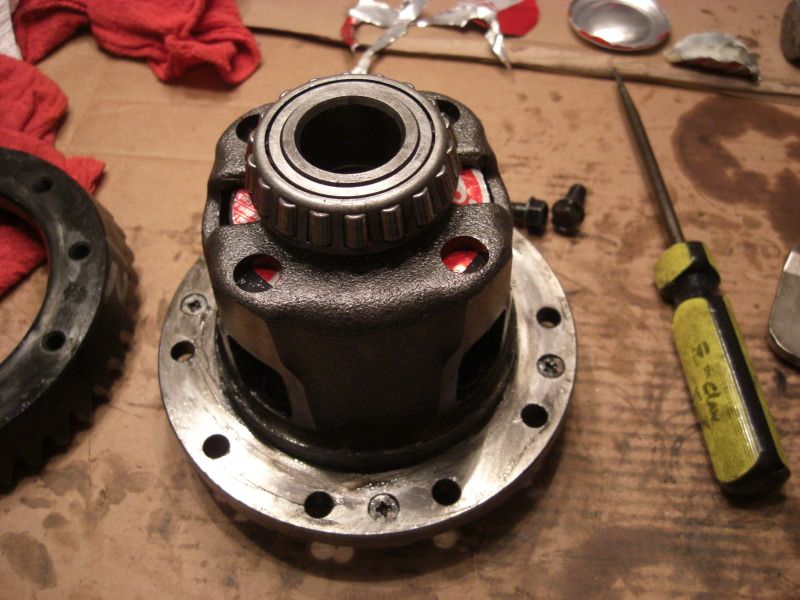
put cartridge back in housing and put everything back together. tomorrow i will find out if this worked or if im going to have to tear it all down again.
after a few embarrassing moments of high centered car or 400hp and not able to even do a doughnut, i had enough. my internal conflicts were great though. weld the stock diff? rebuild it? install an expensive kaaz unit?
i decided to rebuild/shim it. after looking for a bit i couldnt really find a write up so i decided to go about learning and fixing it up myself. ive never been inside a clutch type diff before but here is what i learned.
i used this write up to ease my diff removal
http://www.norotors.com/index.php?topic=3272.0
after diff is out of the car, and you pull the cartridge out of the case, you will have this oily mess on your kitchen table
take note of a key feature; alignment marks of some sort
take off the ring gear and expose these little bastard screws that hold the diff together. make sure to use the correct size screw driver, the screws will strip easily. also a trick i learned is to put a pair of vice grips on two opposing ends of the diff. this will keep it from spreading open and make it easier to remove the screws; do this when re-installing screws too, or you can use a bench vice.
first peering inside
clutch pack out of cartridge
make sure to pay attention to how the stack goes. dont want to redo this sloppy messy job because you put something in backwards
check out how torn up these things are
the springs show wear too. i just put the worn spring in the center of the two other not worn springs.
i also slammed a few cokes so i could build some shims
first design were these; i made 4 total
but after the reinstallation kept buggering up, i clipped off the ears and it made it an easier job to put together. the shims go on the outsides of the clutch pack, between the springs and cartridge
reinstalled
put cartridge back in housing and put everything back together. tomorrow i will find out if this worked or if im going to have to tear it all down again.
Joined: May 2006
Posts: 3,881
Likes: 3
From: Jacksonville, Tampa & Tallahassee
Yes! a writeup with pics, finally. Thanks.
Do you have a way of measuring break away torque without completely reinstalling the pumpkin? I've read some threads on the miata forums and they are shooting for around 90 ft/lbs keeping in mind that readings typically drop a least 10 ft/lbs once the shims and clutches settle in. Considering that the FC is significantly heavier I'd imagine you'd want at least 100-115 ft/lbs breakaway (once settled)
Do you have a way of measuring break away torque without completely reinstalling the pumpkin? I've read some threads on the miata forums and they are shooting for around 90 ft/lbs keeping in mind that readings typically drop a least 10 ft/lbs once the shims and clutches settle in. Considering that the FC is significantly heavier I'd imagine you'd want at least 100-115 ft/lbs breakaway (once settled)
Next episode will be installing and wiring electric Mr2 steering pump
i may have posted this elsewhere but whatever

last night i changed my clutch hydraulics because with the car running it was hard to change into reverse and no amount of bleeding would alleviate the issue. also had an issue with the starter sometimes not catching the ring gear or grinding noises.
after i changed both master and slave for the clutch, i climbed underneath the car to find that i was missing a starter bolt. thought that was the issue with the starter but then i noticed that the engine was seperated from the bell housing about 1/4 inch and i was missing 2 bellhousing bolts and the remaining were relatively loose. also noticed the engine was skewed a bit, upon investigation, i found the drivers side engine mount under the car was loose. replaced bolts, tightened everything down again and reinstalled starter.
after cleaning everything up, i tried out the starter and clutch. easy to shift into all gears and it starts correctly. making me think now that the shifting issue was the trans input shaft was not lined up with the e-shaft so it was binding and causing hard shifts.
just upkeep and maintainence so far i have had to replace turbo to mani bolts(heat cycle of turbo loosened them and two fell out), repair broken ic tab(probably broke due to loose engine mount). replace transmission bolts. rebuild diff. replace clutch hydraulics. rebuild down pipe. replace 3 exhaust hangers.

was having high idle issues and determined that a good spot to start was the throttle body so last night i stripped it of all of the overly complicated junk and cleaned it up and reinstalled. have yet to try and run it with the new setup but it sure does look better.
so one day i was having fun with the car and then i noticed a really funny noise
i took video of this rattly clanky wtfy sound
today i decided to finally dive in and figure out this mystery. with velma giving me felash and daphney being silly and dumb, i pulled the trans expecting a shot clutch and fuktup pieces..
i found no such thing. clutch was perfect. a little dust and thats it.
argh..
so then i thought possible exhaust sleeve?
and pulled the turbo off

then i noticed instantly.. center housing sleeve looked wacky and when i stuck my finger in there, it was pretty wobbly but no ability to pull it out.
oh and it also looked like this
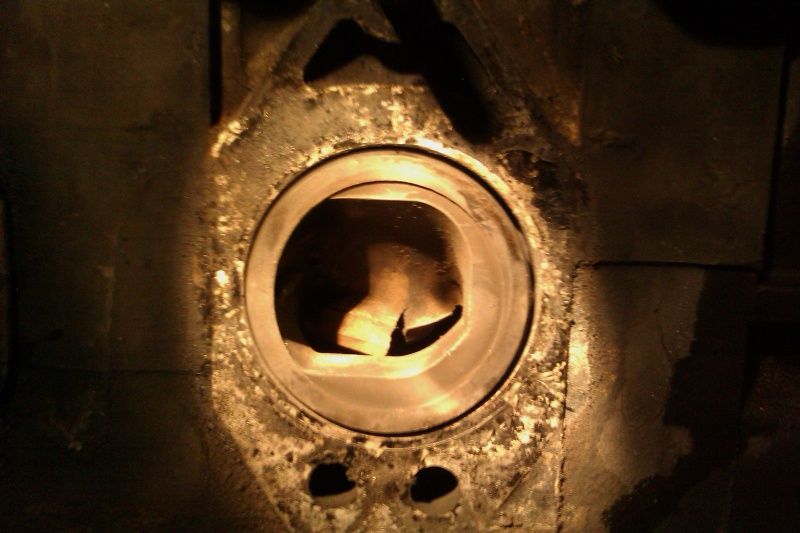
compared to the other sleeves
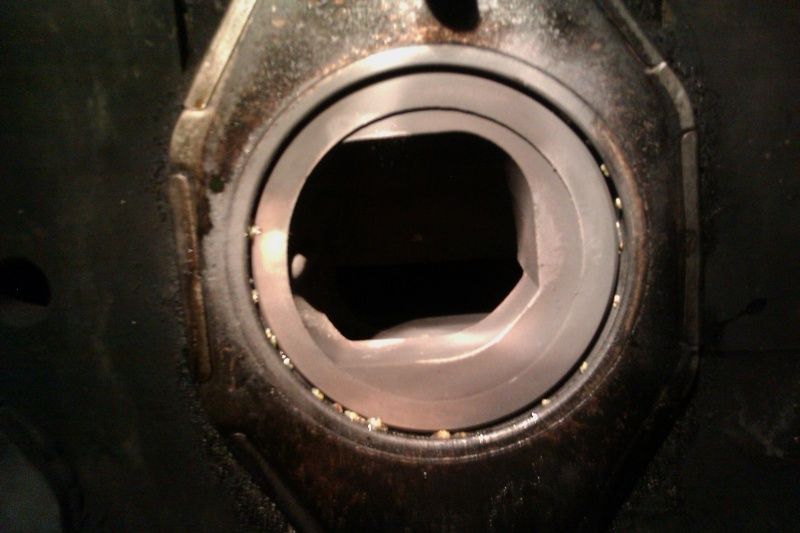
so.. a quick call to karack and we decided that the only real not hillbilly way to fix this mess is to rebuild a perfectly good running 20b.
eff..
velma go away
i took video of this rattly clanky wtfy sound
today i decided to finally dive in and figure out this mystery. with velma giving me felash and daphney being silly and dumb, i pulled the trans expecting a shot clutch and fuktup pieces..
i found no such thing. clutch was perfect. a little dust and thats it.
argh..
so then i thought possible exhaust sleeve?
and pulled the turbo off
then i noticed instantly.. center housing sleeve looked wacky and when i stuck my finger in there, it was pretty wobbly but no ability to pull it out.
oh and it also looked like this
compared to the other sleeves
so.. a quick call to karack and we decided that the only real not hillbilly way to fix this mess is to rebuild a perfectly good running 20b.
eff..
velma go away
true. im not saying i feel lucky cause i know it could be way worse. its just frustrating to have basically a throw away part be the reason i have to tear down my otherwise perfectly running car. there is a lot of summer left i was hoping to enjoy
Can't wait to see this back in action again! Good luck.
Joined: May 2006
Posts: 3,881
Likes: 3
From: Jacksonville, Tampa & Tallahassee
How on earth did that happen? What does the 20b sleeve look like on the inside?
I used n/a rotor housings on my build which have those stupid wings in the exhaust sleeves. My aging builder forgot to swap them out so I had to air chisel/grind them out. A gear oil soaked rag was forced into the chamber after the a large portion was chiseled out and it caught most of the shavings from grinding the port smooth afterward. I was skeptical but the engine runs great and pulls 20+ vac
I used n/a rotor housings on my build which have those stupid wings in the exhaust sleeves. My aging builder forgot to swap them out so I had to air chisel/grind them out. A gear oil soaked rag was forced into the chamber after the a large portion was chiseled out and it caught most of the shavings from grinding the port smooth afterward. I was skeptical but the engine runs great and pulls 20+ vac

