My Goopy, To4r, Ps1000 final build
 12-03-12, 10:33 AM
#51
Rotary Freak
Thread Starter
iTrader: (2)
Join Date: Mar 2006
Location: Wayne NJ
Posts: 2,508
Likes: 0
Received 0 Likes
on
0 Posts
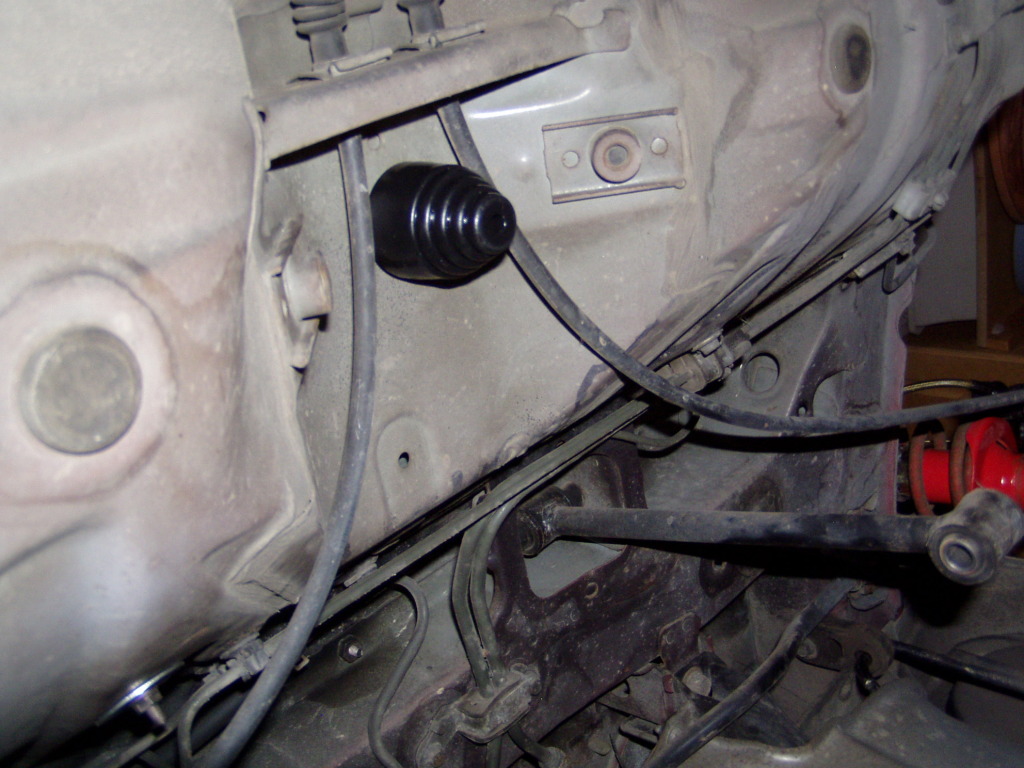
Did alittle today might get some more done later need to do some more cleaning and painting but it's almost there. Does any one know the exact spot to drill out for the pinion snubber from under the car


 12-04-12, 02:46 PM
#57
Rotary Freak
Thread Starter
iTrader: (2)
Join Date: Mar 2006
Location: Wayne NJ
Posts: 2,508
Likes: 0
Received 0 Likes
on
0 Posts
Yeah I think I'm just gonna install just the diff and subframe to make it alittle easier navigate around. I still have to shorten my fuel line and will need room to figure it all out. I got new ss rear brake lines because I didn't feel line running new ss back there and the hard line was in good condition so I jus left it. New comp front diff mount, new trans seal, oring and gaskets, got all my radio stuff just have to wire it up. painted the front cast part of my diff, ordered rear comp diff bushings, and got some LSD additive for when I finally put some new fluid in. Also spent the big bux on an oem outter cv boot kit
12-10-12, 05:56 PM
#58
Rotary Freak
Thread Starter
iTrader: (2)
Join Date: Mar 2006
Location: Wayne NJ
Posts: 2,508
Likes: 0
Received 0 Likes
on
0 Posts
Got the last pieces of the rear, comp diff bushings..
Gonna bring the diff to work tomorrow get them pressed in any advice reguarding installing these or is it strait forward..
Also got a free set of alpine speakers gotta figure out where to mount them..
Gonna bring the diff to work tomorrow get them pressed in any advice reguarding installing these or is it strait forward..
Also got a free set of alpine speakers gotta figure out where to mount them..
12-11-12, 07:28 PM
#60
Rotary Freak
Thread Starter
iTrader: (2)
Join Date: Mar 2006
Location: Wayne NJ
Posts: 2,508
Likes: 0
Received 0 Likes
on
0 Posts
Thanks man basically 8yrs of a build redone in like 6 months..
Today I brought the diff to work today didnt have to get too crazy was able to do the diff bushings with basic tools first I drilled the old bushings center out. It mad it easier the remove the metal sleeves I used an air chisel but they came out easily enough to use a chisel and hammer. Then I cleaned up the holes with a wire wheel lubed them up then thought how I was gonna hold this big *** diff up and press them in. Came up with resting the diff on the work bench And using the bench vise to push them in could get them in evenly using the vice but I got them each started enough just to stay in the diff then I laid the diff down put a couple blocks under the ear and beat the **** out of them with a rubber mallet till they sat perfectly, not to bad overall u could probably do this at home.
Today I brought the diff to work today didnt have to get too crazy was able to do the diff bushings with basic tools first I drilled the old bushings center out. It mad it easier the remove the metal sleeves I used an air chisel but they came out easily enough to use a chisel and hammer. Then I cleaned up the holes with a wire wheel lubed them up then thought how I was gonna hold this big *** diff up and press them in. Came up with resting the diff on the work bench And using the bench vise to push them in could get them in evenly using the vice but I got them each started enough just to stay in the diff then I laid the diff down put a couple blocks under the ear and beat the **** out of them with a rubber mallet till they sat perfectly, not to bad overall u could probably do this at home.
12-11-12, 10:18 PM
#61
Rotary Freak
Thread Starter
iTrader: (2)
Join Date: Mar 2006
Location: Wayne NJ
Posts: 2,508
Likes: 0
Received 0 Likes
on
0 Posts
Ok I spoiled myself.. Just bought a blue NRG harness bar for the lonely 4pts I have in the garage.. Its a early Xmas gift to myself lol I hope it fit in my S5 with the auto belts supposedly it bolts right in I have my doubts..
Also looking at some stuff from here.. What u guys think?
http://www.pro-wholesale.co.nz/ultra...cts/fc-fd-rx7/
Also looking at some stuff from here.. What u guys think?
http://www.pro-wholesale.co.nz/ultra...cts/fc-fd-rx7/
12-12-12, 04:29 PM
#62
Rotary Freak
Thread Starter
iTrader: (2)
Join Date: Mar 2006
Location: Wayne NJ
Posts: 2,508
Likes: 0
Received 0 Likes
on
0 Posts
Got the rears snubber set up its not perfect. I'll have to shim it some more, I got like a 1/4in between the snubber and the diff.
I had a couple friends there so I took advantage and used them to help install the subframe and diff all went smoothly. Got my fuel line setup just have to shorten the return, and start bolting up the rest of my **** then it'll stand on its own feet again. Finish up some wiring and get a basemap then align, tune, and brap. Brought home my 370 wheels so I can see what they look like
I had a couple friends there so I took advantage and used them to help install the subframe and diff all went smoothly. Got my fuel line setup just have to shorten the return, and start bolting up the rest of my **** then it'll stand on its own feet again. Finish up some wiring and get a basemap then align, tune, and brap. Brought home my 370 wheels so I can see what they look like
12-16-12, 07:06 PM
#63
Rotary Freak
Thread Starter
iTrader: (2)
Join Date: Mar 2006
Location: Wayne NJ
Posts: 2,508
Likes: 0
Received 0 Likes
on
0 Posts
Got the whole rear done, wheels on and sitting on the ground. Gotta do the exhaust and driveshaft, alittle wiring, trim the fuel return line, and get a basemap. Soo close to brapping
 12-23-12, 03:47 PM
#67
Rotary Freak
Thread Starter
iTrader: (2)
Join Date: Mar 2006
Location: Wayne NJ
Posts: 2,508
Likes: 0
Received 0 Likes
on
0 Posts
well today got a new trans tailshaft seal in, driveshaft is cleaned painted and installed, and exhaust is completly installed. crooked, but installed lol
gotta fix the exhaust, wire a couple switchs, find out which way my 2 step wires are ran, cut the fuel return lines at the tank, wire my radio, and get a basemap.
havent gotten a chance to play with the harness bar but it looks like its gonna suck to install... more tomorrow
gotta fix the exhaust, wire a couple switchs, find out which way my 2 step wires are ran, cut the fuel return lines at the tank, wire my radio, and get a basemap.
havent gotten a chance to play with the harness bar but it looks like its gonna suck to install... more tomorrow
12-24-12, 08:42 AM
#68
Rotary Freak
Thread Starter
iTrader: (2)
Join Date: Mar 2006
Location: Wayne NJ
Posts: 2,508
Likes: 0
Received 0 Likes
on
0 Posts
well emailed ludwig for a base map to get started, today ill bang out some wiring and the return line ill just need a new screww clamp to keep it secure
12-25-12, 07:27 PM
#69
Rotary Freak
Thread Starter
iTrader: (2)
Join Date: Mar 2006
Location: Wayne NJ
Posts: 2,508
Likes: 0
Received 0 Likes
on
0 Posts
well got most the interior together and wired, just need to figure out which wire to cut on the stock fuel pump connector to use to power the pump i have it set up to use the stock electrical connectors. im pretty sure its black and white..
01-02-13, 08:51 PM
#70
Rotary Freak
Thread Starter
iTrader: (2)
Join Date: Mar 2006
Location: Wayne NJ
Posts: 2,508
Likes: 0
Received 0 Likes
on
0 Posts
Got my basemap from Ludwig. I just need to hook up the fuel pump wire to actually start it. Does any only know the color of the power wire the the fuel pump at the tank top? Is it blue or black and white? I need to go get oil and 2 stroke and fill everything up load my map, then ill bring it to work. And finish all the little things up almost there
01-02-13, 09:38 PM
#71
I've seen this on both my S5's so I don't think it's a fluke.
The harness that plugs into the bulkhead terminates at the shock tower and joins the chassis harness.
The wire colors in this subharness do not relate to the FSM at all however, the pigtail off the main harness is a correct match.
Find the L/G on the chassis side and the corresponding wire in the subharness is the one you want, regardless of color.
01-05-13, 07:33 AM
#72
Rotary Freak
Thread Starter
iTrader: (2)
Join Date: Mar 2006
Location: Wayne NJ
Posts: 2,508
Likes: 0
Received 0 Likes
on
0 Posts
Thanks man I brought my Power probe home so I can just zap the wires and we what happens, lol.
Picked up more fluids just need some oil and super and I'll be good to go.. Tomorrow and monday I have off so we'll see what happens I'm stooked
Picked up more fluids just need some oil and super and I'll be good to go.. Tomorrow and monday I have off so we'll see what happens I'm stooked
01-07-13, 08:10 AM
#73
Rotary Freak
Thread Starter
iTrader: (2)
Join Date: Mar 2006
Location: Wayne NJ
Posts: 2,508
Likes: 0
Received 0 Likes
on
0 Posts
So I got every thing filled up ready to go and can't get my pump to do **** not sure if I got a dud or it's hooked up wrong gonna pull it today and see what's going on would really like to start this hog
01-07-13, 03:36 PM
#74
Rotary Freak
Thread Starter
iTrader: (2)
Join Date: Mar 2006
Location: Wayne NJ
Posts: 2,508
Likes: 0
Received 0 Likes
on
0 Posts
Well got the pump all sorted. Upgraded my firmware loaded my map cranked for a bit and boom car started right up gotta lot of work to do need to add fuel and coolant leak to my list mow