
Lame '89 GTUS drift car build....


Thread Starter
Full Member
Joined: May 2012
Posts: 65
Likes: 0
From: St. Petersburg, FL
Ok, well here is my build attempt. I've been into drifting since '05. Since then I've had only 240sx drift cars s13/s14, back in April I decided to make a change.
Here is a video of me(in car s13 240sx 317rwhp) and another local drifter(Jeremy Lowe) on a practice day at the local oval track getting some tandem action.
https://www.youtube.com/watch?v=dLl5wIAGaj4
Bought an 1989 Rx7 GTUs as my starting chassis. No sunroof, manual windows, 5-lug, and turbo 2 brakes.
Seems like a proper chassis to start with, so here is what I've done so far.
I don't mind opinions, like it or not, just try to be respectful with what you say, on to the pics/updates.
I'll make it kind of a picture book with small descriptions of parts ect.
The day I got it.


Drivetrain removed.

Begining tear down.


Dry Ice magic.


Thread Starter
Full Member
Joined: May 2012
Posts: 65
Likes: 0
From: St. Petersburg, FL
Got tired of looking at the wheels that came on it, so I put the set from my last car on it(MB Battles 17x9.5 +15 offset)

Motorset

Mount kit (grannys speed shop)

Wasn't happy with the condition of the doors, so I found a couple clean ones(red) at the local junk yard.
Test fitting mount kit.


Tranny mount not installed yet, but looks like it's where it should be.

Headers came in(1 3/4"), got them from jagsthatrun.com.

Headers installed.

Motor/tranny didn't seem to help the ride height.

So I ordered some coilovers (megan racing track series)12k front 10k rear since I won't be able to run a front swaybar.

Went ahead and installed them, not adjusted yet.

I also srapped my stock hood, found a really clean turbo 2 alum. hood, also srapped the stock wing and replaced it with the stock "sport" wing for a more subtle look.
Installed the full energy suspension bushing kit.
And that pretty much brings us up to a few days ago. My goal at the start of this about 6 months ago was to at least have it running and driving by the end of the year, so I have a month to reach my goal. it will be close, but I still think it is completely doable. I will be updating on probably a weekly basis from here. I'm very excited about this build so far.
I suppose though that it depends on your definition of "running/driving".
Actually positioning the eng/trans into the chassis is so deceptively simple that you think you're way further along than you really are.
It's the support details that take all the time/creativity and your now tidy engine bay will fill up and get impossibly cluttered as you progress.
Not to be a Debby Downer about it though...I completely approve of LSx swaps (you should look into the Ronin Speedworks mounting kit, it will make your life considerably easier) and plan one for myself.

my coilovers are 8/6 with no roll bars. absolutely fine. you can cut your spring rates almost in half and have better working suspension.
side note.. i like how this thread is called FLlame.. like you expect to get flamed for putting a v8 in and drifting a gtus
side note.. i like how this thread is called FLlame.. like you expect to get flamed for putting a v8 in and drifting a gtus
Thread Starter
Full Member
Joined: May 2012
Posts: 65
Likes: 0
From: St. Petersburg, FL
As for the spring rates, I've always ran low(8/6) spring rates and loved it, but I also usually had at least a front sway bar. If I end up not liking it, I will change to a lower spring rate for sure.
I've never driven a v8, or an fc, so I wasn't really sure which rates to get.
I shouldnt mention I was doing some pricing out for a 2jz or RB25 when I started to realize how slim chance it was to ever find a 20b again.... Maybe fully built turbo miata motor... Anything but a v8 though..
I love the car as it is... but I've always wanted power. This NA is gonna pop at some point, and I really rather not go back to another NA... Unless its 3 rotors.
I love the car as it is... but I've always wanted power. This NA is gonna pop at some point, and I really rather not go back to another NA... Unless its 3 rotors.
Trending Topics
Thread Starter
Full Member
Joined: May 2012
Posts: 65
Likes: 0
From: St. Petersburg, FL
I brought the car over to a friends shop, I put the new t2 hood on the car for the ride over, kinda excited just to see the hood on the car haha.
We took the drivetrain back out to make some room for the headers, and sensor on the rear of the intake, and remove the stock tranny mounts.
Did a quick pressure washer rinse of the engine bay while the motor was out. Put the motor back in and bolted up the tranny crossmember.


We took the drivetrain back out to make some room for the headers, and sensor on the rear of the intake, and remove the stock tranny mounts.
Did a quick pressure washer rinse of the engine bay while the motor was out. Put the motor back in and bolted up the tranny crossmember.


Thread Starter
Full Member
Joined: May 2012
Posts: 65
Likes: 0
From: St. Petersburg, FL

Thread Starter
Full Member
Joined: May 2012
Posts: 65
Likes: 0
From: St. Petersburg, FL
Starting on the wiring mess.


EGR block off plate(delrin).

I wanted to clean out the gas tank prior to installing fuel stuff because the car was sitting for 6 years prior to me buying it, upon inspecting it, decided it was better to just find a replacement tank. Found a local tank for $50, and before installing it, my buddy talked me into letting him make some solid subframe/diff mounts out of nylon/aluminum plate he had laying around at the shop(didn't take much for me to agree to that haha). Here are some pics of them.


New clutch line.

Thread Starter
Full Member
Joined: May 2012
Posts: 65
Likes: 0
From: St. Petersburg, FL
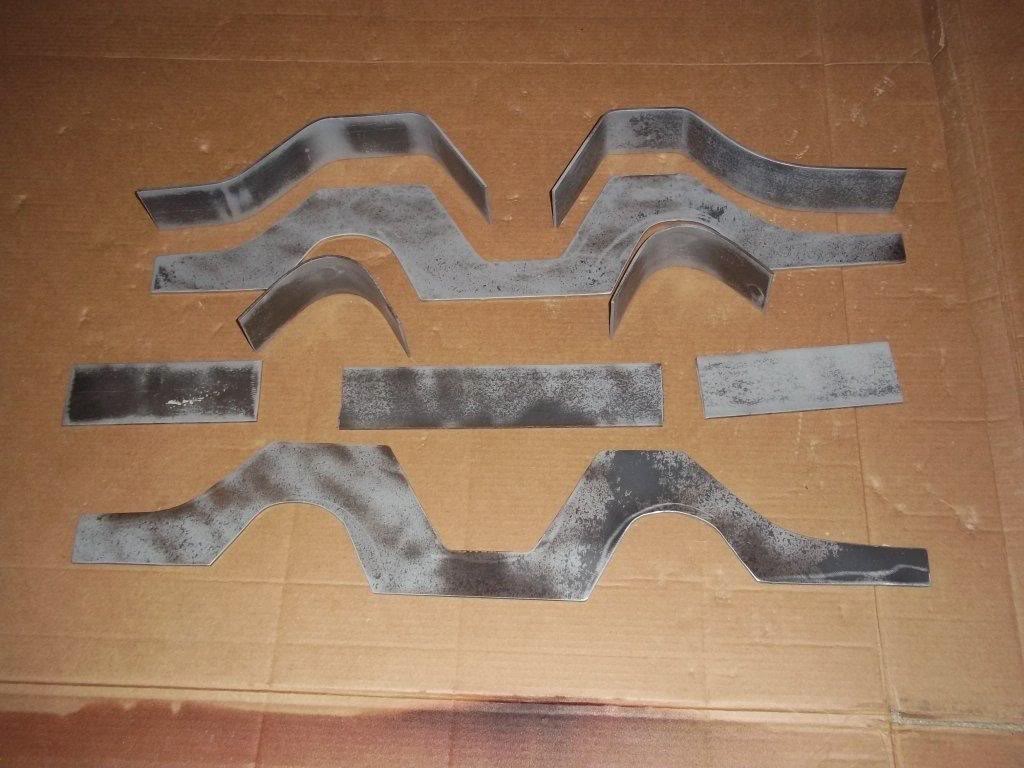
After seeing the headers mounted with tranny mount installed, we were dreading how to route the exhaust over the tranny mount as they suggest to do it. Best solution we could think of was just to fab up a new mount with arches to make life easy to route exhaust.


And now for some bad new.....
Went to bolt up the driveshaft after finishing the tranny mount and it only goes in about 2" and then hits an imaginary wall. Closer inspection reveals that the shaft is not centered in the hole on the rear of the cover of the tranny, stopping the driveshaft from going in all the way. After taking apart the tranny, we are thinking the previous car this motorset came from might have been in some king of accident tweaking/bending the rear tranny cover about 1-1.5mm to the left. All the internals look brand new clean, does look like a small amount of water got in there, but nothing that would cause the issue I am having. Trying to find a local friend with a t56 to try the back cover theory before spending the $200 on a new one.


Thread Starter
Full Member
Joined: May 2012
Posts: 65
Likes: 0
From: St. Petersburg, FL
I didn't do a part out thread, all of the stock items that I didn't use I donated to a local rx7 enthusiast/purist that likes to restore them and owns 13 rx7's. I believe the radio/compartment is the stock setup.
Looks good I like the new mount haha, good deal. What are your plans for the non-concentric tailshaft?
seeing how the LS just drops in almost makes me wanna own one...
looks great, only thing I'm worried about is the tranny mount, would be stronger as a whole piece rather than welded, but if it holds it holds.
looks great, only thing I'm worried about is the tranny mount, would be stronger as a whole piece rather than welded, but if it holds it holds.
Thread Starter
Full Member
Joined: May 2012
Posts: 65
Likes: 0
From: St. Petersburg, FL
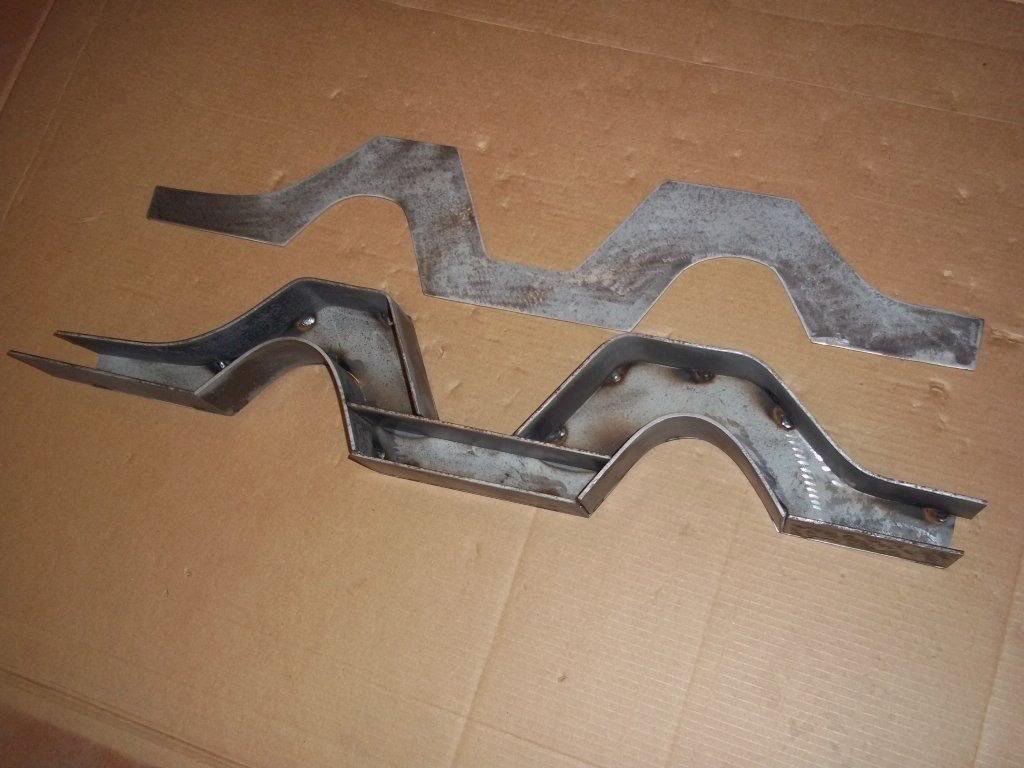
Yeah, the new mount isn't as pretty as the original, but I don't think there will any problem with the strength, it's welded on both sides, and has a gusset, and we added the 2 extra bolt mount points on the tranny tunnel. It will be prepped and painted of course.
I'll submit two examples that solve the exhaust clearance problem in a more structurally sound way:
This is a one off piece by mr2guru on the norotors forum.
This last is a production part from Ronin Speedworks:
Thread Starter
Full Member
Joined: May 2012
Posts: 65
Likes: 0
From: St. Petersburg, FL
Both of those look awesome, I'm a bit confused on how the first one actually mounts to the tranny though, looks like it is literally just sitting in the valley of the mount? Same for the second one, but I do see a tab on the front, just not sure if that's a mount point or gusset? Either way, those look better than what I've got. Guess I'm not the only one with that exhaust routing issue haha.
Of course you're not.
It's worth noting the load both these builders allowed for, I think there's a lot more torque present than your design can handle.
The Ronin piece is particularly well thought out, it has threaded backup plates that go inside the car. After you get the trans mounted right, these plates are glued in place and from then on you don't need access to the interior to remove the trans mount.
Thread Starter
Full Member
Joined: May 2012
Posts: 65
Likes: 0
From: St. Petersburg, FL
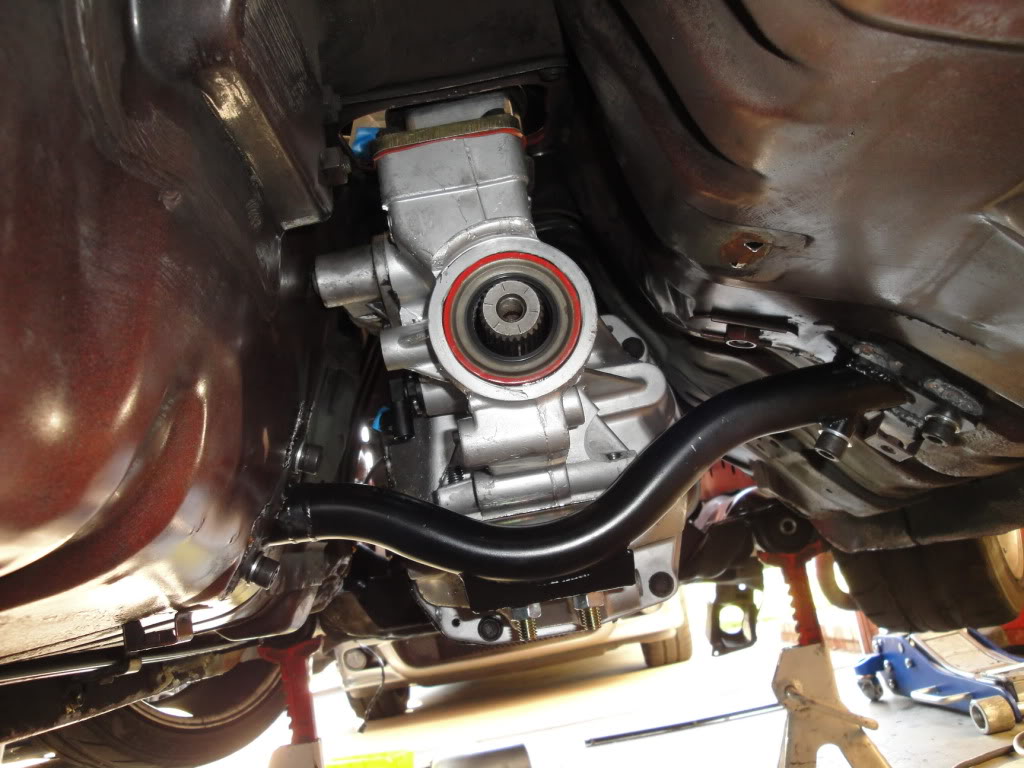
After making solid mounts for the rear diff and subframe, we decided it would be beneficial to make the front diff mount solid as well, and while the diff was out, may as well reinforce it a bit with some scrap aluminum we had laying around, overkill I assume, but damn it looks sweet.


Oil pressure sending unit adapter.

Fitment with header installed(not nearly as close as it looks, pic is decieving)

Well, found out it was as we thought, this little guy was bent about 1mm to the left. A friend of mine happened to have a junk t56 laying around for spare parts and sold me the tail housing, it fixed the problem.


Being a bit less than enthusiastic about hearing that people on the internet were questioning his tranny cross member design, my buddy decided to make some minor adjustments to it. Desided to go with Stainless Steel.

Thread Starter
Full Member
Joined: May 2012
Posts: 65
Likes: 0
From: St. Petersburg, FL
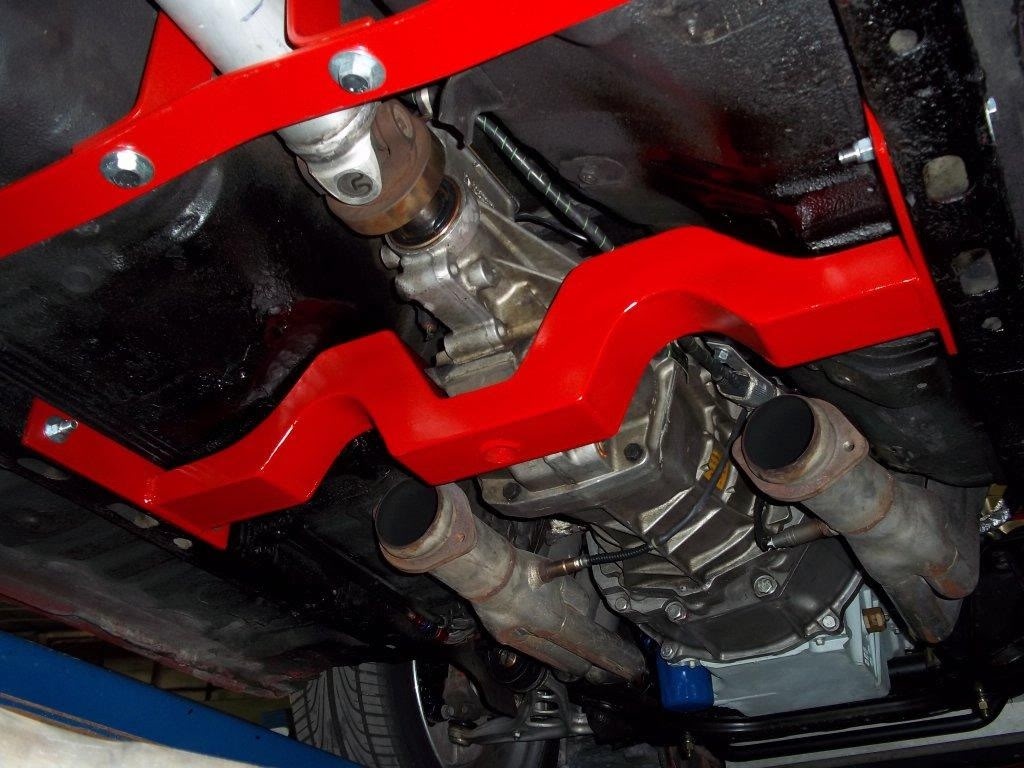
More pics of tranny mount, there are plates on the other sides of the fram rails, and the interior.


Temporary shifter until seats are installed and can fine tune what size I'd like the shifter to be permanantly.


Fuel parts came in today, hoping to have some more pics/updates soon.


Temporary shifter until seats are installed and can fine tune what size I'd like the shifter to be permanantly.


Fuel parts came in today, hoping to have some more pics/updates soon.