When you click on links to various merchants on this site and make a purchase, this can result in this site earning a commission. Affiliate programs and affiliations include, but are not limited to, the eBay Partner Network.
Well I decided to do one of these... Since the project is not really a big build like most of the threads around here, I'll call it a "journey" or a "mini-build". First off, a lot has been completed as of posting this so most of it is going to be a retrospective, then I'll follow up here with any more adventures that happen. Contents will be mostly wear item replacements, little fixes, and my (and the car's) experience becoming a rotary owner. Don't expect engine overhauls (at least I hope that is not going to be necessary), massive restorations or anything like that.
Chapter 1: Buying a rotary?
I have liked cars for a long time, but I would not say I was (or am) a car enthusiast, its more that I'm interested in almost anything engineering. I did have some dreams about cars of course and at that it has always been the low power but low weight affordable category that excited me the most. Fast forward 6-10 years to last year, at which point I started to seriously think about acquiring a fun car. This was a pretty hard choice, originally between old or new. In the end the old car route won, mostly because it provides additional benefits of being an enormous time sink. For an old car, it definitely meant FC for me. To start off, I love rotaries. The engines just fascinate me with how different and rare they are. From all rotary cars, the FC is definitely my love. I'll be honest: it is mostly about looks as I'm probably one of the two people who love the S4 FC the most.
At the start I was looking at cars over here in Europe. Most cars here are S5 convertibles, turbo at that. At first I was content with a convertible, but I changed my mind overtime as the coupe just looks better to me. As time passed I settled on an S4 NA, preferably GXL, with leather interior. Some might be surprized, but I would have taken an automatic as well. Even though I did plan to do some work I didn't want to deal with lot of welding, terrible or missing interior, things like that. As such I was looking at cars in good condition. Gotta keep in mind that parts are much more scarce around here, there are pretty much no junkyards with parts, and import from US or Japan is quite expensive. So to Craigslist I went (with the help of AutoTempest.com, great site). I spent about three months looking for The One. There were some other candidates, but the whole situation is quite hard, trying to buy sight-unseen on another continent. I ended up employing the help of a company doing imports like this, however I did miss a few good cars due to my general inexperience handling everything.
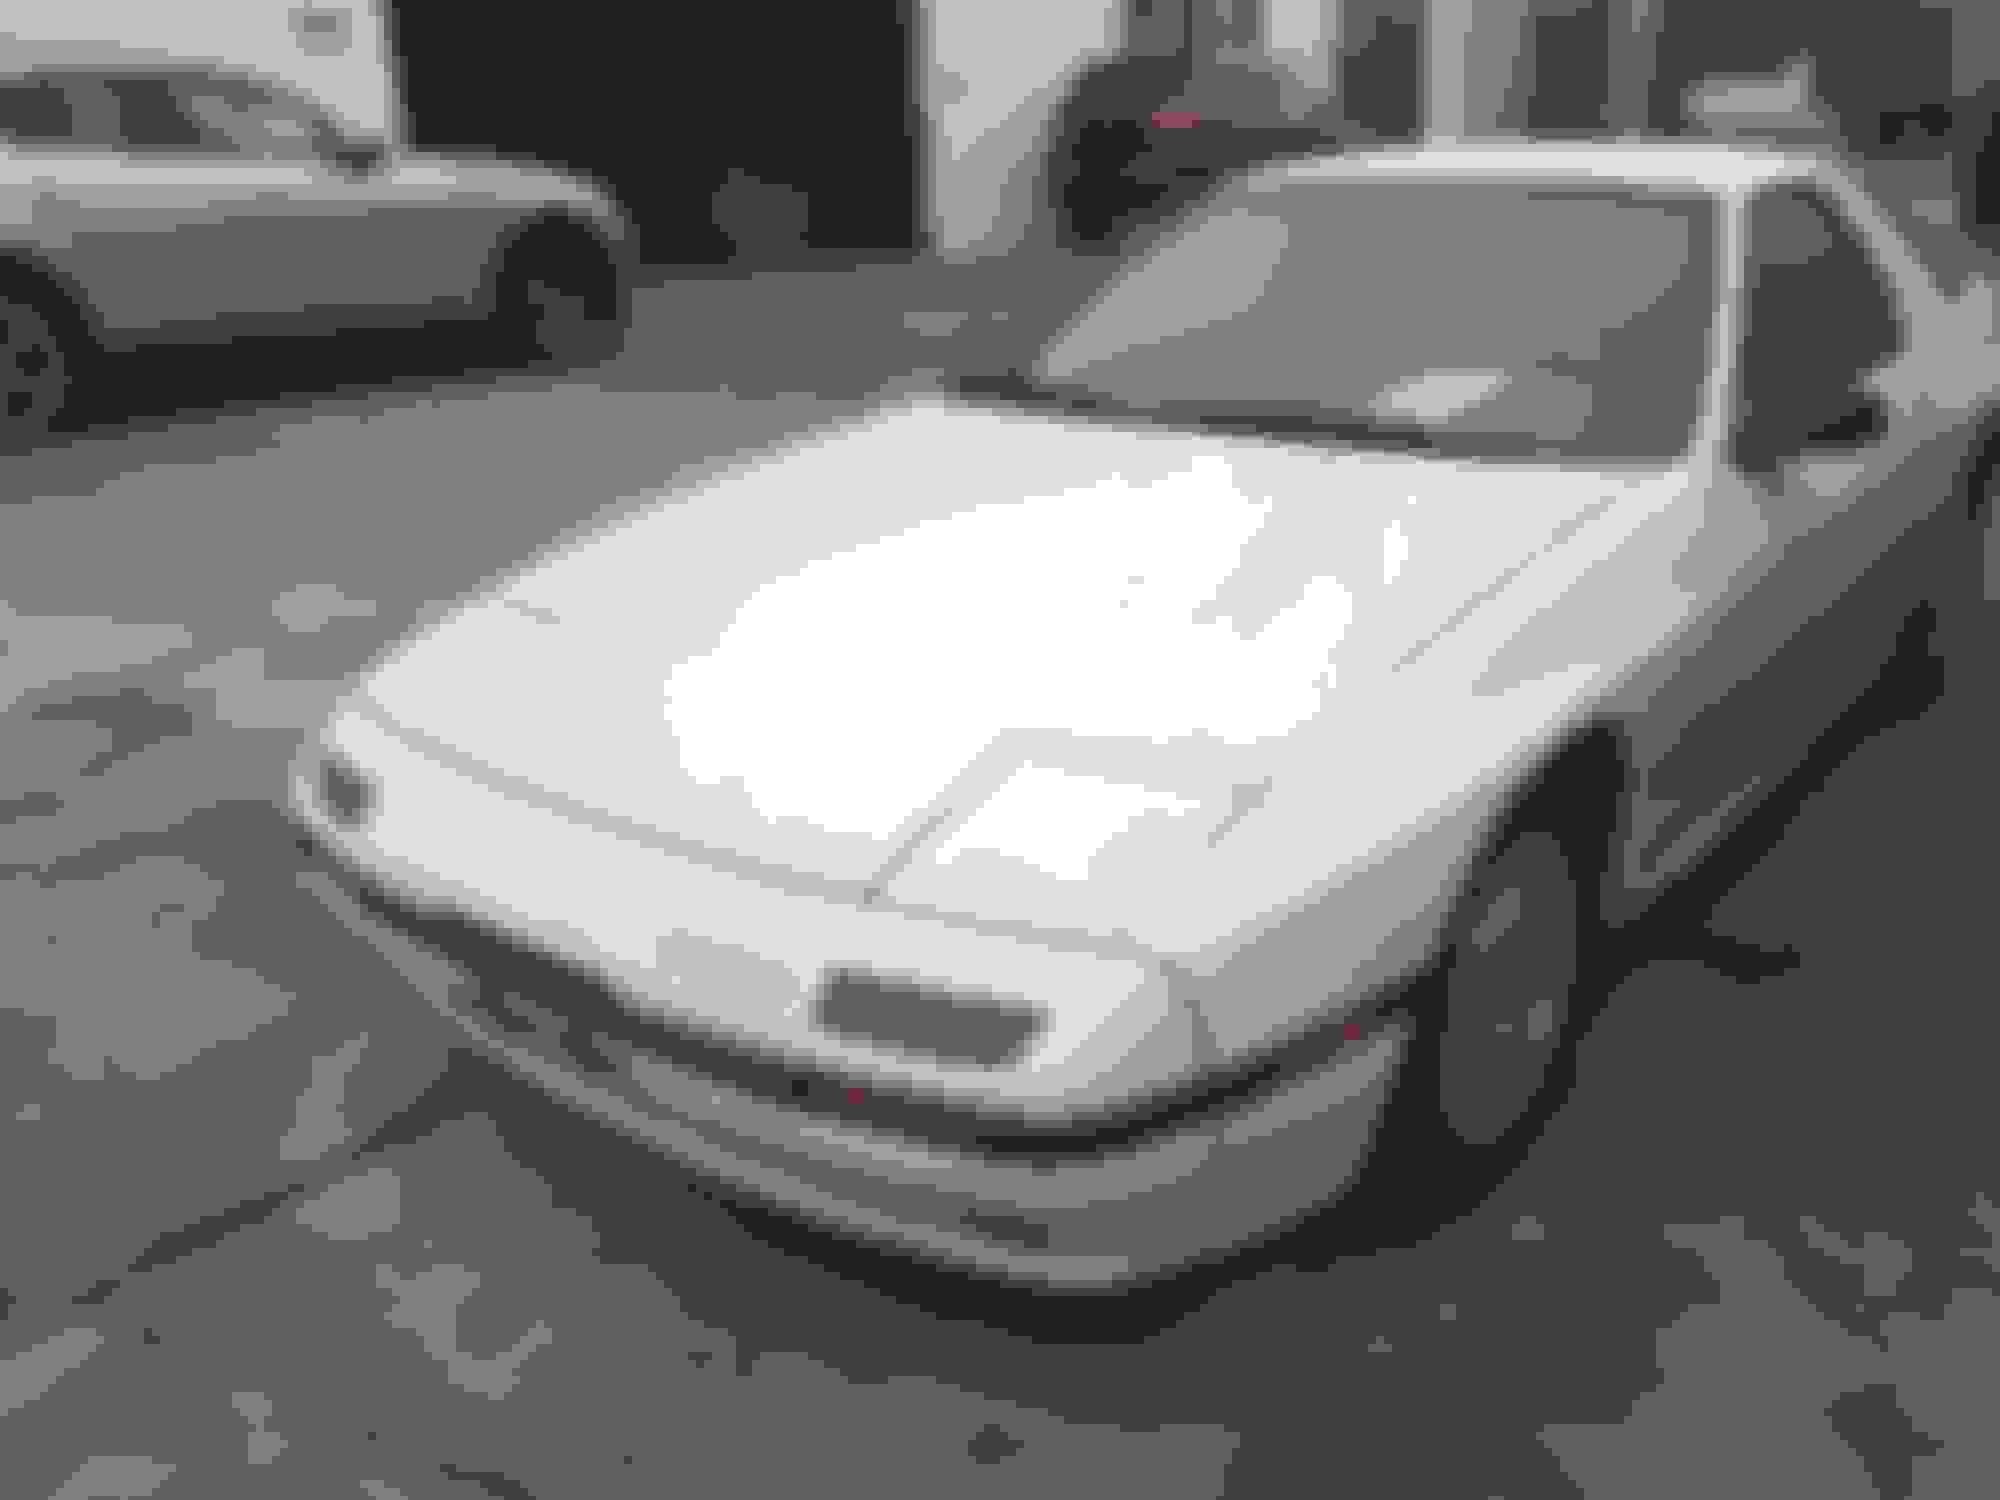
The winner in question is an '86 GXL that lived its life in the deserts of Nevada. Until I found it, after which this poor GXL went on the second overseas journey in its life, and now it has traveled over more than half the globe and ended up in Europe. Overall the import was... boring. Very boring. Nerve wrecking even. After the decision was made some time passed until the company actually bought the vehicle, then shipped it first to LA. Here it was prepared for its grand journey over the the Panama-canal, then the Atlantic. At this point, its just waiting. Months have passed, its ship delayed several times but it finally arrived in Rotterdam in early February, 2019. A smooth import tax procedure later it was shipped to Hungary where it finally arrived at the end of February. I was incredibly excited, but that is the topic for the next chapter. Enjoy the few images until then and see you next time! Nevada (from original ad) LA, picking up dirt with the rains and forest fires (2018 November)
P.S. If you have any feedback on the format I'm using (trying to provide a decent reading experience along with the pictures), feel free to post it!
To the original owner, should he happens upon this: you really cared about this beauty, for which I am incredibly grateful!
Last edited by Barnahadnagy; Sep 3, 2019 at 01:26 PM.
General plans are to have a factory condition car pretty much. Small spoiler: I will break this rule a bit in some upcoming chapters, so it would be more appropriate to say that is should look factory condition, with monetary restrictions. The car could really use a good paint but that is rather expensive and delayed indefinitely for now.
Other plans are to take it out occasionally on joy rides and to visit car meets etc. Fortunately it does no have to be a daily driver as I have access to other cars and mostly use public transport anyways.
Upon arrival the first problem was moving it into its parking space. Pushing a car uphill, turning a power steering with no power all the same time is quite hard. Then the realization hit. Its a perfectly good car, why not start it? Needless to say this made everything much easier. First order of business, check out everything on the car. Overall it seemed to be decent, but quite dirty. The interior was pretty good too. After giving it a good wash, the paint shows a lot of problems: An entire area on the right had the clearcoat peel off in patches, there are many rock chips, some small dents and a bigger dent in the back. Nothing out of expectations though.
Next up, compression test. I don't have access to a proper tester, so a regular one it is. Both rotors produce even bounces to 75-80 PSI, and an overall highest measurement of 95-98 PSI (measured with the check valve on). Satisfied with these results for a 90000 mile engine, I moved on to replacing the plugs and wires before moving the car to the proper garage. Even though the old plugs probably had 20-30k miles in them according to the service logs, they looked pretty good still.
Known issues at this point:
- Dent in the back
- Worn leather on driver's seat and steering wheel
- Spotty wheels
- Paint generally
- Temperature gauge reads halfway up (but is stable, I was not sure if this would be an actual problem)
At this point I should talk about the road legality of a vehicle like this over here. As an import car, there are two routes: Make it pass regular exams, or have it as a classic car. The second option has several advantages, namely no emission checks and no need to change the headlights and add side turn indicators. However it comes at a cost: Your car "has to be able to represent the original factory vehicle", however this lines up completely with what I want so I went this route. This means passing a "classic car exam" where the car is reviewed for part originality (or at least using parts from the era it was made). This is quite strict, an aftermarket stereo is usually immediate disqualification for example. With this in mind I started the work. I removed the seats after having an about 2 hour fight with the bolts that decided to make my life hell despite not having rust or corrosion in the threads, removed the steering wheel and sent them off to have the leather repainted and reconditioned. Then came the wheels. I tried cleaning them up (you'll see the spots in the pictures), and hydrochloric acid was doing a good job at it, but they just never wanted to be perfect so I ended up sending these off to get painted and restored as well. While the car was jacked I could work on the suspension a bit, and as I found out the rear shocks were replaced and no longer had AAS functionality, however the front seemed to be working. A lot of the bushings were pretty worn, especially the rear shocks' ones which is a bit sad considering those barely had 30000 miles in them. I replaced the rear sway bar link and rear spring rubber seat with new OEM bushings, and had a suspension shop make new bushings for the shocks. With this all is well in the rear. An interesting note: the spring rubber seats look to be in really good condition (to me at least) until you compare them with the new ones. Then I realized half of them was completely missing. Finally, one new issues cropped up: A weird burning smell I could not really place anywhere. This would continue to be an issue until recently, as diagnosing it required cleaning the engine bay properly. I did use bottles after bottles of brake cleaner on the engine, even pressure washed the bottom, but that was not enough.
This is probably going to be the most picture heavy post for a while, the next chapters are going to be smaller issues and mods that I did to the car.
General pictures:
Spoiler
The interior before overhaul (I will have to grab new images for the "after" ones, the difference is barely visible on the ones I have unfortunately...)
Spoiler
The bigger dent on the back. This ended up causing a lot of issues later on.
Spoiler
And finally renovated wheels and new tires. For tires I decided to go with Bridgestone Turanza, as that is pretty much the best tire in the original size, albeit they are a bit pricey. In my opinion tires are the most important part of a vehicle, both for fun and safety. The renovated/painted wheels did loose a bit of the texture the original has, but its still slightly visible in person. The color matches the outer rim's color of the original. The only thing I miss frankly is the black paint in the Mazda logo, I'll probably add that in later.
Spoiler
A note here: You can see a blurry spot on the top left on the fender in the last image. Lets say that my polishing skills were not the best and mistakes were made.
P.S.
After sending all this stuff away came the realization that this is going over the allocated budget fast. Originally I calculated with painting for the budget, but that was sacrificed for more bushings, cleaning and other parts. In the next chapter I'll probably show off the incredible audio system I installed. By incredible I mean absolutely terrible, but slightly better than factory. I have to keep the factory head unit and speaker locations after all.
- Temperature gauge reads halfway up (but is stable, I was not sure if this would be an actual problem)
Just letting you know, mine does the same. Mine is an early '86 (manufactured in October 1985, I think) and for whatever reason the thermostat doesn't open until after 1/3 on the gauge, which then settles at 1/2. I'm also not sure if it's "normal" but I know based on an aftermarket gauge that my temps are fine. Either my stock gauge is wonky, or the temp gauges are an early '86 thing that changed after.
Just letting you know, mine does the same. Mine is an early '86 (manufactured in October 1985, I think) and for whatever reason the thermostat doesn't open until after 1/3 on the gauge, which then settles at 1/2. I'm also not sure if it's "normal" but I know based on an aftermarket gauge that my temps are fine. Either my stock gauge is wonky, or the temp gauges are an early '86 thing that changed after.
Good luck with your build
Spoilers for the thread, but now I know that either the early 86 thermostats were a bit different, or it started to not work properly overtime. With the new thermostat it stays right around 1/4-1/3. The stock gauge appears to be incredibly accurate too (for a stock gauge).
Thanks, the last post's stuff is still March and May things. I won't spoil much from later posts, but I just came back from a ride and it was perfect. Except for some known issues like the input bearing and some electrical stuff. And that one oil leak I try to not think about.
Interestingly, I've replaced the thermostat with an OEM replacement and the behaviour is unchanged. Maybe it's just my gauge being weird then.
Either way, glad to hear the car drives well Good luck,
Today I'll be showing off a completely pointless mod I did. The audio system in this car is pretty bad. I do not want to swap the head-unit, or mess with the amplifiers, so to get a bit of a boost so to say I decided to upgrade the speakers. The old speakers were pretty aged, and well... not very good. I did realize that the improvement will be marginal, since the biggest problem is that the speakers are located in terrible positions, along with less than ideal room (passenger compartment?) acoustics.
The two front speakers do not have any sort of space to mount bigger ones without cutting things, so I just replaced them with 10cm Pioneer speakers. However at this point I noticed that the "you-left-your-key-in" chime and the keyhole illumination doesn't work. After removing the board, cleaning contacts, plugging things back a few times only to have it work sometimes, I re-soldered the connector on the horn CPU board. This fixed the keyhole illumination, however to this day the chime is a bit wonky, and usually has pretty distorted sound.
Off to the rear speakers, I wanted to keep the amps and the speaker boxes, but decided to mount 17cm speakers in. The stock upper mounting bracket is not cut out to handle 17cm speakers, but they do fit nicely in the box itself. I decided to create a mounting bracket from aluminium by cutting a circular disc that fits over the stock speaker box and fits the 17cm Pioneer on the inside. Putting this together looked a bit bad, so I decided to use the speaker grille that came with the new speakers. I removed them from their plastic bracket, cut some holes for the screws, and spliced it between the speaker and my bracket. Finally I painted the bracket black. This turned out really nicely, and overall it provides a stock look I could live with. It still sounds bad, but hey the real audio system is the engine anyways.
Spoiler
Naturally the Pioneer logo and the two horizontal bars on the tweeter have to align with the cutout in the top cover, so a bit of planning is required with the screw holes.
With that out of the way, I'll finish up describing my maintenance work on the car up until it got its papers. Rear suspension overhauled I thought about doing the front too, but there was nothing too bad there apart of the sway bar links, so I only did that. One of the rubber mounts that hold the sway bar did squeal occasionally, so I treated that with some grease while at it. This was also a good time to change the differential oil, and the engine oil. Former to SAE-90 limited slip oil by Castrol, and latter to 20W-50 Idemitsu (I'm not going to penny-pinch oils etc, even if it probably does not really matter). After filling the oil I ran into an unwelcome surprise: Oil was slowly leaking by the sub-zero start assist system temperature probe. A system that apparently doesn't do anything, in a car I will probably never use sub-zero anyways... Out with the oil, out with the probe, on with some new washer, in with the probe... and I broke the cable. Can't have a not-connected probe now can we. I added a connector right at the probe so I don't have to twist the cable while plugging in the sensor. No more problems with this at least.
Next up is coolant, I did also flush the radiator a bit with running water before adding glycol based coolant in roughly a 50-50 mixture. Standard stuff fortunately. The battery was also really dead as it discharged over the trip, and was at least 15 years old anyways. I noticed some sign of a battery-meltdown in the past, the negative connector was pretty corroded but I decided to mostly ignore this issue for the time being. Both this and the radiator will be featured again soon though, in a future post.
I also did a whole lot more cleaning everywhere, painted some parts on the bottom that had lost paint and had extremely minor surface rust. This car spent its whole life in Nevada and didn't see a drop of water it seems. Some more parts got painted too, like the brake booster (this looks pretty bad still but is rather hard to access for painting), the grille at the bottom of the front windshield, and the trim alongside the windshields. This trim had the plastic cover disintegrate and new parts were a tad too expensive so I decided to just remove the parts and paint them. They look quite good, but you can see at the very top that something is missing from them.
Spoiler
I did post this before, but here it is for before-after. It looks pretty good here... ...but something feels off at the very end.
To finish up this monstrosity of a post (here I am posting three pictures of a random trim while others are building 400 horsepower engines, it does feel a bit weird sometimes, but I can't help it, this dang car gotta be perfect ), I'll rectify the lack of new-and-clean interior images:
Spoiler
Remember: Always have that fire extinguisher around for when the fuel-pressure dampener decides to kill you.
Last edited by Barnahadnagy; Sep 7, 2019 at 02:41 PM.
Congratulations! I own an '87 GXL with fewer miles on the odometer than yours has strapped to a trailer or a ship's deck (13000). I have really enjoyed driving it and displaying it in car shows. Enjoy!
Dr. Rx
Unfortunately mine is only car show display worthy if you look at it from more than two meters, the paint has seen better days. It still gathers attention and most other people seem to care a lot less about these small things than I do. Overall I'm really happy I got into this, it brings a whole lot of fun. I do kinda wish I had your low miles though, hopefully you'll put many more miles into it.
Chapter 4: Bureaucracy
Having done a whole lot of little things, I was confident in the car for the upcoming tests. First was the classic-car rating, which basically checks if the car is "original". I expected to pass easily, which it did. I did feel quite a awkward when I parked my little FC next to some Italian hand-built V8 worth around hundred times my car. Following this I could finally apply for an actual road worthiness test, except I could not. I had to wait until the paperwork for the classic car exam arrived, which is funny as that is never actually used as the data is available in the electronic system immediately. Anyways I applied for a time after waiting for another week, however road-test for classic cars can only be done in a few locations. These locations had a month long wait time of course. In the meanwhile not much happened, except about one week before the test, where I did the final check. Of course I discovered something was wrong right then and not sooner: The reversing lights were not functional. I quickly determined that the reversing switch was corroded and had about 60-100 ohms of resistance when closed using my trusty multimeter. Fortunately I could find an aftermarket one locally without too much trouble, and swapped it in one day before the test. It does not have the shift-up light inhibitor, but I don't think I'll ever be in a situation where that would be needed. With this I felt confident as I trailered it to the test-site. In a not at all unexpected fashion it took me about four hours from the time I had the appointment for to complete the ordeal, but the car passed with flying colors (notably having 0% difference in braking power between left and right side). Wait another few weeks for my plates to arrive (and I had to pay for three plates, as I have different sizes front and back, however you have to buy a pair originally and then order a smaller one...) and there is only one problem left: How do I attach European plates to a US-spec car without it looking bad?
Fortunately the car came with a front-plate holder which I decided to sacrifice and use as parts. I fabricated holders for myself since the commonly available holders were neither good looking nor a good fit. For the front I cut an aluminium plate that matched the size of the license-plate, rounded the corners to ensure perfect fitment and bent it to match the curve of the front bumper. I attached this to the remains of the stock front holder with four rivets. The rear received a similar treatment, except I sized the plate to match the available area (the license-plate itself is much smaller). I attached this using screw holes found in the area with HiLok fasteners (the license-plate itself was right over the holes preventing access from the front, and this way the license-plate holder-plate assembly). In both cases the license-plate was glued to the aluminium plate with two component glue, and sealed on the side with silicone sealant after painting the aluminium plates black.
The end result is quite a bit better than pretty much any regular license plate holder structure you see around here:
Satisfied with pretty much everything, I went to fill up (including 2 stroke oil, stupid me did not really think that through, ended up using a stick to open up the fuel filler neck...) and on a short drive. The car drove perfectly fine, and behaved nicely at highway speeds in the rain that caught me as well. Some images from this trip:
Spoiler
However afterwards I have noticed something that needed attention. The water pump was leaking a a fair bit of water through the weep hole. I ordered a new water pump, and waited about a month for it to arrive. This time was used however to fix a whole bunch of other things. Since I disassembled the fan and belts, I also removed the alternator for some cleaning. Removed the idler pulleys as well and replaced their bearings in order to get rid of the squeaky noise the car made at idle. Did a whole bunch more cleaning using massive amounts of brake cleaner and a variety of wire brushes, then I enlisted the help of the pressure washer... Which turned out to be a bad-but-good idea, as I managed to bend the bottom... say... 20 rows of fins on the radiator.
This gave me a good excuse to remove the radiator as well, and if I'm there remove the battery box too. Thats when an unpleasant but not surprising discovery was made: The battery mishap that left some marks on the hood was fairly serious, and made a nice little hole into the support beam under the battery.
Spoiler
General engine bay state beforehand:
Only minor surface corrosion fortunately, except for the hole. The inside of the beam looked pretty much undamaged fortunately. .
First off I cold-welded the hole shut. It has another beam inside that looks to be the main one, and overall I don't think this compromises the structure all that much. Of course I had to use the wire brush a whole lot before, cleaning up that was not fun at all. I can't really imagine working on an actually rusty car
After it was finished I re-painted the area in a white that totally does not match the Dover White of the car, but you can't see it anyways so its fine for now. Then the radiator. I choose the incredibly inefficient way of using a forceps to individually straighten each and every pin of the radiator instead of being sensible and attempting to get a radiator comb from somewhere. After I was done with that I rinsed the outside with cold de-greaser and water, which was really effective against the dust on the rad followed by some internal rinsing. In the end I had a pretty much mint radiator, so it was worth it to get it out I guess. I re-wrapped the harness behind the alternator as the outer wrap was in pretty bad shape. Since I still had a lot of time until the pump arrived, I went ahead and replaced the front suspension arm bushings (I replaced the sway bar links previously), the rubber spring seats, and the steering dust boots. The left side dust boot was torn so a lot of dust collected underneath which I cleaned. I also added a bit of grease onto the rack. With this the suspension is in perfect condition.
In the meanwhile my water pump arrived, so I finally swapped that out. One of the gaskets was a bit damaged (still usable, just a bit of an edge case) so I also used gasket maker on that. Since I had that entire part disassembled, I also pulled of the pump housing, cleaned that and replaced the thermostat. The thermostat housing neck had a bit of corrosion that built itself into the rubber hose so I took some extra effort cleaning all that. I also straightened out the oil cooler and aircon radiators with my trust forceps. One thing I a probably unnecessary amount of attention to is the air ducting. I replaced all of the foam insulation with new pieces, and added a lot more to prevent air from escaping in little holes around the shroud. Most probably useless, but I couldn't help it leaving big holes on the sides of the radiator and other places. The reassembly was uneventful, pretty much everything worked as it should. I used brand new Gates belts and as a final touch replaced both clutch and brake fluid.
Spoiler
After cleaning and installing the belts:
Almost ready to go:
After all this the following previously-known issues were fixed, or changed:
- Leaky water pump
- Squeak of unknown origin (either the water pump or one if the idler pulleys)
- Water temperature now reads about 1/5-1/4 up the gauge instead of 1/2 (see posts before this)
The following issues exist(ed) with the car:
- MOP leak at the adjustment shaft
- Passenger side window controls inoperable, fault is probably the driver's side power switch
- Clock is inoperable
- Wiper only works on HIGH, does not park
- Periodic faint whooshing sound from left-rear wheel
This post mostly catches up to September in real-life time, except for the wiper switch which I did fix but I can't even remember when exactly... I have done some more work since, so I'll make another post sometime soon, with some more trip-shots with the car as well. As a final note, I did contemplate shimming the oil thermo pellet since I had decent access, but I decided against it. The functioning of the thermo pellet is quite apparent if you watch the car get warm, as the oil pressure will rise from around 30 to 60 if the car is on cold idle still, when the outside temperature is hot, or to around 45 in colder weather over the course of about 15 seconds (with 15C� outside temperature the cold-idle ends about 30 seconds before the thermo pellet begins to close, while in 25-30C� it opens about a minute before, also note that I'm on 20W-50, not the lighter 10W-30 most people seem to use). Due to this and the fact that I do observe it getting warm every time I did not feel the need to preemptively do anything about it.
I'm going to do this in chronological order. When I first went on a real drive, a summer shower hit me on the highway. That was the moment I realized the wipers only work on high and don't park. Took me a while to actually fix it, but I followed the guide on fc3spro, did some multi-meter measurements ... it works perfectly. I reconnected it and it still worked perfectly. Tried again, didn't work. The relay must have gotten dirty contacts on the inside, but I already had a replacement for it so I just swapped it out. Reassembled the entire thing and now low doesn't work... Got it out, cleaned the contacts, reassembled it again and it has been working ever since, so that's one electrical problem fixed.
Next up my biggest gremlin: CPU. That little ****** with the distorted beeping really drove me mad. First attempt to fix, I re-soldered the connector which appeared to fix the problem until the next time I had the key in. It has been intermittent ever since but now that I got to fix the keyhole light as well (more on that in a moment) I decided to fix this too or get a new one. I'll have my proper beeps or I'll die trying. I disassembled the thing again, grabbed the multi-meter and attempted to find path that were screwed. Along the way I decided that some of the solder joints look pretty bad so I gave up, reconnected it to test if it still works and... I got a continuous distorted beep now. Amazing. Also, keyhole illumination went off way faster than before. Fed up with that I brought it to an acquaintance who can actually solder and to quote him "These are all s***". He re-soldered the entire board and I assembled for the last time. Oh I was happy with the nice beeps I was getting. Keyhole timer also returned to normal, another one down the list.
Keyhole light and window switch. The ignition key light was in working order, but not the one in the keyhole. I removed the passenger door panel previously and determined that the passenger window control is inoperative because the driver side cutoff switch would not supply power to it (it could be controlled from the driver's side). I removed the driver's side door and gave the insides the same treatment as for the other side which meant placing the window motor thing back into the plastic tube it managed to escape from, removing about a kilogram of Nevada sand, applying anti-corrosive coating and re-sealing the door at the end. As for the keyhole light, the original one's bottom completely disintegrated so it had no contact with the wires at all. I replaced it with a 5mm white LED that fit into the plastic socket. I also checked a lot of electronic connections at this point and found out that the driver's side door switch has a bit too high resistance for my taste. That circuit only handles the door light but I still cleaned both switches out. Apart of that everything seemed in order so I went to the window switch which had substantial buildup on all switching surfaces. I'm really surprised it worked at all... The keyhole light is not the brightest unfortunately, but I suppose it does its job if its dark enough outside to be needed.
The last electrical problem was the clock. I was a bit afraid of breaking the trim, but it is rather sturdy actually. The clock board looked alright to me, with much better solder joints than on the CPU, but the clock display had a small burn mark on the side which looked very strange to me. I did not have complete faith that I'm going to fix this with re-soldering, but much to my surprise it is in perfect working order. Only thing left with this is to give the scratched-up plexiglass a bit of polish. Alright, that's it for electronics, but there are more! First off, I could hear a faint whooshing sound on the driver side, which I traced back to the left rear wheel. It turns out, the brake pad had some sticker or something on it and it found its way over the rotor, making contact with it once every revolution. Another easy fix.
The last item for this is the leaking MOP. Since I am extremely lazy I decided I don't need to remove the pump to remove the shaft, but soon realized I'm not getting anywhere like that. After removing the pump itself I sourced some appropriate o-rings, but I only removed the rear end-plate not the front (did get the rings for it just in case). The o-ring for the adjustment shaft is not the best fit so I'm not sure how long that is going to hold up, but it was fairly easy to replace everything so I'm not too worried. With all these fixes the only big item left is the input shaft bearing. I'm contemplating rebuilding the entire transmission since I have to remove it anyways, but I'll see when I get there.
It has been a while since I made a post and quite a bit happened in these past months. Right as I was going home from a car meetup disaster struck. The heater hose gave up and the car lost coolant in seconds.
Spoiler
I won't count it as breaking down since it literally happened around halfway back into the garage. It is not an exaggeration to say I did not shut down the engine any sooner than normal. After this I realized my failure to add the heater hose to the "replace immediately" list when I originally got the car, as what is probably the original heater hose got eaten by the oil and ruptured right at the outlet. I quickly ordered replacement parts and promptly installed them. Around this time I also managed to fix the wiper switch once and for all. As it turns out the backside of the switchboard had some failed solder joints as well.
The next project was improving the sound insulation a bit. This was my first venture into this and I absolutely can't say I'm proud of the installation quality. However it, against all expectations, provided an actual improvement in noise coming from the rear suspension. Overall I applied a layer of damping material on places the car lacked it, especially on the sides of the rear strut tower and wheel well. In some areas I also applied foam, the majority of which went into the underside of the storage boxes.
Spoiler
The last project I'm going to mention is the transmission. I got around removing it, then sending it off to get a bit of maintenance done along with input and output bearing replacements. Removing it was rather easy even without any specialized equipment using a regular jack to support it partially. Installation was also uneventful. In fact the hardest part I'd say was removing the rear exhaust hangers. The transmission itself was in good condition apart of the bearings.
Spoiler
I probably have one of the cleanest transmissions now. In the near future I'll be finishing up the work on the hood insulation that was unfortunately in a very bad state with parts of it torn from wear. Maybe I'll remove the pre-cats too one day (and clean the main cat a bit, just in case). I really am running out of major work, hopefully the car won't create anything serious for me .
The OEM hood insulation had several cuts and was generally not in a sightly shape. I had attempted repair it by placing it in vacuum (and then fixing the surface), but it just made the thing even more uneven. In the end I had to cut out multiple pieces of it. Next up I tried glass fiber. Created a "mold" using the hood itself combined with paper and duct tape. I added a layer under the existing insulation, then a layer in the hole, which was finally affixed to the top by smaller pieces. Then I applied some additional strengthening to the middle and some existing areas, along with fixing the edges of it. Unfortunately the surface of the resin was not very even and I could only create a nice finish on flat surfaces. In the end I used a lot of filler material to create a more or less flat surface then applied black underbody protector to it. I think it ended up rather nicely.
Making the insulation:
Spoiler
The finished insulation:
Spoiler
As a miscellaneous item the ignition switch was also cleaned. Don't forget to clean yours today! Its surprisingly easy: the entire thing comes out to the rear, the lock does not have to be removed.
I think its actually easier to do it from scratch instead of salvaging an existing one. Experience with resin and glass fiber also helps! The finishing with the underbody protector was what salvaged mine, so you can always do that if your surfaces end up uneven.
Been a looooong while since I updated this, and boy, was it a busy year. First, some small issue: the power steering's high pressure line broke and drenched the street in ATF. The spill is still visible on the road, over a year later!
Then, I started to get issues with the coolant overflow tank slowly filling. At first I thought it was a problem with the radiator cap / body, as there were multiple leaks there. After replacing the entire plastic part the small leaks went away but the filling (followed by the coolant buzzer) only got worse. Did some tests, pressurized the system multiple times, always held pressure well. Did exhaust gas testing, turned out negative. Measured the compression, 115 PSI rear, 150 PSI front, as good as it... wait what. Turns out a bit of water is really good at increasing compression, after some time the front settled at 115 PSI as well. The most telltale sign perhaps, the spark plug and tester removed were both wet with coolant. Sigh, time to rebuild then.
Spoiler
Exhaust gas test
The engine came out rather effortlessly, or at least thats what I want to say. It was a fair amount of work but there werent any real problems. We left the AC and PS pump in the car and connected, removed the UIM, pulleys, wires and pulled it off. Then the rest came off, the only bit that was stuck was the oxygen sensor, but that also loosened with a bit (lot) of WD40.
Pictures of the removal:
Spoiler
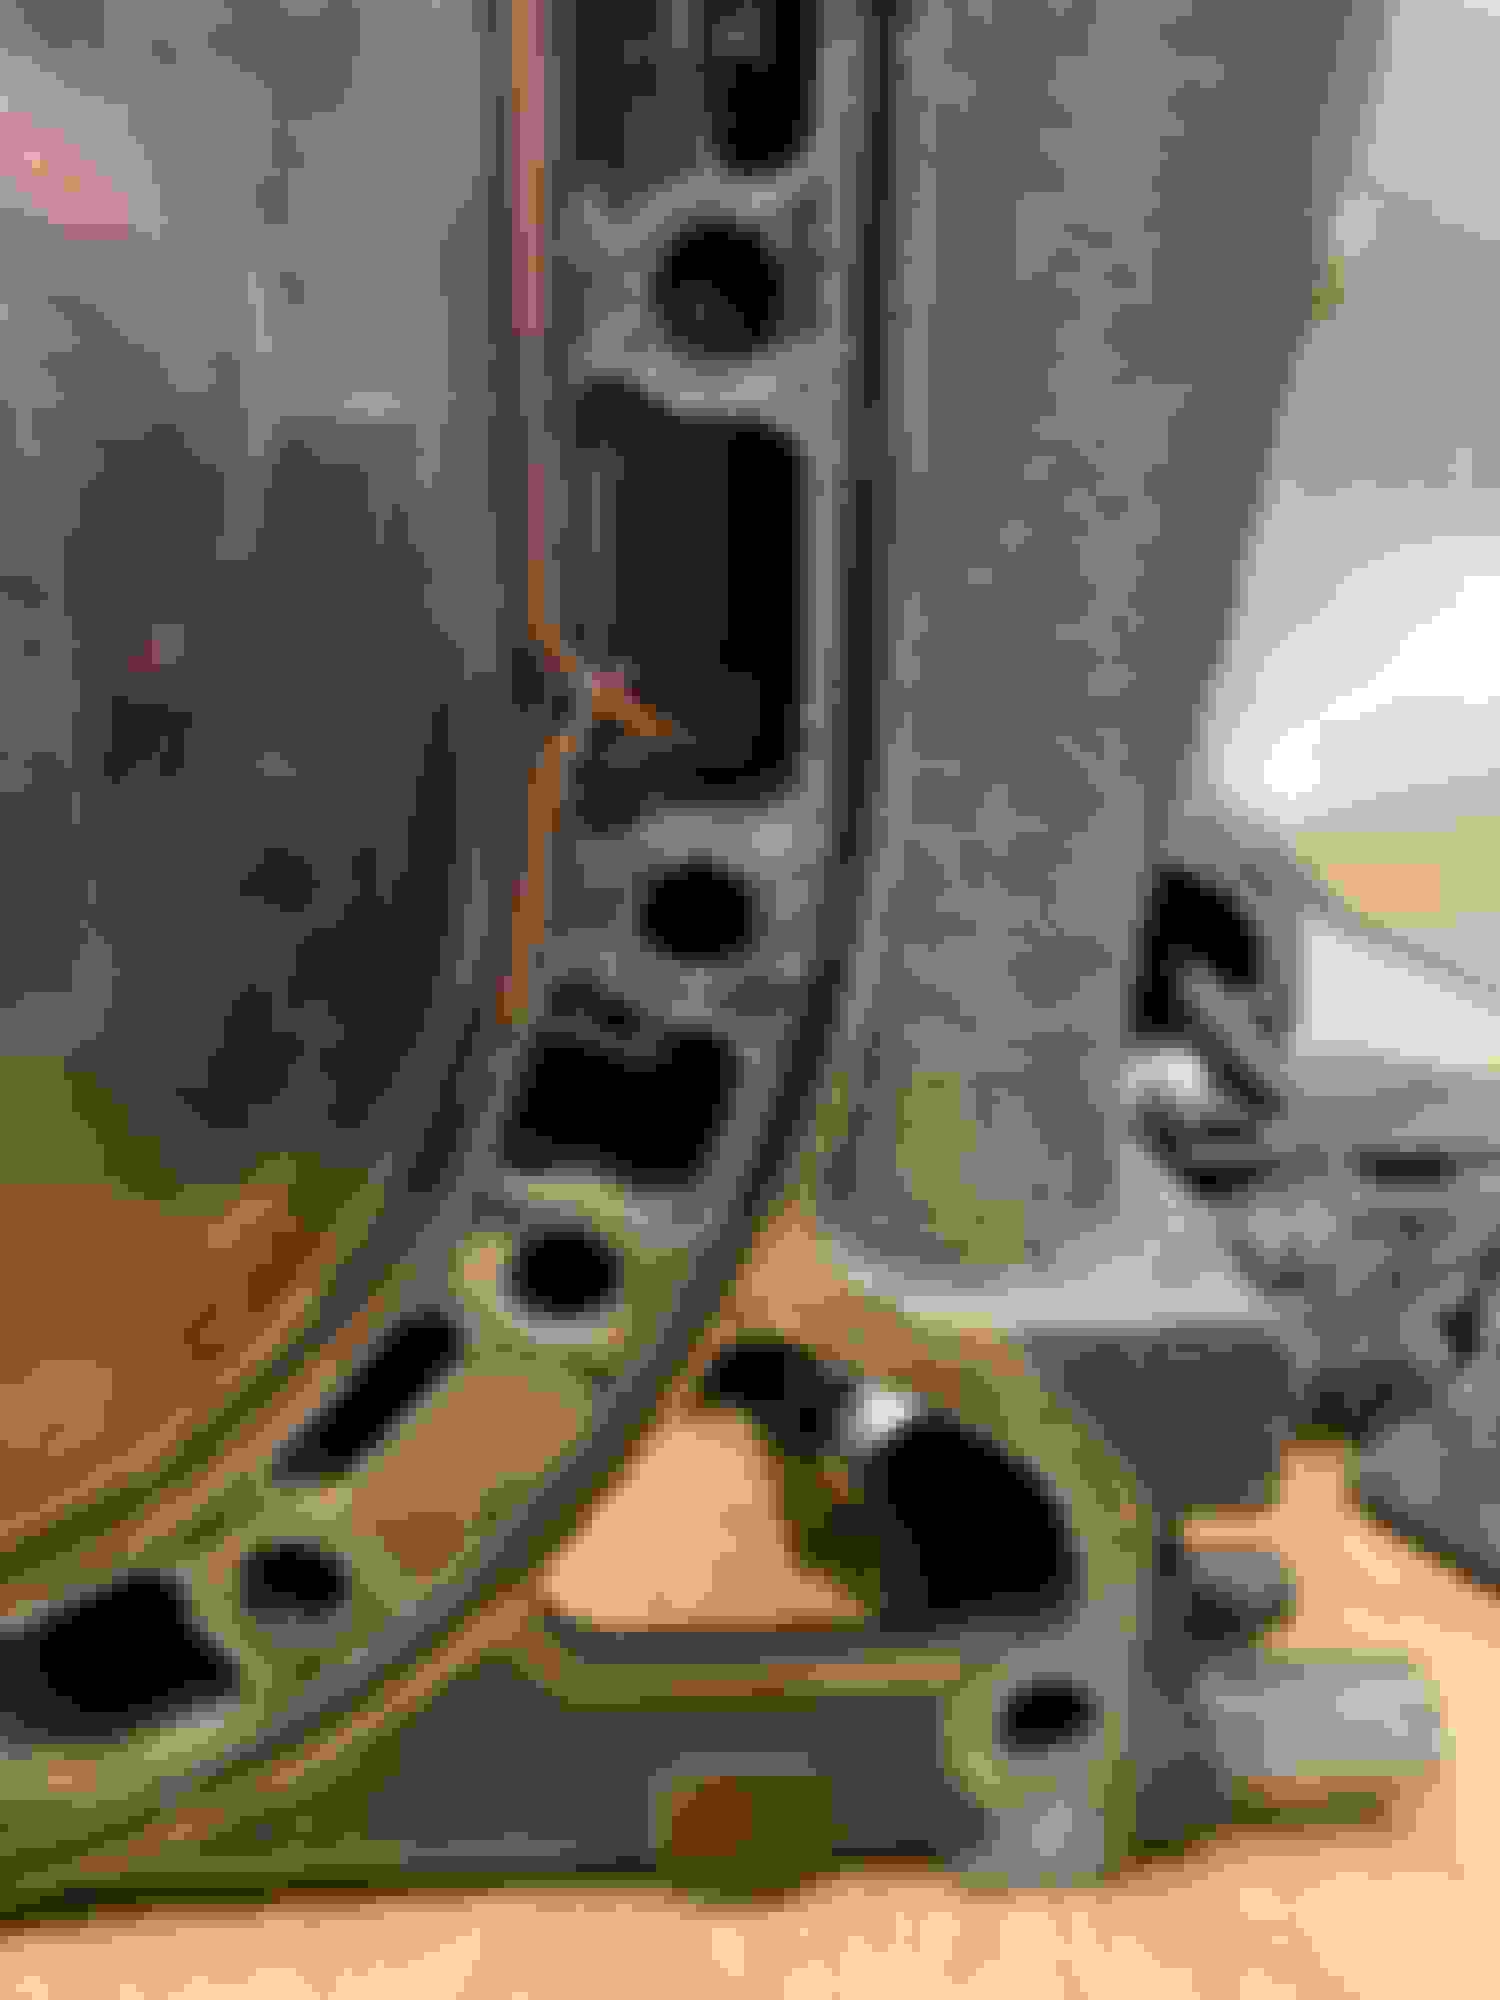
So what was wrong? Well, perhaps as is usual with FCs, the coolant jacket:
Most likely the lack of coolant replacement contributed as there was a fair amount of galvanic corrosion. The previous owner was meticulous about keeping the antifreeze, well, antifreeze and tested its freeze point, but he was seemingly unaware of the corrosion inhabiting properties of it. Pitting is visible on the thermostat neck as well.
Now, not all is bad, the engine was rebuilt with all new seals and bearings and this gave a good opportunity to clean the engine bay. I also spent way more than I should have un-bending all the radiator fins. The sub-zero tank got cleaned and blocked off, the brake booster was repainted, parts of the engine bay got repainted, everything got cleaned. I also replaced the vacuum lines and most rubber hoses.
Spoiler
After about 4 months, it was time to put the engine back in:
Spoiler
As for starting, it went without problems. There are some topics here that I want to cover in the next post, namely the throttle body / thermowax adjustments, the pre-cats, and electrical issues. None the less, the car is running better than ever! Although I am quite sad about it, as it had 110-115 PSI compression (at 90000 miles). To close this up have a picture from the Hungarian RX meet of this year (mostly RX-8s, but we did have two FCs, and FD and an FB).


 ), I'll rectify the lack of new-and-clean interior images: