
JDM FC3S Circut car from Australia

Thread Starter
BRUCE LEE APPROVED
Joined: Dec 2010
Posts: 58
Likes: 1
From: Melbourne, Australia
JDM FC3S Circut car from Australia
Hi guys.
Been a member for a while thought I would post up a quick thread on my FC I am building. This site has been a great source of information along the way.
Started by accident, friend came to buy a wagon off me but I swapped it for this instead. Not much to look at but it would be a great base to get me on the track again after a few years. I had just been separated, and swore no more cars but you will see how that turned out..............anyway enjoy the build!
James.
Here it is the day it arrived. Not much to see yet but I had a vision in my mind of where it would go.
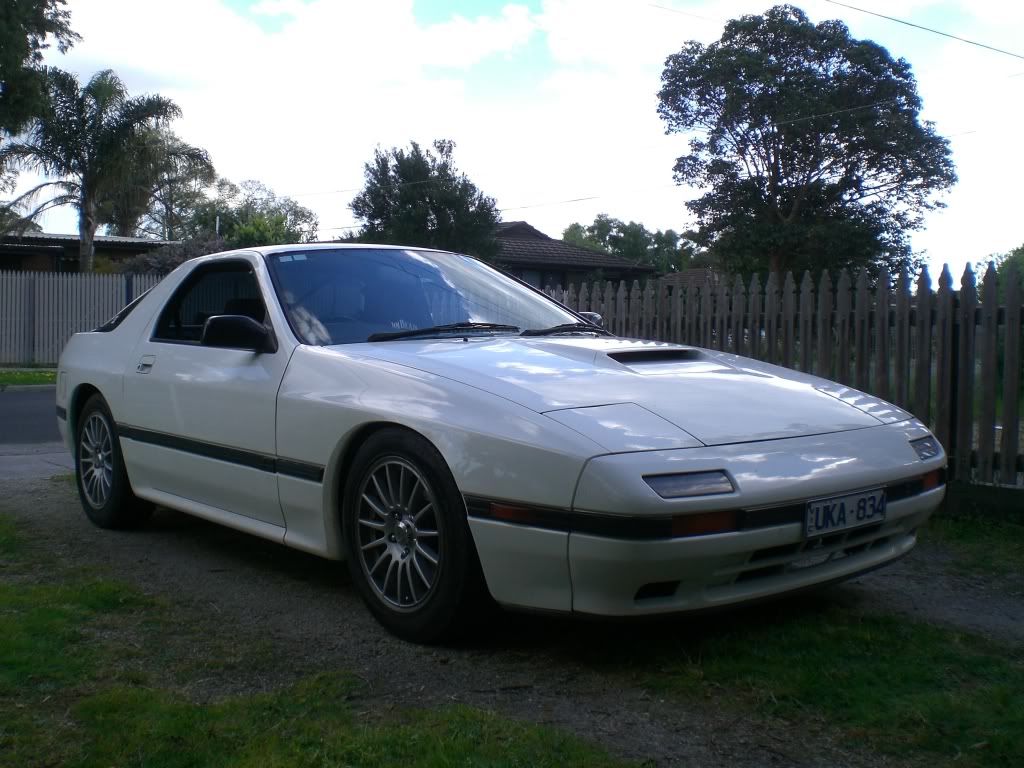
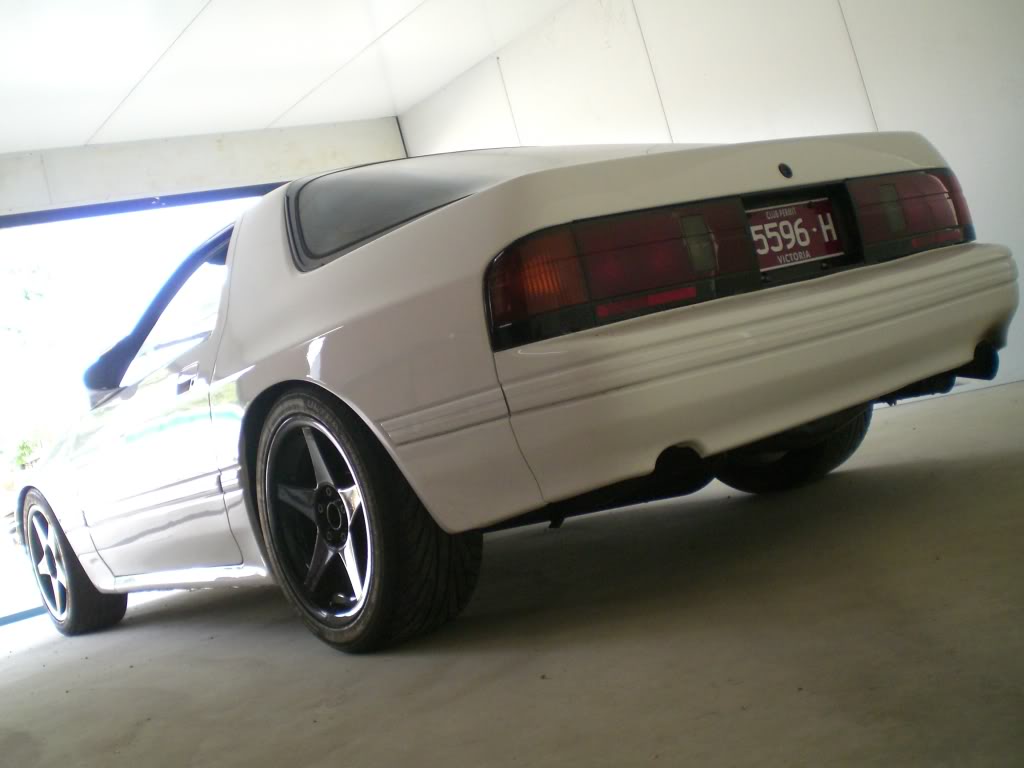
It's a JDM 86 FC3s Turbo import. had 109000km on the clock and stock apart from wheels when it arrived.
Been a member for a while thought I would post up a quick thread on my FC I am building. This site has been a great source of information along the way.
Started by accident, friend came to buy a wagon off me but I swapped it for this instead. Not much to look at but it would be a great base to get me on the track again after a few years. I had just been separated, and swore no more cars but you will see how that turned out..............anyway enjoy the build!
James.
Here it is the day it arrived. Not much to see yet but I had a vision in my mind of where it would go.
It's a JDM 86 FC3s Turbo import. had 109000km on the clock and stock apart from wheels when it arrived.
Thread Starter
BRUCE LEE APPROVED
Joined: Dec 2010
Posts: 58
Likes: 1
From: Melbourne, Australia
Then I started looking around for rims. The build was always going to end up a track/tarmac rally car so performance is important. I came across a few sets of old skool Work Rezax Roar wheels. Forged, light and period perfect so I bought them. dropped in a used set of Teins for now too and I was feeling better already.
I new pretty soon I was going to need a garage to do much more so the car took a back seat to getting on my feet and looking to buy a place to set up my life again. But at now I was getting excited about life again.
I new pretty soon I was going to need a garage to do much more so the car took a back seat to getting on my feet and looking to buy a place to set up my life again. But at now I was getting excited about life again.
Thread Starter
BRUCE LEE APPROVED
Joined: Dec 2010
Posts: 58
Likes: 1
From: Melbourne, Australia
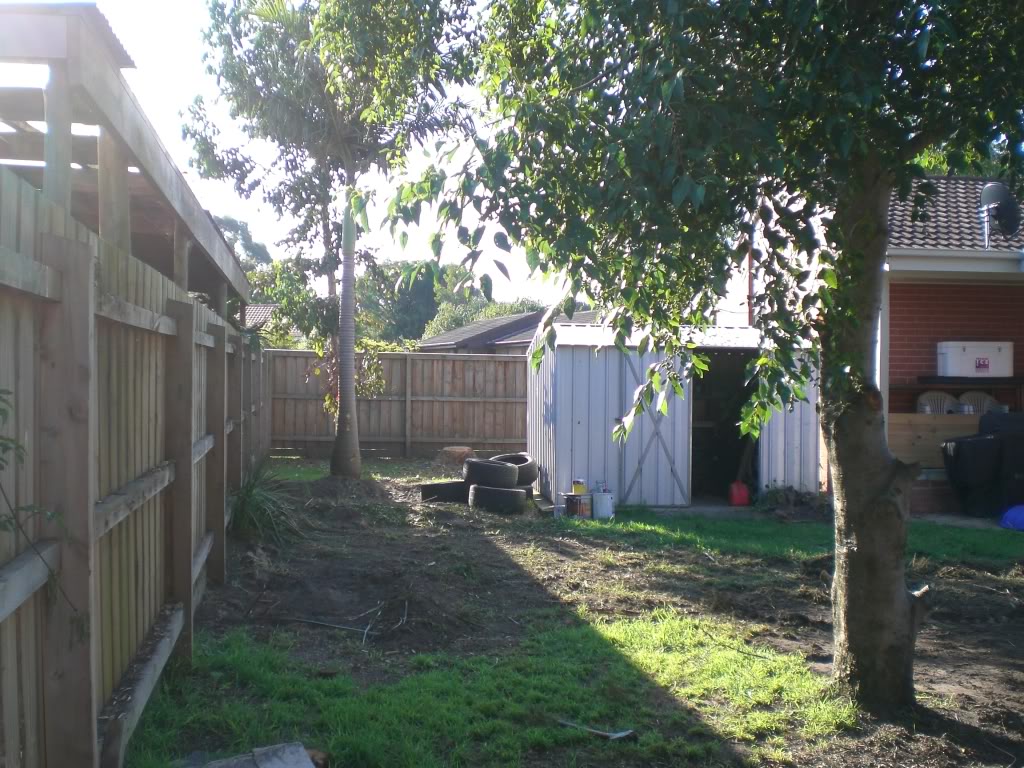
So I bought a place, and it had a small shed. That had to go so I smashed it down and got on with building a workshop I could build the car in properly.
Before
Some beers, get the boys around and chuck on a BBQ
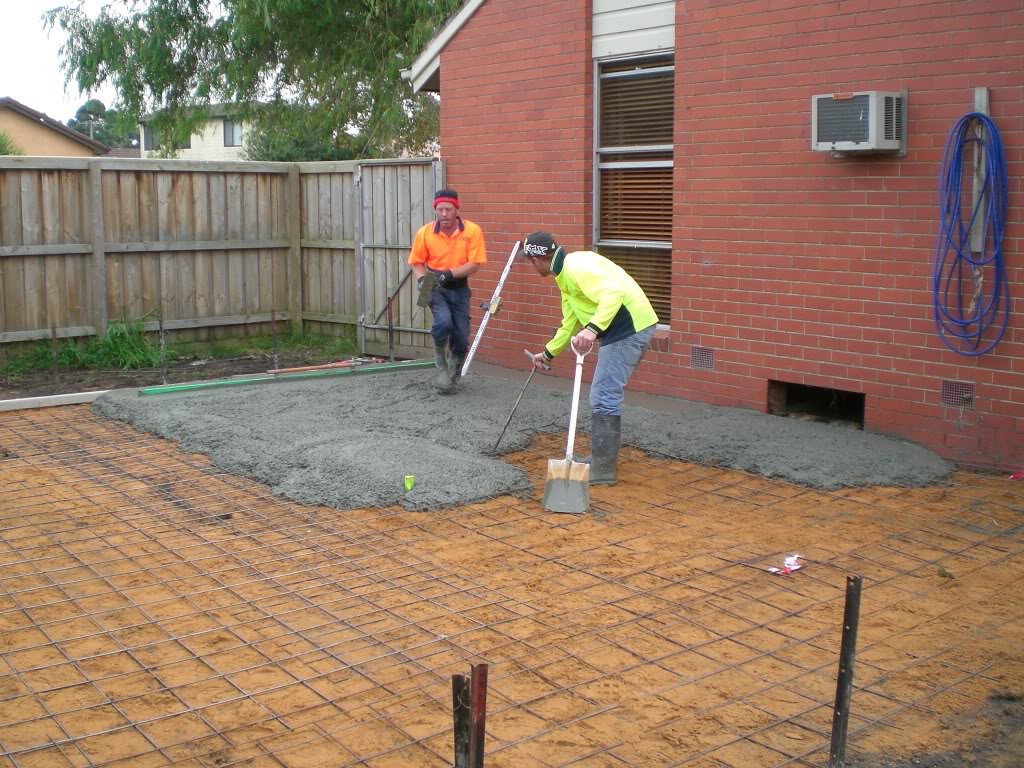
Let slab dry and erect an industrial spray booth/workshop on the side of your 70's 3 bedroom shoebox! I spend more time in the garage so might as well make it comfy!
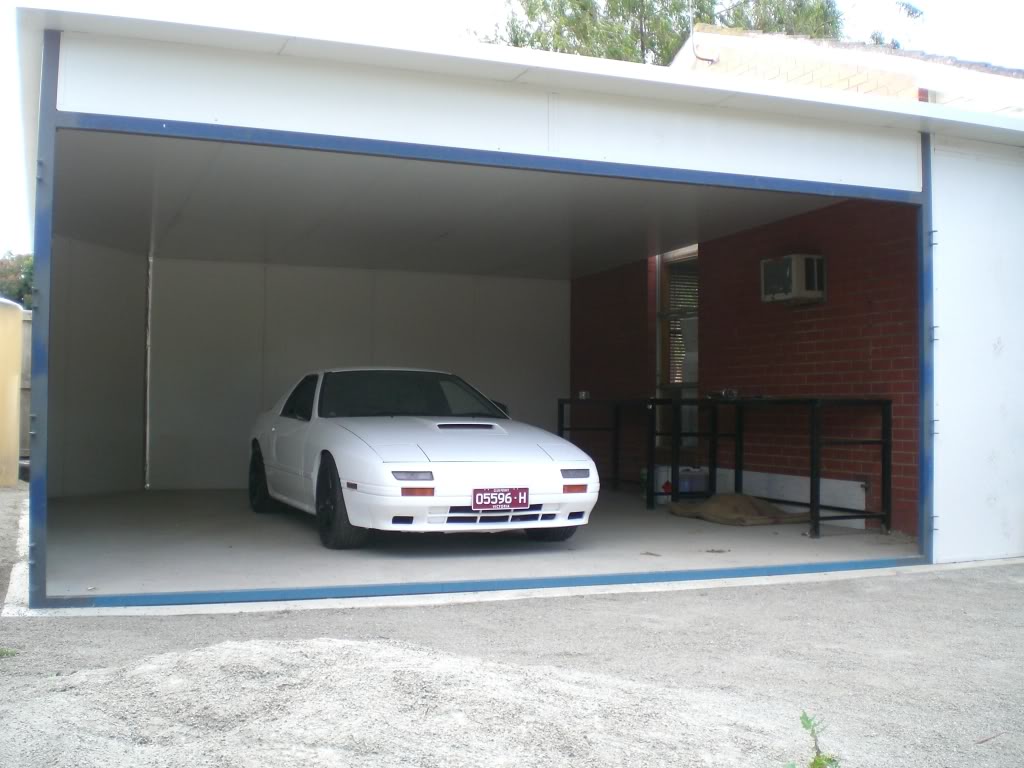
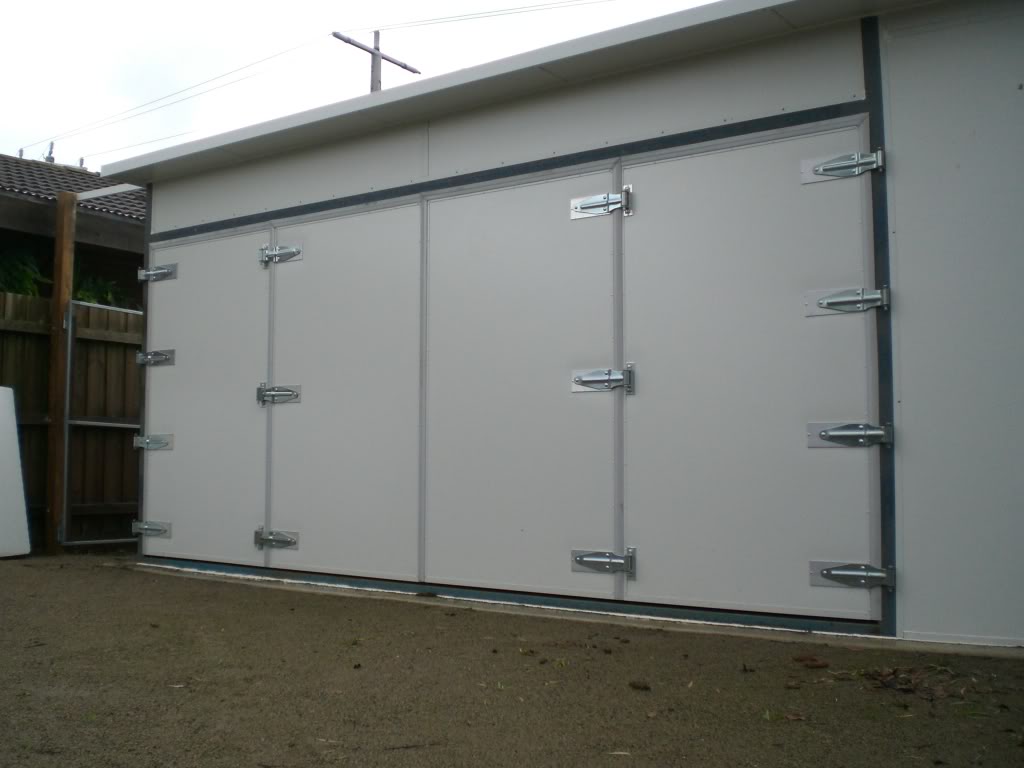
Some bi folding doors and it's ready to go. The coolroom panel means it's warm in winter and cool in summer also.
Before
Some beers, get the boys around and chuck on a BBQ
Let slab dry and erect an industrial spray booth/workshop on the side of your 70's 3 bedroom shoebox! I spend more time in the garage so might as well make it comfy!
Some bi folding doors and it's ready to go. The coolroom panel means it's warm in winter and cool in summer also.
Thread Starter
BRUCE LEE APPROVED
Joined: Dec 2010
Posts: 58
Likes: 1
From: Melbourne, Australia
I did say quick thread, but I better grab a beer and settle in there is a bit to cover from the last few months. Here goes.
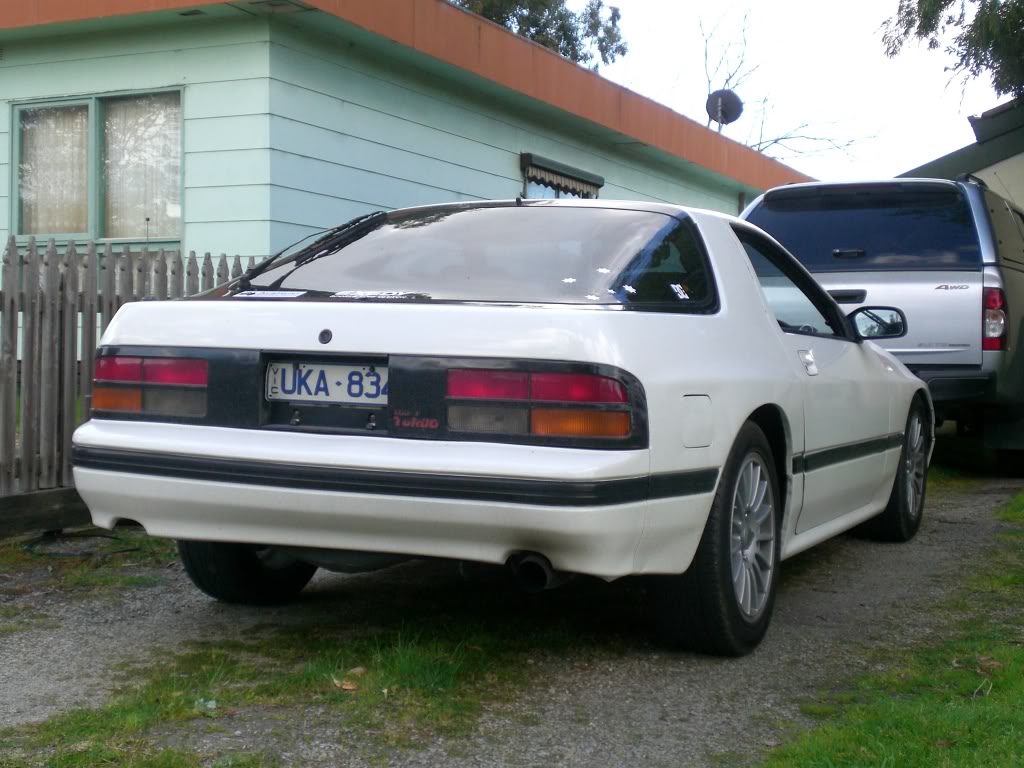
I sell trucks, and my friends company builds the bodies for them. He has a spray booth so with a few beers in hand (a great currency that) we rolled the car in and gave it a new coat of paint. I love white cars and straight white tinter is as white as they come. Makes repairs easy too if I scrape it on the track. I decided my theme would be straight black and straight white for the car. Super clean and basic.


I sell trucks, and my friends company builds the bodies for them. He has a spray booth so with a few beers in hand (a great currency that) we rolled the car in and gave it a new coat of paint. I love white cars and straight white tinter is as white as they come. Makes repairs easy too if I scrape it on the track. I decided my theme would be straight black and straight white for the car. Super clean and basic.
Thread Starter
BRUCE LEE APPROVED
Joined: Dec 2010
Posts: 58
Likes: 1
From: Melbourne, Australia
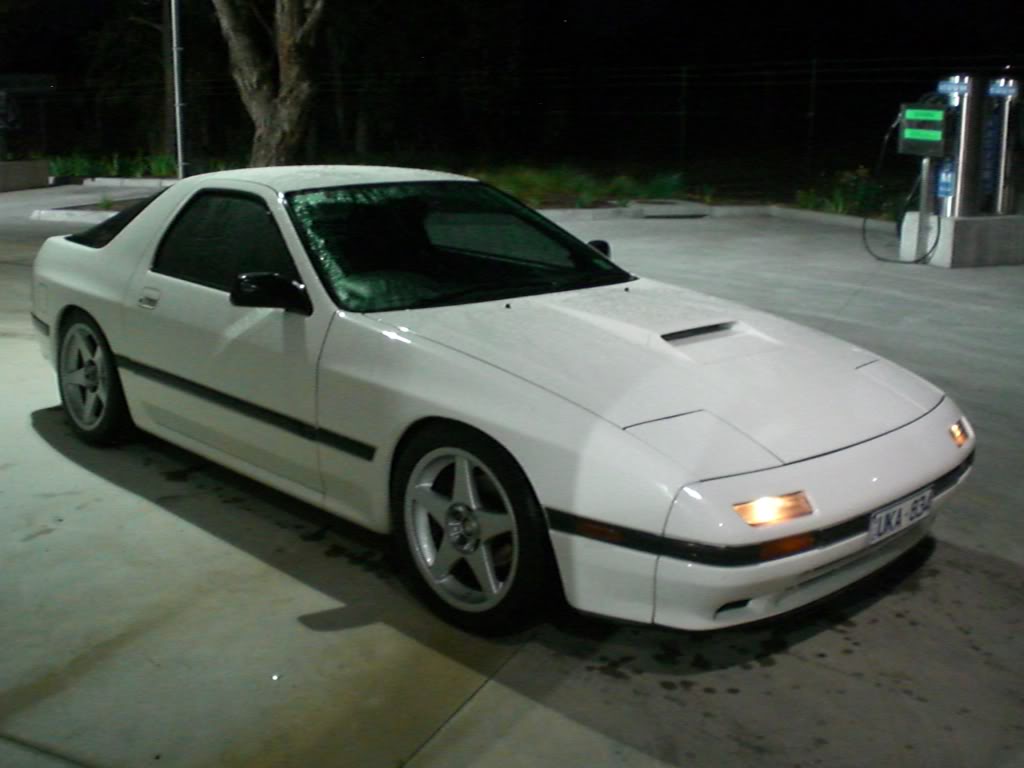
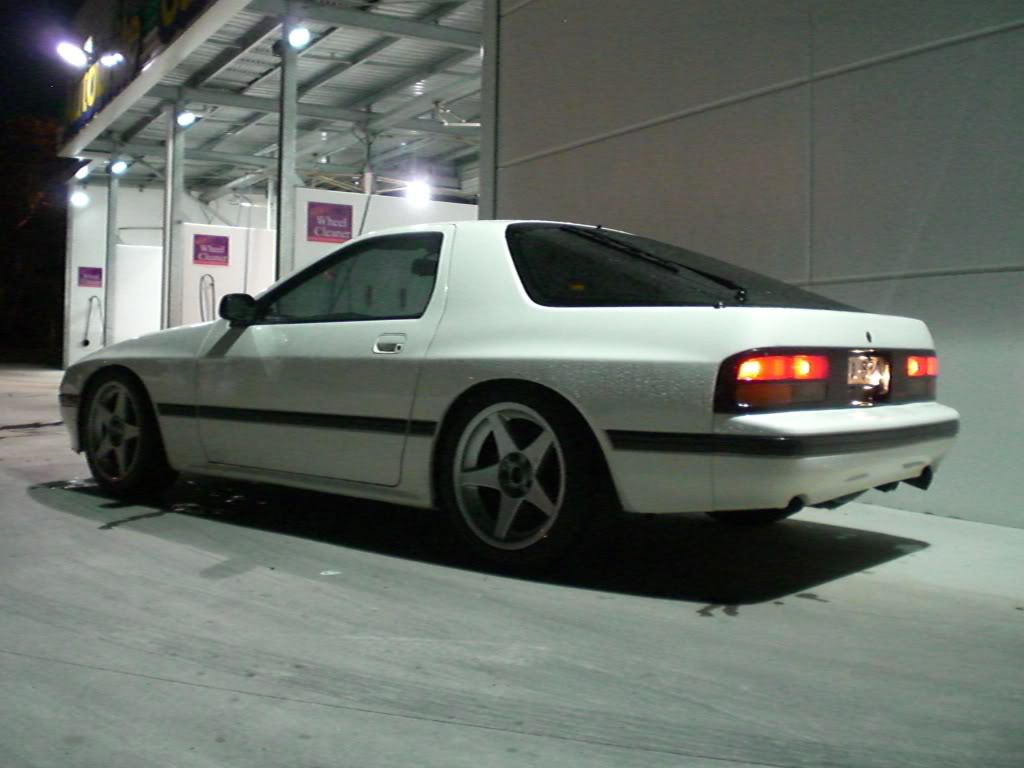
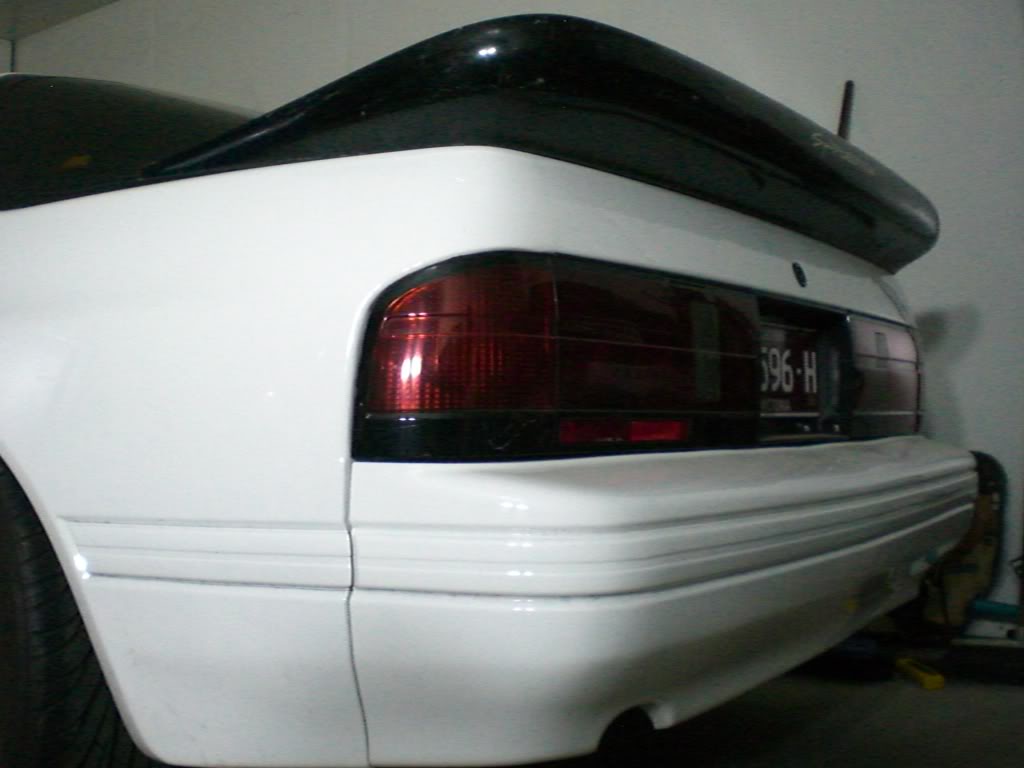
So back in the garage it was looking pretty neat. I decided on a black and white theme so I did the wheels straight black tinter. The car was now over 25 years old, so in Victoria Australia that meant I would register it on the club permit scheme. Cheap registration, relaxed rules for mods and some red licence plates.

By now I was gathering quite alot of parts for the next stage of thye build. I was also spending a few hours a night going over all the information on forums like this one to learn as much as I could about the car before starting the main build.
My goal is too build a period correct circut car. So no huge turbo's, no drift spec kits just an FC that looks like it might have been running around a track in the late 80's to early 90's. The class I will race in allows limited mods (2F Marque Sports Car) and suits my budget perfectly.
Thread Starter
BRUCE LEE APPROVED
Joined: Dec 2010
Posts: 58
Likes: 1
From: Melbourne, Australia
Parts.
In the past I had always had this fetish for odd model cars with near nothing in the way of afetrmarket parts. The FC however is very different. I was a kid in a candy store and I became really interested in finding period correct style parts and good used performance bits and pieces to build it up.
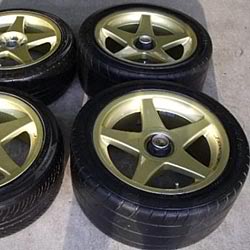
Second set of Work Rezax Roar wheels now black also. I lve the slight concave face, the simple 5 spoke style and they are SO LIGHT. Weight is cheap horsepower.
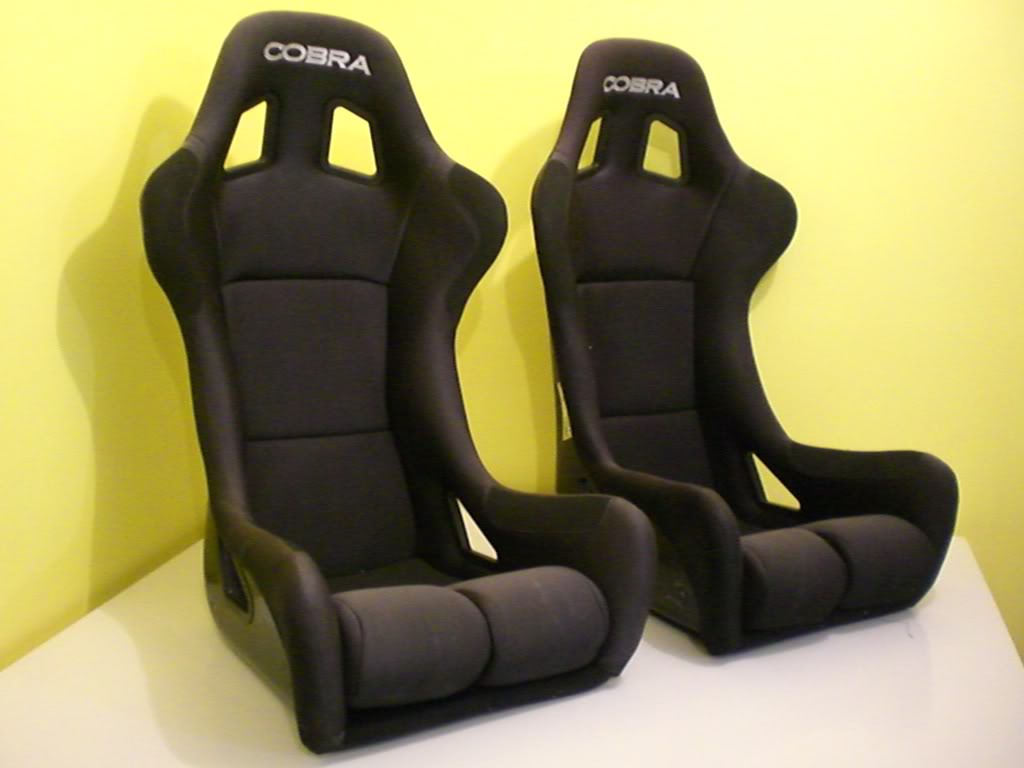
Seats, got a great deal from a guy o bought a car and they were too small for him.
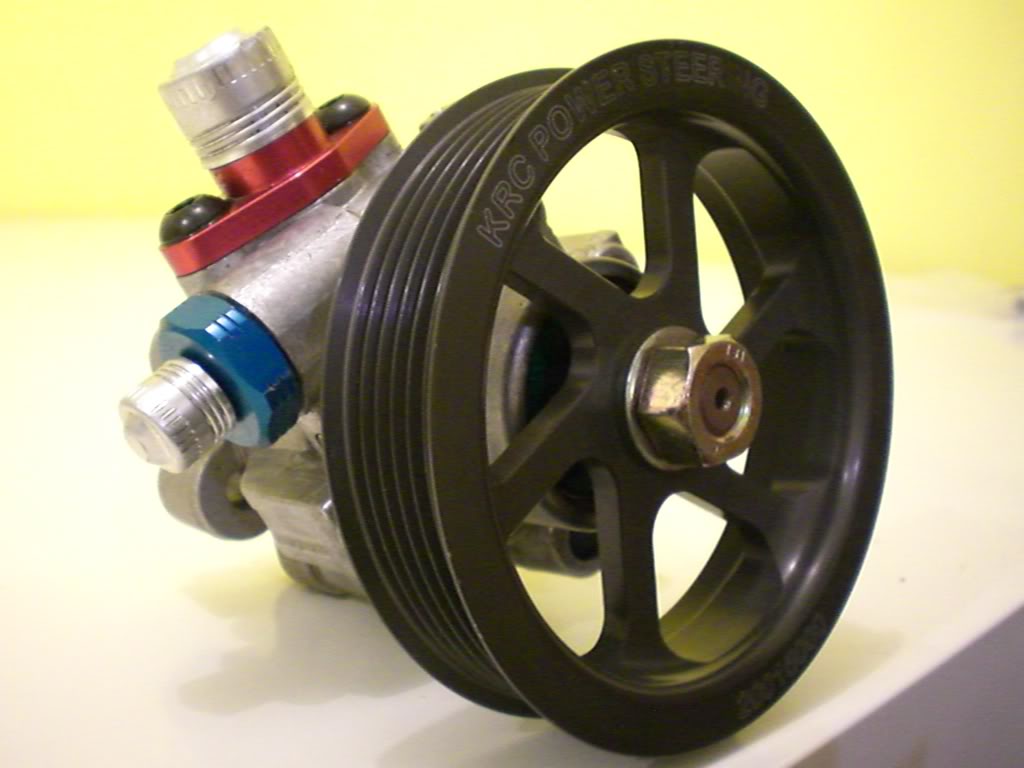
Power steering pump to replace the standard FC monster pump. I am going to run a single multi rib pulley setup too.
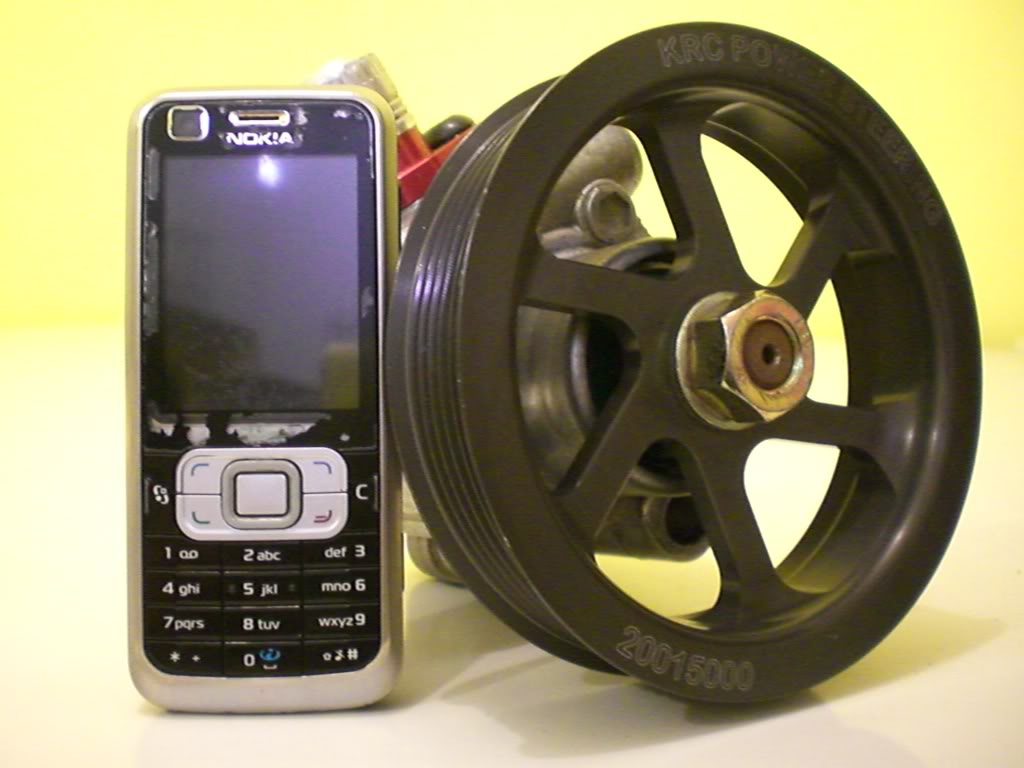
Size compared to my Nokia Phone - way smaller and nicer than stock FC and adjustable for rate too.
I had some mufflers made, 3" and specifically for rotary application.

Rules in my class allow small rear aero so I got 2 of these RE Amemiya wings. I like the style of these and they have a pretty aggressive rear edge.
In the past I had always had this fetish for odd model cars with near nothing in the way of afetrmarket parts. The FC however is very different. I was a kid in a candy store and I became really interested in finding period correct style parts and good used performance bits and pieces to build it up.
Second set of Work Rezax Roar wheels now black also. I lve the slight concave face, the simple 5 spoke style and they are SO LIGHT. Weight is cheap horsepower.
Seats, got a great deal from a guy o bought a car and they were too small for him.
Power steering pump to replace the standard FC monster pump. I am going to run a single multi rib pulley setup too.
Size compared to my Nokia Phone - way smaller and nicer than stock FC and adjustable for rate too.
I had some mufflers made, 3" and specifically for rotary application.
Rules in my class allow small rear aero so I got 2 of these RE Amemiya wings. I like the style of these and they have a pretty aggressive rear edge.
Thread Starter
BRUCE LEE APPROVED
Joined: Dec 2010
Posts: 58
Likes: 1
From: Melbourne, Australia
Now it was time to bite the bullet and really get into converting my car to what I had in my mind. So over 3 days I gutted the inside of the car and removed the sound deadner in reparation for the rollcage.
Dry ice - mans best friend when it comes to removing sound deadner.
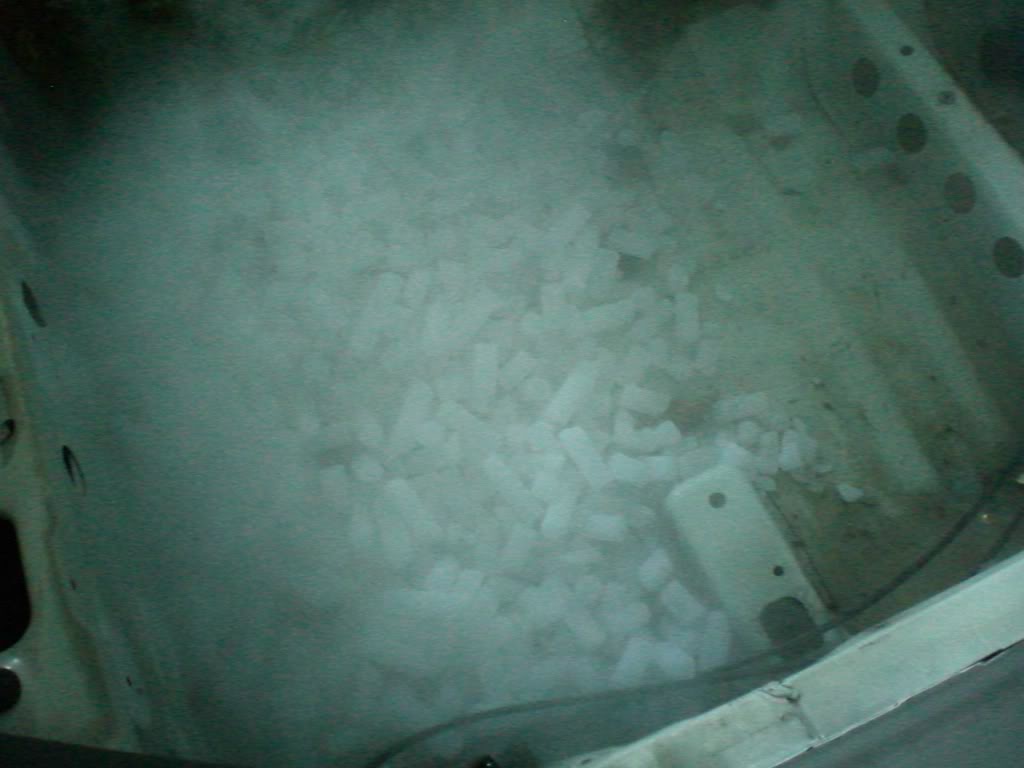
Tap with a mallet
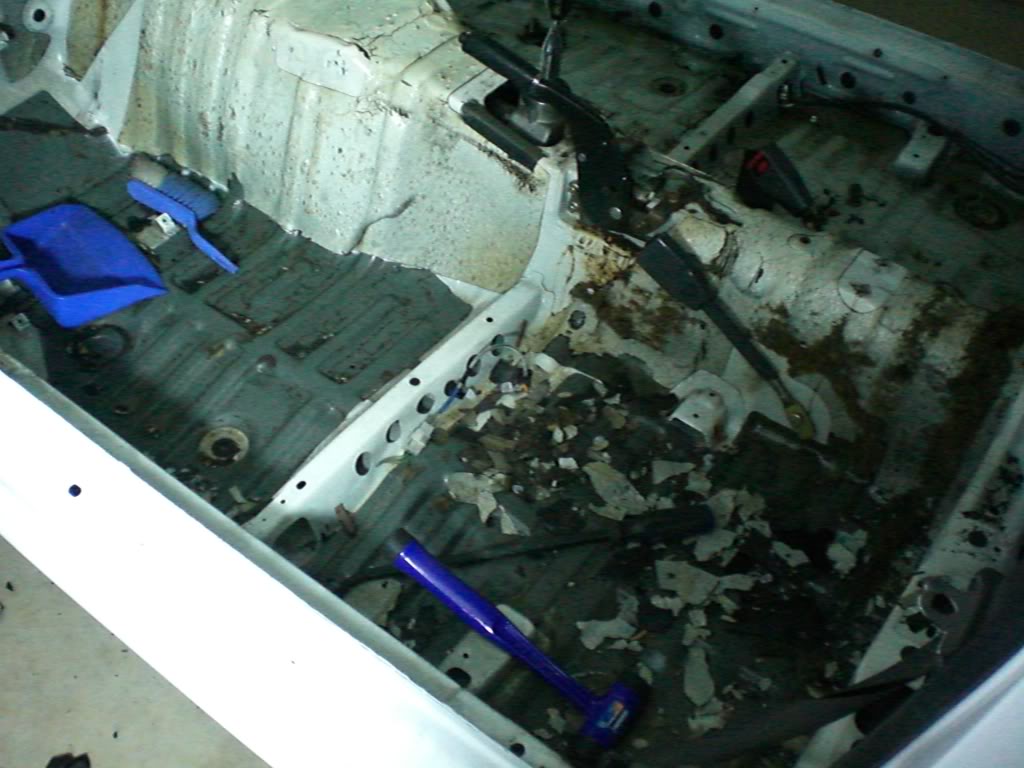
Remove
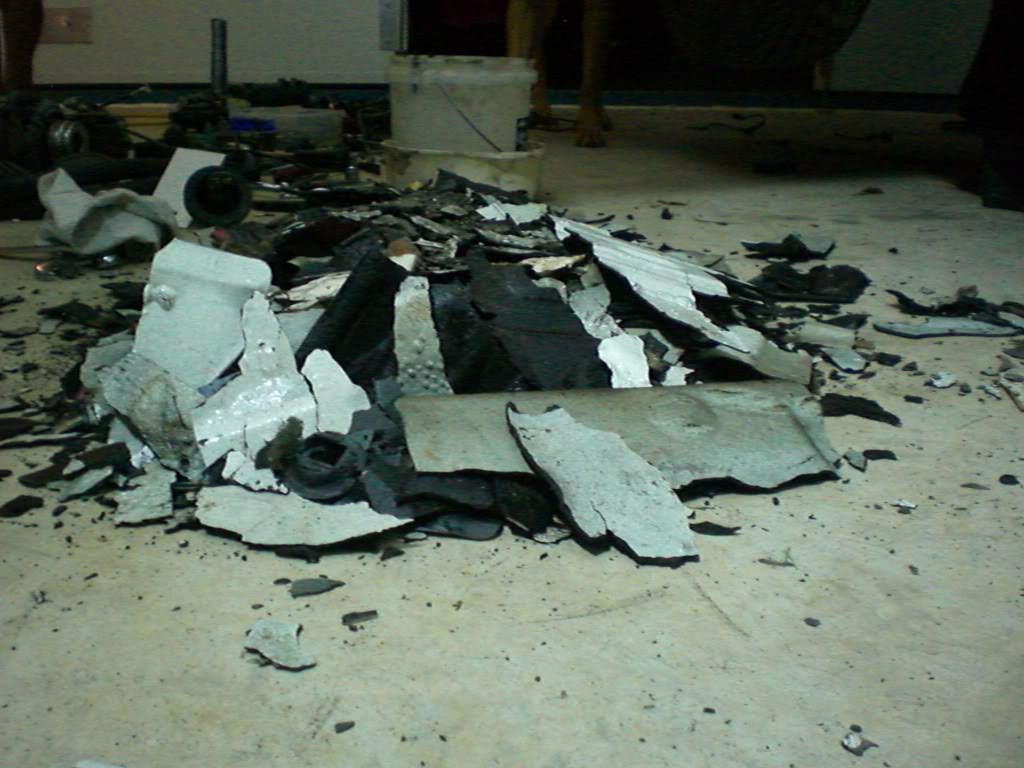
Admire minty fresh floor pan
Yes that is a totally stripped interior.
Dry ice - mans best friend when it comes to removing sound deadner.
Tap with a mallet
Remove
Admire minty fresh floor pan
Yes that is a totally stripped interior.
Trending Topics
Thread Starter
BRUCE LEE APPROVED
Joined: Dec 2010
Posts: 58
Likes: 1
From: Melbourne, Australia
Rollcage time.
So, I rang a friend who builds racecars. Manual and rulebook in hand we sat down and discussed the plan of attack. Pretty quickly I decided that if I was going to build this car from stock, for myself to keep I wanted to do it right first time. I am a panel beater by trade and was lucky enough to do alot of my time on race cars. Rollcages are pretty specialised though so I left that to the expert.
Rules require a 6 point cage with basic side intrusion. What we decided on was an FIA spec cage. Reason being is in Tarmac Rallies you don't have alot of runoff area - rather big trees, creeks beds and other obstacles just meters from the road. In a perfect world I hope to never use it but if I do I have a fighting chance.
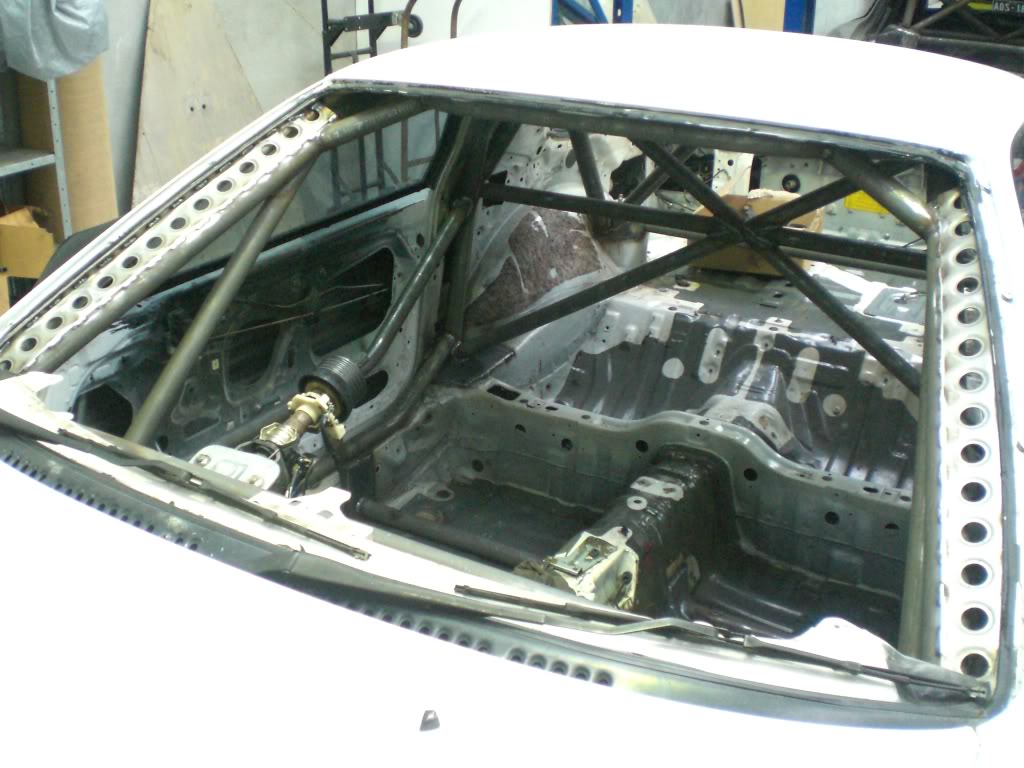
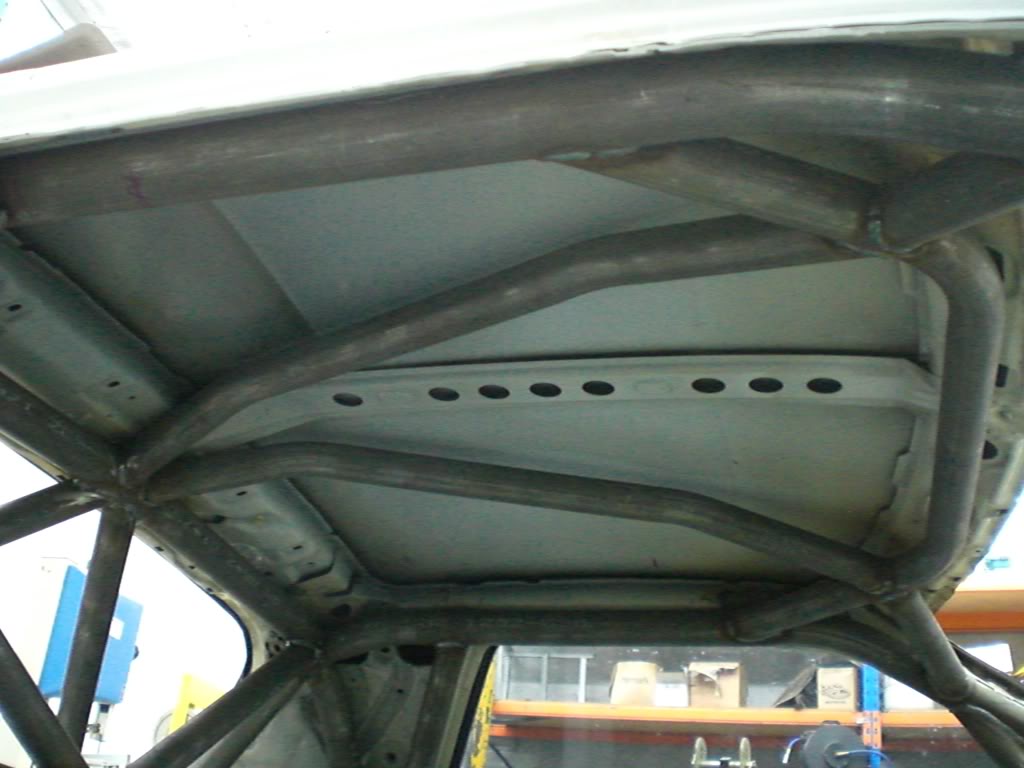
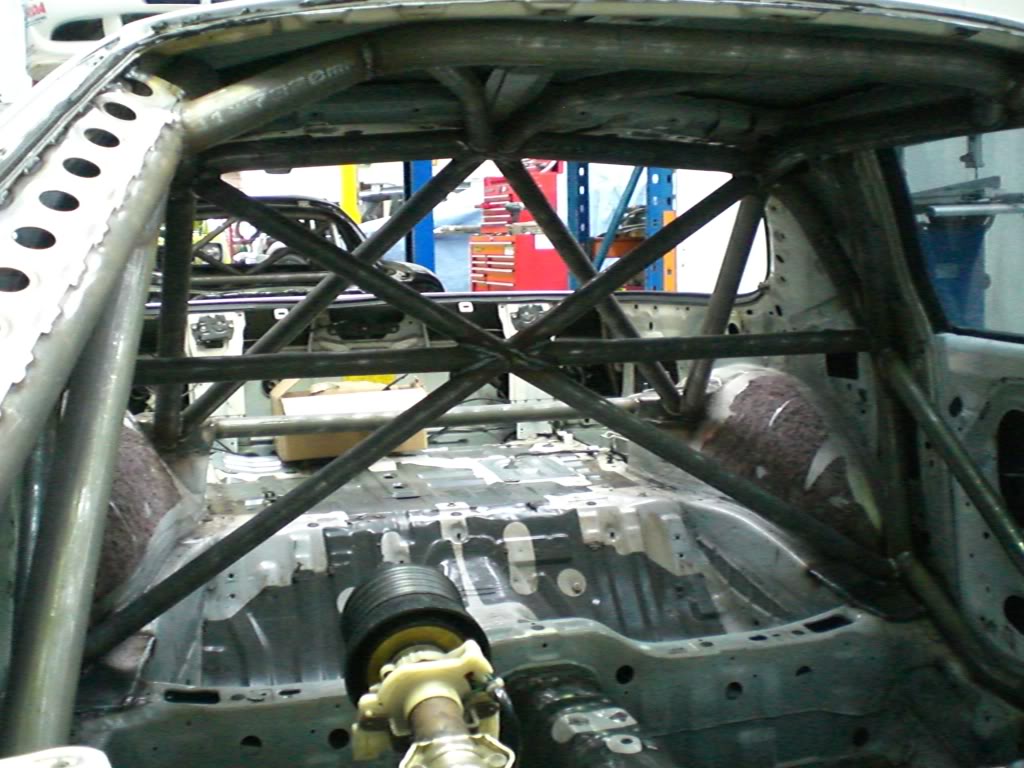
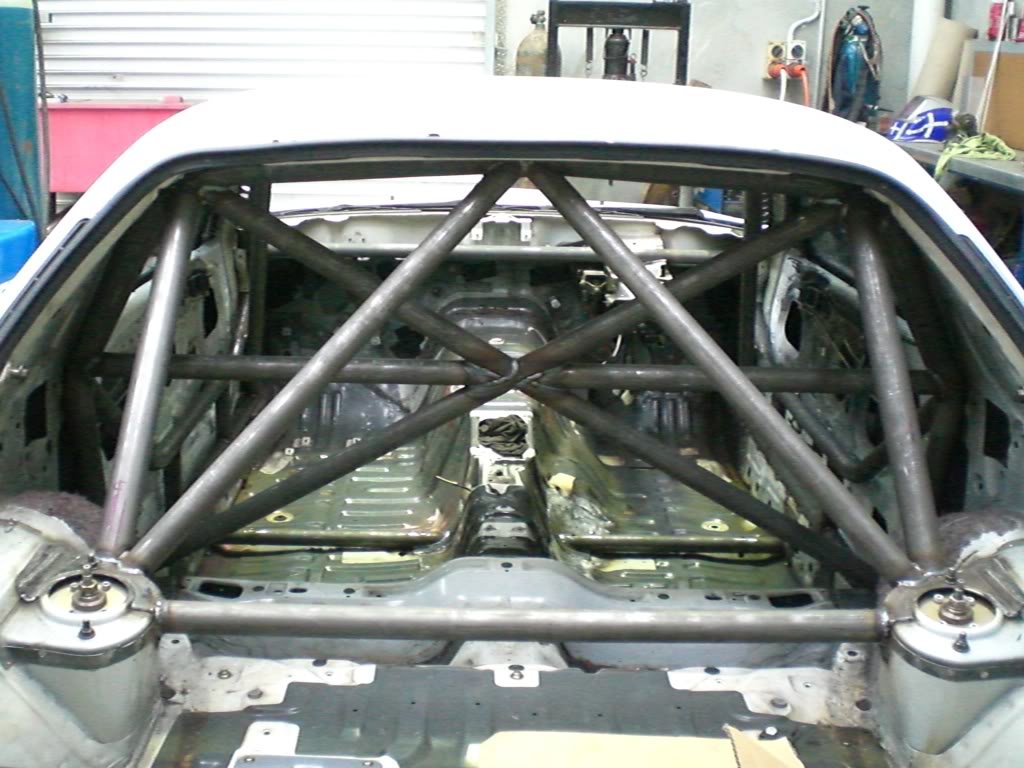
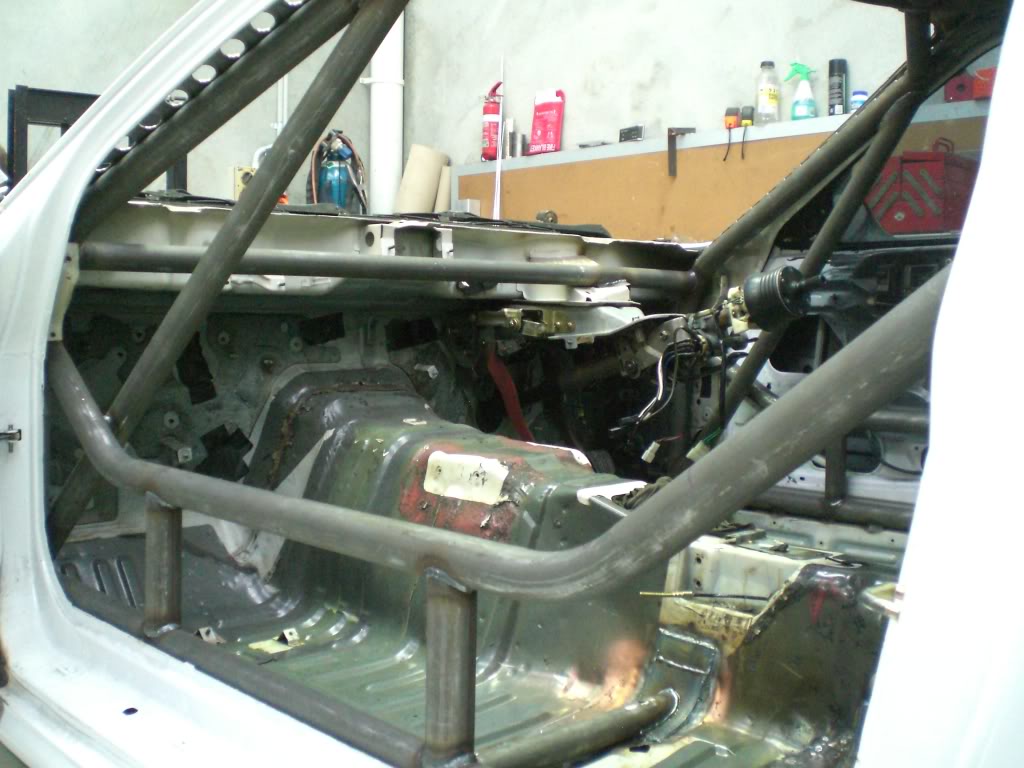
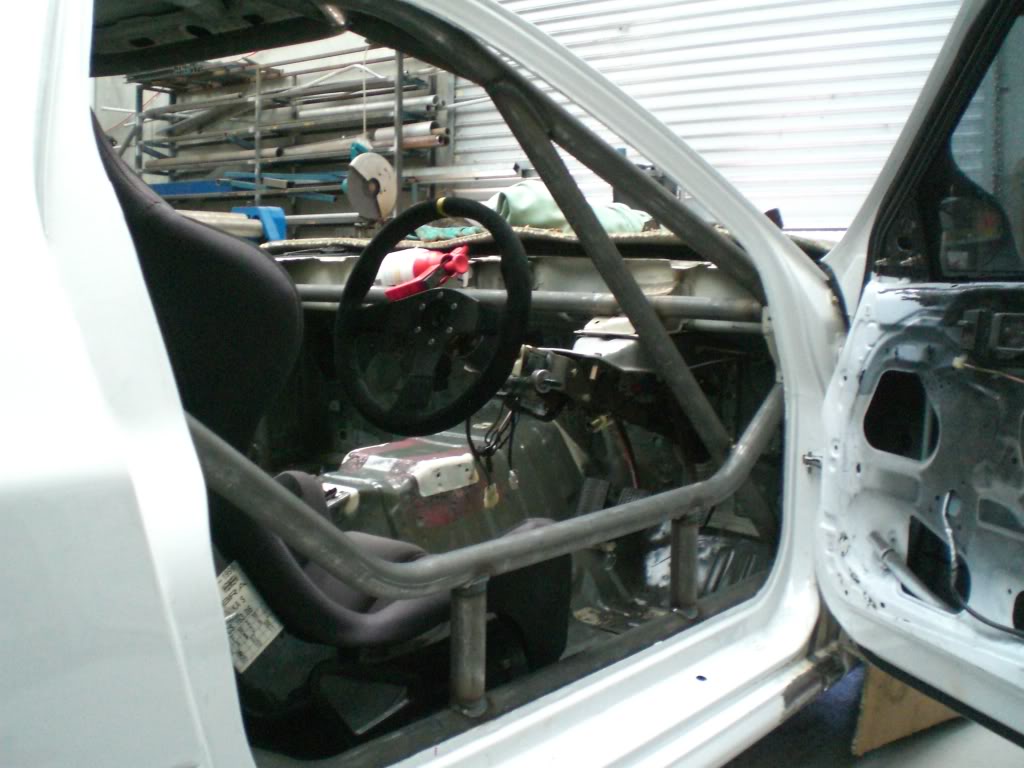
Thread Starter
BRUCE LEE APPROVED
Joined: Dec 2010
Posts: 58
Likes: 1
From: Melbourne, Australia
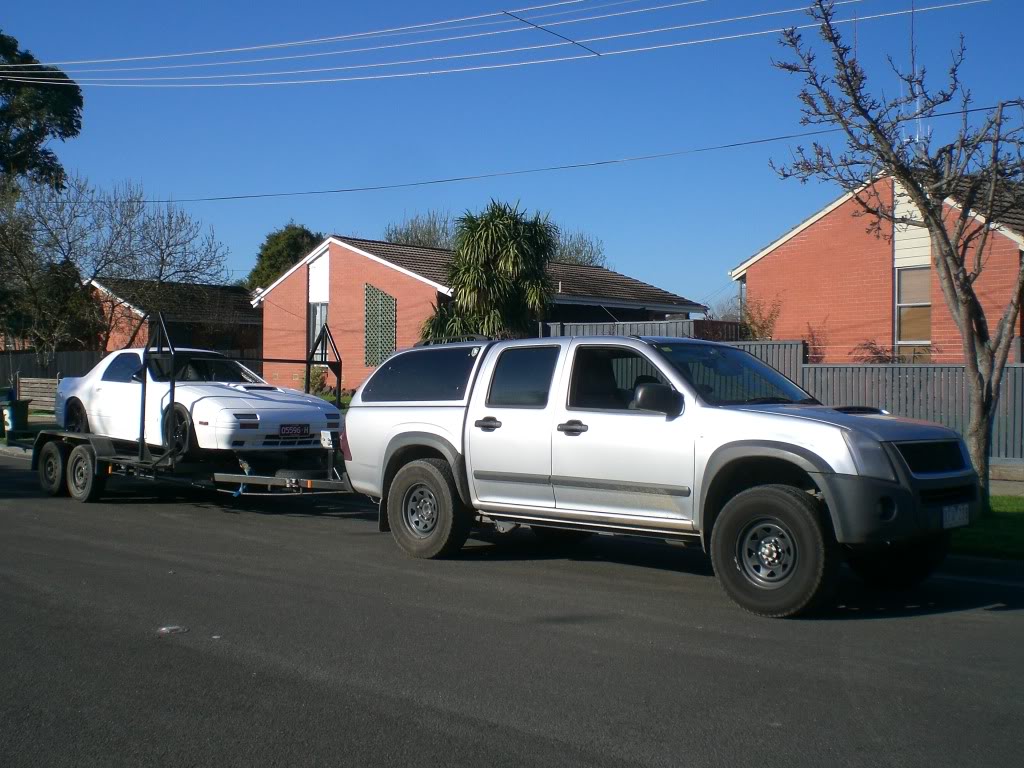
By now I had a car that was not really driveable. This meant a trailer. A customer of mine had sold his racecar and had an old trailer sitting at home. It had surface rust and was pretty basic. I re painted and rewired it and added a tyre rack on the front. Then towed the car home to prepare for the next stage.
By now I had joined a local forum for Rotaries and a guy not 5km from my place had the same car and was a wealth of knowlegde. While in the grandstand one Sunday afternoon watching the V8 super cars Simon casually mentioned removing the motor and trans is a 2 hour job - challenge accepted.
Ready to tidy up before paint.
Thread Starter
BRUCE LEE APPROVED
Joined: Dec 2010
Posts: 58
Likes: 1
From: Melbourne, Australia
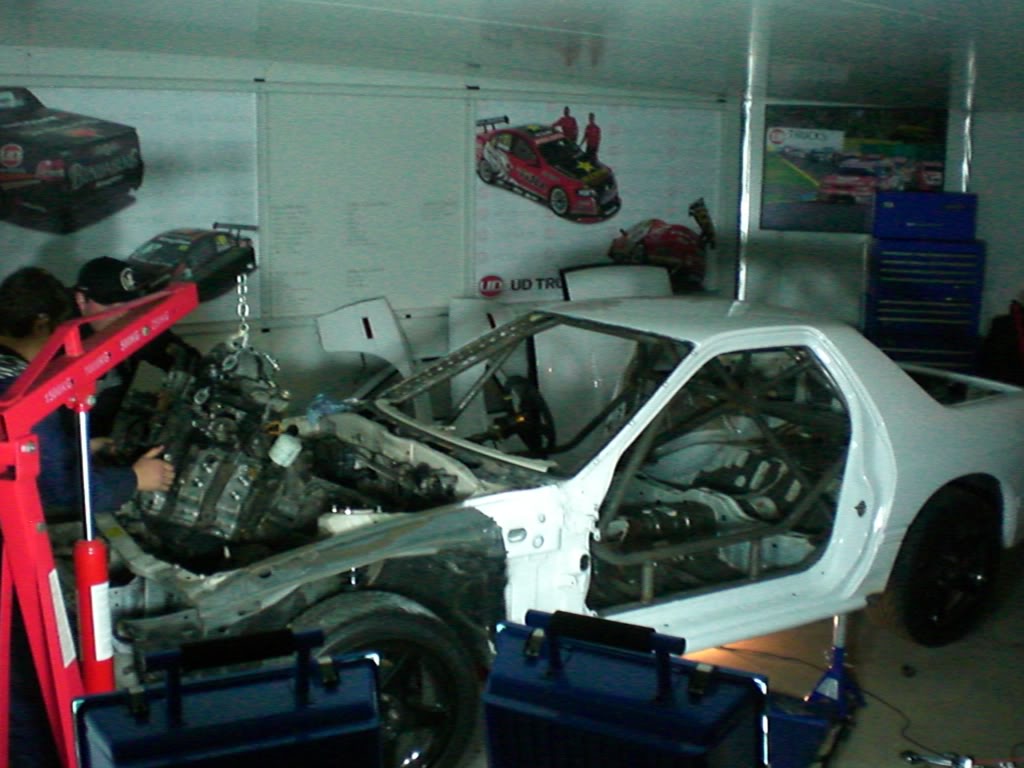
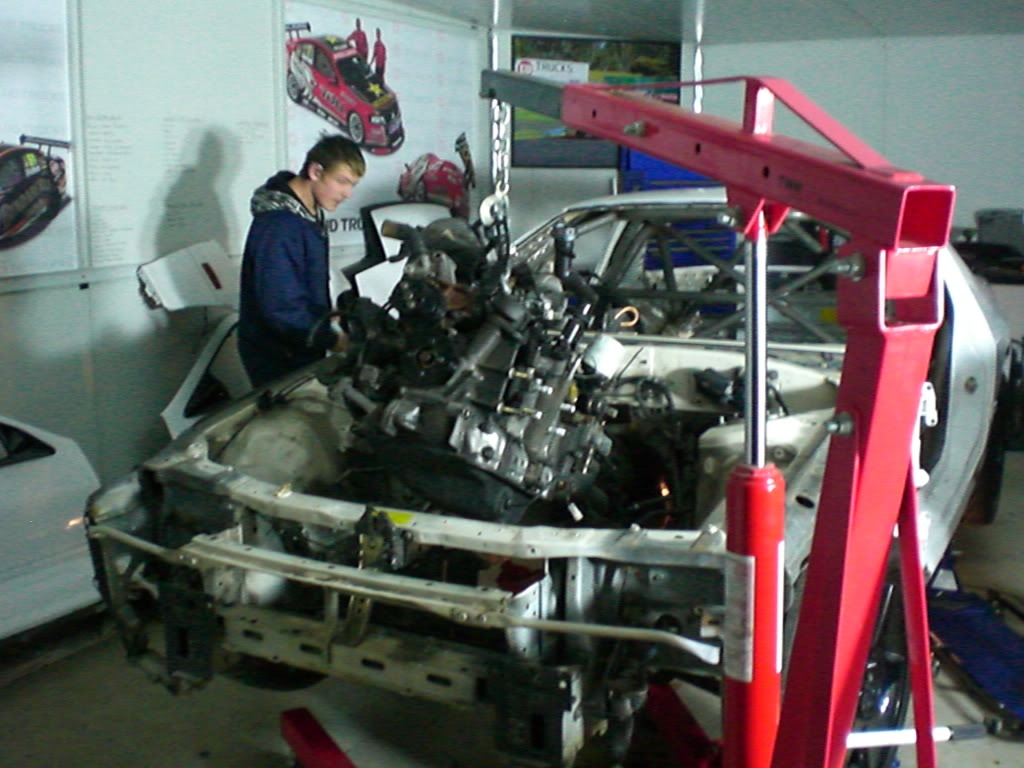
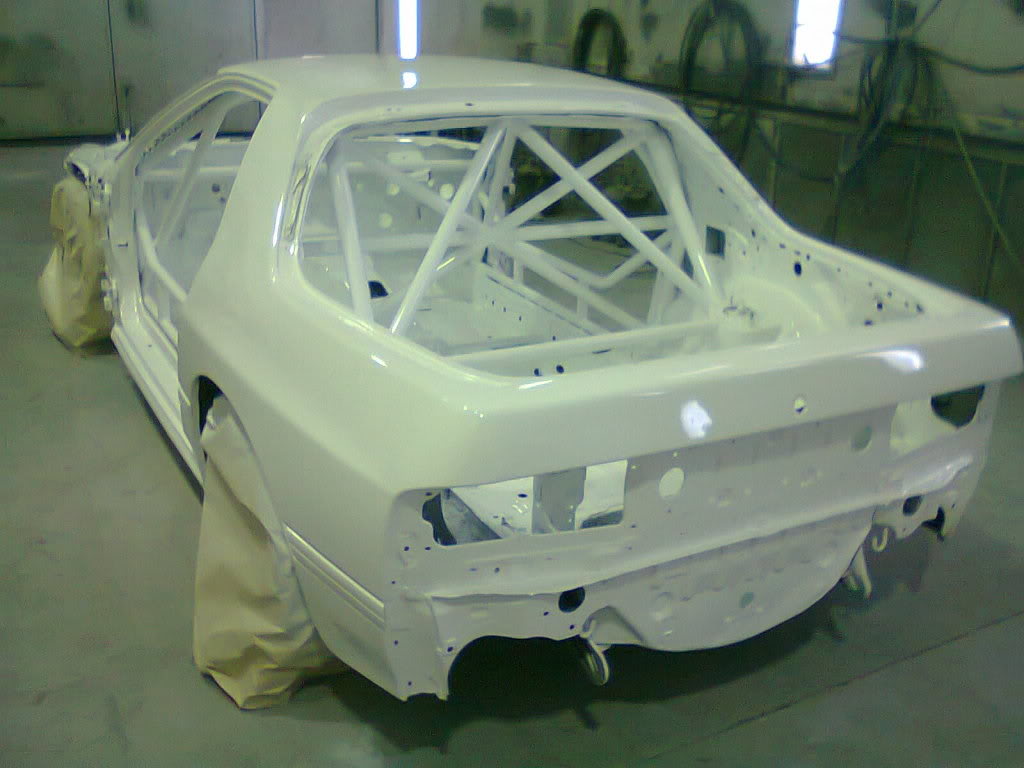
With the engine bay totally bare - it was back to the booth to paint the inside and engine bay.
Prime it
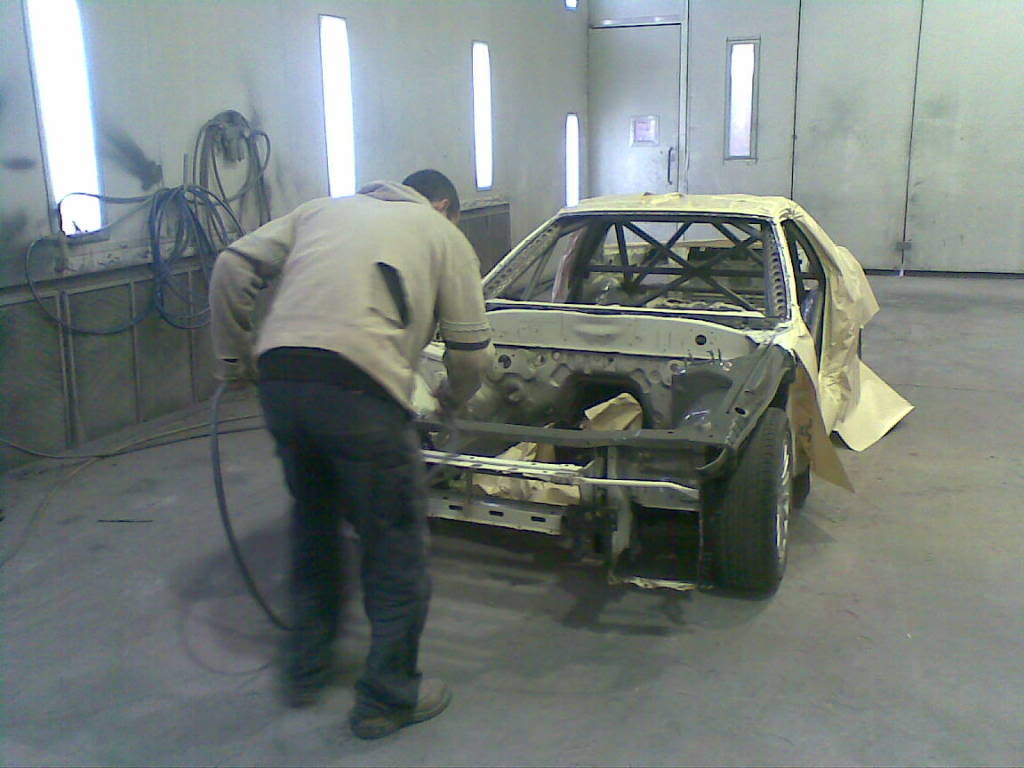
Eat McDonalds breakfast while it dries..........................
Paint it
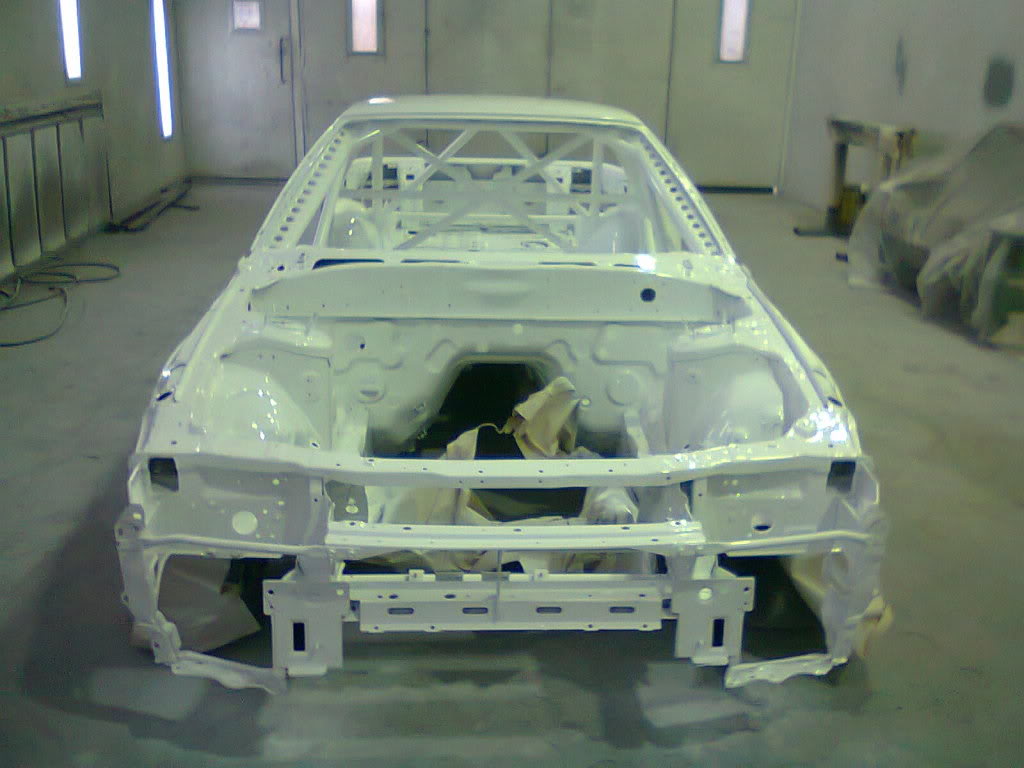
Prime it
Eat McDonalds breakfast while it dries..........................
Paint it
Thread Starter
BRUCE LEE APPROVED
Joined: Dec 2010
Posts: 58
Likes: 1
From: Melbourne, Australia
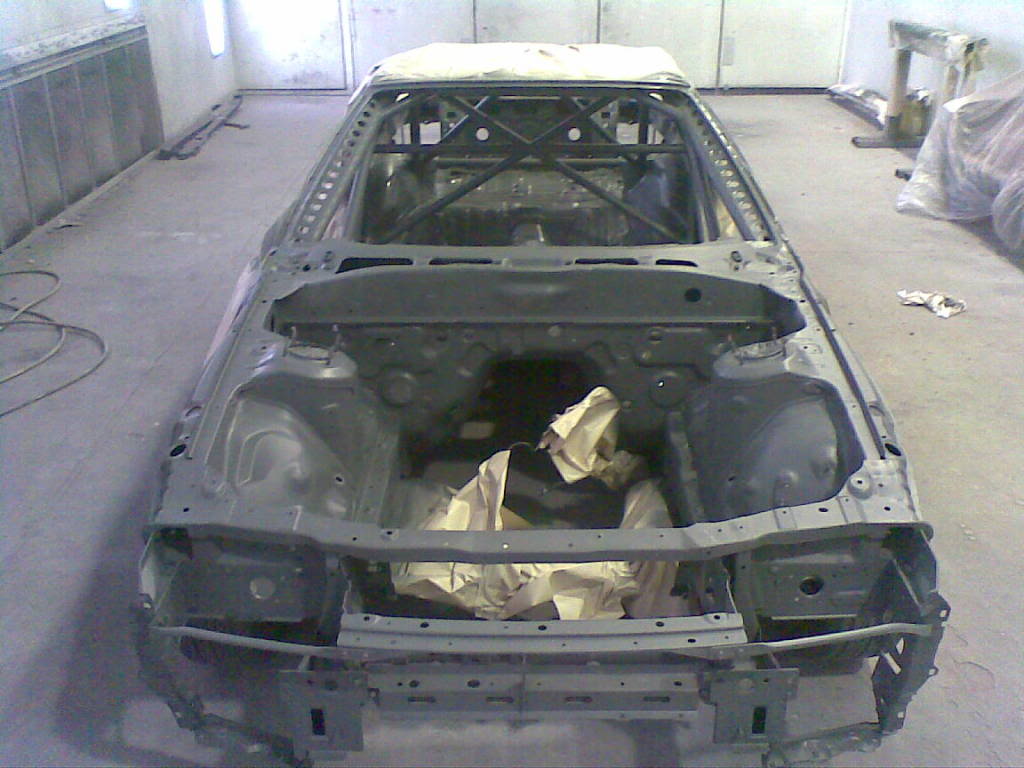
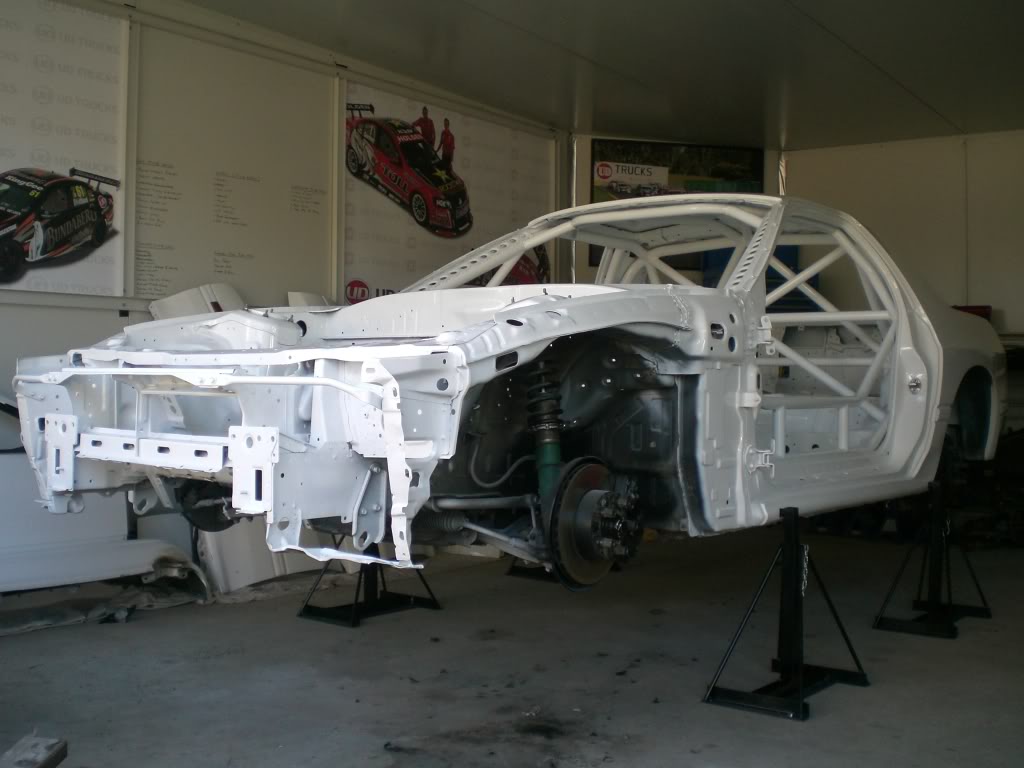
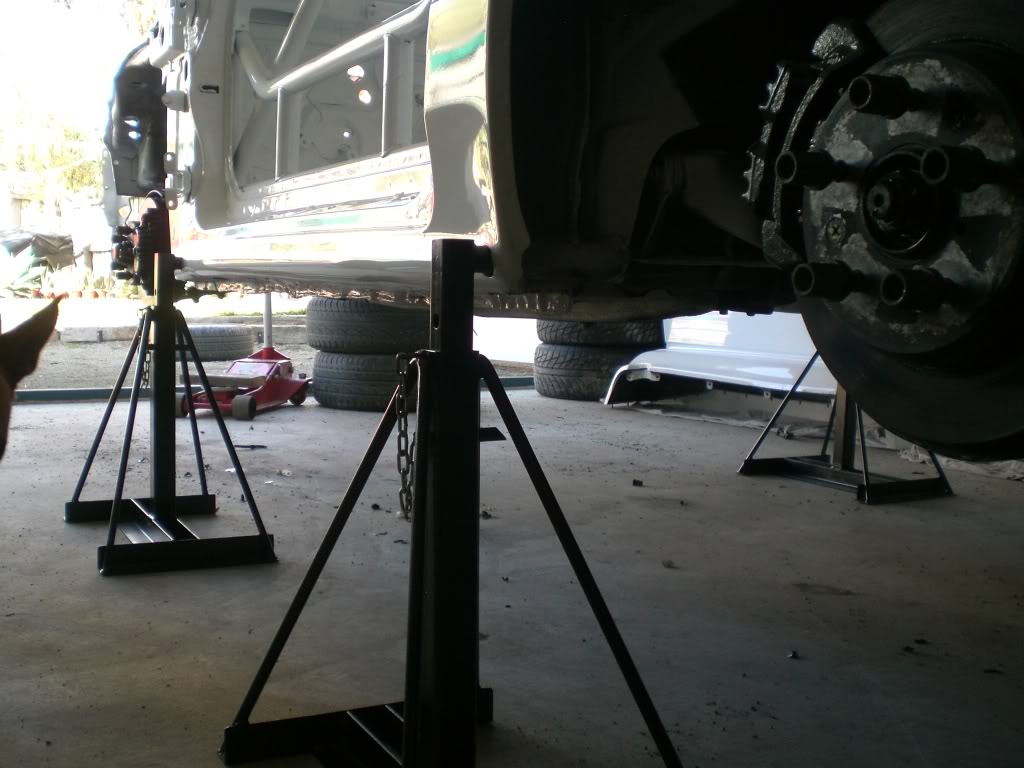
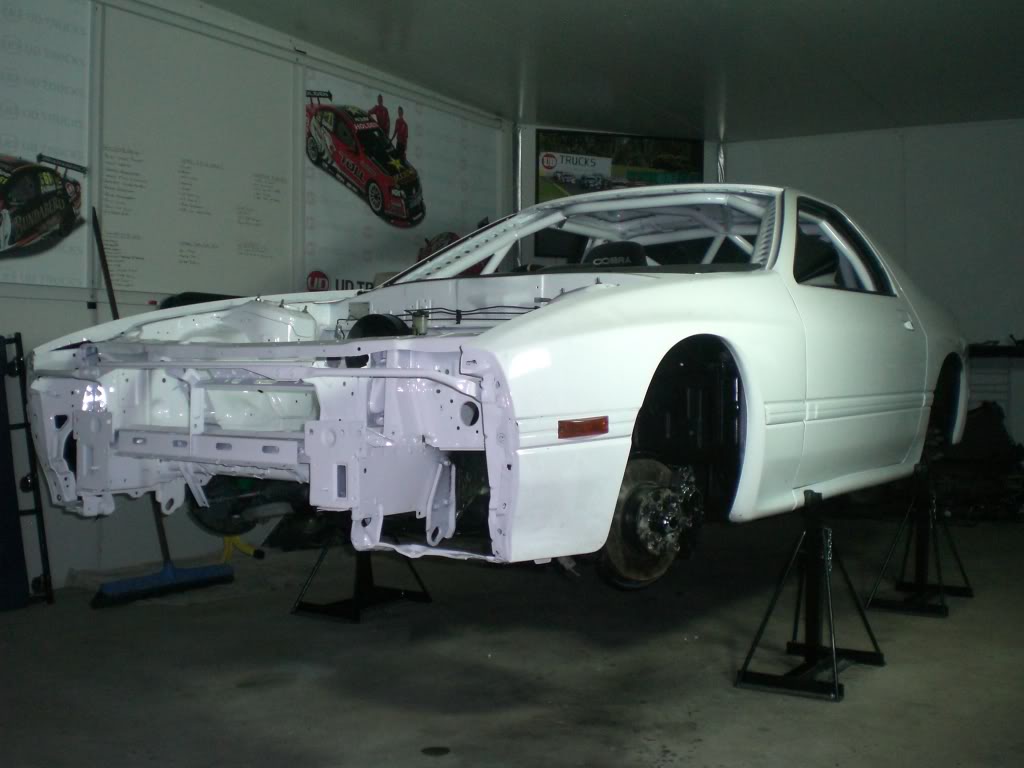
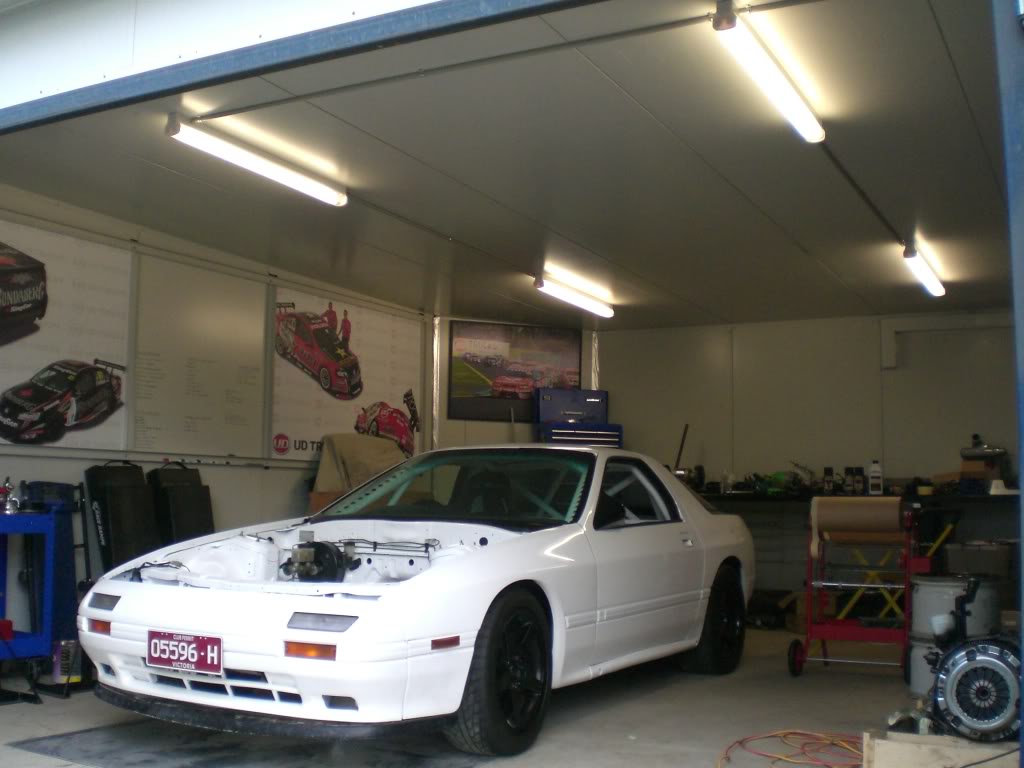
Back in the workshop looking about as bare as it can. Also you might notice the sill stands - nothing worse than trying to work under a car with no room. These handy things get the car high and stable. I hate putting a jack stand under a car then finding where it is happens to be right in the way.
Thread Starter
BRUCE LEE APPROVED
Joined: Dec 2010
Posts: 58
Likes: 1
From: Melbourne, Australia
The old Teins in the car were just old. The spring rates were something like 10kg front and 8kg rear. No good on a tarmac rally or a track for that matter just too stiff. They had been treated quite badly too.
Rallies need suspension with a little give and even on the track you need weight transfer to get the car handling right. So I bought a new set of Teins with 5kg front and 4kg rear. Sounds soft but I have done alot of research into this and consulted with my race engineer and these are where we need to be.
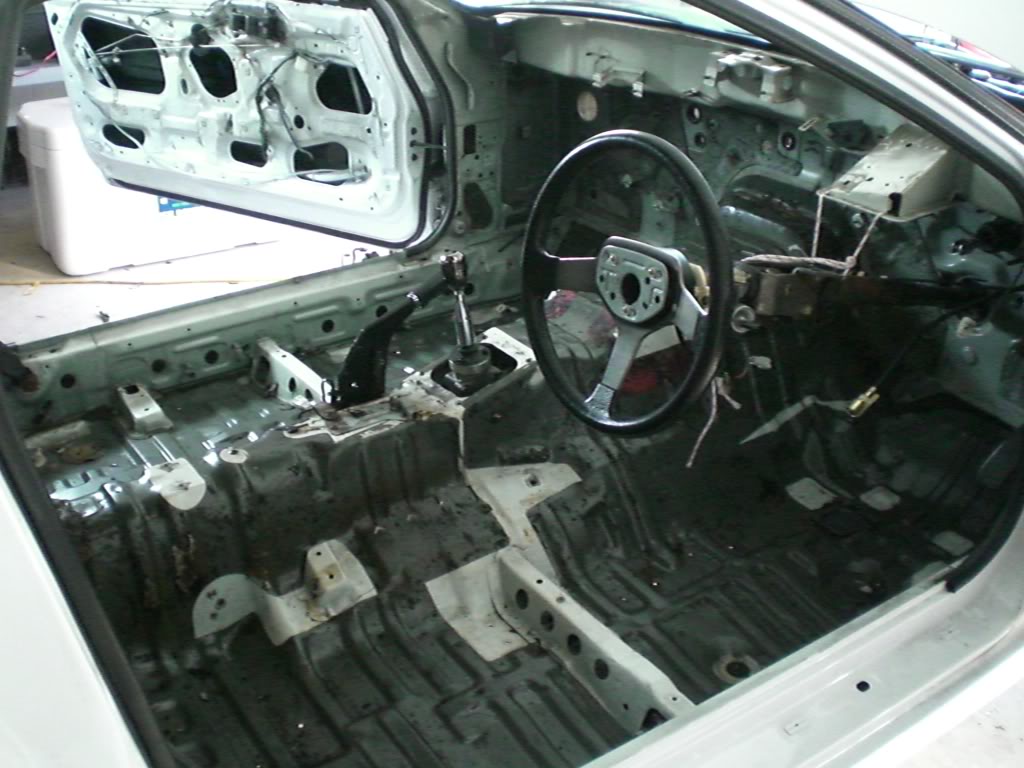
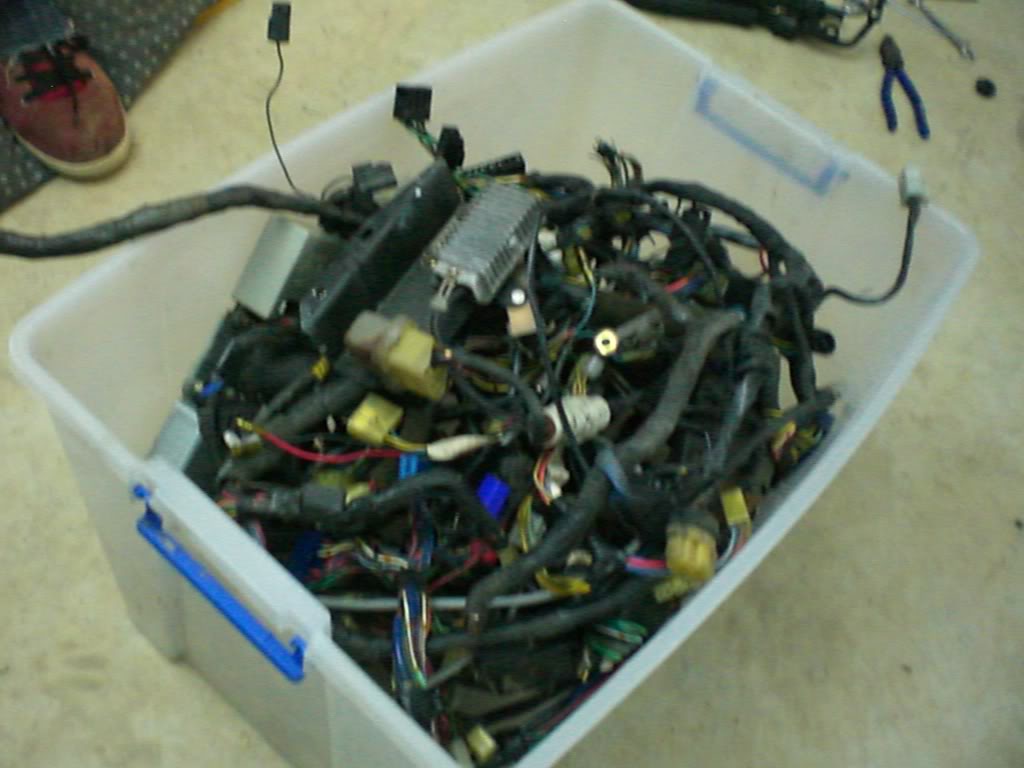
By now I had totally removed the wiring lom - a major source of electrical gremlins in an FC. I am rewiring the whole car and running a Microtec so just the basics are needed anyway.
Wiring destined for the bin
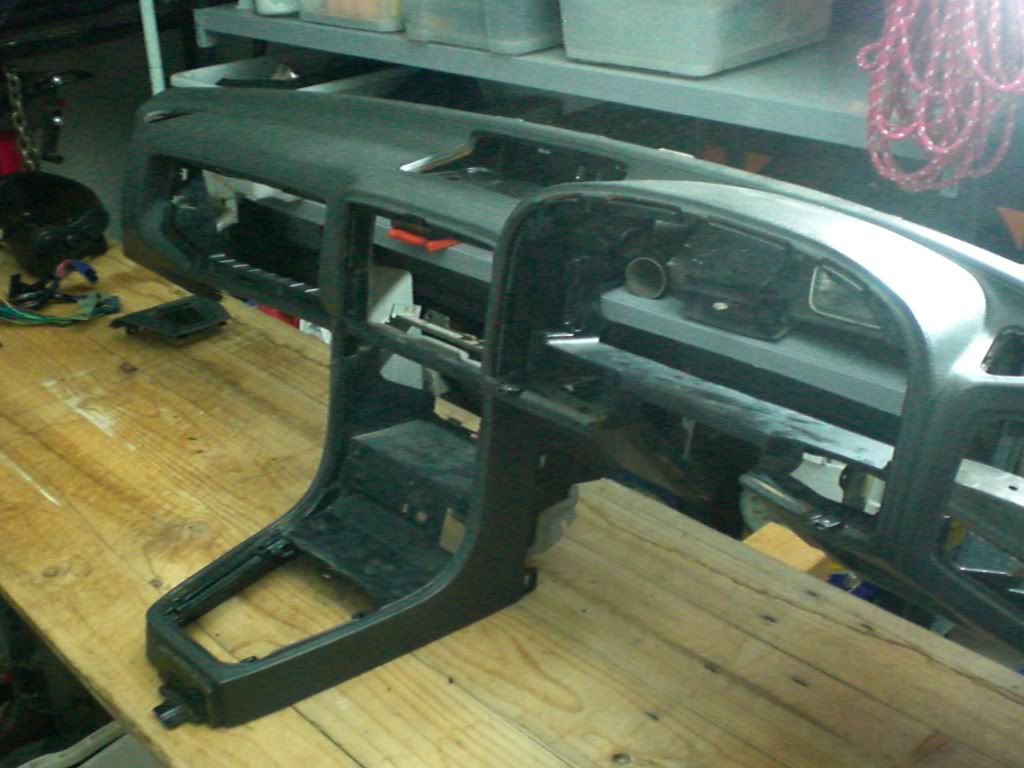
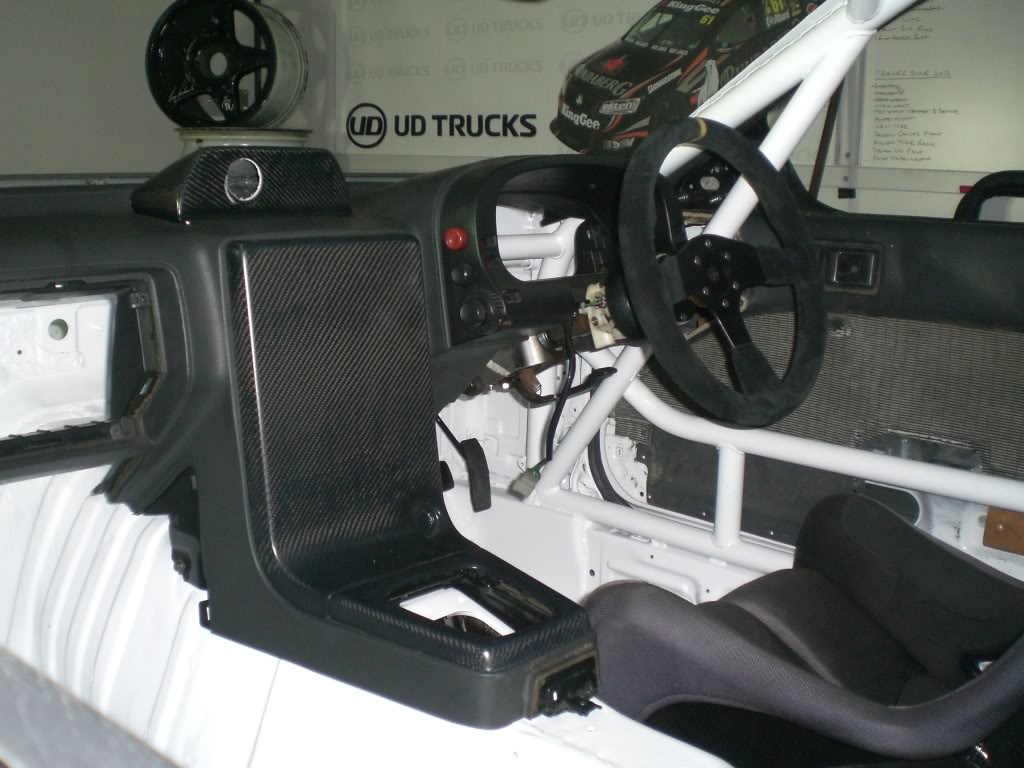
Stripped dash ready to be trial fitted before assembly.
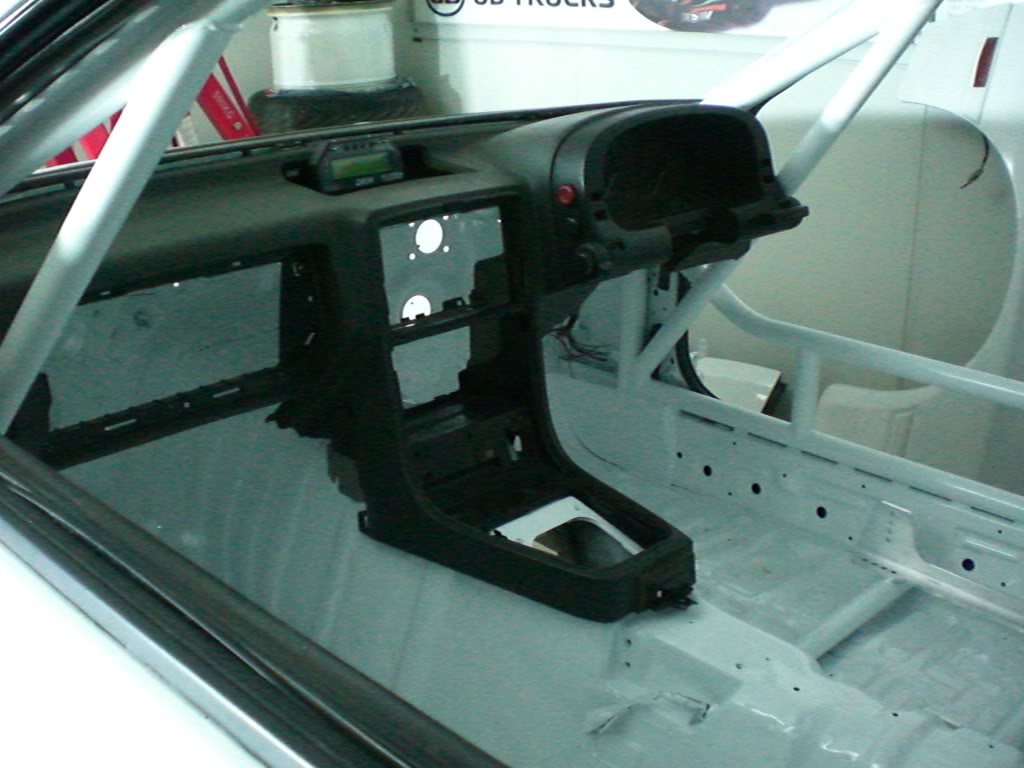
I like how all the controls for wipers and lights are on the speedo head surround - this makes the dash easier to keep minimal along with the steering column and I can run a blank centre console ready to accept more important items than aircon and heating...........
Trial fitting - went in alot easier than I anticipated.
Pedals in, and dash panels all installed.
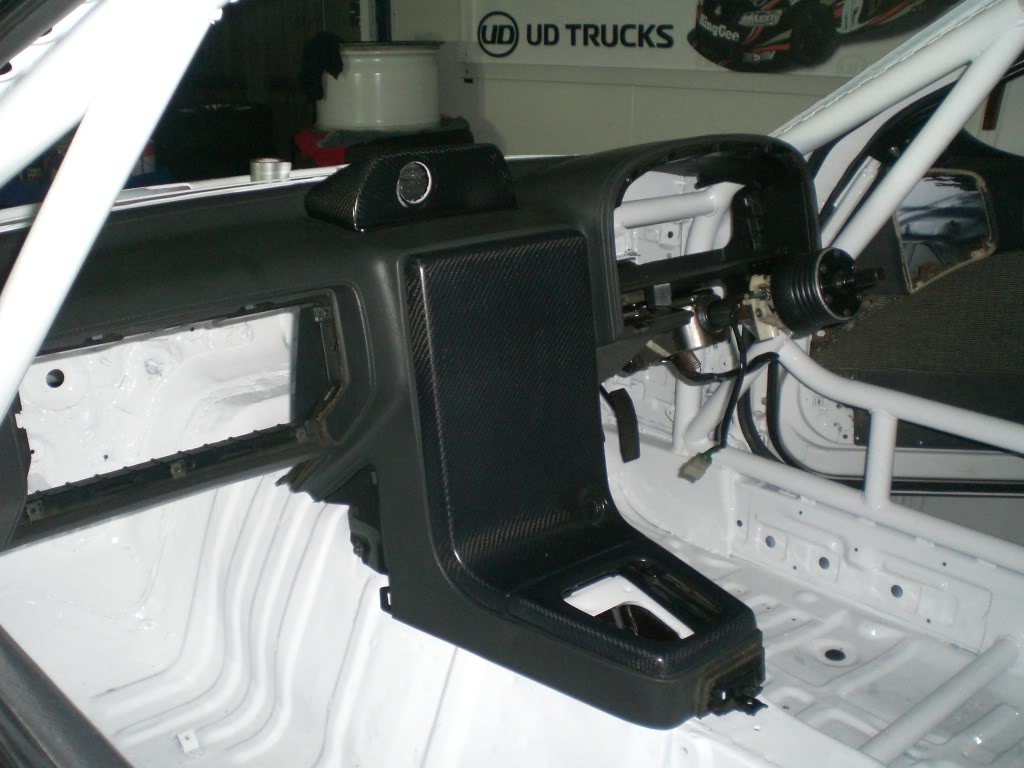
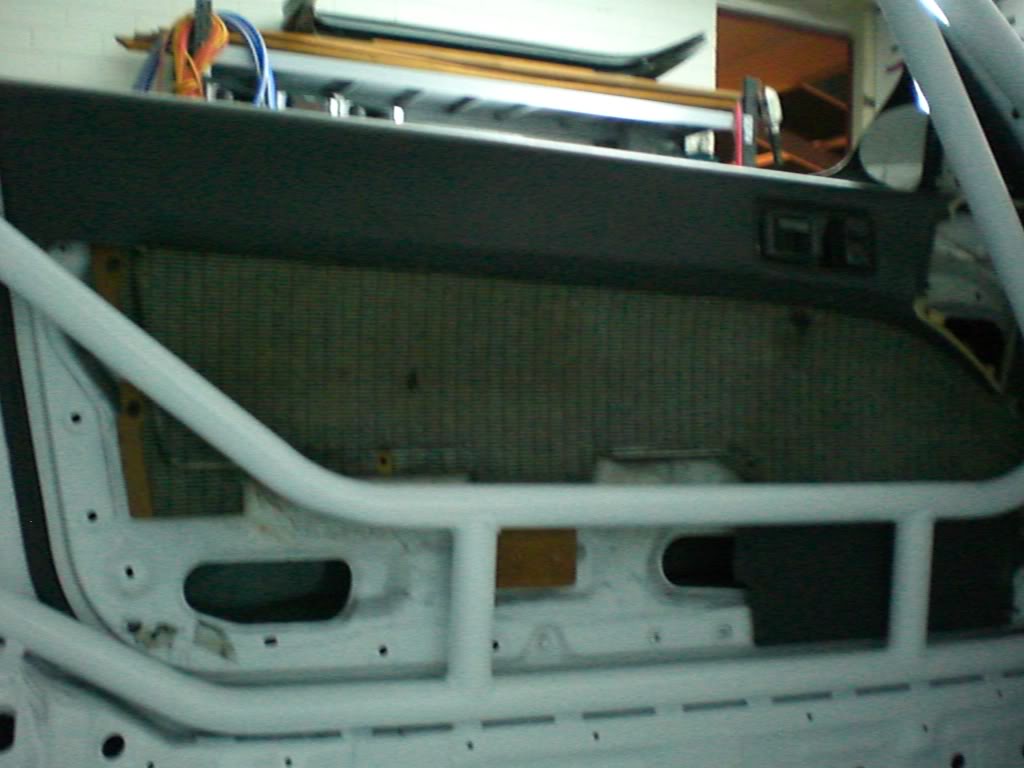
Trial fitting/cutting the door trims to clear the side intrusions.
Steering column and seat in - starting to look like my sort of office.
Rallies need suspension with a little give and even on the track you need weight transfer to get the car handling right. So I bought a new set of Teins with 5kg front and 4kg rear. Sounds soft but I have done alot of research into this and consulted with my race engineer and these are where we need to be.
By now I had totally removed the wiring lom - a major source of electrical gremlins in an FC. I am rewiring the whole car and running a Microtec so just the basics are needed anyway.
Wiring destined for the bin
Stripped dash ready to be trial fitted before assembly.
I like how all the controls for wipers and lights are on the speedo head surround - this makes the dash easier to keep minimal along with the steering column and I can run a blank centre console ready to accept more important items than aircon and heating...........
Trial fitting - went in alot easier than I anticipated.
Pedals in, and dash panels all installed.
Trial fitting/cutting the door trims to clear the side intrusions.
Steering column and seat in - starting to look like my sort of office.
Thread Starter
BRUCE LEE APPROVED
Joined: Dec 2010
Posts: 58
Likes: 1
From: Melbourne, Australia
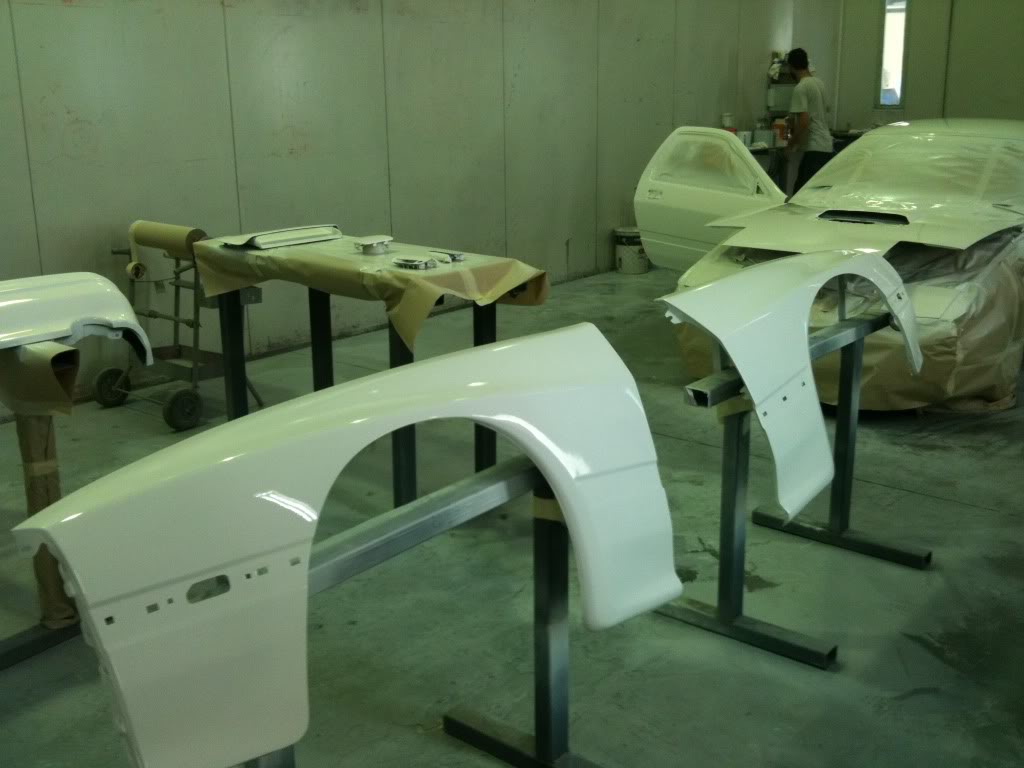
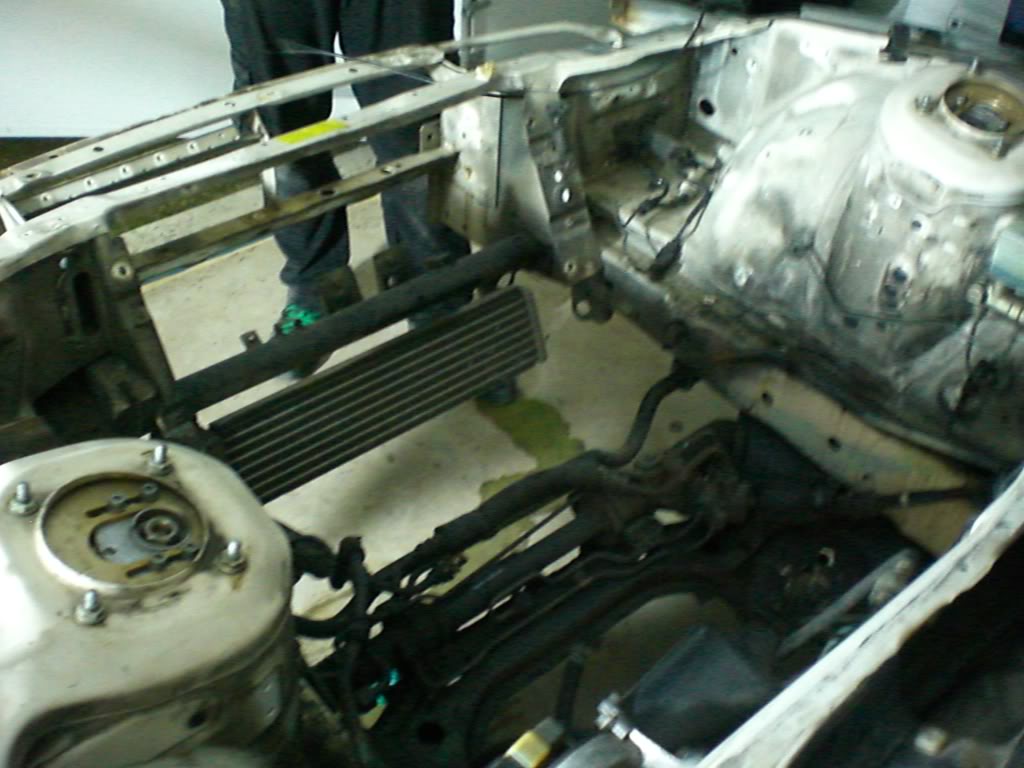
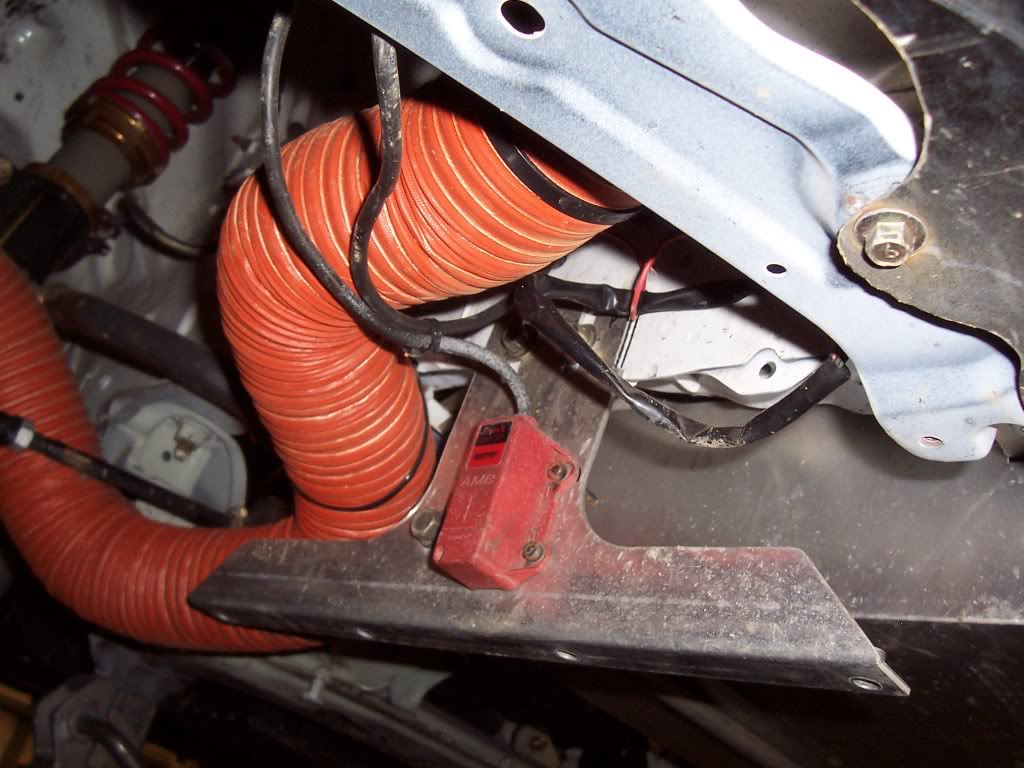
Brake lines, I labeled the things and took lots of pictures and re assembly was easy. Brake booster in, and all the crossmembers are soda blasted and repainted. I have been repainting everything in rust proof epoxy satin black to make the car tidy.
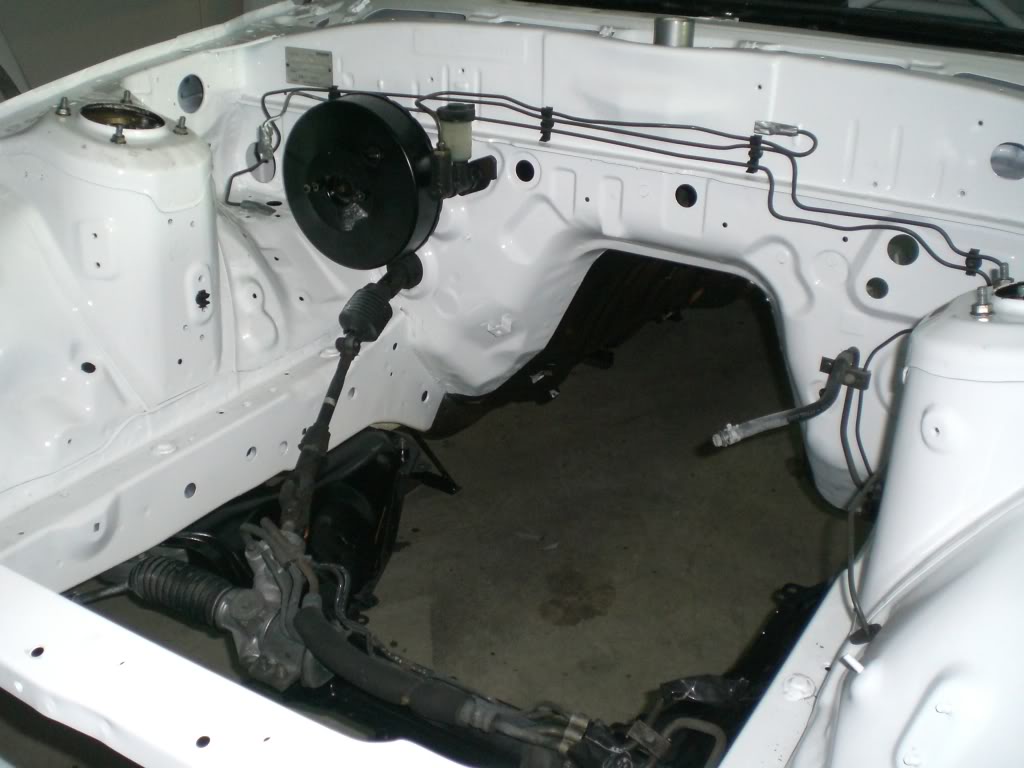
Doors on, fenders on and all under the car painted epoxy satin black. Fuel tank re installed with intank Bosch 044 and rear end re installed with 4.11 Mazdaspeed 1.5 way torsen LSD. All wounts and control arm bushed are now delrin, and the front diff mount is welded solid along with DTSS cancellors.
On the fuel system I am going to give it a go without a surge tank. If surge does occur - then I will swap to external pump with 044. Runing 4 1000cc ID injectors on aftermarket rail but more on the motor later.
Thats it for now, I am making my undertray and lip tomorrow and I will post pics of the turbo, intercooler and other bits and pieces. Thanks for reading my build.
James.
Last edited by JamesG; Sep 15, 2012 at 12:47 PM.
Beautiful car and I love the seemingly casual way things get done..."I needed workspace and bang!, garage is built, "I needed a rollcage" and voila!, rollcage appears.
I know it's not that easy and fast but it's fun to imagine it might be.
A comment about your build sequence...
I thought it was typical- and certainly it seems logical- to do all the build/fab work first, then strip down for paint.
Were there time constraints or other reasons for approaching this car backwards?
Thread Starter
BRUCE LEE APPROVED
Joined: Dec 2010
Posts: 58
Likes: 1
From: Melbourne, Australia
Beautiful car and I love the seemingly casual way things get done..."I needed workspace and bang!, garage is built, "I needed a rollcage" and voila!, rollcage appears.
I know it's not that easy and fast but it's fun to imagine it might be.
A comment about your build sequence...
I thought it was typical- and certainly it seems logical- to do all the build/fab work first, then strip down for paint.
Were there time constraints or other reasons for approaching this car backwards?
I know it's not that easy and fast but it's fun to imagine it might be.
A comment about your build sequence...
I thought it was typical- and certainly it seems logical- to do all the build/fab work first, then strip down for paint.
Were there time constraints or other reasons for approaching this car backwards?
Oh and the garage - built it in 5 hours after the slab was down. Those coolroom/spraybooths are so easy to build! I pre fabbed the door frame and the rest was built on the day onsite. Not quite bang and done but pretty close!
Thread Starter
BRUCE LEE APPROVED
Joined: Dec 2010
Posts: 58
Likes: 1
From: Melbourne, Australia
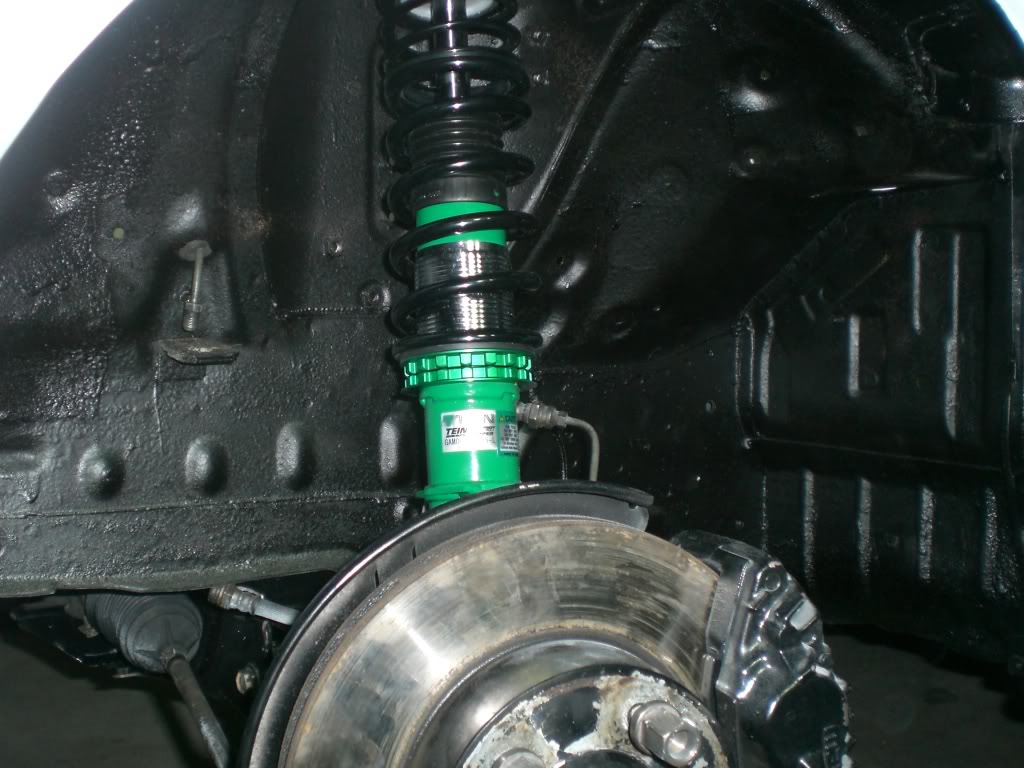
I have been meaning to wire up my workshop lights and finally got up Sunday and decided to get it done. I can't beleive I put it off for so long. I was using a portable worklight, now it's like daylight and so much easier at 2am! I lost track of time and went to work today with 3 hours sleep...........
I had to drop the car onto its wheels to install the lights - first time in 2 months since it was a bare shell. I installed Tein Super Street coilovers to replace the old Tein HA setup that was very very average. The HA were VERY firm, at least 8kg front and 6kg rear but I have heard could be as high as 10kg front 8kg rear. Certainly felt firm I have the dampers backed off all the way to try to smooth it out. Anyway the new suspension was as low as it can go so I expected it to be on the deck - wrong. Turns out the Australian Spec Tein SS are tuned for Aussie conditions and that means lower rate springs (5kg front and 4 kg rear), damping to suit and the suspension just can't go as low.
I wanted the lower spring rates to suit the tracks and tarmac rally events and expected the valving to suit but the ride height was a surprise. I was not happy at first as I really liked it so the fenders sat just on top of the tyre - now its about 30mm or just under an inch higher. The more I spoke to my race mechanic the more I realised its better that way for what I intend to use it for. I realise now I must be in my mid 30's because I am actually listening to a suspension guy instead of slamming it to the weeds
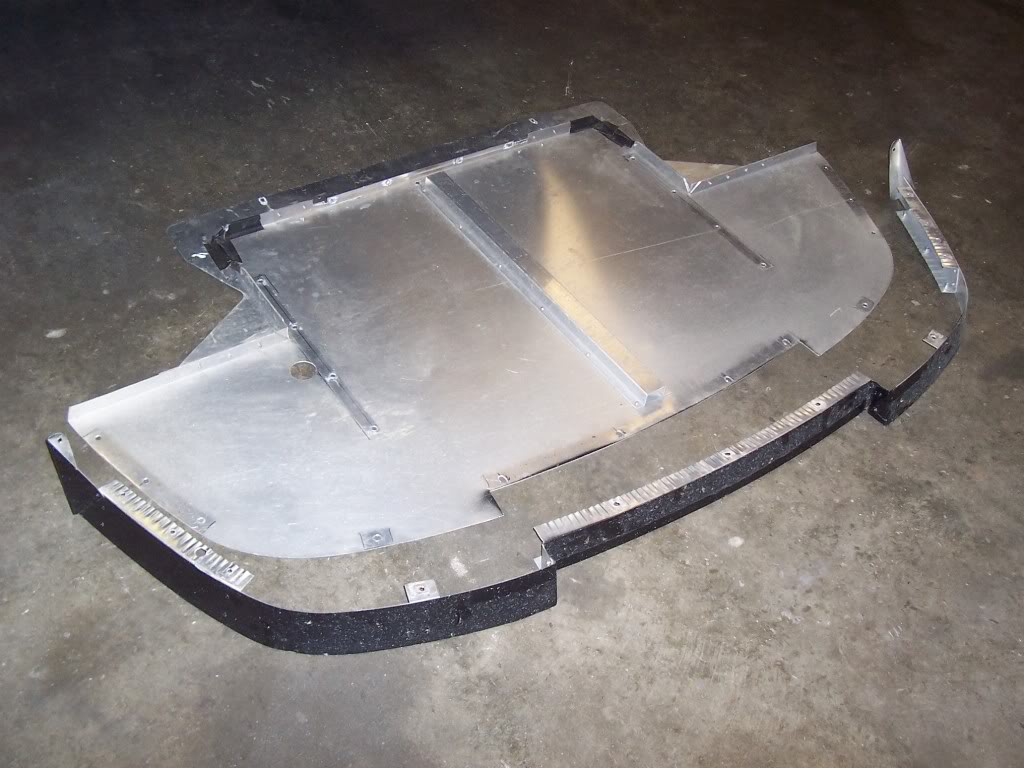
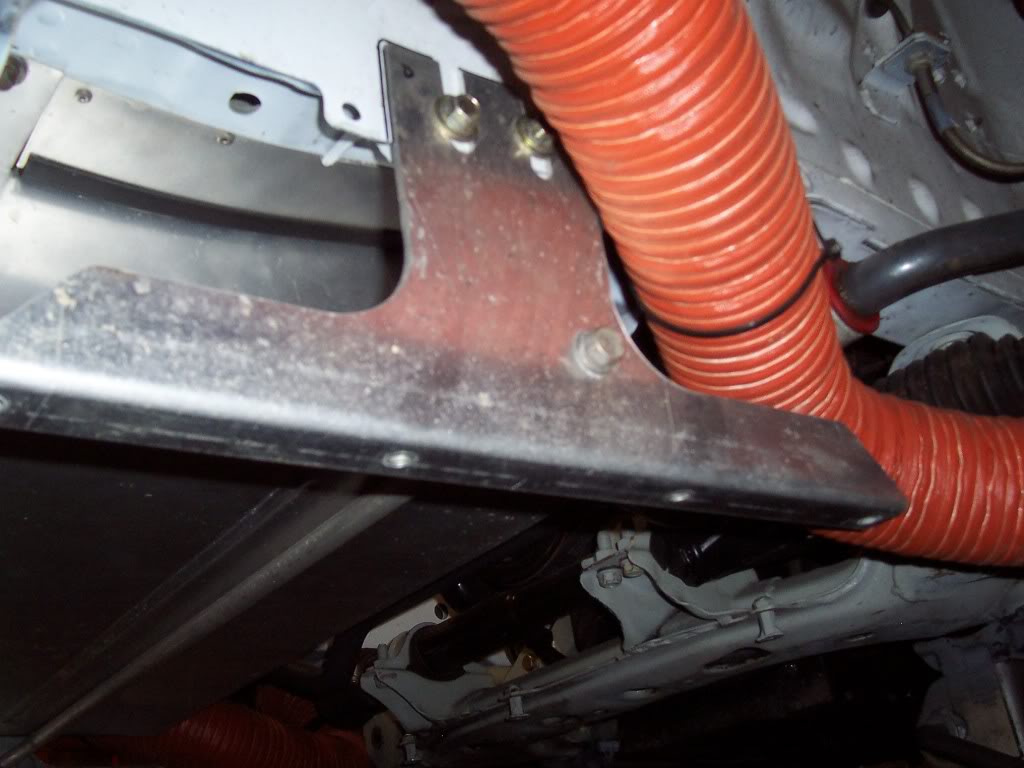
I started fitting up the front bar and working on an undertray idea.
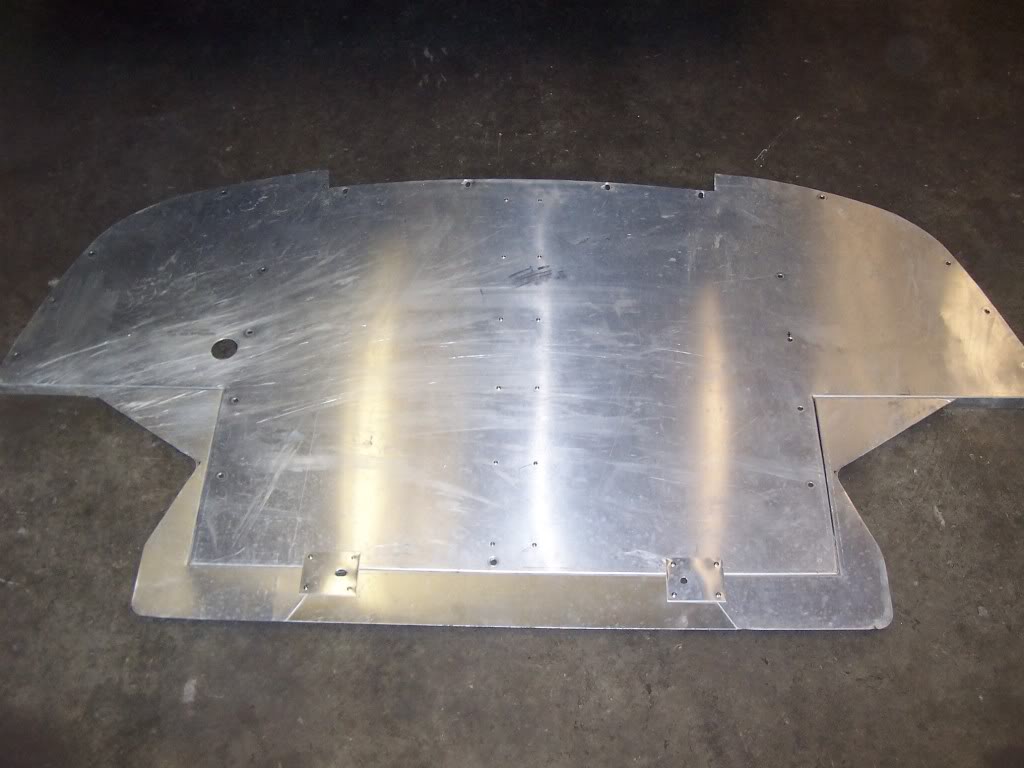
I am basing it on this car below from the US. I saw it somewhere online where the owner was advertising for sale the undertray.

Here is the tray in more detail.
I had to drop the car onto its wheels to install the lights - first time in 2 months since it was a bare shell. I installed Tein Super Street coilovers to replace the old Tein HA setup that was very very average. The HA were VERY firm, at least 8kg front and 6kg rear but I have heard could be as high as 10kg front 8kg rear. Certainly felt firm I have the dampers backed off all the way to try to smooth it out. Anyway the new suspension was as low as it can go so I expected it to be on the deck - wrong. Turns out the Australian Spec Tein SS are tuned for Aussie conditions and that means lower rate springs (5kg front and 4 kg rear), damping to suit and the suspension just can't go as low.
I wanted the lower spring rates to suit the tracks and tarmac rally events and expected the valving to suit but the ride height was a surprise. I was not happy at first as I really liked it so the fenders sat just on top of the tyre - now its about 30mm or just under an inch higher. The more I spoke to my race mechanic the more I realised its better that way for what I intend to use it for. I realise now I must be in my mid 30's because I am actually listening to a suspension guy instead of slamming it to the weeds
I started fitting up the front bar and working on an undertray idea.
I am basing it on this car below from the US. I saw it somewhere online where the owner was advertising for sale the undertray.
Here is the tray in more detail.
Thread Starter
BRUCE LEE APPROVED
Joined: Dec 2010
Posts: 58
Likes: 1
From: Melbourne, Australia
Just make sure the beer is consumed AFTER the job is done!!!!
Amemiya stuff is not common - I think I have just been lucky. The mirrors pop up time to time. I got one Amemiya wing off ebay for $100.00 and an identical spare from some old guy at work. He had it in his garage from a bulk lot of parts he got at a hot rod swap meet of all places! I JUS?T missed a rare front lower half bar from amemiya too but I am going with stock S4 Bar, lip and the undertray now. Easier to replicate if/when I smash it.
Amemiya stuff is not common - I think I have just been lucky. The mirrors pop up time to time. I got one Amemiya wing off ebay for $100.00 and an identical spare from some old guy at work. He had it in his garage from a bulk lot of parts he got at a hot rod swap meet of all places! I JUS?T missed a rare front lower half bar from amemiya too but I am going with stock S4 Bar, lip and the undertray now. Easier to replicate if/when I smash it.


Joined: Aug 2008
Posts: 1,018
Likes: 3
From: Kansas City, MO
This is looking fantastic sir, keep it up. Really really like the cage, wow that thing looks amazing.
Good job on getting a great workspace sorted ASAP too.
Good job on getting a great workspace sorted ASAP too.
Last edited by misterstyx69; Jan 19, 2014 at 12:10 AM.

Thread Starter
BRUCE LEE APPROVED
Joined: Dec 2010
Posts: 58
Likes: 1
From: Melbourne, Australia
