
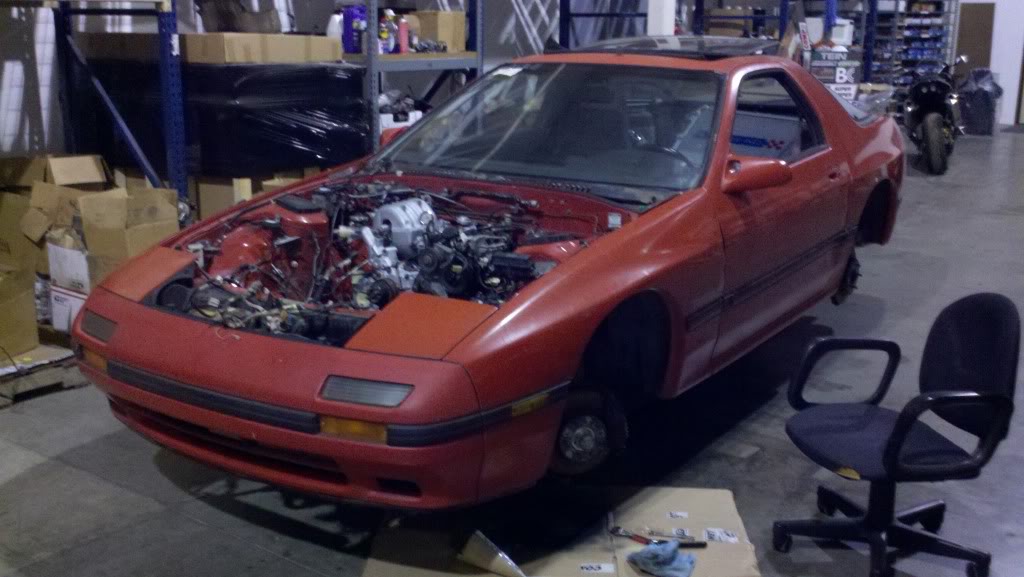
Back in an FC, now with more TII...

Title says it all. Been using RX7Club for many years to help friends, and for work from time to time. Had a clean unmolested 89 GXL a few years back that I bought with a seized motor (I believe it was rusted stuck from overheating and blowing a coolant seal). Found a healthy S5 N/A motor from the guys at Lucky 7 to put in, total investment of about $1,200 for a CA smog legal S5 coupe. It ran fantastic, passed CA smog with flying colors, miss it dearly. Heard recently that it is still running strong, and the new owner is loving it.
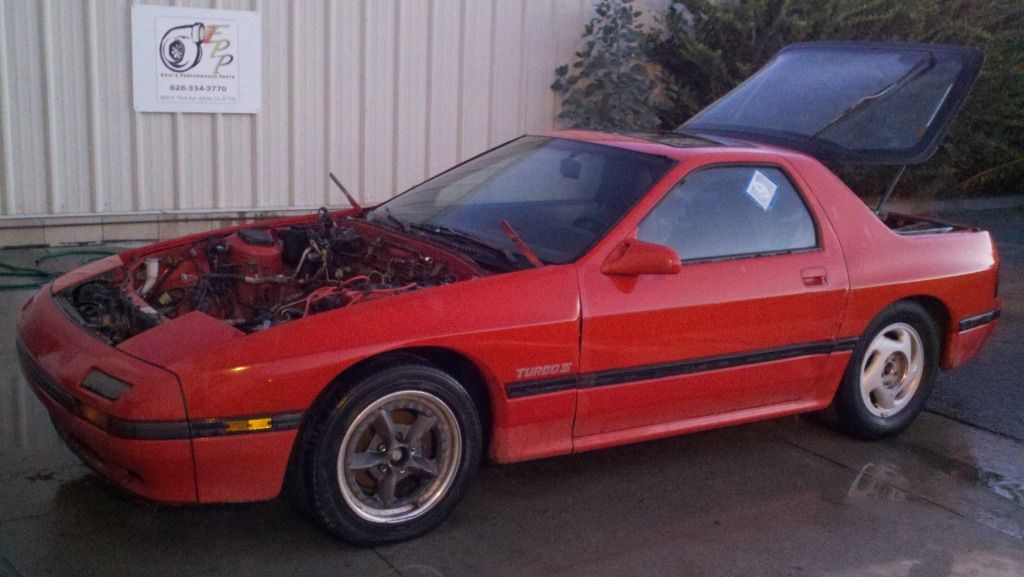
A friend had a 87 TII sitting in his back yard for at least 7 years. It was limped home on one rotor after a long night of running up on the mountain. Motor that blew up in it was a JDM S5 TII. Many years of offers and asking (not just me, but other friends and random people), finally it's mine for a smokin' deal! Both he and I are happy it will soon be on the street again. Been a long time since we've ridden in it ya know!
BONUS LIST:
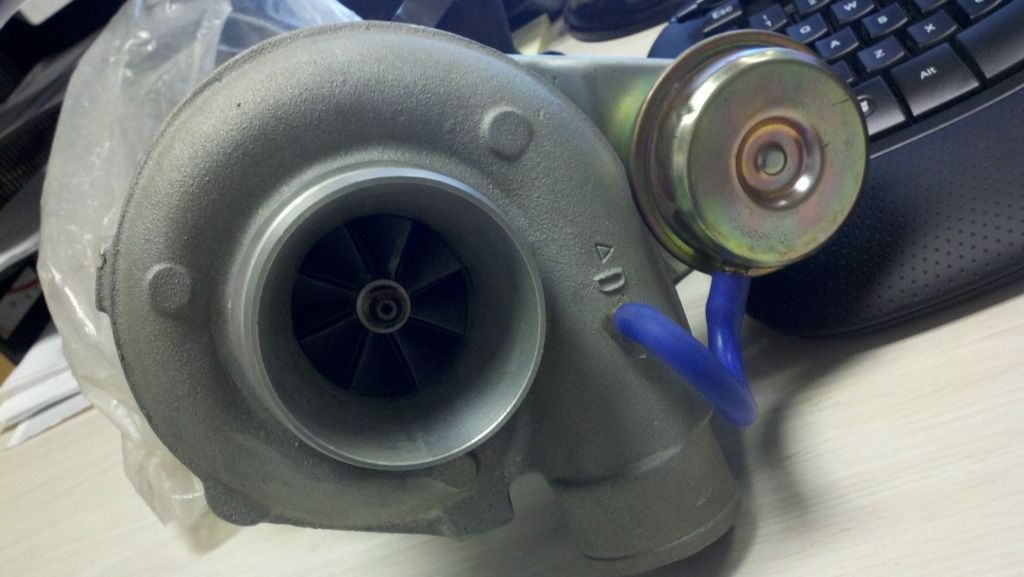
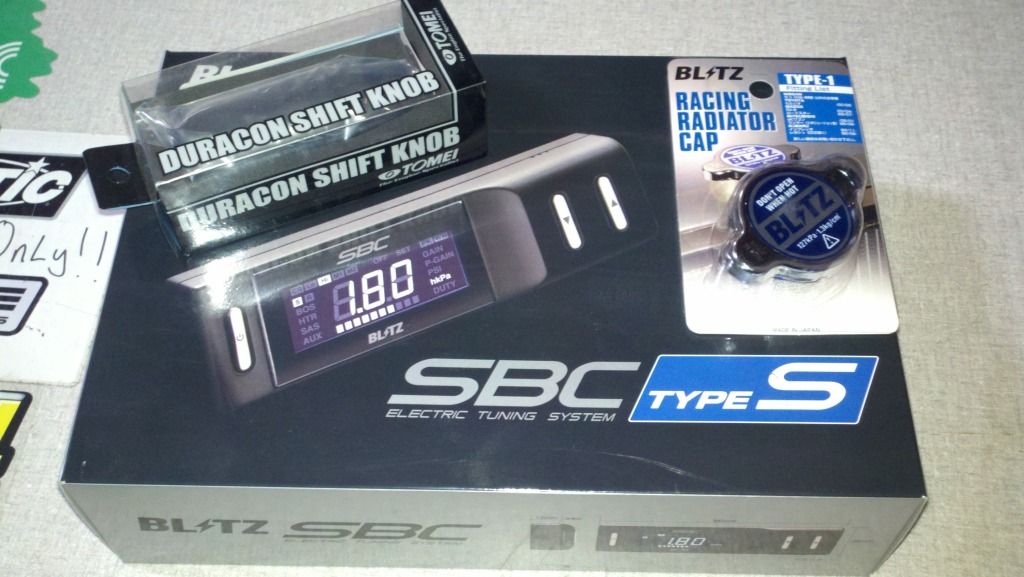
- Fresh S5 based hybrid turbo, looks like a 54-trim
- Rtek v1.5
- Walbro 255LPH
- Original TII wheels and Panasport G7-C5R's
- SS Braided Brake Lines
- SS Braided Oil Cooler Lines
- Working Power Everything (when it last ran)
- Working Heater & A/C (when it last ran)
- Trans shifted smooth and no grinds (when it last ran)
- LSD seemed to work well (when it last ran)
- RB Exhaust & DP (Coated, Extra O2 & EGT bung already in.)
- Tokico Blue Shocks & Eibach Springs
- Energy Suspension Master Kit (Still New In Box)
- RB DTSS Eliminators
- Some chrome short shifter that came off a S5 TII front clip.
- Some Phenolic Intake Manifold Gaskets
- Spare parts out the wazoo (turbos, harnesses, rats nests, injectors, AFM's, TMIC's, intake manifolds, sunroof, door, cats, turbo diff/trans)
- WINGLESS! my preference.
- HKS Turbo Timer
- 3" Filter MAF Adapter
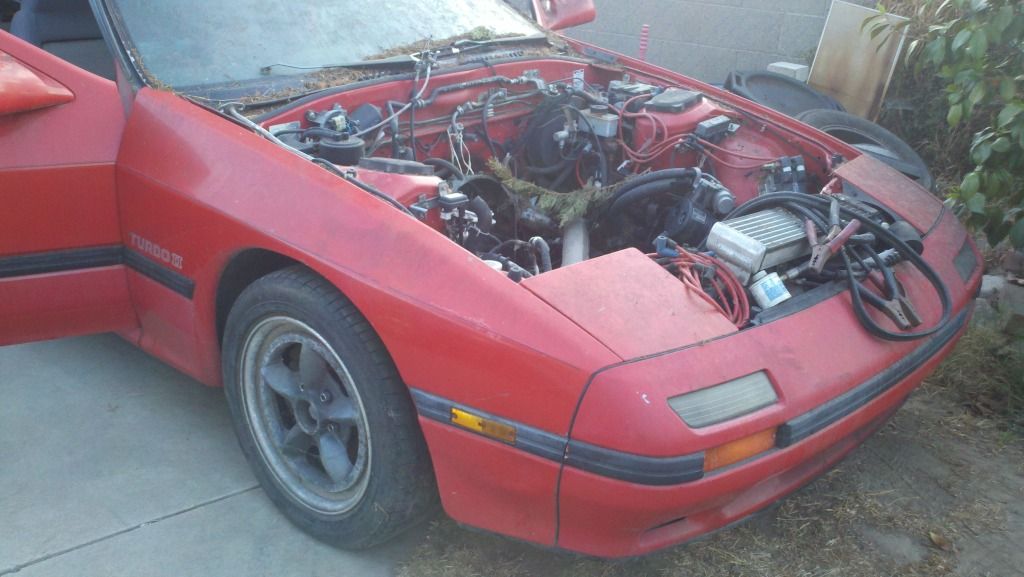
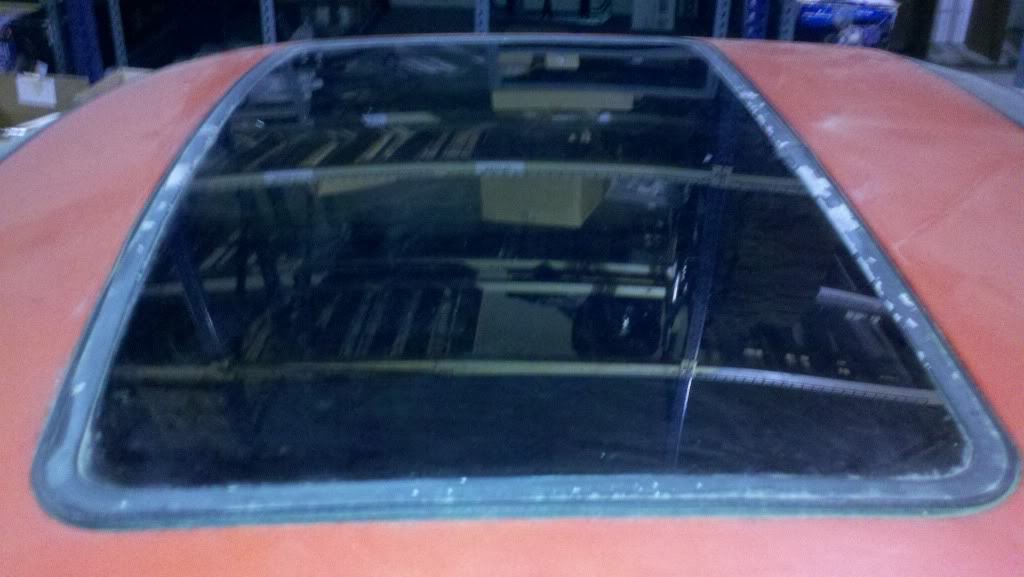
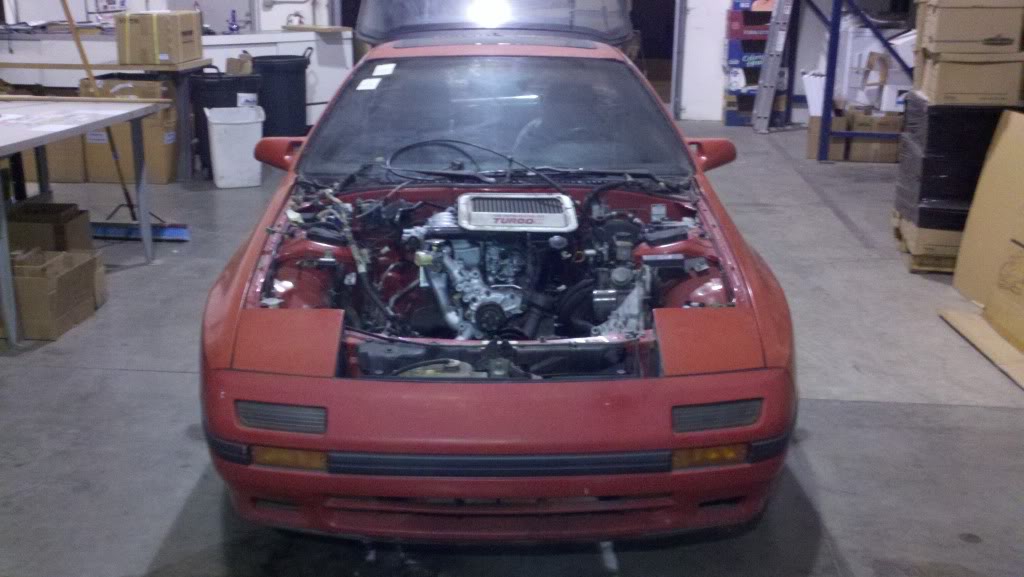
How it looked sitting at my friends house.
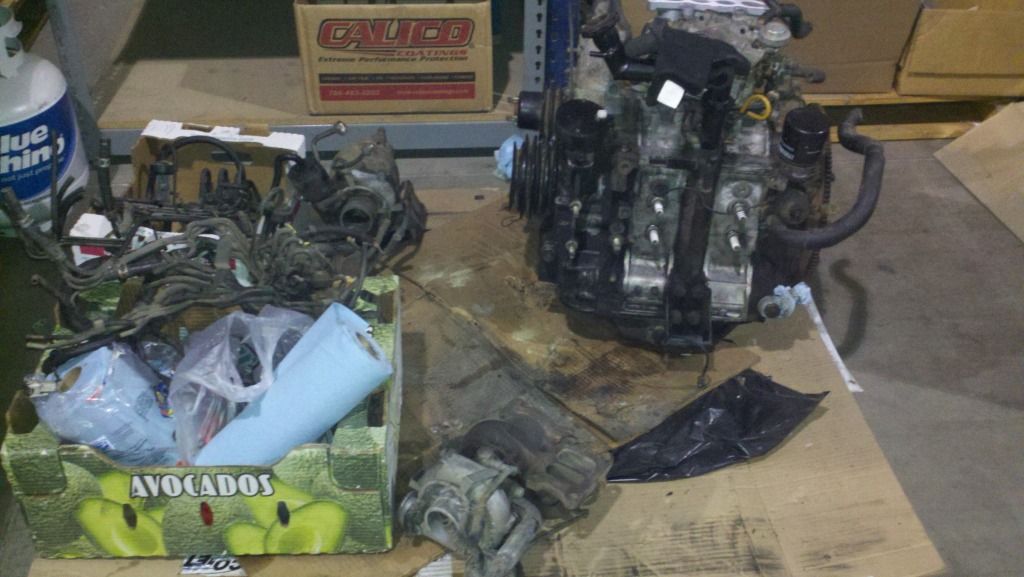
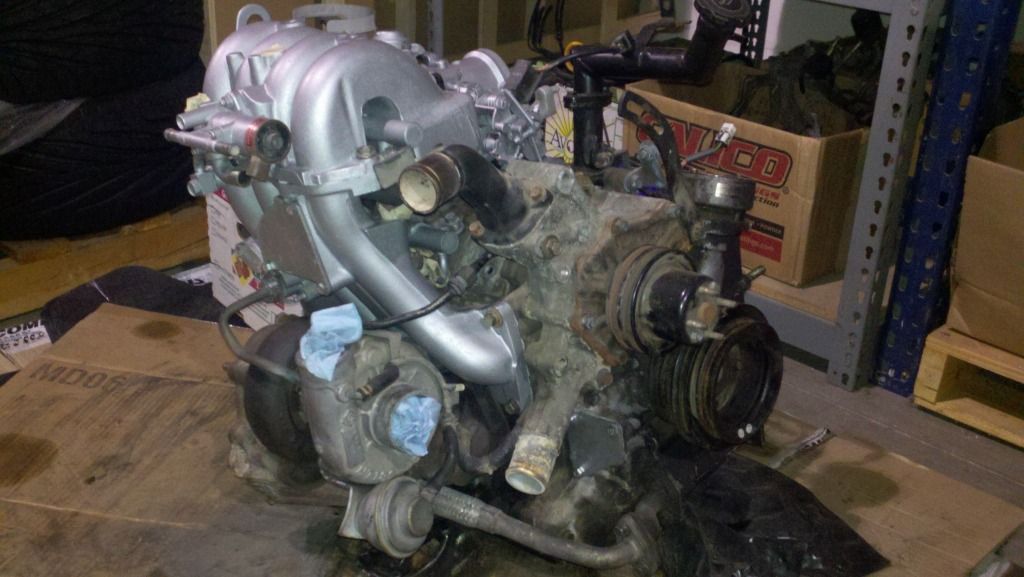
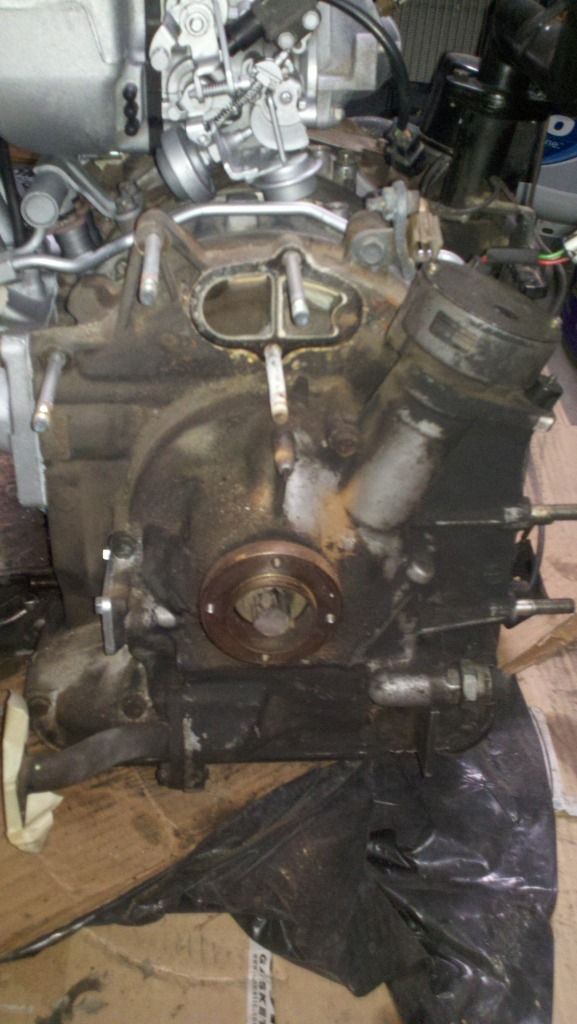
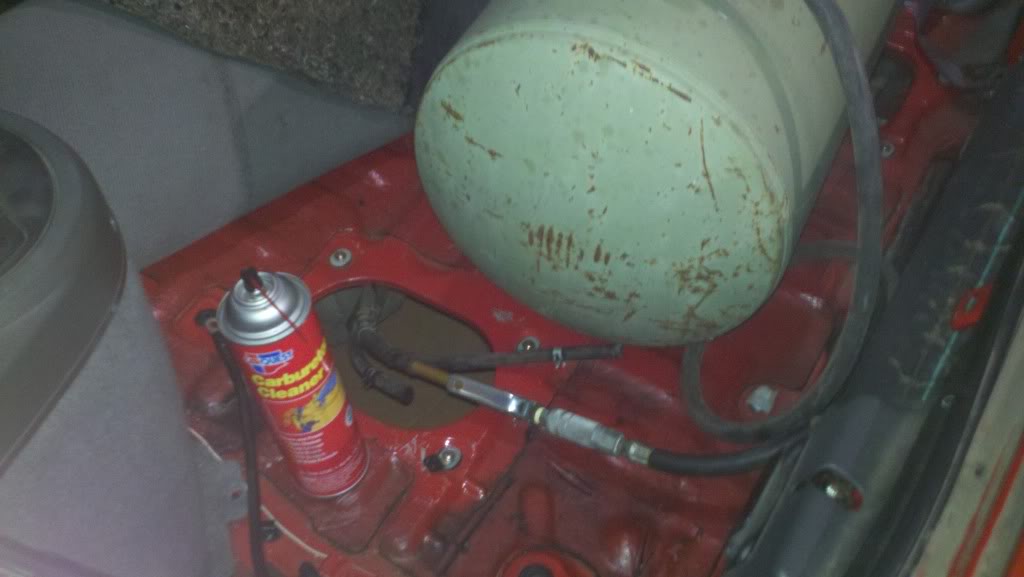
Stripping stuff down and cleaning. It's a JDM S5 TII motor we pulled from a front clip after the blow up many years ago.
Hybrid
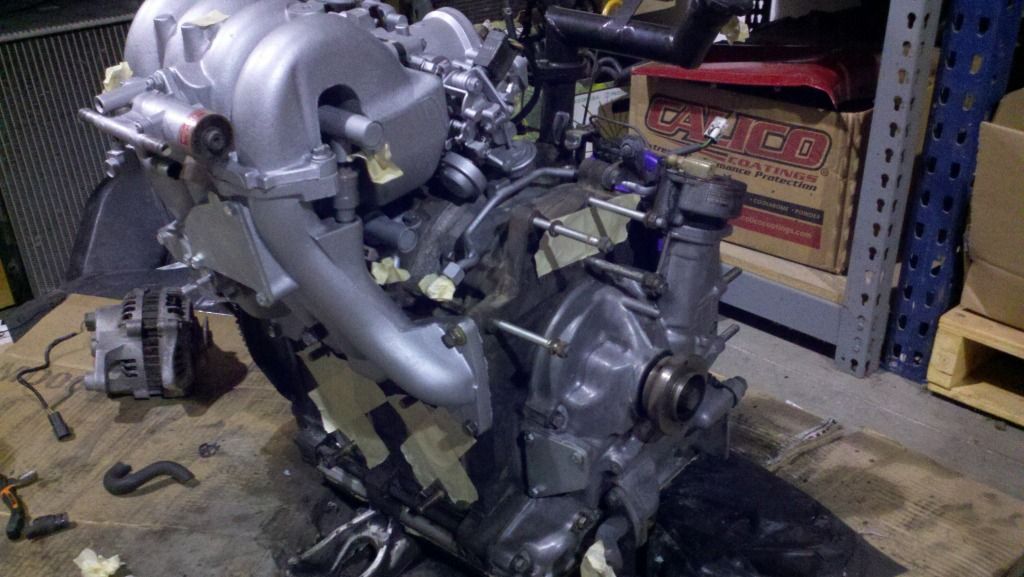
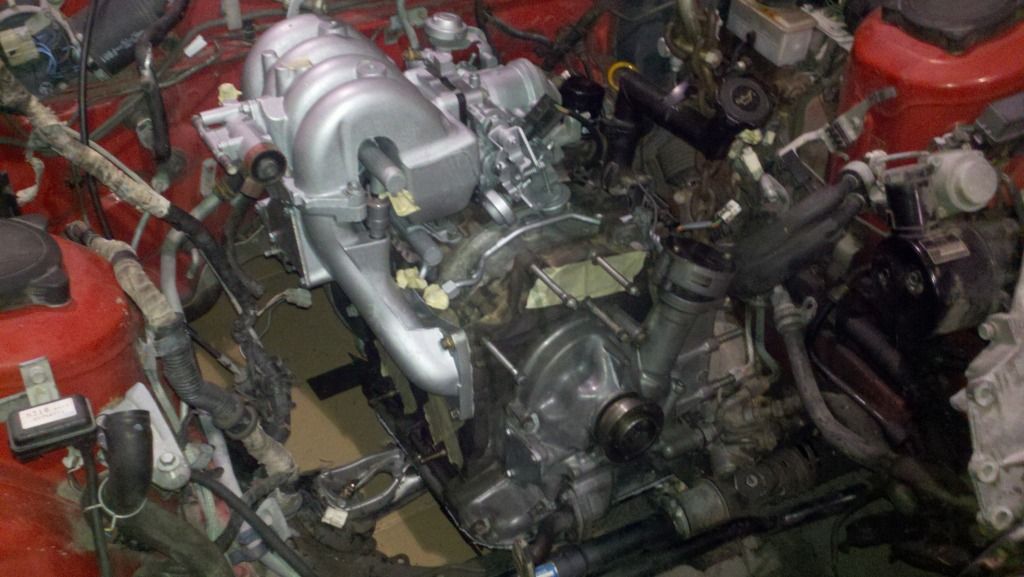
Mock-up after cleaning the intake manifolds and painting them. Also stripped down the T/B for cleaning/painting (thermowax to BAC passage was completely plugged). Nate91242's guide really helped me out on T/B, thanks if you see this!
Getting a head start on cutting vacuum lines and things needed. I cut up my nest to use only what I'm keeping (BAC, Thermowax, Turbo Oil Feed Hard Line, Fuel Hard Line & bracket over the engine).
Cleaned up stock turbo I'll be using. Waiting for new 7psi adjustable actuator and bracket. Porting exhaust housing currently.
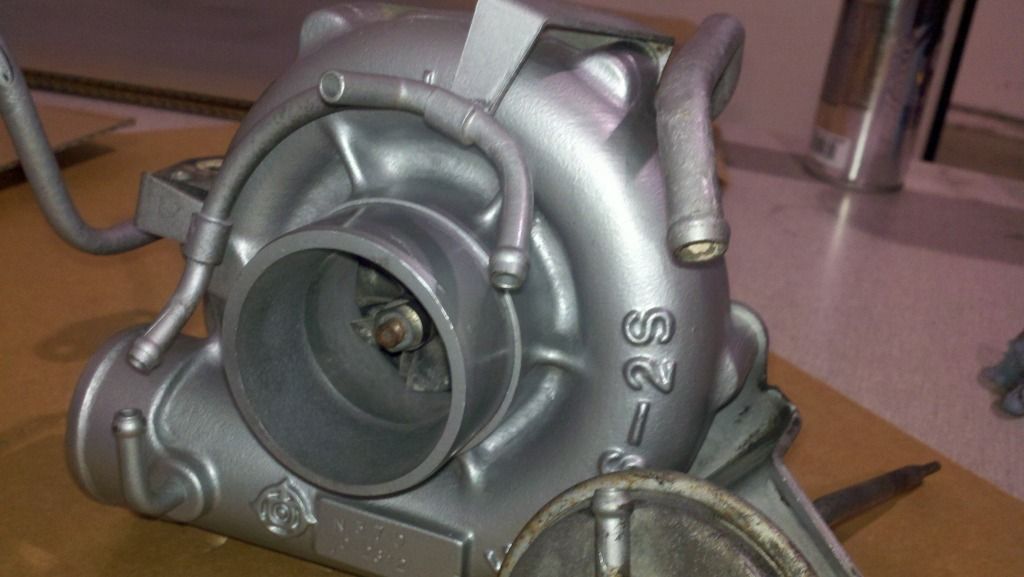
Cleaned & Flowed @ RC Engineering. Highly suggest anyone do this on an engine of "un-known" origin.

Quick wash and vacuum of all the debris accumulated over the years of sitting in a back yard. Don't mind the Toyota Previa wheels out back, just to move to car to the shop.
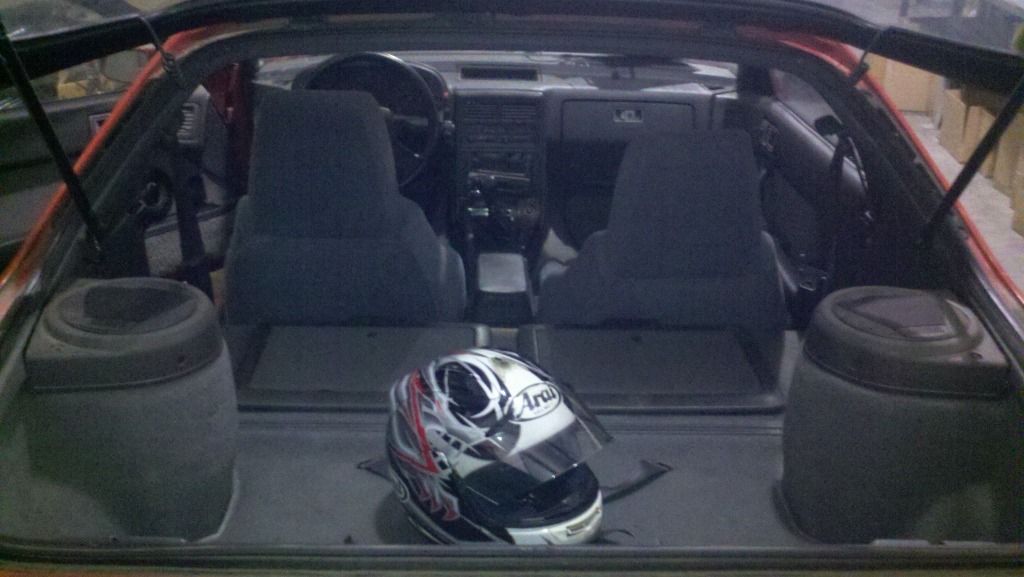
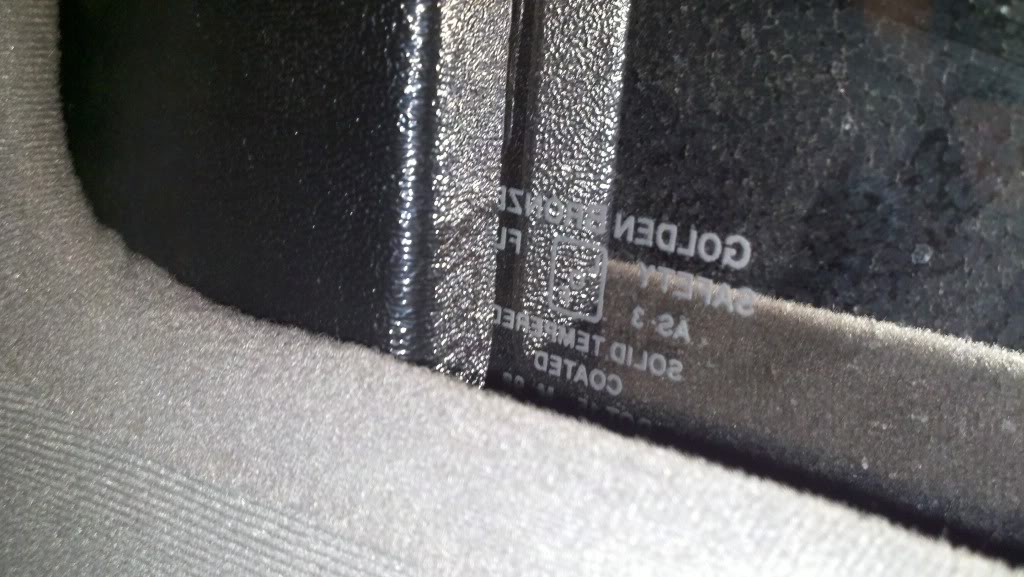
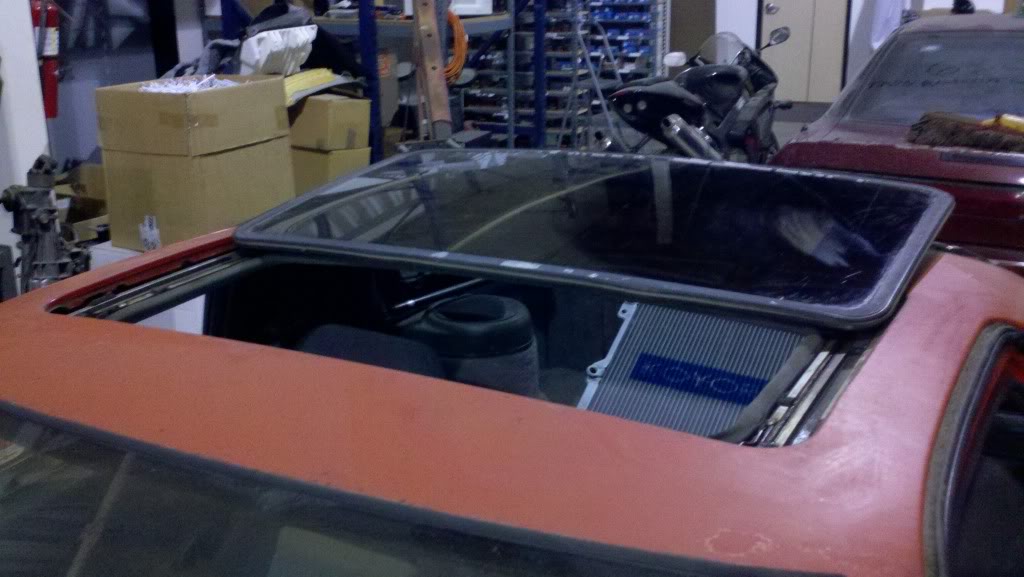
Complete un-torn interior. Hatch struts that work.
Next to tackle is pulling the water pump and housing so I can get the front cover area all cleaned up/inspected. Flywheel coming off this week for re-surface and a new Exedy Stage 1 Clutch. Need to pull the gas tank and fuel lines for cleaning. Get a new fuel filter and sock for the Walbro. Then I'll be one step closer to first fire up in 7 years!
Really just looking to get this mostly unmolested car back on the road. If it can be stock, I will probably leave it that way. If it can be improved and look stock or hides easily, I'll probably do that. Been there and done that with a stripped down raced out street car, not anymore. Let alone beat one up that is still so complete. Current goal is 1-2 months for it to be running and drive-able as a mostly stock TII.
If you read this far thanks for being patient. I'll be updating this as I make progress towards the first start in many moons. This forum has been a great help to me and a number of friends over the years. Time I start contributing what little I can....
A friend had a 87 TII sitting in his back yard for at least 7 years. It was limped home on one rotor after a long night of running up on the mountain. Motor that blew up in it was a JDM S5 TII. Many years of offers and asking (not just me, but other friends and random people), finally it's mine for a smokin' deal! Both he and I are happy it will soon be on the street again. Been a long time since we've ridden in it ya know!
BONUS LIST:
- Fresh S5 based hybrid turbo, looks like a 54-trim
- Rtek v1.5
- Walbro 255LPH
- Original TII wheels and Panasport G7-C5R's
- SS Braided Brake Lines
- SS Braided Oil Cooler Lines
- Working Power Everything (when it last ran)
- Working Heater & A/C (when it last ran)
- Trans shifted smooth and no grinds (when it last ran)
- LSD seemed to work well (when it last ran)
- RB Exhaust & DP (Coated, Extra O2 & EGT bung already in.)
- Tokico Blue Shocks & Eibach Springs
- Energy Suspension Master Kit (Still New In Box)
- RB DTSS Eliminators
- Some chrome short shifter that came off a S5 TII front clip.
- Some Phenolic Intake Manifold Gaskets
- Spare parts out the wazoo (turbos, harnesses, rats nests, injectors, AFM's, TMIC's, intake manifolds, sunroof, door, cats, turbo diff/trans)
- WINGLESS!
my preference.- HKS Turbo Timer
- 3" Filter MAF Adapter
How it looked sitting at my friends house.
Stripping stuff down and cleaning. It's a JDM S5 TII motor we pulled from a front clip after the blow up many years ago.
Hybrid
Mock-up after cleaning the intake manifolds and painting them. Also stripped down the T/B for cleaning/painting (thermowax to BAC passage was completely plugged). Nate91242's guide really helped me out on T/B, thanks if you see this!
Getting a head start on cutting vacuum lines and things needed. I cut up my nest to use only what I'm keeping (BAC, Thermowax, Turbo Oil Feed Hard Line, Fuel Hard Line & bracket over the engine).
Cleaned up stock turbo I'll be using. Waiting for new 7psi adjustable actuator and bracket. Porting exhaust housing currently.
Cleaned & Flowed @ RC Engineering. Highly suggest anyone do this on an engine of "un-known" origin.
Quick wash and vacuum of all the debris accumulated over the years of sitting in a back yard. Don't mind the Toyota Previa wheels out back, just to move to car to the shop.
Complete un-torn interior. Hatch struts that work.
Next to tackle is pulling the water pump and housing so I can get the front cover area all cleaned up/inspected. Flywheel coming off this week for re-surface and a new Exedy Stage 1 Clutch. Need to pull the gas tank and fuel lines for cleaning. Get a new fuel filter and sock for the Walbro. Then I'll be one step closer to first fire up in 7 years!
Really just looking to get this mostly unmolested car back on the road. If it can be stock, I will probably leave it that way. If it can be improved and look stock or hides easily, I'll probably do that. Been there and done that with a stripped down raced out street car, not anymore. Let alone beat one up that is still so complete. Current goal is 1-2 months for it to be running and drive-able as a mostly stock TII.
If you read this far thanks for being patient. I'll be updating this as I make progress towards the first start in many moons. This forum has been a great help to me and a number of friends over the years. Time I start contributing what little I can....
Last edited by MaliciousMD; Aug 19, 2012 at 04:19 PM.

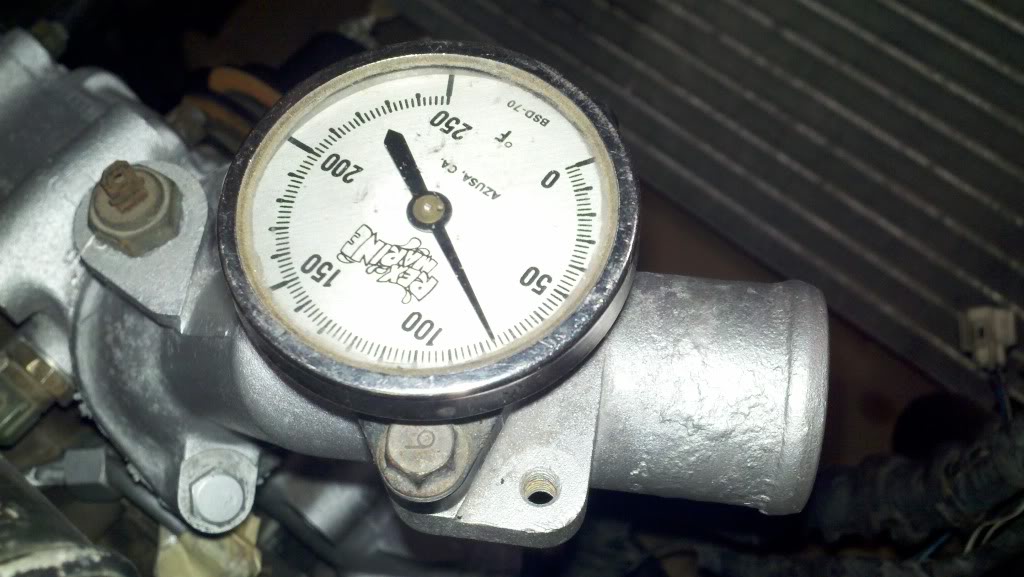
Nope. As stock as stock can be. Stock turbo, as low of boost as I can run. I have an adjustable WG actuator coming that is 7psi, so I'll try to keep it there. It's similar to what you see on the GT28RS or GT2871R turbos.
Funny, I don't even like avocados in any way shape or form.
Funny, I don't even like avocados in any way shape or form.
good luck with your build...I got a build going as well, but really enjoy seeing clean bodies from the west
I don't know, something about avocados, just can't enjoy em. Even lived in a house for 2 years with an avocado tree, just gave them away...
Finished porting my waste gate tonight. Remembered as we had some Cerakote C-138 Jet Back 1800F coating laying around. So I sprayed the exhaust housing and manifold. Definitely going to have to re-coat my RB down pipe. Anyone looking to DIY high temp coat stuff should look into C-138 as it does not require any baking. Air cure FTW! Everything else just got rattle can high temp engine paint. Still no sign of my adjustable WG actuator, may not even use it now. Only time will tell...
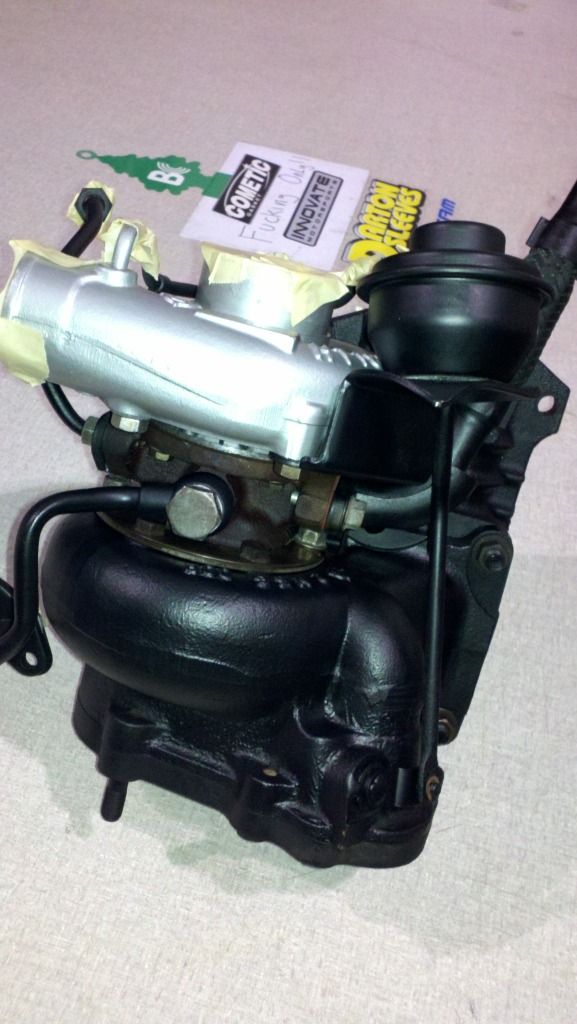
Finished porting my waste gate tonight. Remembered as we had some Cerakote C-138 Jet Back 1800F coating laying around. So I sprayed the exhaust housing and manifold. Definitely going to have to re-coat my RB down pipe.
Thanks for the coating tip. I'll pick some up! Howuch would be needed for stock turbo and manifold?
Car looks amazing, especially knowing it sat for 7 years. It wouldn't look like that where I live.
Car looks amazing, especially knowing it sat for 7 years. It wouldn't look like that where I live.
Last edited by tuscanidream; Aug 22, 2012 at 08:12 AM.
Trending Topics
Car is a little rougher than the crappy cell phone pics show. Clear is gone in some spots but not too major yet. Need driver side fender and door replaced (actually already have these as they came with the car). Panasport wheels need to be taken apart and powder coated/polished. It'll just take time and some TLC.
Last edited by MaliciousMD; Aug 22, 2012 at 09:15 AM.
Major hick-up #1 in the process yesterday, but was not totally un-expected. Pics tell the whole story.
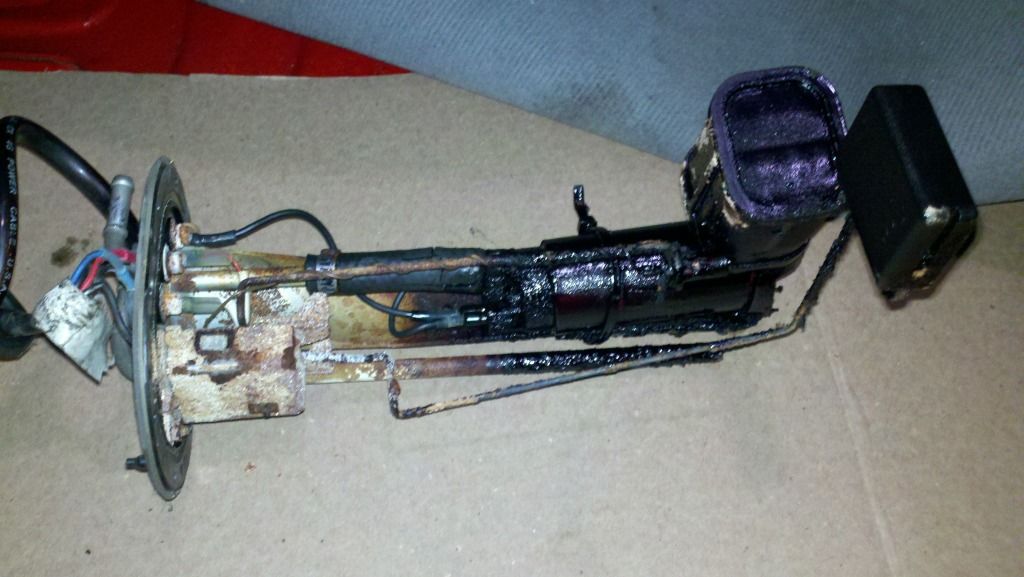
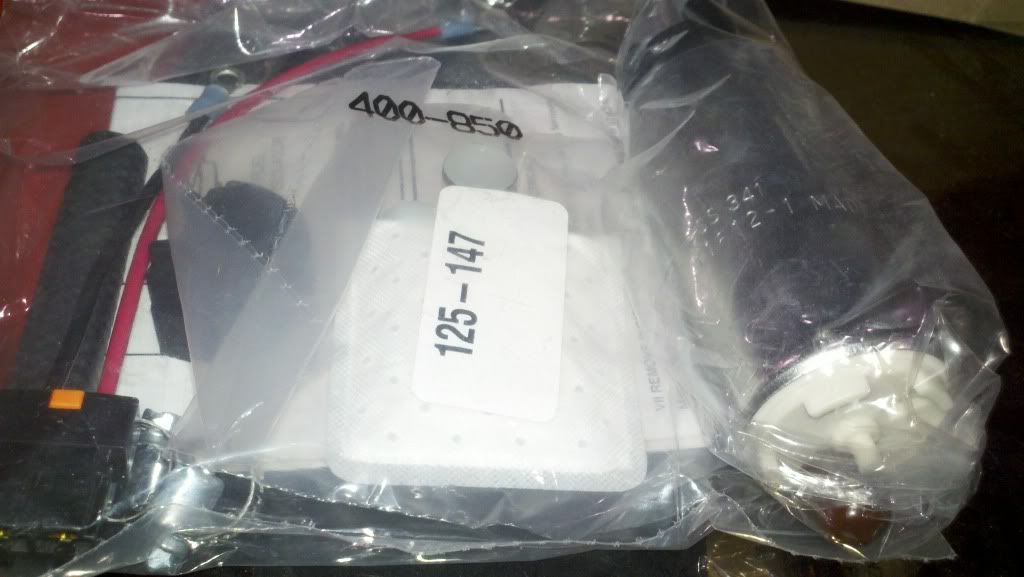
My Walbro HP 255LPH and sending unit pulled from the car. Already picked up a new Walbro and filter from my supplier next door, always in stock
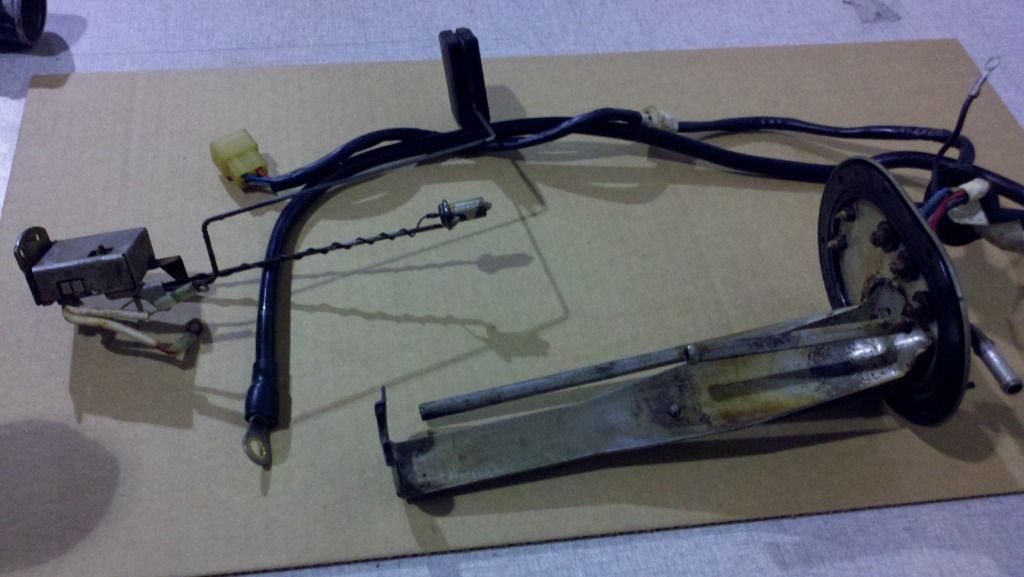
About an hour later worth of picking (with picks, lol), steel wool, and scraping.
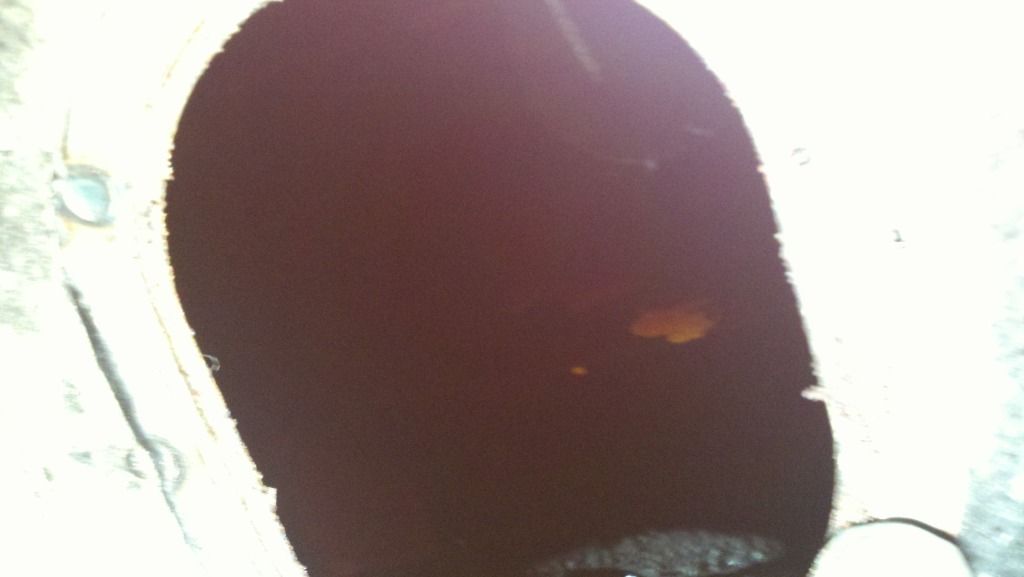
Bad pic but you can see there's crap floating in the tank and rusty 7 year old gas. Lovely...
So I went back to cleaning up the engine. Pulled water pump and housing to get the front cover clean. Before...
After... Also have S4 water pump & housing going instead of the S5 stuff pulled off.
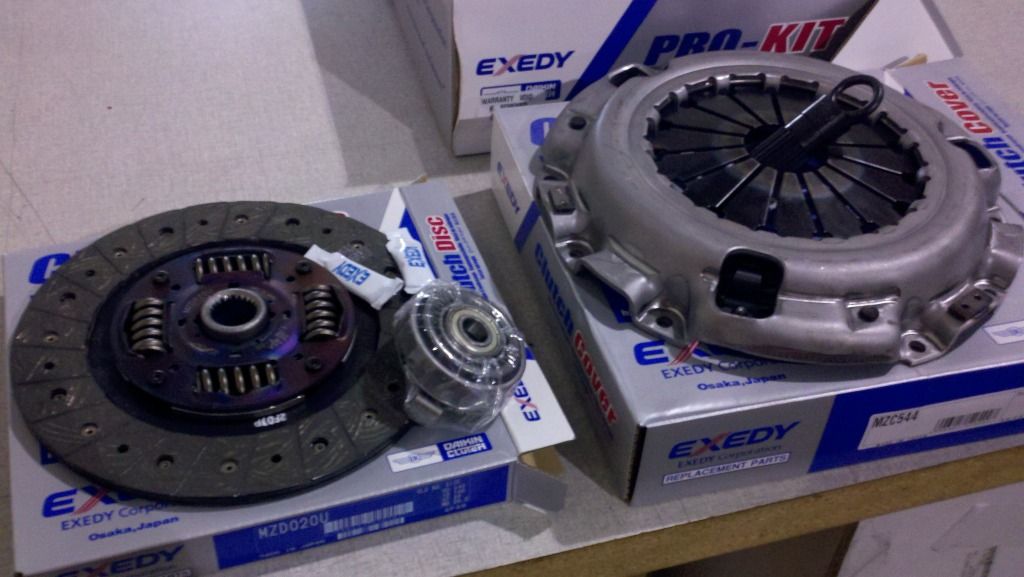
Also decided to pick up the OEM replacement Exedy clutch instead of the Stage 1 as my guys next door had it in stock. Plus the car will be mostly stock and NEVER track raped. It's gonna be a driver . Flywheel was pulled and re-surfaced as well, all already on the engine ready to go in the car.
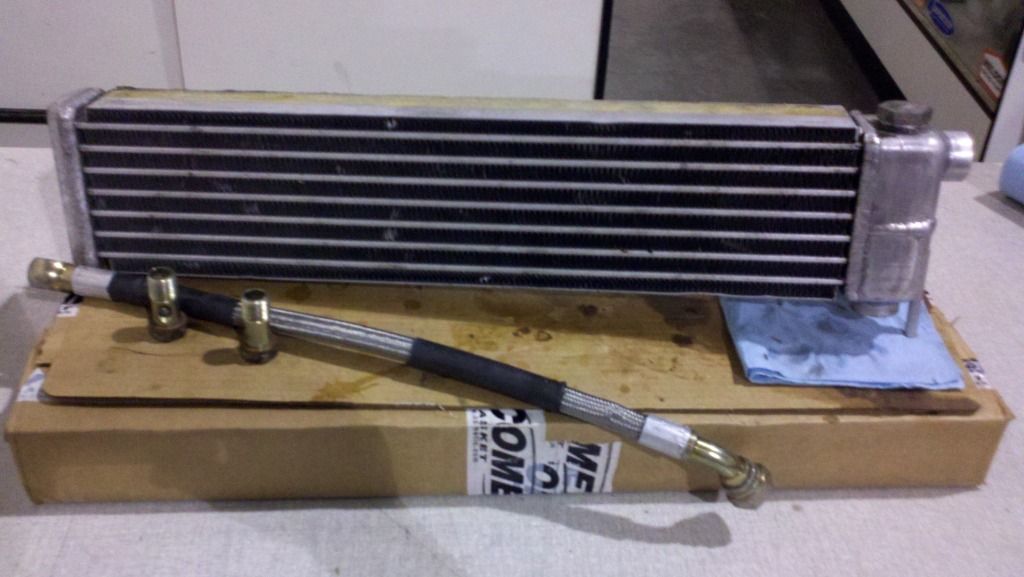
Cleaned up my oil cooler. Pressure tested the long line that goes from the rear iron to the cooler and it had a small leak. Getting that re-done today as I don't own a crimping tool, but plenty of braided line, FML....
Looking to get the oil pan pulled off (and the pan/pick-up cleaned) tonight. Keg & LIM I'd also like to get dropped into the car tonight. That way I can get some wiring and routing knocked out. I should be getting my copper exhaust manifold gasket in today or Monday. Already have OEM MLS down-pipe and turbine inlet gaskets set aside with some Permatex copper spray. Kinda bummed about the gas tank and lines situation, but moping about it doesn't get me anywhere. Anyone in SoCal (LA Area) know where I can take this bitch to get cleaned and sealed?
My Walbro HP 255LPH and sending unit pulled from the car. Already picked up a new Walbro and filter from my supplier next door, always in stock
About an hour later worth of picking (with picks, lol), steel wool, and scraping.
Bad pic but you can see there's crap floating in the tank and rusty 7 year old gas. Lovely...
So I went back to cleaning up the engine. Pulled water pump and housing to get the front cover clean. Before...
After... Also have S4 water pump & housing going instead of the S5 stuff pulled off.
Also decided to pick up the OEM replacement Exedy clutch instead of the Stage 1 as my guys next door had it in stock. Plus the car will be mostly stock and NEVER track raped. It's gonna be a driver
. Flywheel was pulled and re-surfaced as well, all already on the engine ready to go in the car.Cleaned up my oil cooler
. Pressure tested the long line that goes from the rear iron to the cooler and it had a small leak. Getting that re-done today as I don't own a crimping tool, but plenty of braided line, FML....Looking to get the oil pan pulled off (and the pan/pick-up cleaned) tonight. Keg & LIM I'd also like to get dropped into the car tonight. That way I can get some wiring and routing knocked out. I should be getting my copper exhaust manifold gasket in today or Monday. Already have OEM MLS down-pipe and turbine inlet gaskets set aside with some Permatex copper spray. Kinda bummed about the gas tank and lines situation, but moping about it doesn't get me anywhere. Anyone in SoCal (LA Area) know where I can take this bitch to get cleaned and sealed?
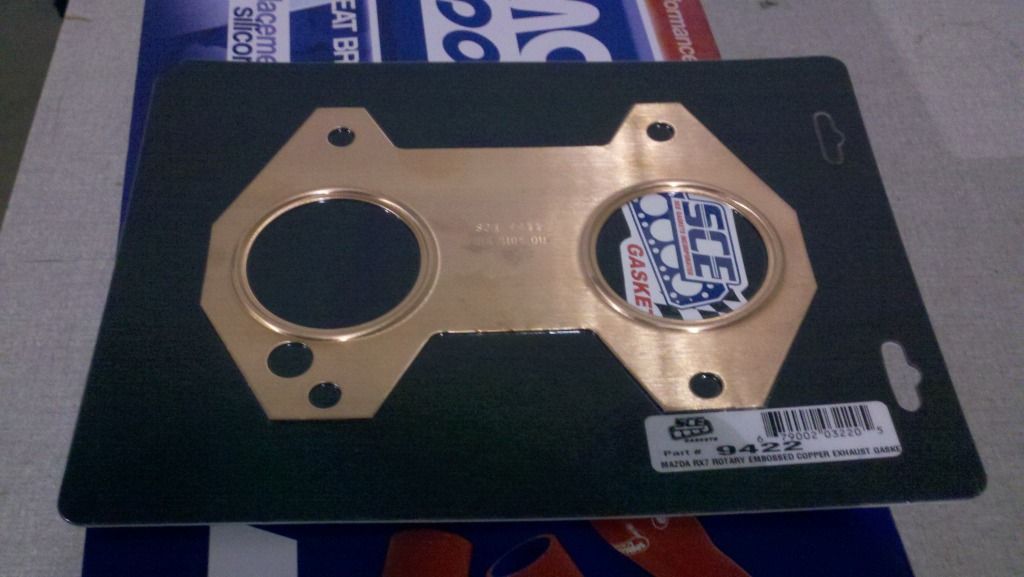
Got my copper exhaust manifold gasket in yesterday, sorry forgot to snap a pic of it. Made by SCE Gaskets in Lancaster, CA. Been using their copper header and head gaskets for Dometic applications for a lot of years. Bitchin' gaskets and have no question in my mind as to if it will seal on the TII.
Pulled off the oil pan and pick-up tube for cleaning. Pick-up was clean but the bottom of the pan as suspected had a bit of sludge built up at the bottom. Cleaned both up, re-sealed...
Then proceeded to drop the engine in last night with the help of some friends
Now to start wiring and running hoses. Still have some engine bay detailing to do as well.
Got an old (ex and actually old) co-worker who is still restoring classic Mustangs and he gave me a few good leads on getting my gas tank cleaned and re-sealed. Getting the gas tank issue sorted out would make me feel much better. I don't think me using a DIY kit would work or last as well as a professional clean and seal.
Pulled out my clutch master and slave, completely trashed. Reservoir also just crumbled in my hands the second I touched it...
Copper Exhaust Gasket...
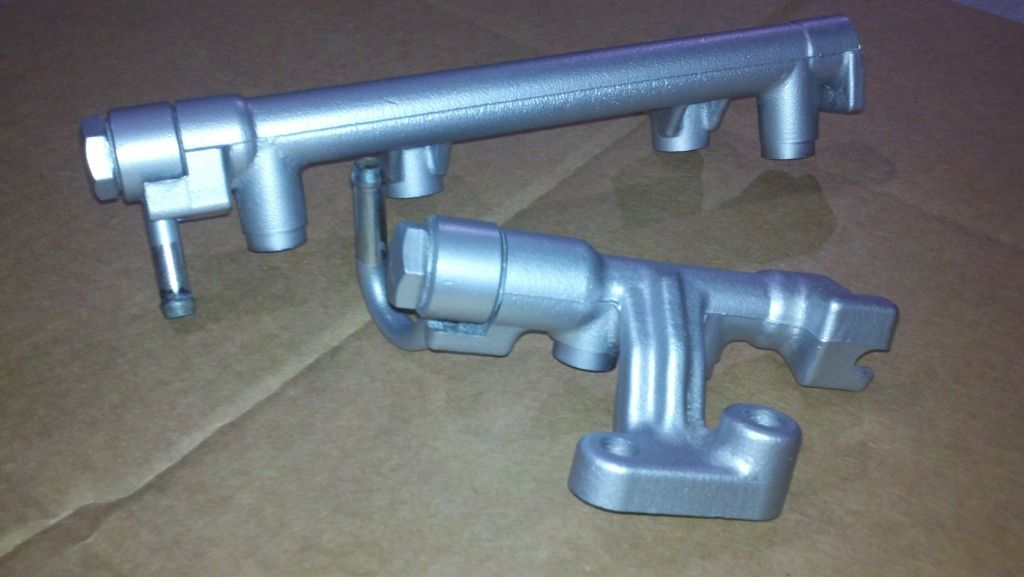
Cleaned up my S4 fuel rails as I found a way to use regular fuel hose with an FPR. Waiting for fittings and FPR to come in next week...
Other goodies...
More to come soon....
Mini update...
My homies at Car Quest, always cheap, always deliver me the right **** in the first shot. New clutch slave and master to go in.
Walbro waiting for me to take the gas tank to my guy for boil and seal. Just been too busy, but mostly lazy.
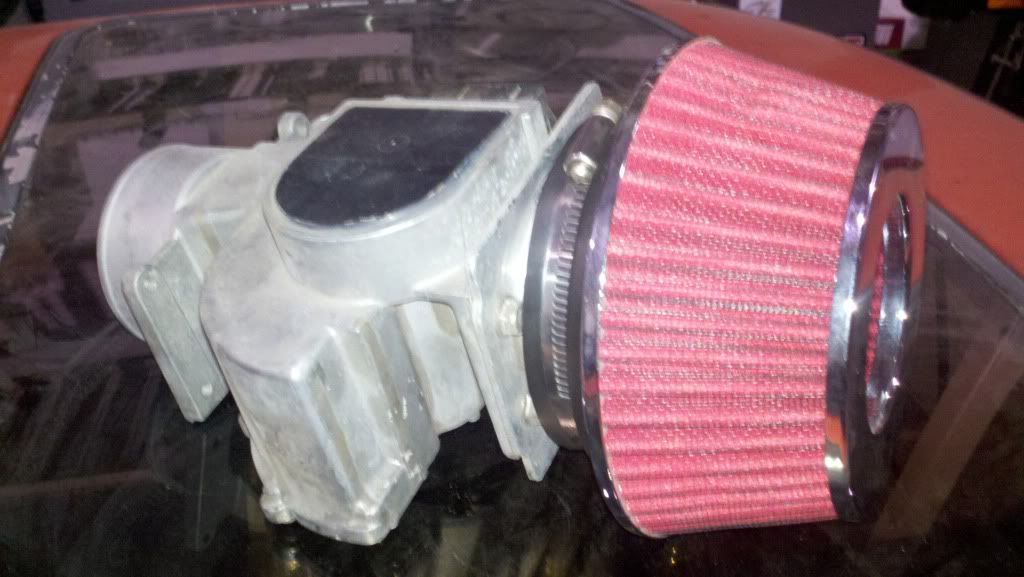
Brand new FREE.99 ricer red cone filter. Probably change this to a Blitz SUS later...
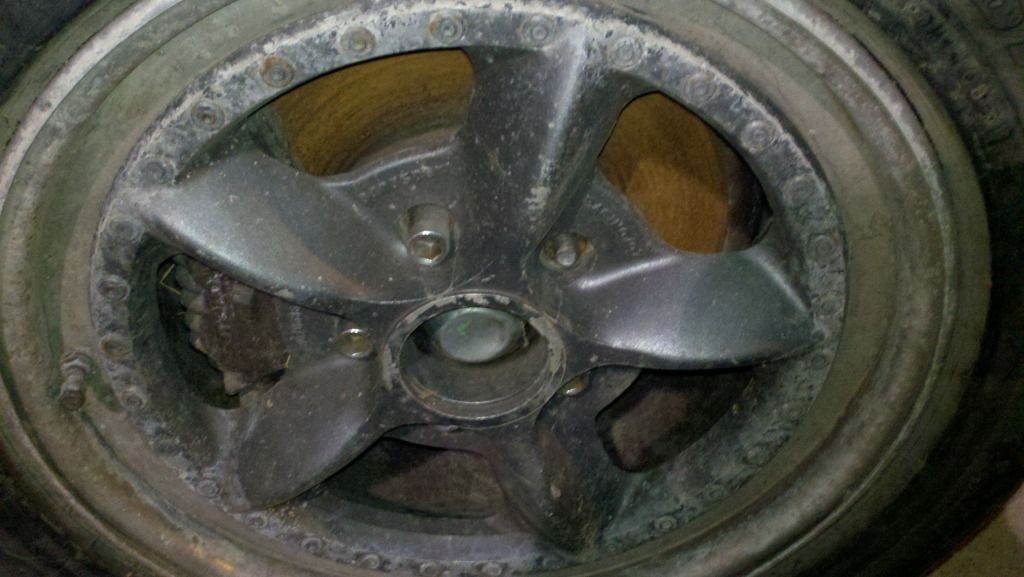
Stared at the Panasport's for like an hour. Debated back on forth on gold or original gunmetal. Made up my mind on original gunmetal. Depressed that I found one barrel slightly bent, but they need to come apart to get re-polished and powder coated anyways.
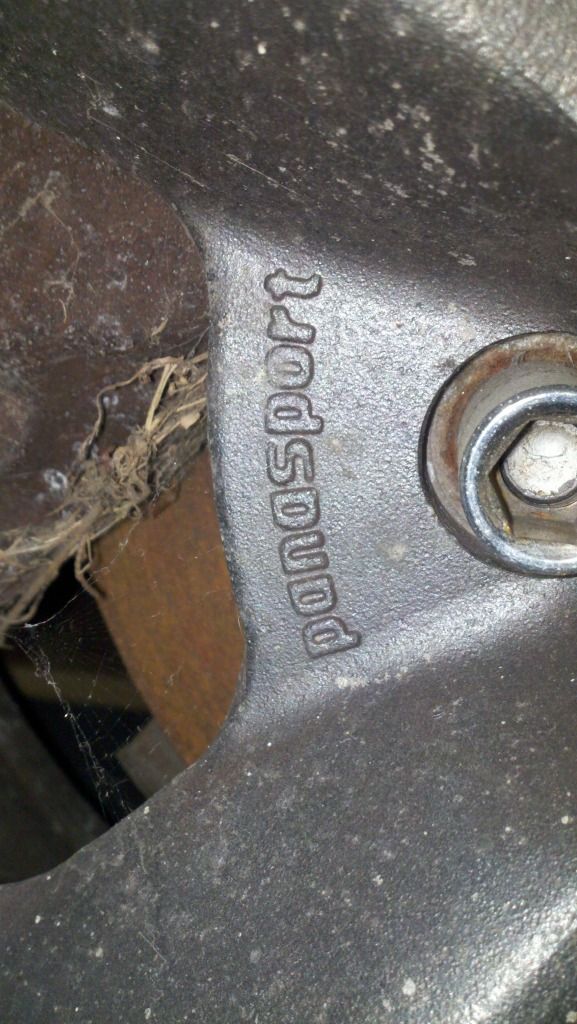
Search starts for some center caps as well. Panasport USA website doesn't even show the G7 C5R's. Panasport Japan website still shows they offer brand new possibly.
My homies at Car Quest, always cheap, always deliver me the right **** in the first shot. New clutch slave and master to go in.
Walbro waiting for me to take the gas tank to my guy for boil and seal. Just been too busy, but mostly lazy.
Brand new FREE.99 ricer red cone filter. Probably change this to a Blitz SUS later...
Stared at the Panasport's for like an hour. Debated back on forth on gold or original gunmetal. Made up my mind on original gunmetal. Depressed that I found one barrel slightly bent, but they need to come apart to get re-polished and powder coated anyways.
Search starts for some center caps as well. Panasport USA website doesn't even show the G7 C5R's. Panasport Japan website still shows they offer brand new possibly.
Got a bit less lazy last night...
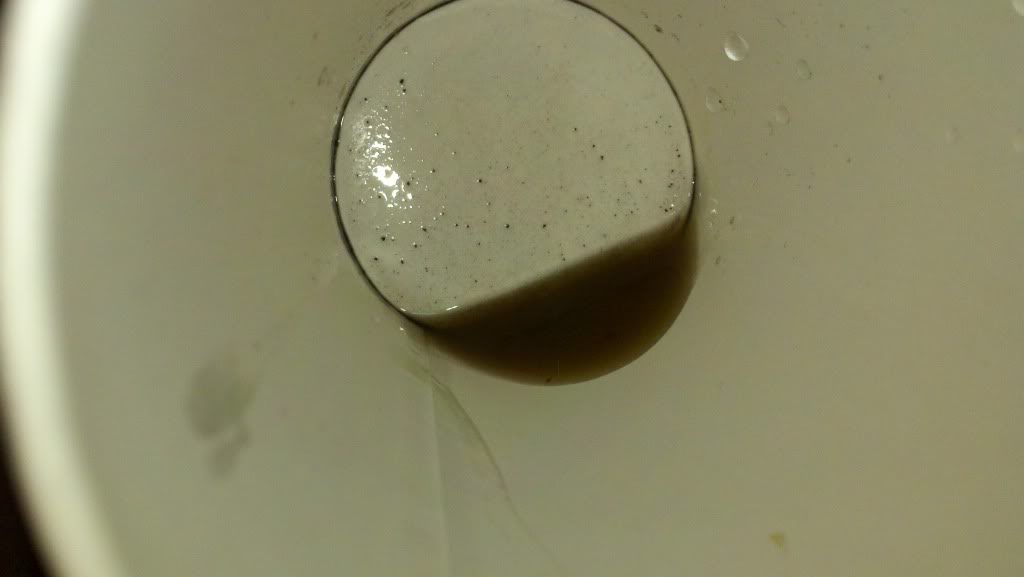
Gas that I drained out of the tank. So horribly old I almost passed out from the fumes.

The inside of my gross gas tank. I don't think I've ever pulled a tank out of a car this bad before. Varnished and rusted to epic proportions.
With the gas tank out and car in the air I checked out the axles, drive shaft, diff, bushings, etc since there's a ton of room out back now. As expected the underside of the car reveals it's never been in a major accident. Driveline looks to be in perfect working order and bushings intact.
Also got my new clutch slave and master cylinders installed. Waiting on an S/S braided clutch line, and then to move on to the brake system hydraulics. As she sits now, always waiting for more money and more parts
After some lazy maker, I started to think I should dump a RB26 into this car cause I'd probably have it running by now. Too many bling parts laying around the shop. 
Gas that I drained out of the tank. So horribly old I almost passed out from the fumes.
The inside of my gross gas tank. I don't think I've ever pulled a tank out of a car this bad before. Varnished and rusted to epic proportions.
With the gas tank out and car in the air I checked out the axles, drive shaft, diff, bushings, etc since there's a ton of room out back now. As expected the underside of the car reveals it's never been in a major accident. Driveline looks to be in perfect working order and bushings intact.
Also got my new clutch slave and master cylinders installed. Waiting on an S/S braided clutch line, and then to move on to the brake system hydraulics. As she sits now, always waiting for more money and more parts
After some lazy maker
, I started to think I should dump a RB26 into this car cause I'd probably have it running by now. Too many bling parts laying around the shop.
Mini-update....
New clutch master and slave in, decided to re-use the old line since it was in fantastic condition. Been bled already, love seeing clear hydraulic fluid.
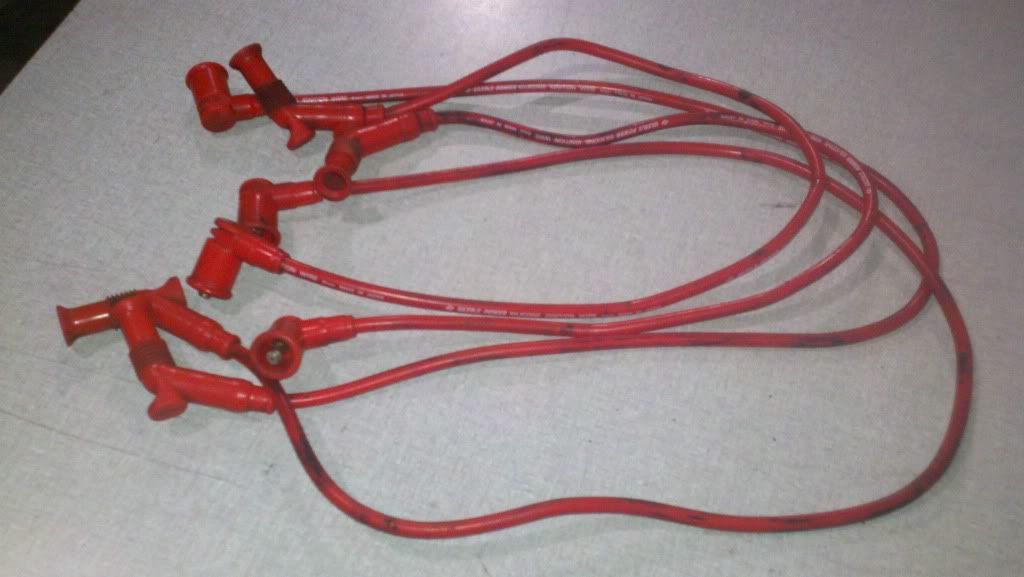
Digging through my boxes looking for things I found some Ultra Racing spark plug wires, need to be cleaned up but I think I'll be using these. Score free wires!
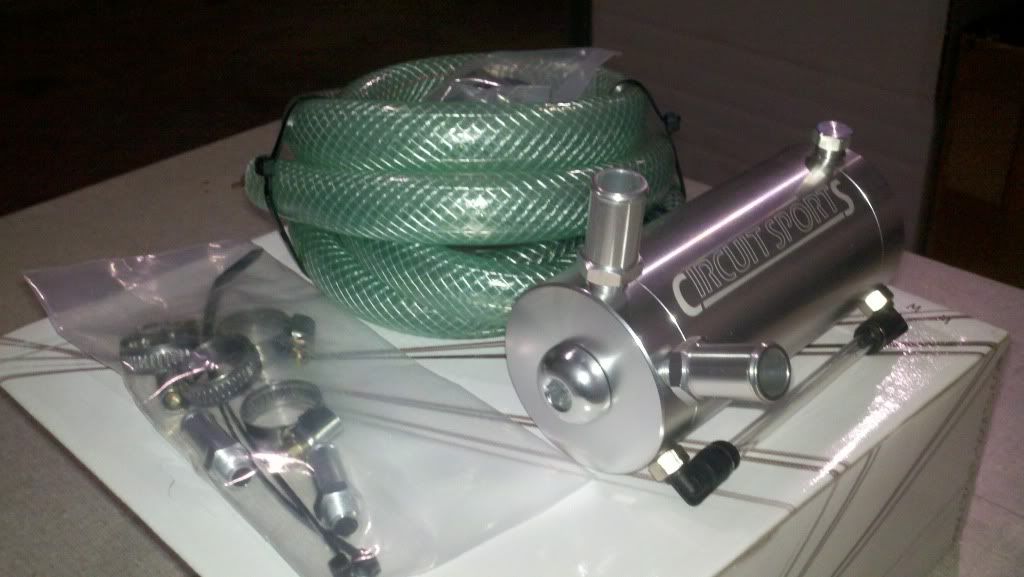
Got my oil catch tank in, the smallest one I could find (250cc). Going to try to and tuck it under my cruise control.
Got my fuel rail fittings in as well, still no FPR.
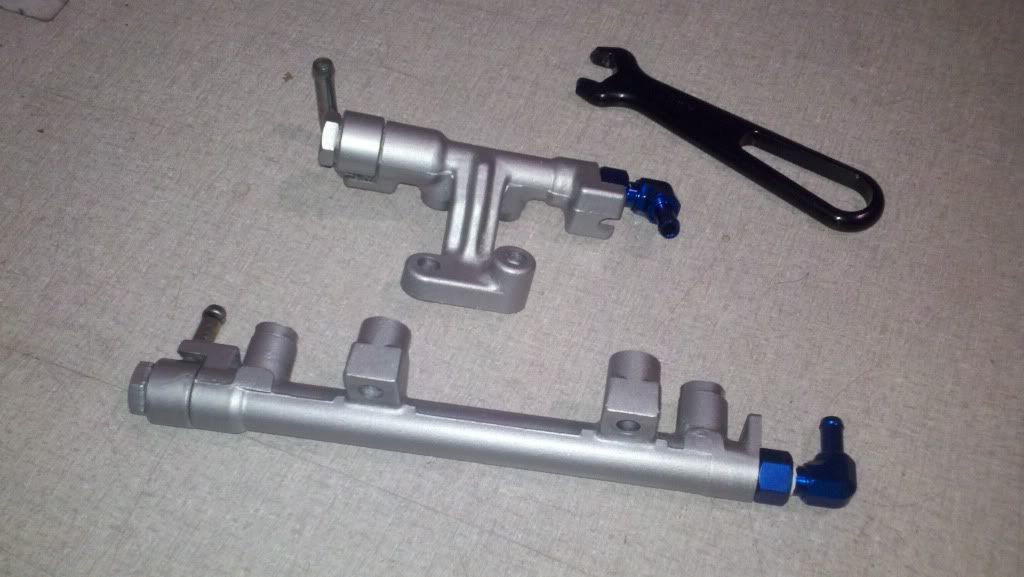
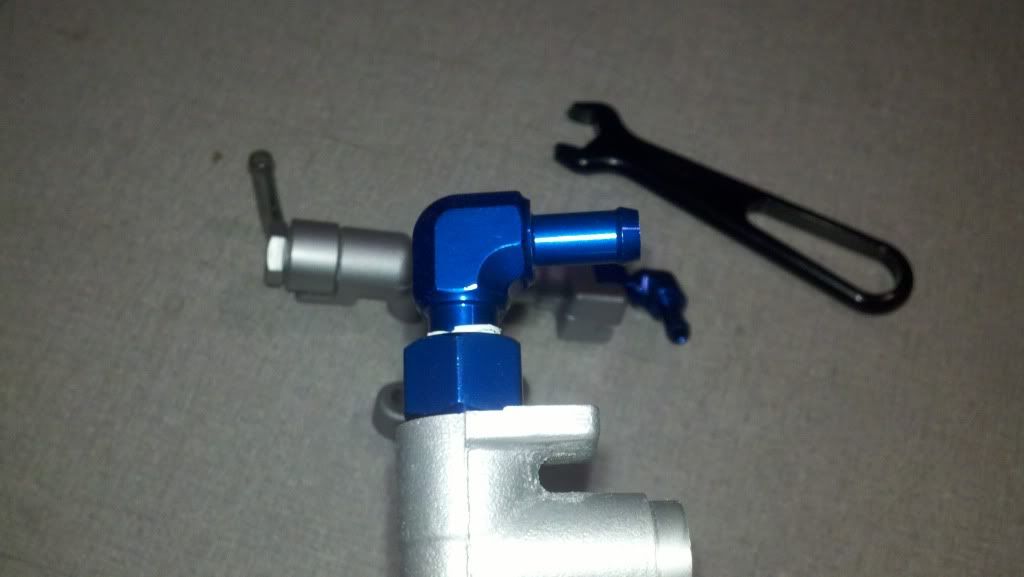
The fuel rail adapter that screws into the rail directly is from Tomei and originally listed for Toyota 1JZ applications which is also M12x1.25 thread pitch. Fittings are sealed at the rail end with new Nissan OEM SR20 fuel injector lower o-rings we have coming out our asses. O-ring fit perfectly in the little indentation at the end of the rail. Inside diameter of the fittings is also equivalent to the stock banjo bolt holes so I'm not worried about them being a restriction in the system. May mount my FPR right off the rail if it will fit as it's one of the smaller boost referenced Circuit Sports units.
Have more goodies coming in this week, stay tuned...
New clutch master and slave in, decided to re-use the old line since it was in fantastic condition. Been bled already, love seeing clear hydraulic fluid.
Digging through my boxes looking for things I found some Ultra Racing spark plug wires, need to be cleaned up but I think I'll be using these. Score free wires!
Got my oil catch tank in, the smallest one I could find (250cc). Going to try to and tuck it under my cruise control.
Got my fuel rail fittings in as well, still no FPR.
The fuel rail adapter that screws into the rail directly is from Tomei and originally listed for Toyota 1JZ applications which is also M12x1.25 thread pitch. Fittings are sealed at the rail end with new Nissan OEM SR20 fuel injector lower o-rings we have coming out our asses. O-ring fit perfectly in the little indentation at the end of the rail. Inside diameter of the fittings is also equivalent to the stock banjo bolt holes so I'm not worried about them being a restriction in the system. May mount my FPR right off the rail if it will fit as it's one of the smaller boost referenced Circuit Sports units.
Have more goodies coming in this week, stay tuned...
Slowly picking away...
Put the starter in, 3-piece main pulley back on. Mocked up fuel lines and upper manifold for clearance, don't like the feed routing at all, will finalize when I get my FPR hopefully this week. Exhaust manifold is on, copper gasket got several healthy coats of copper spray. S4 water pump and housing all cleaned up, OEM thermostat is in, associated sensors thread sealed. Some Blitz bling...
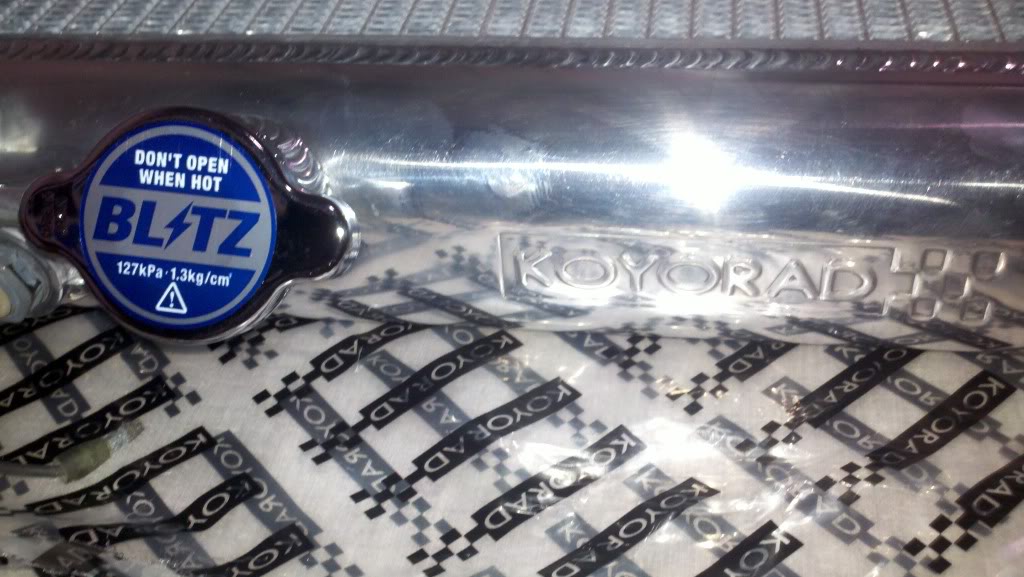
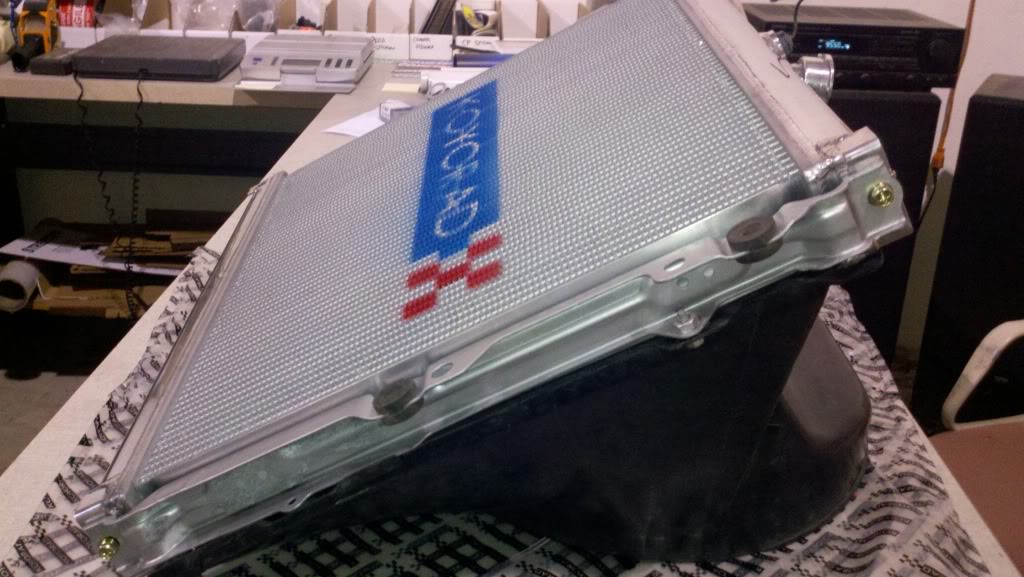
New Koyo S4 radiator, associated sensors thread sealed in. Cleaned up my rad support brackets, test fit the shroud and set it in the car for a sec. Looks to fit quite nicely, still too much to do to dump the rad in yet though. Blitz bling again...
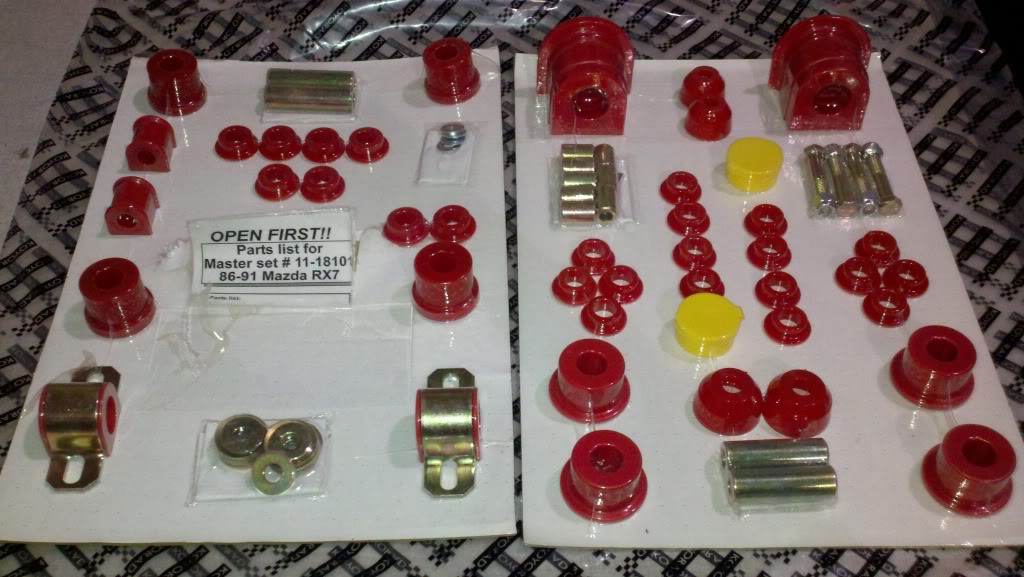
Friend I got the car from dropped off the Energy Suspension Master Kit that's been sitting around. Gotta start picking away at doing bushings...
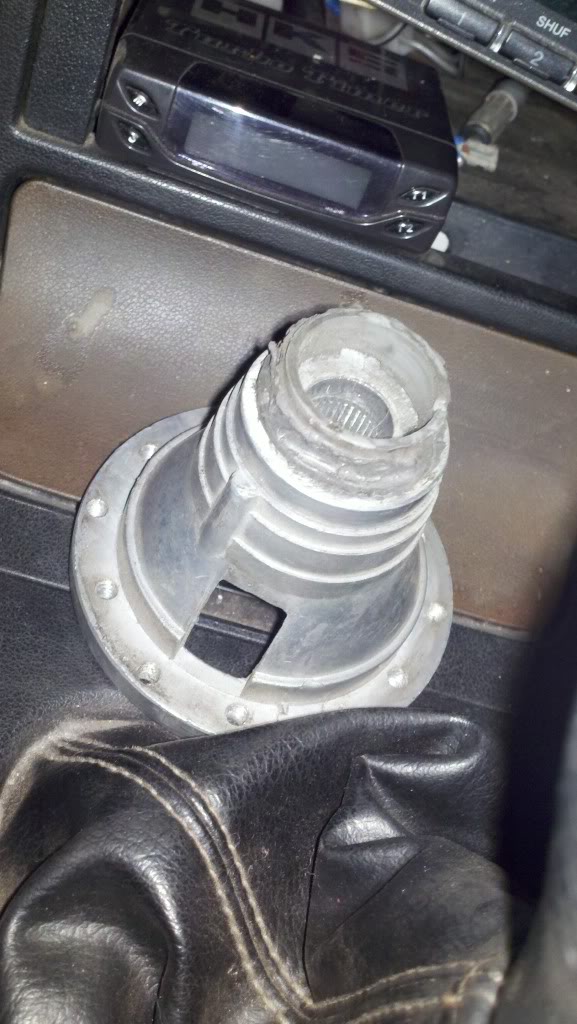
Another friend went about his normal junk yard hopping and pulled this off an FC supposedly. So he FREE.99'd it to me.
Have a red steel one too, but why go back right?
Goal is to get the rest of the engine mock up done this week so I can start stripping select things from the engine bay for a good scrub a dub. Need to go through m boxes and find all of the A/C stuff. A friend has some good condition power steering lines and pump he said he'd donate to the cause as well. My lines appear to be slightly rotted and there is clearly a P/S leak that developed from sitting for so long. Every time I turn around there's something else that could use some TLC, this is going to take awhile...
Put the starter in, 3-piece main pulley back on. Mocked up fuel lines and upper manifold for clearance, don't like the feed routing at all, will finalize when I get my FPR hopefully this week. Exhaust manifold is on, copper gasket got several healthy coats of copper spray. S4 water pump and housing all cleaned up, OEM thermostat is in, associated sensors thread sealed. Some Blitz bling...
New Koyo S4 radiator, associated sensors thread sealed in. Cleaned up my rad support brackets, test fit the shroud and set it in the car for a sec. Looks to fit quite nicely, still too much to do to dump the rad in yet though. Blitz bling again...
Friend I got the car from dropped off the Energy Suspension Master Kit that's been sitting around. Gotta start picking away at doing bushings...
Another friend went about his normal junk yard hopping and pulled this off an FC supposedly. So he FREE.99'd it to me.
Have a red steel one too, but why go back right?Goal is to get the rest of the engine mock up done this week so I can start stripping select things from the engine bay for a good scrub a dub. Need to go through m boxes and find all of the A/C stuff. A friend has some good condition power steering lines and pump he said he'd donate to the cause as well. My lines appear to be slightly rotted and there is clearly a P/S leak that developed from sitting for so long. Every time I turn around there's something else that could use some TLC, this is going to take awhile...
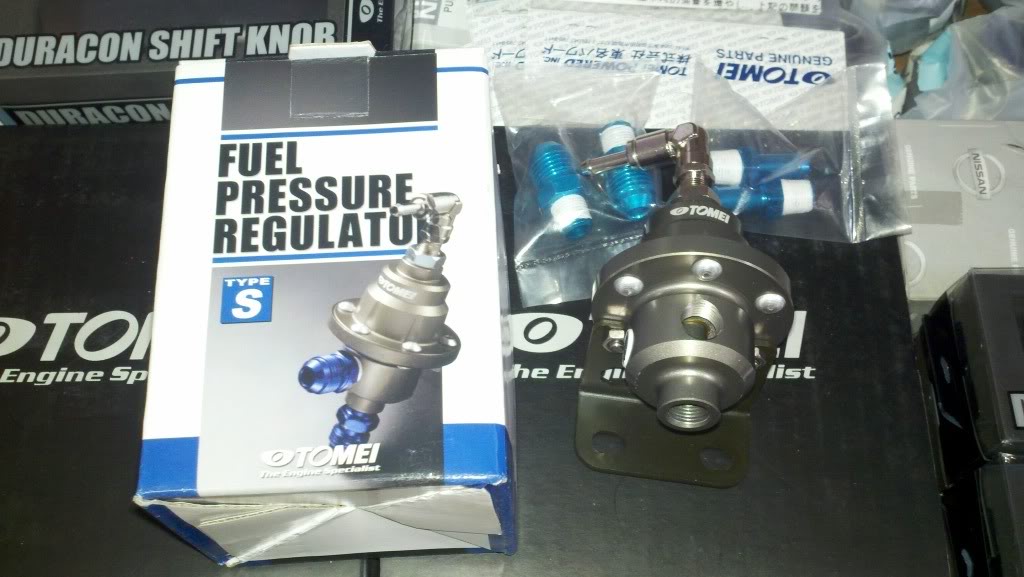
Tomei Type-S fuel pressure regulator came in, will be finalizing fuel routing today.
Mocked up all the way to the TMIC. Should have this back down to the keg for final engine bay cleaning next week.

Found this laying around from some old boat stuff I have. Going to ditch the rad cap @ the neck, then make an aluminum adapter replace the plastic cap neck.
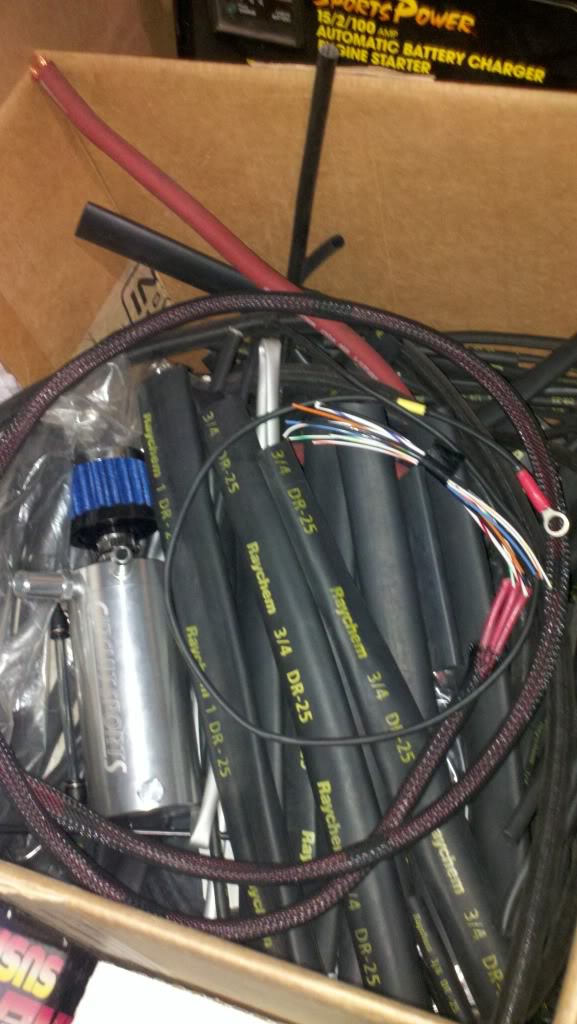
Friend I bought the car from does high end custom wiring harnesses. So yet again all this was FREE.99'd to me. Engine bay wiring should looks nice and neat after I go through everything.
Mocked up all the way to the TMIC. Should have this back down to the keg for final engine bay cleaning next week.
Found this laying around from some old boat stuff I have. Going to ditch the rad cap @ the neck, then make an aluminum adapter replace the plastic cap neck.
Friend I bought the car from does high end custom wiring harnesses. So yet again all this was FREE.99'd to me. Engine bay wiring should looks nice and neat after I go through everything.


Thanks...
Got my ***** a little too deep into the guts of additional waste gate porting the other day and fucked up a little. Should have put this bitch in a vice instead of using cylinder head stands. Turbine housing slipped off the stands and my grinder go into the small WG port at the top a lot more than I was planning to do. Don't think it'll hurt a thing though.
Got my ***** a little too deep into the guts of additional waste gate porting the other day and fucked up a little. Should have put this bitch in a vice instead of using cylinder head stands. Turbine housing slipped off the stands and my grinder go into the small WG port at the top a lot more than I was planning to do. Don't think it'll hurt a thing though.
Last edited by MaliciousMD; Sep 14, 2012 at 03:50 PM.
Tossed a battery in and tested some electronics such as power windows, mirrors, locks and sunroof. All working other than the sun roof needing a little push up to get it started, rails need lubing.
Ricer crap.
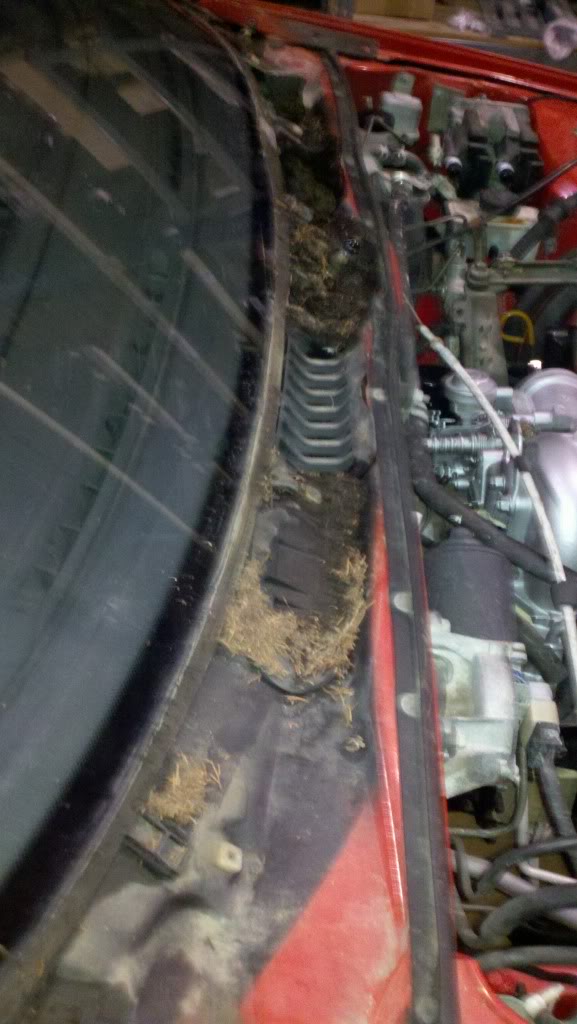
Pulled out the windshield lower guard grills and shop vac'd out all the derbis, was quite a bit of crap in there. Surprised to just find caked layers of dirt and no rust that I can see till I can find a way to scurb in there.
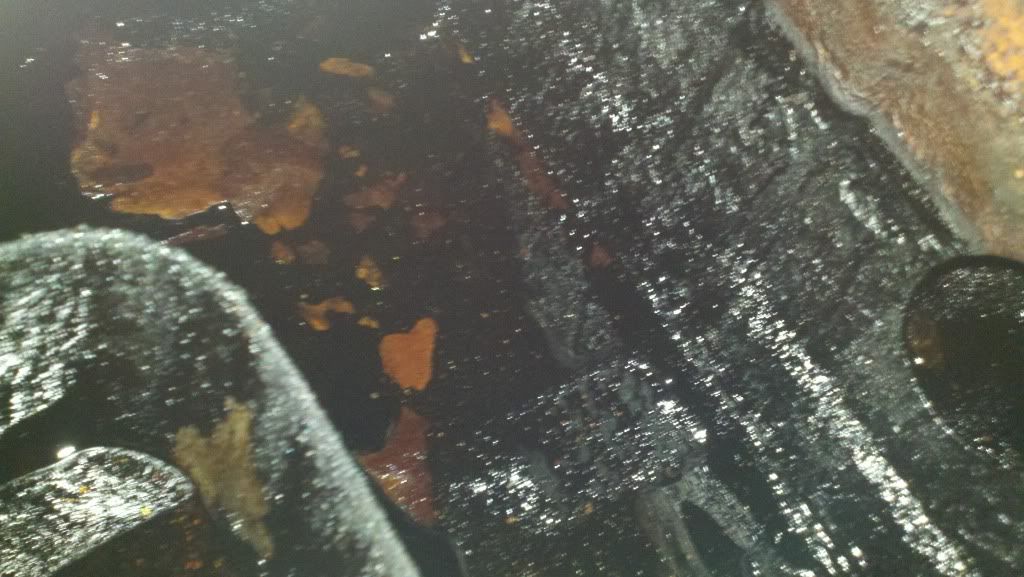
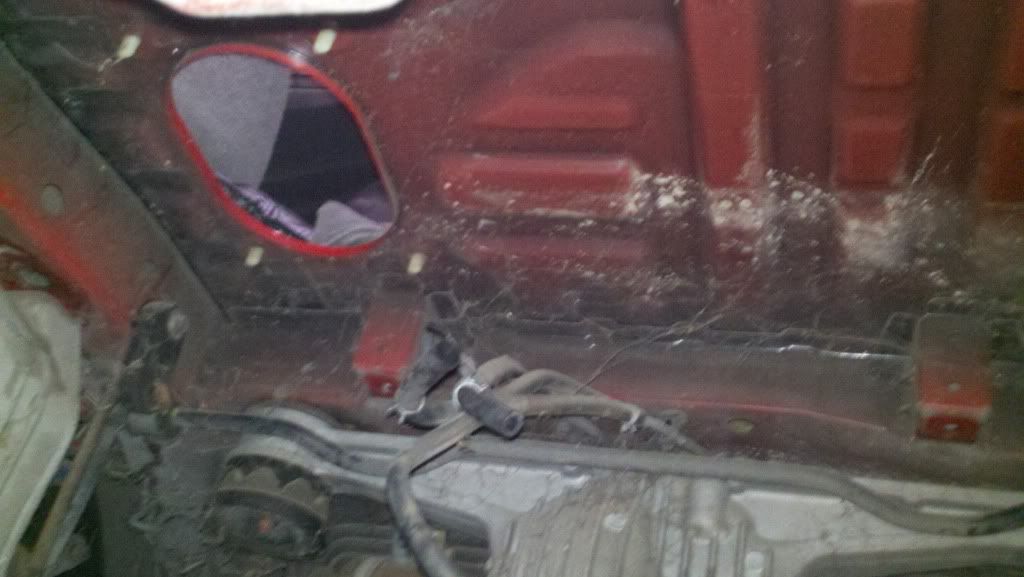
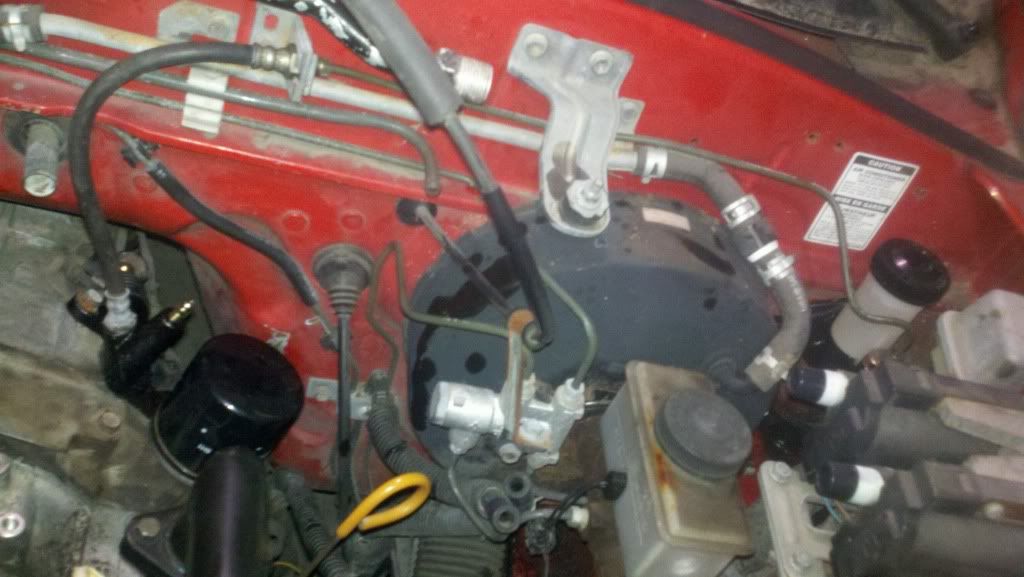
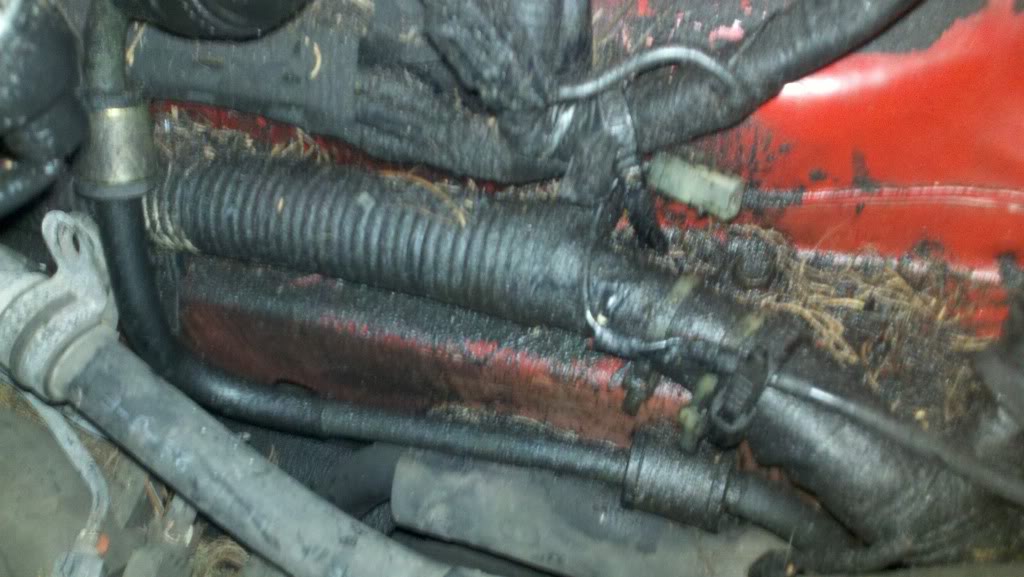
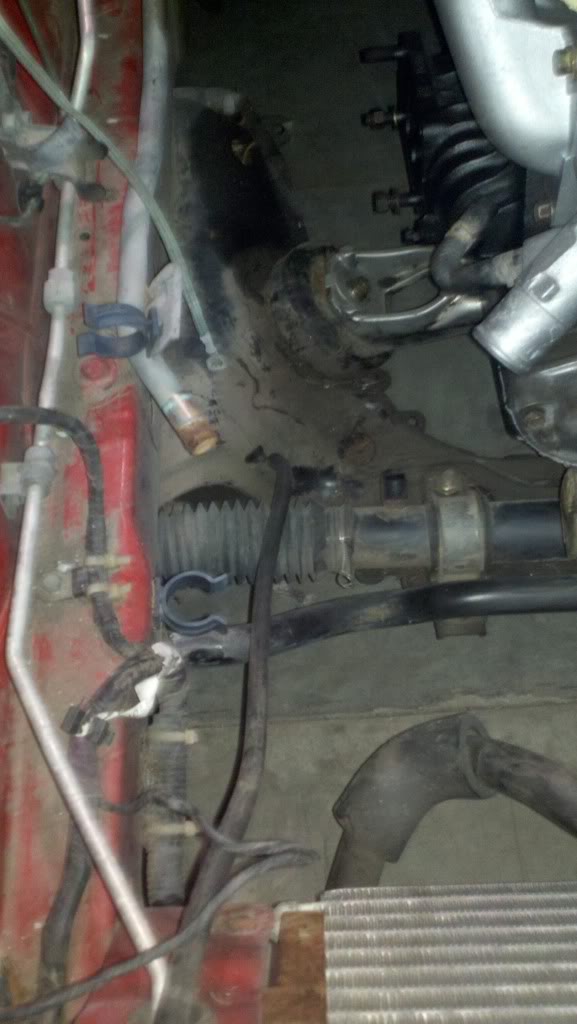
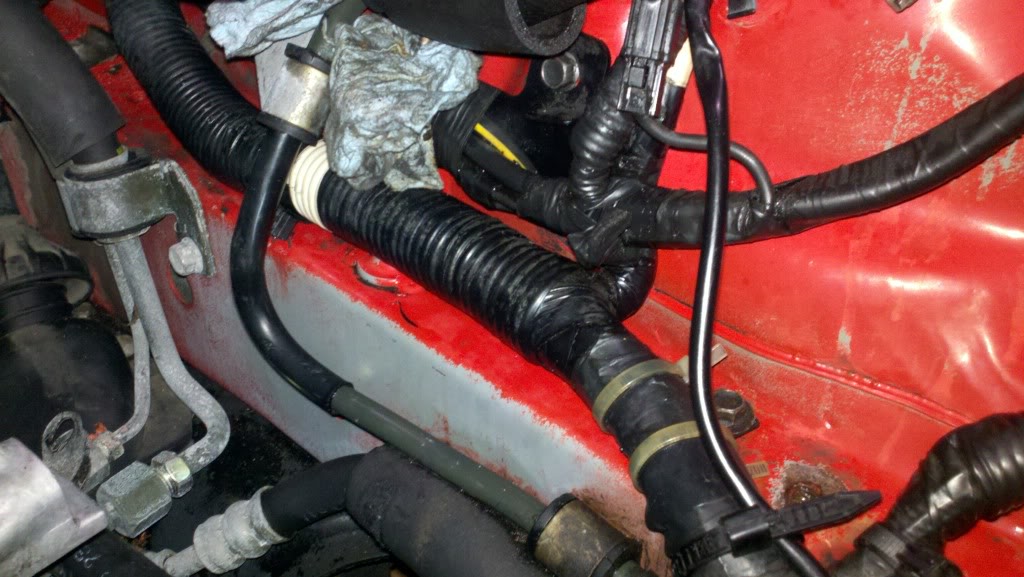
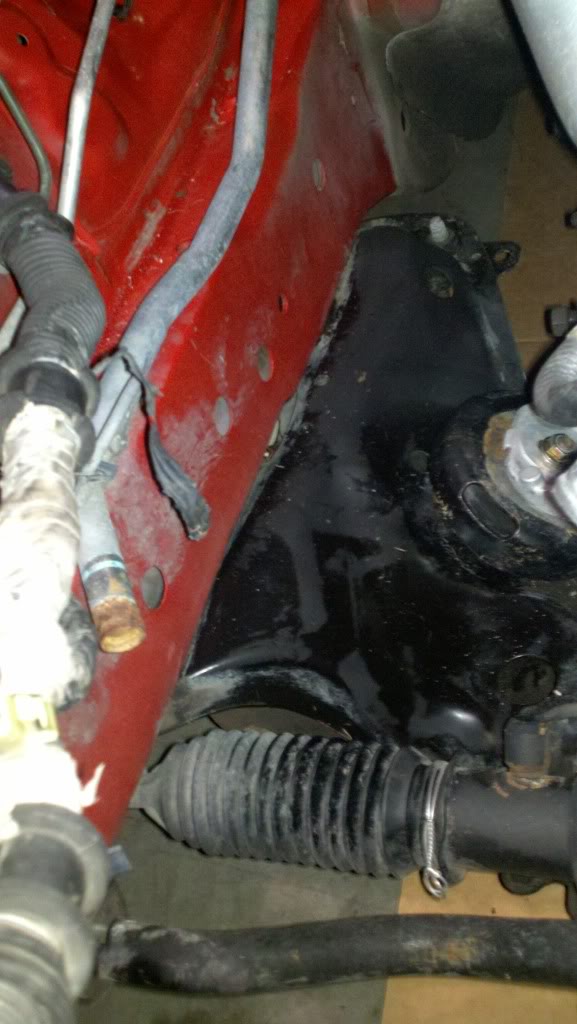
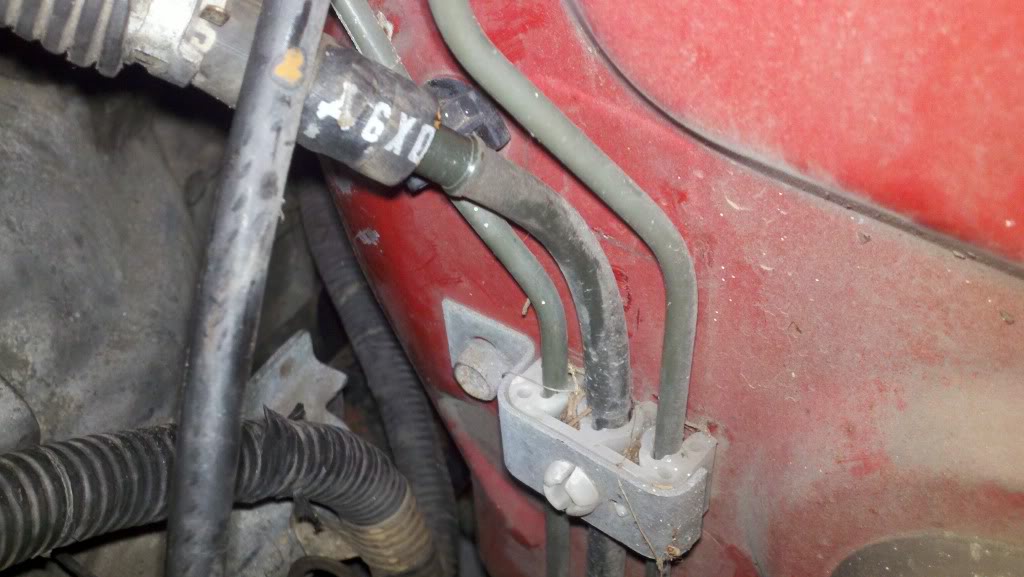
Found the source of the power steering leak, will mend soon. The mess it caused + debris from sitting. Random under hood dirtyness.
Cleaner, still need to give it a once over.
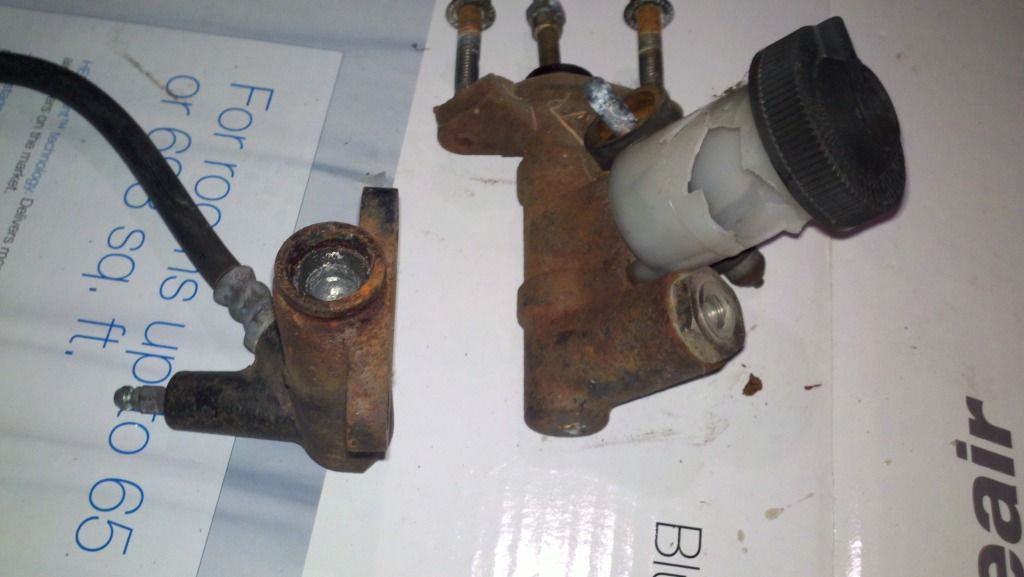
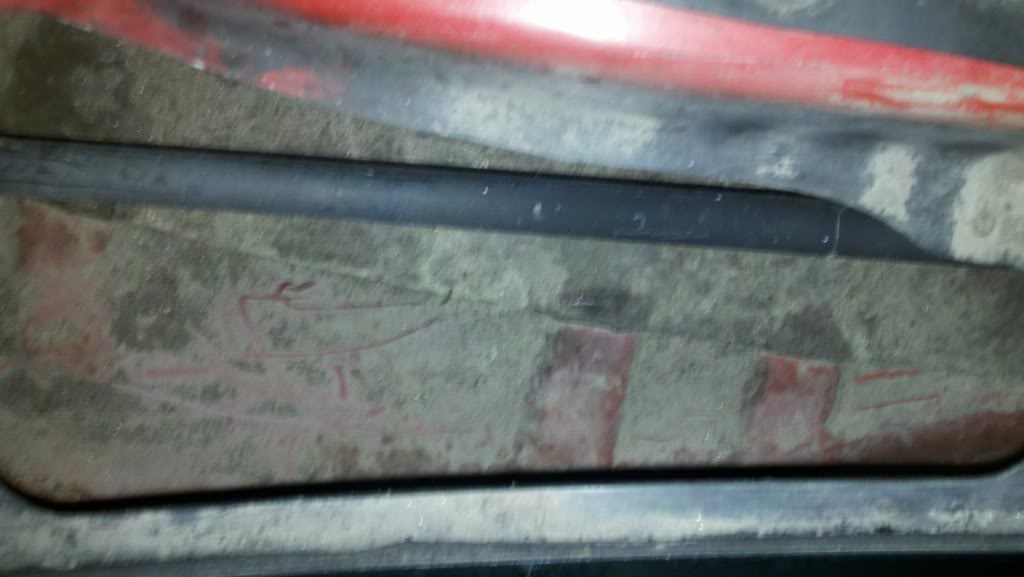
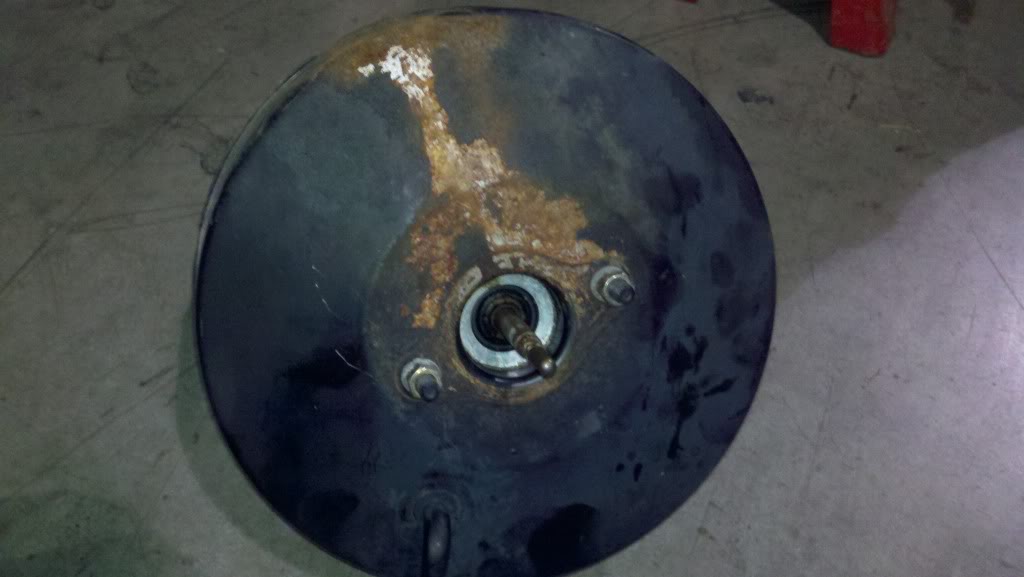
Started the brake system work. Straight to the trash with this brake master cylinder as it's too cheap to buy a reman unit then waste time rebuilding this water logged rusted out garbage. However I did manage to get it pulled without making any mess on my new found cleaner frame rail/fender well.

Ricer crap.
Pulled out the windshield lower guard grills and shop vac'd out all the derbis, was quite a bit of crap in there. Surprised to just find caked layers of dirt and no rust that I can see till I can find a way to scurb in there.
Found the source of the power steering leak, will mend soon. The mess it caused + debris from sitting. Random under hood dirtyness.
Cleaner, still need to give it a once over.
Started the brake system work. Straight to the trash with this brake master cylinder as it's too cheap to buy a reman unit then waste time rebuilding this water logged rusted out garbage. However I did manage to get it pulled without making any mess on my new found cleaner frame rail/fender well.
Got smart and ripped out the driver seat as I got tired of crawling under the dash with it in. Began picking at things in anticipation for major cleaning of brake and fuel feed/return hard lines.
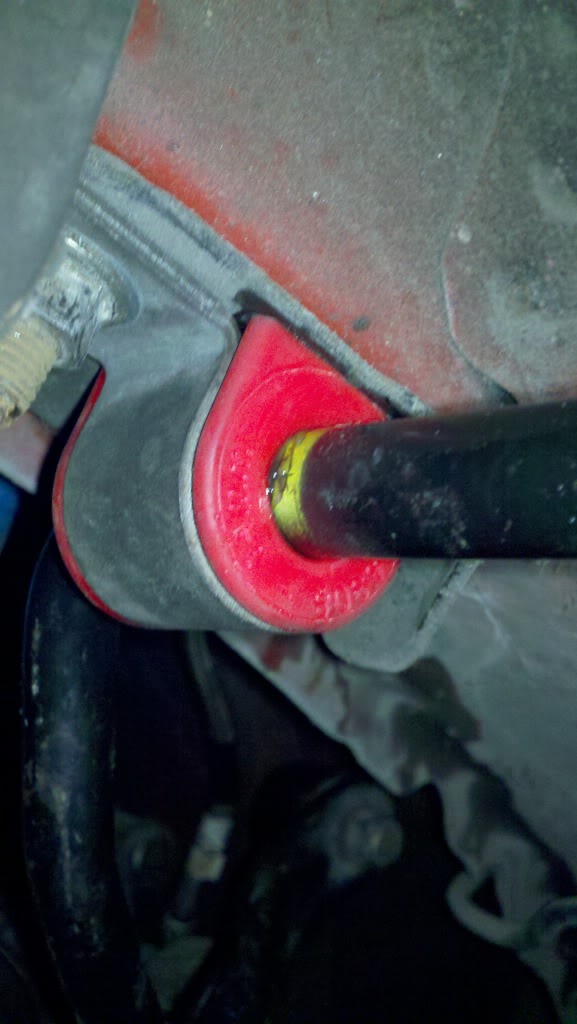
Decided to go ahead and pull out the brake booster as it looks horrible. Surprisingly the rubber boot cabin side looks brand new, seals look nice, not rotted out. Anyone ever try installing one upside down so the booster nipple is down by the OEM fuel return hard line? Think it would look cleaner to ditch that oddly bent stock hard line/hose on the fire wall and tuck this down by the transmission. Thoughts or should I just do it? I'd assume no adverse effects from flipping upside down because it's just vacuum. We'll see.
Poof! It's like new with zero work!
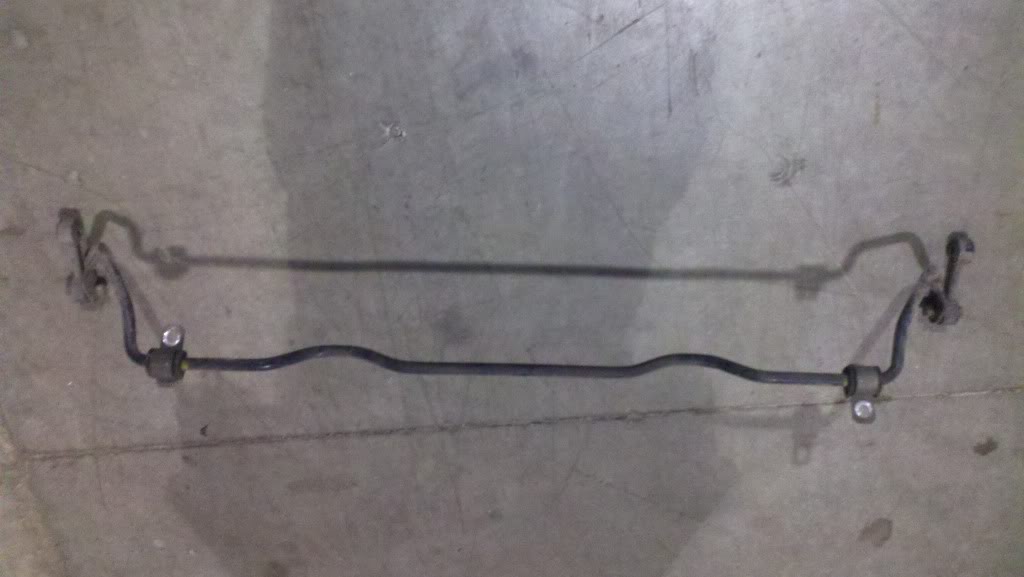
Pulled the rear sway bar, put in the Energy Suspension bushings from the Master Kit. End link bushings look decent still. Will do for now. Also gives me rear brake access to begin the brake line douche-a-thon before putting in the fresh master cylinder...
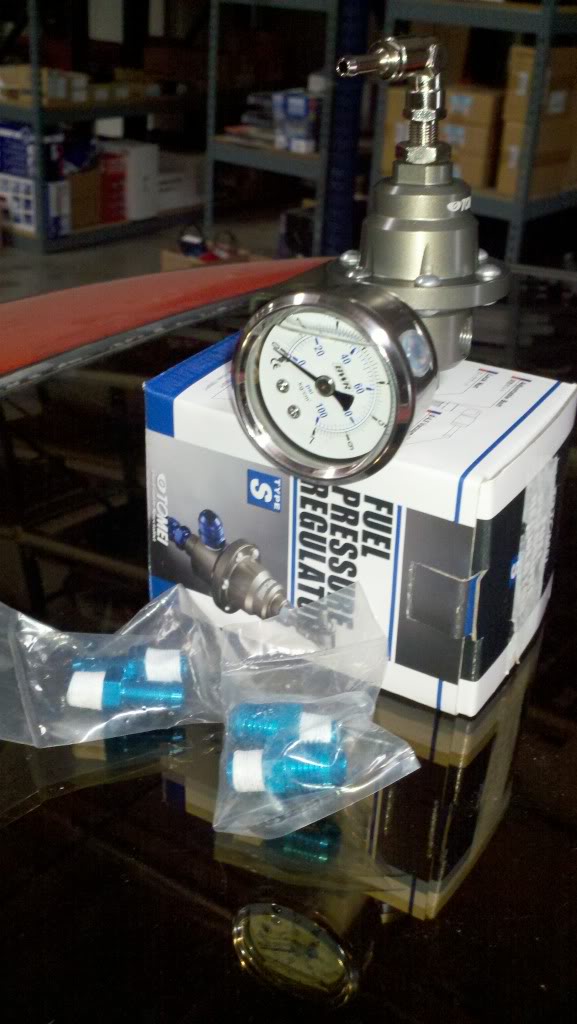
Took a gamble on a $1.60 fitting I threw on an order hoping it would work. Fit better than I imagined, think it was a slick cheap install. Also hope it's close relation to the fuel rail will help with the fact I do not have a pulsation damper anymore. Glad I didn't end up going with the bigger Type-L unit, used the Type-S on 400WHP SR's without a problem, won't even break a sweat with the stock turbo. Only gripe is I now cannot screw on my fuel pressure gauge @ the FPR due to being too close to the UIM. Need to do some Home Depot brass adapter extension making. Yes I also have tried it with the throttle/cruise control cables attached, does not seem to interfere at all.
Gently & slightly bent the fuel return hard line as this all (feed/return) will now run behind the UIM/TB and not below the UIM/TB like stock. Might bend it a bit more depending on how my fuel hose support bracket ends up.
Perhaps tomorrow I'll either dive into the hard brake/fuel line douching, or fire wall/fender well clean up with relocation of select under hood items. Sometimes I think the cleaning and fixing crap from the car sitting for so long will never end. But if you never do it then you're pooched and one day farther behind. Need to keep my one day closer mentality, even if it is as I say picking at things...
Decided to go ahead and pull out the brake booster as it looks horrible. Surprisingly the rubber boot cabin side looks brand new, seals look nice, not rotted out. Anyone ever try installing one upside down so the booster nipple is down by the OEM fuel return hard line? Think it would look cleaner to ditch that oddly bent stock hard line/hose on the fire wall and tuck this down by the transmission. Thoughts or should I just do it?
I'd assume no adverse effects from flipping upside down because it's just vacuum. We'll see. Poof! It's like new with zero work!
Pulled the rear sway bar, put in the Energy Suspension bushings from the Master Kit. End link bushings look decent still. Will do for now. Also gives me rear brake access to begin the brake line douche-a-thon before putting in the fresh master cylinder...
Took a gamble on a $1.60 fitting I threw on an order hoping it would work. Fit better than I imagined, think it was a slick cheap install.
Also hope it's close relation to the fuel rail will help with the fact I do not have a pulsation damper anymore. Glad I didn't end up going with the bigger Type-L unit, used the Type-S on 400WHP SR's without a problem, won't even break a sweat with the stock turbo. Only gripe is I now cannot screw on my fuel pressure gauge @ the FPR due to being too close to the UIM. Need to do some Home Depot brass adapter extension making. Yes I also have tried it with the throttle/cruise control cables attached, does not seem to interfere at all.Gently & slightly bent the fuel return hard line as this all (feed/return) will now run behind the UIM/TB and not below the UIM/TB like stock. Might bend it a bit more depending on how my fuel hose support bracket ends up.
Perhaps tomorrow I'll either dive into the hard brake/fuel line douching, or fire wall/fender well clean up with relocation of select under hood items. Sometimes I think the cleaning and fixing crap from the car sitting for so long will never end. But if you never do it then you're pooched and one day farther behind. Need to keep my one day closer mentality, even if it is as I say picking at things...
Thank you. Funny you say that as the friend I bought the car from said the same thing when he dropped by and saw the car today.
Realized sway bar pics in other post are stock bushings, lol.
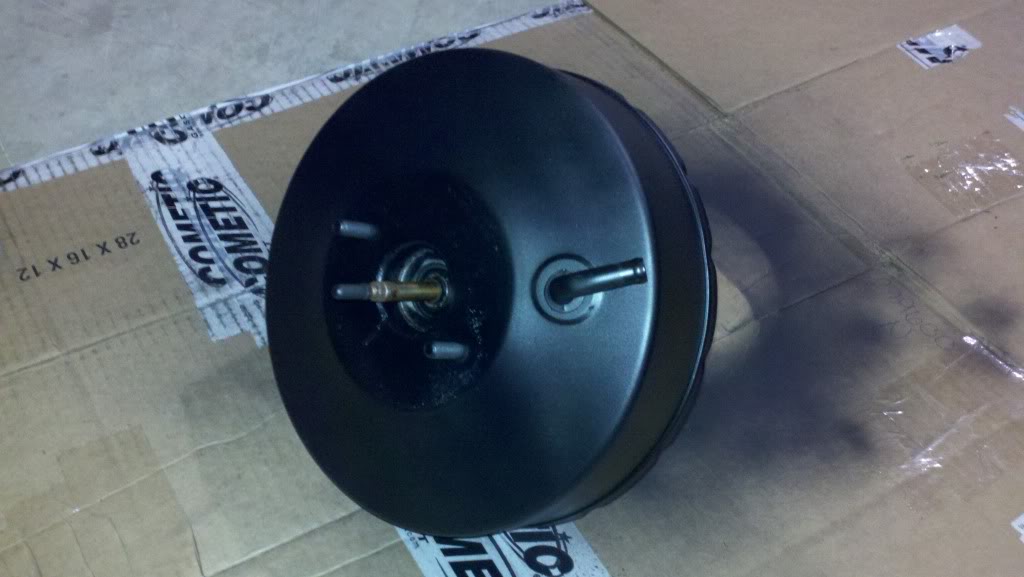
Booster all cleaned up and painted. Noticed today that it's not an original piece (Bendix slapped right on it) which would explain its relatively good condition aside aesthetics.
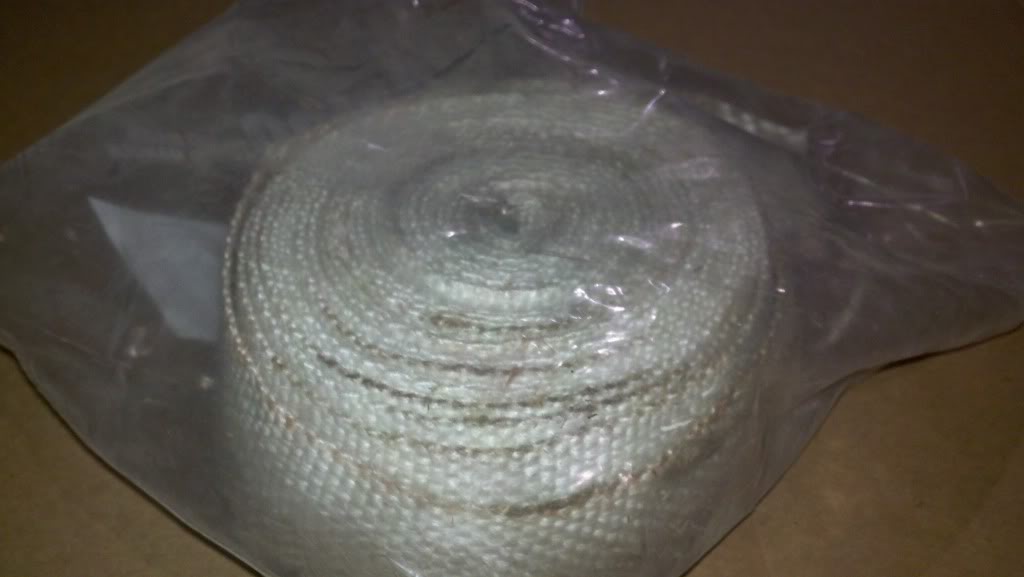
Rummaging through the shop found some very lightly used exhaust wrap. Score for another FREE.99
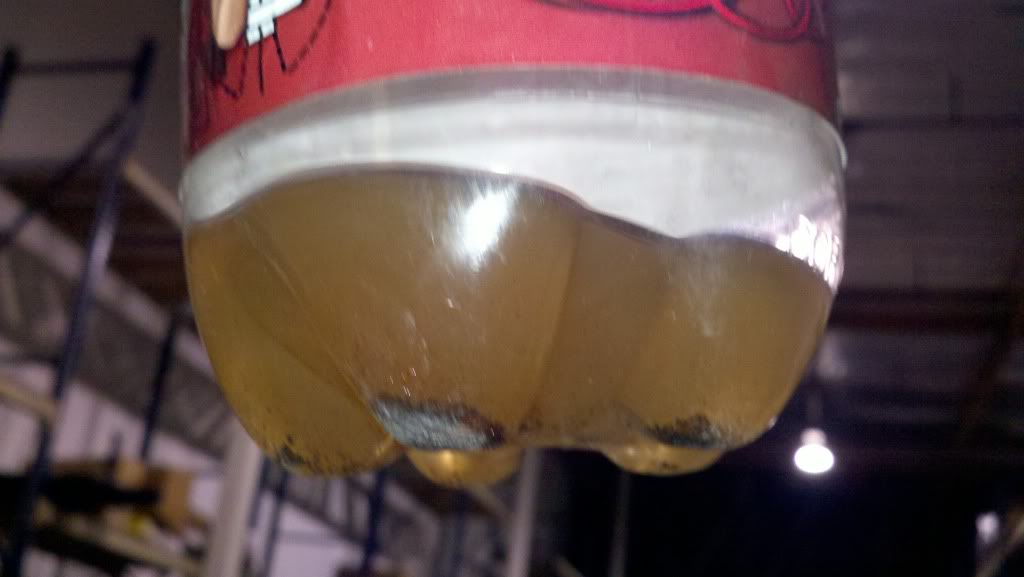
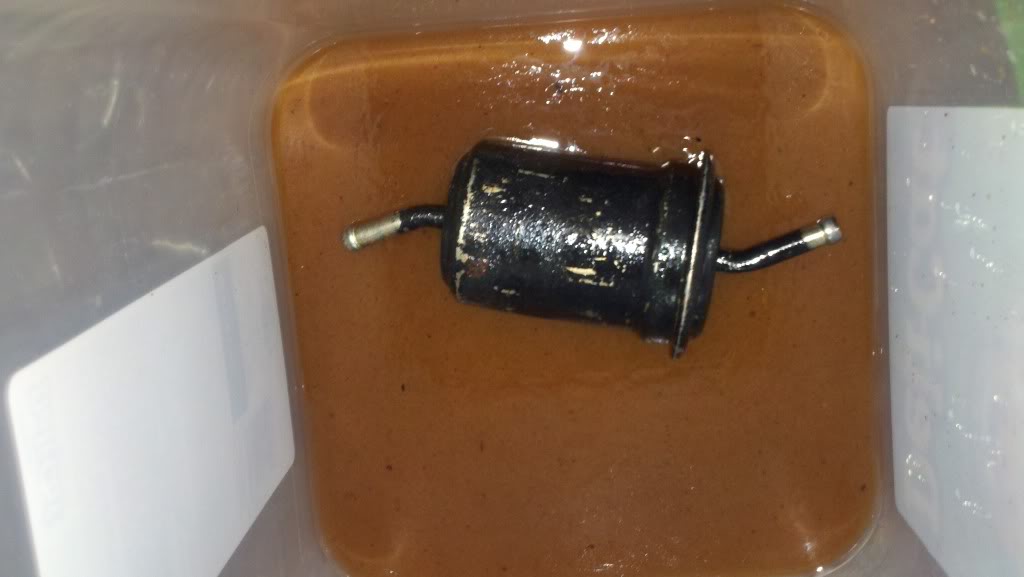
And then there began fuel hard line douching. Cleaned and cleared return hard line, what came out before it began to run clear.
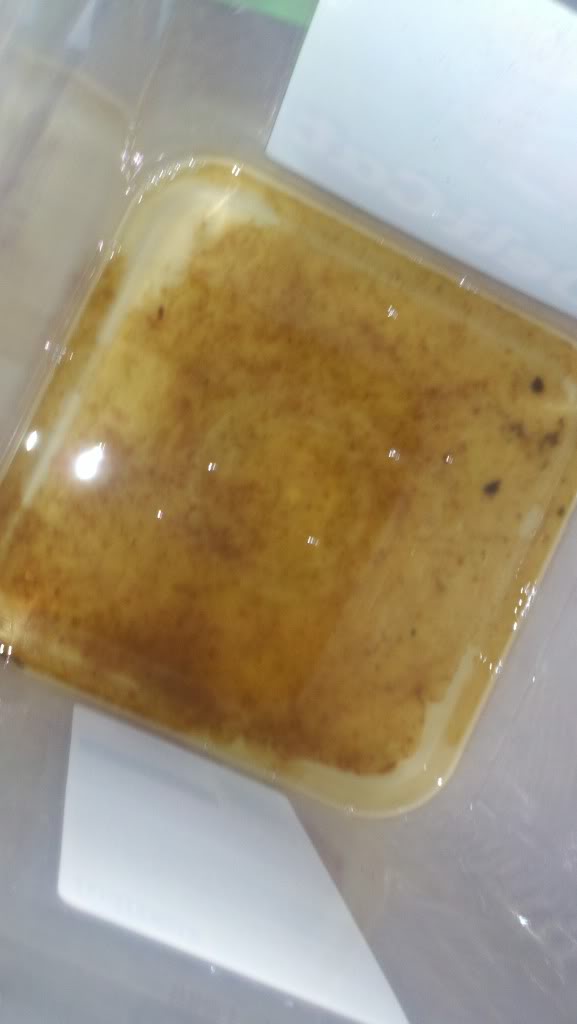
Fuel feed hard line was not as bad as I would've thought considering the gas tank condition. First douche through the 20th douche a ton of who knows what came out, but at least began to run clear. Got it down now to where it runs perfectly clear and have very very little sediment coming out.
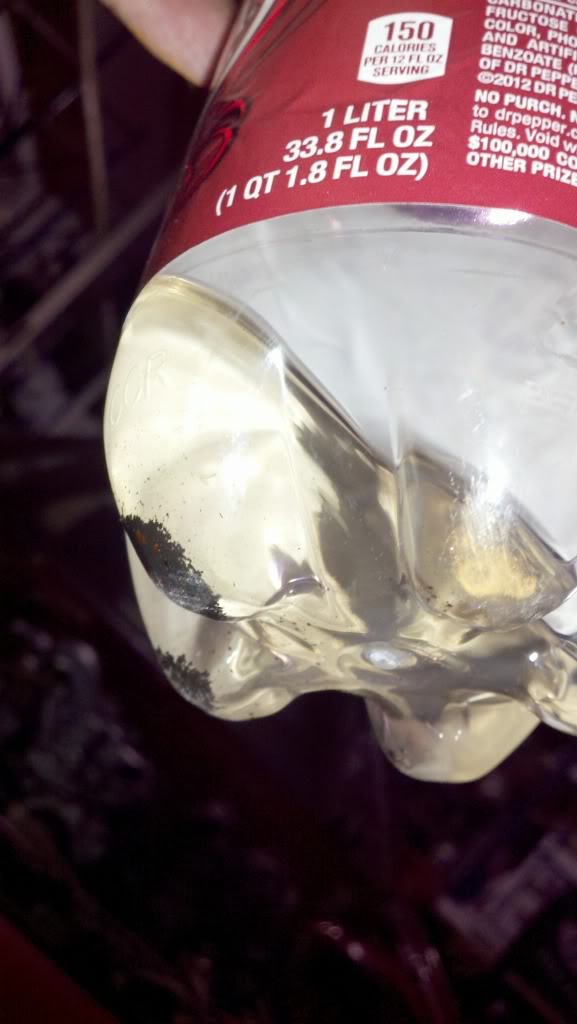
End byproduct of the douching.
Ye olde doucher ghetto deluxe.
Keep looking in this box thinking how nice it would be to de-pin the entire engine harness and shrink/wrap. I think I'm far too lazy for that. Only time will tell if I dip my ***** that deep into it.
Tomorrow I think will be a final feed hard line douching followed by the beginnings of my brake hard line douching.
Realized sway bar pics in other post are stock bushings, lol.
Booster all cleaned up and painted. Noticed today that it's not an original piece (Bendix slapped right on it) which would explain its relatively good condition aside aesthetics.
Rummaging through the shop found some very lightly used exhaust wrap. Score for another FREE.99
And then there began fuel hard line douching. Cleaned and cleared return hard line, what came out before it began to run clear.
Fuel feed hard line was not as bad as I would've thought considering the gas tank condition. First douche through the 20th douche a ton of who knows what came out, but at least began to run clear. Got it down now to where it runs perfectly clear and have very very little sediment coming out.
End byproduct of the douching.
Ye olde doucher ghetto deluxe.
Keep looking in this box thinking how nice it would be to de-pin the entire engine harness and shrink/wrap. I think I'm far too lazy for that. Only time will tell if I dip my ***** that deep into it.
Tomorrow I think will be a final feed hard line douching followed by the beginnings of my brake hard line douching.
Full on air born.
Douched out both front brake lines. They now appear to be clean and clear.

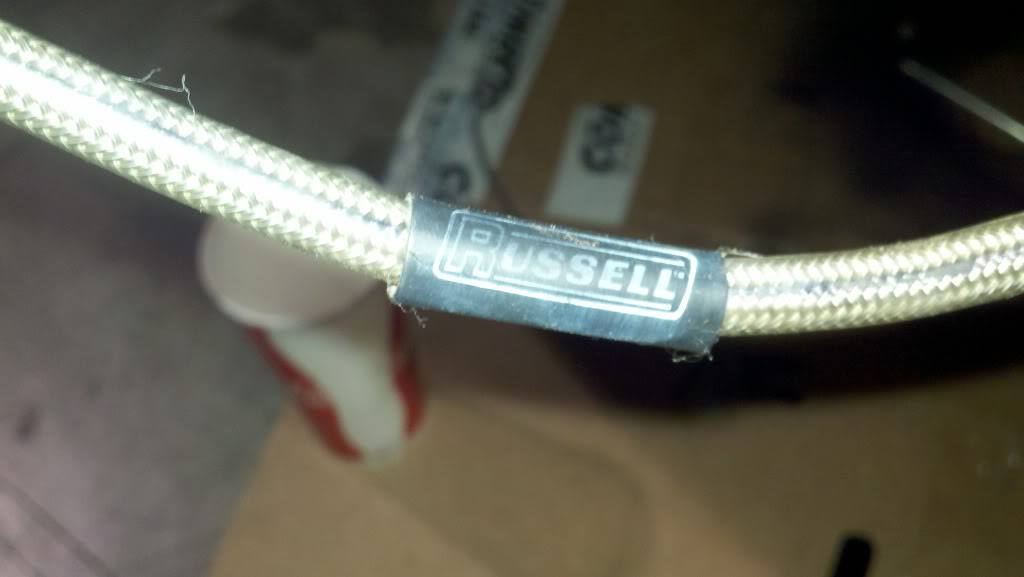
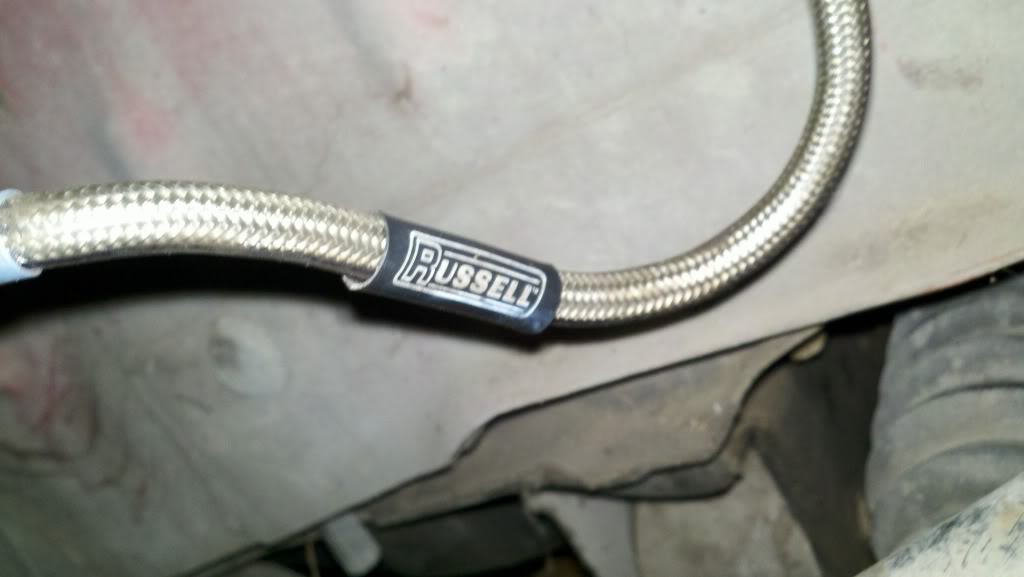
Ended up taking out the Russell SS lines and cleaning less abrasively as I didn't want to dry out the inner lining.
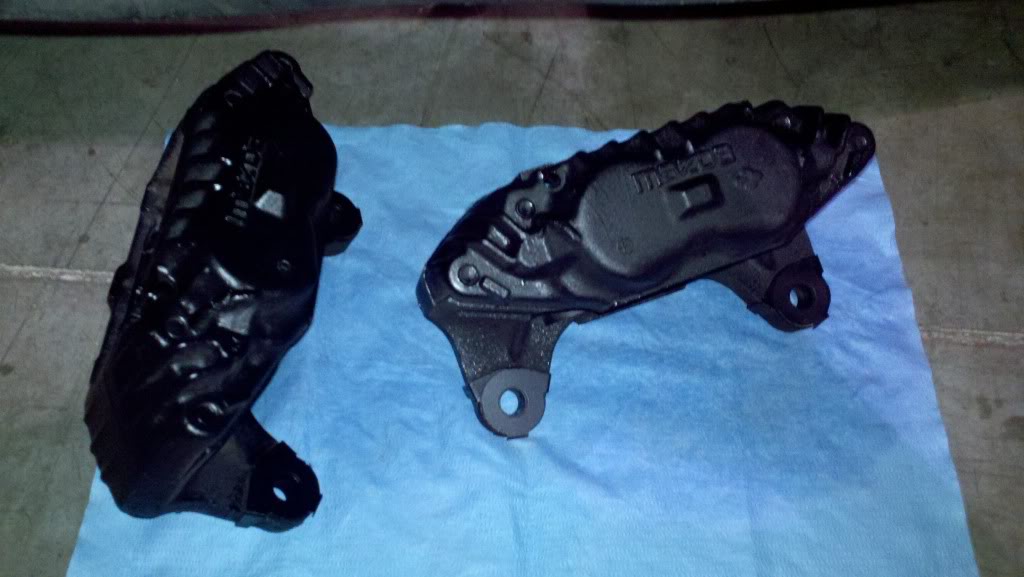
Mixture of both water and brake fluid puked out of the bleed screw/hard line inlet. To my surprise the front brakes are not seized, all 8 pistons moved easily, seals all intact. Perhaps luck is now turning to my side. Taped up the basics and sprayed satin black.
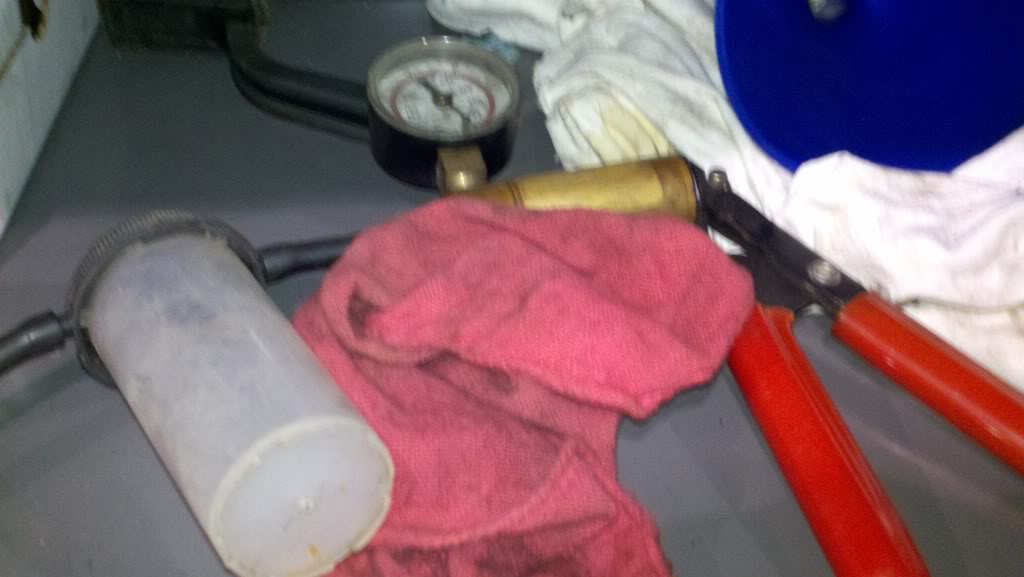
Will knock out the same process for the rear tomorrow. Hopefully I'll get it all re-assembled with the booster and master cylinder in place to get it ready for a bleed. Also hoping pumping the foot pedal in conjunction with the hand held bleeder will mean it won't take me forever to bleed a completely dry system.
Douched out both front brake lines. They now appear to be clean and clear.
Ended up taking out the Russell SS lines and cleaning less abrasively as I didn't want to dry out the inner lining.
Mixture of both water and brake fluid puked out of the bleed screw/hard line inlet. To my surprise the front brakes are not seized, all 8 pistons moved easily, seals all intact. Perhaps luck is now turning to my side. Taped up the basics and sprayed satin black.
Will knock out the same process for the rear tomorrow. Hopefully I'll get it all re-assembled with the booster and master cylinder in place to get it ready for a bleed. Also hoping pumping the foot pedal in conjunction with the hand held bleeder will mean it won't take me forever to bleed a completely dry system.