Angie's FC Exterior Buildup thread
 01-27-09, 03:09 PM
#151
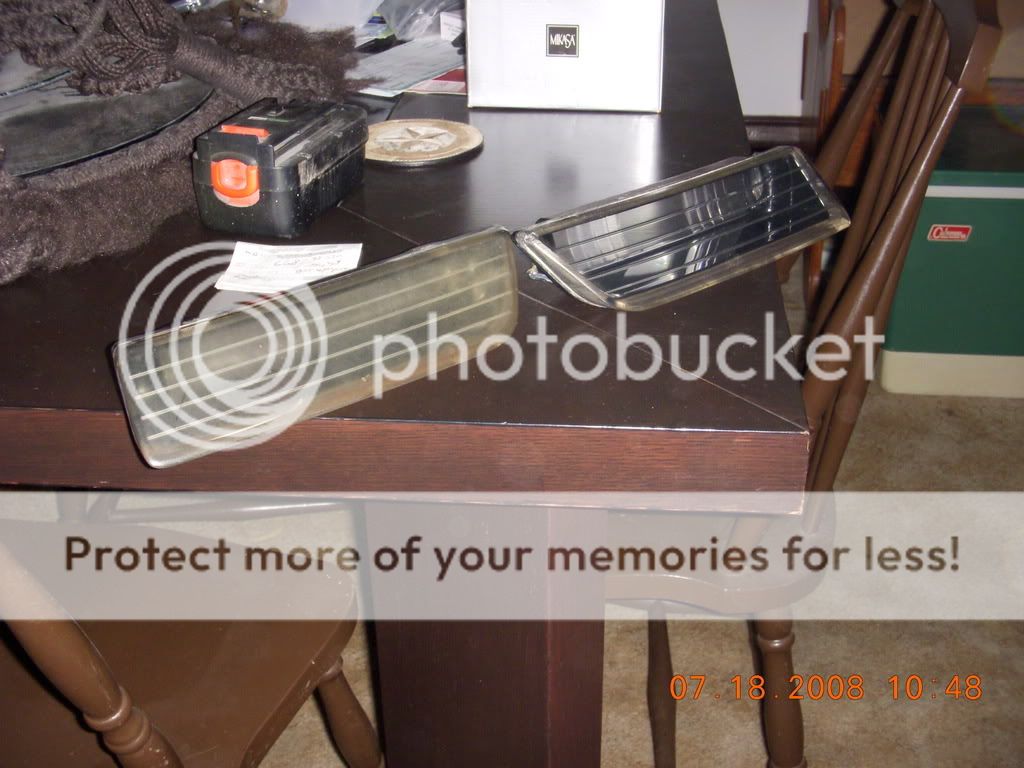
Thats a quick before/after of the sanding and polishing that is achieved with FTP lenses.
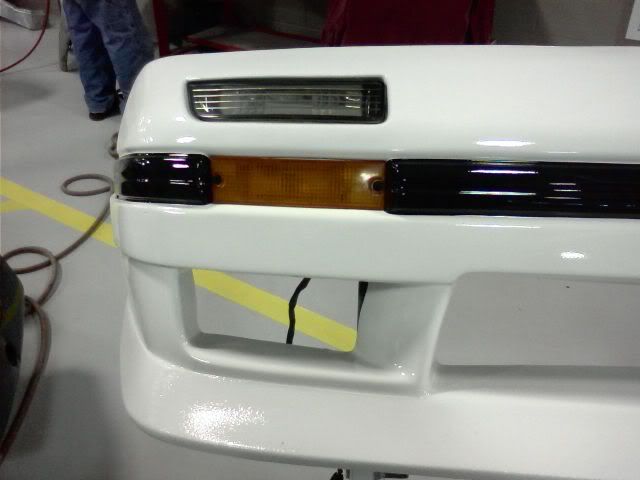
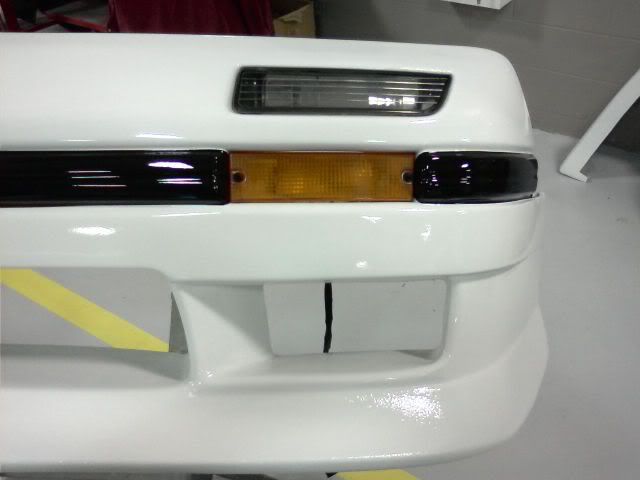
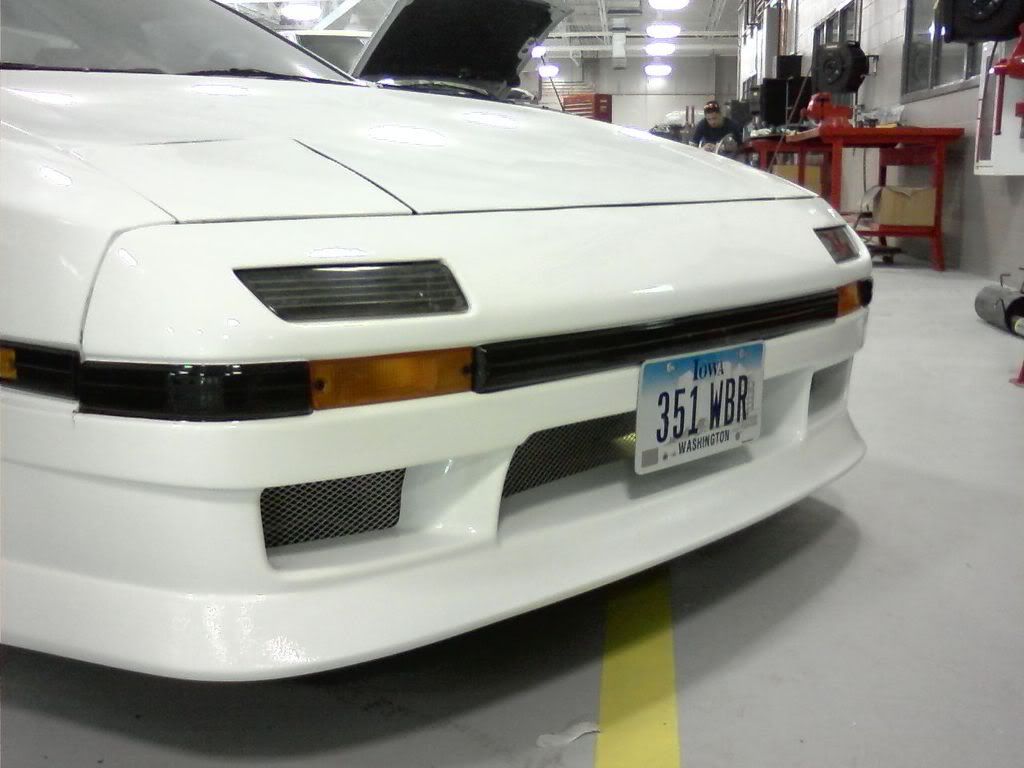
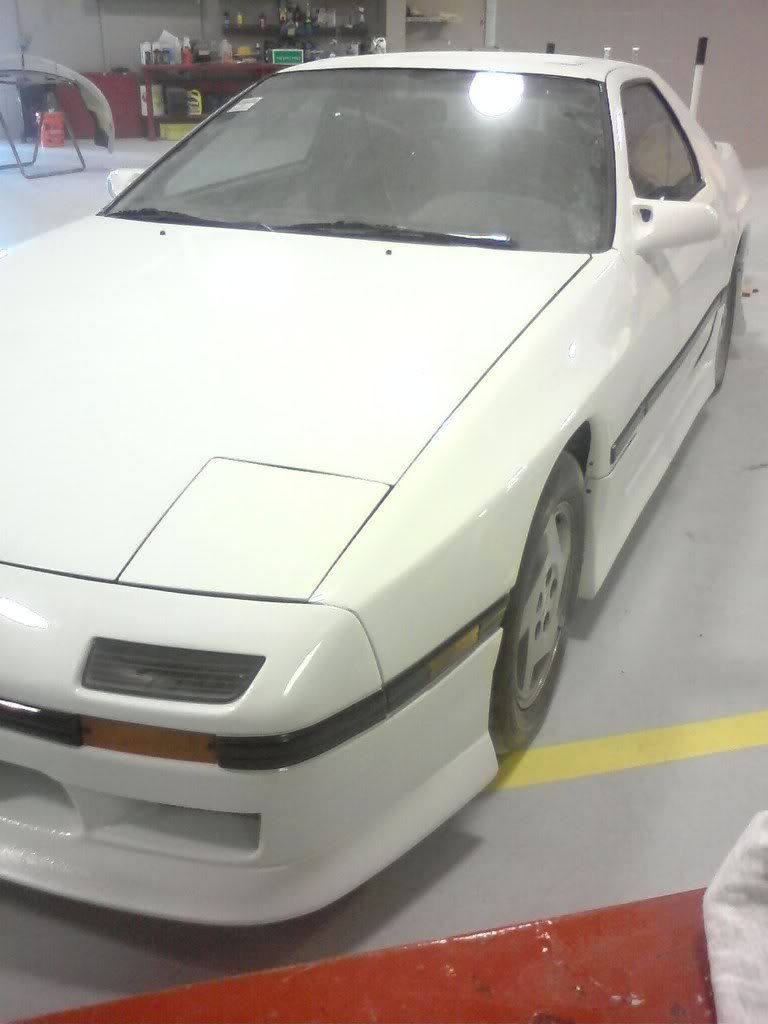
Got the entire front bumper put together and ready to be installed. Also installed sideskirts today. Not much time to do much lately as my instructor is having us do other side projects/assignments. Heres some pics of everything done up and installed.
 01-28-09, 09:48 PM
#152
Not to jack my own thread, but does anyone have a good idea on how to mount the front license plate? Putting it in the front window is not an option. It needs to be mounted on the front of the car facing forward in order to be legal. We really dont need any more reasons to be pulled over.
Any ideas are appreciated.
Any ideas are appreciated.
01-29-09, 07:51 AM
#153
*insert clever title here
Join Date: Nov 2005
Location: Des Moines, IA
Posts: 332
Likes: 0
Received 0 Likes
on
0 Posts
Not to jack my own thread, but does anyone have a good idea on how to mount the front license plate? Putting it in the front window is not an option. It needs to be mounted on the front of the car facing forward in order to be legal. We really dont need any more reasons to be pulled over.
Any ideas are appreciated.
Any ideas are appreciated.
Amazing build man. Read through the whole thing and can't wait to see the final product. I'm definitely going to have to come over your way when it is done so I can see it for myself.
 01-29-09, 06:41 PM
#158
I added the chip guard.
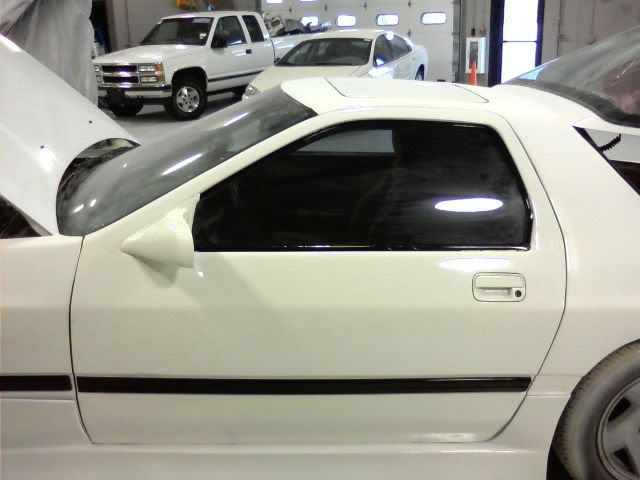
Got most of the car buffed out. Only thing left to do is to buff out the driver quarter and driver side of the roof. Also got the front bumper installed along with the headlight covers and some of the side moldings.
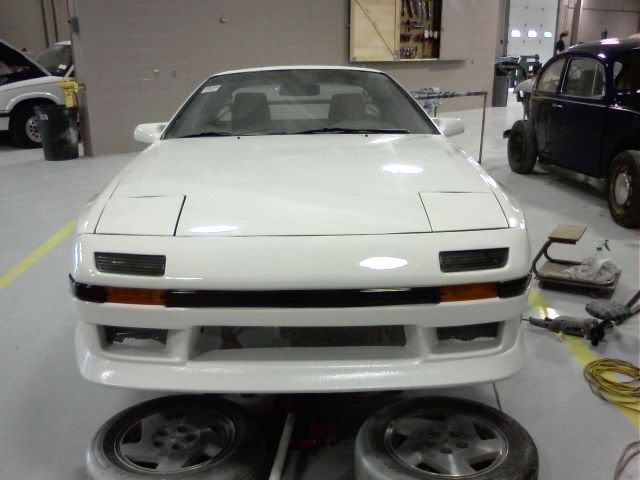
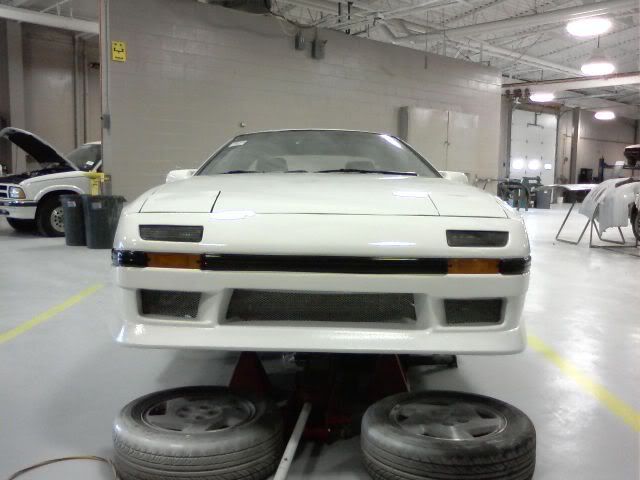

The passenger side doesnt line up the best when it comes to the bumper. As you can see the molding doesnt line up as the bumper sits a bit lower than one would want. Not really much I can do about this. I do know that this car has been wrecked - front end collision. Im sure that this is the main reason that I was having issues.
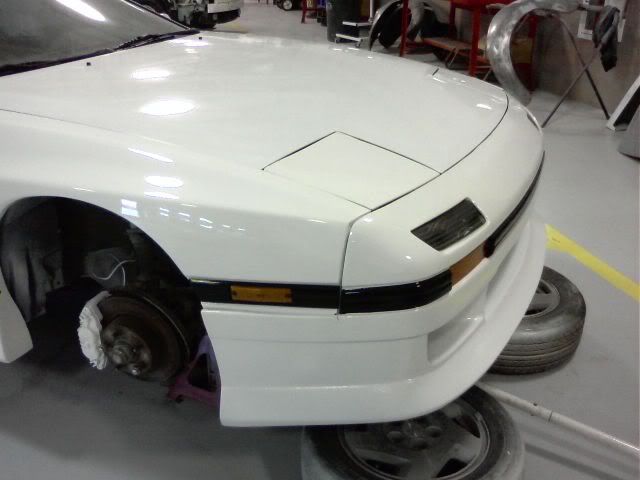
Got most of the car buffed out. Only thing left to do is to buff out the driver quarter and driver side of the roof. Also got the front bumper installed along with the headlight covers and some of the side moldings.
The passenger side doesnt line up the best when it comes to the bumper. As you can see the molding doesnt line up as the bumper sits a bit lower than one would want. Not really much I can do about this. I do know that this car has been wrecked - front end collision. Im sure that this is the main reason that I was having issues.
02-02-09, 02:57 PM
#162
*insert clever title here
Join Date: Nov 2005
Location: Des Moines, IA
Posts: 332
Likes: 0
Received 0 Likes
on
0 Posts
02-02-09, 05:18 PM
#163
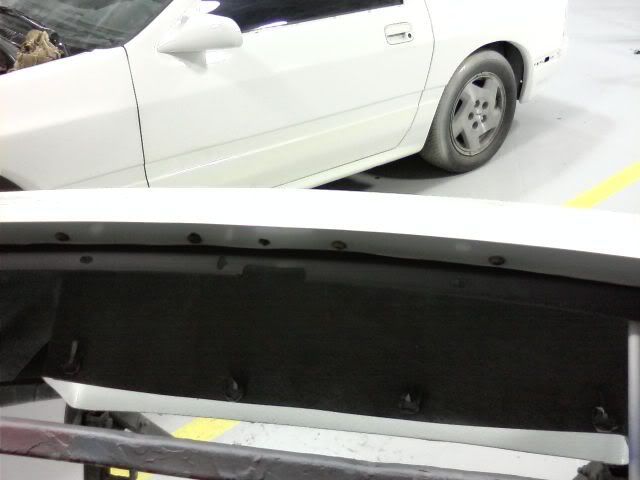
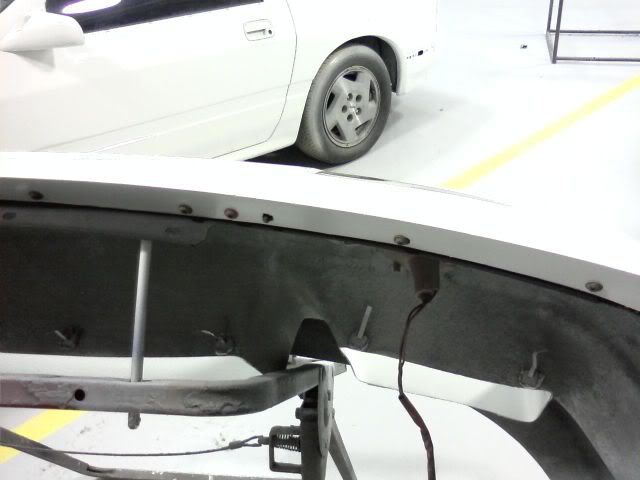
A quick update. I got the rear molding stripe painted today. Before anyone asks, I painted the rear molding piece last as when I sprayed the car I didn't have the black paint bought yet so it kept getting pushed back until now. Anyways, coming soon will be the HOW TO (in this thread) of mounting the rear bumper. Basically, you glue it on and then I plan on slamming a couple screws into the ends, into the fender well edge like I did with the sideskirts (you can see this in the 1st pic below.

02-03-09, 02:07 PM
#166
As you may have noticed, the sideskirts stuck out away from the fender next to the door. I figured out a way to fix this. I shot some urethane in behind the sideskirt and then of course you have to hold it tight against the fender so then came the idea to use a port-a-power to hold it. Here are some pics of how I made it work.
In the first pic you can see that I had to suspend the port-a-power up so it can press against the correct area. I used jack stands to hold the port-a-power up. I also put a cloth in between it and the car since it was so dirty. I the needed to find something that would be heavy enough to remain stationary. I used my toolbox on one side and some smaller tool boxes filled with stuff (weigh about 50 pounds apiece lol). I didn't really need anything that heavy just as long as it was heavy enough to stay put and not move while the urethane set up overnight.
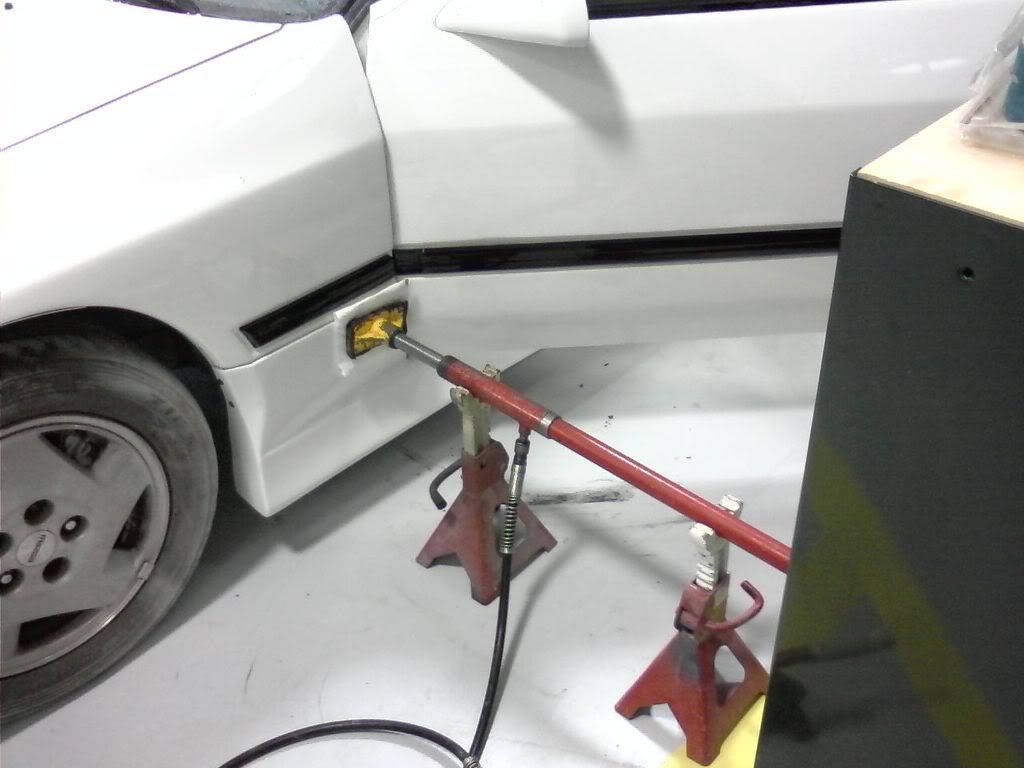
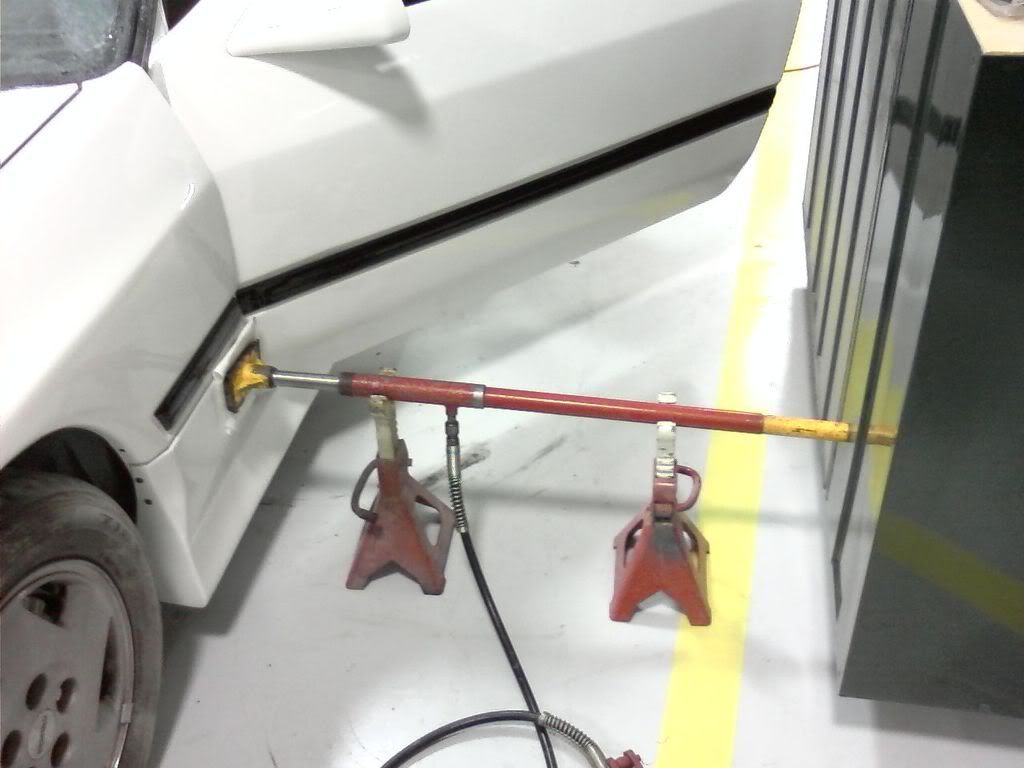
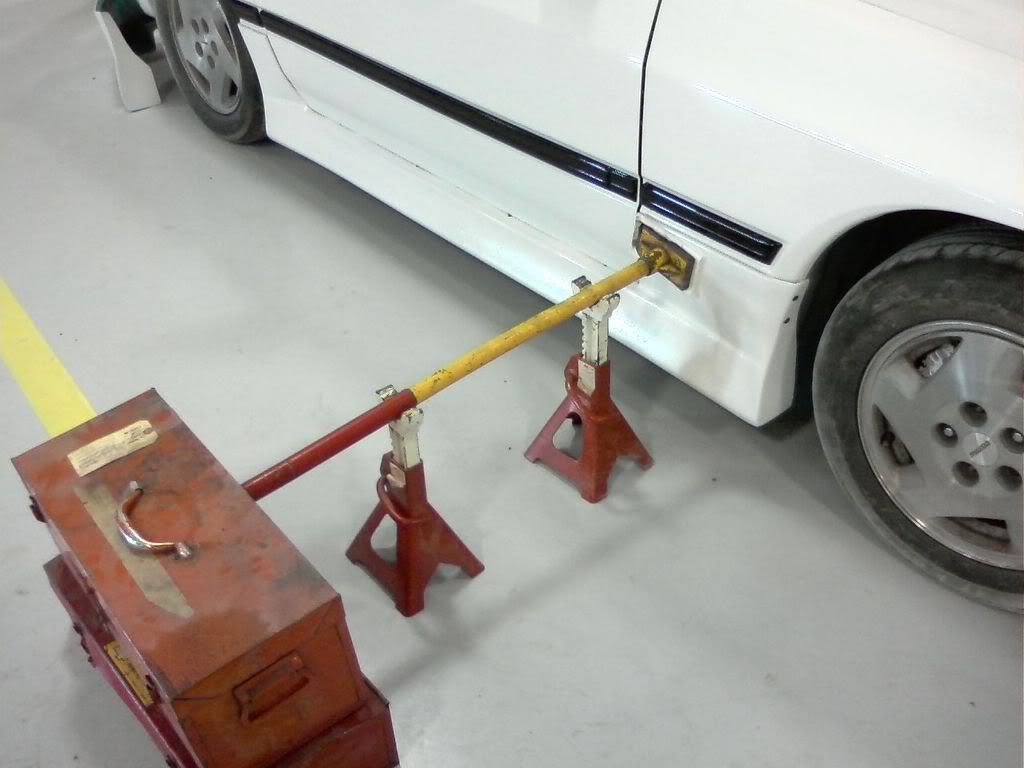
In the first pic you can see that I had to suspend the port-a-power up so it can press against the correct area. I used jack stands to hold the port-a-power up. I also put a cloth in between it and the car since it was so dirty. I the needed to find something that would be heavy enough to remain stationary. I used my toolbox on one side and some smaller tool boxes filled with stuff (weigh about 50 pounds apiece lol). I didn't really need anything that heavy just as long as it was heavy enough to stay put and not move while the urethane set up overnight.
02-04-09, 07:12 PM
#168
Some rust was starting under the driver rear one in front of the wheel. The little one.
Update: I got the rear brakes on finally after messing around with trying to rebuild the calipers and found that I had bought the right kit, but the wrong parts were in it so one caliper piston wouldnt go back in correctly. I will have pics of the car tomorrow as I plan on installing the rear bumper piece.
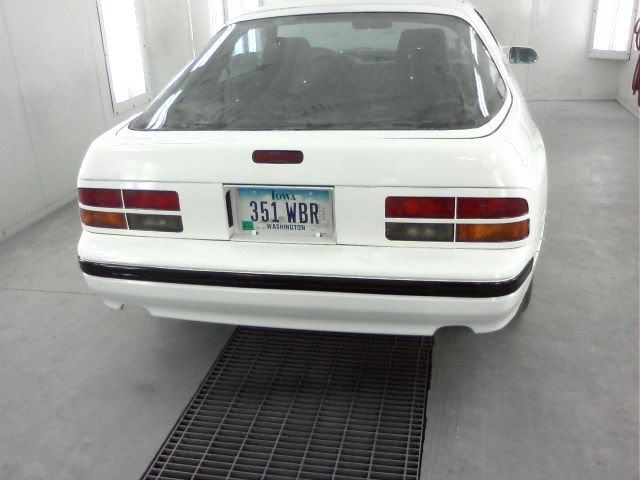
I also installed the front license plate. I took off the bumper and placed a couple small pieces of aluminum behind the bumper opposite the license plate (with the proper size hols drilled, etc) and riveted the plate on. Looks pretty decent.
Like I said, pics tomorrow of rear bumper installation and the pics of the other things I got done. Its definitely on the downhill slide now. Only thing left to do is to figure out why I cant bleed the front brakes and install rear bumper piece then finally the mufflers. Should hopefully be driving it home next week!!!! WOOT
Update: I got the rear brakes on finally after messing around with trying to rebuild the calipers and found that I had bought the right kit, but the wrong parts were in it so one caliper piston wouldnt go back in correctly. I will have pics of the car tomorrow as I plan on installing the rear bumper piece.
I also installed the front license plate. I took off the bumper and placed a couple small pieces of aluminum behind the bumper opposite the license plate (with the proper size hols drilled, etc) and riveted the plate on. Looks pretty decent.
Like I said, pics tomorrow of rear bumper installation and the pics of the other things I got done. Its definitely on the downhill slide now. Only thing left to do is to figure out why I cant bleed the front brakes and install rear bumper piece then finally the mufflers. Should hopefully be driving it home next week!!!! WOOT
 02-05-09, 04:28 PM
#170
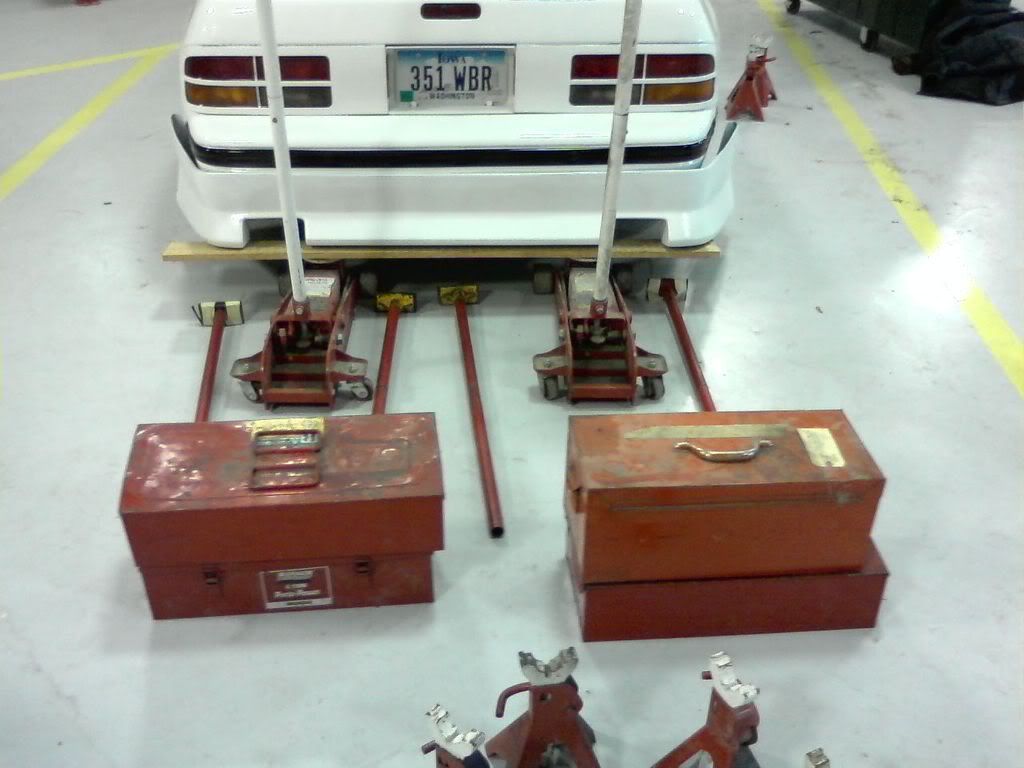
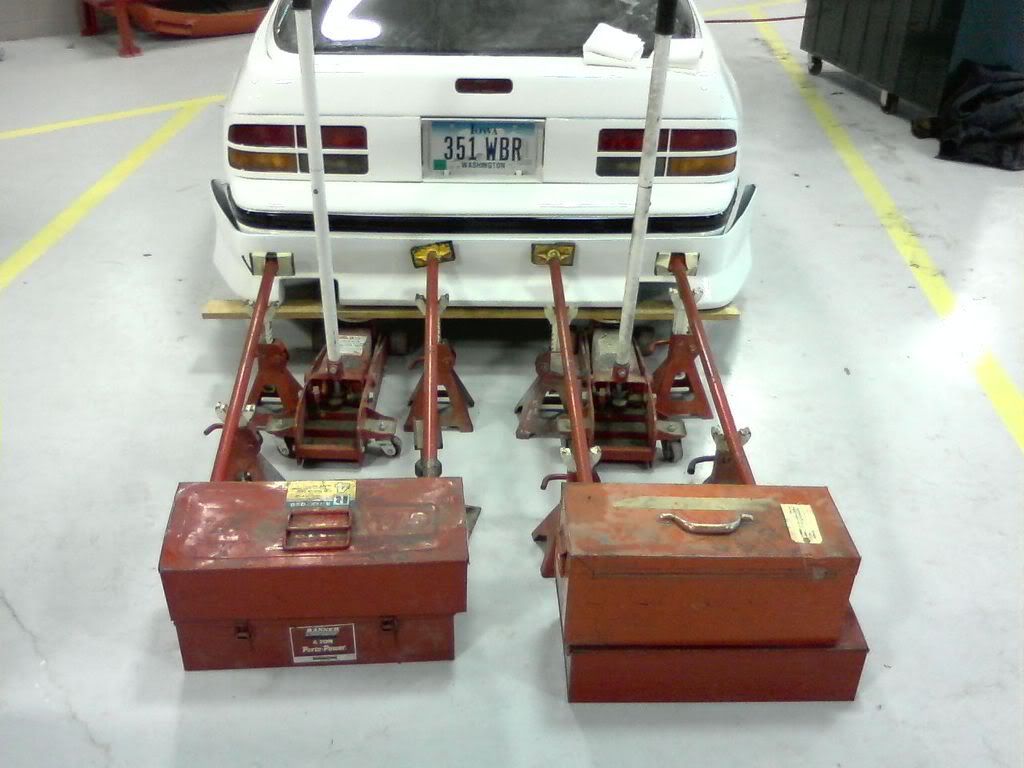
OK so now the really good stuff - the moment youve all been waiting for (or at least 4 of you). how I installed the rear bumper piece.
The first thing I did was got it sitting up next to the car and got it aligned properly so it would be on straight. I did this by setting the bumper on 2 jacks with a piece of 1x6 on top of them for better overall support.
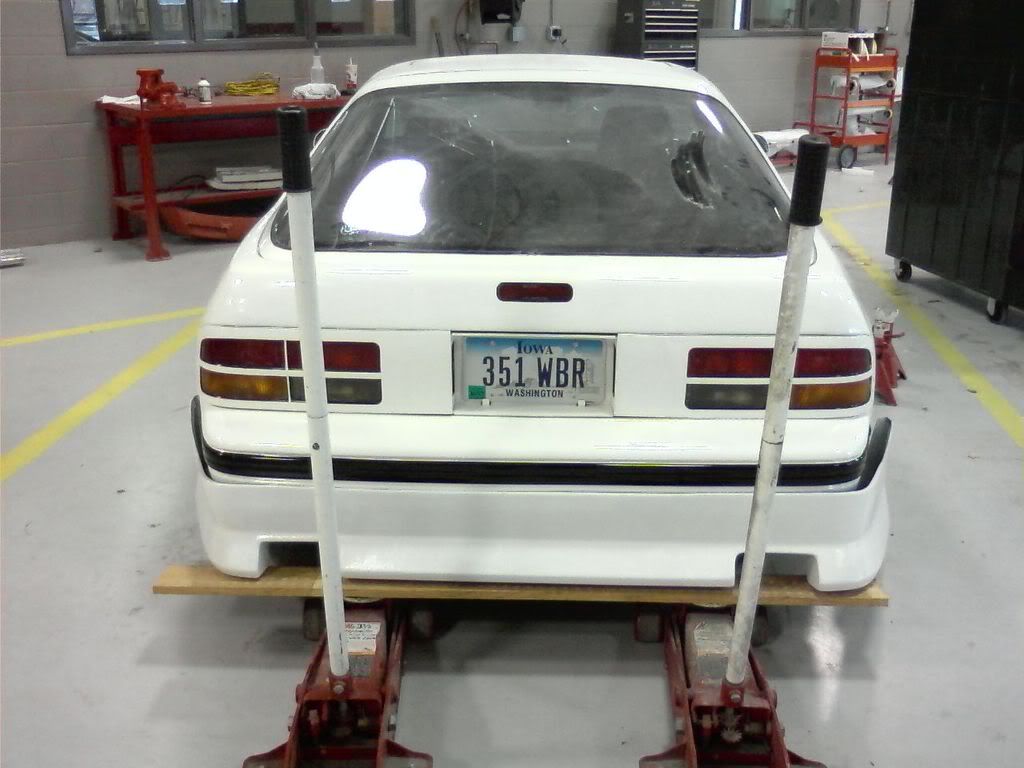
Like the sideskirt pieces I decided to use urethane to hold it in place since it is so strong.
I also decided that the best way to hold the bumper piece onto the rear bumper cover (without taking it off) was to do basically the same thing I did with the sideskirts also. Here are pics with it all sitting, ready to go.
Next I moved the bumper away from the car but left it resting on the jacks still and put 2 beads of urethane across the inside lip area of the bumper piece.
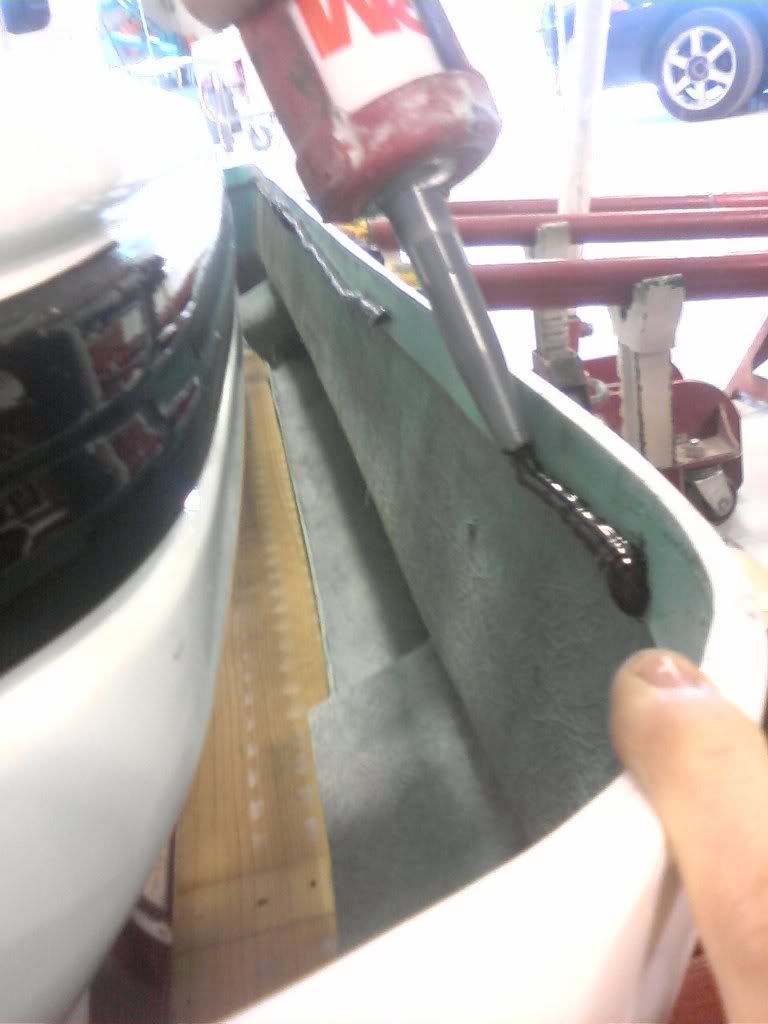
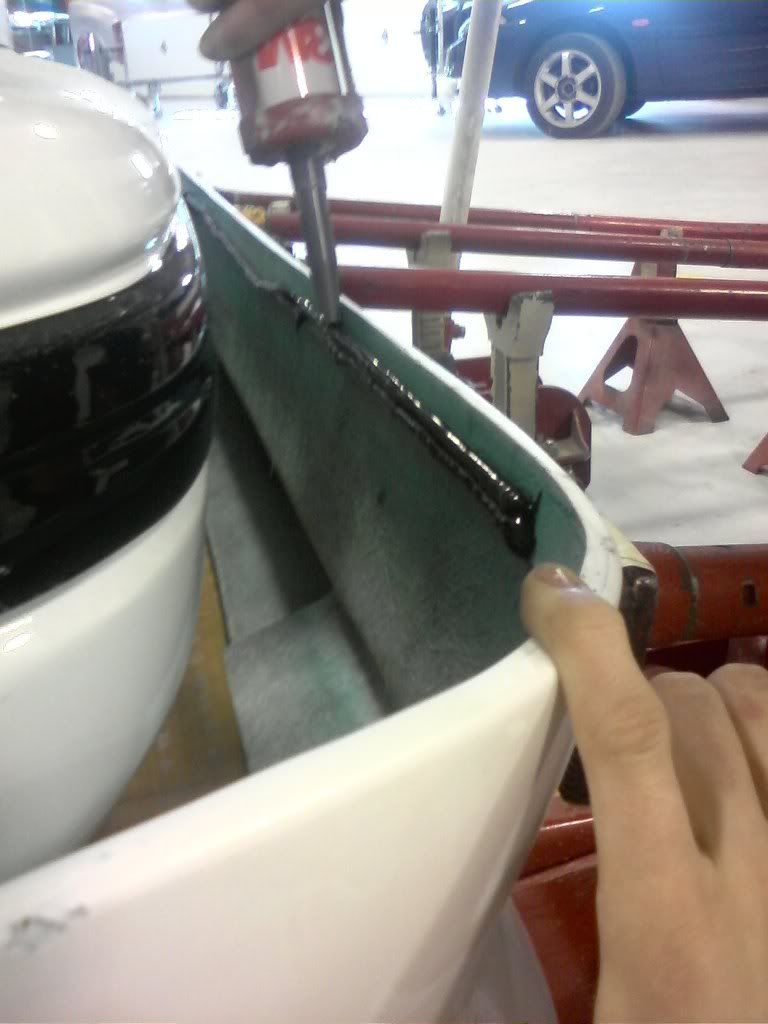
Once the urethane was applied I slid the bumper piece up against the car and then slid the supports from the port-a-power sets up against the bumper piece with some paper cloths in between the pads and the bumper piece. This is what the car looks like now:
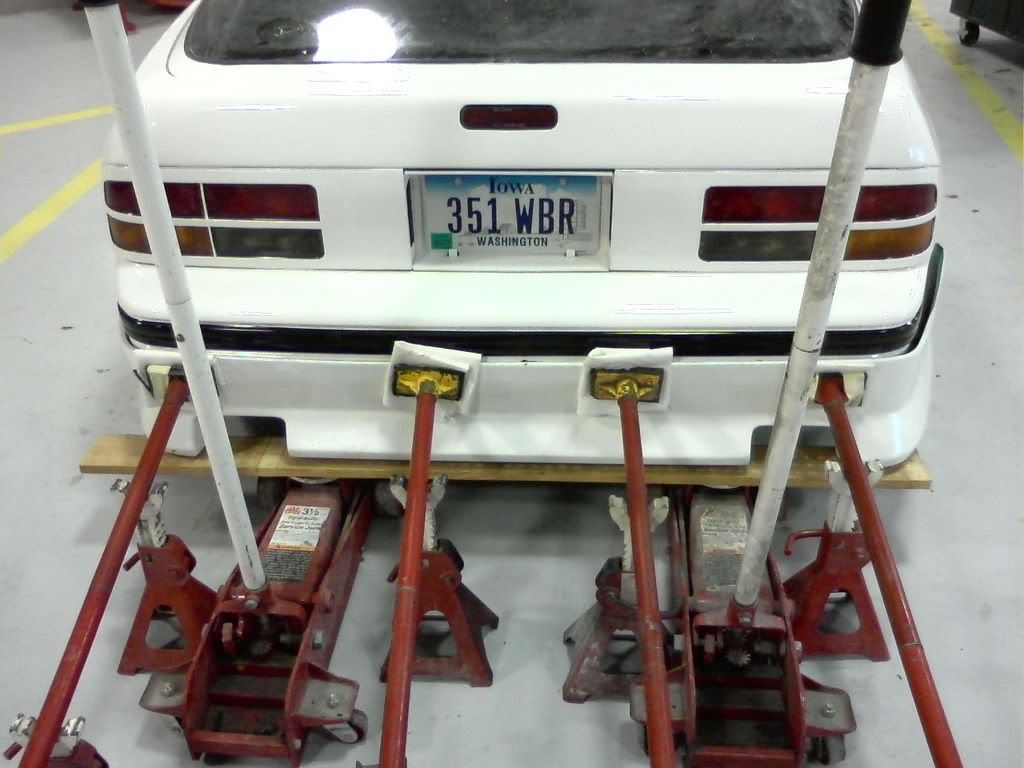
I'll let it sit like this over the weekend and on Monday I will put a couple screws in the fender well areas to hold the ends in place. Only thing left to do now is adjust my ebrake and install the mufflers...
Hope you like!
The first thing I did was got it sitting up next to the car and got it aligned properly so it would be on straight. I did this by setting the bumper on 2 jacks with a piece of 1x6 on top of them for better overall support.
Like the sideskirt pieces I decided to use urethane to hold it in place since it is so strong.
I also decided that the best way to hold the bumper piece onto the rear bumper cover (without taking it off) was to do basically the same thing I did with the sideskirts also. Here are pics with it all sitting, ready to go.
Next I moved the bumper away from the car but left it resting on the jacks still and put 2 beads of urethane across the inside lip area of the bumper piece.
Once the urethane was applied I slid the bumper piece up against the car and then slid the supports from the port-a-power sets up against the bumper piece with some paper cloths in between the pads and the bumper piece. This is what the car looks like now:
I'll let it sit like this over the weekend and on Monday I will put a couple screws in the fender well areas to hold the ends in place. Only thing left to do now is adjust my ebrake and install the mufflers...
Hope you like!
02-08-09, 12:45 PM
#173
I was going to have this be my very last post on this thread but Im bored so I figured I would make it now, a few days before the car is completely done.
Im surprised no one asked how much I have in this car. For others, I am sure it was a thought they had. Maybe they didnt want to ask as they were afraid of the answer.
Here it is:
Car: 500
Parts car: 200
Wheels: 250 (used)
Tires from TireRack plus local mounting/balancing: 510 - 215/40/18 Sumitomo HTR ZIII
Body kit from eBay: ~600 shipped
S5 interior parts from eBay: 55
Paint: 400 (includes primers, clear, etc)
Used Hatch w/out wiper and S4 vert hood: 100
Shop use and supplies: 200 (what the college charged me for supplies and tool use, etc)
Windshield: 125
Misc 100
Now, the things still needing bought -
Warning light surround: 45 (MT)
Defrost grilles - all 3: 72 (MT)
Lowering springs: ~250
Add shipping, etc: 375 total for needed parts
Grand total: 3395
So, in short for ~3500 I bought a car and made it nice (straight, nice paint, body kit) that had almost as many power mods as was available for the engine it had (NA).
Special thanks to:
87 t-66 - parts
blmcquig - car, parts, engine diagnosis
driftfc87 - parts car, wheels, parts, engine diagnosis
Angie - for letting me spend so much
May have forgotten someone and if I did Im sorry.
Last edited by IanS; 02-08-09 at 12:52 PM.
02-08-09, 12:59 PM
#174
i think that urathane is a pretty bad idea, kinda seals off potential work on the future since those pieces will be semi permanent now.
I like how it overal looks though, with the black trim. This car could be epic with some big wide japanese low offset wheels and the right stance.
I like how it overal looks though, with the black trim. This car could be epic with some big wide japanese low offset wheels and the right stance.