
1929 speedster 13b build -pic HEAVY


Thread Starter
Full Member
Joined: Aug 2015
Posts: 113
Likes: 0
From: calgary
im new and i started a 'questions' thread that is now starting to become a build thread as i learn more and have less questions.... so heres a more appropriate build thread.
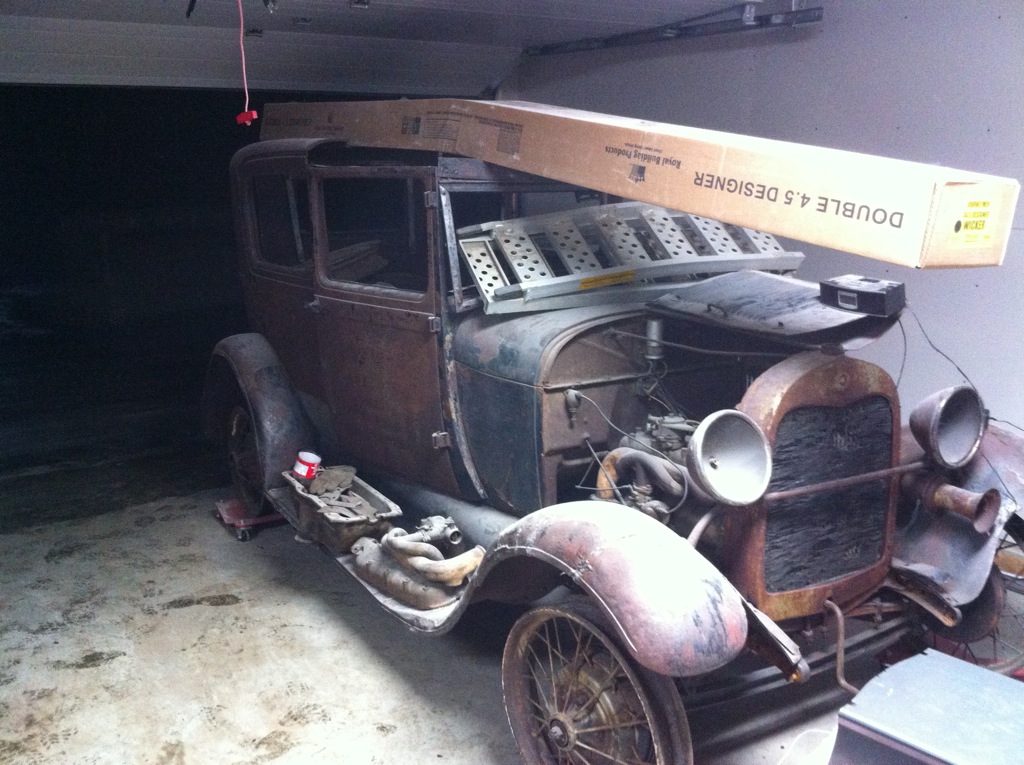
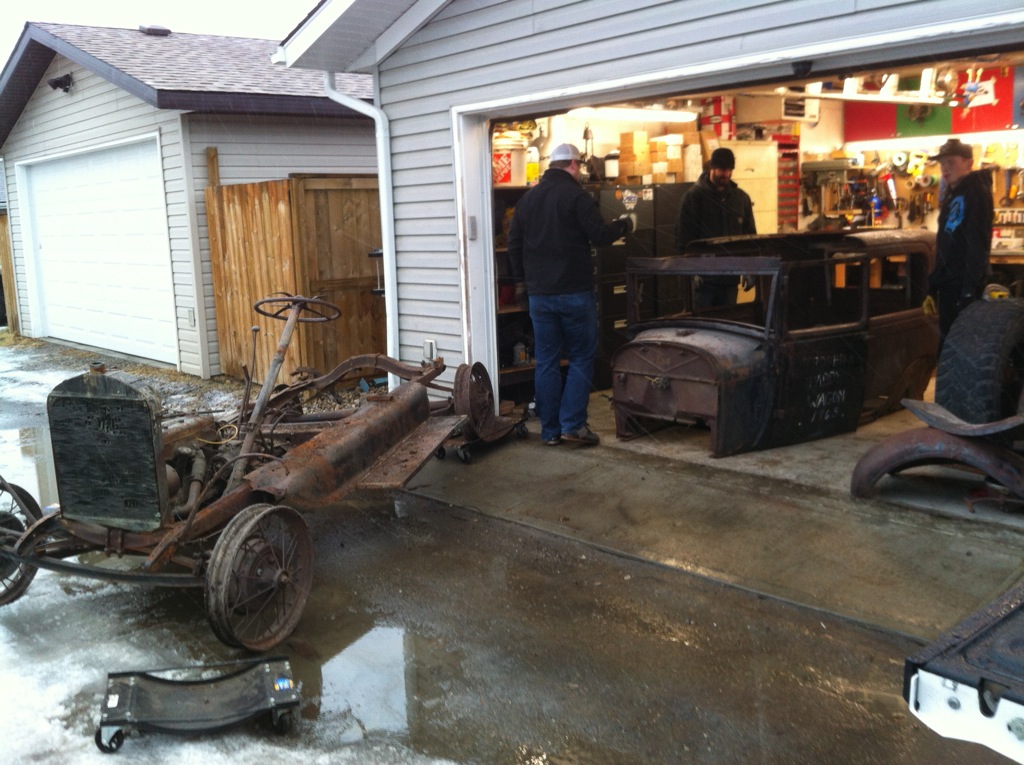
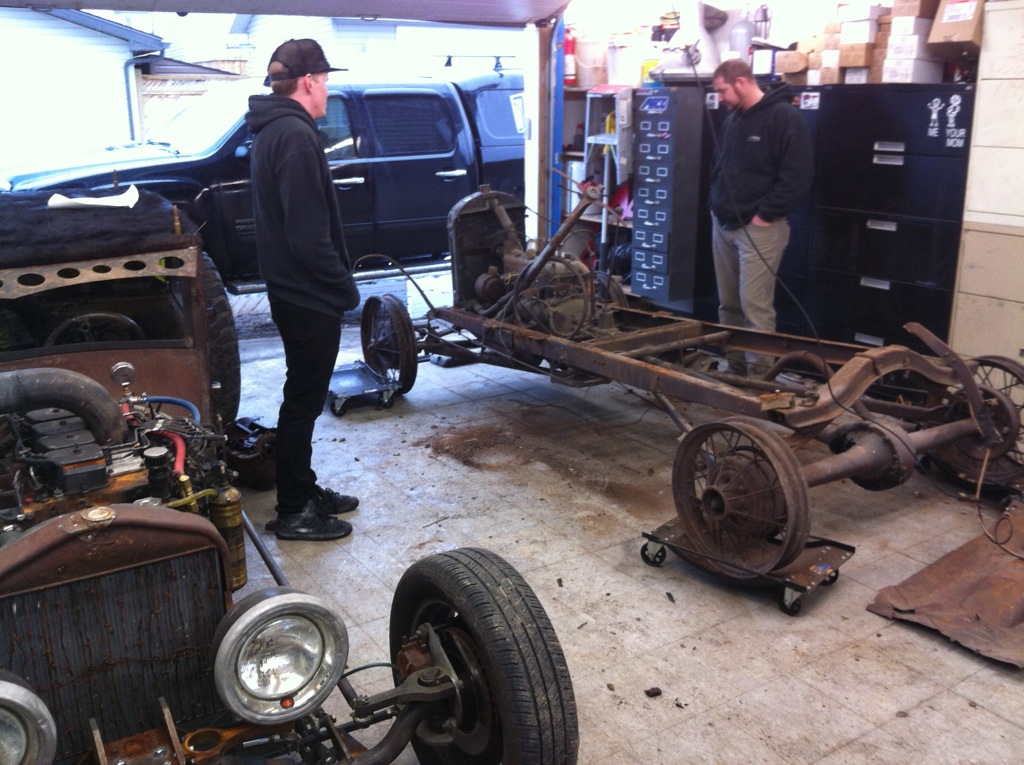
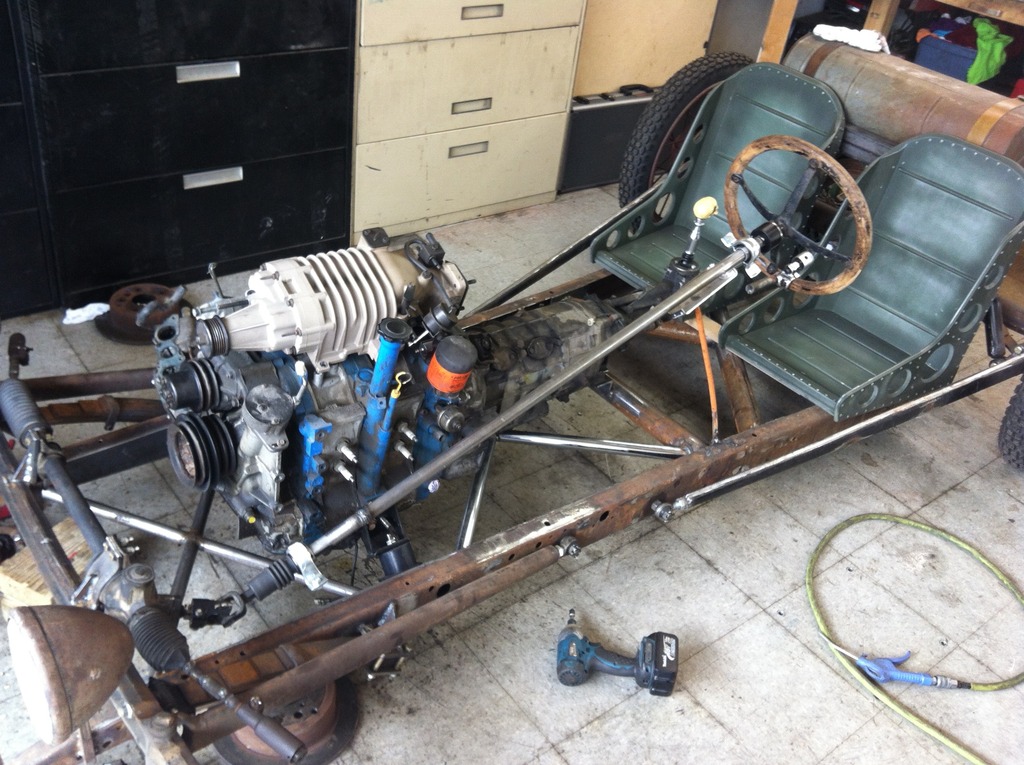
ive build my share of rat rods and been building and fabricating in that game for 5 or 6 years. a friend wanted a model A ford body, so when i found him an original roller last christmas for $1000, we brought it to my garage, stripped the body, and i kept the frame. then over the 2 week christmas break, it turned into a speedster frame. i wasn't planning to start another build, but if i have necessary parts sitting around for more than 3 days, they tend to turn into something =).
the original goal in my head was a complete road worthy build for $1000, that weighed under 1350 pounds.
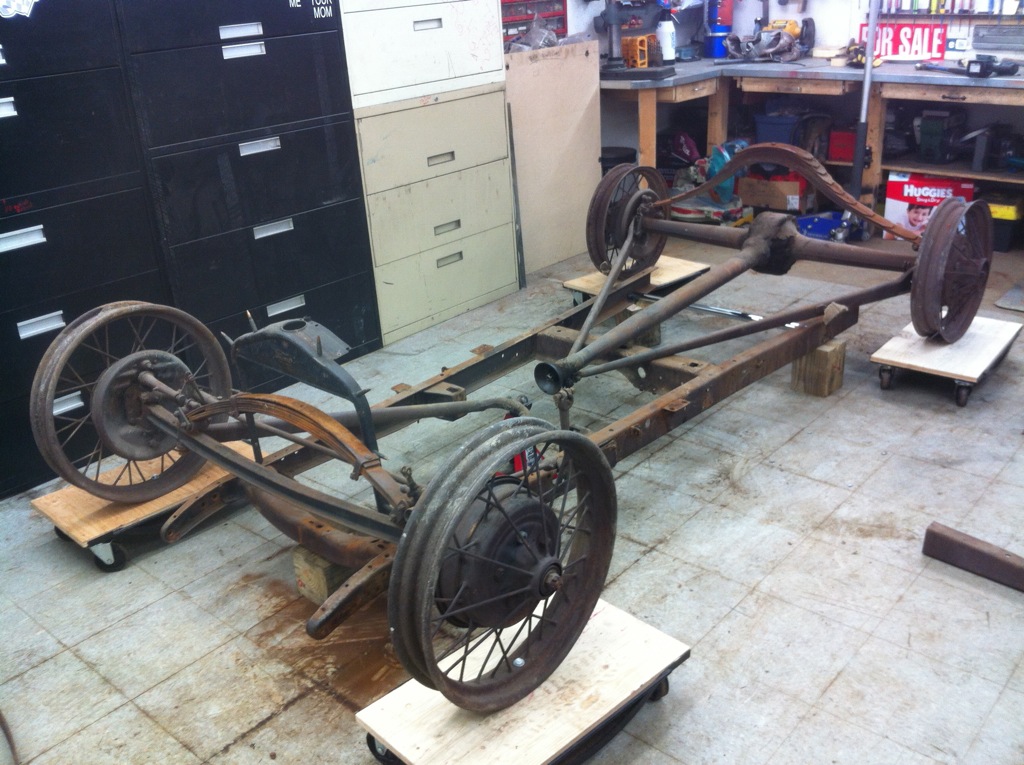
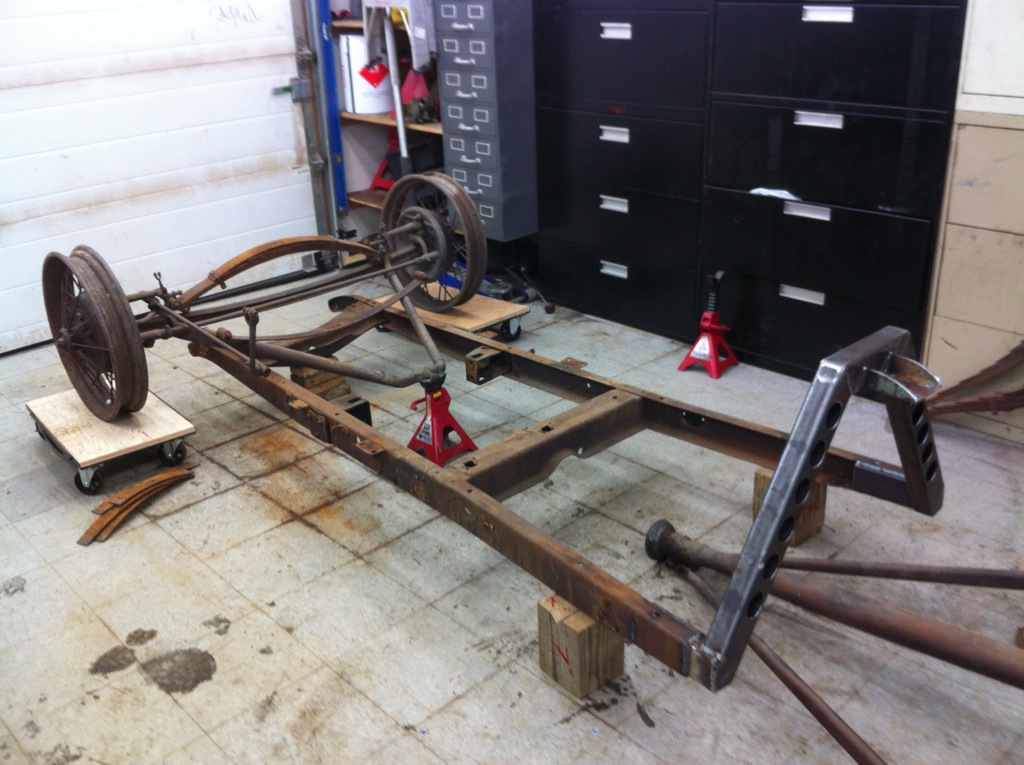
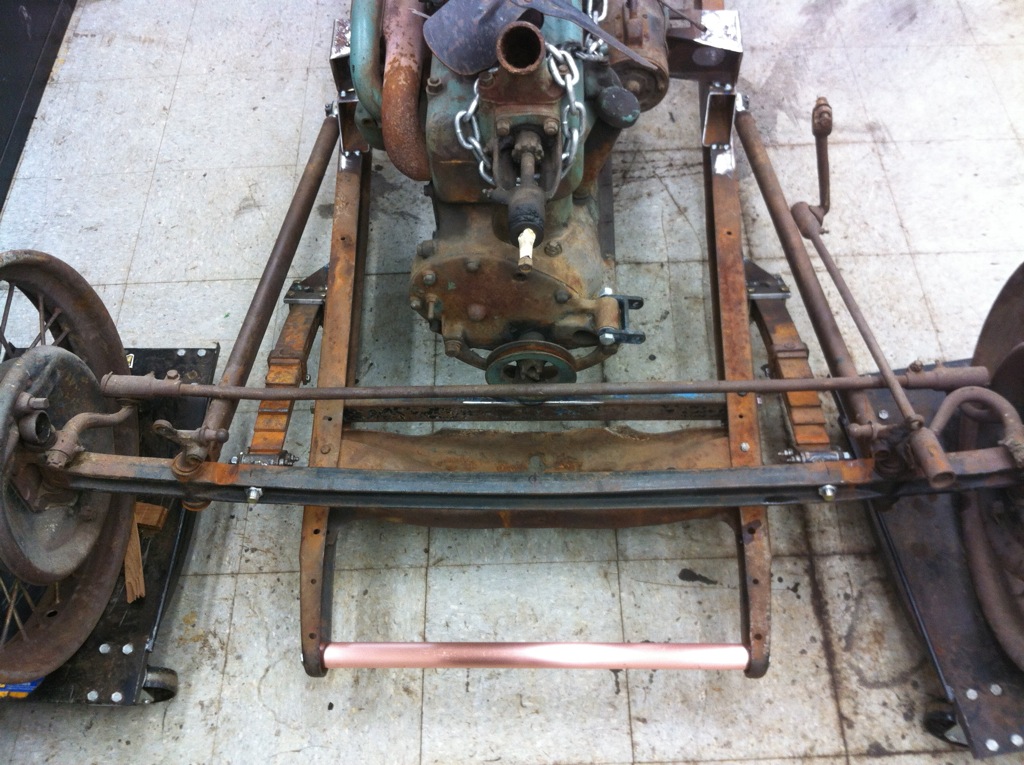
i was going to use the original 35hp model A engine and supercharge it up to 60hp, but those plans changed as things went along
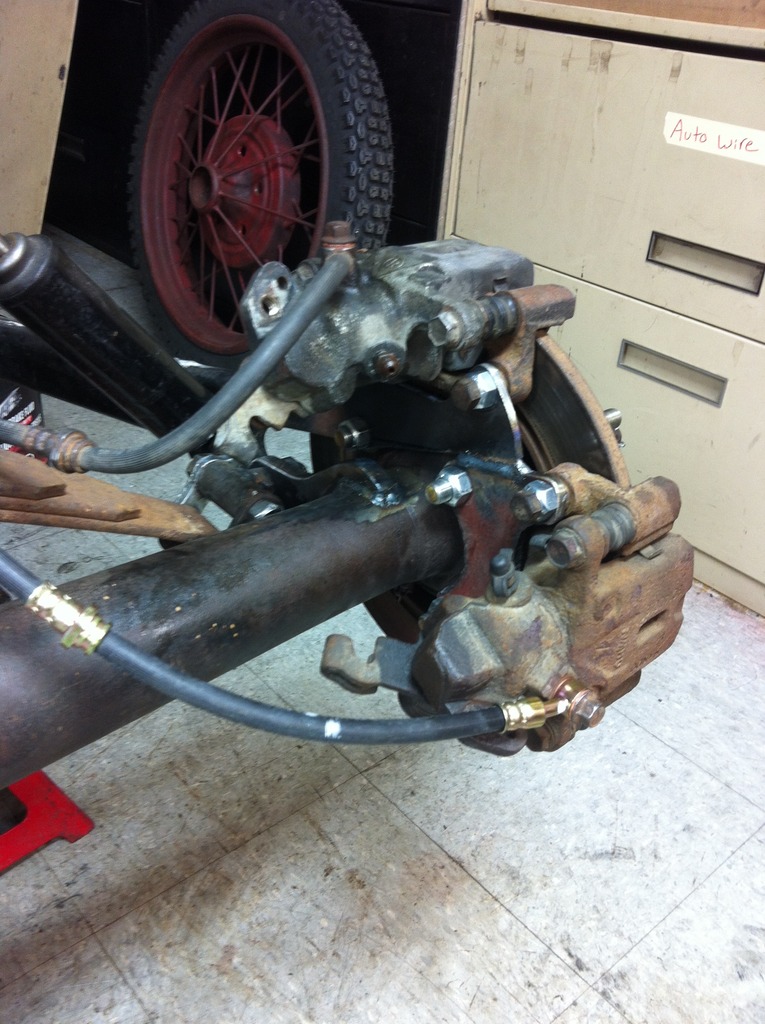
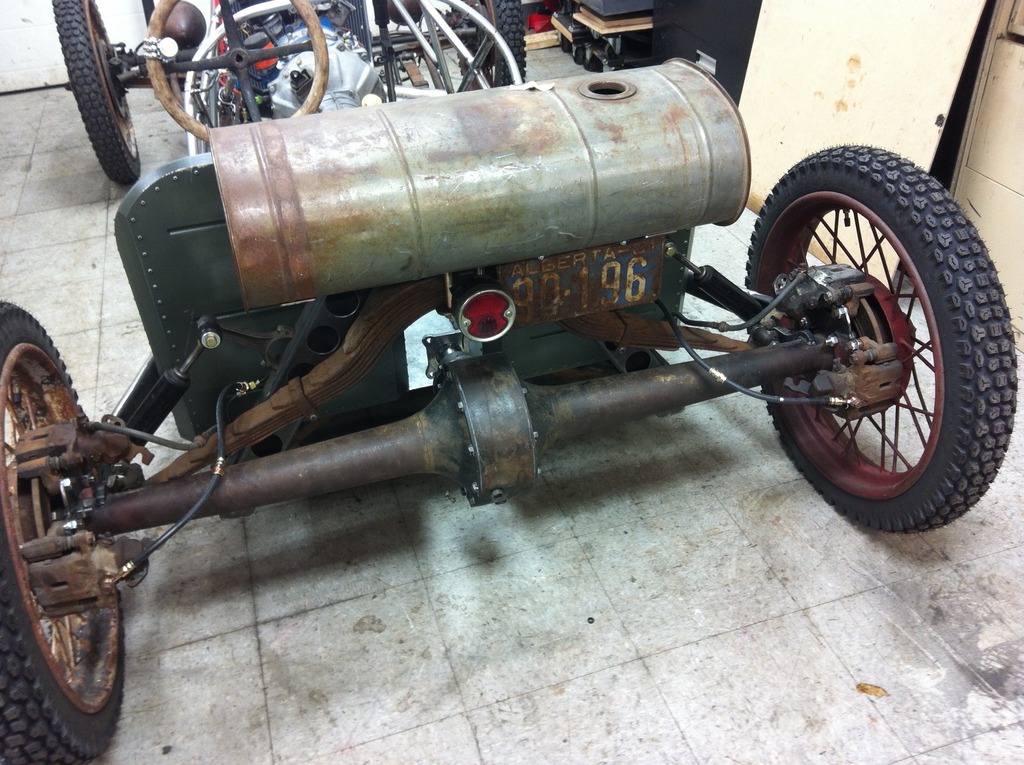
as always in hot-rodding, you have to make alot of your own parts and make things fit. these are tuburon calipers, on corolla discs, on 1929 ford spindles/hubs.
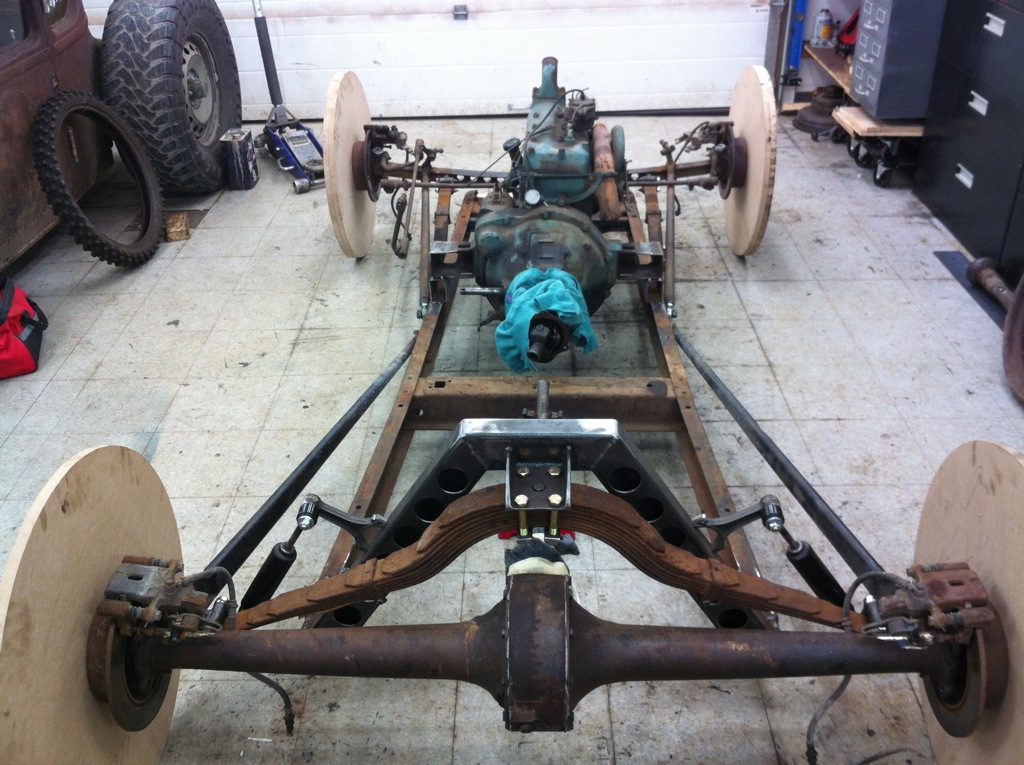
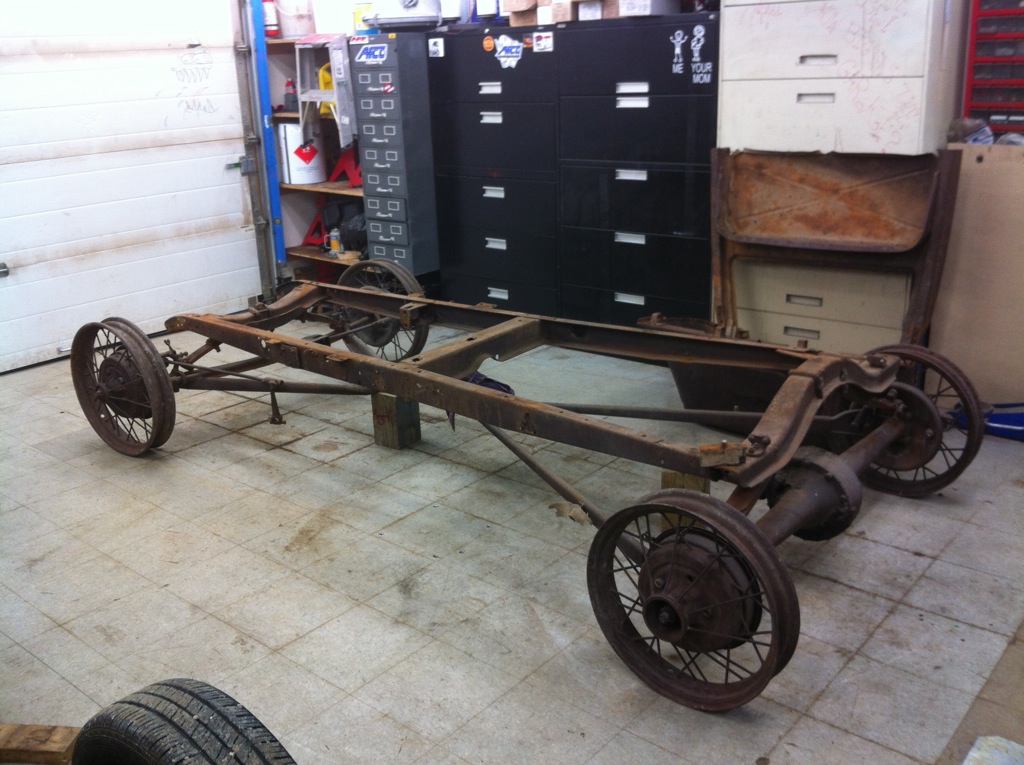
quarter leaf front suspension using as many original parts as passable.
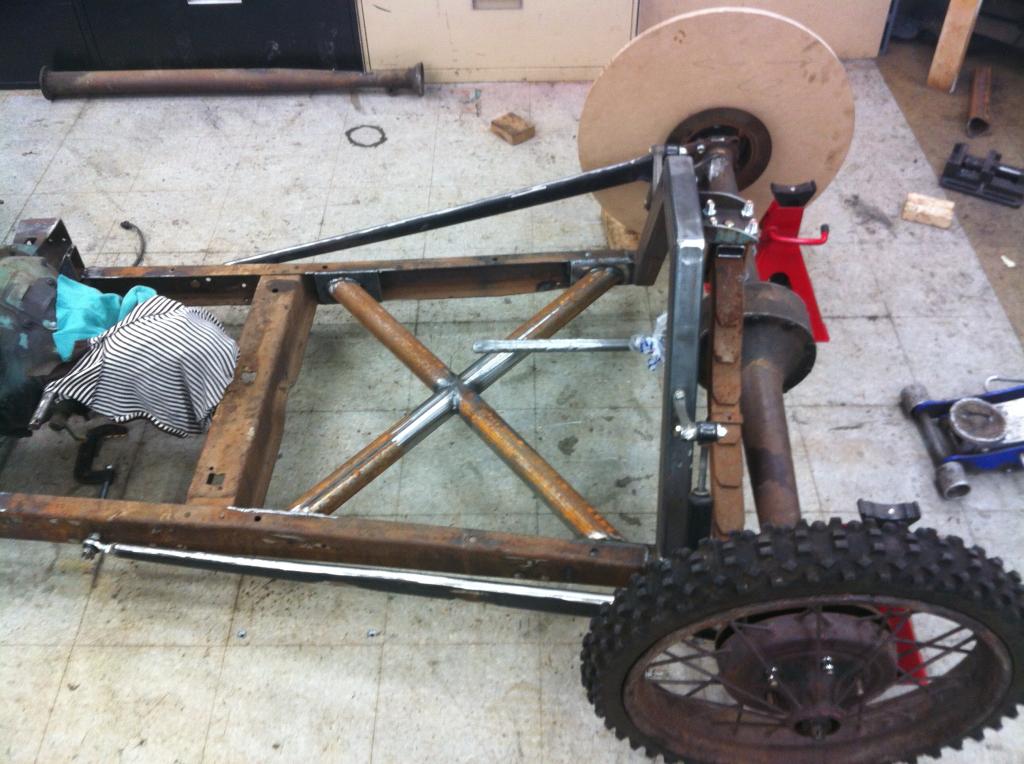
another innovation.... 21" front tires/tubes from a dirt bike work on 1929 ford 21" wheels.

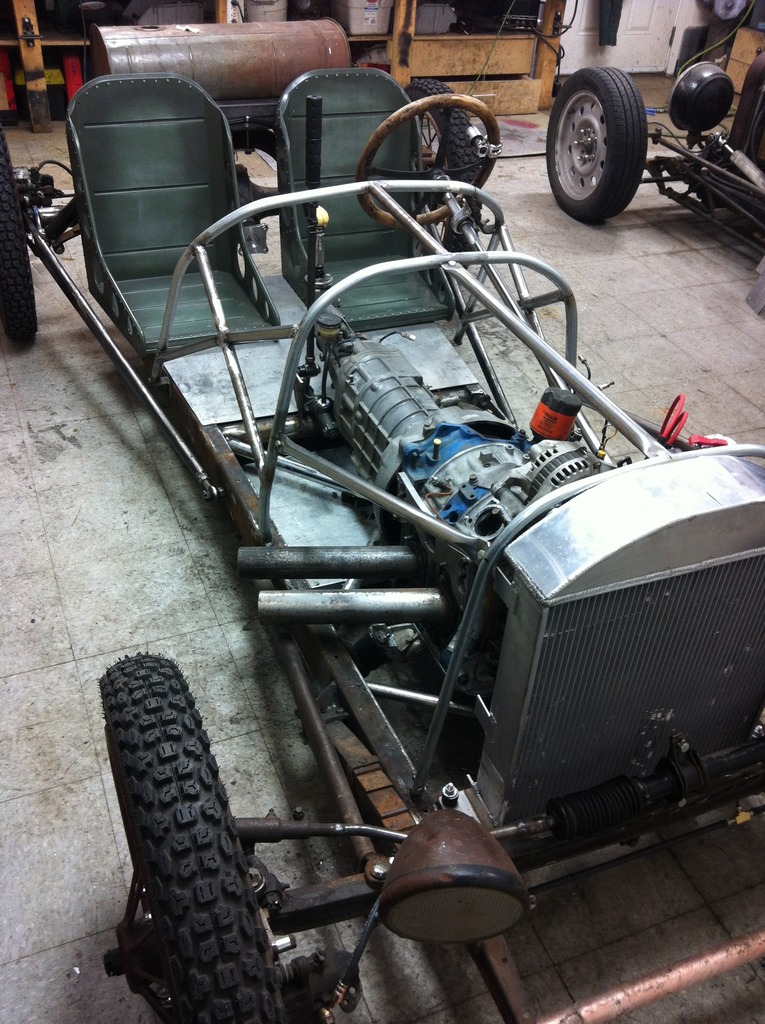
rather than box the frame like most do, i chose to cross brace it in as many places as i could. this would do as much and more than simply boxing in the C-channel frame as far as twist and rigidity goes, while still keeping it light.
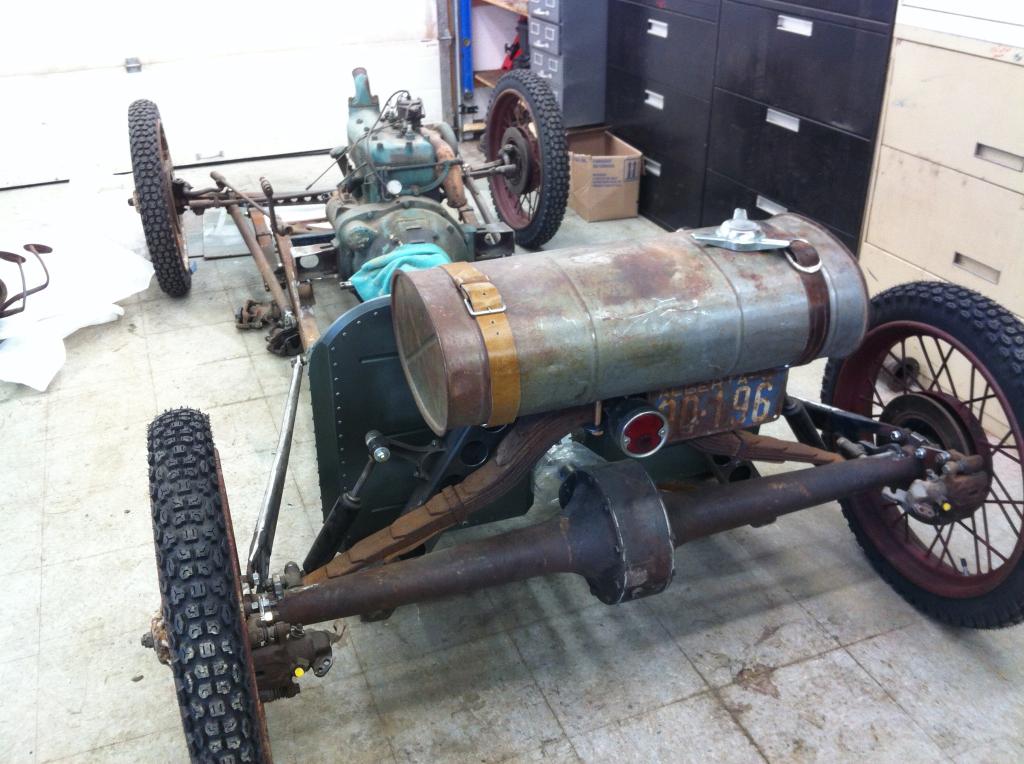
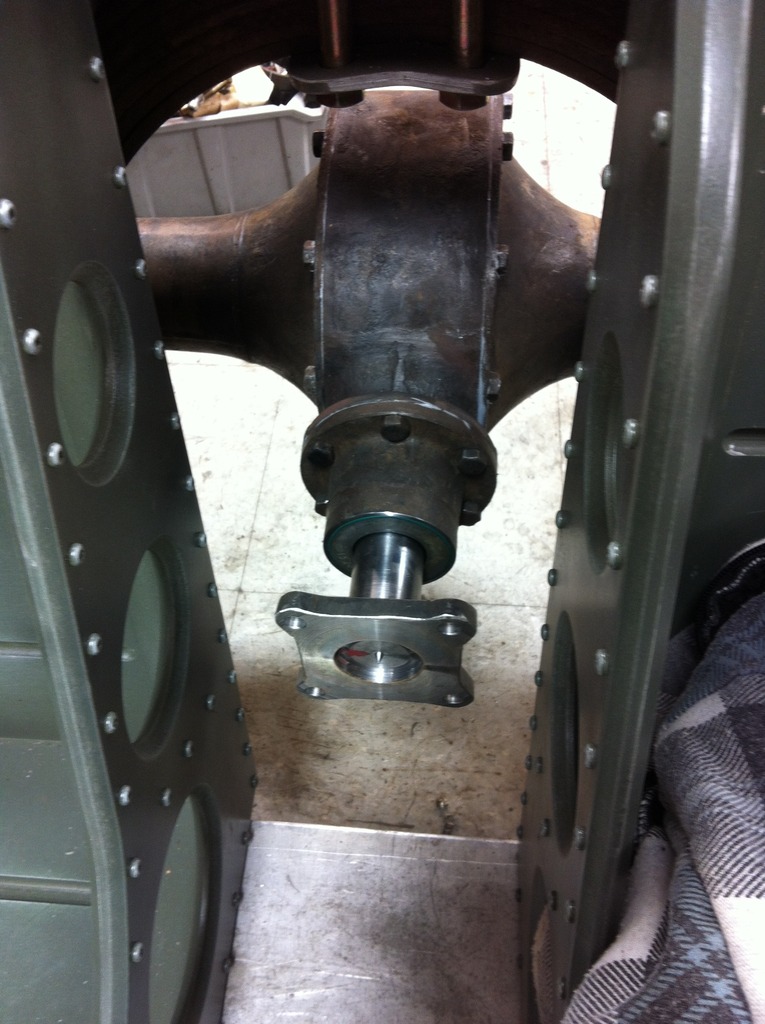
the rear axle is the original 1929 ford with 4.10 gears.
ive build my share of rat rods and been building and fabricating in that game for 5 or 6 years. a friend wanted a model A ford body, so when i found him an original roller last christmas for $1000, we brought it to my garage, stripped the body, and i kept the frame. then over the 2 week christmas break, it turned into a speedster frame. i wasn't planning to start another build, but if i have necessary parts sitting around for more than 3 days, they tend to turn into something =).
the original goal in my head was a complete road worthy build for $1000, that weighed under 1350 pounds.
i was going to use the original 35hp model A engine and supercharge it up to 60hp, but those plans changed as things went along
as always in hot-rodding, you have to make alot of your own parts and make things fit. these are tuburon calipers, on corolla discs, on 1929 ford spindles/hubs.
quarter leaf front suspension using as many original parts as passable.
another innovation.... 21" front tires/tubes from a dirt bike work on 1929 ford 21" wheels.
rather than box the frame like most do, i chose to cross brace it in as many places as i could. this would do as much and more than simply boxing in the C-channel frame as far as twist and rigidity goes, while still keeping it light.
the rear axle is the original 1929 ford with 4.10 gears.
Thread Starter
Full Member
Joined: Aug 2015
Posts: 113
Likes: 0
From: calgary
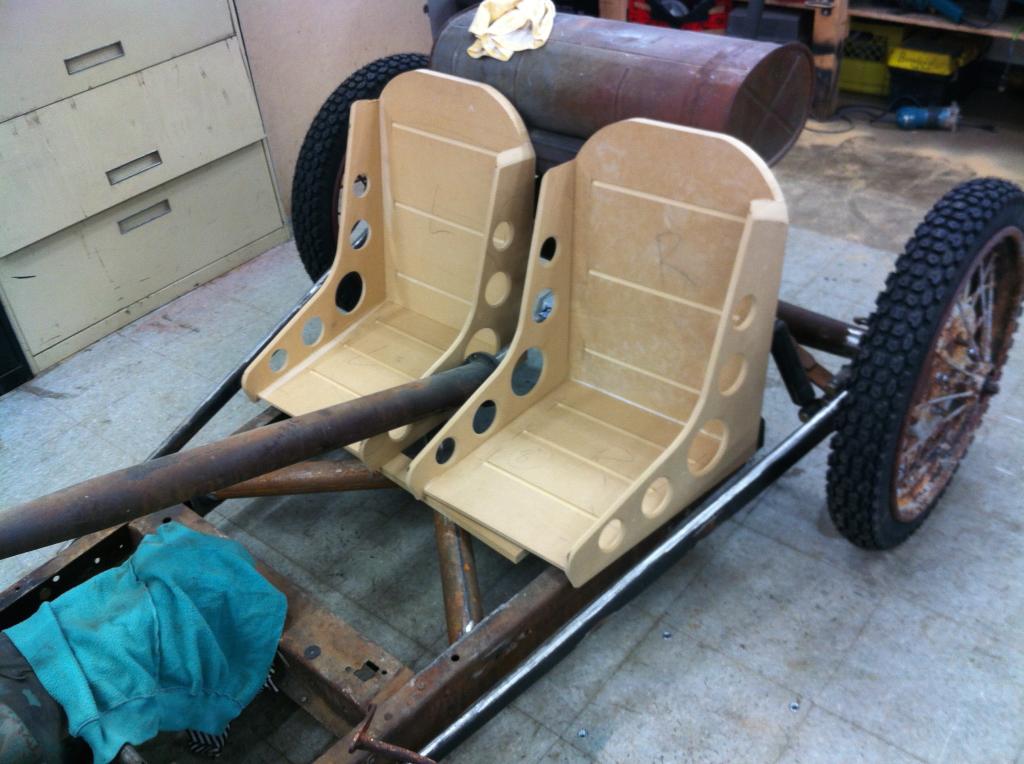
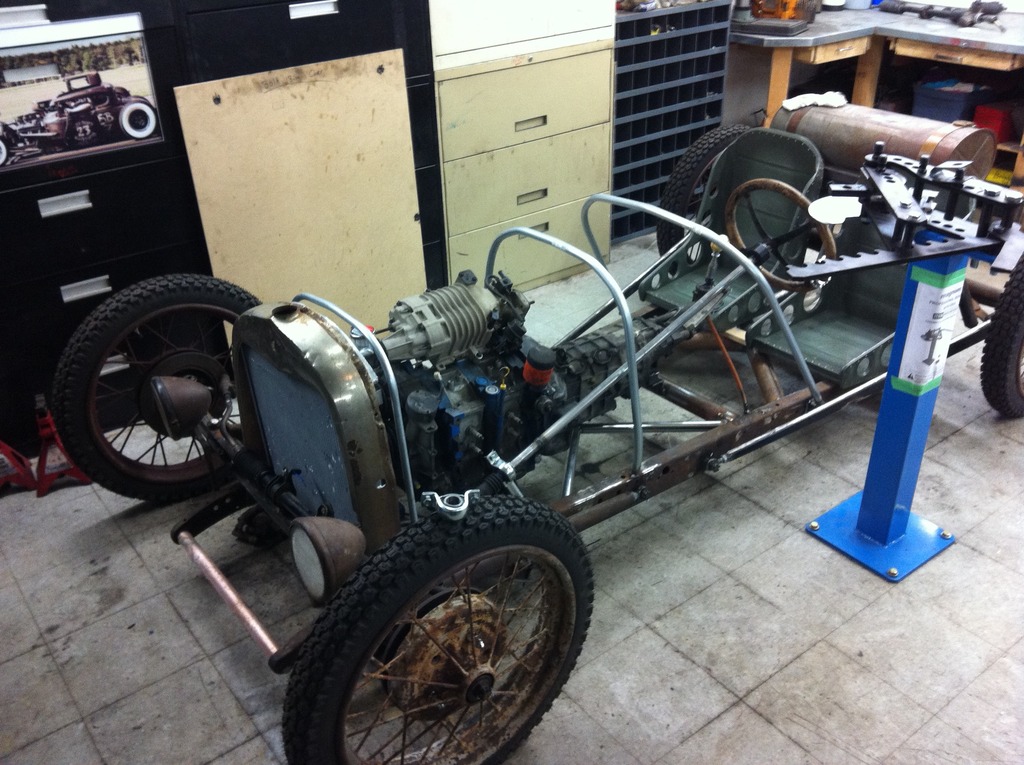
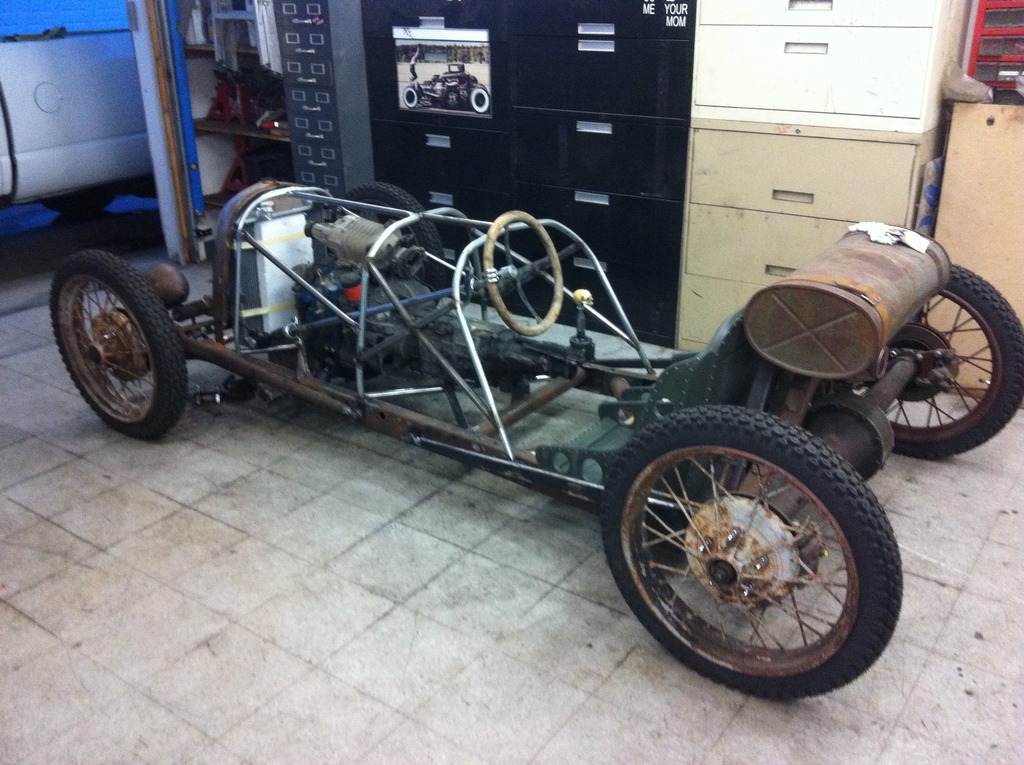
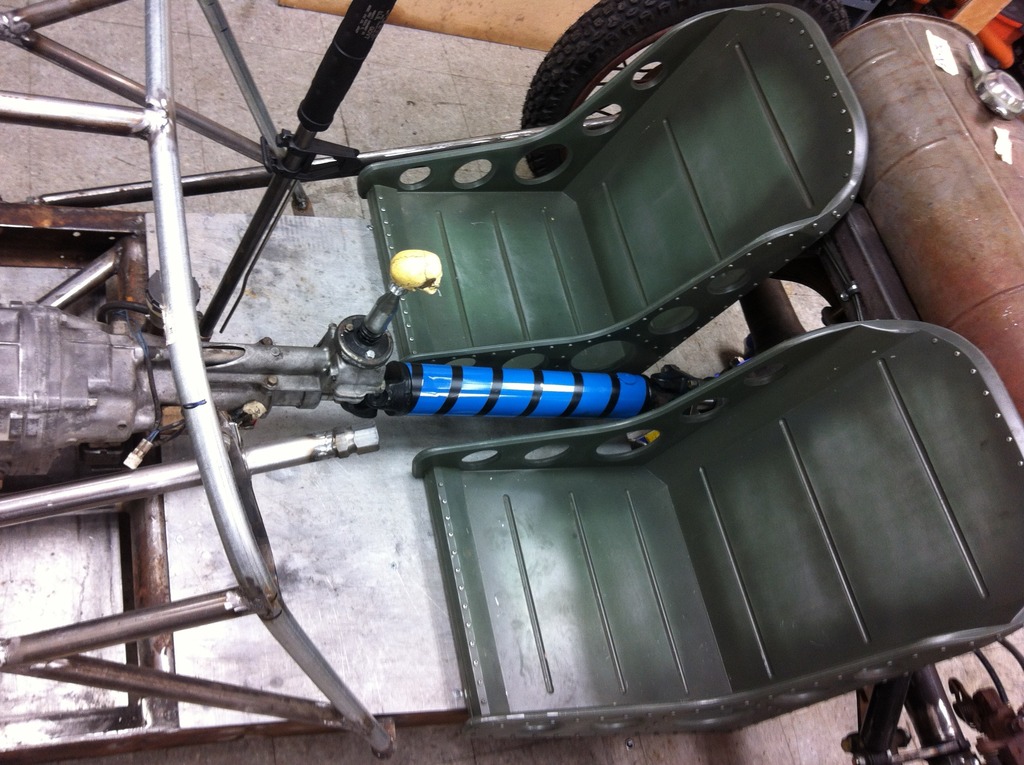
the bomber seats are made of wood... as im a woodworker by trade and that's easier to for me than shaping aluminum =)
all painted up with a war time patina
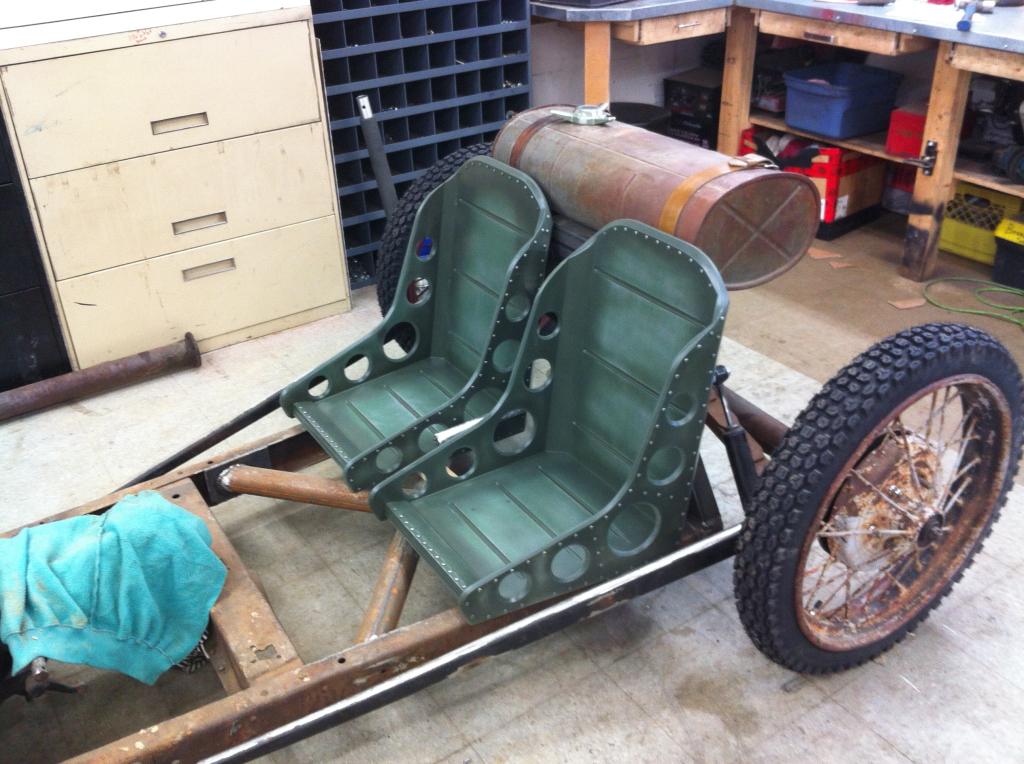
the fuel tank is from a Model T ford or an old combine. im not too sure
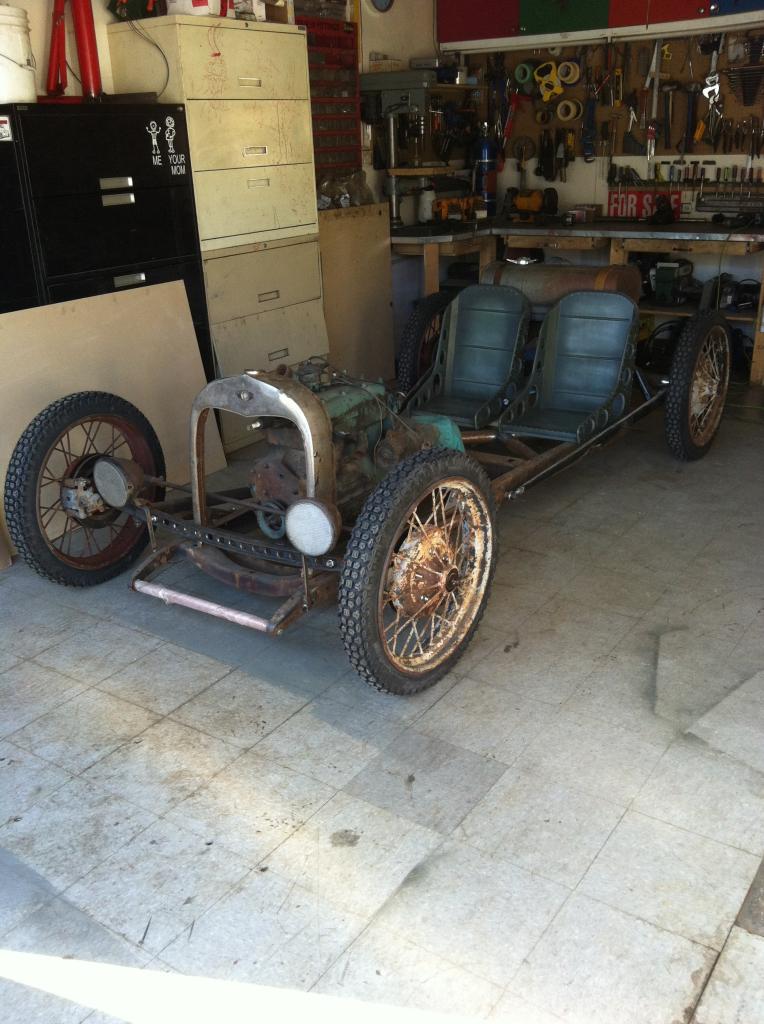
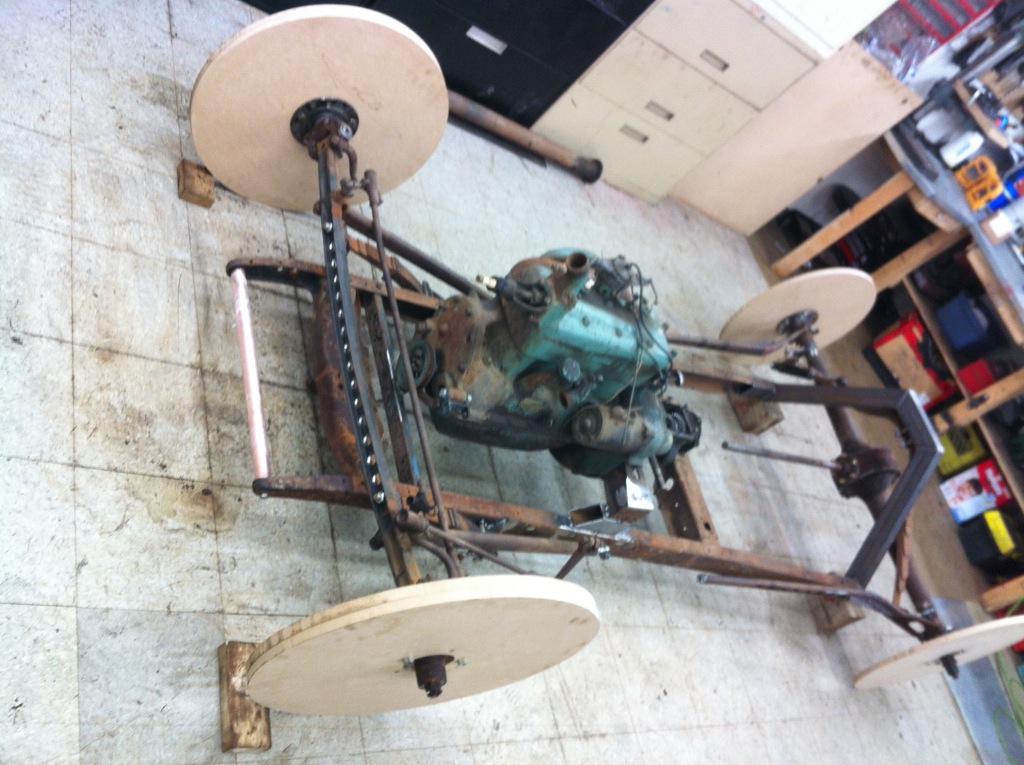
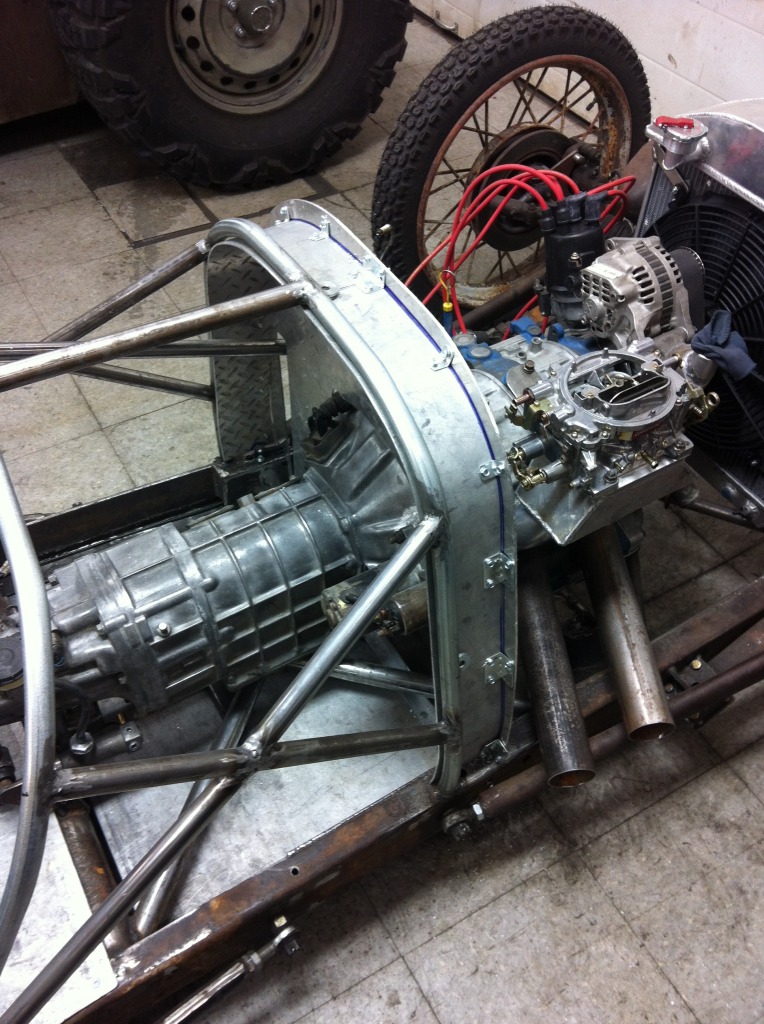
heres where it starts to get interesting... i decided to ditch the 35hp model A engine for a 13b. original plans were to use an M62 supercharger on it that came off a Buick 3.8L but ive since decided against that mostly for space issues.
heres the general idea if you haven't gathered this already...

all painted up with a war time patina
the fuel tank is from a Model T ford or an old combine. im not too sure
heres where it starts to get interesting... i decided to ditch the 35hp model A engine for a 13b. original plans were to use an M62 supercharger on it that came off a Buick 3.8L but ive since decided against that mostly for space issues.
heres the general idea if you haven't gathered this already...


 . I'm eagerly awaiting more updates
Thread Starter
Full Member
Joined: Aug 2015
Posts: 113
Likes: 0
From: calgary
i bent some 7/8" and 1" tube for the framework to support the future fiberglass body. this is by no means a structural cage of any kind. simply for bodywork support.
still with the blower in planning... before i decided to stay N/A
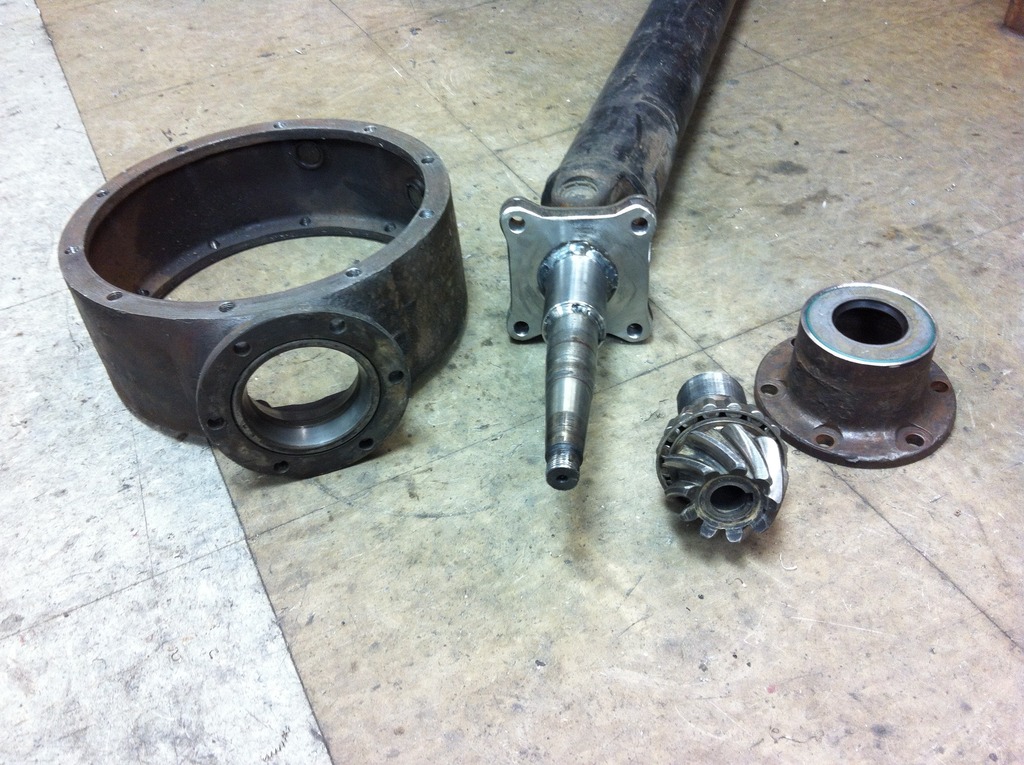
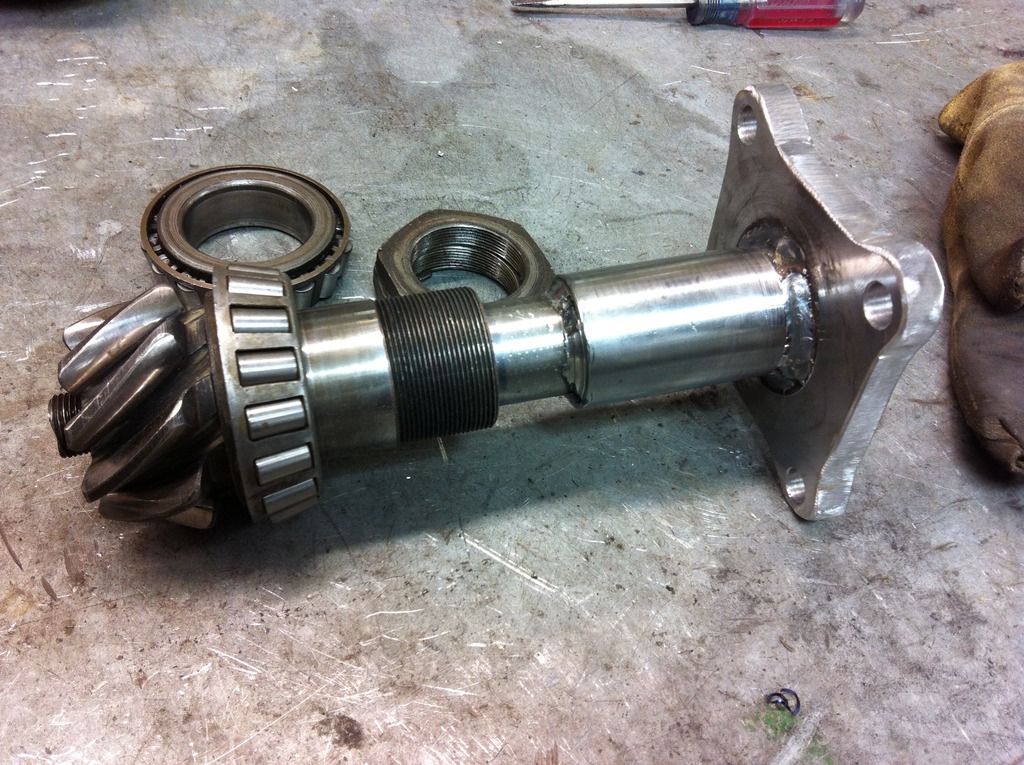
early foreds used a 'torque tube' rather than a U-joint style drive shaft that we know today so i had to somehow convert this direct pinion shaft to a modern drive shaft style U-joint. heres what i came up with on my lathe for the cost of a $19 oil seal.
still with the blower in planning... before i decided to stay N/A
early foreds used a 'torque tube' rather than a U-joint style drive shaft that we know today so i had to somehow convert this direct pinion shaft to a modern drive shaft style U-joint. heres what i came up with on my lathe for the cost of a $19 oil seal.
Thread Starter
Full Member
Joined: Aug 2015
Posts: 113
Likes: 0
From: calgary
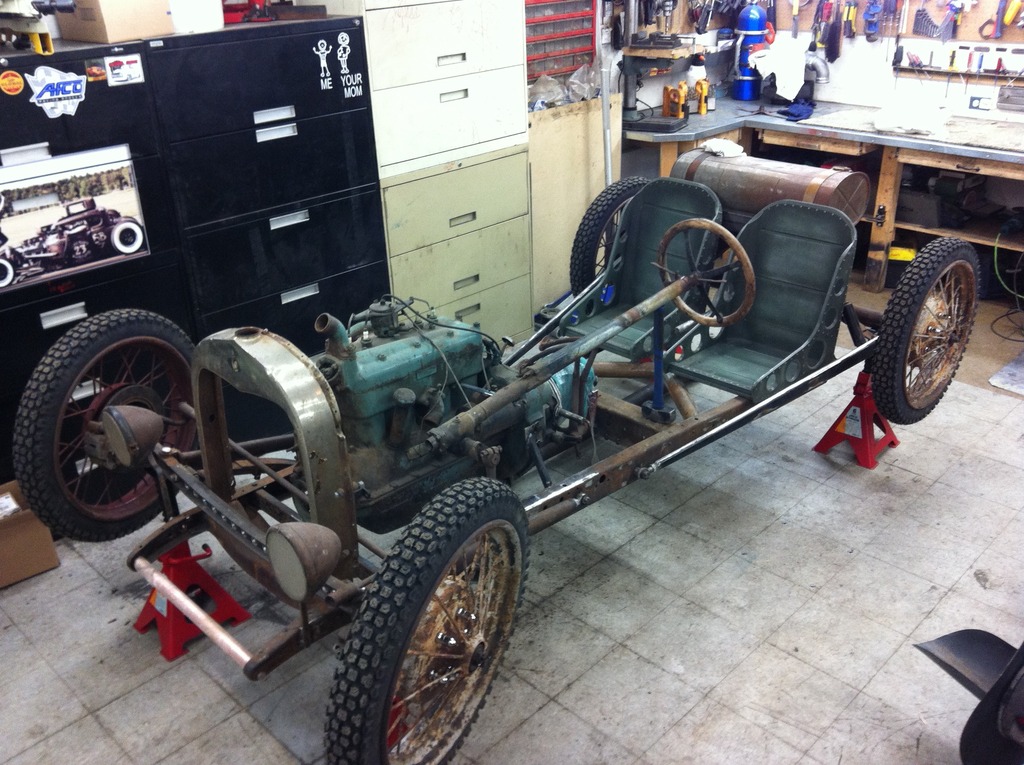
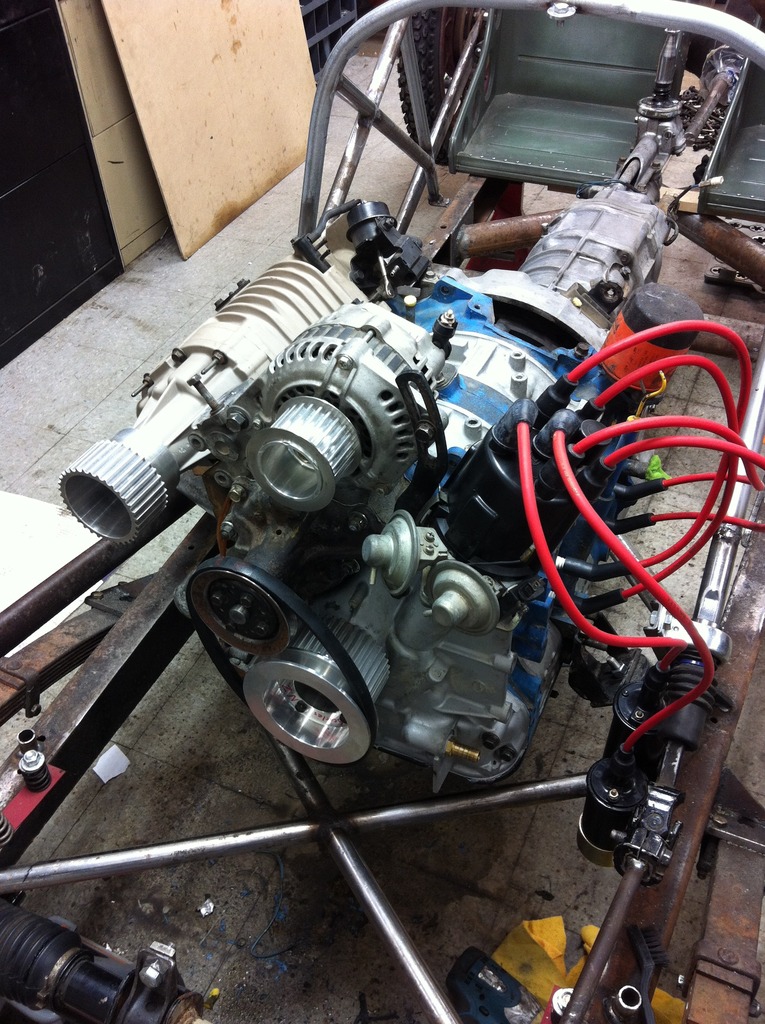
^gotta have some of this action going on, and ken blocks cars are always so cool so i HAD to add a hand brake!! and give it some flare while i was at it.

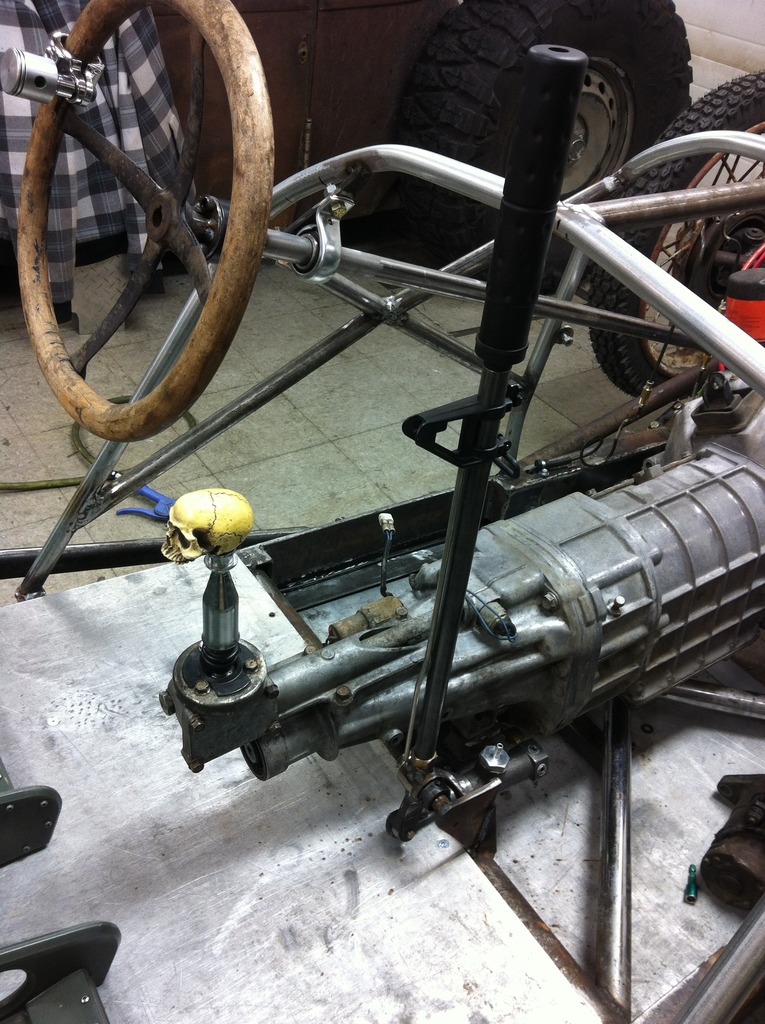
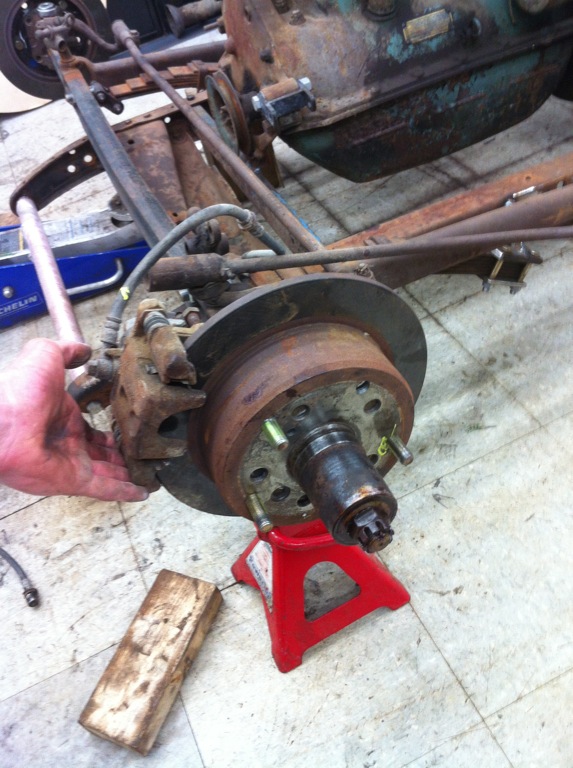
second set of dedicated rear calipers. also helps with the bad ***-ness look =)
its a hot rod so ya gotta have some loud pipes! i also did a gilmer drive belt. that sound is a MUST.
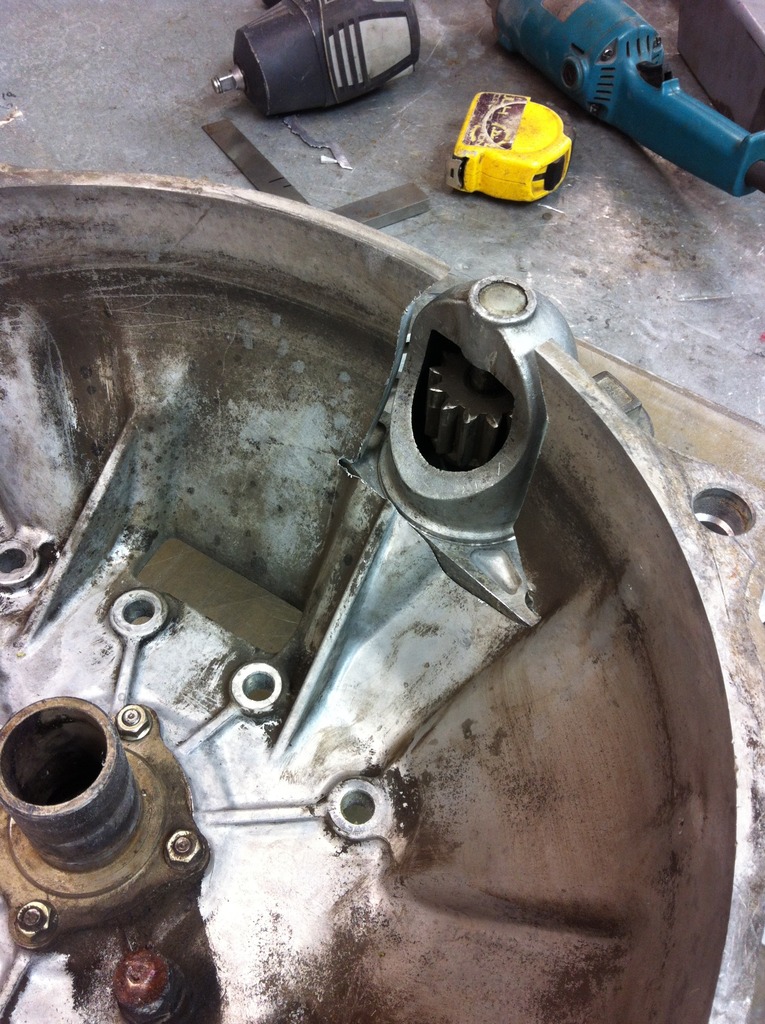
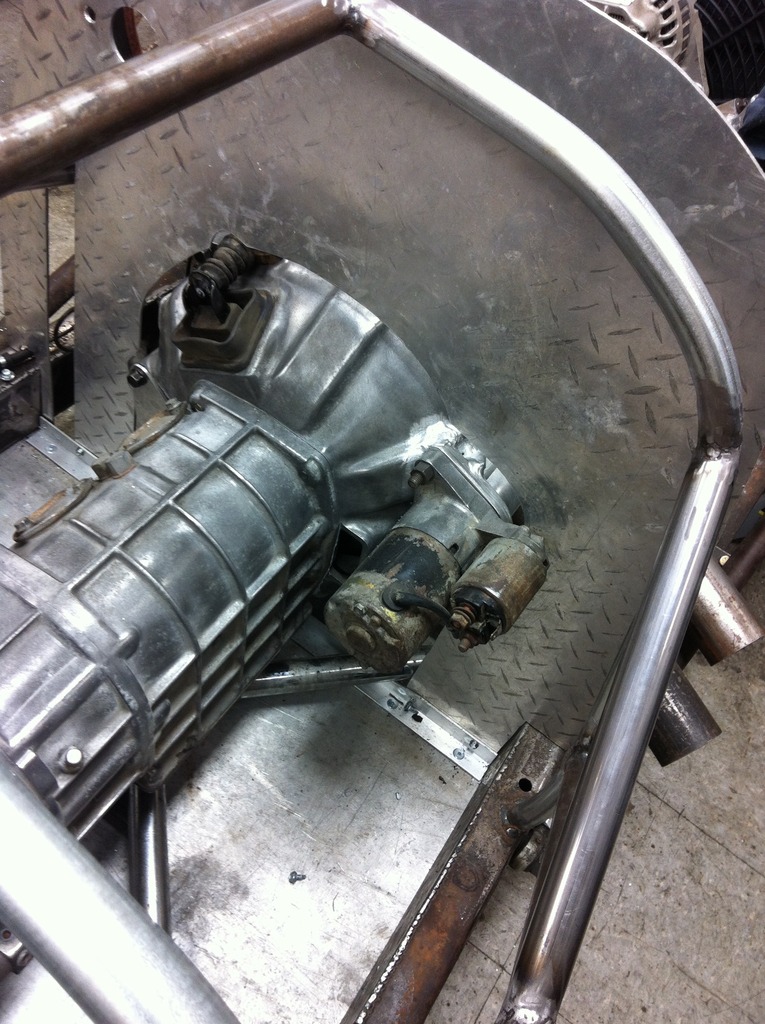
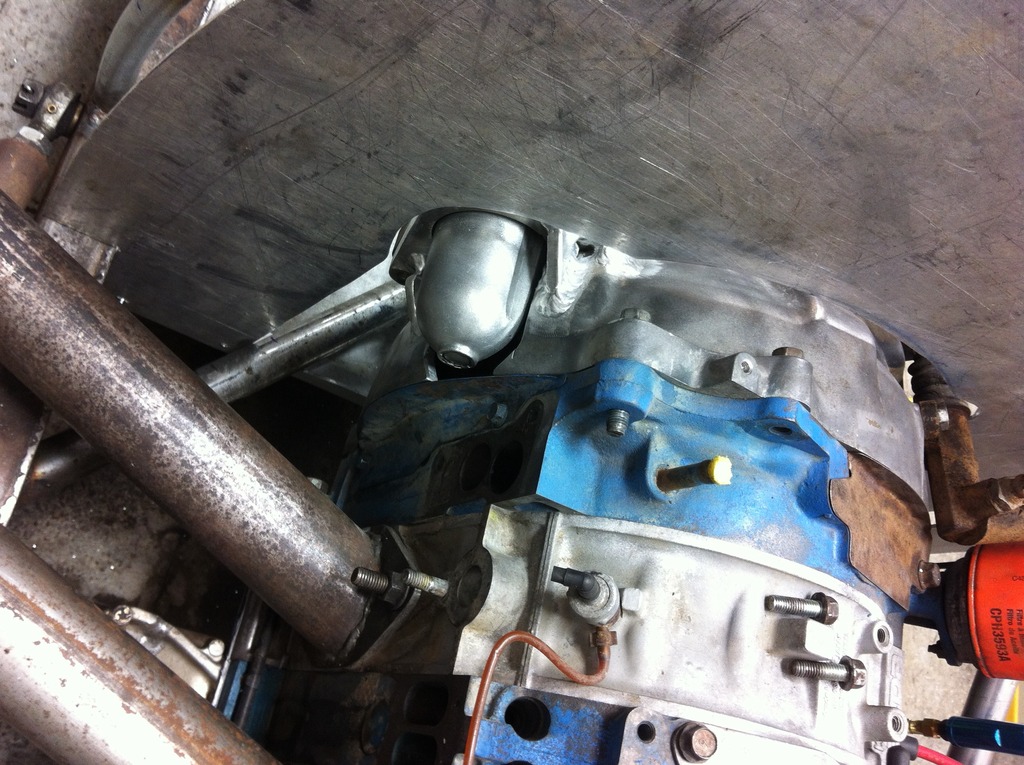
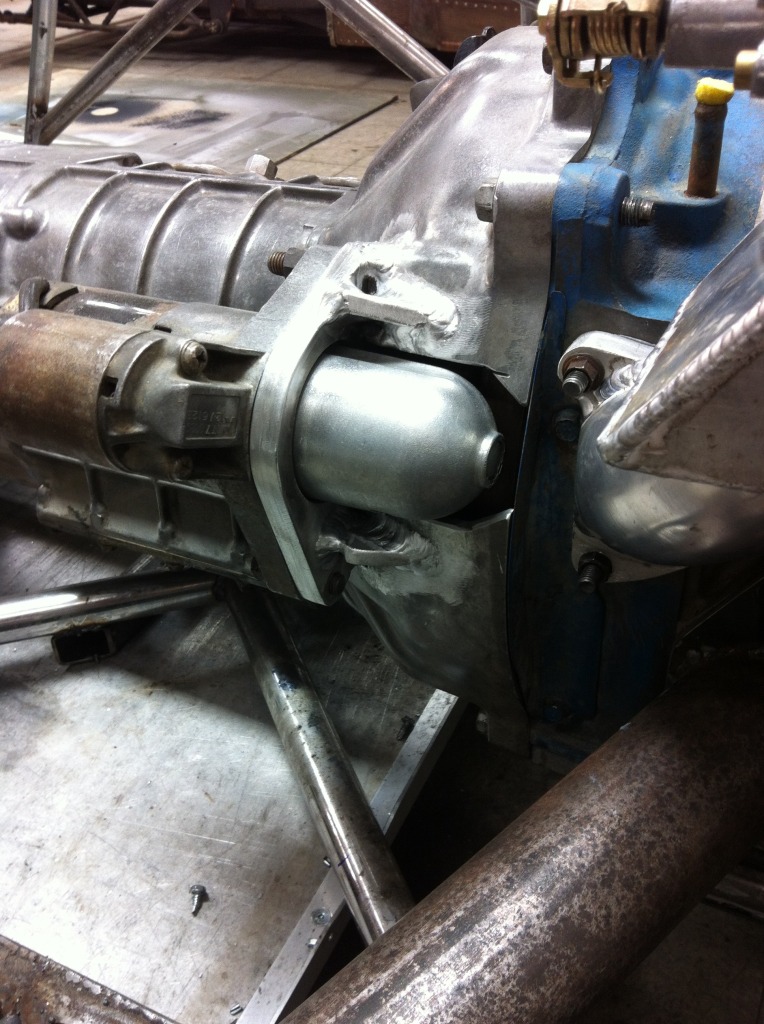
the stock 13b starter was right where my feet and pedals need to be so that had to get moved. after lots of searching, an old RX2 top mount still wouldn't work so i cut up the bell-housing and fabbed it over to the passenger side up high out of the passengers feet.
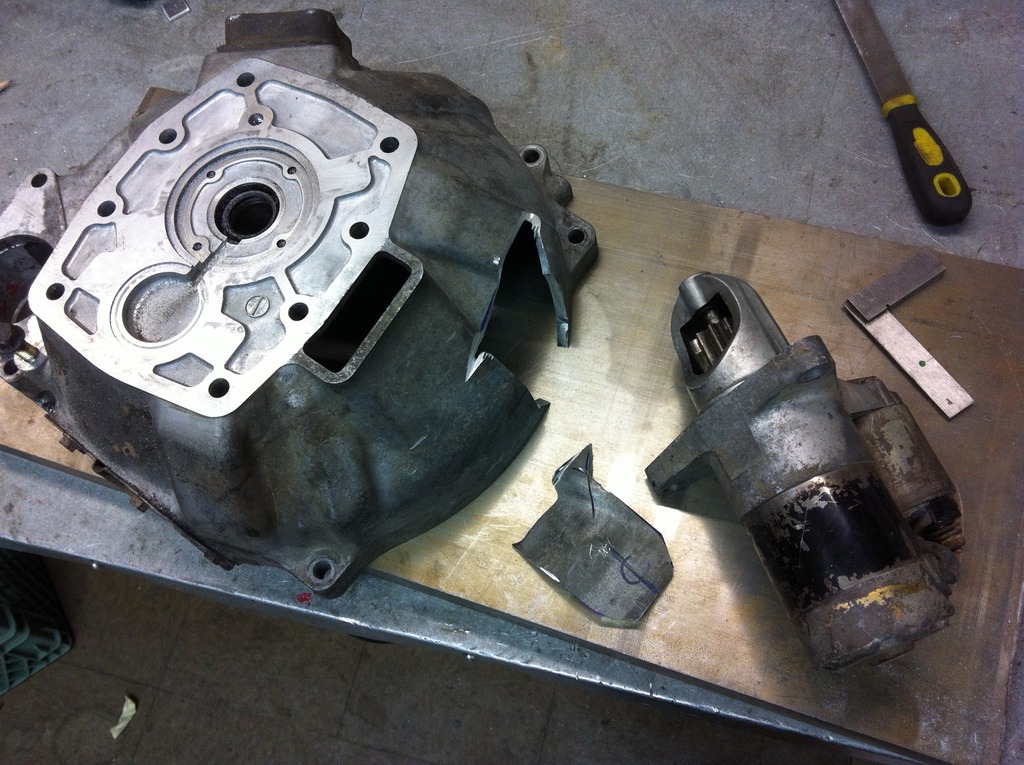
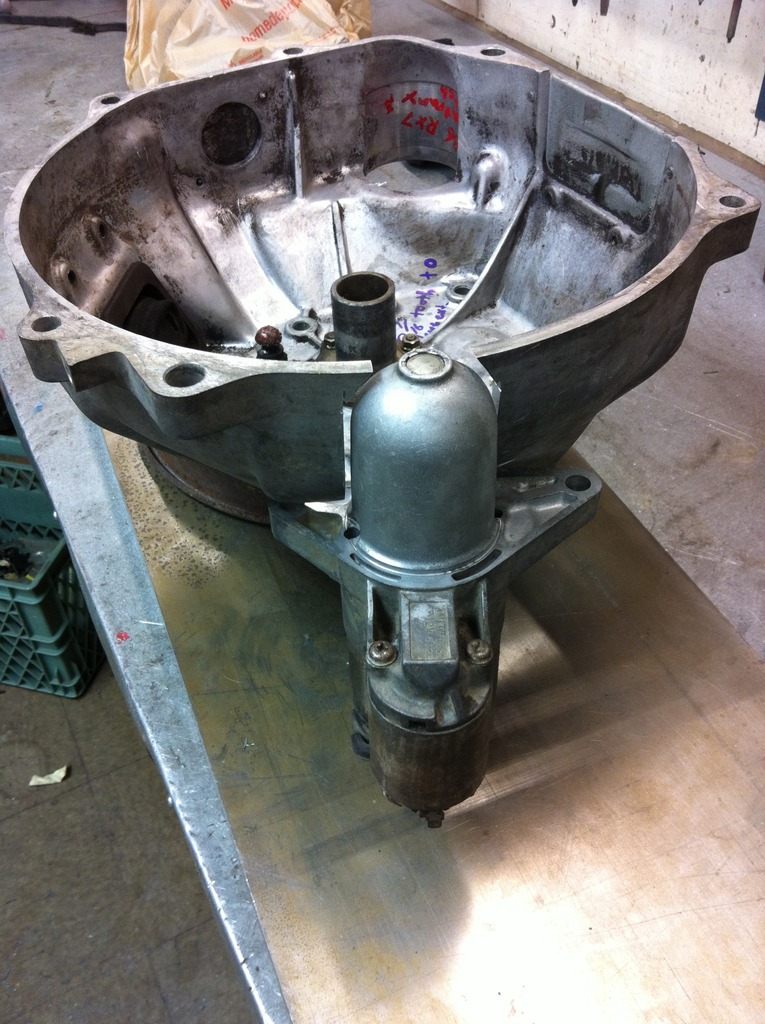
the firewall is in the way so its hard to see how sweet it actually turned out
Thread Starter
Full Member
Joined: Aug 2015
Posts: 113
Likes: 0
From: calgary
na, it'll probably explode. haha. we'll see. i spooled it so that should help a little... at least thats what i tell myself. in reality, it should take the torque no problem and the speed shouldn't be that bad either. might need a new gear set after a few seasons as they are super slack on how tightly the teeth mesh, but remember, these were the same read diffs they used to run at Bonneville in the 40s and 50s hitting some pretty mad speeds
Trending Topics
Thread Starter
Full Member
Joined: Aug 2015
Posts: 113
Likes: 0
From: calgary
heres the drive shaft cut down and installed.
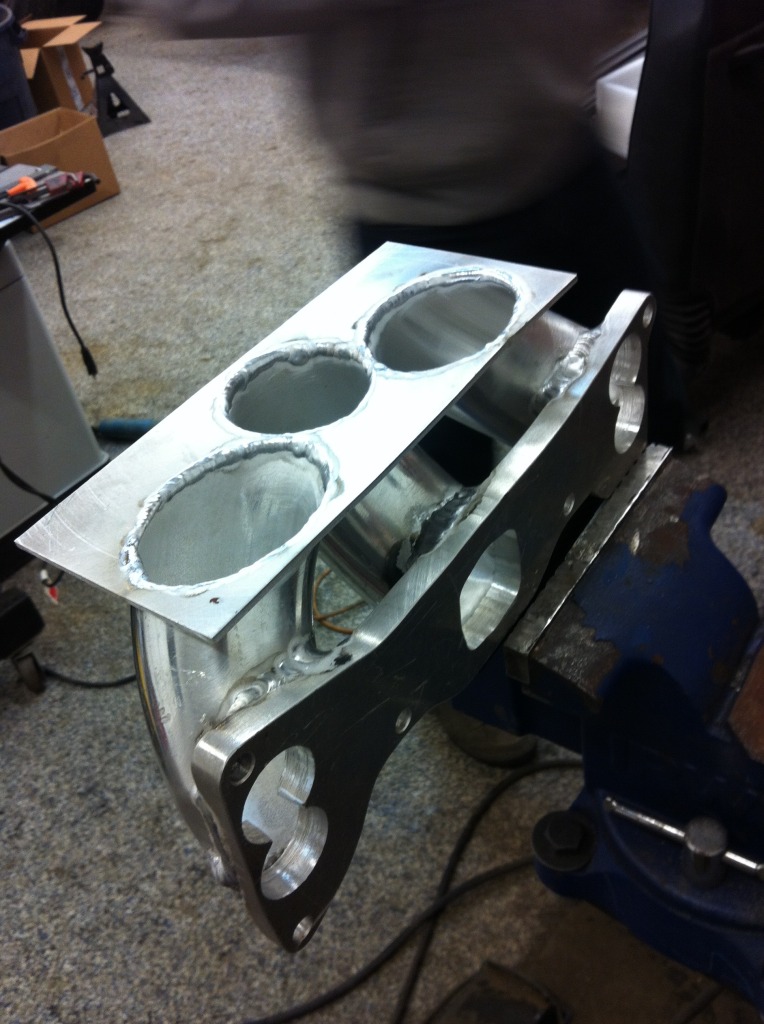
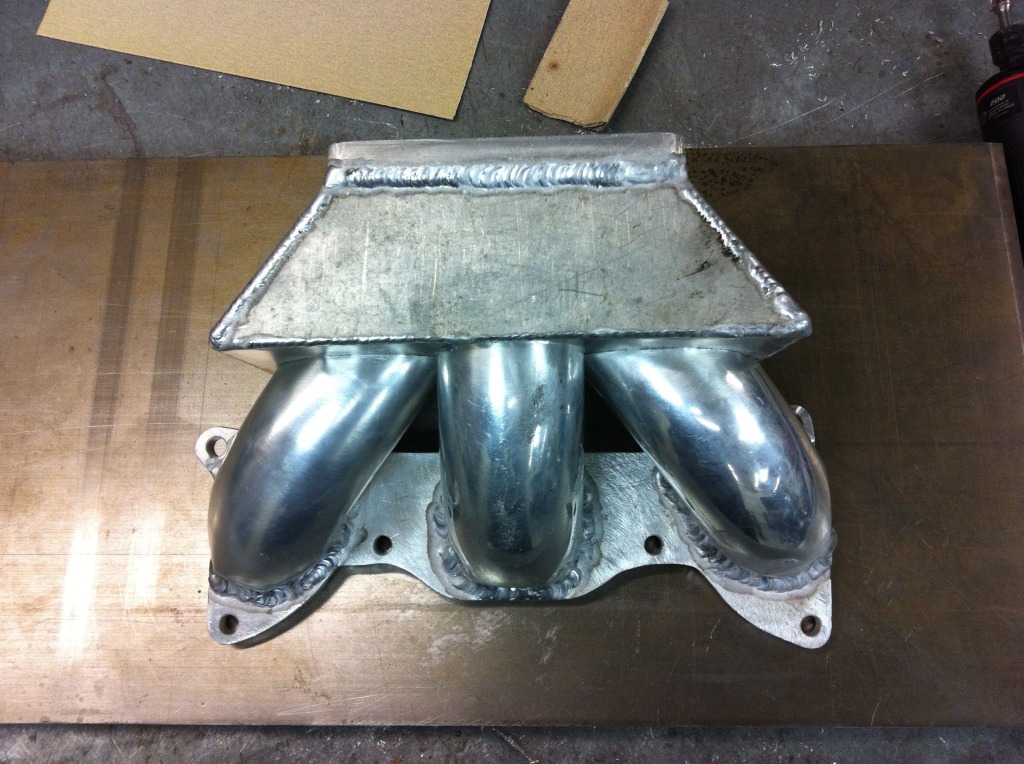
the start of my intake that will hold a 500cfm edelbrock 4 barrel carb. you can see why truing to fit a blower in there as well as any kind of intake just wasn't going to happen. this is where im at with it up to date. tomorrow evening ill get the intake welded up and then its back to finishing the firewall, then mounting the master and pedals/linkage.
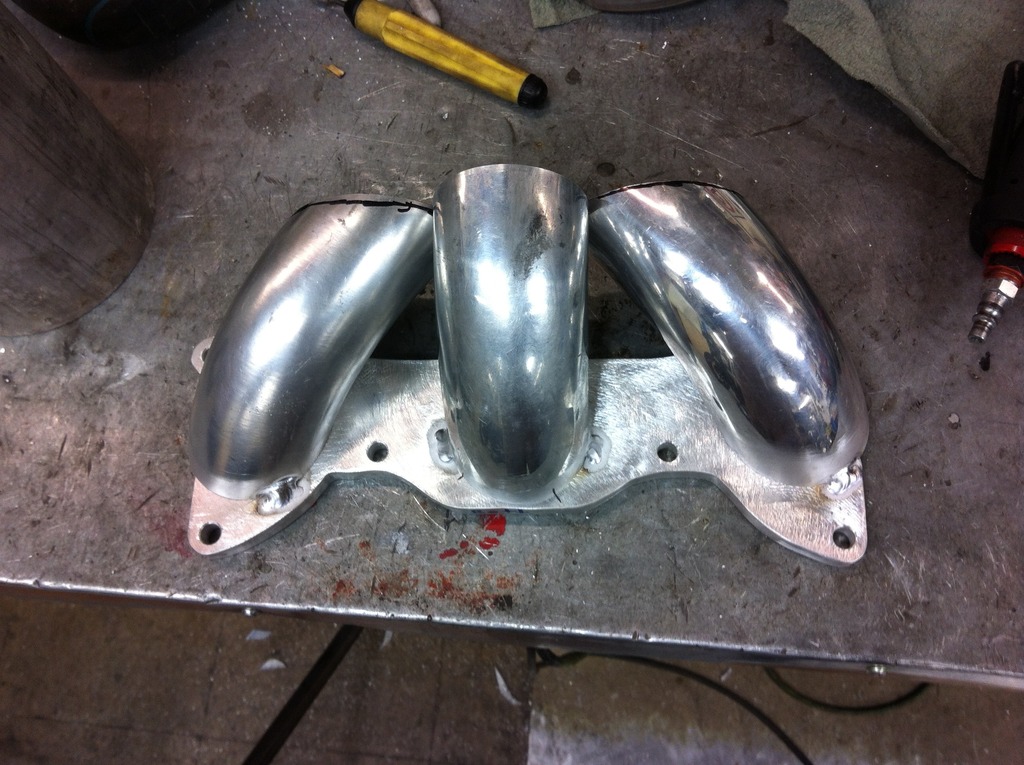
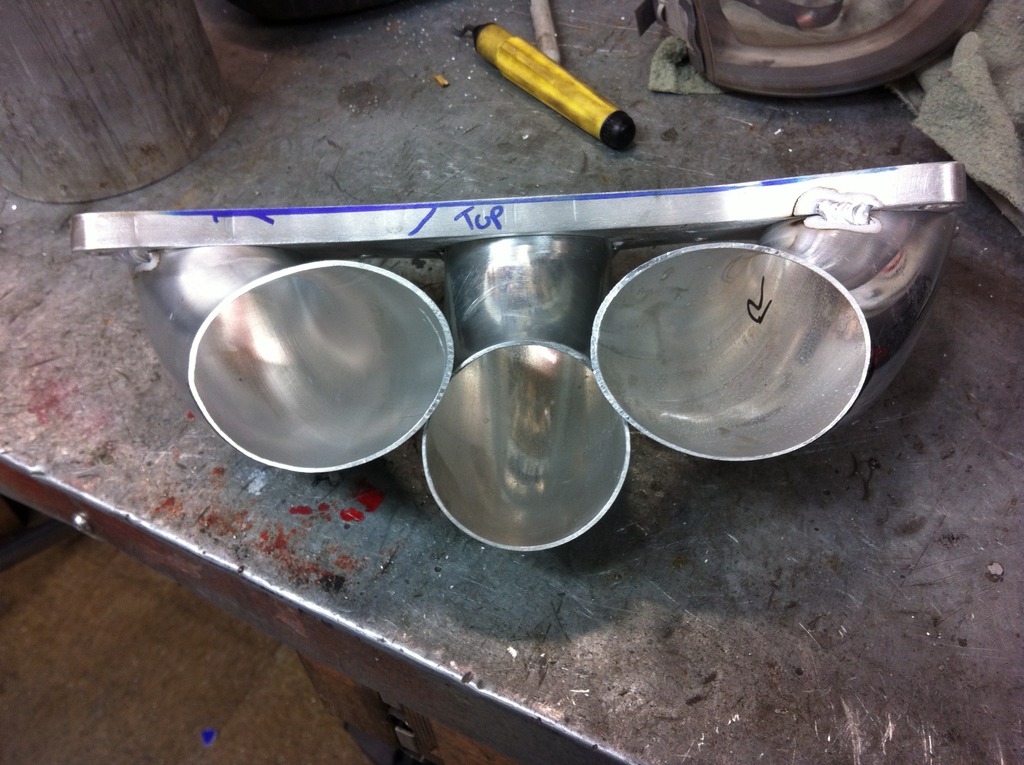
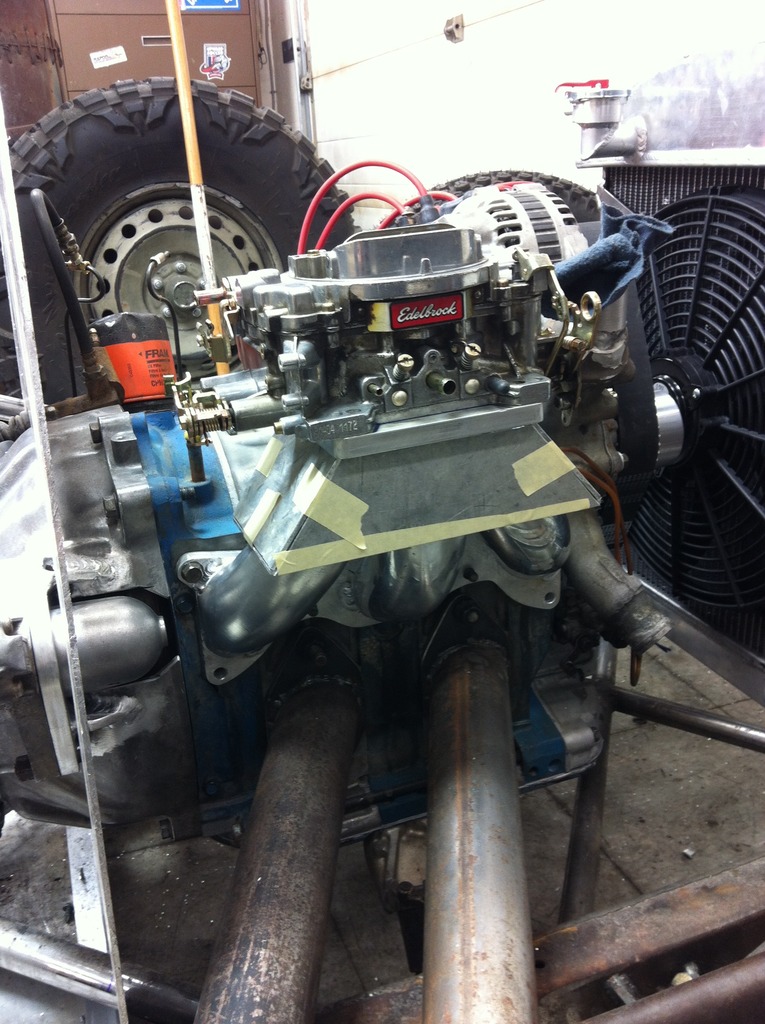
the start of my intake that will hold a 500cfm edelbrock 4 barrel carb. you can see why truing to fit a blower in there as well as any kind of intake just wasn't going to happen. this is where im at with it up to date. tomorrow evening ill get the intake welded up and then its back to finishing the firewall, then mounting the master and pedals/linkage.
Last edited by turbo-minivan; Jan 17, 2016 at 09:24 PM.

Thread Starter
Full Member
Joined: Aug 2015
Posts: 113
Likes: 0
From: calgary
more to come in the following days. hope your enjoying =). i know i sure am!
oh, once i desided to do the 13b, my $1000 budget obviously had to go out the window, (highly ambitious to begin with, i know), but im still trying to keep it on the mad cheap. so far to date, im at $2750 almost to the dollar (all side cash so the wife doesn't freak out), and thats right down to buying the fluids and small brass fittings and so on. so heres hoping $3500 will be my total cost, and im still shooting for a curb weight of under 1350lbs.
if i can manage that, in 'theory', this should be a 12 second flat kinda car with its street port motor. that should be more than enough to bend these old wheels and shred off the dirt bike tires while jumping ditches! =)


Thread Starter
Full Member
Joined: Aug 2015
Posts: 113
Likes: 0
From: calgary
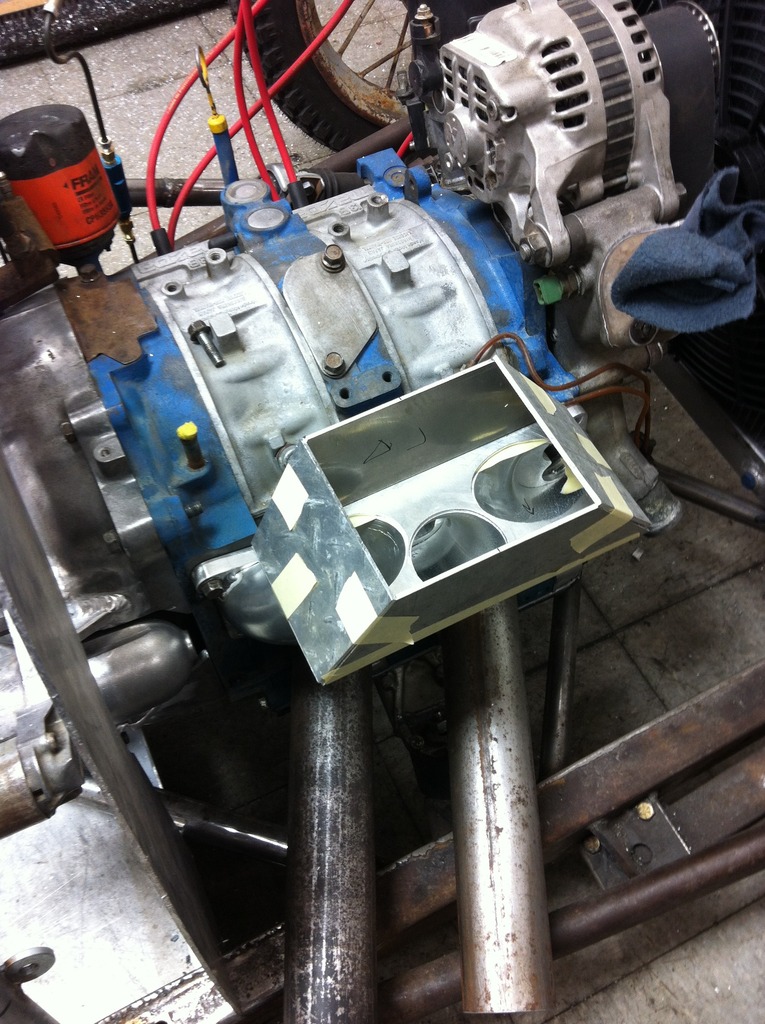
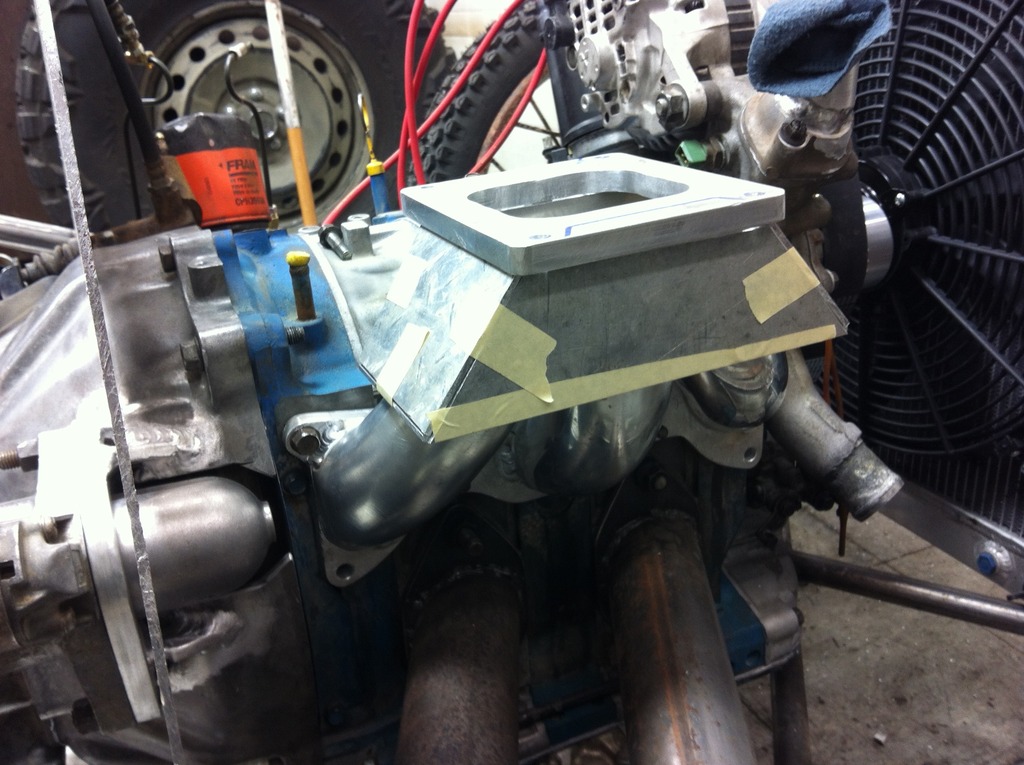
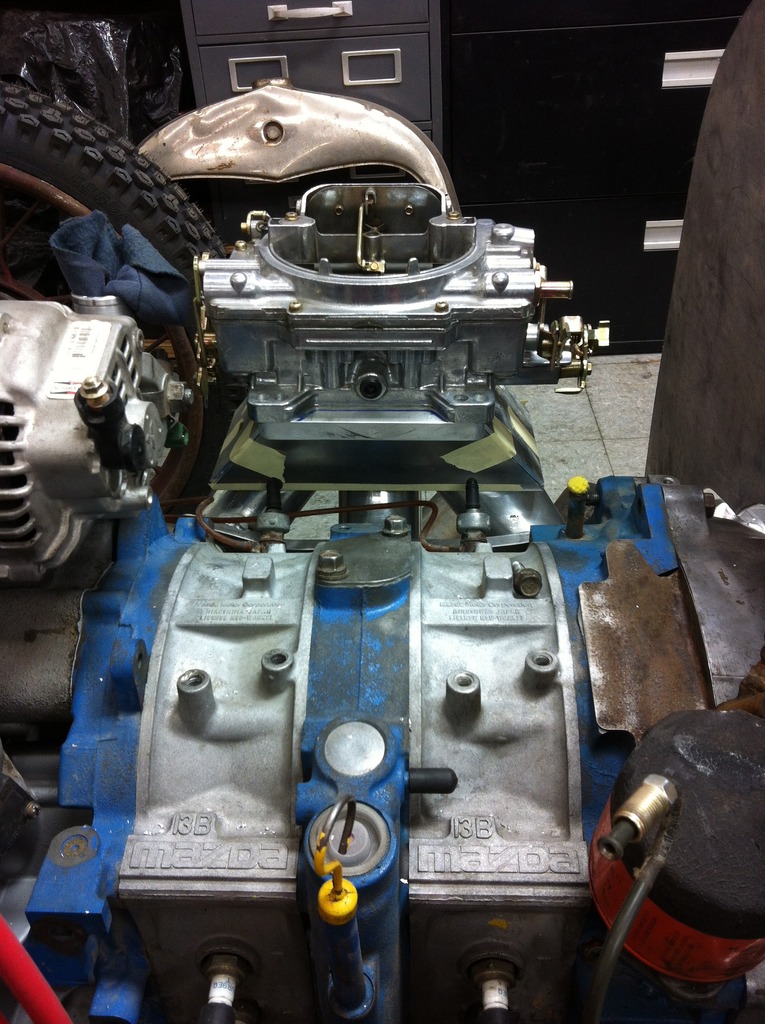
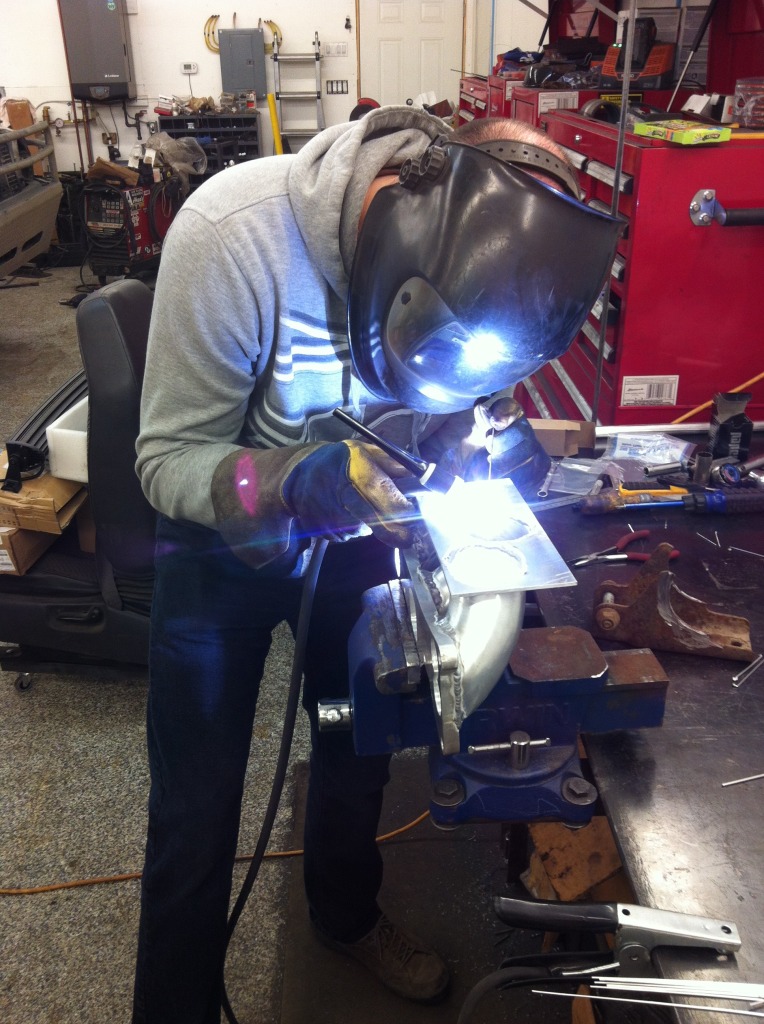
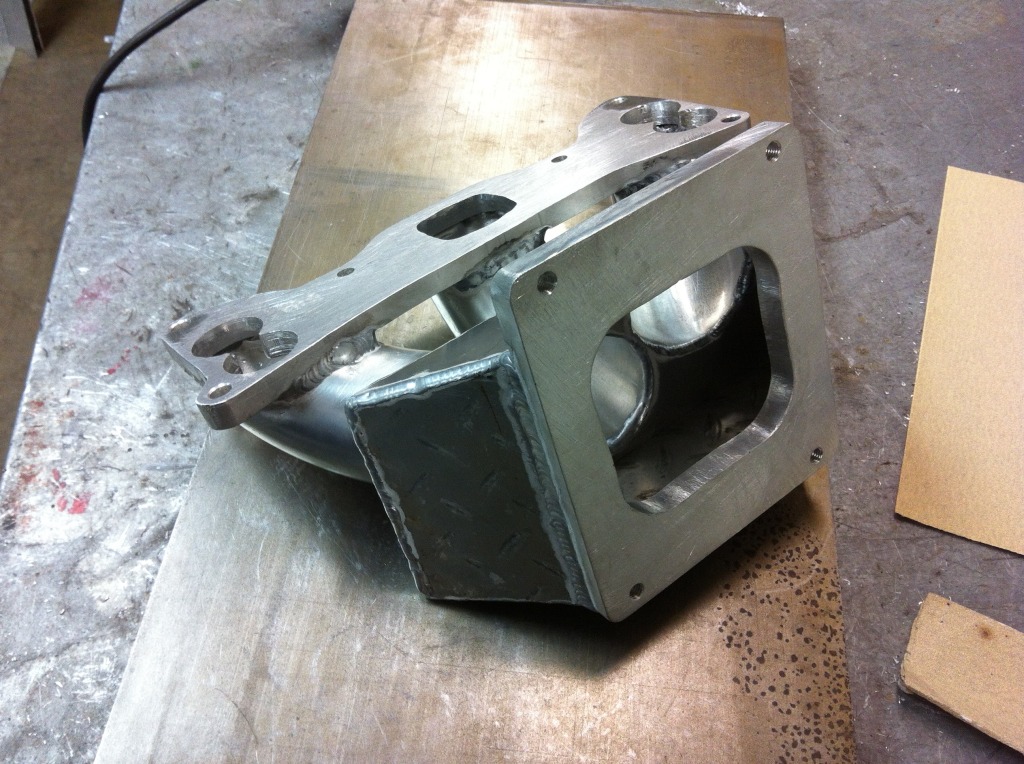
i was able to get some more welding gas today so the intake is finished. my friend does my aluminum TIGing and there were some pretty tight spots to try and get the torch into... but hes awesome and did a great job!
its now installed and the 500cfm carb is bolted on.
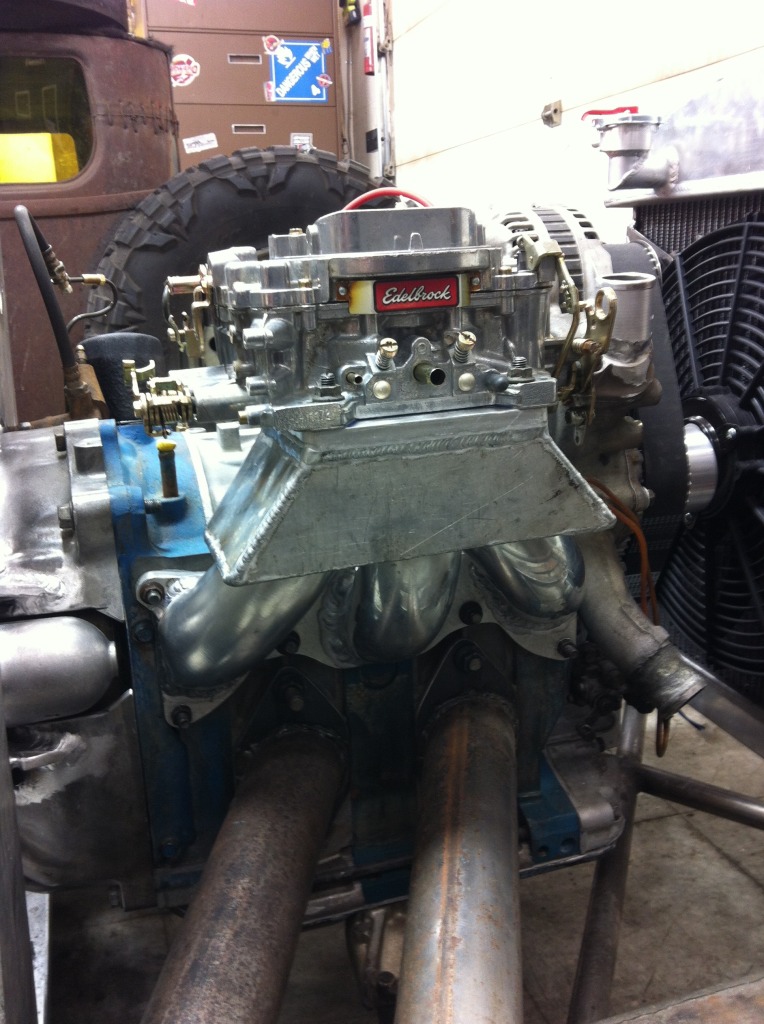
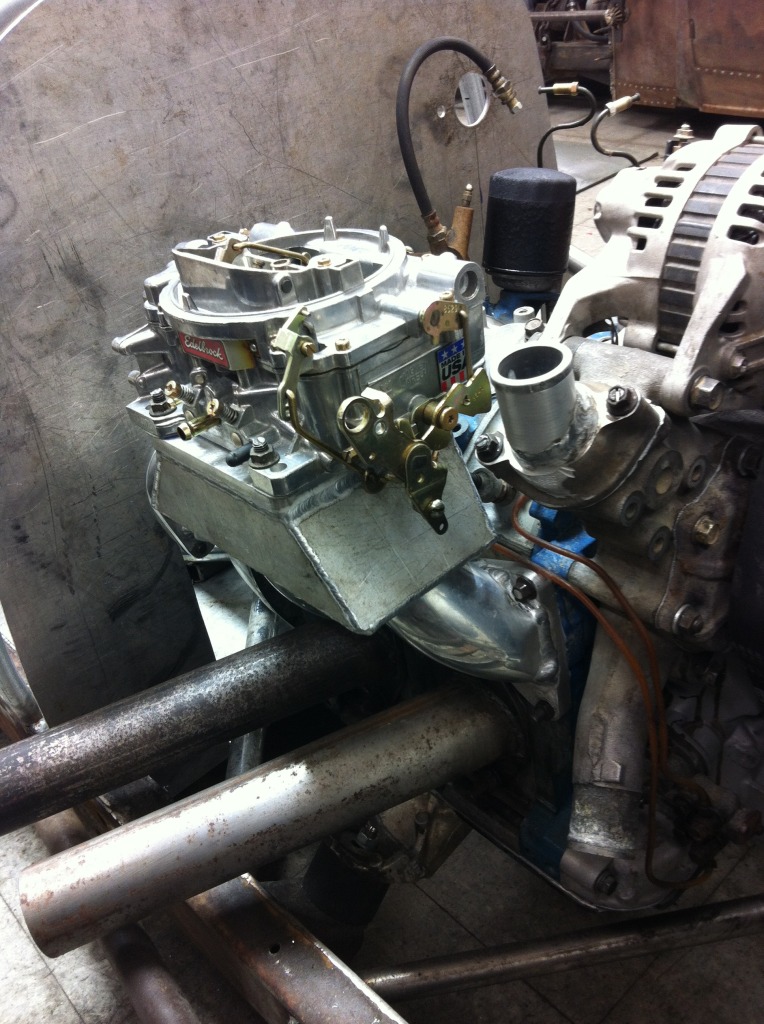
its now installed and the 500cfm carb is bolted on.
Thread Starter
Full Member
Joined: Aug 2015
Posts: 113
Likes: 0
From: calgary
here is a better picture of the relocated starter flange that i couldn't get before.
i also started on the firewall flange tonight and got it all screwed together so it can get tack welded together. once its tacked in spots from the inside, ill remove all the L-brackets and cut the firewall to final shape with the flange and it will get welded all around the outer edge. once finished, the flange will get riveted around the inner edge into the tube structure. then to mount the master cylinder and do some pedals. with any luck, i should be about 2 weeks away from getting it running enough to drive it around the block!!
i also started on the firewall flange tonight and got it all screwed together so it can get tack welded together. once its tacked in spots from the inside, ill remove all the L-brackets and cut the firewall to final shape with the flange and it will get welded all around the outer edge. once finished, the flange will get riveted around the inner edge into the tube structure. then to mount the master cylinder and do some pedals. with any luck, i should be about 2 weeks away from getting it running enough to drive it around the block!!
Last edited by turbo-minivan; Jan 19, 2016 at 11:47 PM.
MECP Certified Installer
Joined: Feb 2009
Posts: 3,176
Likes: 3
From: Mesquite, TX-DFW
I have one question and one observation.
How do you add oil? It looks as if the oil filler is blocked off?
Having that drive shaft spinning open right next to me would be terrifying.
Cool build.
How do you add oil? It looks as if the oil filler is blocked off?
Having that drive shaft spinning open right next to me would be terrifying.
Cool build.
Thread Starter
Full Member
Joined: Aug 2015
Posts: 113
Likes: 0
From: calgary
haha, if you look real close the 'oil cap' is a lid off and old 35mm film container (if anyone is old enough to remember those), so it just pops out and snaps back in.
the drive shaft will get loops over the U-joints and it will get a tunnel. i may be crazy, but im not retarded. haha! an open DS would be pure madness!
the drive shaft will get loops over the U-joints and it will get a tunnel. i may be crazy, but im not retarded. haha! an open DS would be pure madness!
Joined: Jun 2006
Posts: 4,815
Likes: 24
From: Columbia, Tennessee
I'm not sure you'll like that Edelbrock on a rotary. 4 barrel "V8" carbs don't work too well on these engines. Your going to need a fire extinguisher mounted in close reach with those side pipes!
Will you be making a scatter shield for the drive shaft? I'd hate for it to explode in my face.
Will you be making a scatter shield for the drive shaft? I'd hate for it to explode in my face.
Thread Starter
Full Member
Joined: Aug 2015
Posts: 113
Likes: 0
From: calgary
I'm not sure you'll like that Edelbrock on a rotary. 4 barrel "V8" carbs don't work too well on these engines. Your going to need a fire extinguisher mounted in close reach with those side pipes!
Will you be making a scatter shield for the drive shaft? I'd hate for it to explode in my face.
Will you be making a scatter shield for the drive shaft? I'd hate for it to explode in my face.