
Rx7 Rally Car


Thread Starter
Respecognize!
Joined: Sep 2004
Posts: 4,106
Likes: 72
From: Anchor Bay, CA
GSLSE rears and FC based single pots up front. once i get the volvo five lug axle in the rear, ill be going with the five lug and four pistons up front. Same surface area, but better distribution, weight and heat transfer. Still PLENTY of braking
Thread Starter
Respecognize!
Joined: Sep 2004
Posts: 4,106
Likes: 72
From: Anchor Bay, CA
OFFICIAL! whizbangrally.com is up!
will have a ongoing blob, event updates, bio junk and media.
OFFICIAL WHIZBANG RALLY WEBSITE
will have a ongoing blob, event updates, bio junk and media.
OFFICIAL WHIZBANG RALLY WEBSITE
Thread Starter
Respecognize!
Joined: Sep 2004
Posts: 4,106
Likes: 72
From: Anchor Bay, CA
Progress! Had to order the clevis for the handbrake, but that came in yesterday. Also had to order the rear main seal and oil pan gasket which came in today as well. So ideally tonight, i should have the engine suspended in the engine bay, ready to make the mounts.
I had to have a friend make a sleeve for the steering quickener adapters. Essentially, the column portion I am splicing into is .7" and the adapter ID is .75" so in the interest of having a good fit, i needed a spacer to center it before welding.
I also do not like how the oil return was run so that will be replaced as well.
Thread Starter
Respecognize!
Joined: Sep 2004
Posts: 4,106
Likes: 72
From: Anchor Bay, CA
So tonight i replace the rear main seal, finished cleaning the oil pan, attached the flying miata clutch kit and the 1.8 flywheel and positioned the engine for the engine mounts. With that, bring the non-rotary disdain.
Tinkering with the level and spacing for about an hour before i got it perfect. I will have to pull the oil pan (i didnt make the gasket for a reason) to tap for the oil return. the way it was done by the previous miata engine owner was silly, wrapping around the entire engine.
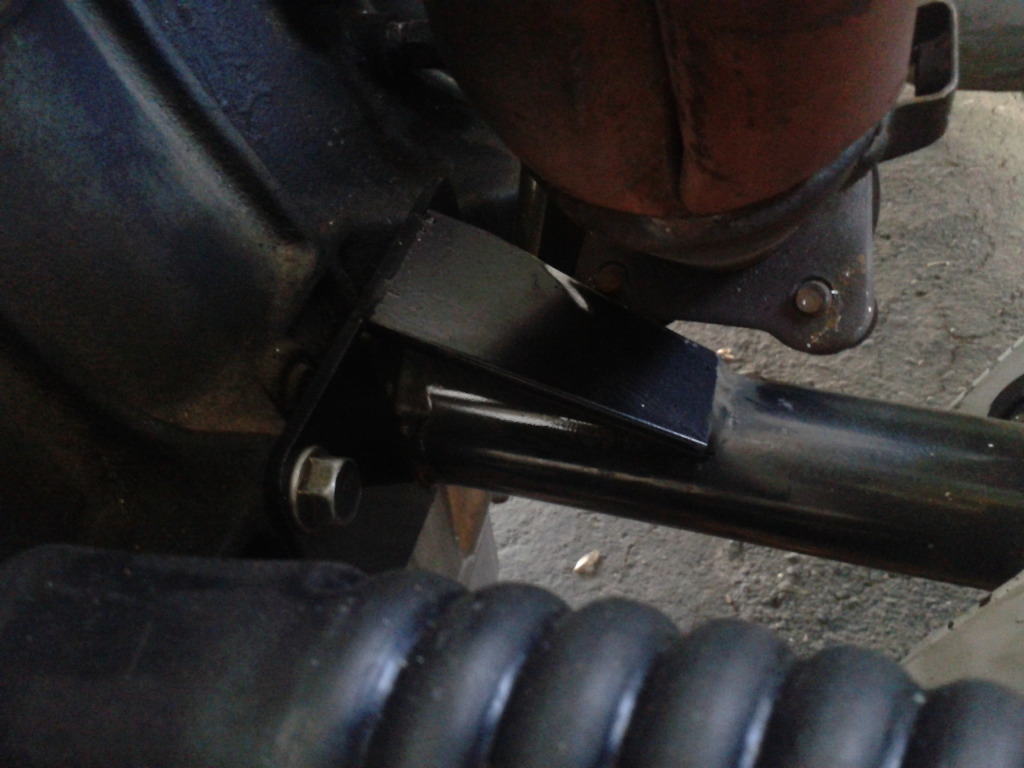
I also assembled the CNC handbrake and mounted that. Welded a front support bracket due to the angle. Ill let the pictures speak for the rest.


Tinkering with the level and spacing for about an hour before i got it perfect. I will have to pull the oil pan (i didnt make the gasket for a reason) to tap for the oil return. the way it was done by the previous miata engine owner was silly, wrapping around the entire engine.
I also assembled the CNC handbrake and mounted that. Welded a front support bracket due to the angle. Ill let the pictures speak for the rest.


Thread Starter
Respecognize!
Joined: Sep 2004
Posts: 4,106
Likes: 72
From: Anchor Bay, CA
Subaru tops are on the coilovers. I still need to make a top plate with the subaru pattern for the rx7.
Also started the engine mounts. Passenger side is coming along nice. Since there are no considerations there. The driver's side however, i am dealing with making the mount and the steering things not occupy the same space.


Also started the engine mounts. Passenger side is coming along nice. Since there are no considerations there. The driver's side however, i am dealing with making the mount and the steering things not occupy the same space.
Thread Starter
Respecognize!
Joined: Sep 2004
Posts: 4,106
Likes: 72
From: Anchor Bay, CA
passenger side engine mount pretty much done. Also a pic of the issues i have with the subaru top mount.
[IMG]http://i1089.photobucket.com/albums/i352/WhizbangRally/Rx7%20Rally%20Car/IMG
_9564.jpg[/IMG]


[IMG]http://i1089.photobucket.com/albums/i352/WhizbangRally/Rx7%20Rally%20Car/IMG
_9564.jpg[/IMG]
Thread Starter
Respecognize!
Joined: Sep 2004
Posts: 4,106
Likes: 72
From: Anchor Bay, CA
driver's side mount is mocked up! Perfect clearance with the steering quickener. Tomorrow ill get the metal to mount the quickener and finish the steering! Then i just need to do the trans mount, then i can pull the engine and finish weld.


Thread Starter
Respecognize!
Joined: Sep 2004
Posts: 4,106
Likes: 72
From: Anchor Bay, CA
Finally got the FB tops onto the coilovers! Good news is they clear! I also got the ARP studs onto the five lug hugs. Assembled the whole shebang with calipers and the wheel to see if everything clears. Looks perfect. Huge amounts of clearance!!!
I also removed the engine and finish welded the mount brackets. Added supports for the driver's side. The mount for steering quickener was made and welded too. Finished welding the steering adapters as well.


I also removed the engine and finish welded the mount brackets. Added supports for the driver's side. The mount for steering quickener was made and welded too. Finished welding the steering adapters as well.
Thread Starter
Respecognize!
Joined: Sep 2004
Posts: 4,106
Likes: 72
From: Anchor Bay, CA
Some more pics.
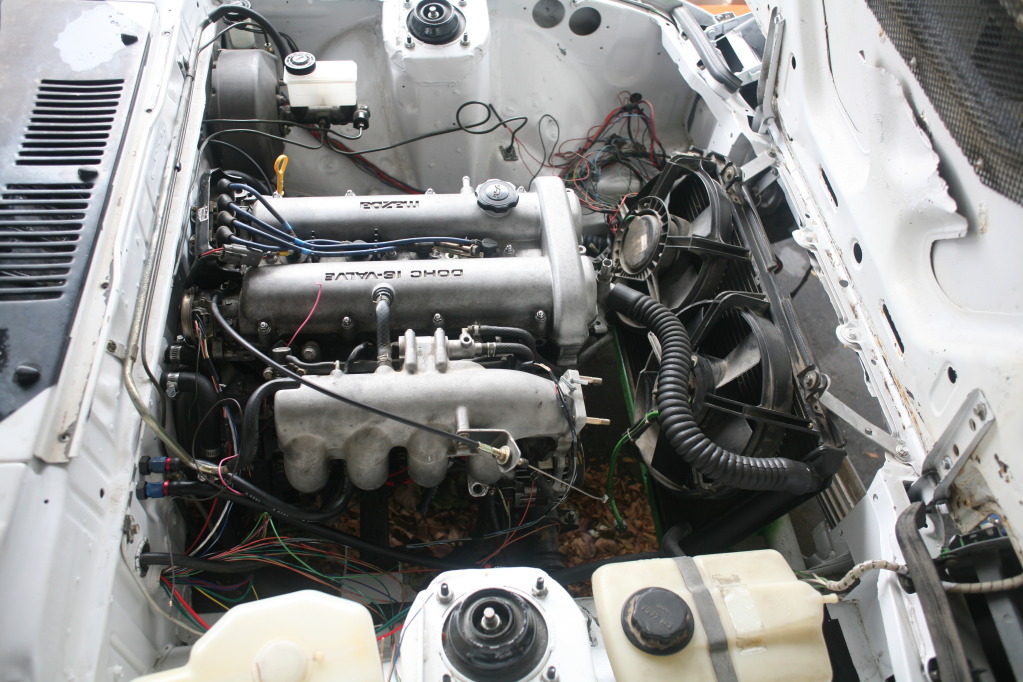
Managed to make the pin mounts for the rear hatch. Also, trimmed the fenders for tire clearance since the axle line moved forward. Also, also, mounted the Saab 900 radiator and the intercooler. Used square tube and some flat steel on the bottom, then aluminum on the top. Clutch line is done. Brakes are getting there. I need some odd ball fitting for the input to the Wilwood cylinder.
Going to clean and prep the inside of the car here soon so i can paint the inside after filling holes and just plain old age and wear. Then the fuel lines and brakes lines will be mounted permanently in the cabin and the electrical can begin.


Thread Starter
Respecognize!
Joined: Sep 2004
Posts: 4,106
Likes: 72
From: Anchor Bay, CA
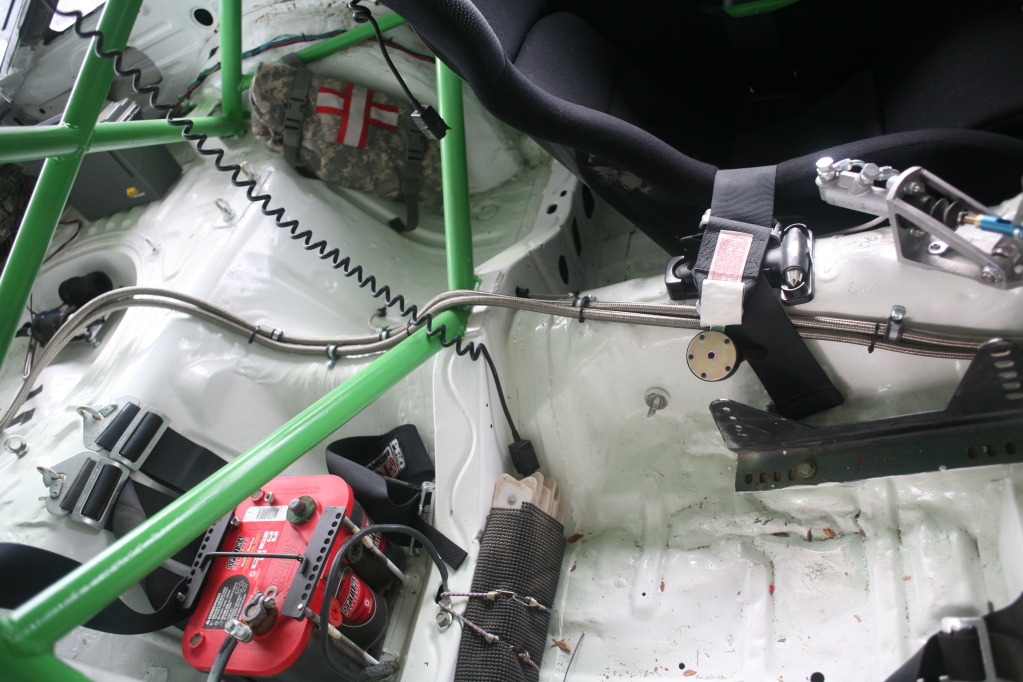
Fitted the studs for the pump plate, mounted the fuel filter, and start to size the -6AN lines in for the fuel array. Summit (Russell) brand hoses are living nightmare to assemble and I will only buy Earls (Jegs) next time. Going to mark and measure and pay a place in town to deal with assembling those things.
Also, most of the brakes lines are done. need a Master Cylinder to bias line, and a line to go to the axle that is flexible.
Also I mounted the foot switch for the horn on the co-driver foot rest. A similar switch will go on the other side for wipers/sprayer activation.


Also, most of the brakes lines are done. need a Master Cylinder to bias line, and a line to go to the axle that is flexible.
Also I mounted the foot switch for the horn on the co-driver foot rest. A similar switch will go on the other side for wipers/sprayer activation.
Thread Starter
Respecognize!
Joined: Sep 2004
Posts: 4,106
Likes: 72
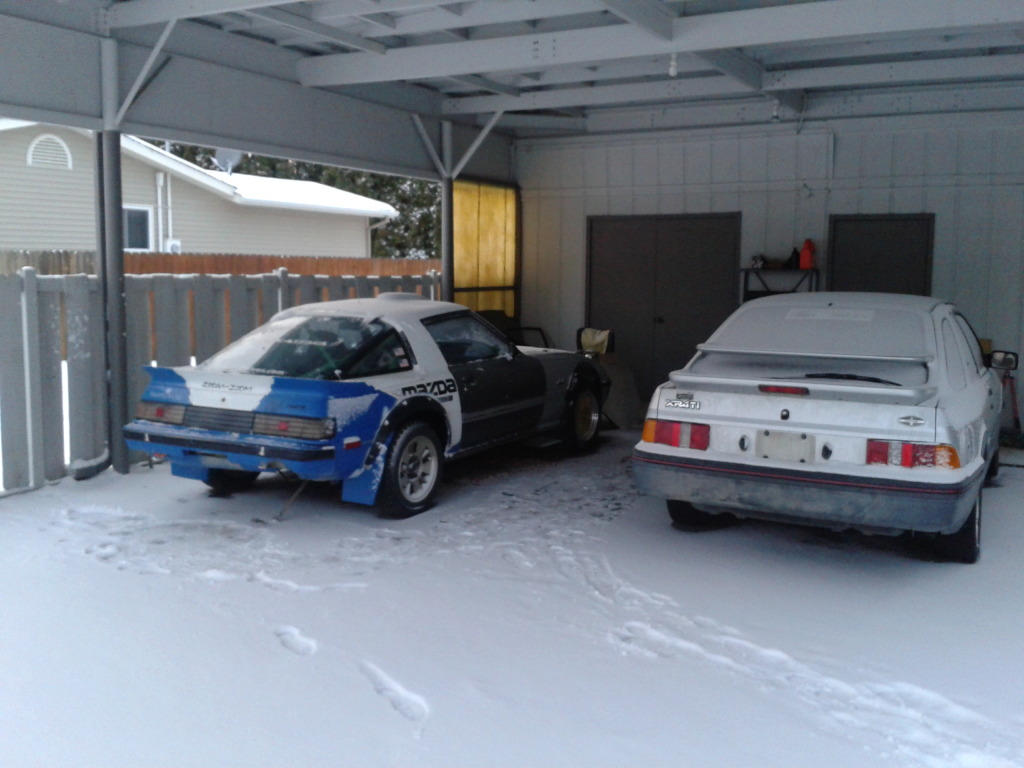
From: Anchor Bay, CA
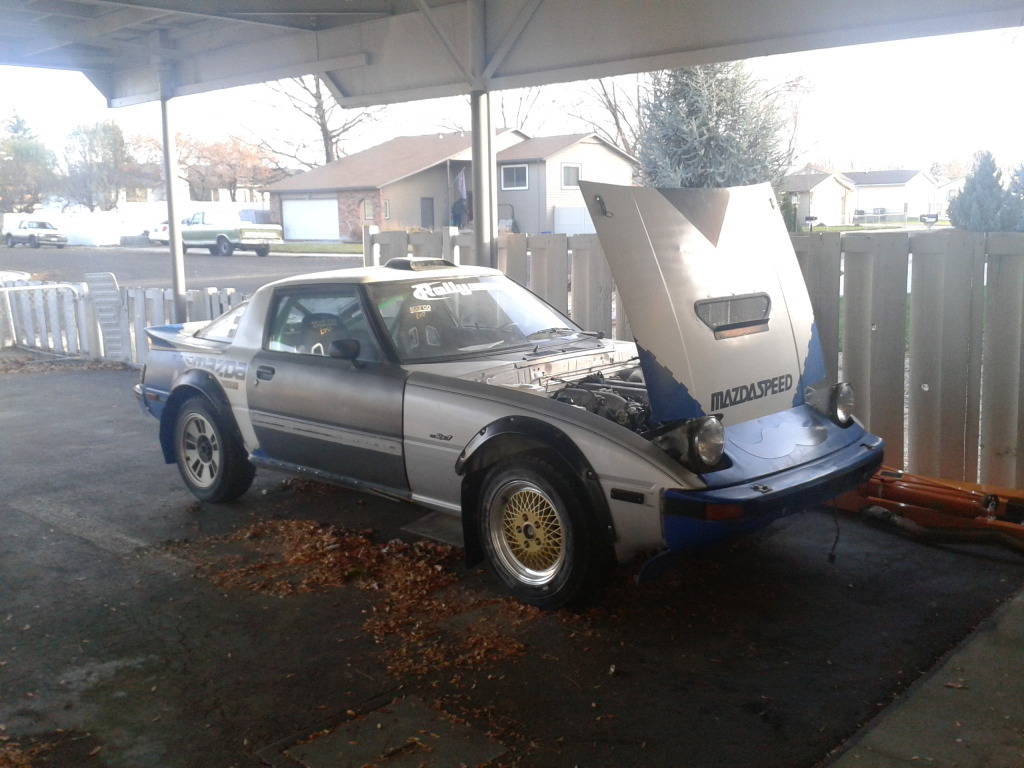
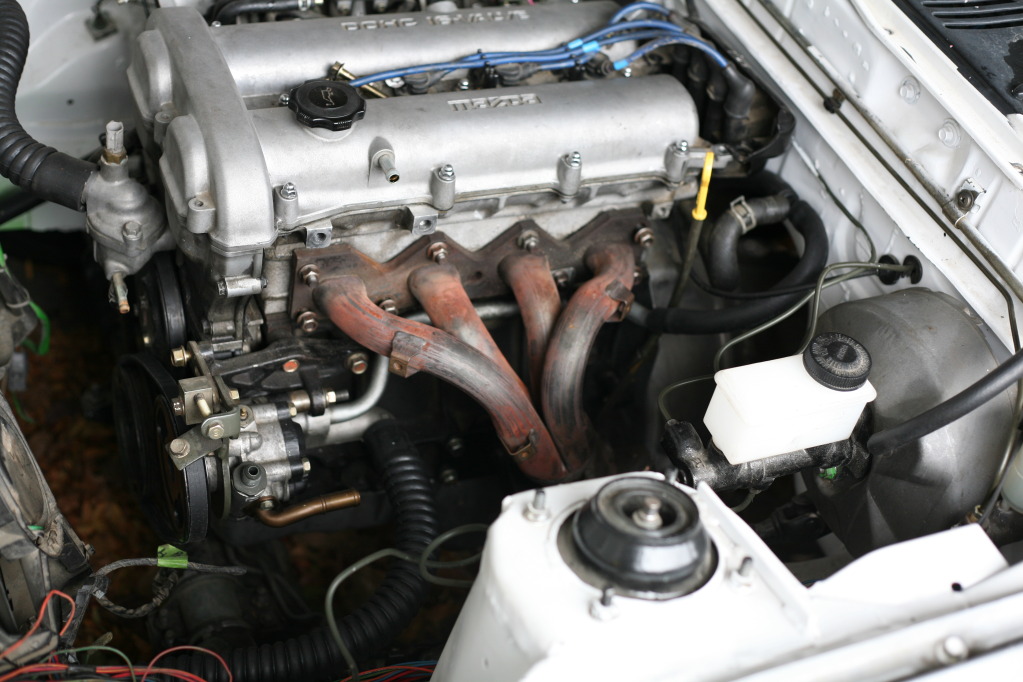
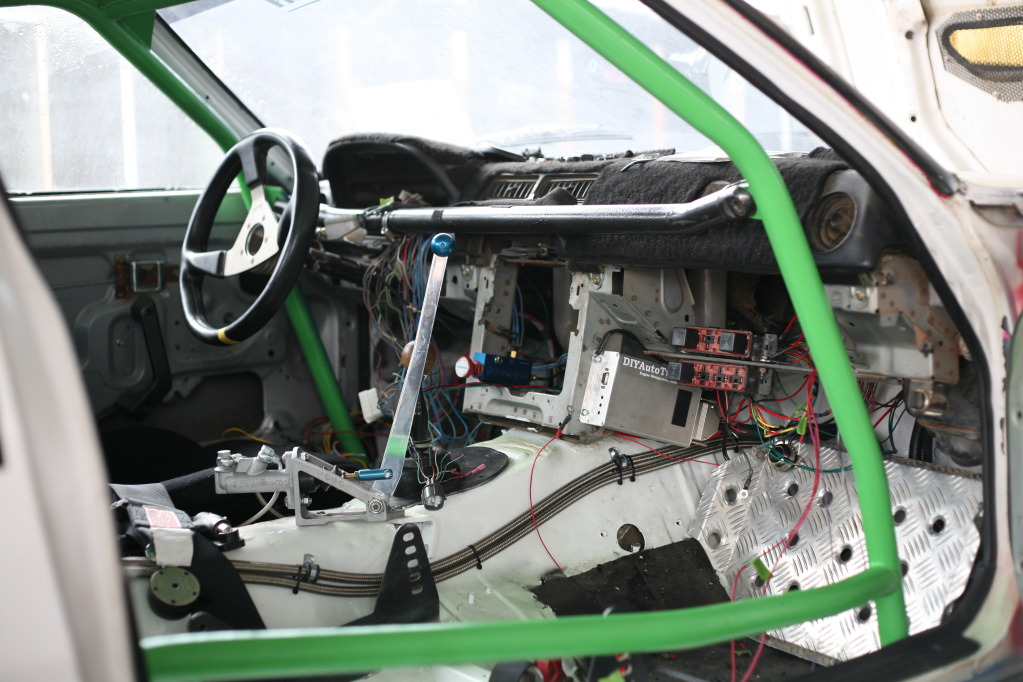
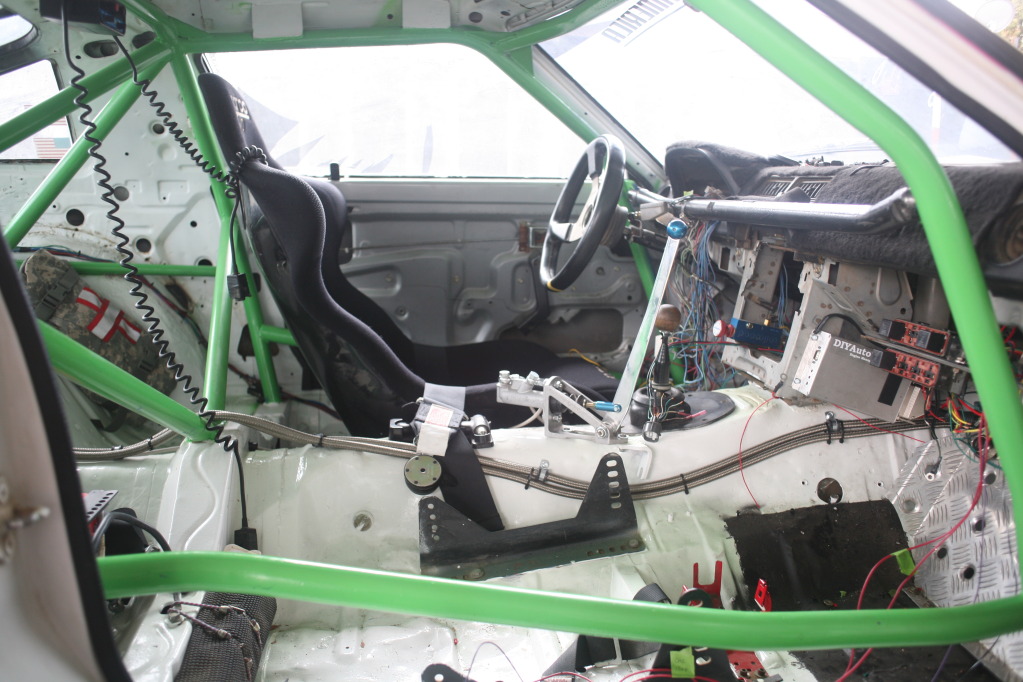
some pics in its new home and some progress. managed to borrow a header, and the stock 1.6 WILL FIT!!!!!!!!!!!!!!!!!!!!!!!!!! So yea Dave ill be in business! Lots left to do with the megasquirt.
Thread Starter
Respecognize!
Joined: Sep 2004
Posts: 4,106
Likes: 72
From: Anchor Bay, CA
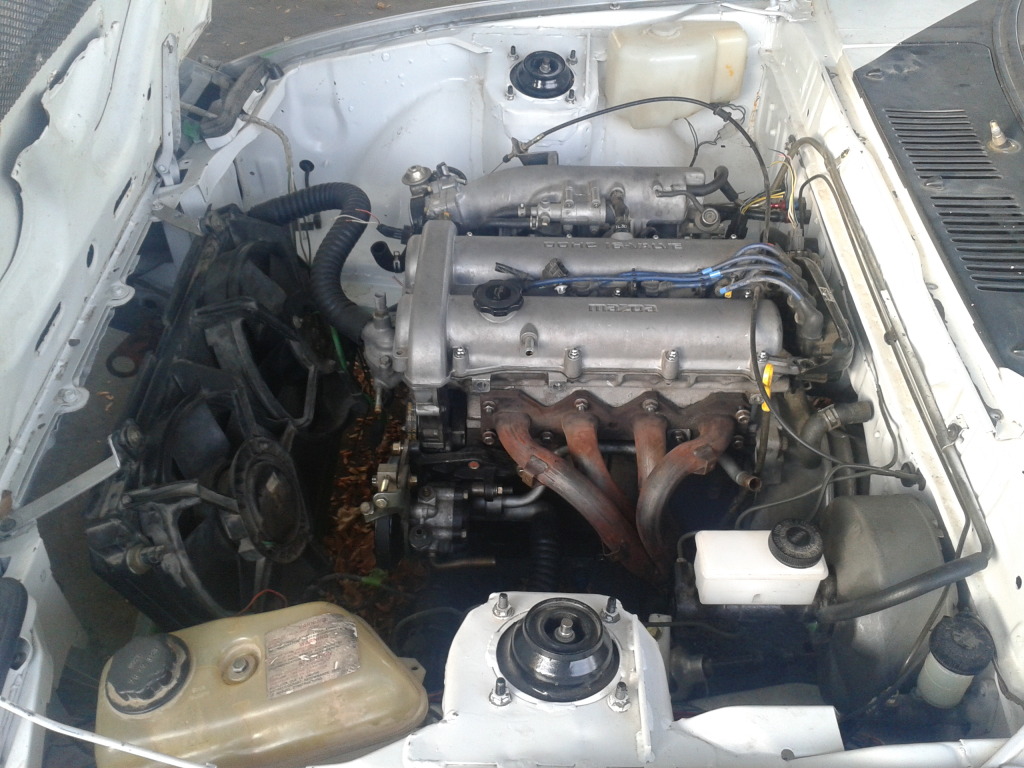
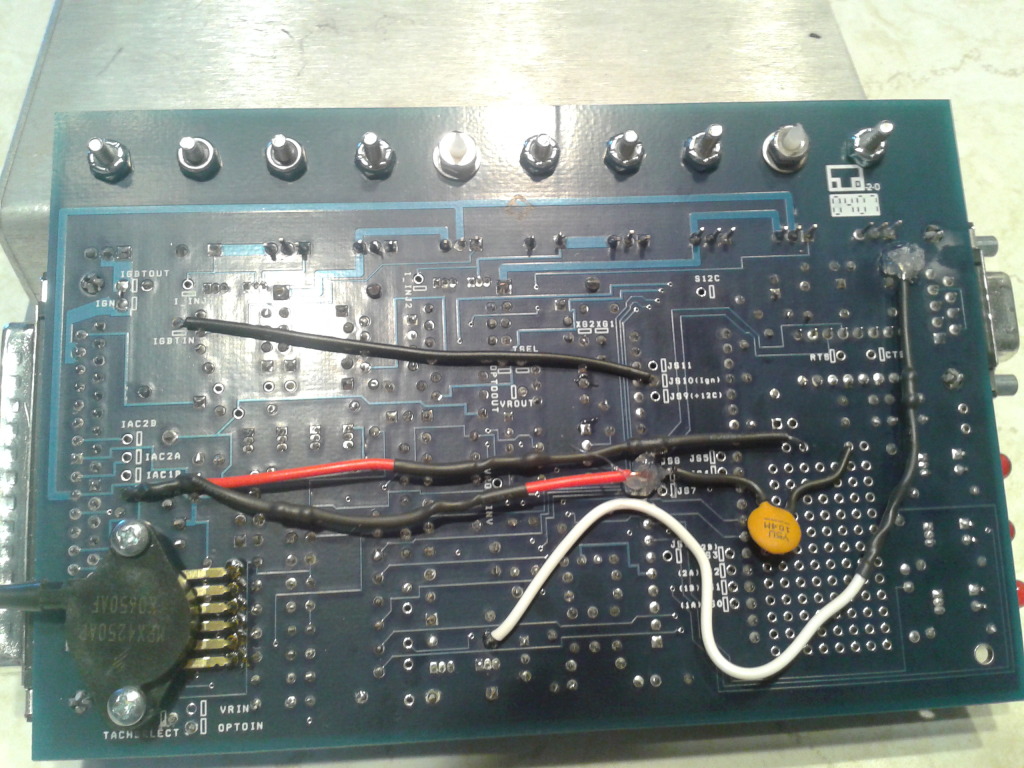
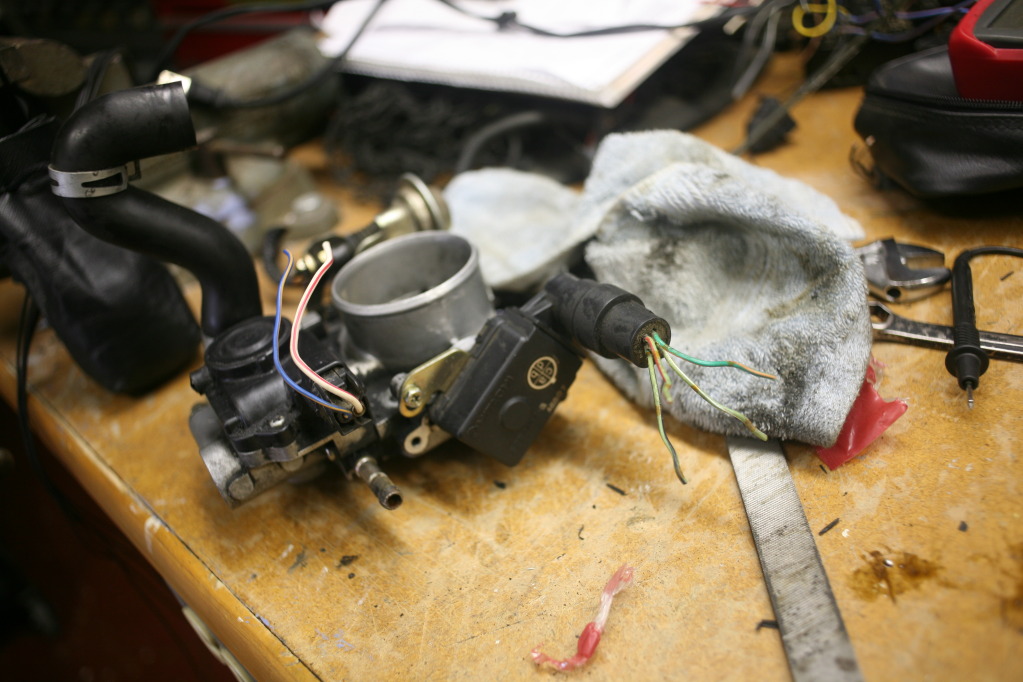
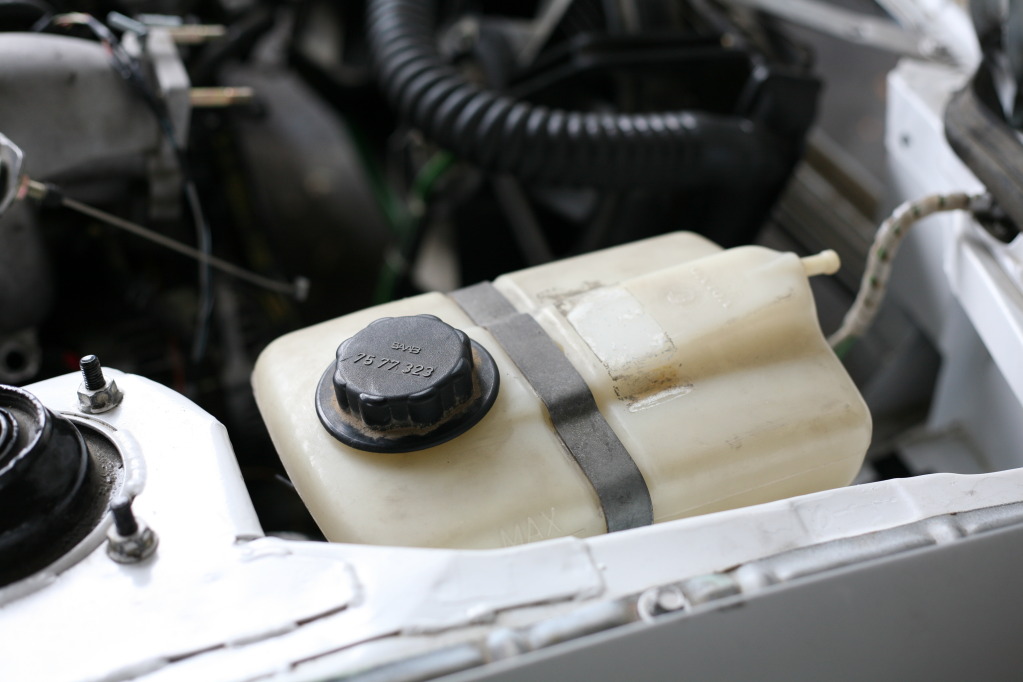
couple progress pics! Fuel lines are getting there, megasquirt is in the car, just need to run the TPS, IAT, and ignition outs. Have to weld a bung to the intake manifold for the IAT though. Coolant stuff is almost finished! Might start here soon!


holy crapinski!!! this is awesome, man. i really, REALLY dig it. i'm excited for you and can't wait to see it in some sideways action.
[obligatory piston racism]dude, c'mon this car sucks! you should've put a bridgeport 13B with a GT42R in it. now i'm going to have to flood your precious cylinders with premix and punch holes in your exhaust and firewall then while you sleep i'm going play tapes of the 787B backwards in your garage to give the car nightmares. grrrrrr!!!
how's that? [/obligatory piston racism]
Thread Starter
Respecognize!
Joined: Sep 2004
Posts: 4,106
Likes: 72
From: Anchor Bay, CA
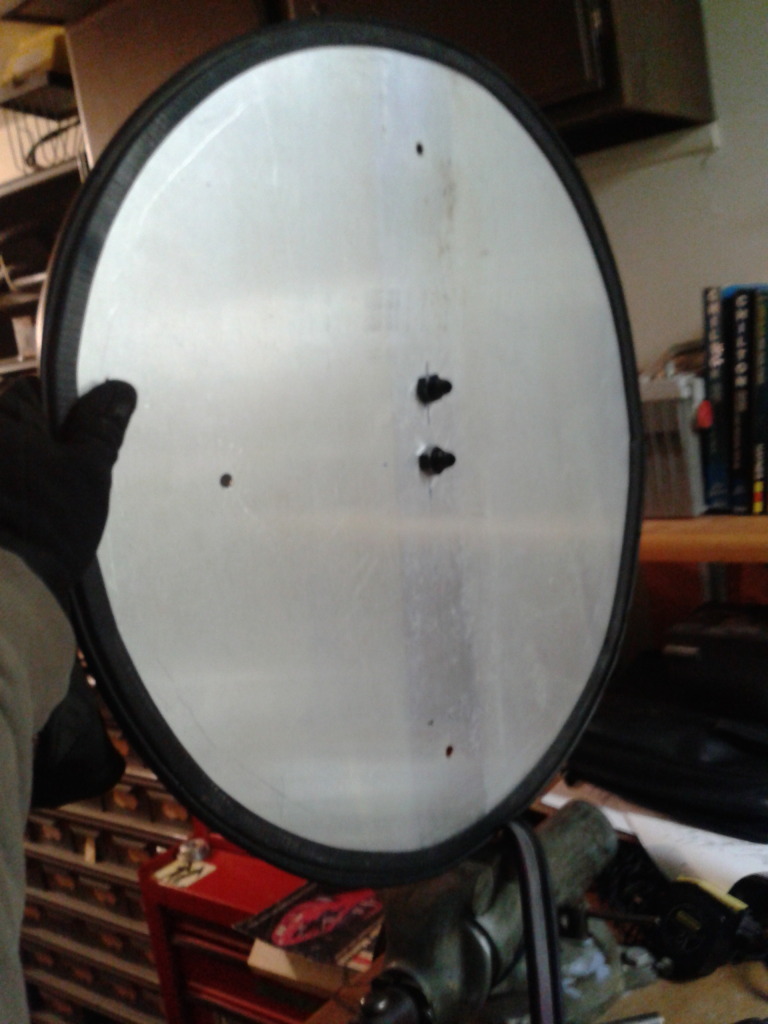
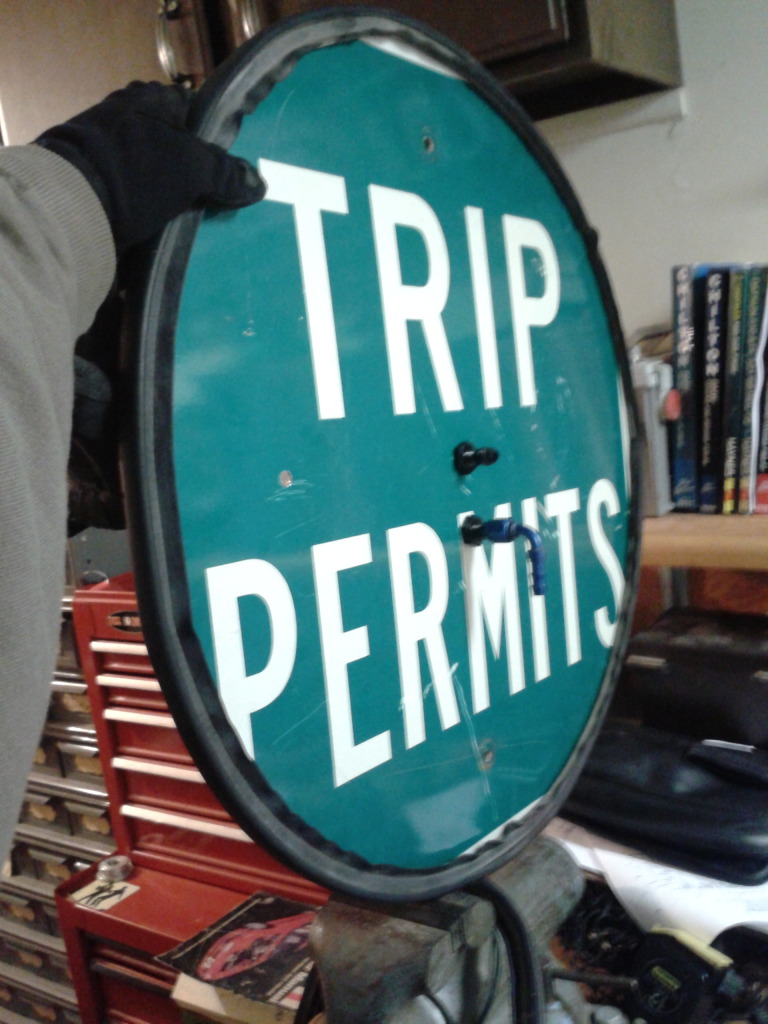
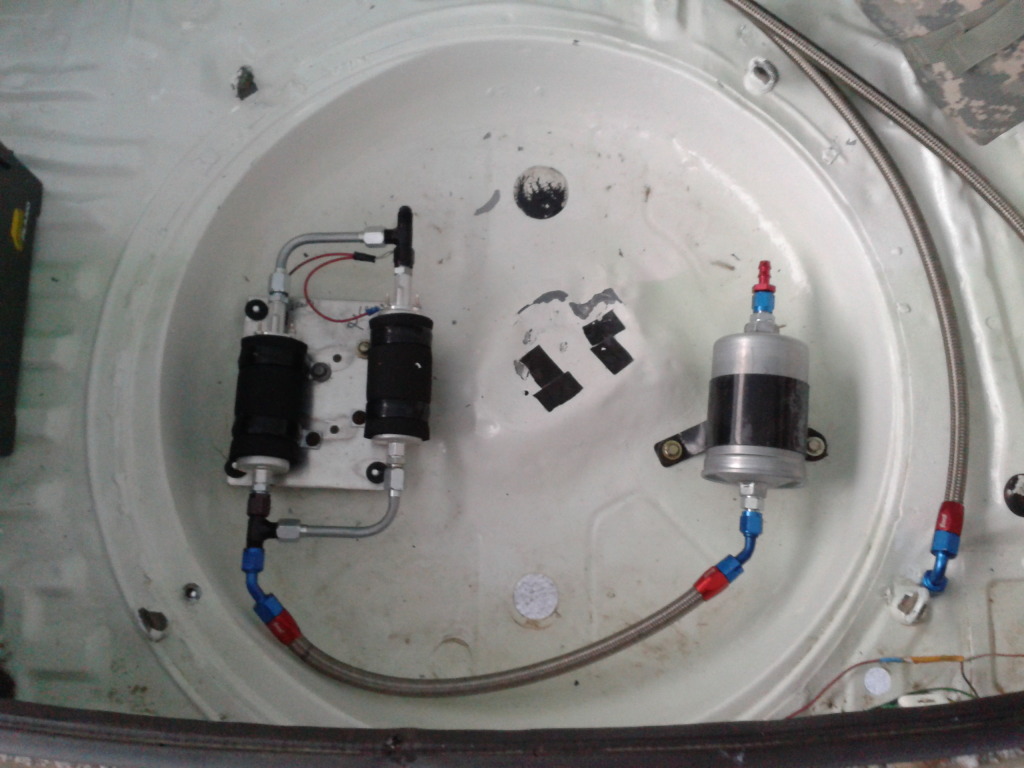
managed to make my bulkhead today despite the snow / cold! Pictures should explain most of what happened, but it was a road sign, cut to a circle. drilled for the return and feed bulkhead fittings. the two original sign mounting holes will be used to hold the bulkhead down, but i didnt feel like getting the welder out to make the brackets to hold it.
still either one 180 degree fitting for braided line or two 90 degree 3/8 barb to 6AN fittings so i can finish plumbing the system. then ill get the gas tank up and drop the lines to the tank!
Also the fuel pump stuff is done!
still either one 180 degree fitting for braided line or two 90 degree 3/8 barb to 6AN fittings so i can finish plumbing the system. then ill get the gas tank up and drop the lines to the tank!
Also the fuel pump stuff is done!