Project Resurrection: Running Log
 07-06-12, 09:47 PM
#551
Day 1347
... and on the third day of his vacation, DivinDriver said, "let there be garage time, or I'm gonna have a conniption!"
...and there was garage time. And it was good - right up to the point where I ripped a 2" gouge in my right palm with a screwdriver. After that, not quite as good.
But I digress.
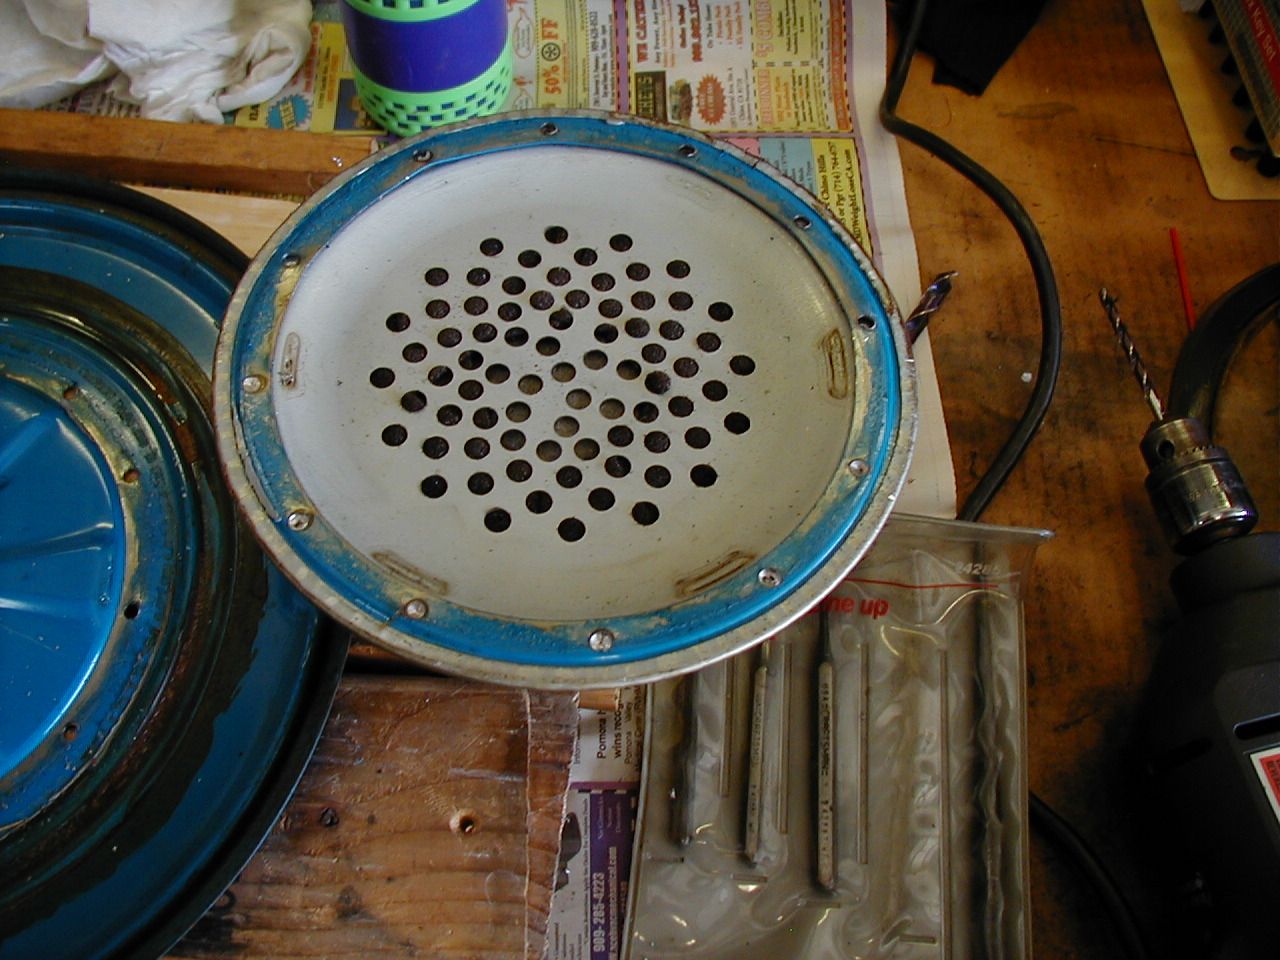
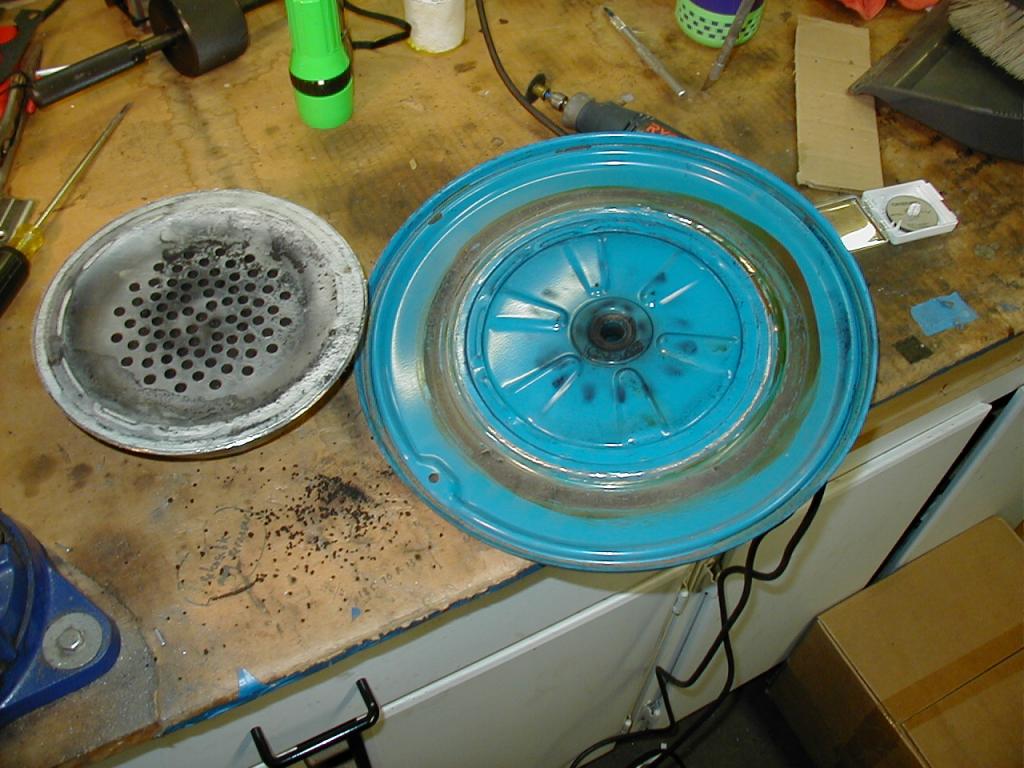
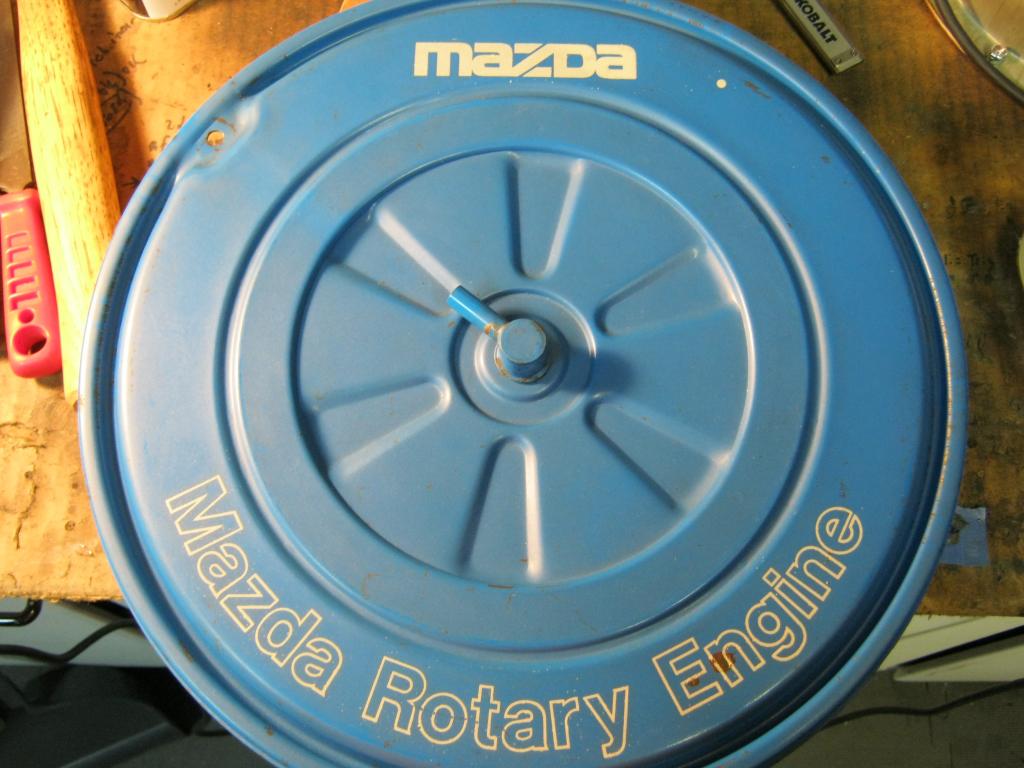
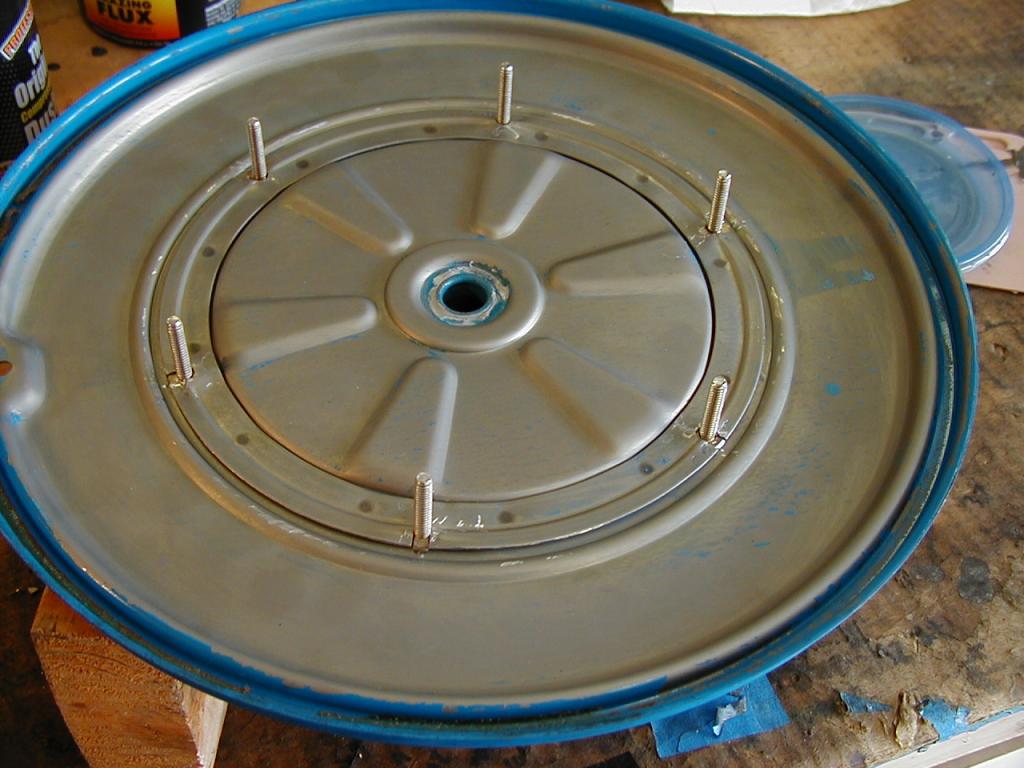
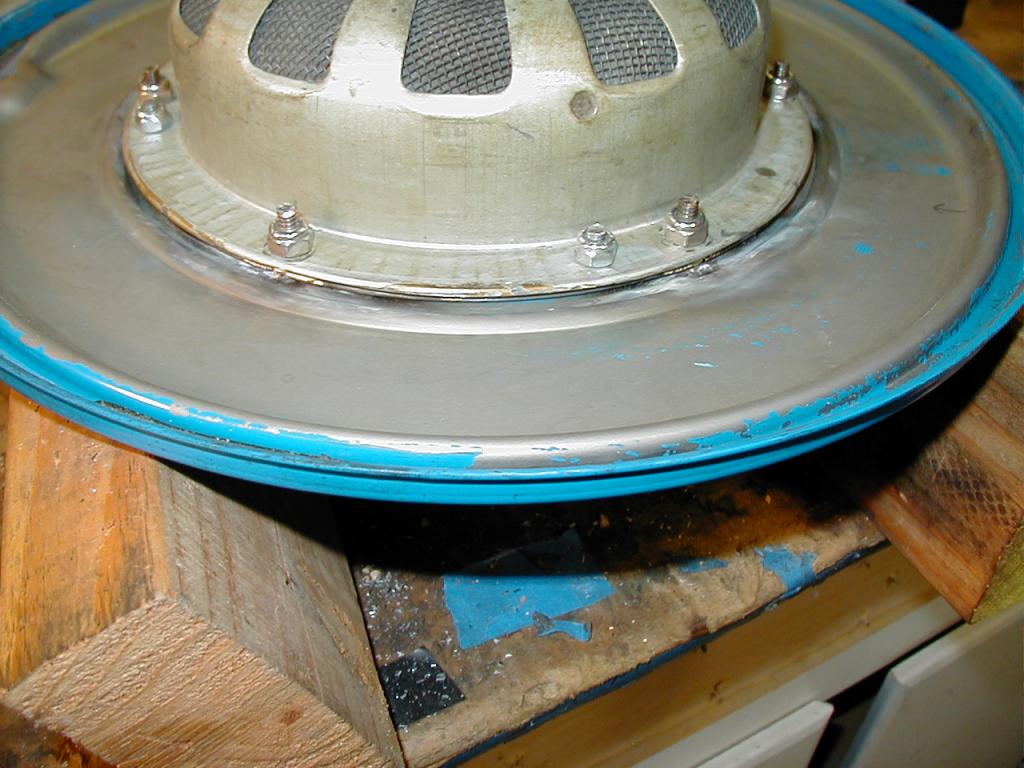
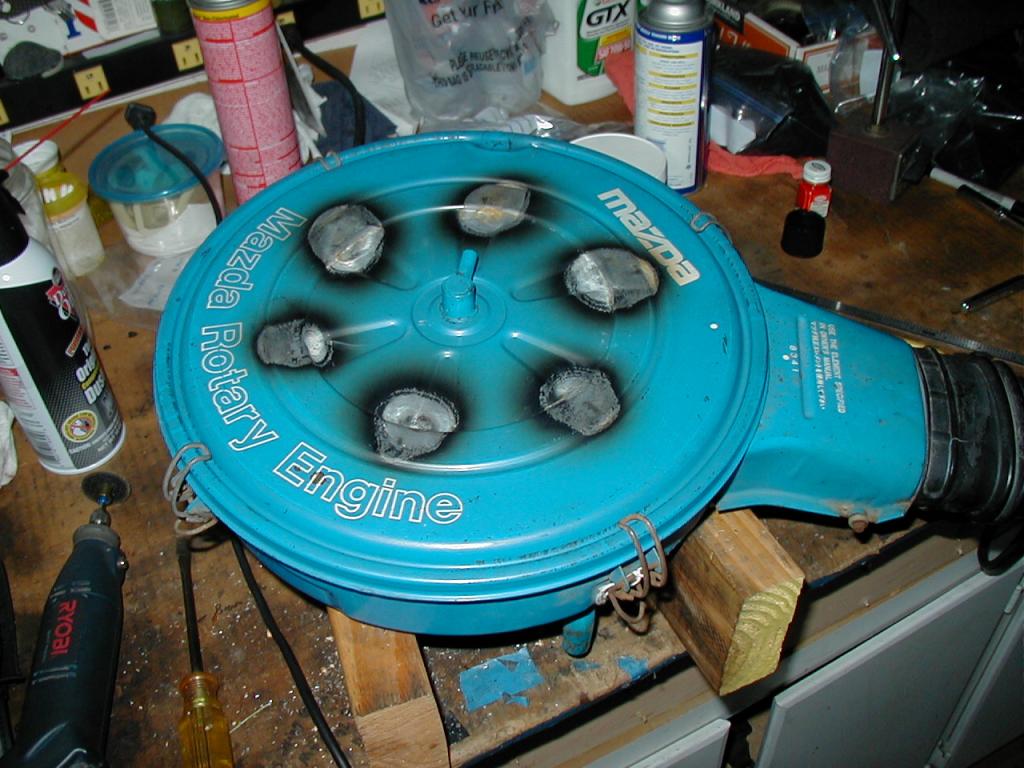
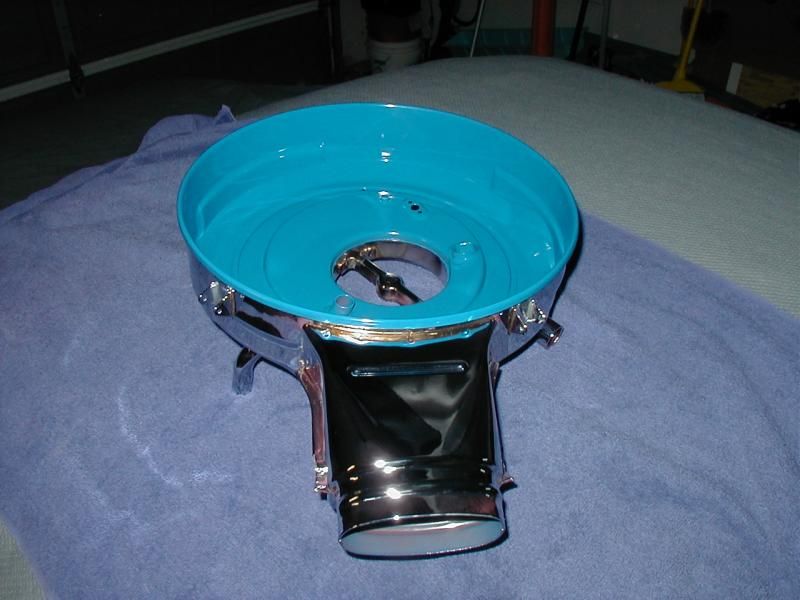
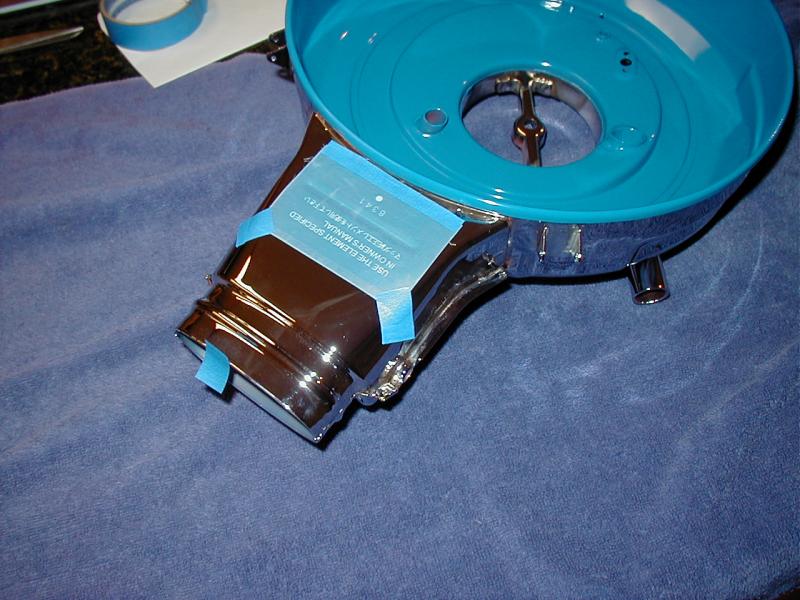
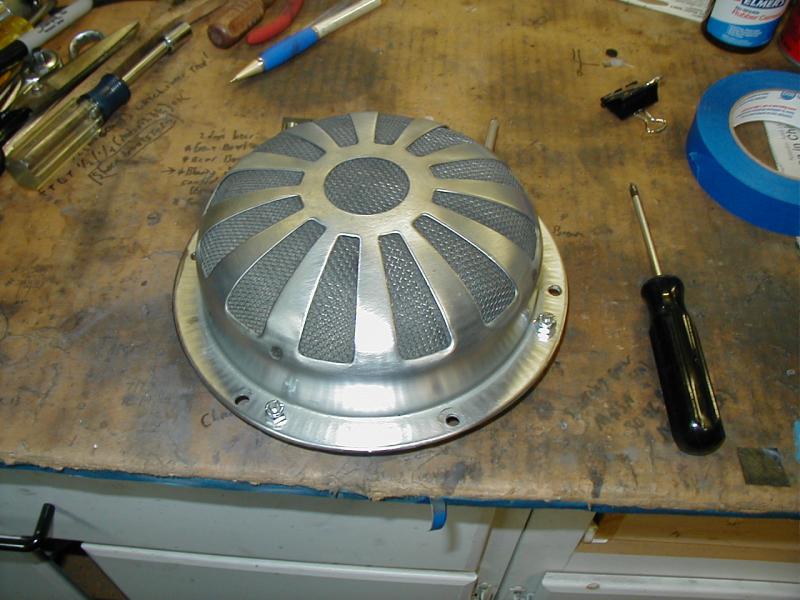
So, here's a garden-variety SA a/c lid (with the rubber and felt gasket rings already peeled off):

As noted before, the odd things about its construction are:
1) that the pattern of 12 spot-weld dimples visible on the outside of the lid don't match with the 8 spot-weld dimples on the inside.
2) the dimples on the outside of the lid are under the paint; the inside assembly sits on TOP of the paint - - you can clearly see paint (and sealant) underneath the overhanging edges of the lip.
So, I decided that the first move in attempting to disassemble this thing was to drill out a couple of the inside spot welds and see if I got any slack or movement. I was hoping to avoid having to drill all the way through the outside lid surface if I could, for aesthetic reasons.
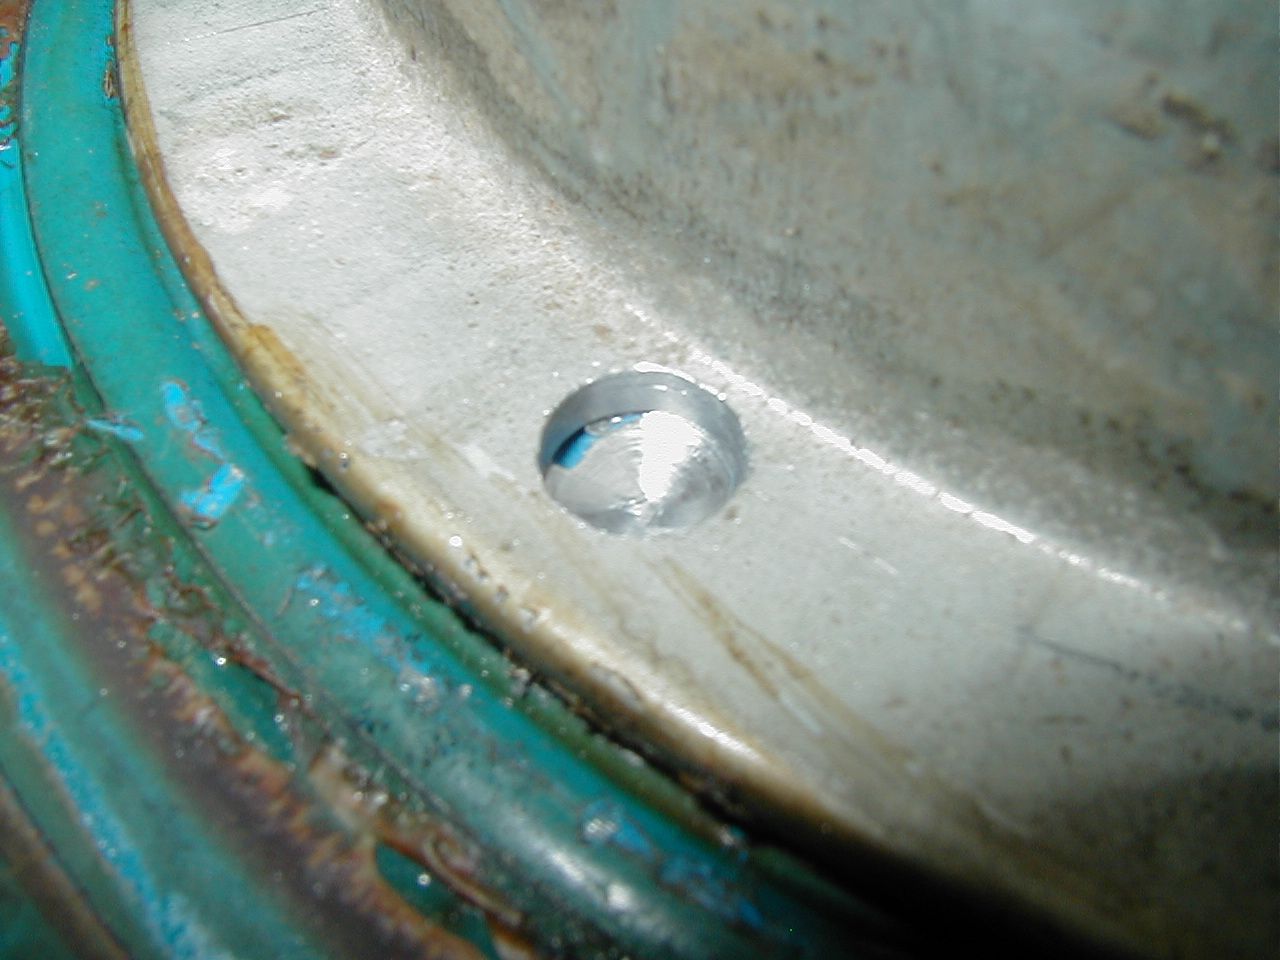
When I hit that tiny void that shows blue paint, I thought I was on the right track... but drilling out several more of the welds did not free the lid at all. Hrm? Clearly more to the construction here than first appears.
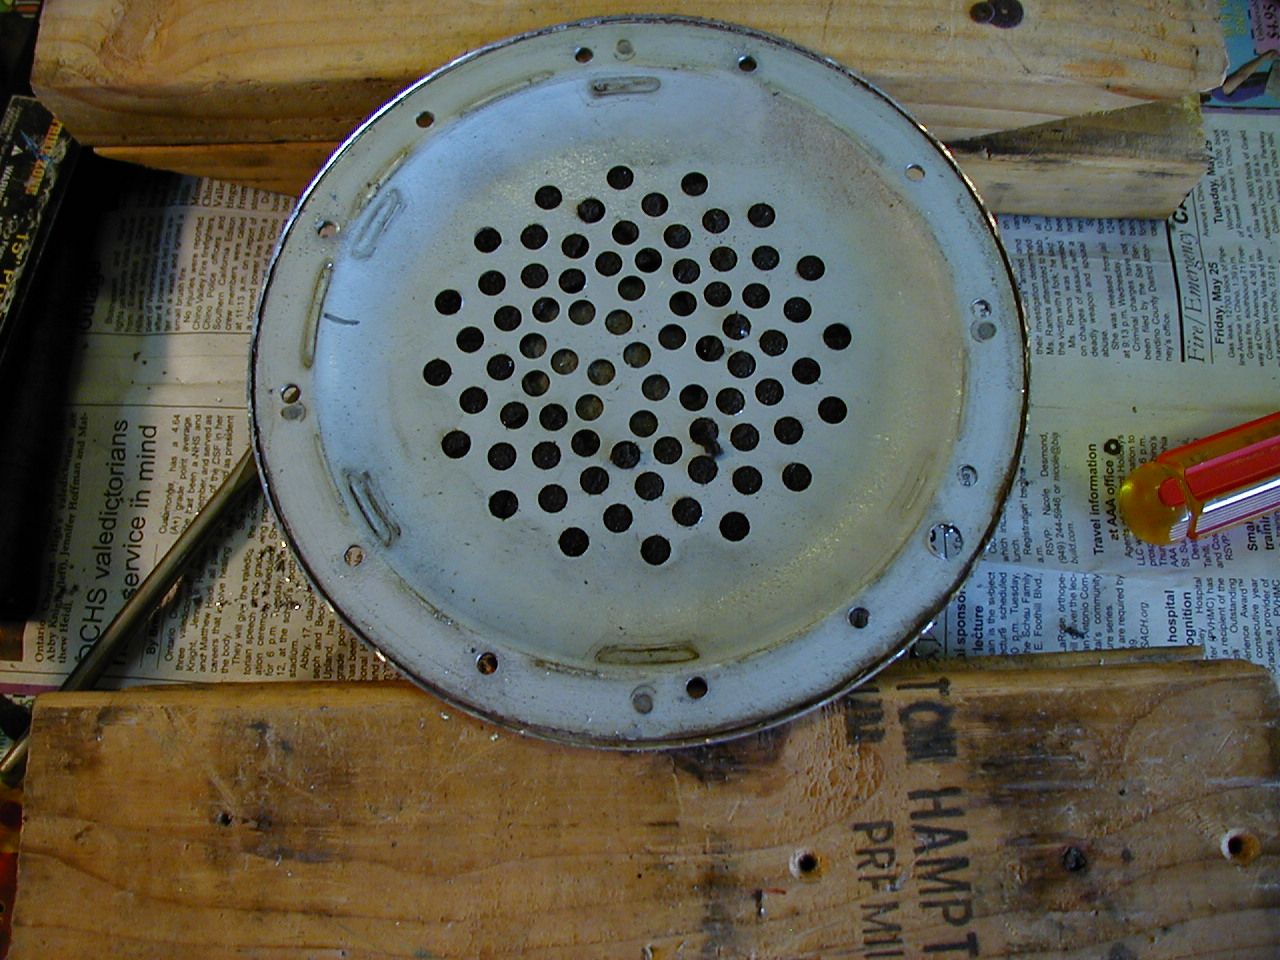
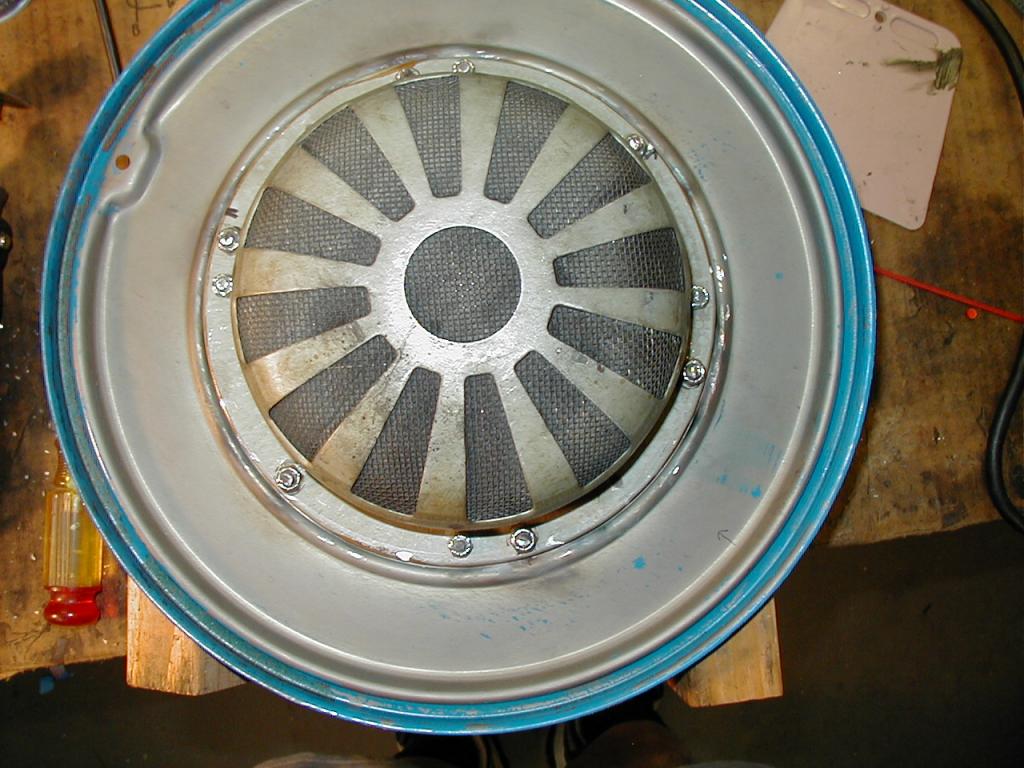
So, I figured there was nothing for it but to drill out all 12 of the exterior-visible spots, which I did with a 3/16" bit, going all the way through as I expect to use 3/16" dia. countersunk studs brazed in the holes to reassemble the thing.
The welds are not exactly evenly spaced or on a perfect circle, which means these units were not robotically assembled - - hand-welded, most likely, using a jig.

While doing this, I also noticed that the exterior spot welds are closer to the center of the lid than are thie interior ones. Which made sense when I saw things apart, later.
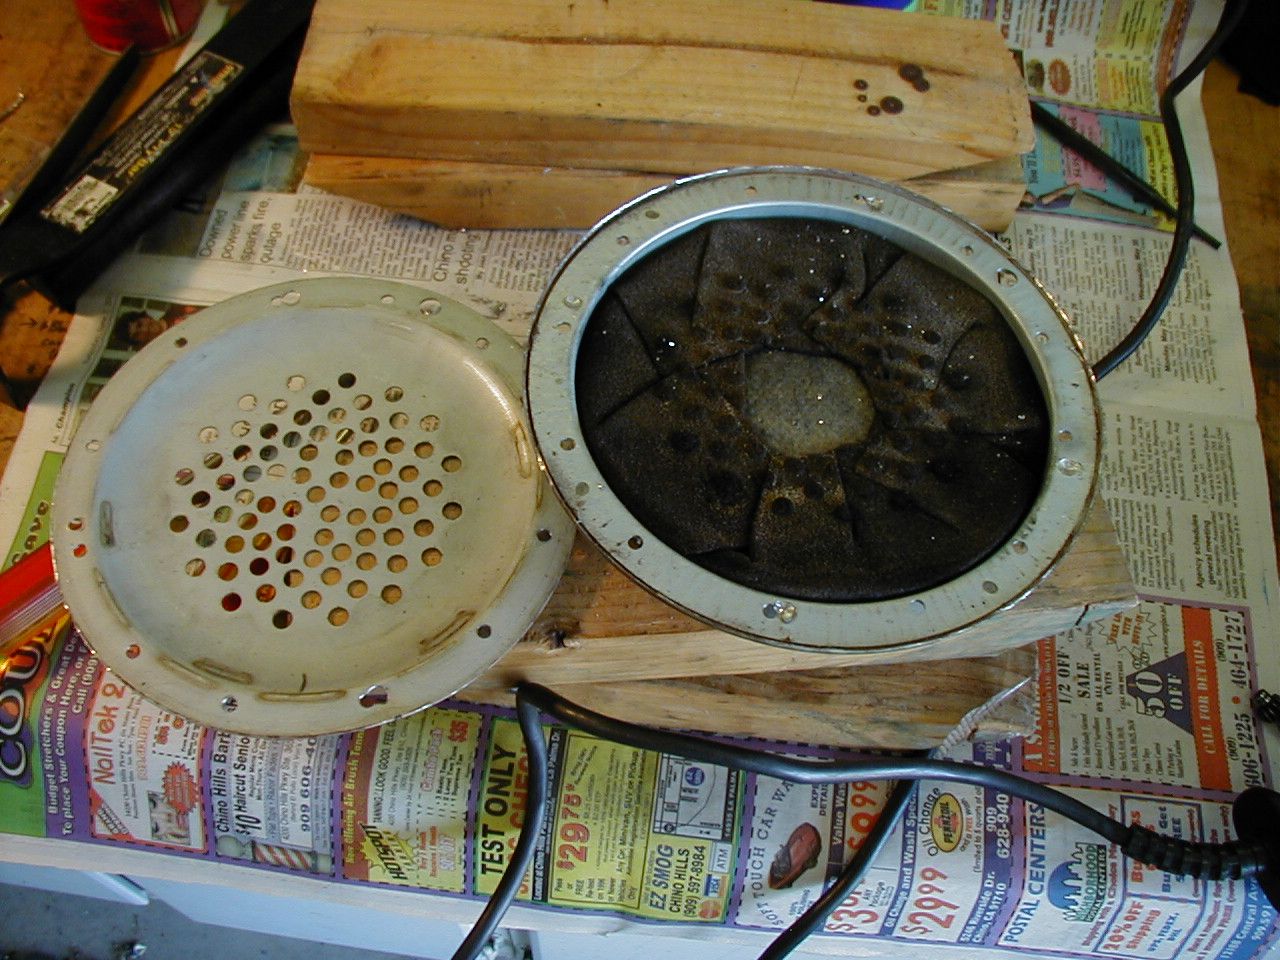
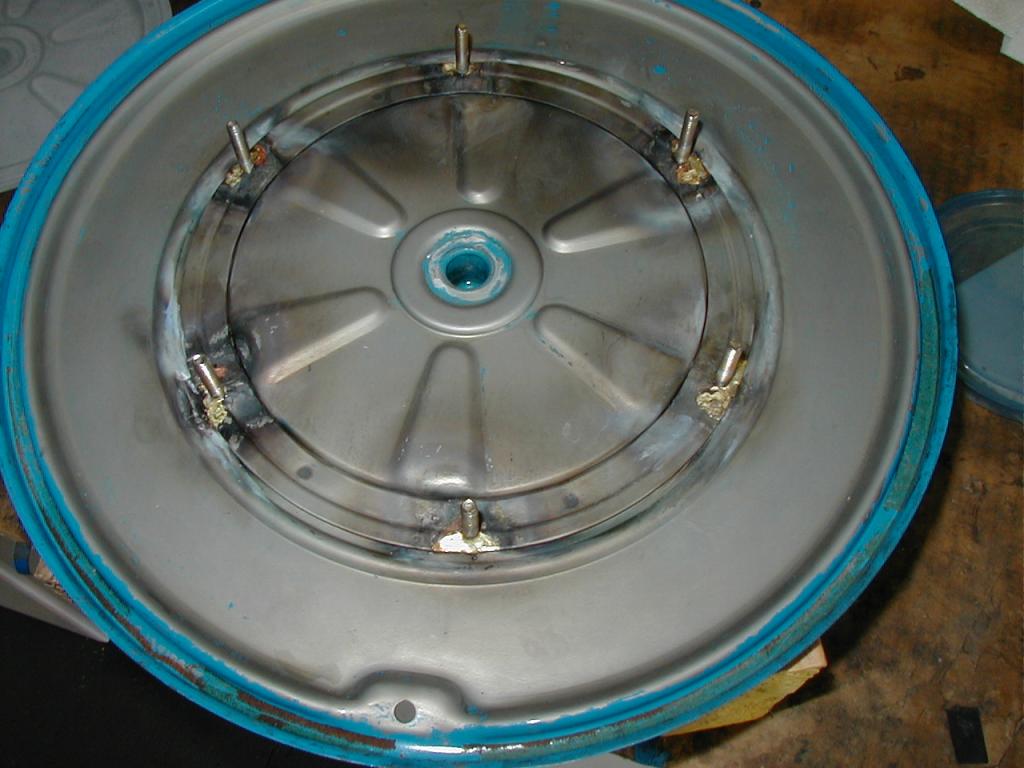
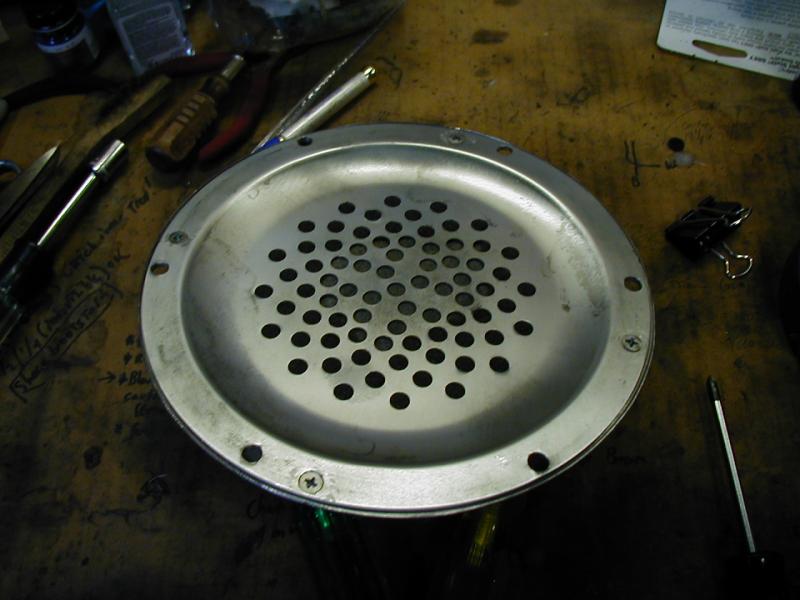
Drilling out the 12 exterior welds freed the canister assembly from the lid:
...at which point a few things became apparent.
First, the blue ring was spot-welded to the lid before painting, and then the canister assembly was artfully crimped under the blue ring's flange by a machine that probably looked like the world's biggest snap-setting tool. Quite a feat, since the rim was crimped under for about a quarter inch, yet the paint was unharmed!
Second, there's no way to manually uncrimp that and ever hope to reassemble the unit after replacing the carbon, so I'd have to cut off the crimped part while leaving a downturned rim to hold everything centered on reassembly.
Third, the blue ring is NOT spot-welded to the canister assembly... which means that the perforated 'lid' must be welded to the canister.
Fourth, Mazda REALLY didn't want these coming apart. Ever. Built like a tank - - possibly to ensure survival if a backfire came up through the carb. Or maybe it was more fun to make something that would probably outlast civilization, as a disposable part.
So, I set to dremelling the flange off the rim.

Nine red cut-off wheels later:
Here we can at last see the spot-welds that hold the canister lid on. There are only 4 on the top side, and 8 on the bottom... which means the bottom is two separate pieces of metal.
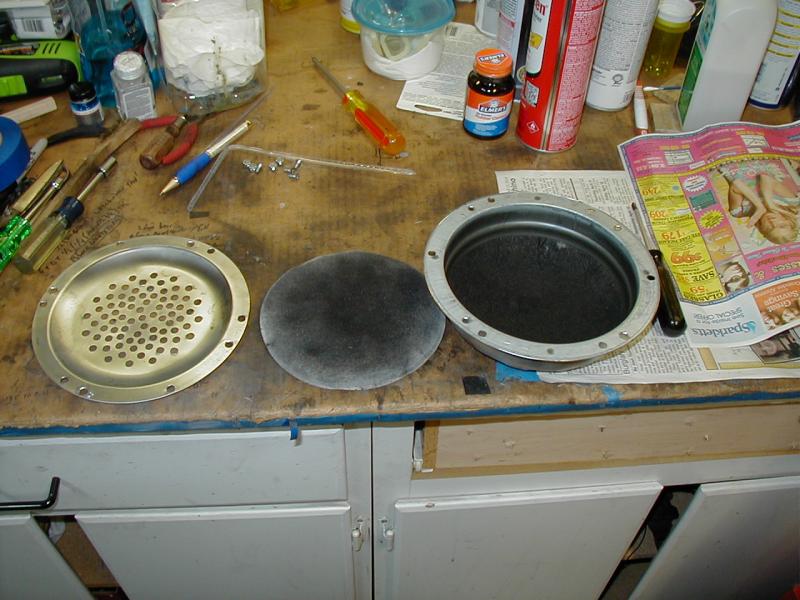
Drill those 4 out (from the inside, to try to minimize further mangling of the remaining flange) and we at last get to:
What looks like a folded layer of 2mm open-cell foam element, with a fiber or paper filter in the center.
I tried turning the can over to see if the foam envelope goes all the way around, and would just come out withe carbon still inside.
I was partly right; the foam does go all the way around... but at it's age, it no longer had the strength to hold the carbon material inside.
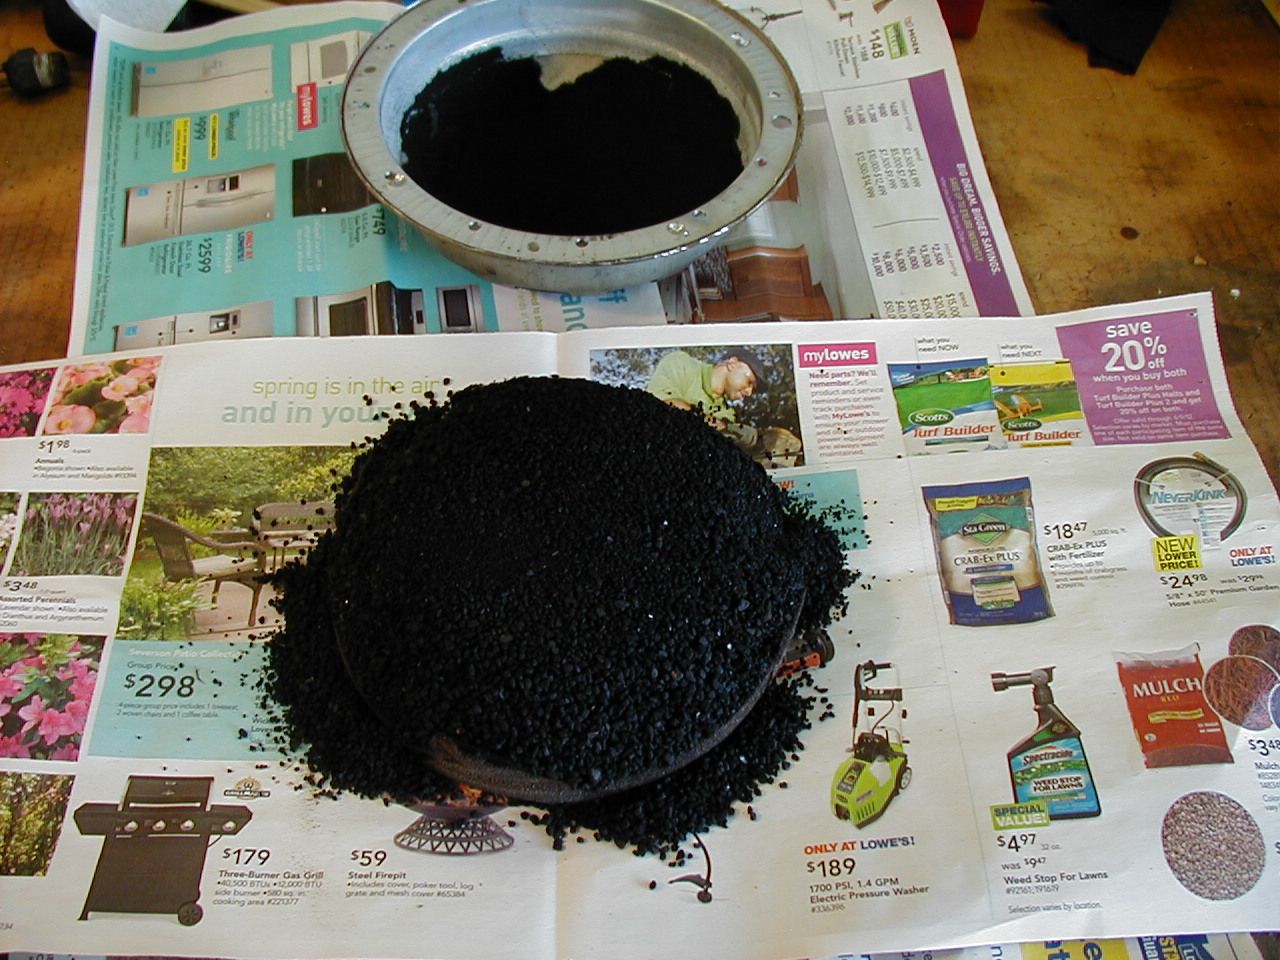
Here at long last is the magic eco-dirt that sops up gas vapors until vacuum pulls them back out. Looks like somebody's day-old coffee filter.
Up close:
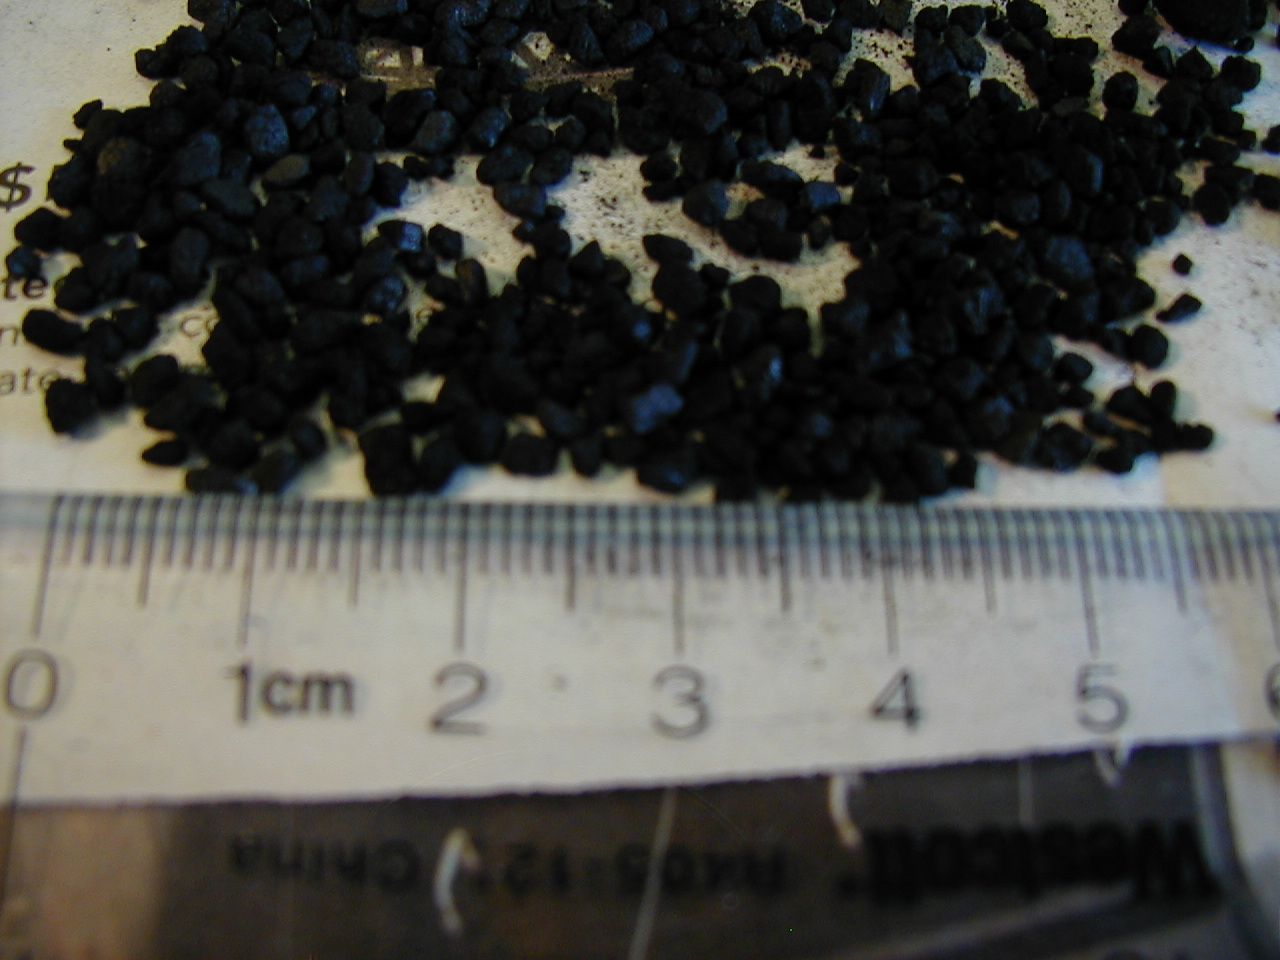
Finer-grained than I remember aquarium-carbon to be. Quite strong, too; it looks like it would crush easily but it does not. A good percentage of the outside layer, though, was pulverized dust trapped in the filter elements - - which is probably what 'clogs' them with age, preventing adequate vapor flow for absorption in the grains.
The actual construction of the element is this:
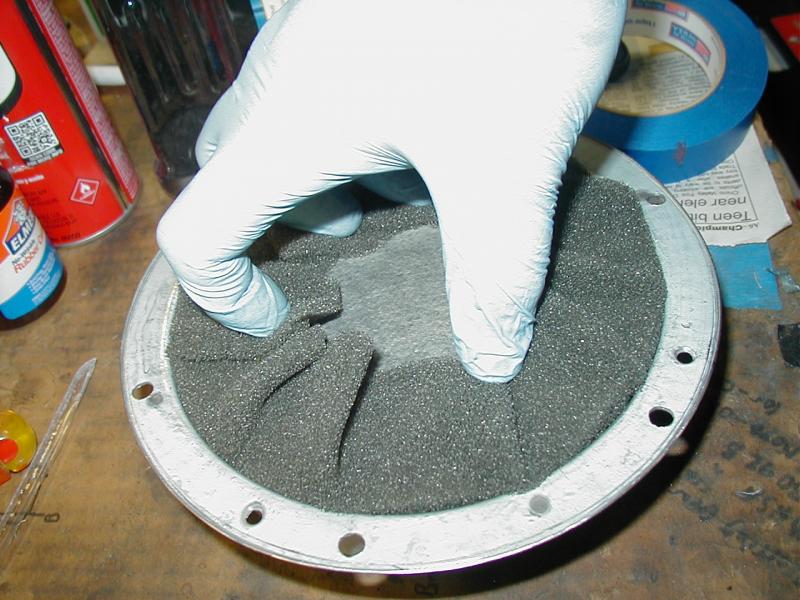
The bottom 'can' is made of two pieces of formed sheet metal, and clamped between them is an exterior wire screen, and an interior fiber filter element. The two pieces of sheet metal are spot-weded four times up top on the flange.
A 2mm thick (uncompressed) sheet open-cell foam filter element is placed inside this cup-shaped can, and a measured amount of granular activated carbon is poured in. The granules look to have started out at 2-5mm in largest dimension, and seem to have been tamped down pretty firmly. Even with the amount of dust that had been created with age, there was not much motion in the canister when shaken.
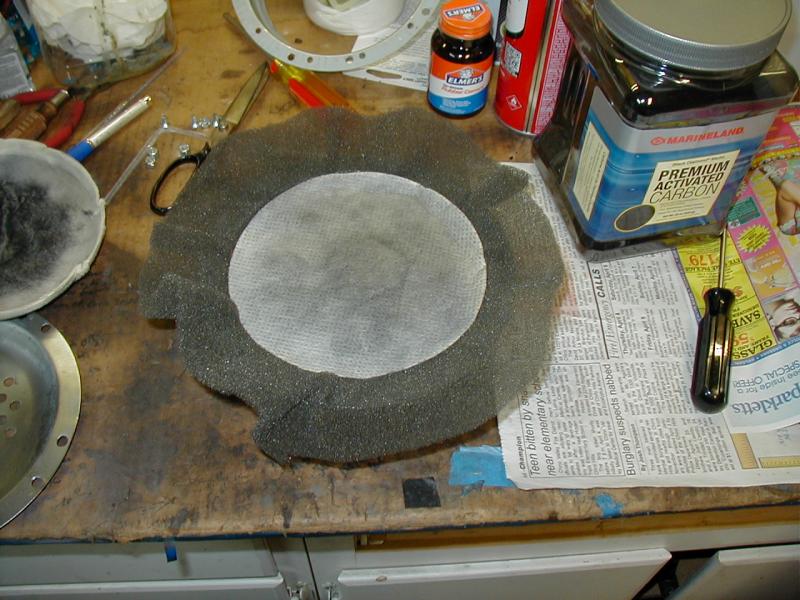
A circular paper/fiber filter element is placed on top the carbon,...

... and the margins of the foam are folded over it, in a neat pleated fashion. A center space of about 1.5 inches diameter is kept clear of foam, to expose the filter directly to the vapor fitting on top the a/c lid.

The canister lid is then placed on top, and spot-welded around the circumference of the can's flange 4 times.
This assembly was then die-crimped under another flange which had been spot-welded to the inside of the lid prior to painting.
So, what do I need to do to 'rejuvenate' this thing and make it work as good as new to minimize my flooding issues, while still looking nice and passing smog muster?
I think the plan goes something like this:
1) locate proper quantity of vapor-phase activated charcoal of this grain size, and also a couple square feet of fuel-proof open-cell foam filter element of 2mm thickness and with a cell size of about 1mm or so.
2) blow all the carbon dust out of the fiber filter elements with compressed air. They look to be in fine shape, they just have a lot of dust in them. replacingn them exactly would be about impossible, and the bottom one is not removable in any case.
3) strip all paint from the outer a/c lid
4) countersink the 12 holes in the lid and braze in 3/16" CS hardware of appropriate length. Smooth the upper surface. Paint or otherwise beautify the lid.
5) reassemble the unit using fuel-safe RTV to achieve a good seal, and using Nylok or other self-securing nuts to prevent any from ever falling off - - as they'd go straight down the carb!
6) Victory.
So, now it's on to step one.
... and on the third day of his vacation, DivinDriver said, "let there be garage time, or I'm gonna have a conniption!"
...and there was garage time. And it was good - right up to the point where I ripped a 2" gouge in my right palm with a screwdriver. After that, not quite as good.
But I digress.
So, here's a garden-variety SA a/c lid (with the rubber and felt gasket rings already peeled off):
As noted before, the odd things about its construction are:
1) that the pattern of 12 spot-weld dimples visible on the outside of the lid don't match with the 8 spot-weld dimples on the inside.
2) the dimples on the outside of the lid are under the paint; the inside assembly sits on TOP of the paint - - you can clearly see paint (and sealant) underneath the overhanging edges of the lip.
So, I decided that the first move in attempting to disassemble this thing was to drill out a couple of the inside spot welds and see if I got any slack or movement. I was hoping to avoid having to drill all the way through the outside lid surface if I could, for aesthetic reasons.
When I hit that tiny void that shows blue paint, I thought I was on the right track... but drilling out several more of the welds did not free the lid at all. Hrm? Clearly more to the construction here than first appears.
So, I figured there was nothing for it but to drill out all 12 of the exterior-visible spots, which I did with a 3/16" bit, going all the way through as I expect to use 3/16" dia. countersunk studs brazed in the holes to reassemble the thing.
The welds are not exactly evenly spaced or on a perfect circle, which means these units were not robotically assembled - - hand-welded, most likely, using a jig.
While doing this, I also noticed that the exterior spot welds are closer to the center of the lid than are thie interior ones. Which made sense when I saw things apart, later.
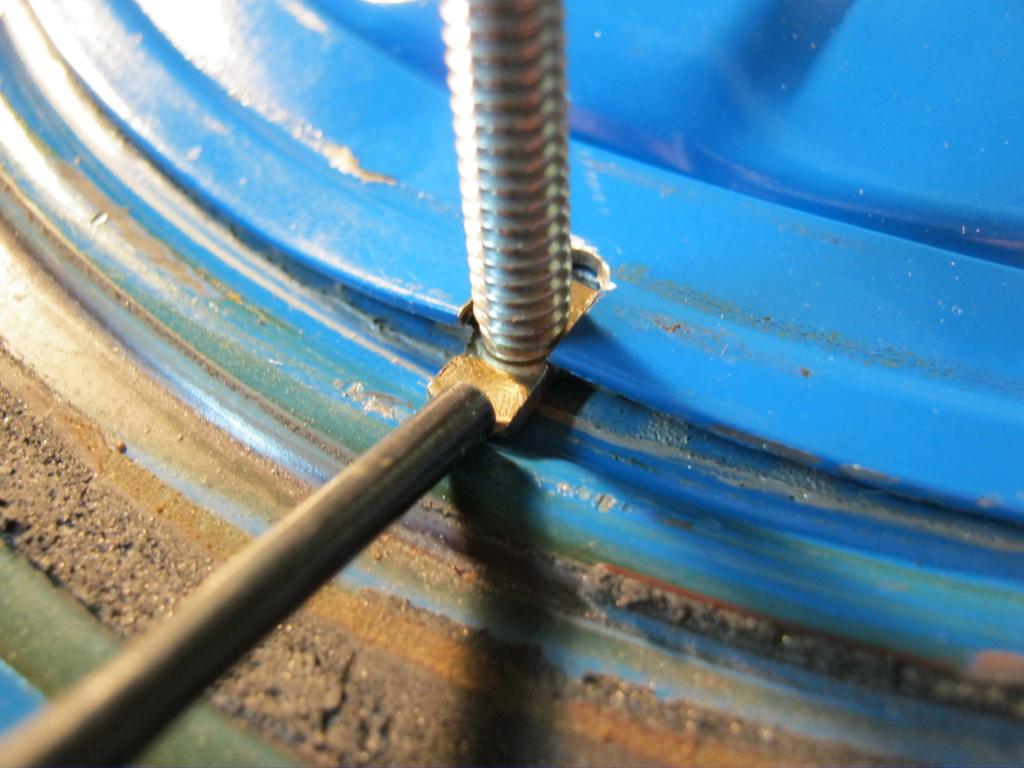
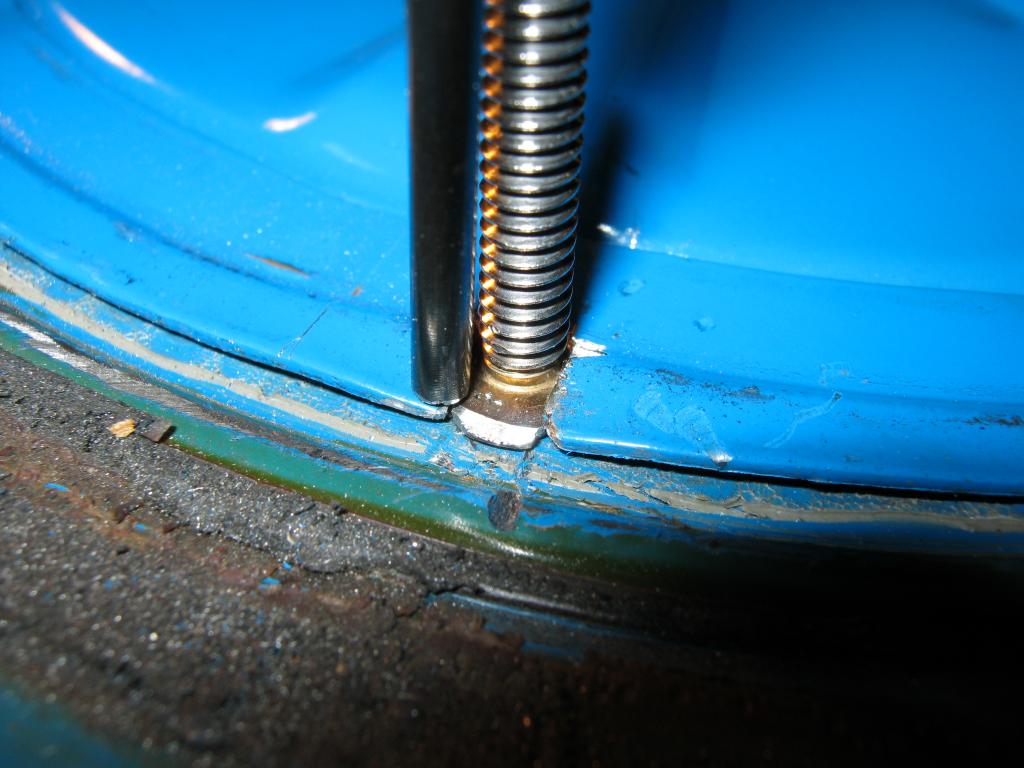
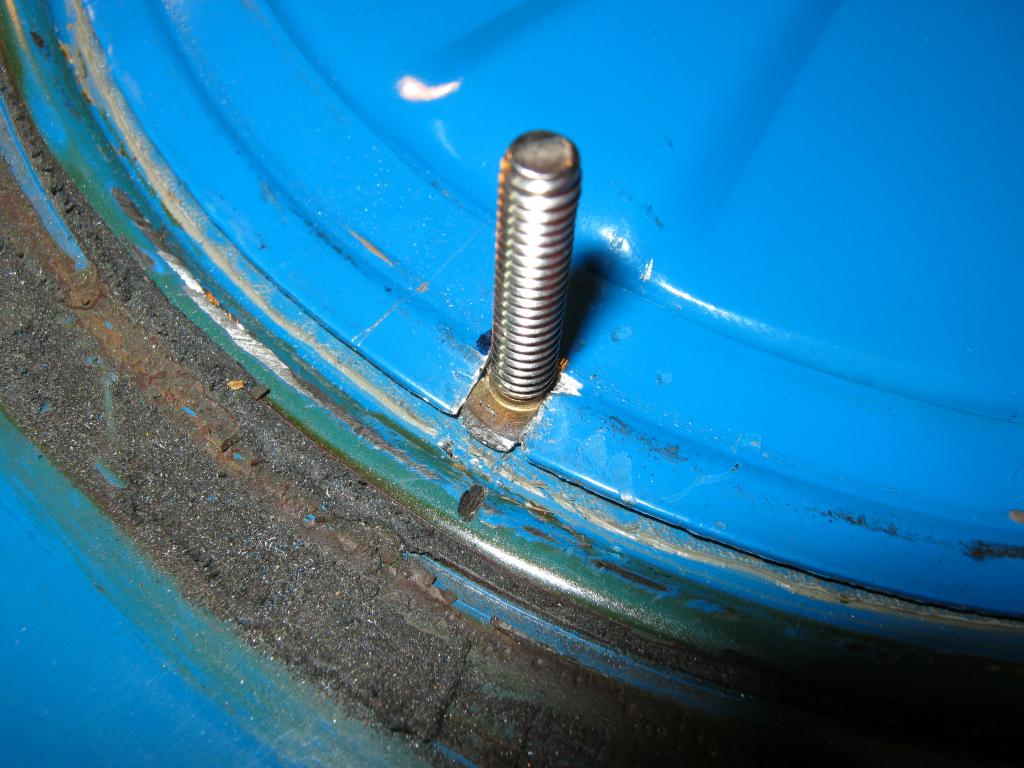
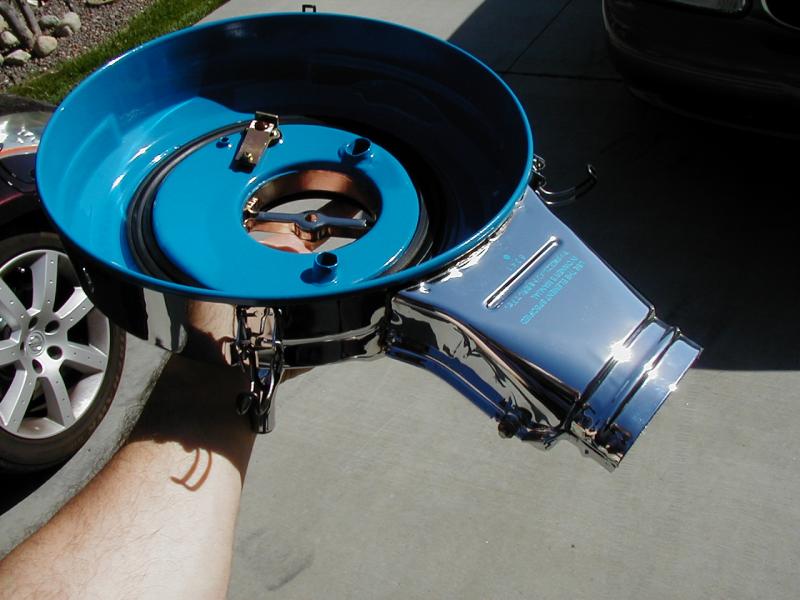
Drilling out the 12 exterior welds freed the canister assembly from the lid:
...at which point a few things became apparent.
First, the blue ring was spot-welded to the lid before painting, and then the canister assembly was artfully crimped under the blue ring's flange by a machine that probably looked like the world's biggest snap-setting tool. Quite a feat, since the rim was crimped under for about a quarter inch, yet the paint was unharmed!
Second, there's no way to manually uncrimp that and ever hope to reassemble the unit after replacing the carbon, so I'd have to cut off the crimped part while leaving a downturned rim to hold everything centered on reassembly.
Third, the blue ring is NOT spot-welded to the canister assembly... which means that the perforated 'lid' must be welded to the canister.
Fourth, Mazda REALLY didn't want these coming apart. Ever. Built like a tank - - possibly to ensure survival if a backfire came up through the carb. Or maybe it was more fun to make something that would probably outlast civilization, as a disposable part.
So, I set to dremelling the flange off the rim.
Nine red cut-off wheels later:
Here we can at last see the spot-welds that hold the canister lid on. There are only 4 on the top side, and 8 on the bottom... which means the bottom is two separate pieces of metal.
Drill those 4 out (from the inside, to try to minimize further mangling of the remaining flange) and we at last get to:
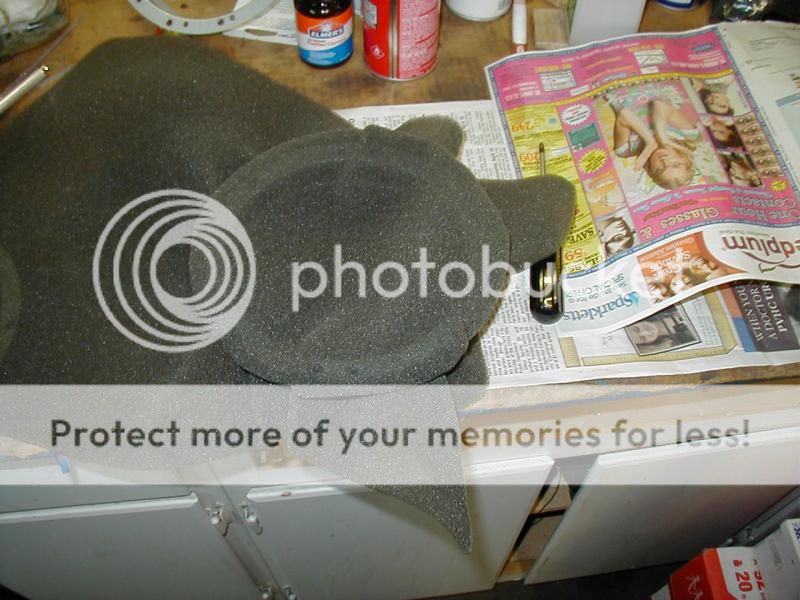
What looks like a folded layer of 2mm open-cell foam element, with a fiber or paper filter in the center.
I tried turning the can over to see if the foam envelope goes all the way around, and would just come out withe carbon still inside.
I was partly right; the foam does go all the way around... but at it's age, it no longer had the strength to hold the carbon material inside.
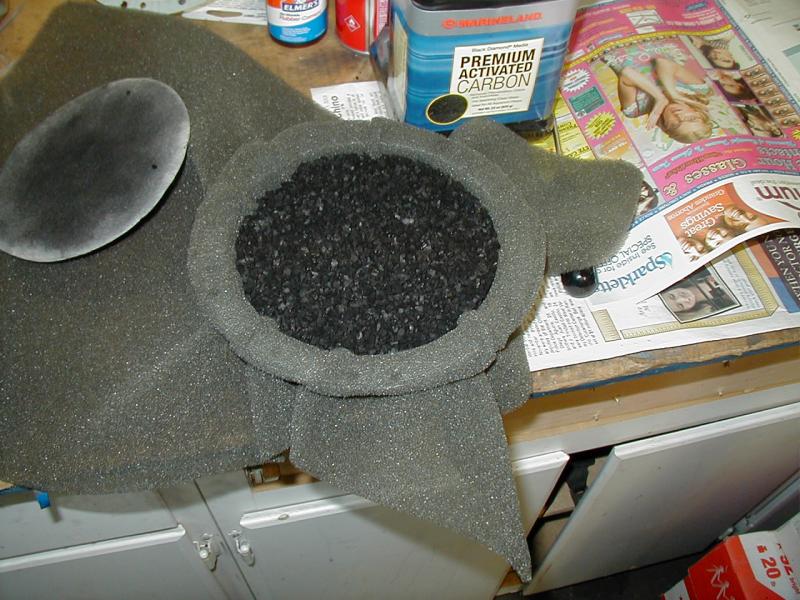
Here at long last is the magic eco-dirt that sops up gas vapors until vacuum pulls them back out. Looks like somebody's day-old coffee filter.
Up close:
Finer-grained than I remember aquarium-carbon to be. Quite strong, too; it looks like it would crush easily but it does not. A good percentage of the outside layer, though, was pulverized dust trapped in the filter elements - - which is probably what 'clogs' them with age, preventing adequate vapor flow for absorption in the grains.
The actual construction of the element is this:
The bottom 'can' is made of two pieces of formed sheet metal, and clamped between them is an exterior wire screen, and an interior fiber filter element. The two pieces of sheet metal are spot-weded four times up top on the flange.
A 2mm thick (uncompressed) sheet open-cell foam filter element is placed inside this cup-shaped can, and a measured amount of granular activated carbon is poured in. The granules look to have started out at 2-5mm in largest dimension, and seem to have been tamped down pretty firmly. Even with the amount of dust that had been created with age, there was not much motion in the canister when shaken.
A circular paper/fiber filter element is placed on top the carbon,...
... and the margins of the foam are folded over it, in a neat pleated fashion. A center space of about 1.5 inches diameter is kept clear of foam, to expose the filter directly to the vapor fitting on top the a/c lid.
The canister lid is then placed on top, and spot-welded around the circumference of the can's flange 4 times.
This assembly was then die-crimped under another flange which had been spot-welded to the inside of the lid prior to painting.
So, what do I need to do to 'rejuvenate' this thing and make it work as good as new to minimize my flooding issues, while still looking nice and passing smog muster?
I think the plan goes something like this:
1) locate proper quantity of vapor-phase activated charcoal of this grain size, and also a couple square feet of fuel-proof open-cell foam filter element of 2mm thickness and with a cell size of about 1mm or so.
2) blow all the carbon dust out of the fiber filter elements with compressed air. They look to be in fine shape, they just have a lot of dust in them. replacingn them exactly would be about impossible, and the bottom one is not removable in any case.
3) strip all paint from the outer a/c lid
4) countersink the 12 holes in the lid and braze in 3/16" CS hardware of appropriate length. Smooth the upper surface. Paint or otherwise beautify the lid.
5) reassemble the unit using fuel-safe RTV to achieve a good seal, and using Nylok or other self-securing nuts to prevent any from ever falling off - - as they'd go straight down the carb!
6) Victory.
So, now it's on to step one.

The following users liked this post:
Maxwedge (03-19-21)
07-06-12, 10:13 PM
#552
When you paint the air cleaner get some "Ford Blue" dupli color engine paint. It is rediculously close to the original air cleaner color. It is a perfect match. I have painted just the lid on an air cleaner before, and you couldn't tell that I hadn't painted the bottom of the air cleaner to match it.
07-07-12, 11:52 AM
#553
Moderator
iTrader: (3)
Join Date: Mar 2001
Location: https://www2.mazda.com/en/100th/
Posts: 30,826
Received 2,594 Likes
on
1,842 Posts
Day 1347
... and on the third day of his vacation, DivinDriver said, "let there be garage time, or I'm gonna have a conniption!"
...and there was garage time. And it was good - right up to the point where I ripped a 2" gouge in my right palm with a screwdriver. After that, not quite as good.
But I digress.
So, here's a garden-variety SA a/c lid (with the rubber and felt gasket rings already peeled off):
As noted before, the odd things about its construction are:
1) that the pattern of 12 spot-weld dimples visible on the outside of the lid don't match with the 8 spot-weld dimples on the inside.
2) the dimples on the outside of the lid are under the paint; the inside assembly sits on TOP of the paint - - you can clearly see paint (and sealant) underneath the overhanging edges of the lip.
So, I decided that the first move in attempting to disassemble this thing was to drill out a couple of the inside spot welds and see if I got any slack or movement. I was hoping to avoid having to drill all the way through the outside lid surface if I could, for aesthetic reasons.
When I hit that tiny void that shows blue paint, I thought I was on the right track... but drilling out several more of the welds did not free the lid at all. Hrm? Clearly more to the construction here than first appears.
So, I figured there was nothing for it but to drill out all 12 of the exterior-visible spots, which I did with a 3/16" bit, going all the way through as I expect to use 3/16" dia. countersunk studs brazed in the holes to reassemble the thing.
The welds are not exactly evenly spaced or on a perfect circle, which means these units were not robotically assembled - - hand-welded, most likely, using a jig.
While doing this, I also noticed that the exterior spot welds are closer to the center of the lid than are thie interior ones. Which made sense when I saw things apart, later.
Drilling out the 12 exterior welds freed the canister assembly from the lid:
...at which point a few things became apparent.
First, the blue ring was spot-welded to the lid before painting, and then the canister assembly was artfully crimped under the blue ring's flange by a machine that probably looked like the world's biggest snap-setting tool. Quite a feat, since the rim was crimped under for about a quarter inch, yet the paint was unharmed!
Second, there's no way to manually uncrimp that and ever hope to reassemble the unit after replacing the carbon, so I'd have to cut off the crimped part while leaving a downturned rim to hold everything centered on reassembly.
Third, the blue ring is NOT spot-welded to the canister assembly... which means that the perforated 'lid' must be welded to the canister.
Fourth, Mazda REALLY didn't want these coming apart. Ever. Built like a tank - - possibly to ensure survival if a backfire came up through the carb. Or maybe it was more fun to make something that would probably outlast civilization, as a disposable part.
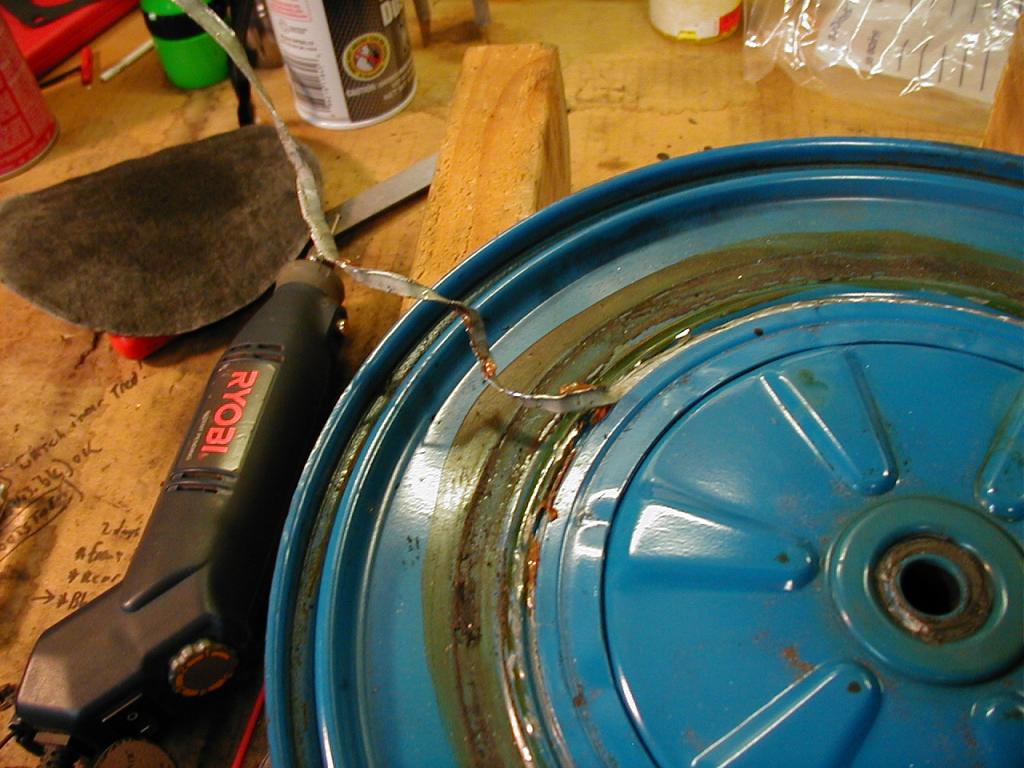
So, I set to dremelling the flange off the rim.
Nine red cut-off wheels later:
Here we can at last see the spot-welds that hold the canister lid on. There are only 4 on the top side, and 8 on the bottom... which means the bottom is two separate pieces of metal.
Drill those 4 out (from the inside, to try to minimize further mangling of the remaining flange) and we at last get to:
What looks like a folded layer of 2mm open-cell foam element, with a fiber or paper filter in the center.
I tried turning the can over to see if the foam envelope goes all the way around, and would just come out withe carbon still inside.
I was partly right; the foam does go all the way around... but at it's age, it no longer had the strength to hold the carbon material inside.
Here at long last is the magic eco-dirt that sops up gas vapors until vacuum pulls them back out. Looks like somebody's day-old coffee filter.
Up close:
Finer-grained than I remember aquarium-carbon to be. Quite strong, too; it looks like it would crush easily but it does not. A good percentage of the outside layer, though, was pulverized dust trapped in the filter elements - - which is probably what 'clogs' them with age, preventing adequate vapor flow for absorption in the grains.
The actual construction of the element is this:
The bottom 'can' is made of two pieces of formed sheet metal, and clamped between them is an exterior wire screen, and an interior fiber filter element. The two pieces of sheet metal are spot-weded four times up top on the flange.
A 2mm thick (uncompressed) sheet open-cell foam filter element is placed inside this cup-shaped can, and a measured amount of granular activated carbon is poured in. The granules look to have started out at 2-5mm in largest dimension, and seem to have been tamped down pretty firmly. Even with the amount of dust that had been created with age, there was not much motion in the canister when shaken.
A circular paper/fiber filter element is placed on top the carbon,...
... and the margins of the foam are folded over it, in a neat pleated fashion. A center space of about 1.5 inches diameter is kept clear of foam, to expose the filter directly to the vapor fitting on top the a/c lid.
The canister lid is then placed on top, and spot-welded around the circumference of the can's flange 4 times.
This assembly was then die-crimped under another flange which had been spot-welded to the inside of the lid prior to painting.
So, what do I need to do to 'rejuvenate' this thing and make it work as good as new to minimize my flooding issues, while still looking nice and passing smog muster?
I think the plan goes something like this:
1) locate proper quantity of vapor-phase activated charcoal of this grain size, and also a couple square feet of fuel-proof open-cell foam filter element of 2mm thickness and with a cell size of about 1mm or so.
2) blow all the carbon dust out of the fiber filter elements with compressed air. They look to be in fine shape, they just have a lot of dust in them. replacingn them exactly would be about impossible, and the bottom one is not removable in any case.
3) strip all paint from the outer a/c lid
4) countersink the 12 holes in the lid and braze in 3/16" CS hardware of appropriate length. Smooth the upper surface. Paint or otherwise beautify the lid.
5) reassemble the unit using fuel-safe RTV to achieve a good seal, and using Nylok or other self-securing nuts to prevent any from ever falling off - - as they'd go straight down the carb!
6) Victory.
So, now it's on to step one.
... and on the third day of his vacation, DivinDriver said, "let there be garage time, or I'm gonna have a conniption!"
...and there was garage time. And it was good - right up to the point where I ripped a 2" gouge in my right palm with a screwdriver. After that, not quite as good.
But I digress.
So, here's a garden-variety SA a/c lid (with the rubber and felt gasket rings already peeled off):
As noted before, the odd things about its construction are:
1) that the pattern of 12 spot-weld dimples visible on the outside of the lid don't match with the 8 spot-weld dimples on the inside.
2) the dimples on the outside of the lid are under the paint; the inside assembly sits on TOP of the paint - - you can clearly see paint (and sealant) underneath the overhanging edges of the lip.
So, I decided that the first move in attempting to disassemble this thing was to drill out a couple of the inside spot welds and see if I got any slack or movement. I was hoping to avoid having to drill all the way through the outside lid surface if I could, for aesthetic reasons.
When I hit that tiny void that shows blue paint, I thought I was on the right track... but drilling out several more of the welds did not free the lid at all. Hrm? Clearly more to the construction here than first appears.
So, I figured there was nothing for it but to drill out all 12 of the exterior-visible spots, which I did with a 3/16" bit, going all the way through as I expect to use 3/16" dia. countersunk studs brazed in the holes to reassemble the thing.
The welds are not exactly evenly spaced or on a perfect circle, which means these units were not robotically assembled - - hand-welded, most likely, using a jig.
While doing this, I also noticed that the exterior spot welds are closer to the center of the lid than are thie interior ones. Which made sense when I saw things apart, later.
Drilling out the 12 exterior welds freed the canister assembly from the lid:
...at which point a few things became apparent.
First, the blue ring was spot-welded to the lid before painting, and then the canister assembly was artfully crimped under the blue ring's flange by a machine that probably looked like the world's biggest snap-setting tool. Quite a feat, since the rim was crimped under for about a quarter inch, yet the paint was unharmed!
Second, there's no way to manually uncrimp that and ever hope to reassemble the unit after replacing the carbon, so I'd have to cut off the crimped part while leaving a downturned rim to hold everything centered on reassembly.
Third, the blue ring is NOT spot-welded to the canister assembly... which means that the perforated 'lid' must be welded to the canister.
Fourth, Mazda REALLY didn't want these coming apart. Ever. Built like a tank - - possibly to ensure survival if a backfire came up through the carb. Or maybe it was more fun to make something that would probably outlast civilization, as a disposable part.
So, I set to dremelling the flange off the rim.
Nine red cut-off wheels later:
Here we can at last see the spot-welds that hold the canister lid on. There are only 4 on the top side, and 8 on the bottom... which means the bottom is two separate pieces of metal.
Drill those 4 out (from the inside, to try to minimize further mangling of the remaining flange) and we at last get to:
What looks like a folded layer of 2mm open-cell foam element, with a fiber or paper filter in the center.
I tried turning the can over to see if the foam envelope goes all the way around, and would just come out withe carbon still inside.
I was partly right; the foam does go all the way around... but at it's age, it no longer had the strength to hold the carbon material inside.
Here at long last is the magic eco-dirt that sops up gas vapors until vacuum pulls them back out. Looks like somebody's day-old coffee filter.
Up close:
Finer-grained than I remember aquarium-carbon to be. Quite strong, too; it looks like it would crush easily but it does not. A good percentage of the outside layer, though, was pulverized dust trapped in the filter elements - - which is probably what 'clogs' them with age, preventing adequate vapor flow for absorption in the grains.
The actual construction of the element is this:
The bottom 'can' is made of two pieces of formed sheet metal, and clamped between them is an exterior wire screen, and an interior fiber filter element. The two pieces of sheet metal are spot-weded four times up top on the flange.
A 2mm thick (uncompressed) sheet open-cell foam filter element is placed inside this cup-shaped can, and a measured amount of granular activated carbon is poured in. The granules look to have started out at 2-5mm in largest dimension, and seem to have been tamped down pretty firmly. Even with the amount of dust that had been created with age, there was not much motion in the canister when shaken.
A circular paper/fiber filter element is placed on top the carbon,...
... and the margins of the foam are folded over it, in a neat pleated fashion. A center space of about 1.5 inches diameter is kept clear of foam, to expose the filter directly to the vapor fitting on top the a/c lid.
The canister lid is then placed on top, and spot-welded around the circumference of the can's flange 4 times.
This assembly was then die-crimped under another flange which had been spot-welded to the inside of the lid prior to painting.
So, what do I need to do to 'rejuvenate' this thing and make it work as good as new to minimize my flooding issues, while still looking nice and passing smog muster?
I think the plan goes something like this:
1) locate proper quantity of vapor-phase activated charcoal of this grain size, and also a couple square feet of fuel-proof open-cell foam filter element of 2mm thickness and with a cell size of about 1mm or so.
2) blow all the carbon dust out of the fiber filter elements with compressed air. They look to be in fine shape, they just have a lot of dust in them. replacingn them exactly would be about impossible, and the bottom one is not removable in any case.
3) strip all paint from the outer a/c lid
4) countersink the 12 holes in the lid and braze in 3/16" CS hardware of appropriate length. Smooth the upper surface. Paint or otherwise beautify the lid.
5) reassemble the unit using fuel-safe RTV to achieve a good seal, and using Nylok or other self-securing nuts to prevent any from ever falling off - - as they'd go straight down the carb!
6) Victory.
So, now it's on to step one.
i was at the Volvo plant a year ago, and there was a guy with a bucket of springs, a bucket of shocks, and he/she was just assembling them...
and #5, i'd maybe also stake the nut on, or use a really big one. if you notice the air cleaner nut won't fit down the carb, by design.
07-11-12, 10:20 AM
#555
Ended up getting Nyloks, as wire-retained nuts for #10 hardware are rare. I figure a combination of Nyloks and coating the exposed threads with RTV will be adequate to prevent hardware walkoff.
Been in the high 90's outside the last couple days, seriously crimping my project time.
Been in the high 90's outside the last couple days, seriously crimping my project time.
07-11-12, 12:28 PM
#557
True; at least, I hope not.
Now all I need to assemble and test is the foam and the carbon. Hitting a pet store at lunch today for the carbon. The foam I may need to order - having some trouble locating any that is thin enough and still fuel safe.
I'll bolt it all up and try it out before I go to the trouble of stripping paint and brazing the screws in. Have to pony up for a brazing-capable torch, too.
 07-11-12, 03:42 PM
#559
I imagine so. Not gonna fully tool-up for gas welding at this time, though - - no place to keep gas bottles safely at home.
Filter foam: This oughta do the trick:
15 in. x 24 in. x 1/4 in. Foam Room A/C FPR 2 Air Filter-F1524 at The Home Depot
Price is hard to beat, too...
I was hoping to find some closer to 1/8" thick, but it probably doesn't matter much. The old foam that was in there, which appears to have started life around 2-3mm thick, was mashed down to the thickness of tissue paper over the whole bottom of the assembly anyway. If it worries me I can probably fillet it down with a serrated knife.
Large jug of aquarium carbon cost me $20 at PetSmart; looks like the right volume & roughly the same grain size, but feels lighter. It's possible that the old carbon is so clogged up with guck that it has gained weight even as it lost capability to filter.
03-11-13, 12:56 AM
#560
OK, so after finding out how this whole deal goes together, and after ptotato-chipping one lid via overheating it trying to braze it back together, I came up with a different approach for reassembly.
First, instead of drilling out the welds thru the lid, instead I cut the retaining lip off the canister from the inside of the lid.
This left the welded retaining ring and the lid intact, and gave me a canister that only needed four spot-welds drilled out to disassemble and reassemble.
After pulling the left-over scrap of the retaining lip out from under the welded ring, this left the nice retaining ring inside, already welded to the lid, with a raised lip all around the outside edge.
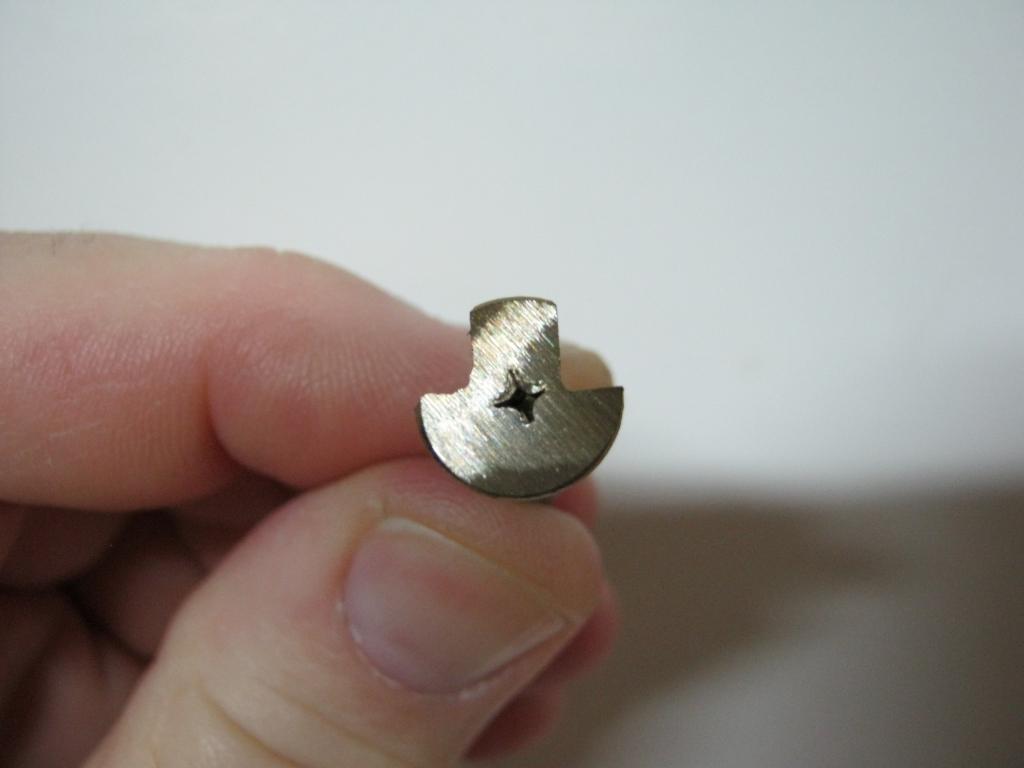
First, I bought a handful of 8-32 stainless truss head screws. Truss-heads have a nice wide head that's not too thick.

Using a bench grinder, I ground the heads down flat to 0.050" thickness

Then, using a dremel and a cut-off wheel, I cut a pair of right-angles into one side of the head, making it a rounded 'T' shape.
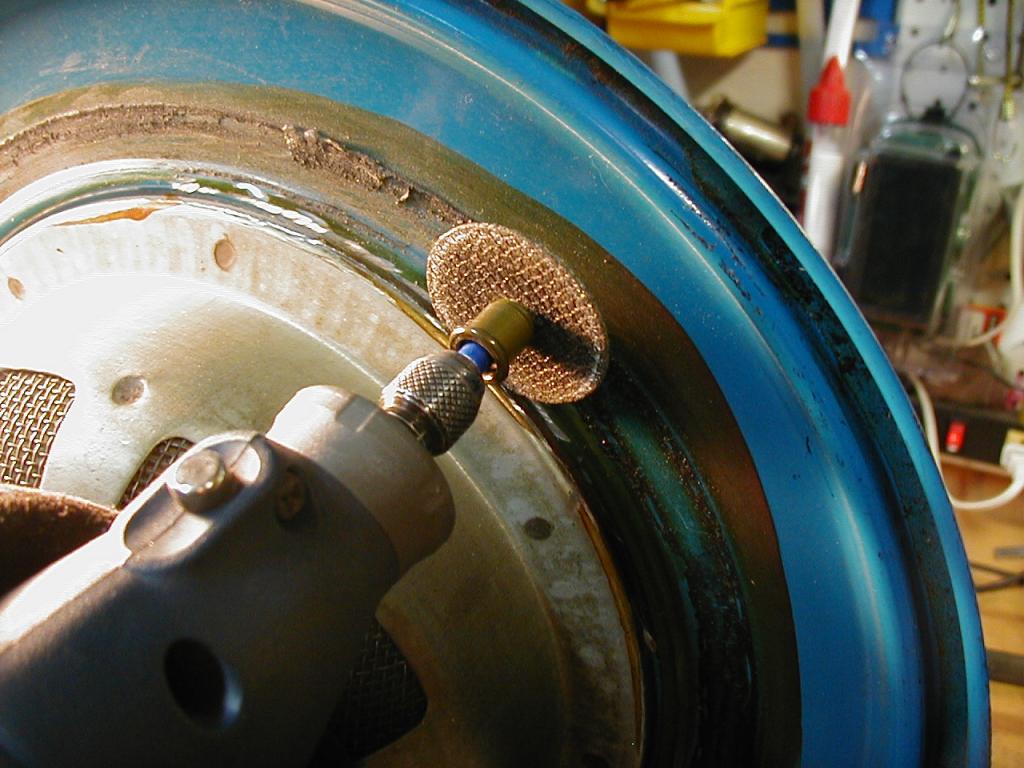
On the retaining ring, I cut a u-shaped slot the same width as the shaft of the screw, and just deep enough into the ring that the shaft will be centered under the raised lip of the ring. I used a tiny high-speed end mill in the dremel for this - it's only about 1/8 of an inch across. Cuts the soft steel like butter.
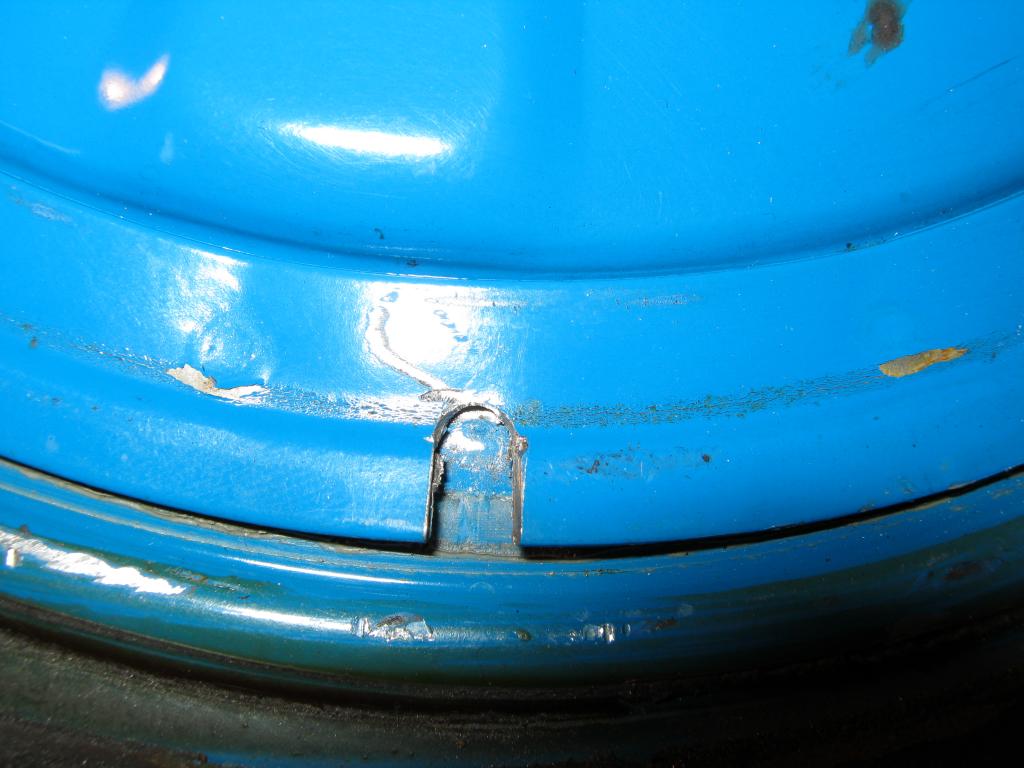
I then pried the lips of the ring up just enough to make some working space...
...and using a drift, I drove the rounded part of the head under the tightly-fitted rear half of the ring.
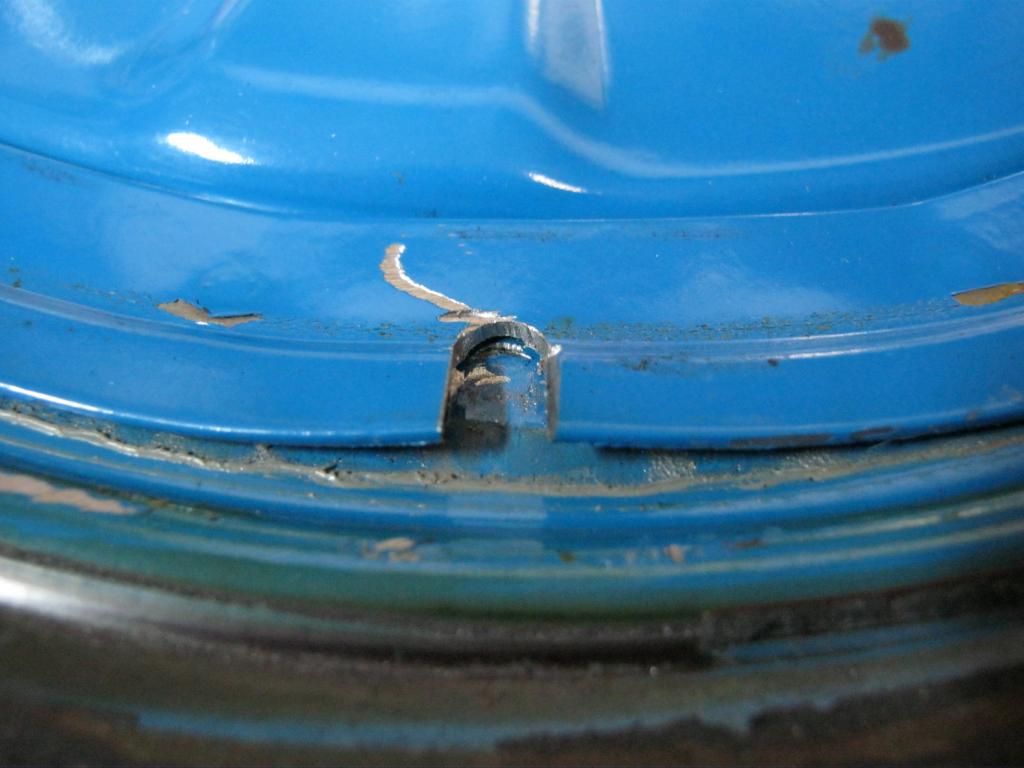
Once the screw's in place, I swaged the two corners of the slot down into the recesses I'd cut into the screw head, locking it in place and preventing rotation
Finished; now, reapeat 5 more times without error, heh.
Completely invisible from the outside.
I'm going to strip the paint from the inside and put a small braze dot on each stud to be sure it stays locked in place, but they fit so well that I could probably get by with them just as is.
First, instead of drilling out the welds thru the lid, instead I cut the retaining lip off the canister from the inside of the lid.
This left the welded retaining ring and the lid intact, and gave me a canister that only needed four spot-welds drilled out to disassemble and reassemble.
After pulling the left-over scrap of the retaining lip out from under the welded ring, this left the nice retaining ring inside, already welded to the lid, with a raised lip all around the outside edge.
First, I bought a handful of 8-32 stainless truss head screws. Truss-heads have a nice wide head that's not too thick.
Using a bench grinder, I ground the heads down flat to 0.050" thickness
Then, using a dremel and a cut-off wheel, I cut a pair of right-angles into one side of the head, making it a rounded 'T' shape.
On the retaining ring, I cut a u-shaped slot the same width as the shaft of the screw, and just deep enough into the ring that the shaft will be centered under the raised lip of the ring. I used a tiny high-speed end mill in the dremel for this - it's only about 1/8 of an inch across. Cuts the soft steel like butter.
I then pried the lips of the ring up just enough to make some working space...
...and using a drift, I drove the rounded part of the head under the tightly-fitted rear half of the ring.
Once the screw's in place, I swaged the two corners of the slot down into the recesses I'd cut into the screw head, locking it in place and preventing rotation
Finished; now, reapeat 5 more times without error, heh.
Completely invisible from the outside.
I'm going to strip the paint from the inside and put a small braze dot on each stud to be sure it stays locked in place, but they fit so well that I could probably get by with them just as is.
03-24-13, 02:26 PM
#561
Brazing went... okay, I guess, this time. I still got things a bit too hot and the lid picked up a warp of about 1/4 inch, but it's not enough to influence function, it snaps to the air cleaner body fine and when the carbon canister is bolted to the inside it flattens out nicely.
That oxy/MAP torch seems too hot for brazing sheet metal; it's all I can do to keep from actually melting the steel. Tiny flame, but intense. It's also a total bitch to get lit & adjusted(adjustments on the fuel valve **** are hair-trigger, but the oxy is 10 turns to open enoughto matter). But I perserved, and once lit & adjusted it's pretty stable. The old propane torch was just not quite strong enough, and this one's almost overkill.
Pix of the progress.
PIX:

Also proceeding with the effort to make silkscreens for restoring the letting on the cover and base once refinishing is complete. The font on the curved "Mazda Rotary Engine" is a tough match; it's similar to, but not exactly the same, as "Swis721 Black Outline BT" but compressed lengthwise by 10%. I think the actual font may be a tweaked (& therefore copyrightable) version of "Folio Bold Outline" condensed 10% horizontally, but I don't currently have that one, & it costs fair money. The Swis721 is closeenough that you can't spot the differences without overlaying the two. Mainly shows in the position & shape of the "holes" in hollow letters like o and g.
Progress.
That oxy/MAP torch seems too hot for brazing sheet metal; it's all I can do to keep from actually melting the steel. Tiny flame, but intense. It's also a total bitch to get lit & adjusted(adjustments on the fuel valve **** are hair-trigger, but the oxy is 10 turns to open enoughto matter). But I perserved, and once lit & adjusted it's pretty stable. The old propane torch was just not quite strong enough, and this one's almost overkill.
Pix of the progress.
PIX:
Also proceeding with the effort to make silkscreens for restoring the letting on the cover and base once refinishing is complete. The font on the curved "Mazda Rotary Engine" is a tough match; it's similar to, but not exactly the same, as "Swis721 Black Outline BT" but compressed lengthwise by 10%. I think the actual font may be a tweaked (& therefore copyrightable) version of "Folio Bold Outline" condensed 10% horizontally, but I don't currently have that one, & it costs fair money. The Swis721 is closeenough that you can't spot the differences without overlaying the two. Mainly shows in the position & shape of the "holes" in hollow letters like o and g.
Progress.
03-30-13, 01:50 AM
#563

Very nice build thread. Nice to see someone put so much work into a
classic SA. I don't think have ever seen someone put so much effort in
to passing Smog. Congrats and keep up the great work
classic SA. I don't think have ever seen someone put so much effort in
to passing Smog. Congrats and keep up the great work
04-05-13, 10:57 PM
#564
Thank you, sir; I'm persistent, if not particularly rational.
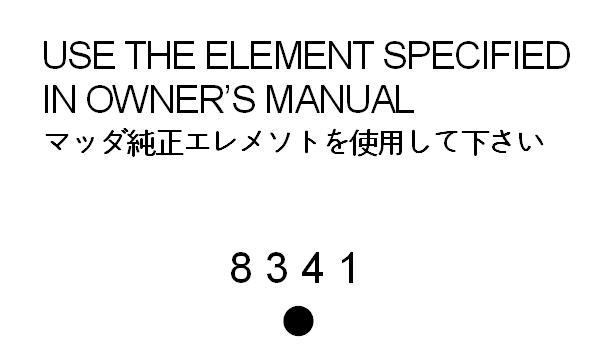
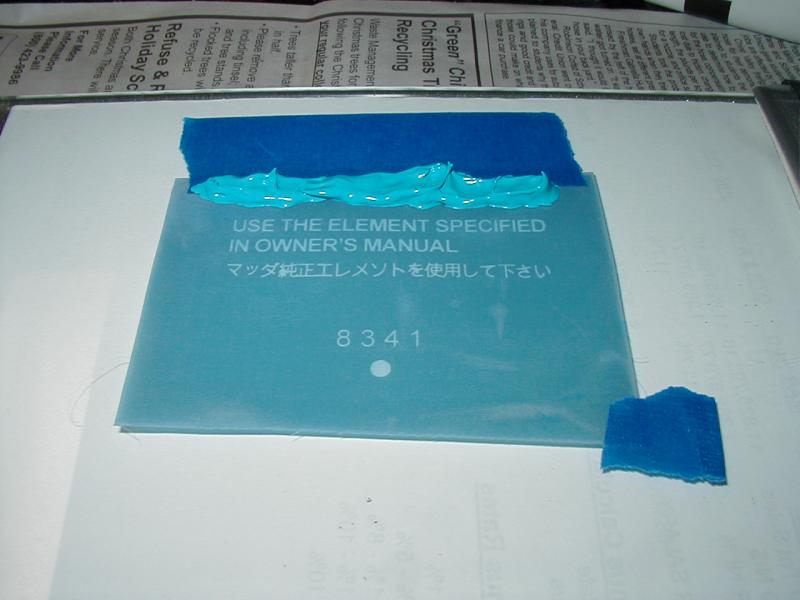
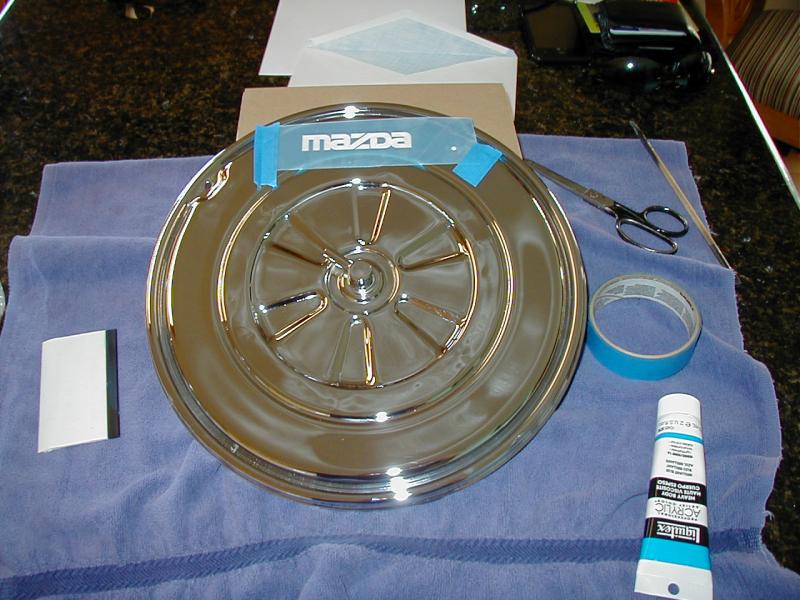
First pass test of the fine-detail silkscreen for the air cleaner body. Testing the print on glass, because 1) glass is hard to get adherence, so if it works on glass, it will work on any material, and 2) I can easily clean it off the glass and try again until I get the techniques right.
Taped:

Inked:
Stroked:
Stoked!
Far better clarity and detail than the original factory legend.
Looks like I could have maybe given it a second pull of ink to better saturate all the corners, but that worked well.
Onward! Sanding!
First pass test of the fine-detail silkscreen for the air cleaner body. Testing the print on glass, because 1) glass is hard to get adherence, so if it works on glass, it will work on any material, and 2) I can easily clean it off the glass and try again until I get the techniques right.
Taped:
Inked:
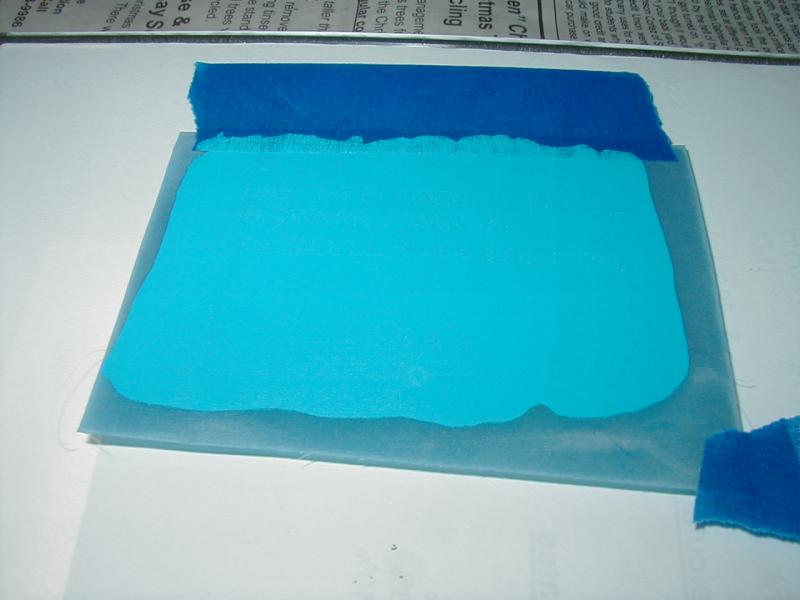
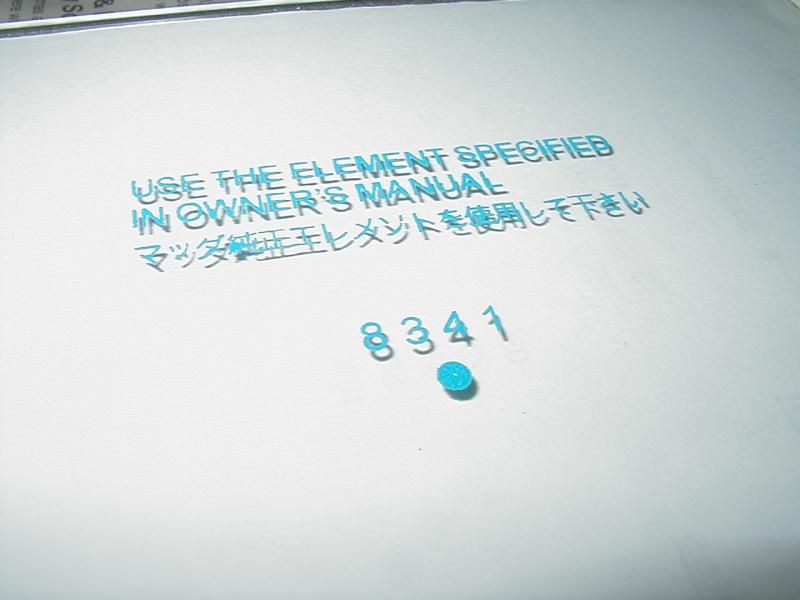
Stroked:
Stoked!
Far better clarity and detail than the original factory legend.
Looks like I could have maybe given it a second pull of ink to better saturate all the corners, but that worked well.
Onward! Sanding!
04-07-13, 12:00 PM
#565
Rotary Freak
iTrader: (19)
Join Date: Oct 2007
Location: Colorado Springs, CO
Posts: 2,014
Likes: 0
Received 0 Likes
on
0 Posts
that looks really good. I was trying to figure out how to match the original silk screen on the factory mud flaps. I'd like to try and replicate it but I'm not sure where to even begin, lol.
04-09-13, 11:53 PM
#566
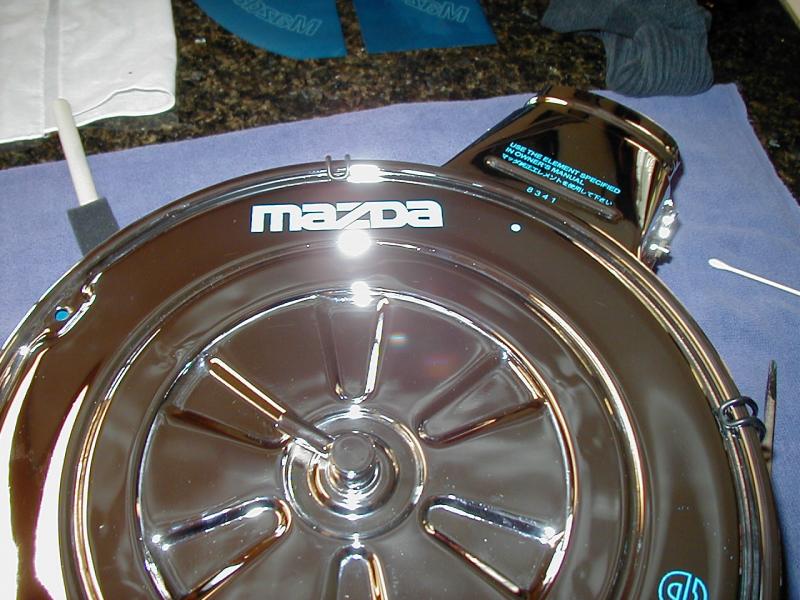
Time to actually put the 'screen down where it belongs...
On my nice, shiny, (now chromed) original-to-the-car air cleaner body:

Ahhhhhh.... the payoff of all that work, it is sweet!
Can't wait til I get the lid finished, too!
On my nice, shiny, (now chromed) original-to-the-car air cleaner body:
Ahhhhhh.... the payoff of all that work, it is sweet!
Can't wait til I get the lid finished, too!
04-21-13, 12:13 AM
#567
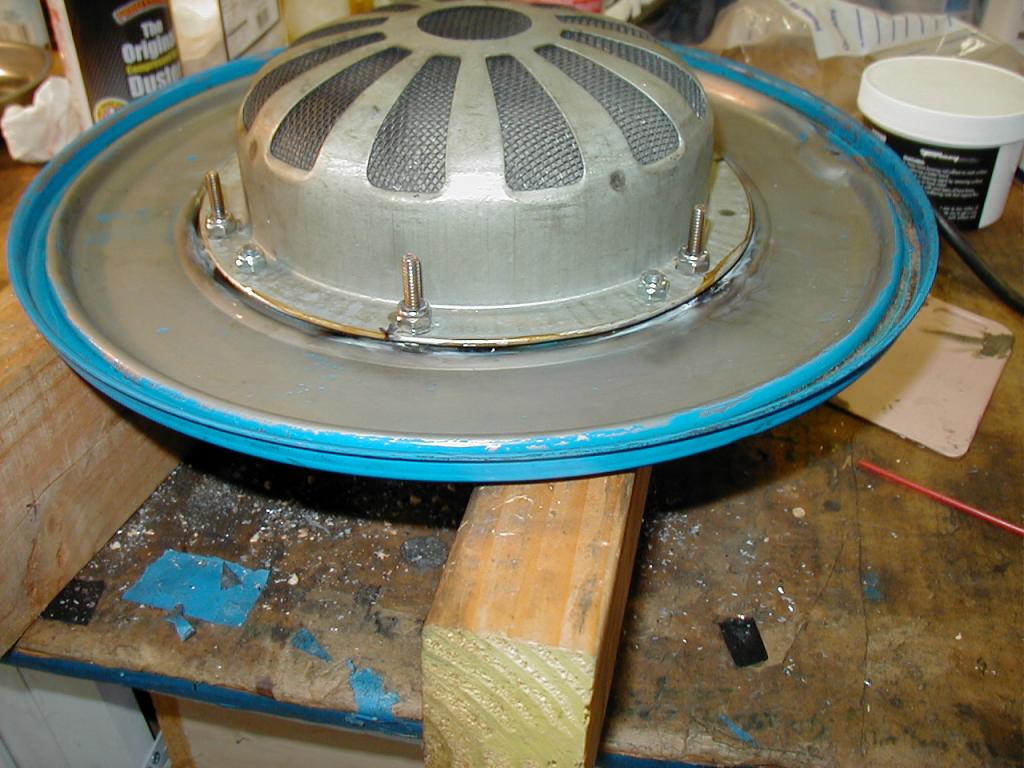
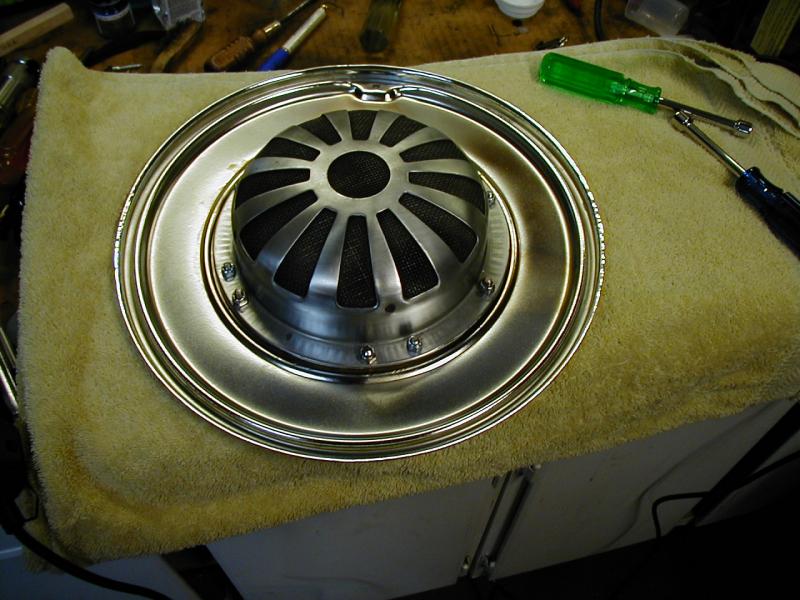
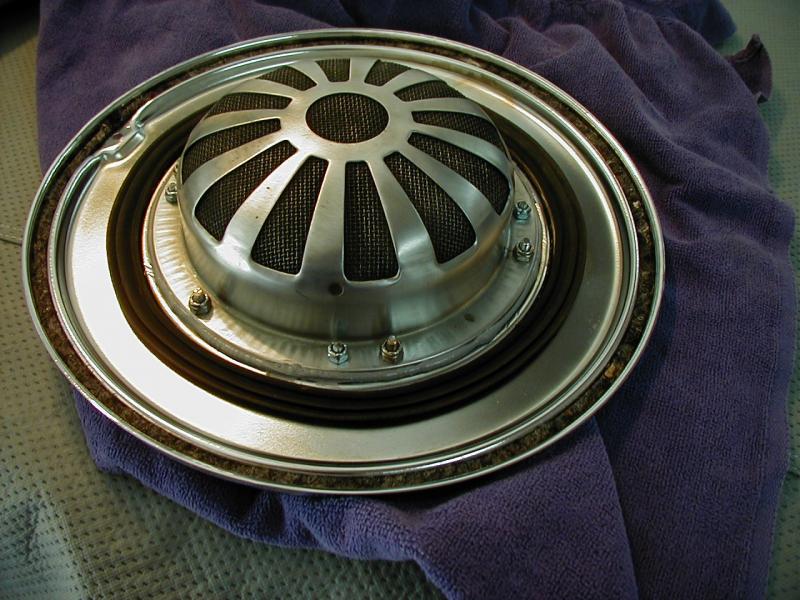
And, finally finished up the reassembly of my now-serviceable charcoal canister, and air cleaner:
"bucket" parts
Open-cell liner
Activated carbon
Trim the liner to overlap the top & put top filter paper in
Pleat-fold the liner
Install the cover with nylok nuts
Topside, assembled
Bolt to brazed-in studs with more nyloks, & seal edge with gas-safe sealant
Install new felt edge gasket, and original silicone filter gasket... done!
Reassemble painted, polished, and silkscreened filter body
Set up to silkscreen logos
And, wait for them to dry. Flash washed out the shiny wet paint; it's actually the same blue as the other screen prints.
Can't wait for it all to dry, so I can install it and get some outdoor pix!
04-21-13, 01:39 PM
#569
Not a bad thought... I went with brushed steel and plasti-dip on the ends to prevent scratches, but you're right that a little color highlight of some kind would look good. If I'd had easy access to blue plasti-dip, I would have used that, but all I could get locally was black, yellow, or red.
04-21-13, 03:32 PM
#570
Ready or not...
Join Date: Dec 2009
Location: Taos, NM
Posts: 261
Likes: 0
Received 0 Likes
on
0 Posts
[QUOTE=DivinDriver;11445171]And, finally finished up the reassembly of my now-serviceable charcoal canister, and air cleaner:[/QUOTE
purrrrrrr-deee! I was appreciating your tenacity... now I'm impressed. No one else has one like it!
purrrrrrr-deee! I was appreciating your tenacity... now I'm impressed. No one else has one like it!
04-22-13, 12:14 AM
#571
I decided to keep this one a little more grounded: It's not "perfect," but I declare it 'good enough' considering I just cannot spend any more time on it just now.
Before and after pix.
 04-23-13, 11:18 AM
#573
DAMN!! Even your shop towels look brand spankin new!! Is there no grease or dirt in CA??
Very inspiring DD. Every time I think "Ahh, no one will see it", I think "DD wouldn't take that shortcut - he'd do it perfectly", so thanks DD for keeping me inspired to do it right!
Very inspiring DD. Every time I think "Ahh, no one will see it", I think "DD wouldn't take that shortcut - he'd do it perfectly", so thanks DD for keeping me inspired to do it right!
04-25-13, 10:47 PM
#574
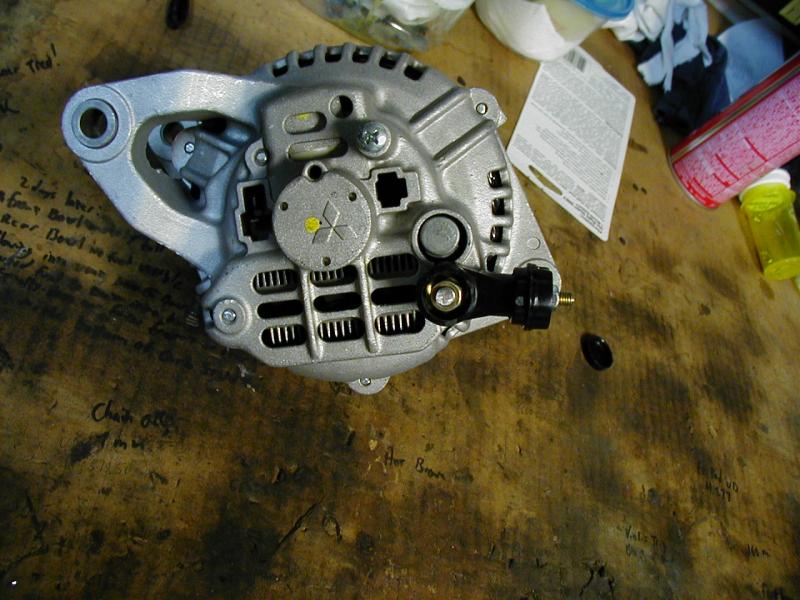
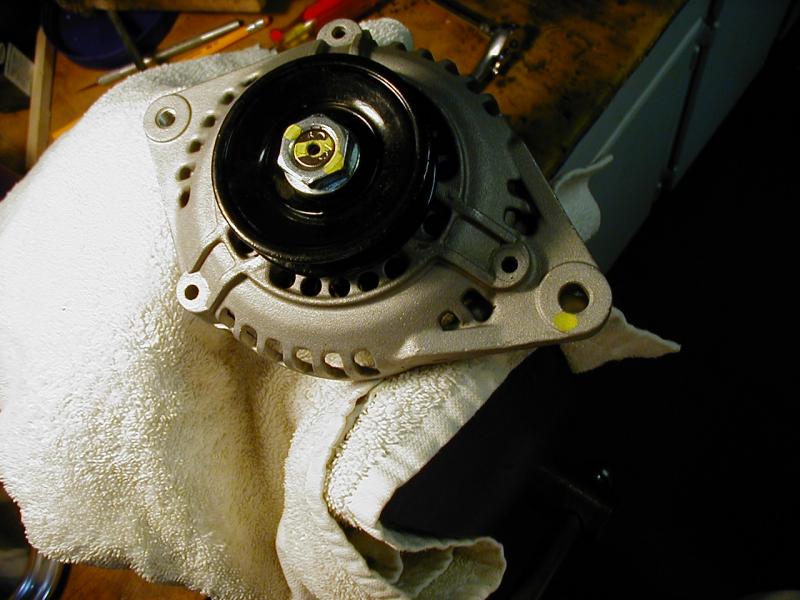
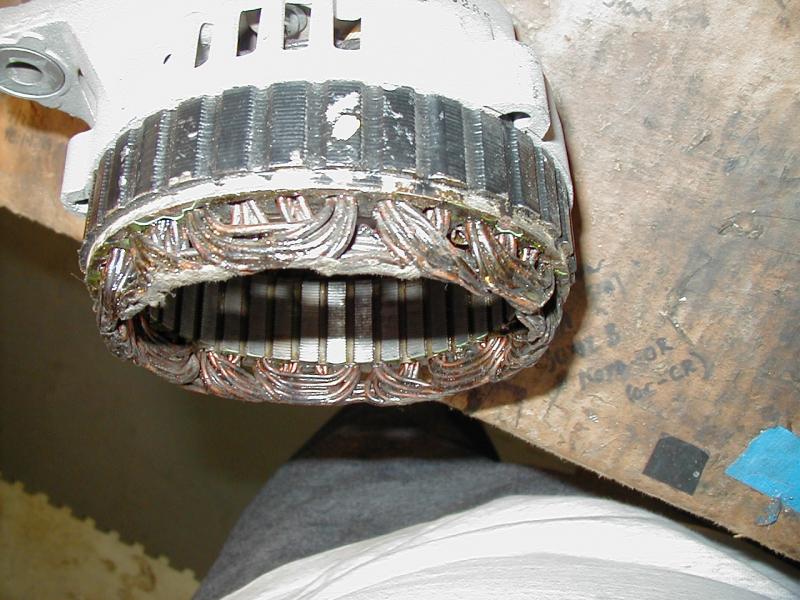
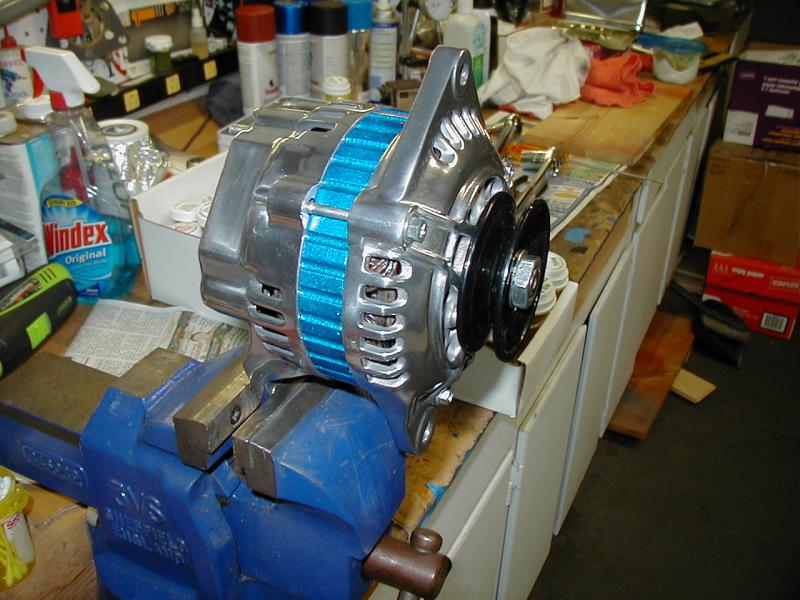
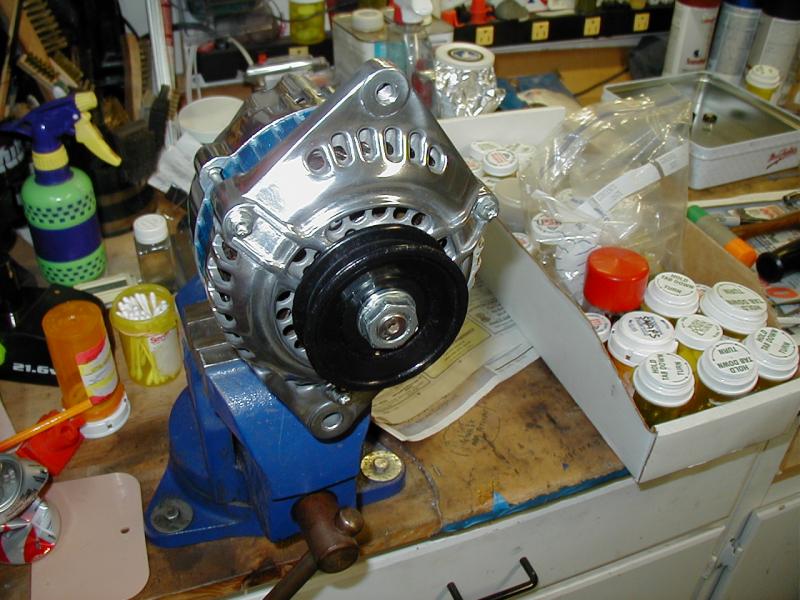
In and tested - solid 14V charge even at idle with the lights on & wipers going. I'll locate a proper spacer for it and swap it in, but for now, my "hidden" 10.8-grade washer stack will do the job until I can find one.
The old brushed SA alt:
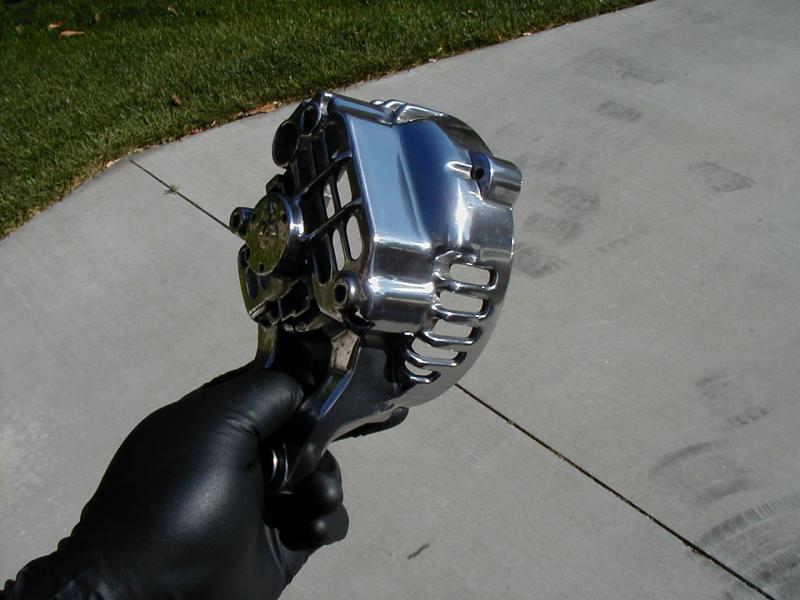
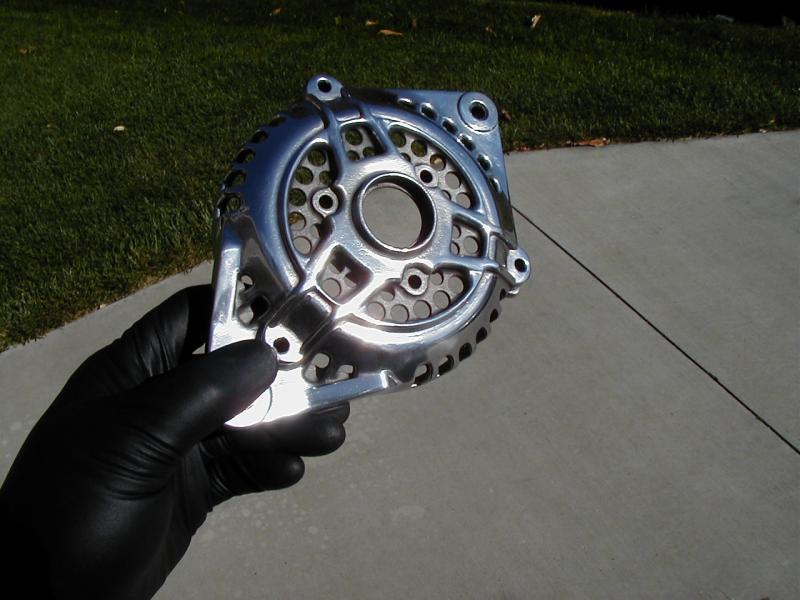
The new hotness:
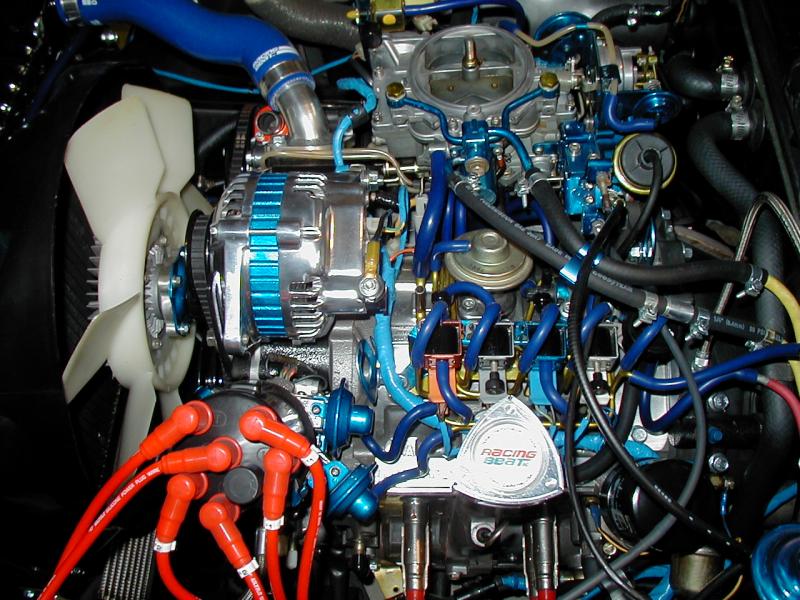
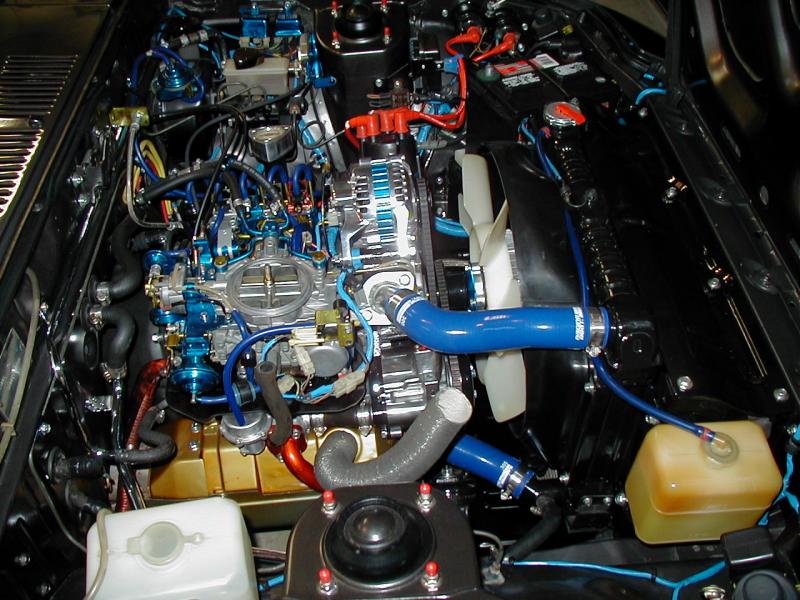
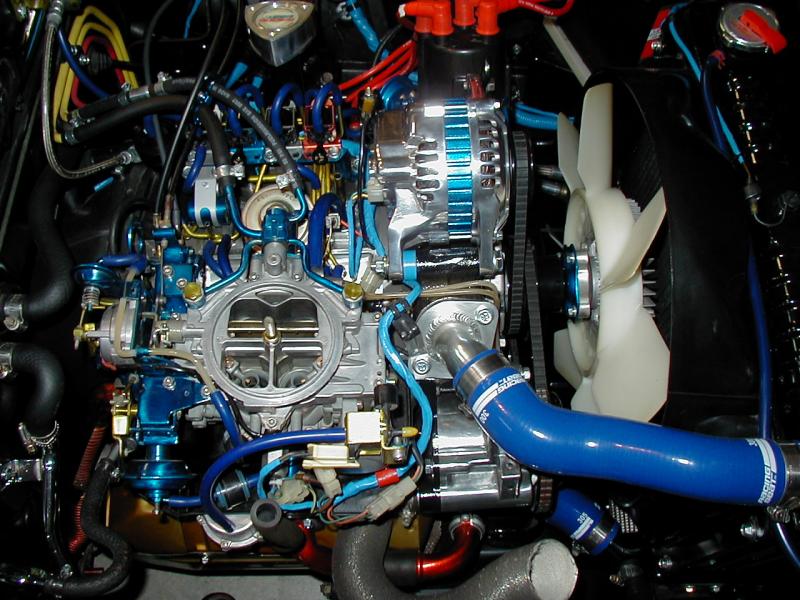
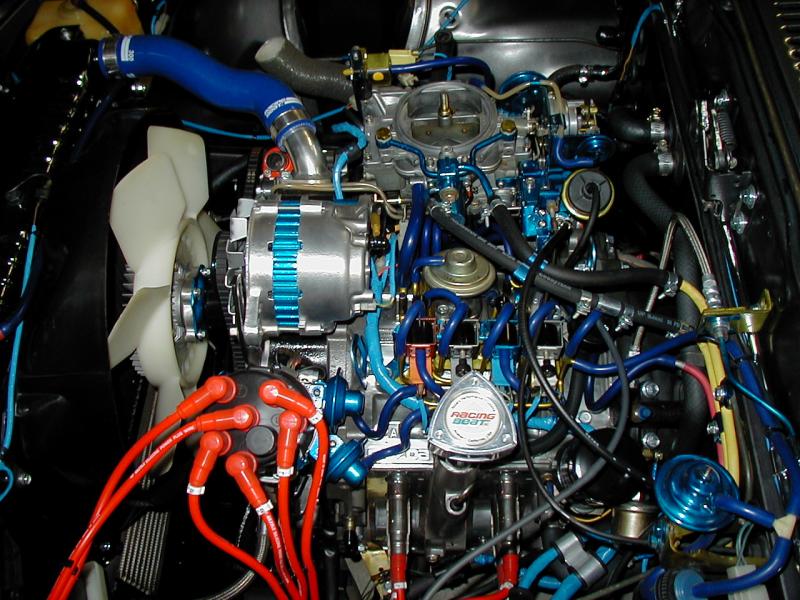
...and a teaser of what the weekend should finally see finished:
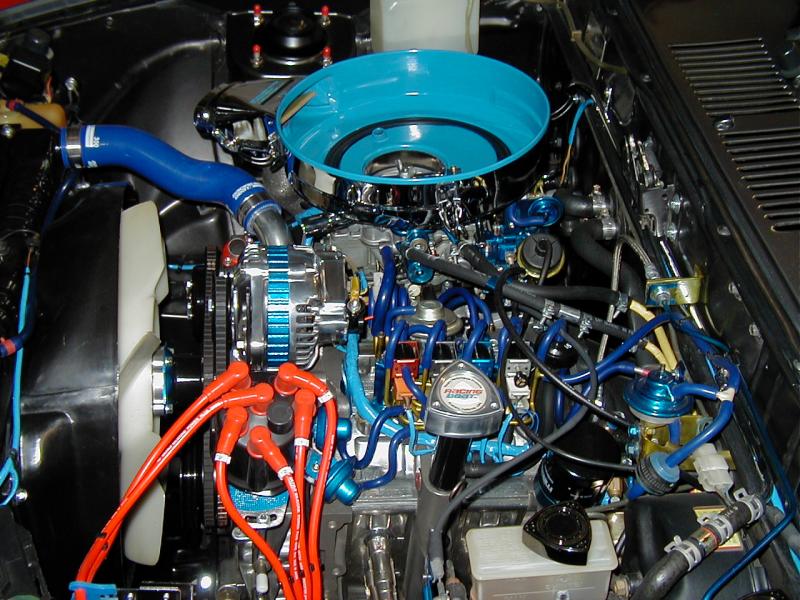

The old brushed SA alt:
The new hotness:
...and a teaser of what the weekend should finally see finished: