
My SA - from a UK barn to who knows where


Thread Starter
What's that smell?
Joined: Jul 2007
Posts: 217
Likes: 0
From: Dorset, England
Well after all the excitement of turbos, porting and all the other stuff that puts hairs on your chest, it was time to start attacking the massive list of little jobs that needed taking care of. The first was to replace the drivers seat which was in the process of prolapsing with a foamy fountain every time I entered or exited the 7. Luckily the passenger seat in the other black one was pretty good albeit with a torn base so out that came and I swapped over the rear part onto my current one which was pretty mint.
Whilst doing interior tasks, I thought it was about time the ECU got a proper home - and now it doesn't really require access it could be hidden away. Fortunately the blower duct had comically fallen off onto my fianc�s feet whilst going on one of our drives that tries to convince her this is a bonafide proper car that would have quite a high chance of getting us home - and this exposed the perfect spot for the ECU.
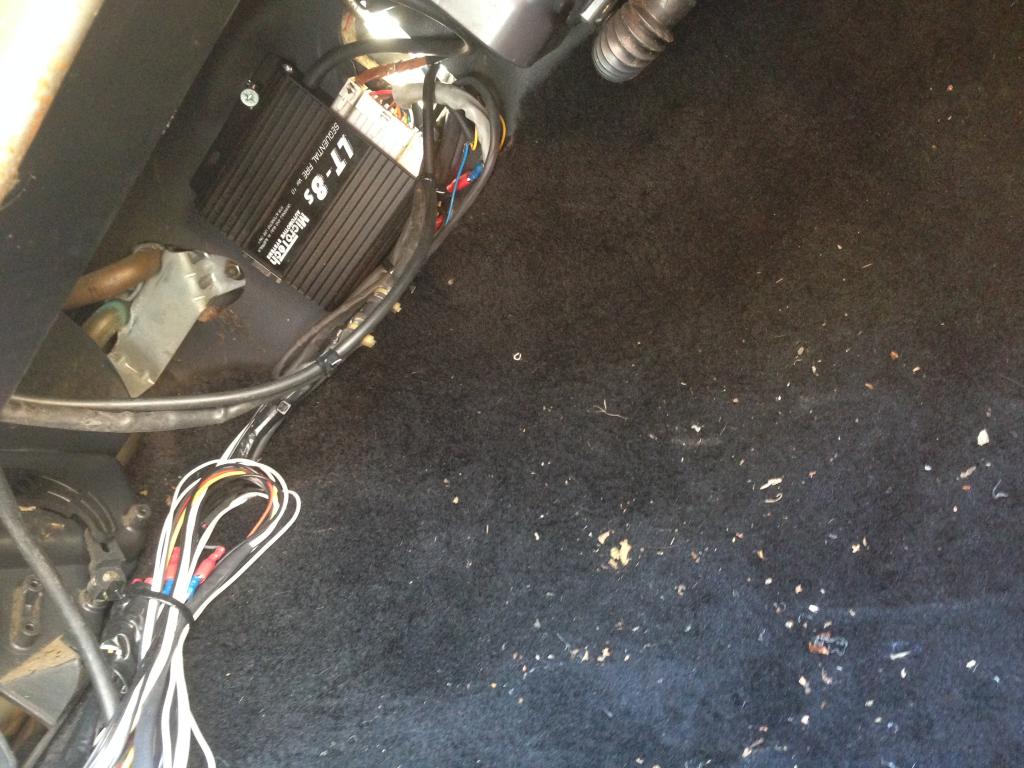
Job done.
I even put the blower duct back. And got the blowers working for the first time in the ownership of this car. Go me!
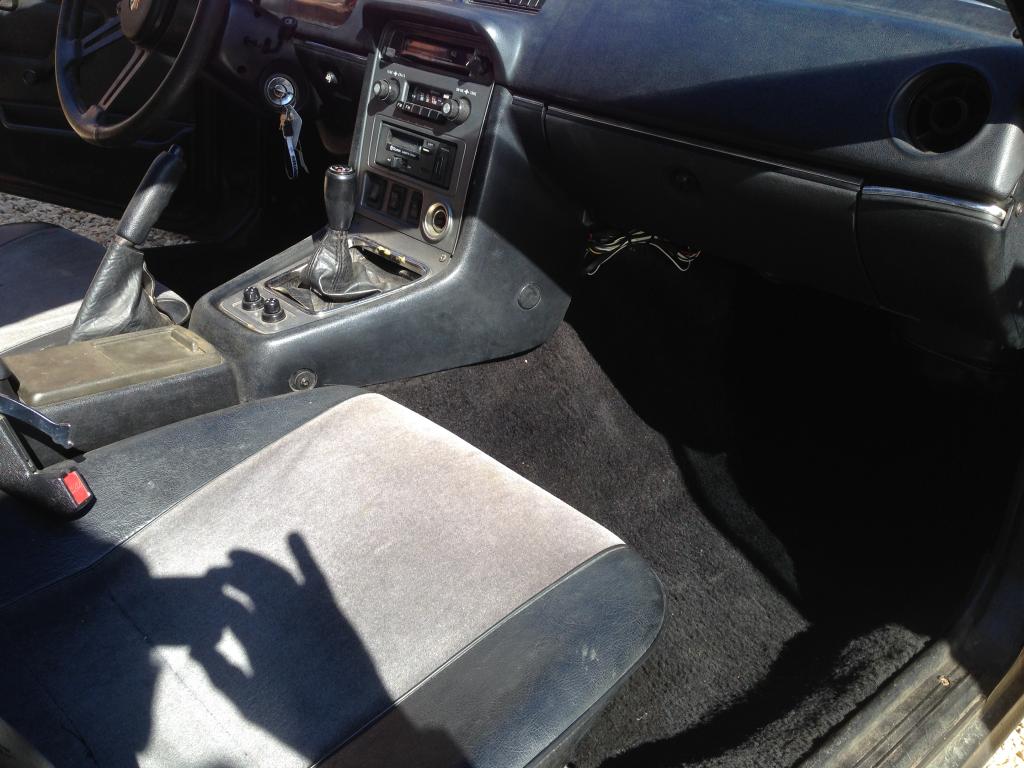
So the interior is looking quite respectable now and stock as a rock.
What else?
Oh yeah, refitted the horns and replaced all the worn out and perished exhaust hangers that were ready to throw in the towel. Not a job I'd wish on my worst enemy but it's done now.
She even got new boots.
Woot! :?
Whilst doing interior tasks, I thought it was about time the ECU got a proper home - and now it doesn't really require access it could be hidden away. Fortunately the blower duct had comically fallen off onto my fianc�s feet whilst going on one of our drives that tries to convince her this is a bonafide proper car that would have quite a high chance of getting us home - and this exposed the perfect spot for the ECU.

Job done.
I even put the blower duct back. And got the blowers working for the first time in the ownership of this car. Go me!
So the interior is looking quite respectable now and stock as a rock.


What else?
Oh yeah, refitted the horns and replaced all the worn out and perished exhaust hangers that were ready to throw in the towel. Not a job I'd wish on my worst enemy but it's done now.
She even got new boots.

Woot! :?
Thread Starter
What's that smell?
Joined: Jul 2007
Posts: 217
Likes: 0
From: Dorset, England
This week saw me have to get all sherlock holmes. For what feels like forever ( or at least for as long as I've had this setup in Nev, then the S1) the water has always fallen in level overnight with no signs of leaks, no sign of water seal failure, anything whatsoever. But enough was enough and on a fresh keg my sense of humour had run out so out I went on the hunt to solve the mystery. Annoyingly it was blaringly obvious once I actually opened my eyes
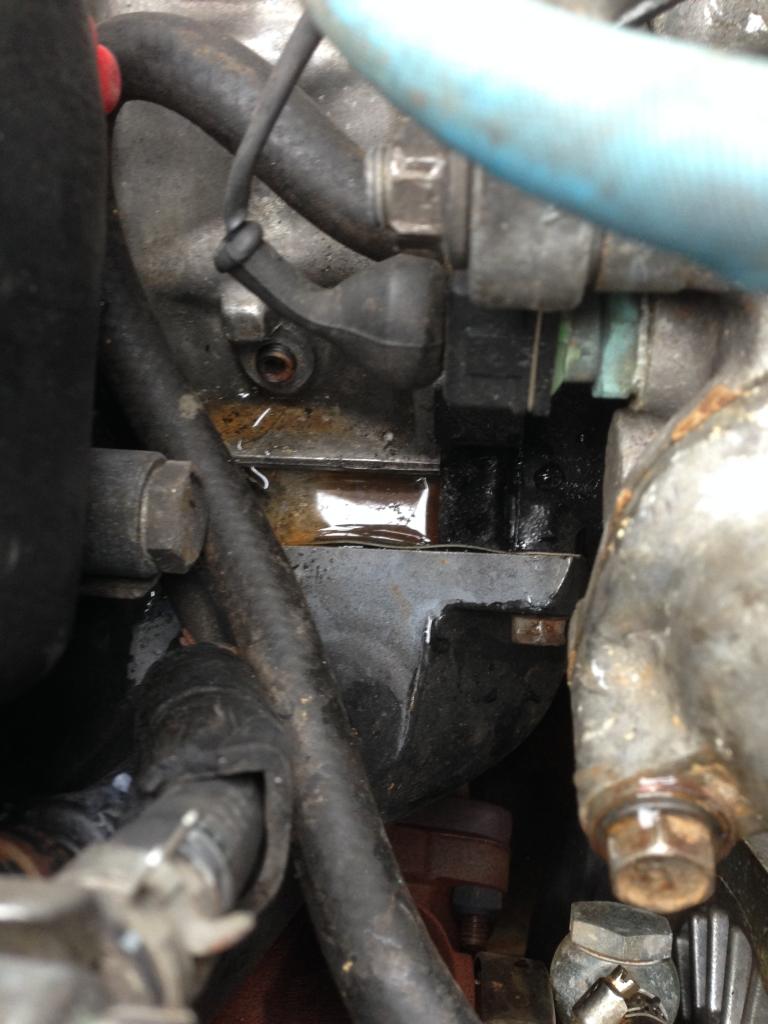
There it bloody well is. In my defence, I'd not spotted it before because this is directly below the filler neck so kinda assumed it was overspill - turns out it wasn't. Anyway, after a little more expertly placed squeezes of pipework I also noticed this little bugger...
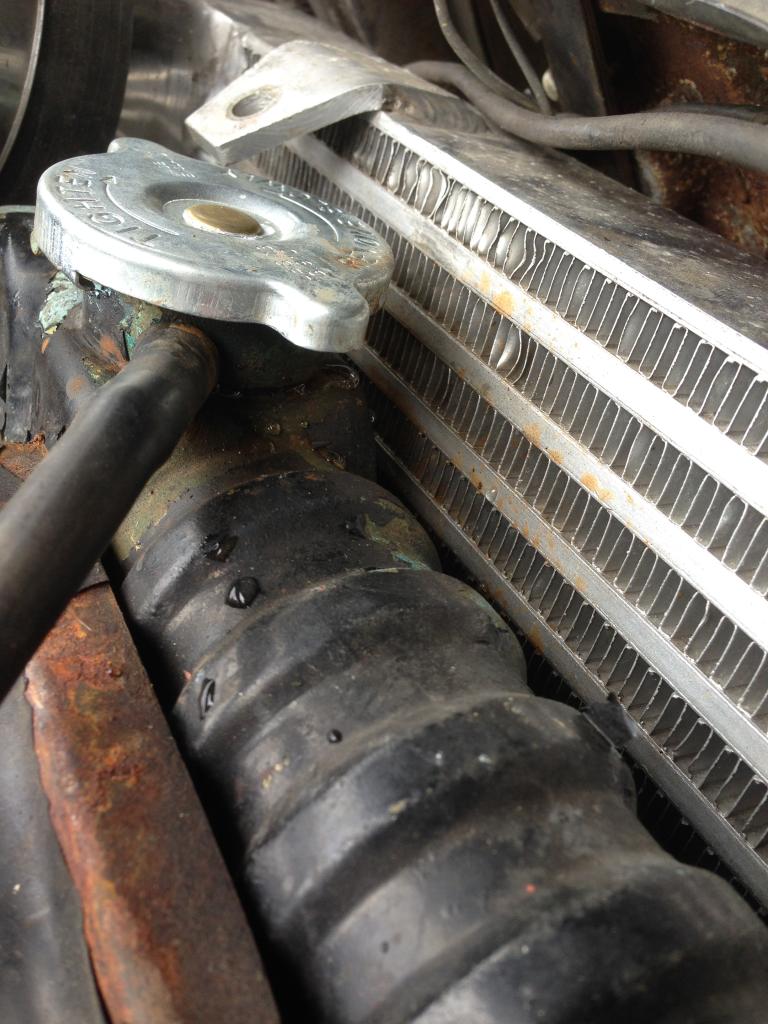
That'll be another leak from the overflow pipe of the radiator. Yay!
FML
Thread Starter
What's that smell?
Joined: Jul 2007
Posts: 217
Likes: 0
From: Dorset, England
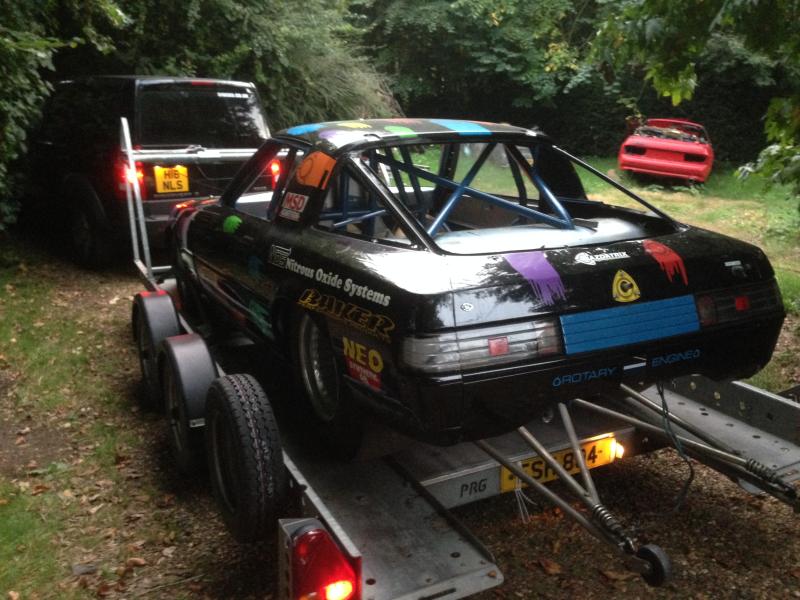
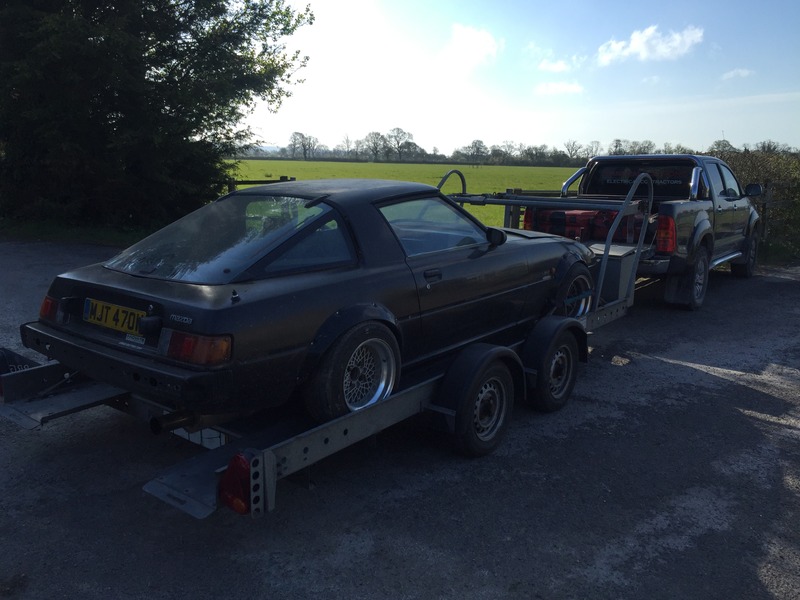
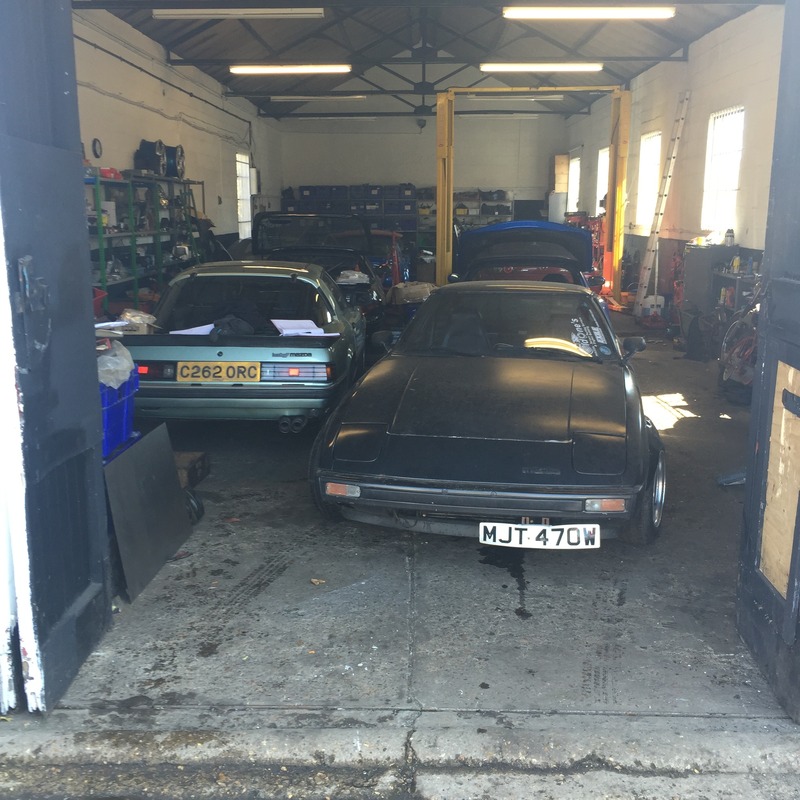
Not a lot has been happening for the last couple of weeks due to wedding based tomfoolery apart from sorting the water leaks but this week saw a shift in priorities now thats all settled down. So back to rotors! First off, I've spent a couple of evenings in the company of uncle Timmy moving some cars from his old premises to new - one of which was this rather splendid bit of kit. W(p
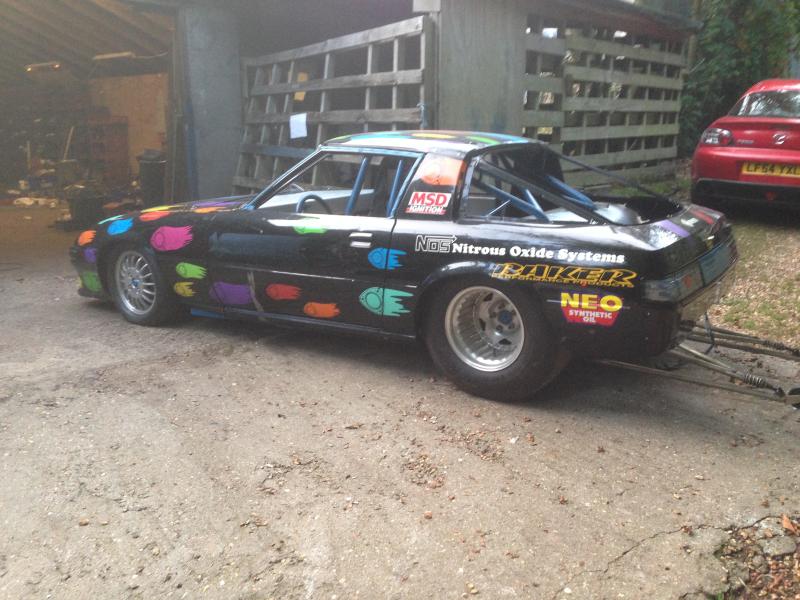
Bit squeaky bum time strapping her down as I wasn't keen on spreading an iconic car around the Dorset countryside but we made it safe and is now at its new home.
So on to the S1, now I've got over the initial awe at of how brutal it is my attention now needs to shift onto bringing that brutality a bit lower down the RPM range as it's all a bit hectic. First port of call is some form of boost control as 7psi doesn't really cut it plus the waste gate so big that when it's cracking at 4-5psi, you can start to imagine that building any sort of boost is hard work. Initially I was just going to just put an inline bleed valve in but it looks like Tim is sorting me a Blitz boost controller which apparently is what grown up people use so thats exciting. Upshot is that'll give me the snap open and shut action of the gate I desire. The other item on my setup that is being binned is the eBay intercooler. Now we all now that it rarely ends well when we buy ***** off eBay and this scenario is no different, and apparently an intercooler that is embarrassingly thin and has casting quality inside rougher that a stubbly ******* is not a lot of good for transporting the boost that my poor turbo is trying to build whilst its having an asthma attack trying to push it through what amounts to no more than a metaphorical bottleneck.
Enter stage left, a manly intercooler for manly boost and a pleasurable flow rate.
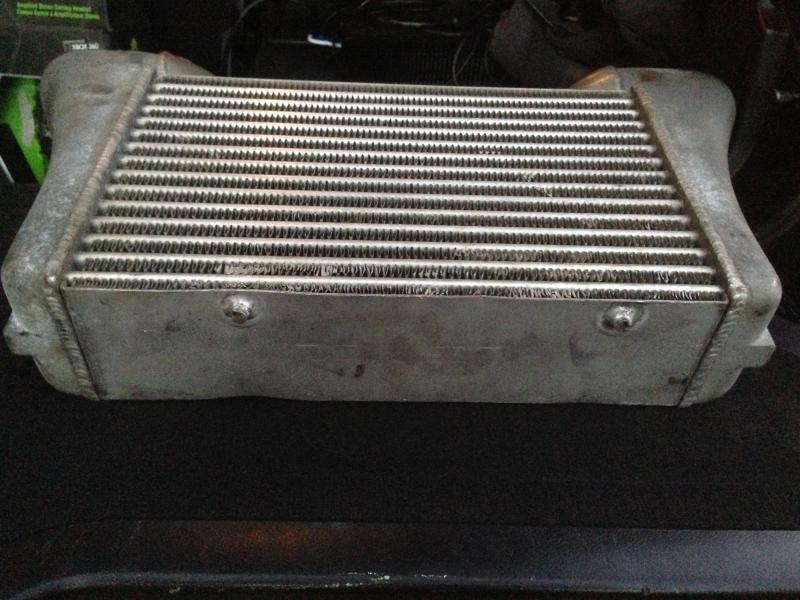
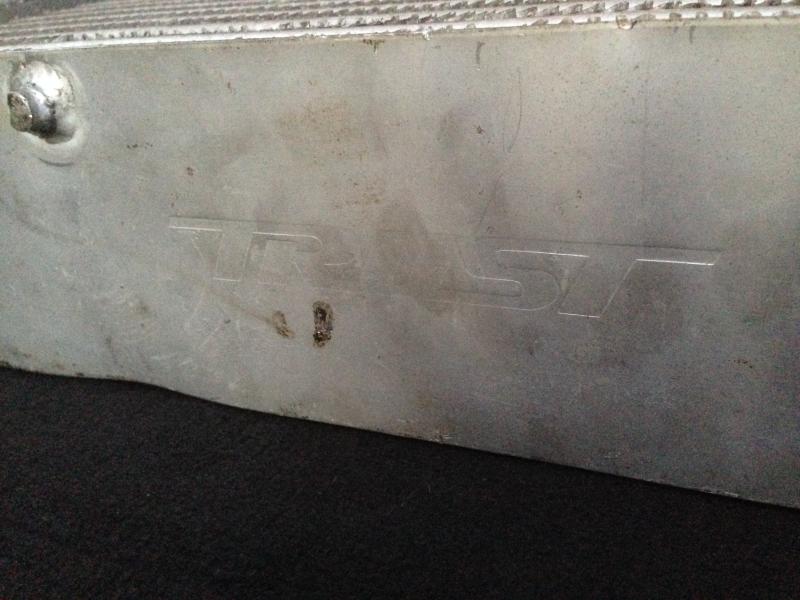
A rather lovely Trust IC which is nigh on 120mm thick. That should do it.
Also to go on will be another radiator (I like swapping rads me), but back into stock upright position to end my life of airlock misery, and in no particular order...
FD coils
New HT leads
HKS Twin power ignition amp for leading
4x SARD 1000cc injectors
Then back to the rollers.
That's enough for now. Especially considering I'd foolishly convinced myself that the engine side of things was nearing completion. :roll:

Bit squeaky bum time strapping her down as I wasn't keen on spreading an iconic car around the Dorset countryside but we made it safe and is now at its new home.

So on to the S1, now I've got over the initial awe at of how brutal it is my attention now needs to shift onto bringing that brutality a bit lower down the RPM range as it's all a bit hectic. First port of call is some form of boost control as 7psi doesn't really cut it plus the waste gate so big that when it's cracking at 4-5psi, you can start to imagine that building any sort of boost is hard work. Initially I was just going to just put an inline bleed valve in but it looks like Tim is sorting me a Blitz boost controller which apparently is what grown up people use so thats exciting. Upshot is that'll give me the snap open and shut action of the gate I desire. The other item on my setup that is being binned is the eBay intercooler. Now we all now that it rarely ends well when we buy ***** off eBay and this scenario is no different, and apparently an intercooler that is embarrassingly thin and has casting quality inside rougher that a stubbly ******* is not a lot of good for transporting the boost that my poor turbo is trying to build whilst its having an asthma attack trying to push it through what amounts to no more than a metaphorical bottleneck.
Enter stage left, a manly intercooler for manly boost and a pleasurable flow rate.


A rather lovely Trust IC which is nigh on 120mm thick. That should do it.
Also to go on will be another radiator (I like swapping rads me), but back into stock upright position to end my life of airlock misery, and in no particular order...
FD coils
New HT leads
HKS Twin power ignition amp for leading
4x SARD 1000cc injectors
Then back to the rollers.
That's enough for now. Especially considering I'd foolishly convinced myself that the engine side of things was nearing completion. :roll:
Thread Starter
What's that smell?
Joined: Jul 2007
Posts: 217
Likes: 0
From: Dorset, England
Well summer is just round the corner over here so time to sort my **** out. I work away a lot so my friend Tim at RXMotors is sorting it out for me.
The awakening...
And in safe hands...
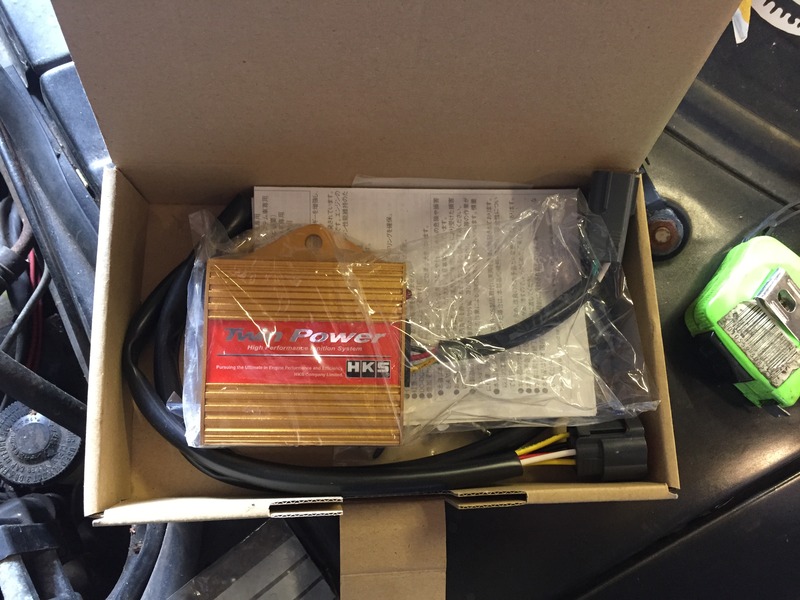
Paid the old girl a visit today seeing as I was close by, and thankfully the bits I've ordered are starting to arrive. Most surprising arrival of all was the HKS Twin Power, all the way from 'merica in a little over a week and no **** bruising by customs and excise so I'll put the lube back in the cupboard till next time. Anyway, here it is for those not familiar. Just a box really - some signal goes in, witchcraft happens, and a stronger signal comes out.
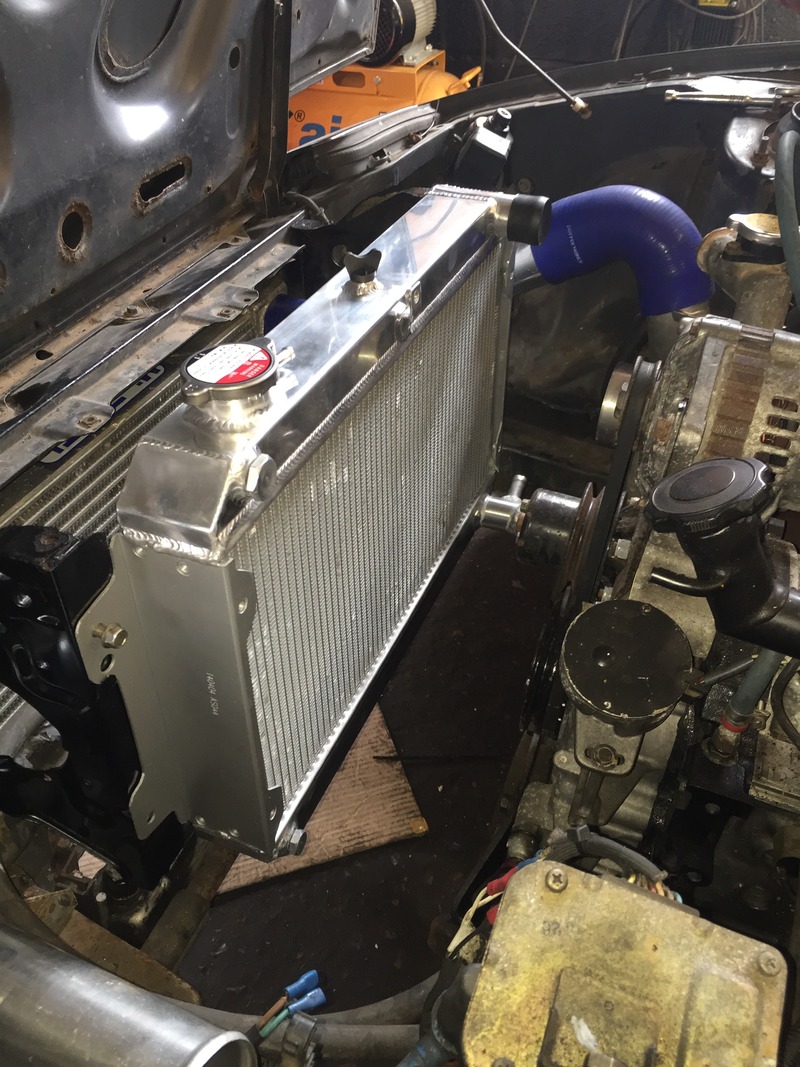
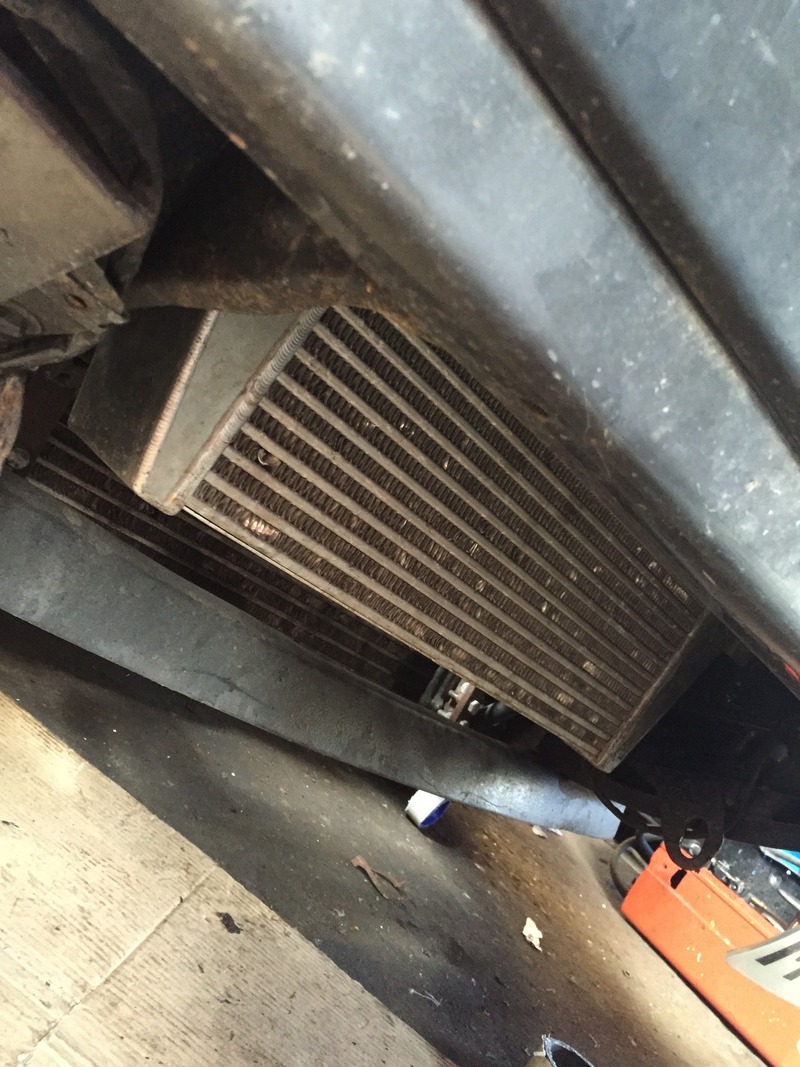
Equally pleasing was the bargain 3 row radiators that are currently doing the rounds on eBay. The level of quality you get for the money is pretty astounding and makes faffing around with the cruddy old one a total waste of energy. I'm back to it mounted in the stock position too so it's a straightforward fit. The only part of that scenario that we'll have to adapt is where the expansion bottle is going to live, as the boost pipe from the intercooler fires straight through where the bracket once lived.
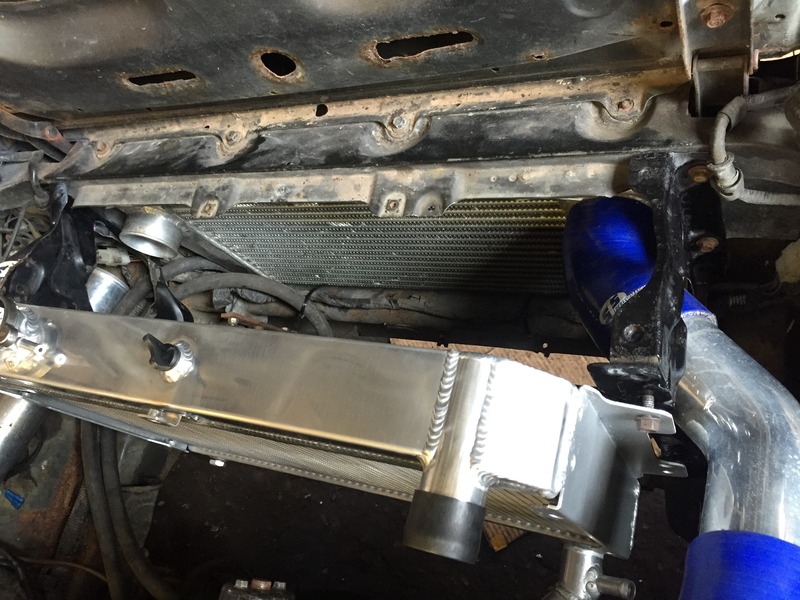
You may recall that I mentioned the intercooler to be fitted would be a Trust unit, and splendid it was too. Shame it wasn't interested in fitting where we wanted it any sense so this was ditched in favour of a Forge unit thats just as splendid (if not more so) and consequently now looks like it grew there.
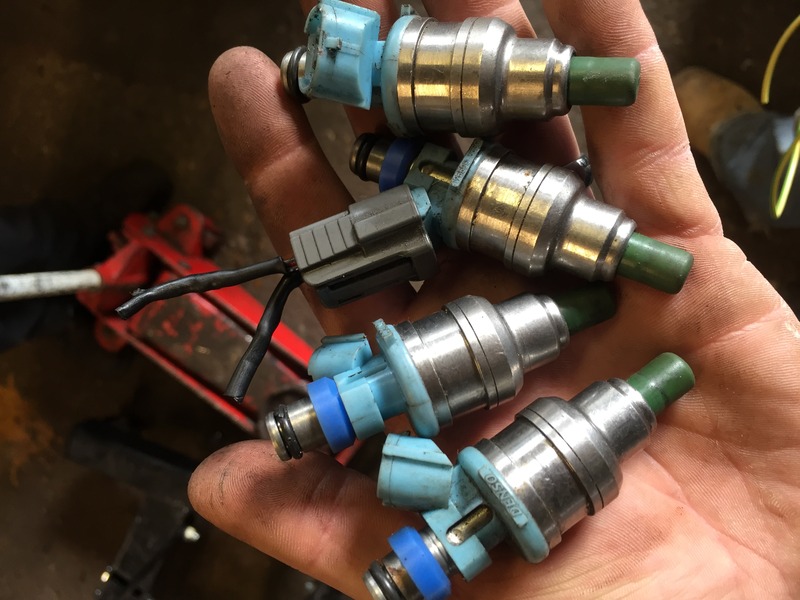
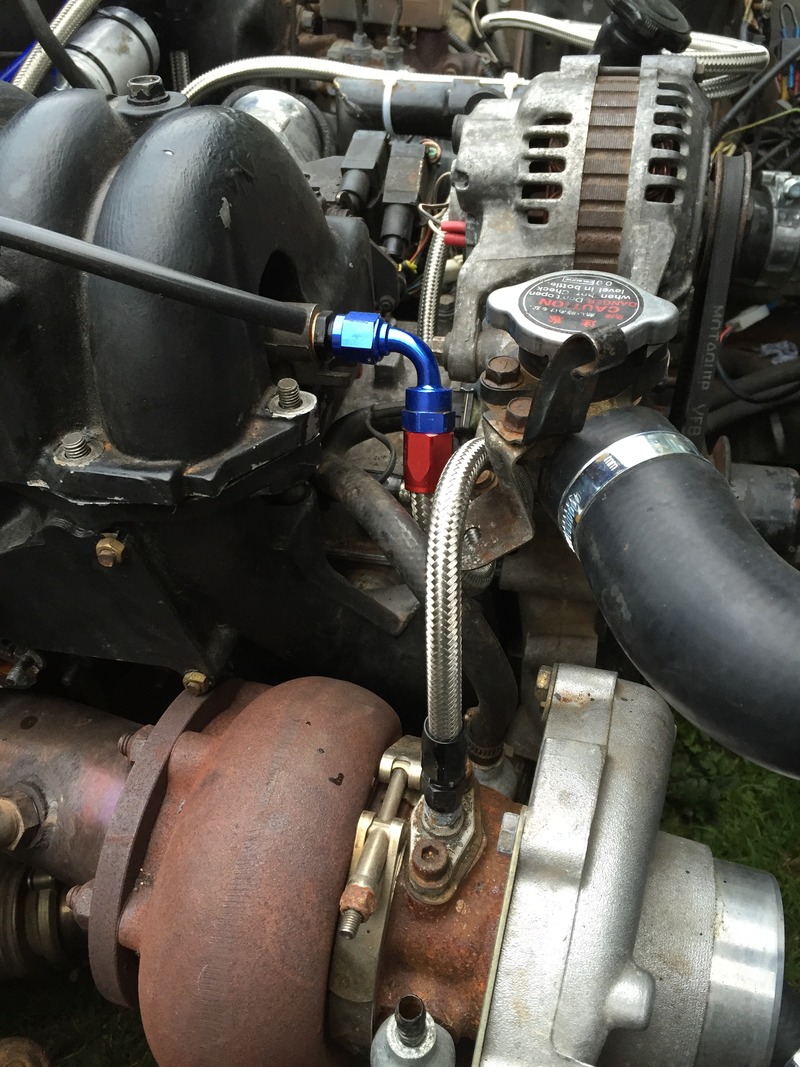
With that in, the ingredients for the boost pipework (the blue elbows in the picture were purely for fitment purposes) have been ordered and that'll be job jobbed. Whilst I was there we gave the 1000cc Sard's the once-over and for the benefit of me not wanting to deploy the fire extinguisher we ordered a refurb kit, off of eBay again of all places. Who knew? Anyway, this comes with all the O rings and gauzes etc you'd possibly require to make you injectors like new. Here they are though, pre-op.
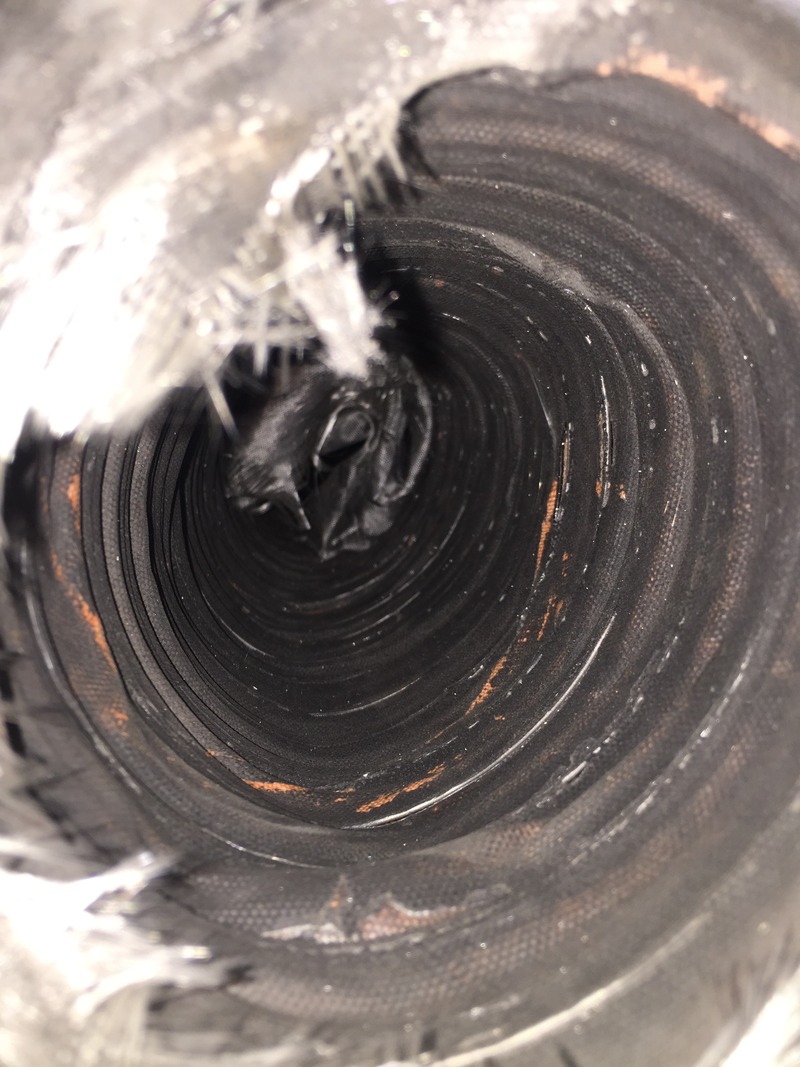
And finally - this is the inside view of the ducting I had from the air filter to the turbo. It's safe to say I'm a lucky boy that none got sucked up but the turbo has had a pretty valiant attempt at turning the ducting inside out thats for sure. Explains why she felt a bit sluggish last outing. :shock:
The awakening...

And in safe hands...

Paid the old girl a visit today seeing as I was close by, and thankfully the bits I've ordered are starting to arrive. Most surprising arrival of all was the HKS Twin Power, all the way from 'merica in a little over a week and no **** bruising by customs and excise so I'll put the lube back in the cupboard till next time. Anyway, here it is for those not familiar. Just a box really - some signal goes in, witchcraft happens, and a stronger signal comes out.

Equally pleasing was the bargain 3 row radiators that are currently doing the rounds on eBay. The level of quality you get for the money is pretty astounding and makes faffing around with the cruddy old one a total waste of energy. I'm back to it mounted in the stock position too so it's a straightforward fit. The only part of that scenario that we'll have to adapt is where the expansion bottle is going to live, as the boost pipe from the intercooler fires straight through where the bracket once lived.


You may recall that I mentioned the intercooler to be fitted would be a Trust unit, and splendid it was too. Shame it wasn't interested in fitting where we wanted it any sense so this was ditched in favour of a Forge unit thats just as splendid (if not more so) and consequently now looks like it grew there.

With that in, the ingredients for the boost pipework (the blue elbows in the picture were purely for fitment purposes) have been ordered and that'll be job jobbed. Whilst I was there we gave the 1000cc Sard's the once-over and for the benefit of me not wanting to deploy the fire extinguisher we ordered a refurb kit, off of eBay again of all places. Who knew? Anyway, this comes with all the O rings and gauzes etc you'd possibly require to make you injectors like new. Here they are though, pre-op.

And finally - this is the inside view of the ducting I had from the air filter to the turbo. It's safe to say I'm a lucky boy that none got sucked up but the turbo has had a pretty valiant attempt at turning the ducting inside out thats for sure. Explains why she felt a bit sluggish last outing. :shock:

Thread Starter
What's that smell?
Joined: Jul 2007
Posts: 217
Likes: 0
From: Dorset, England
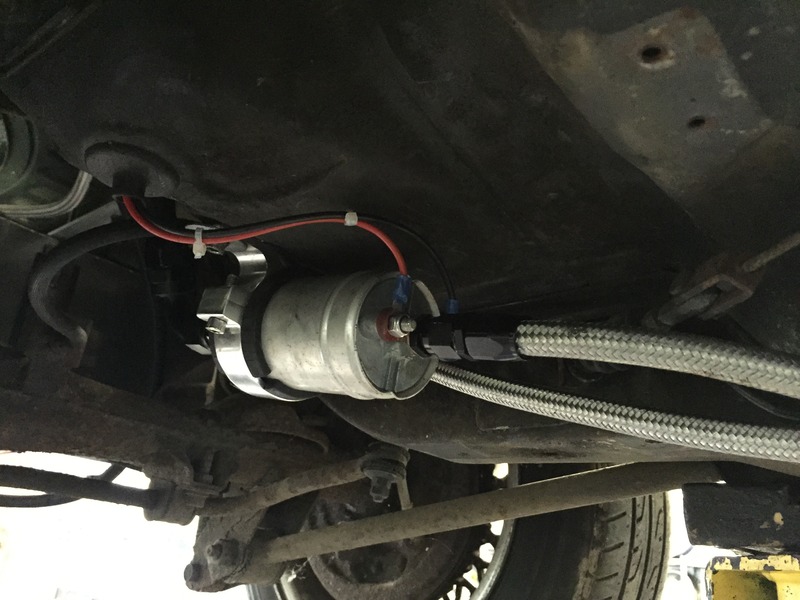
Summer has come and gone and the 7 remained in Uncle Tim's workshop while I cracked on with extension on my house. As it was clearly not moving anywhere fast this year Tim though it prudent that we focus on updating the infrastructure of the old girl. This meant binning the old fuel tank and lines along with the swirl pot and lift pump that had steadfastly served the 13bt for a couple of years.
I've got a good friend who's business repairs alloy tankers so he's pretty talented with a welder. Naturally I thought it'd be a good idea to take advantage of this so I talked him into making me a fuel tank. I was pleased with the outcome.
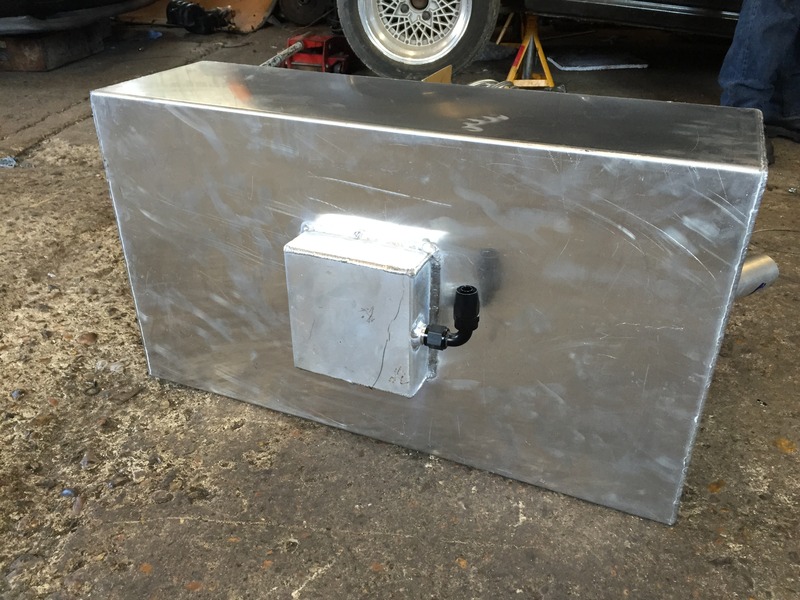
I always wanted to go for the drop tank look, and thats what I got.
Topside I used a universal sender which I'll pair with a little box of tricks to match the resistance for the S1 gauge, there you'll also see the return line and the one way breather valve.
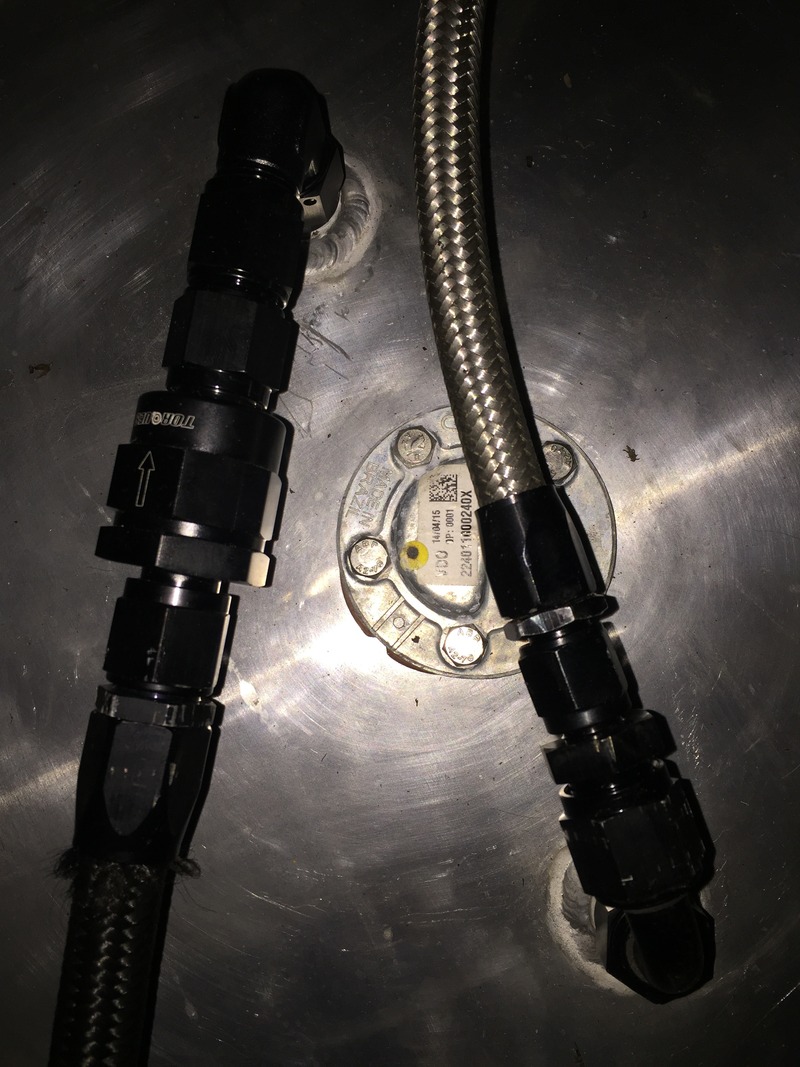
We've put in new AN-06 lines and the filter is in an easily changeable place in the bay alongside the FPR...
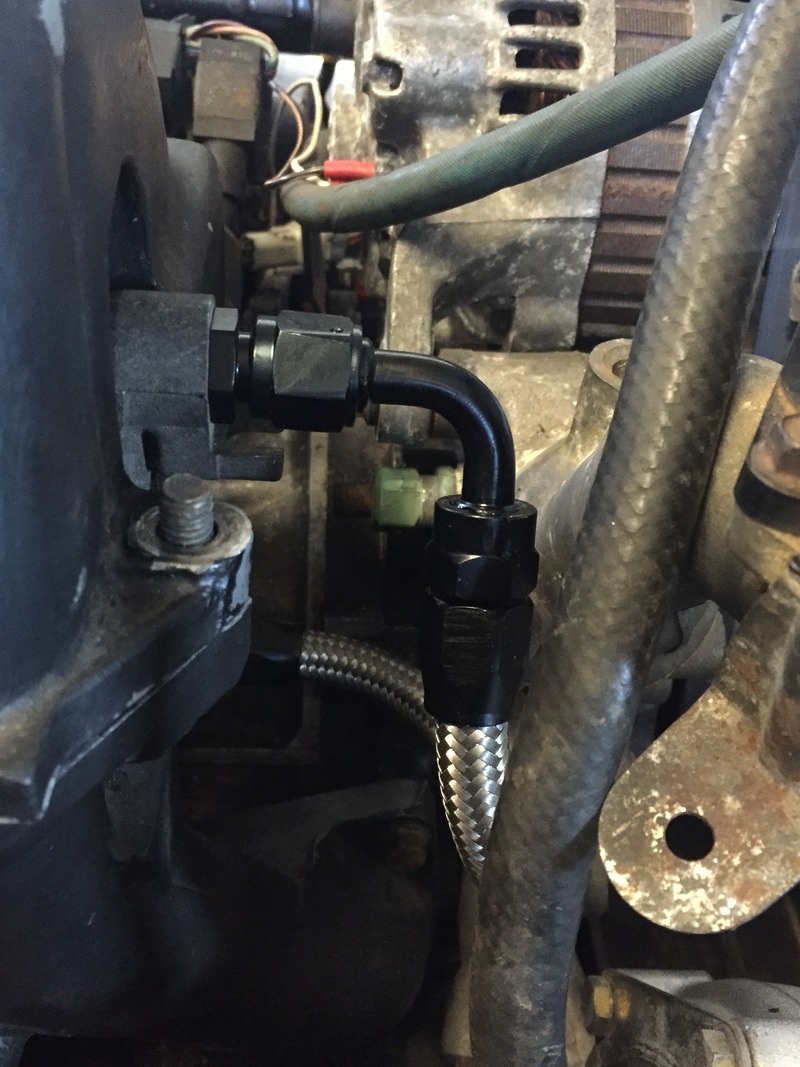
Now I'm slowly swapping all the small oil and water lines to braided, I never realised how addictive it is making it look pretty
Breather hoses changed ready for small catch tank
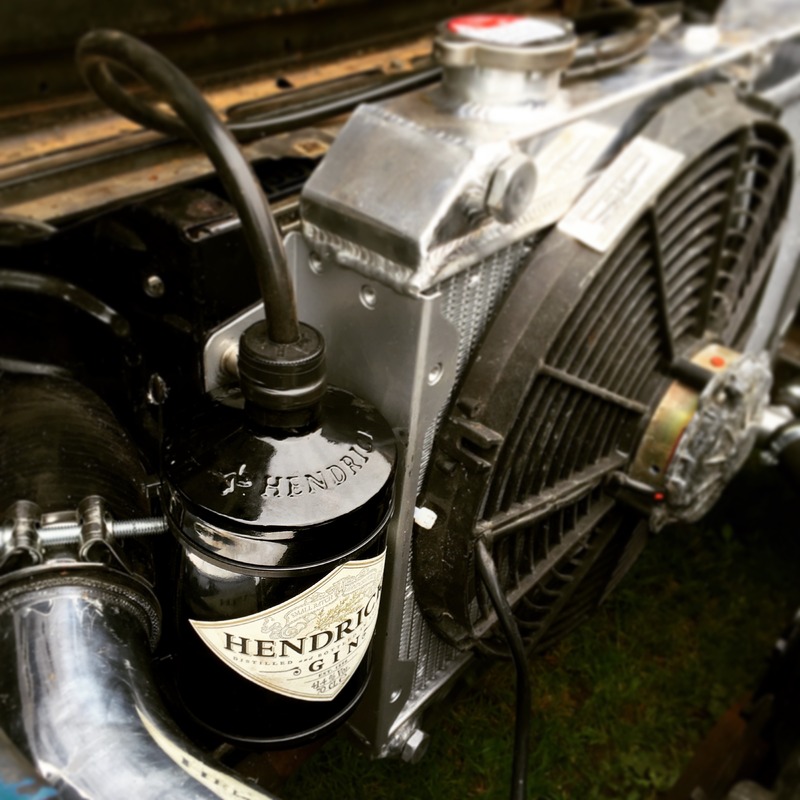
And lastly my love for Gin being applied to the 7 in the form of an expansion bottle.
Let it sit idling for half an hour and all seems good, can't wait to get her back on the rollers.

I've got a good friend who's business repairs alloy tankers so he's pretty talented with a welder. Naturally I thought it'd be a good idea to take advantage of this so I talked him into making me a fuel tank. I was pleased with the outcome.

I always wanted to go for the drop tank look, and thats what I got.

Topside I used a universal sender which I'll pair with a little box of tricks to match the resistance for the S1 gauge, there you'll also see the return line and the one way breather valve.

We've put in new AN-06 lines and the filter is in an easily changeable place in the bay alongside the FPR...


Now I'm slowly swapping all the small oil and water lines to braided, I never realised how addictive it is making it look pretty

Breather hoses changed ready for small catch tank

And lastly my love for Gin being applied to the 7 in the form of an expansion bottle.

Let it sit idling for half an hour and all seems good, can't wait to get her back on the rollers.


Thread Starter
What's that smell?
Joined: Jul 2007
Posts: 217
Likes: 0
From: Dorset, England
Another heap of bits awaited my arrival home from the week away at work...
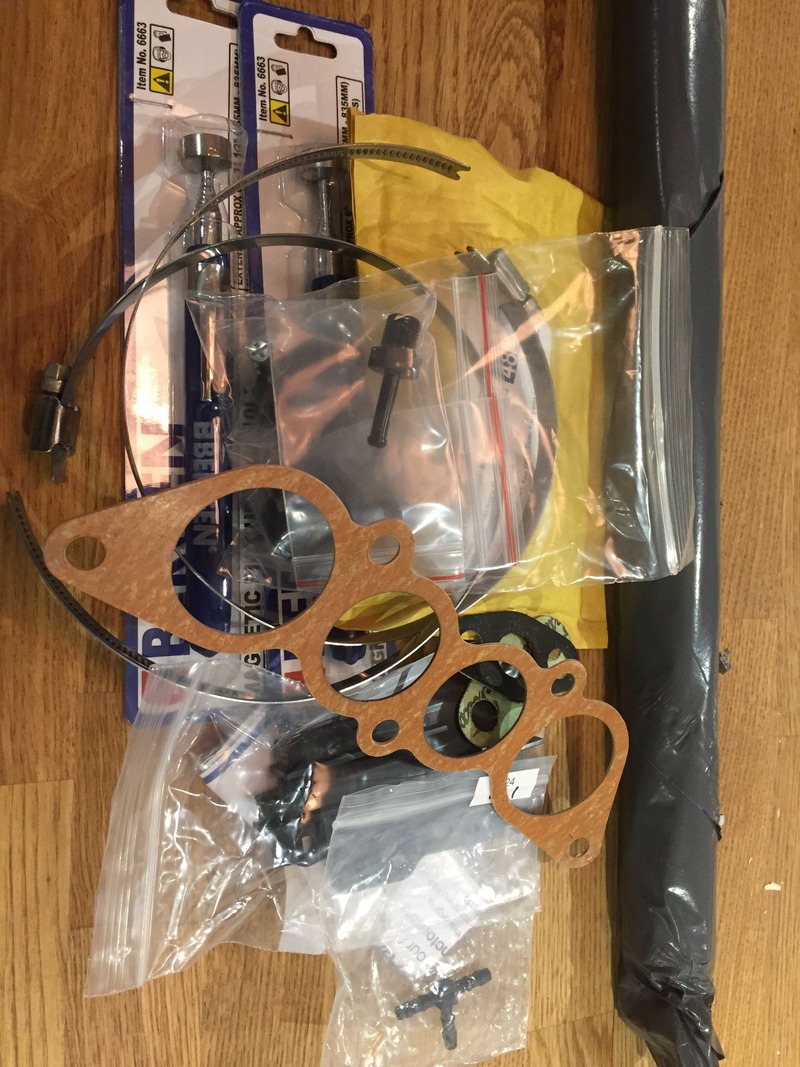
Most of it mundane stuff really and barely photo worthy but all a necessity.
Finally managed to get the correct sized bung of the large port on top of the UIM
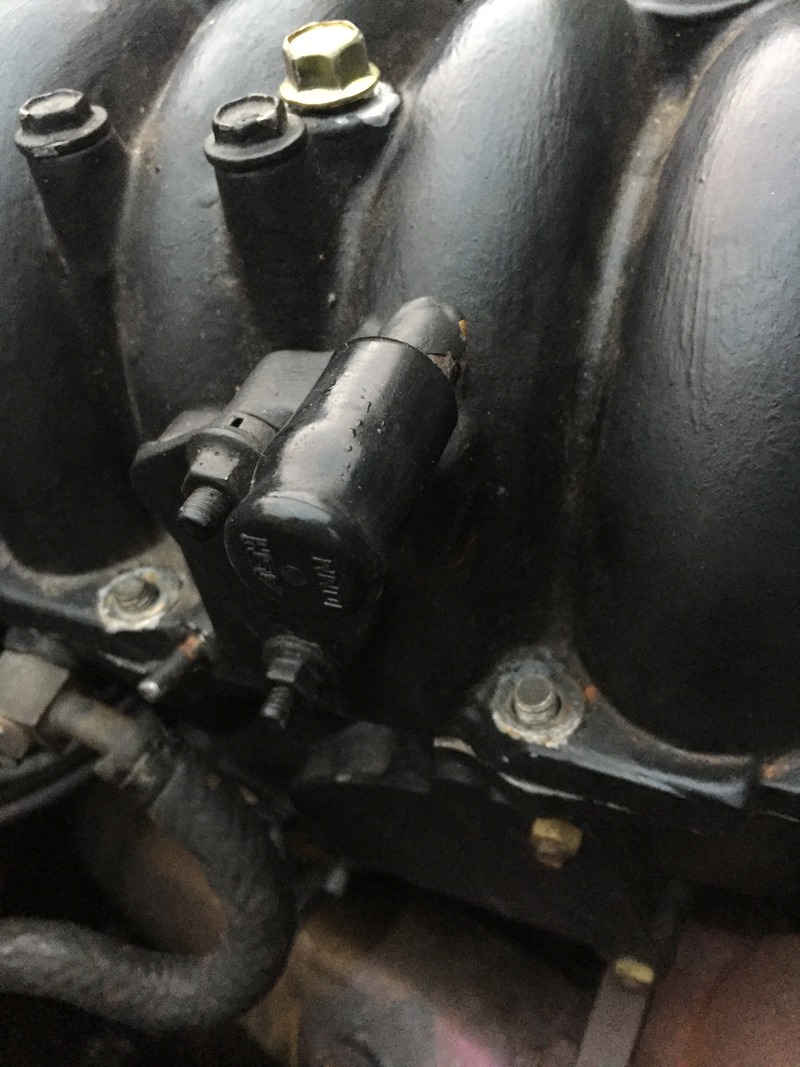
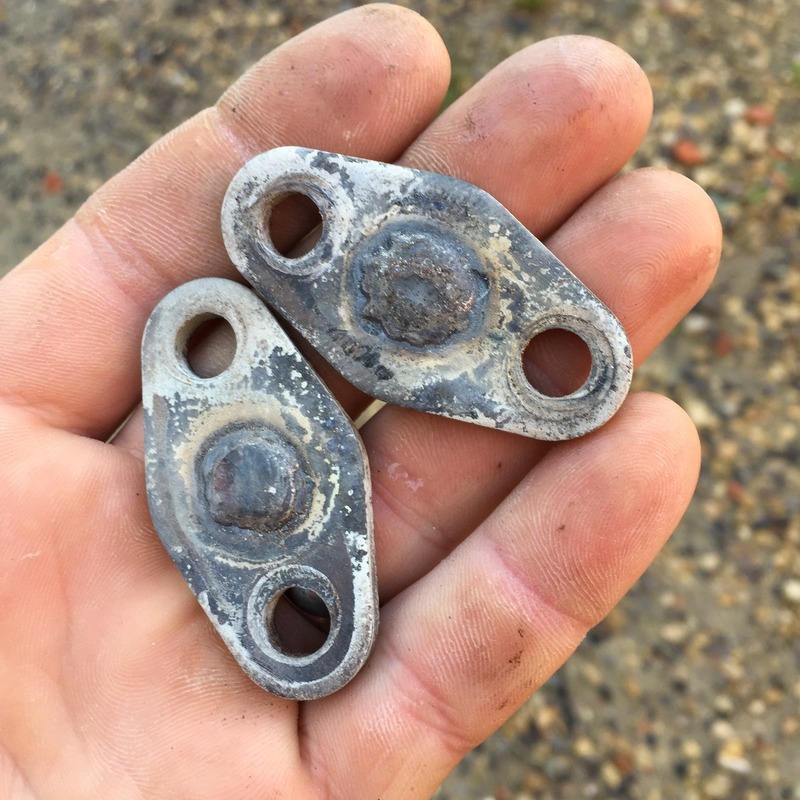
And got the two LIM outlets welded up, one of them being the cause of my ongoing coolant loss over the years which I only realised when I took it apart. Anyhow, they shouldn't leak now.
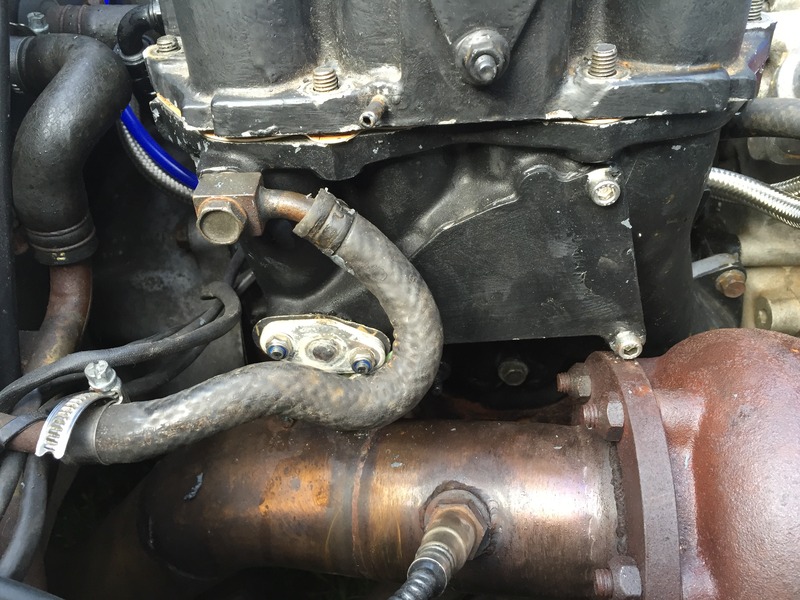
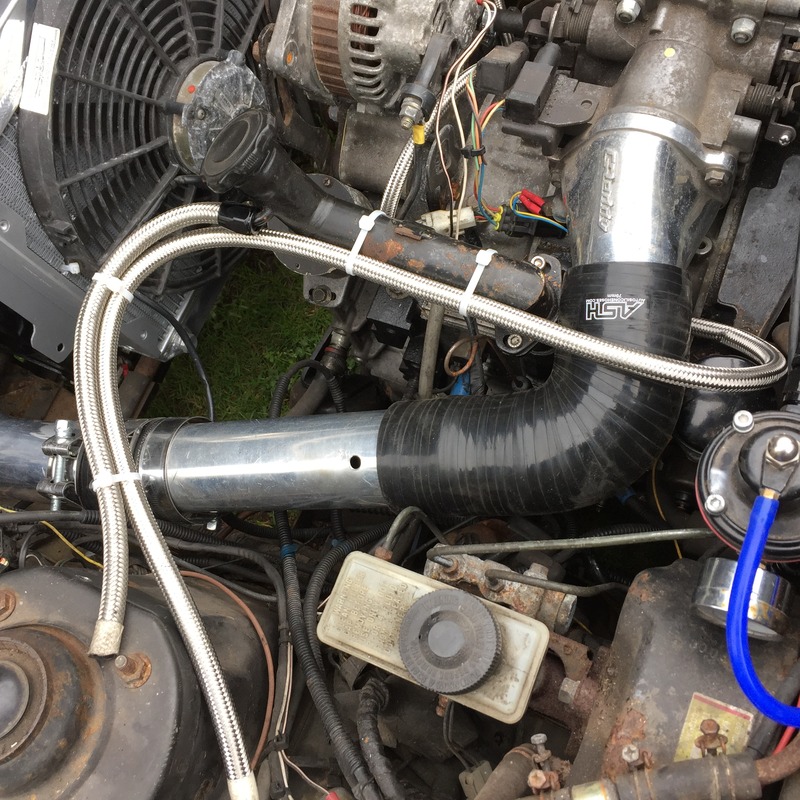
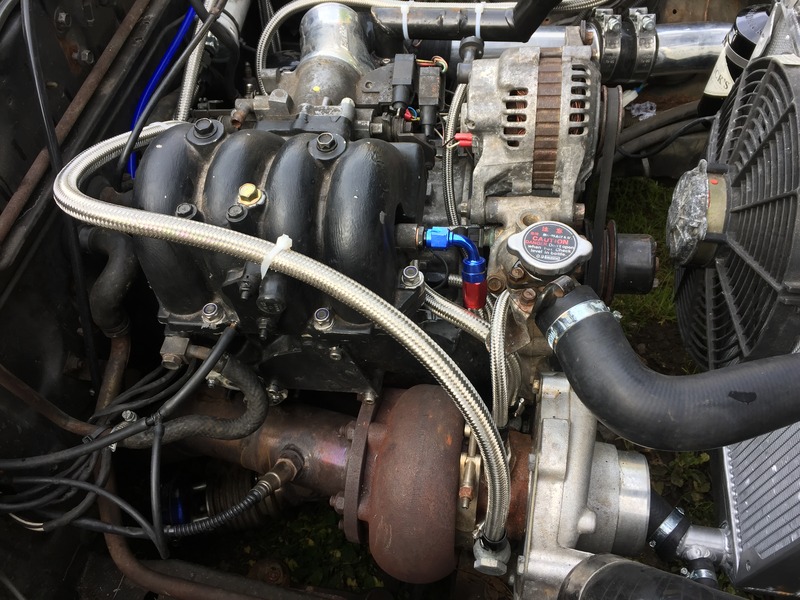
Made up the turbo coolant lines, which in turn highlighted my annoying throttle cable which currently (being a lefty) comes from the wrong side so I'm gonna swap it all around at some point. I've also got to replace that nasty unbraided brake vacuum hose lol. :oops:

Most of it mundane stuff really and barely photo worthy but all a necessity.
Finally managed to get the correct sized bung of the large port on top of the UIM

And got the two LIM outlets welded up, one of them being the cause of my ongoing coolant loss over the years which I only realised when I took it apart. Anyhow, they shouldn't leak now.


Made up the turbo coolant lines, which in turn highlighted my annoying throttle cable which currently (being a lefty) comes from the wrong side so I'm gonna swap it all around at some point. I've also got to replace that nasty unbraided brake vacuum hose lol. :oops:


Thread
Thread Starter
Forum
Replies
Last Post
alphawolff
1st Generation Specific (1979-1985)
17
Nov 17, 2015 05:57 PM