
My 85 S, the parts sponge "Pacman" - Yes, I have too many builds going on


Thread Starter
Joined: Feb 2002
Posts: 8,389
Likes: 120
From: North Jersey
cfamilyfix - Thanks! You should come out sometime and check it out - I still have a bunch of 12a parts you can have too 
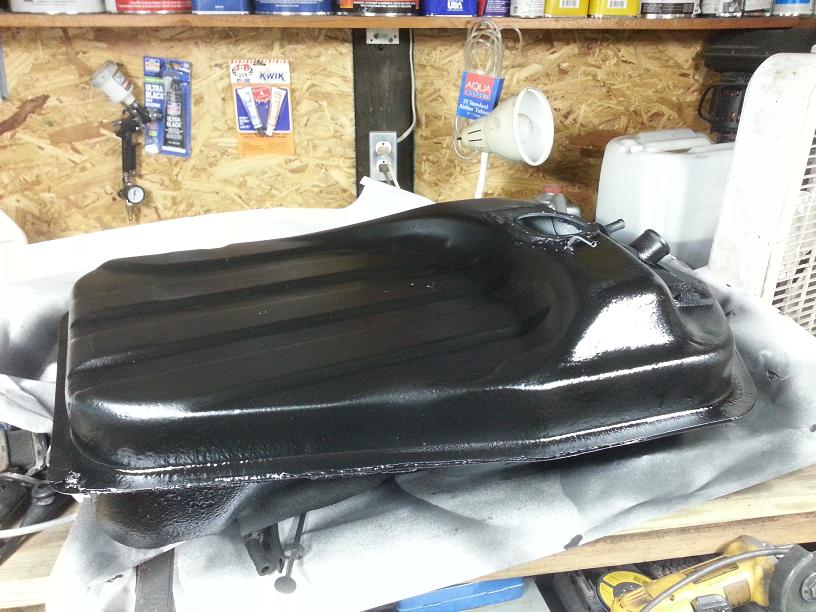
woodmv - Yeah, tanks are a bit of a challenge to weld especially because the metal is super thin after sandblasting all that rust off. Thankfully there was still enough meat left that I didnt' blow any holes in there. The trick is to keep the heat concentrated on the much thicker ring, once that has started to melt (this happens in a split second of course) drag the pool over onto the tank and it all blends together. Having a fast (relatively speaking) wire speed helps too since it builds up the weld a bit faster. Welding the slosh baffle in there is harder in my opinion since there's basically no room for the gun. If you are wondering why there is a patch section behind the mounting ring, its basically a piece I remove to give myself more access, otherwise you can't even get the baffle in there in the first place.
woodmv - Yeah, tanks are a bit of a challenge to weld especially because the metal is super thin after sandblasting all that rust off. Thankfully there was still enough meat left that I didnt' blow any holes in there. The trick is to keep the heat concentrated on the much thicker ring, once that has started to melt (this happens in a split second of course) drag the pool over onto the tank and it all blends together. Having a fast (relatively speaking) wire speed helps too since it builds up the weld a bit faster. Welding the slosh baffle in there is harder in my opinion since there's basically no room for the gun. If you are wondering why there is a patch section behind the mounting ring, its basically a piece I remove to give myself more access, otherwise you can't even get the baffle in there in the first place.
Thread Starter
Joined: Feb 2002
Posts: 8,389
Likes: 120
From: North Jersey
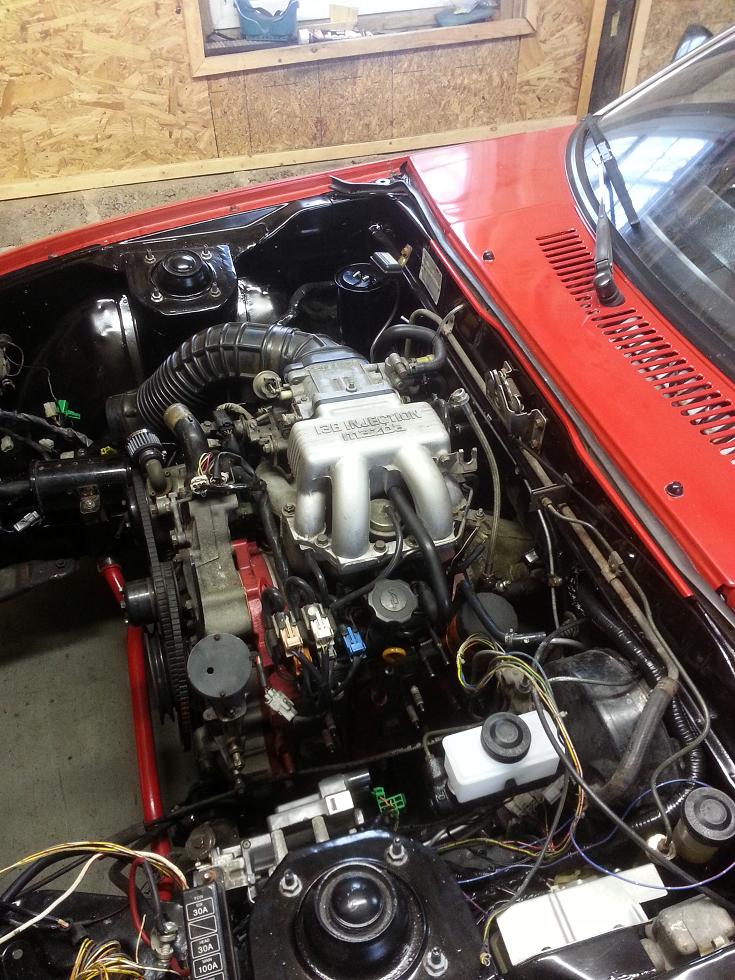
Making good progress this week. Friday night I went to the shipping depot and picked up my engine. Spent a good chunk of Friday night pulling the upper intake manifold off and replacing all the vacuum lines with high temp silicone hose. Not a fan of trusting crunchy 25 year old rubber hose. Also replaced the fuel hose between the fuel rails with new stuff from the parts store. While I was in there I gave everything a good once over and all looks good. Not surprising for a rebuild with 8000 miles on it, but better safe than sorry. The wiring harness Kevin had on this engine was from a Vert that had air bags which adds a fairly bulky and ugly blue wrapped section of harness that snakes its way throughout the car, including the engine harness. Anyway, I wanted to open and rewrap the engine harness anyway, so it was a good excuse to remove all that crap. While I was it I removed the connectors for the FC wiper motor and cruise actuator since that does nothing in an FB swap. Some new split loom and a bunch of good 3m tape later and it's much more presentable. - Sorry didn't really take many (or any) pics of this along the way. I was a man on a mission haha.
Really the only downer with this engine is that it didn't have a flywheel on it. He might have mentioned that and I didn't see it but either way it's not a huge deal. I still had the flywheel off my old S5 na core, but it was really rusted from sitting so long in a damp shed. Brought it to Napa, $35 changed hands and I've got a nice resurfaced flywheel. I don't care enough on this one to clean the rest of the rust off of it, the seal surface was still clean so I'm good to go.
I was also not in the mood to clean/paint/detail my transmission. This car is being build as a driver, not a show car and it'll see winter so it's gonna get dirty again anyway. The trans is from my original 83 S, has 134k miles on it and always shifted great. It's been sitting since I pulled it from that car in 2006 so I did take some time to replaced the front and rear seal, rewrite the reverse light switch, change the mount etc.
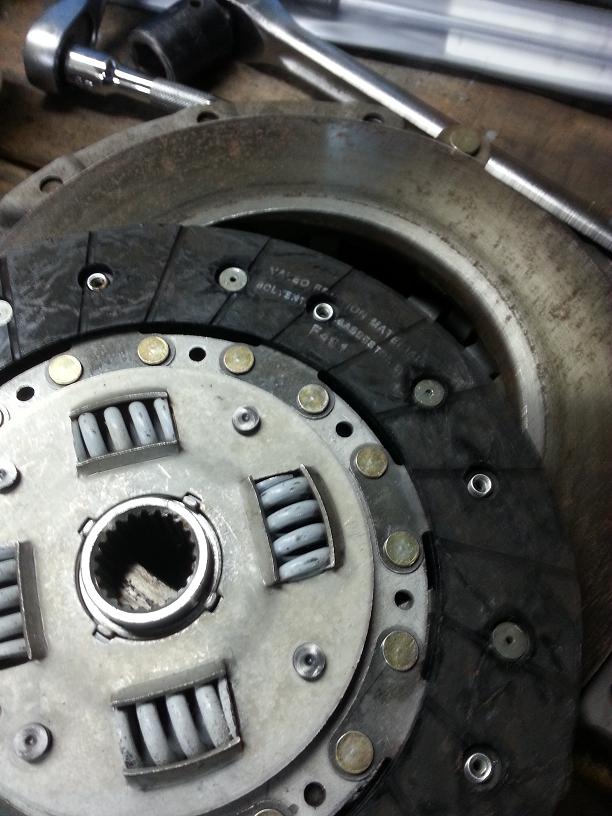
The clutch is also an S5 NA unit that I bought in like 2008ish, used for a whole 40 miles on my FC before the engine went. You can still see writing on the friction disk, shows how new it is for that to not be worn off.
After messing up my new pilot bearing and wasting a few hours trying to figure out why the trans wouldn't go on easily, I put a new pilot bearing (thankfully I bought a spare) and got it all bolted together smoothly. Now it's ready to drop in the car. Hoping to get it in the car this week or weekend, even though it's barely been above 15 degree's outside.
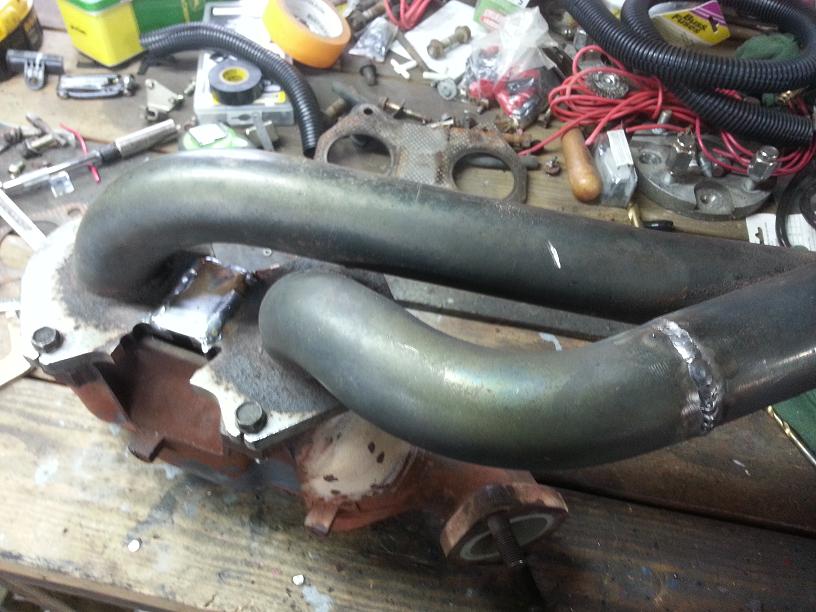
For exhaust i'm using a old RB 12a header that I modified to fit the 13b. I cut the flange and remove half an inch (give or take) from the rear pipe and welded it back together. I bolted it to a stock 13b manifold to make sure that everything would stay put while welding. I used a piece of 1/8" steel to bridge the gap on the flange and keep everything in place, then welded the pipe back together. The flange isn't super pretty but the S5's lower intake sticks out so far you won't be able to see it. I was going to buy a 13b flange and go that route, but this was free and I like that Only thing left is to put an o2 bung on the collector and bolt it onto the engine.
Anyway, that's where i'm at. I know the trans looks like hell, again, I don't care haha.
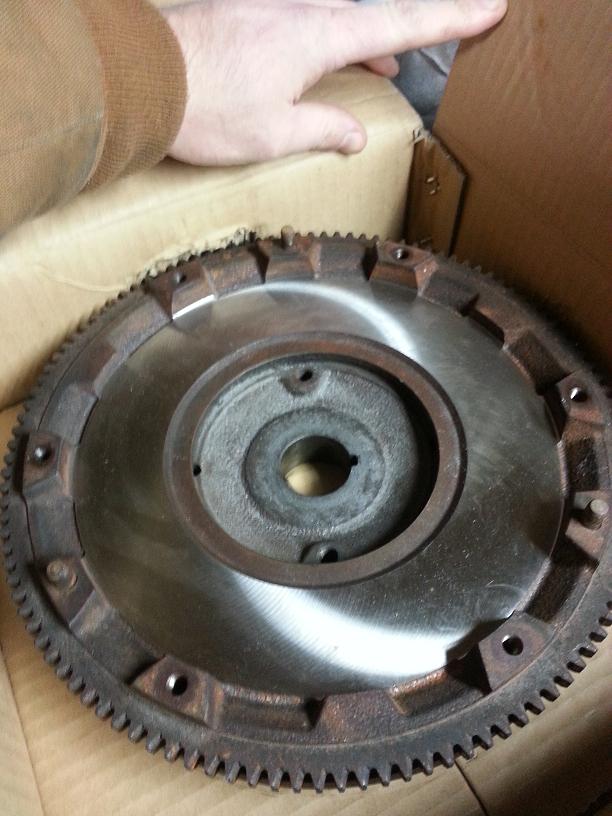
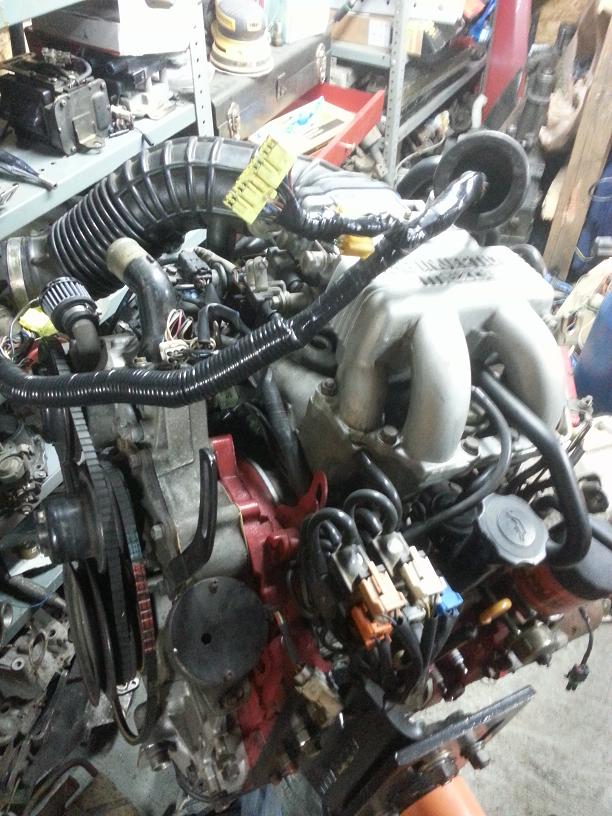
Really the only downer with this engine is that it didn't have a flywheel on it. He might have mentioned that and I didn't see it but either way it's not a huge deal. I still had the flywheel off my old S5 na core, but it was really rusted from sitting so long in a damp shed. Brought it to Napa, $35 changed hands and I've got a nice resurfaced flywheel. I don't care enough on this one to clean the rest of the rust off of it, the seal surface was still clean so I'm good to go.
I was also not in the mood to clean/paint/detail my transmission. This car is being build as a driver, not a show car and it'll see winter so it's gonna get dirty again anyway. The trans is from my original 83 S, has 134k miles on it and always shifted great. It's been sitting since I pulled it from that car in 2006 so I did take some time to replaced the front and rear seal, rewrite the reverse light switch, change the mount etc.
The clutch is also an S5 NA unit that I bought in like 2008ish, used for a whole 40 miles on my FC before the engine went. You can still see writing on the friction disk, shows how new it is for that to not be worn off.
After messing up my new pilot bearing and wasting a few hours trying to figure out why the trans wouldn't go on easily, I put a new pilot bearing (thankfully I bought a spare) and got it all bolted together smoothly. Now it's ready to drop in the car. Hoping to get it in the car this week or weekend, even though it's barely been above 15 degree's outside.
For exhaust i'm using a old RB 12a header that I modified to fit the 13b. I cut the flange and remove half an inch (give or take) from the rear pipe and welded it back together. I bolted it to a stock 13b manifold to make sure that everything would stay put while welding. I used a piece of 1/8" steel to bridge the gap on the flange and keep everything in place, then welded the pipe back together. The flange isn't super pretty but the S5's lower intake sticks out so far you won't be able to see it. I was going to buy a 13b flange and go that route, but this was free and I like that
Only thing left is to put an o2 bung on the collector and bolt it onto the engine.Anyway, that's where i'm at. I know the trans looks like hell, again, I don't care haha.
Last edited by 82transam; Jan 29, 2014 at 09:38 AM.
Thread Starter
Joined: Feb 2002
Posts: 8,389
Likes: 120
From: North Jersey
Bit more progress. Warmed the shop up enough to undercoat the gas tank so that's basically done now. I picked up a few feet of FI fuel hose yesterday ($8 a foot, ugh) but still need to sandblast the gas tank straps this weekend though.
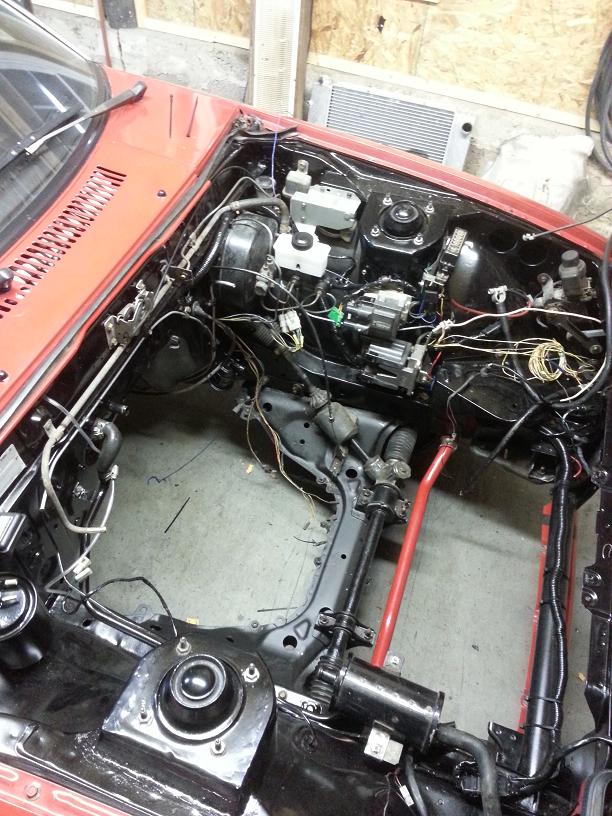
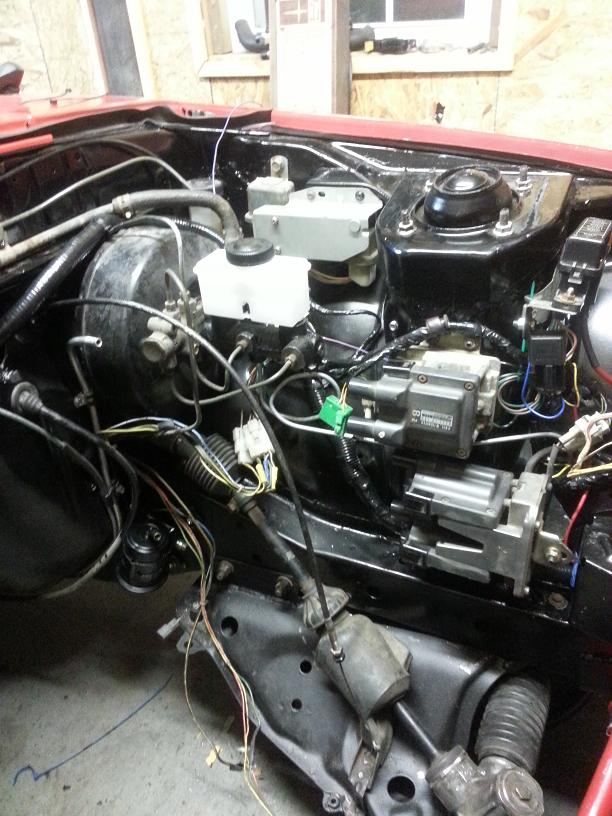
Finished up my FC swap harness (for the coils and such) and installed that. I still have to pass a few more things through the firewall and finish up the grommet but most of the wiring is done at this point hopefully. That mess of crimp connectors and ugly wires under the brake booster will all get removed and redone once the engine is in - I have no way to tell how long to make those wires without it. Same goes for the pile of wires up by the battery tray. Those are for the oil pressure gauge, coolant temp etc. Once the engine is in I can finalize them
I tried to keep all the FC components in one area, makes the wiring much easier to keep neat. On my other builds I've put the coils up farther, closer to where the battery used to be on them, but on this one i'm keeping the battery in the engine bay so I had to keep that space free. Overall it came out pretty well. I'm just hoping the A/C compressor doesn't hit that trailing coil. We'll see...
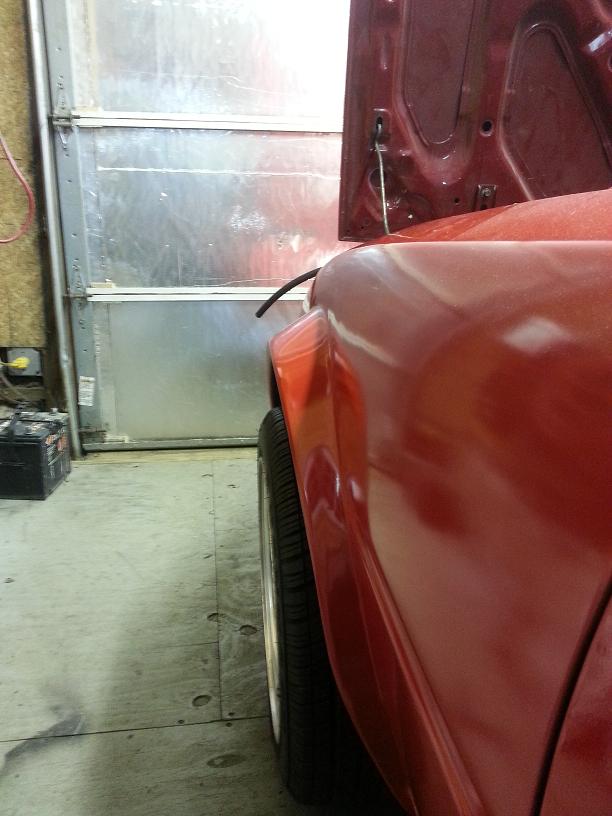
I'm not sure what offset these wheels are, but combined with the track width of the FC subframe they're damn near perfect for these flares. Once the front end settles a bit it should be perfect. Hopefully they don't rub haha.
Finished up my FC swap harness (for the coils and such) and installed that. I still have to pass a few more things through the firewall and finish up the grommet but most of the wiring is done at this point hopefully. That mess of crimp connectors and ugly wires under the brake booster will all get removed and redone once the engine is in - I have no way to tell how long to make those wires without it. Same goes for the pile of wires up by the battery tray. Those are for the oil pressure gauge, coolant temp etc. Once the engine is in I can finalize them
I tried to keep all the FC components in one area, makes the wiring much easier to keep neat. On my other builds I've put the coils up farther, closer to where the battery used to be on them, but on this one i'm keeping the battery in the engine bay so I had to keep that space free. Overall it came out pretty well. I'm just hoping the A/C compressor doesn't hit that trailing coil. We'll see...
I'm not sure what offset these wheels are, but combined with the track width of the FC subframe they're damn near perfect for these flares. Once the front end settles a bit it should be perfect. Hopefully they don't rub haha.
Last edited by 82transam; Jan 31, 2014 at 12:13 PM.
Thread Starter
Joined: Feb 2002
Posts: 8,389
Likes: 120
From: North Jersey
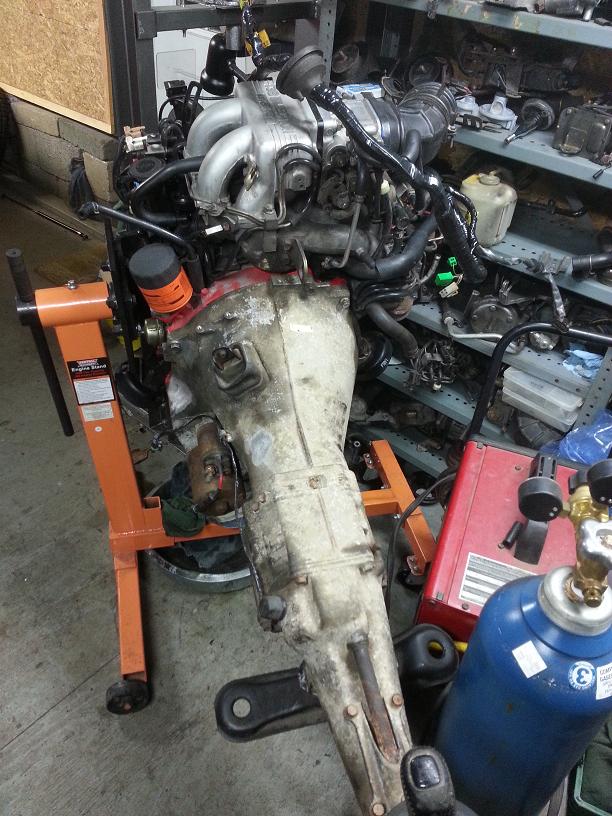
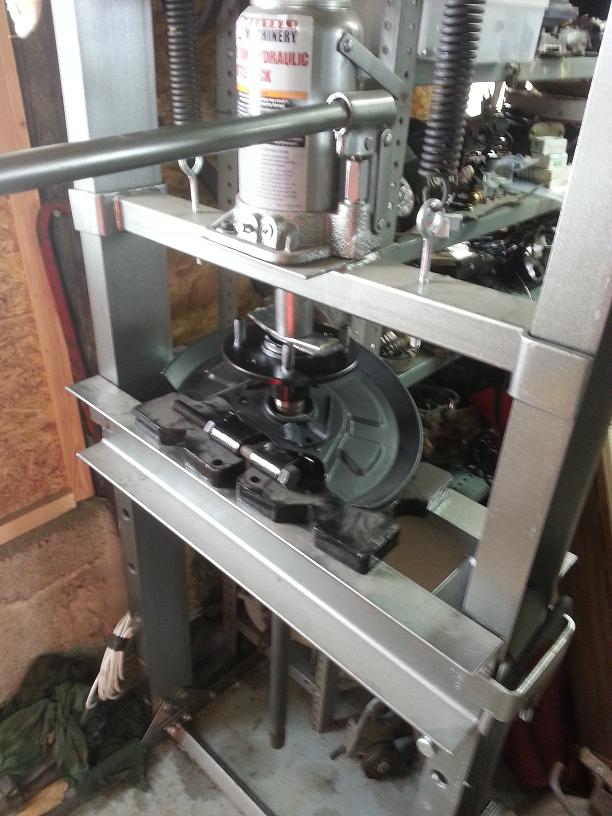
More progress. We had a break in the single digit temps this weekend and enough snow melted in front of the shop for me to push this out and get the engine/trans dropped in. Went pretty smoothly, and the best part is the FB trans mount lines right up. I was all set to do some modding to the FB trans cross member since I didn't think the FC subframe would put the engine in exactly the same spot - but sure enough it bolts right up. Bonus!
Since taking this pic I actually got a few more things done. The wires for the alternator, coolant temp sensor, oil pressure sensor and low oil sensor are run and I hooked up and started bleeding the clutch. It was taking a while and both the wife and I got bored so I'll go back to that tonight or tomorrow. I still have to finish wiring up the starter and reverse lights, but overall the wiring is nearly done.
I also took advantage of the weather and finished sandblasting the gas tank straps and GSL-SE axles (just the hub side, might as well try to preserve them as best I can). I'm hoping to get the gas tank in this week, finish the exhaust and get the rad/oil cooler in. Then it'll be time to fire it up (i hope haha)
Getting there...
Thread Starter
Joined: Feb 2002
Posts: 8,389
Likes: 120
From: North Jersey
Thanks! Don't be ashamed though, "All" I'm doing here really is bolting a bunch of parts together and cleaning up wiring and such - it's far from a restoration (for now haha)
I'm very driven to get this one done and honestly have been treating it almost as a second job, putting 35+ hours in on it a week just to get it done. The end result will be worth it but spending that much time does kinda ruin the fun if I'm honest. I'm looking forward to taking a break from back to back big builds like this one and the Panda for a few months and just do smaller projects. More importantly I'm making it a point this year to go on more fun drives - something I've gotton away from. Most of my time on the road is dealing with my 60 mile (round trip) commute everyday. I need to get out on the backroads for nice drives more often.
Anyway, I'm rambling....
Thread Starter
Joined: Feb 2002
Posts: 8,389
Likes: 120
From: North Jersey
Haven't been taking many pictures at all along the way on this one, but I have made quite a bit of progress. Here's an update for the 1 person left who is actually reading this.
Basically all the wiring is done with exception of the electric fan and fuel pump. I neatened up the wiring for the alternator and stock sensor sending units and ran them over to the engine basically where the stock coil/ignitor wiring would have gone on a 12a. Finished hooking up the reverse light switch and starter trigger wire. Anything that wasn't related to the reverse lights or starter trigger was cut out and wrapped up. No need for all that clutter - the FC stuff adds enough wiring as it is...
I installed the FC ECU (N351) where the stock S3 ecu would go. Very handy that it bolts right in, and that there is already a hole in the firewall on that side for the engine wiring. The 83 and older don't have any of that. I haven't bought a new battery for this thing yet but I do have an old crappy one from my Subaru which had enough juice to power up the car and test things. Starter barely moves (battery is really shot haha), but at least it confirms that the wiring is correct. I plugged a spare CAS into the engine harness and spun it by hand to confirm that the plugs and injectors fire, the tach works, fuel pump relay clicks on etc. Very happy about that, one more thing off the list.
With that done I finished assembling the fuel tank/pump/sending unit etc and installed that into the car. There was very little drama there, just some annoying fiddling getting the 4mm bolts that hold the pump assembly in started. One the tank was in I ran new hose to the hard lines and finished hooking the filter up etc. I need to finish running a wire to the pump then I can put some gas in there and pressurize the system.
Last night I got to work on the rest of the exhaust. Finished welding an o2 bung in the header, installed the mid pipe (in rough shape but it'll work for now) and started shortening the cat, only needs a little bit taken off - overall the exhaust install has been a breeze. I did have to make some heat shields though since all of them were missing off of this car. Thankfully I had some of an FC heat shield left that I was able to use...
Anyway, a few more hours of work and I should be ready to fire this thing up.
Ha! I'll pile on: 4!
I'm inspired by this and other threads that show people are making tremendous progress with their builds, but I have to admit I'm a bit jealous too. Wish I had that kind of time and resources to put into mine. Keep up the good work!
I'm inspired by this and other threads that show people are making tremendous progress with their builds, but I have to admit I'm a bit jealous too. Wish I had that kind of time and resources to put into mine. Keep up the good work!
Thread Starter
Joined: Feb 2002
Posts: 8,389
Likes: 120
From: North Jersey
Thanks guys.This week has been killing my momentum unfortunately. We got another 10" of snow yesterday, followed by freezing rain and then another 3" or so on top of that. Was out there for hours with the snow blower. Fun. Got dried off and ate, then went out to the shop for an hour or two of work on this thing and bam, power goes out from all the ice on the lines. Double Fun! Had to dig the generator out of the garage, get it started (always needs starter fluid despite being only a year old, pain in the ***) and by that time it was too late to get anything done. Besides, the generator is big but I doubt it would be happy with a welder going.
Hopefully tonight I can get the exhaust buttoned up, and a few other details. Assuming no major road blocks I'll be test firing it this weekend.
Oh and woodmv, I know what you mean, projects tend to drag out and you start to get frustrated about the lack of progress, but just keep at it and you'll get it done. I've gone too far the other way and it's starting to lose its fun. Hopefully once this one is on the road I'll take it down a notch for a while... I've said that before though..
UGH! That SUCKS! We only got about 2 or 3 inches of snow with this last storm that melted away through the night. I grew up with what you're living through tho and can feel your pain!
Thread Starter
Joined: Feb 2002
Posts: 8,389
Likes: 120
From: North Jersey
Yeah this winter has been pretty crazy, got more snow Saturday, and again this morning. Makes me really appreciate Subaru AWD and snow tires...
Anyway, big weekend for this project. I was able to work on it almost non stop - time is a blur so I can't remember exactly what I did on what day at this point haha, but basically I got the exhaust finished up, got the e-fan wired up, took care of all the misc lines and hoses that still needed connecting, filled fluids etc and turned the key. I gotta say, this has been the smoothest swap I've done so far. It took maybe 5 seconds of cranking before it fired up. I noticed that the oil pressure gauge wasn't reading anything so I turned it back off. Checked the oil filter and it was full of oil. Restarted the engine and checked the sender with a multimeter, working as expected so something is either wrong with the gauge itself, or the wiring going to it. Bottom line is it's got sufficient oil pressure, so I'm not worried about it too much, although I definitely need to fix that. I'm still waiting on my oil cooler hoses from Corksport so I just have a old line looped between the front cover and rear iron for now. I will not drive the car until an oil cooler is there, but for just idling in the shop it's fine.
I did have to pull the upper intake back off to make some adjustments to the throttle body (was "idling" at 1500) since most of the adjustments are near impossible to get to on these with it on the car (T2's are much easier to adjust in my opinion) anyway, got it right the first time and now it purrs at 800 after it's warmed up. Timing was off a hair too so I adjusted that as well, otherwise it's all great.
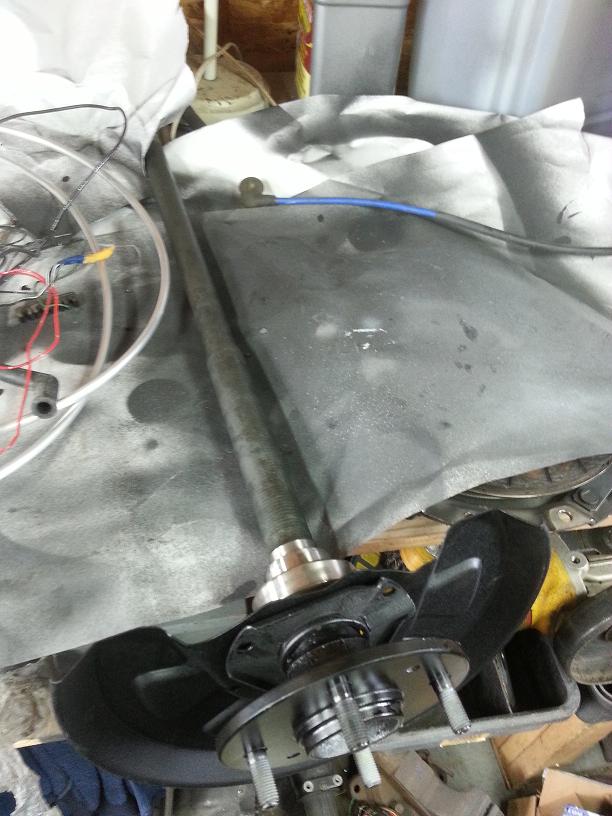
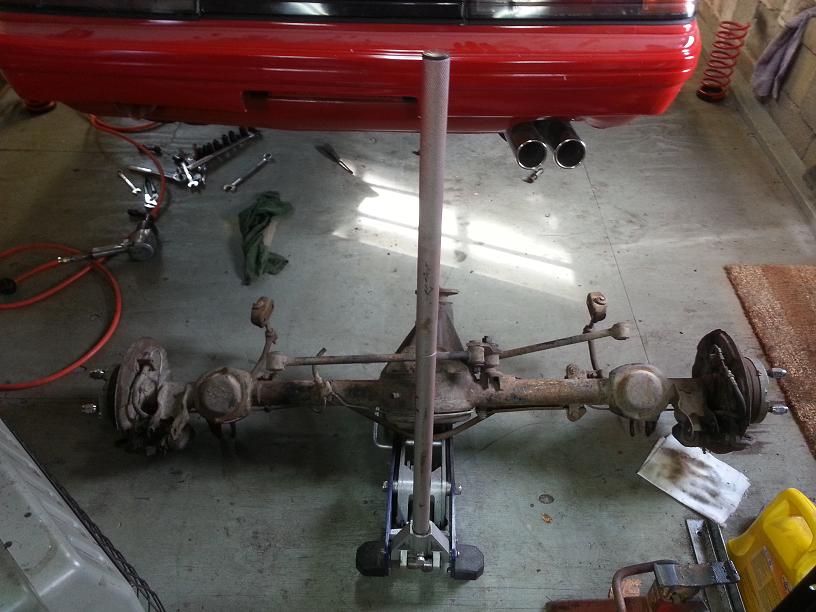
Once I knew the engine was running solid I decided to tear into the rear end. As I mentioned in an earlier post, the GSL rear end this car had in it was an 83 (big driveshaft flange, but small axles) Since I want to use GSL-SE axles on this, the 83 rear end is of no use to me. Thankfully my blue 83 has an 85 GSL rear in it. I didn't take many pics, but I pulled both rear ends, put the 83 GSL rear into the 83 (I'll remove it again once the weather is nicer to sandblast and paint it) and put the SE axles into the 85 GSL rear, along with SE brakes and installed it into the 85. To say I was exhausted after all that is perhaps an understatement. Changing the rear end on the blue on outside was entertaining... The car is sitting in a bunch of snow and ice. I did set a new personal record though and managed to get all that done in under 5 hours. A few weeks ago I sandblasted the hub area on the SE axles and painted them as well as the backing plates. While I was at it I installed new bearings/retainers (finally got to use my harbor freight press lol) and put new seals in the rear end - then topped it up with redline oil.
So there you have it, a insanely busy weekend, but worth it. I'm hoping to bleed the brakes tonight, and get the last few things done on this thing this week, then I can take it for a test drive.
83 GSL rear out...
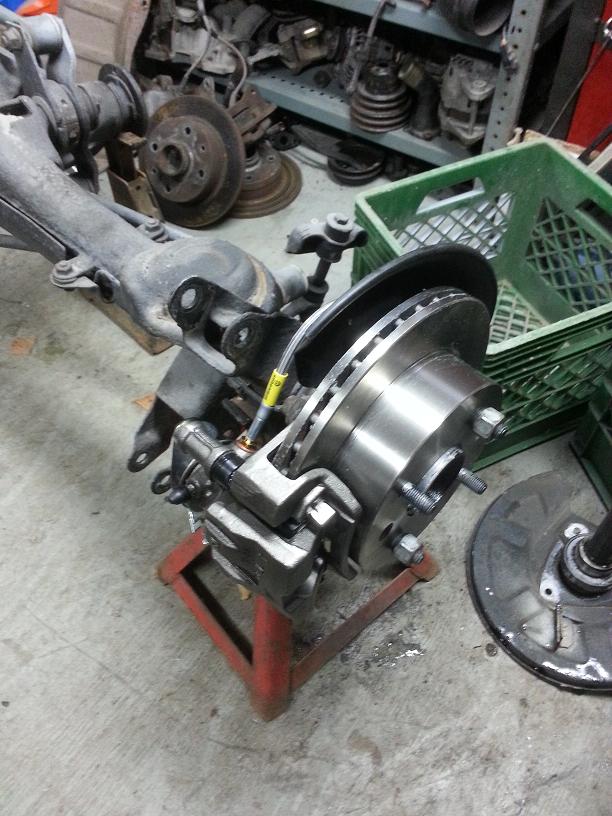
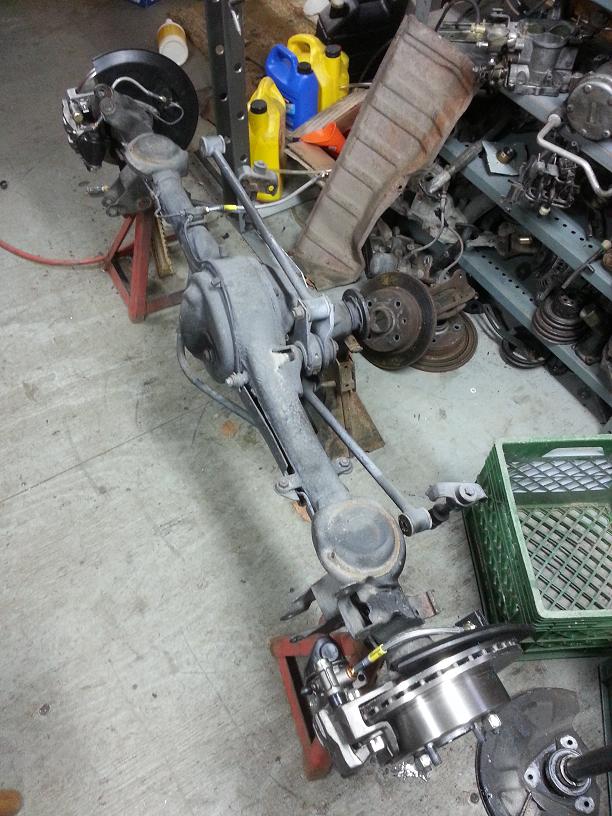
85 GSL rear with SE axles etc on. It's a bit dirty, but this was all sandblasted, and sealed up back in 2010, holding up really well too.
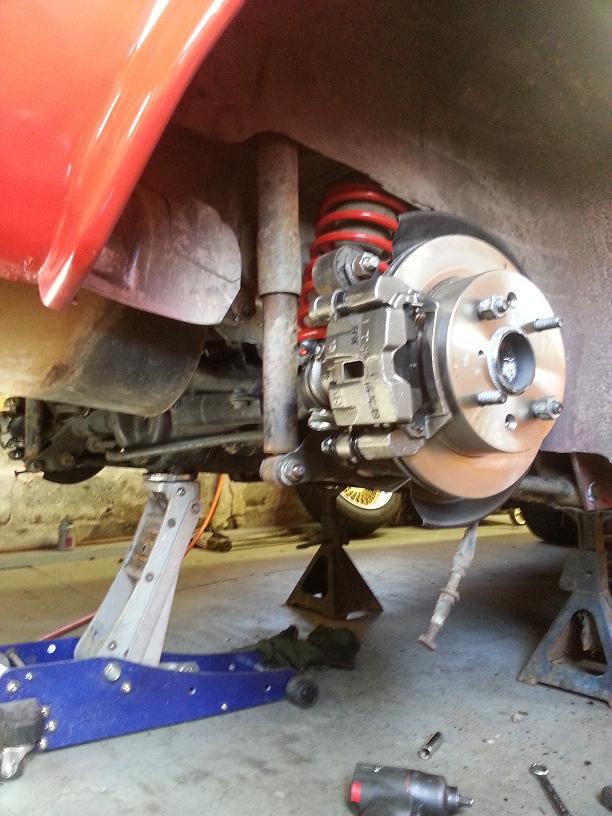
In it's new home
Anyway, big weekend for this project. I was able to work on it almost non stop - time is a blur so I can't remember exactly what I did on what day at this point haha, but basically I got the exhaust finished up, got the e-fan wired up, took care of all the misc lines and hoses that still needed connecting, filled fluids etc and turned the key. I gotta say, this has been the smoothest swap I've done so far. It took maybe 5 seconds of cranking before it fired up. I noticed that the oil pressure gauge wasn't reading anything so I turned it back off. Checked the oil filter and it was full of oil. Restarted the engine and checked the sender with a multimeter, working as expected so something is either wrong with the gauge itself, or the wiring going to it. Bottom line is it's got sufficient oil pressure, so I'm not worried about it too much, although I definitely need to fix that. I'm still waiting on my oil cooler hoses from Corksport so I just have a old line looped between the front cover and rear iron for now. I will not drive the car until an oil cooler is there, but for just idling in the shop it's fine.
I did have to pull the upper intake back off to make some adjustments to the throttle body (was "idling" at 1500) since most of the adjustments are near impossible to get to on these with it on the car (T2's are much easier to adjust in my opinion) anyway, got it right the first time and now it purrs at 800 after it's warmed up. Timing was off a hair too so I adjusted that as well, otherwise it's all great.
Once I knew the engine was running solid I decided to tear into the rear end. As I mentioned in an earlier post, the GSL rear end this car had in it was an 83 (big driveshaft flange, but small axles) Since I want to use GSL-SE axles on this, the 83 rear end is of no use to me. Thankfully my blue 83 has an 85 GSL rear in it. I didn't take many pics, but I pulled both rear ends, put the 83 GSL rear into the 83 (I'll remove it again once the weather is nicer to sandblast and paint it) and put the SE axles into the 85 GSL rear, along with SE brakes and installed it into the 85. To say I was exhausted after all that is perhaps an understatement. Changing the rear end on the blue on outside was entertaining... The car is sitting in a bunch of snow and ice. I did set a new personal record though and managed to get all that done in under 5 hours. A few weeks ago I sandblasted the hub area on the SE axles and painted them as well as the backing plates. While I was at it I installed new bearings/retainers (finally got to use my harbor freight press lol) and put new seals in the rear end - then topped it up with redline oil.
So there you have it, a insanely busy weekend, but worth it. I'm hoping to bleed the brakes tonight, and get the last few things done on this thing this week, then I can take it for a test drive.
83 GSL rear out...
85 GSL rear with SE axles etc on. It's a bit dirty, but this was all sandblasted, and sealed up back in 2010, holding up really well too.
In it's new home
Last edited by 82transam; Feb 18, 2014 at 09:25 AM.
Thread Starter
Joined: Feb 2002
Posts: 8,389
Likes: 120
From: North Jersey
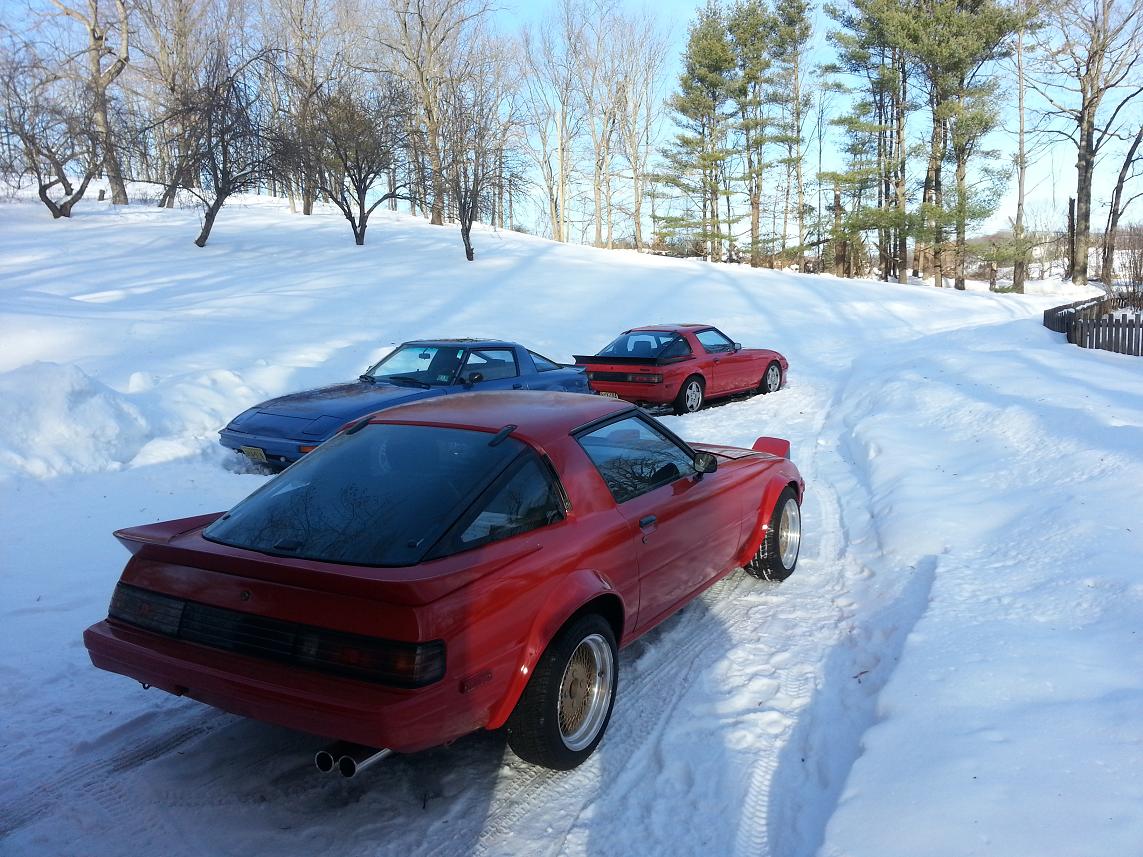
Here's a few shots of it running outside with the other kids, and also of the touch screen I started working on installing. Woo
Anyone wanna guess what the shift **** is from?
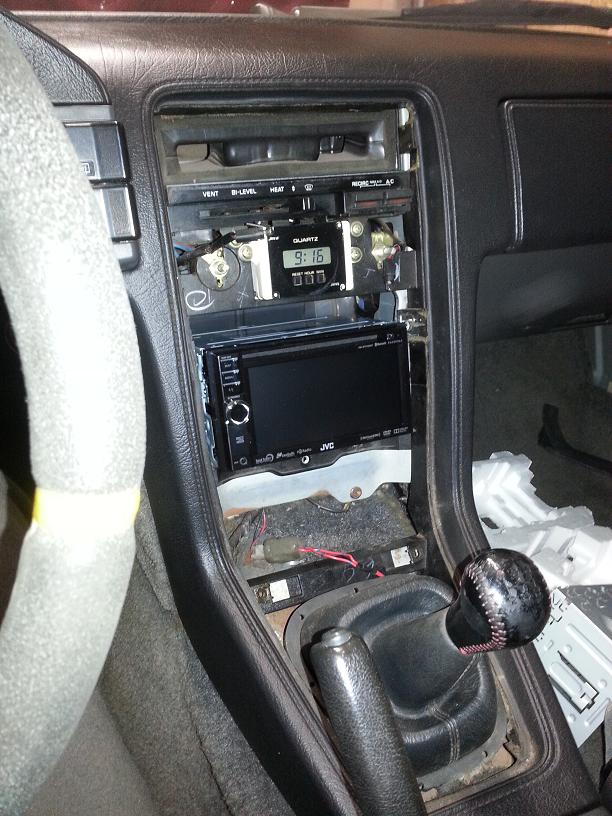
Anyone wanna guess what the shift **** is from?
Wow Sean you are really cranking on this thing. It looks great! Would love to take a ride out there and check it out in person (as well as pillage your 12a stuff) as soon as this snow is gone...I'm so over WINTER!!!
Thread Starter
Joined: Feb 2002
Posts: 8,389
Likes: 120
From: North Jersey
Nah, "just" 20 ton, the one that goes on sale like every other week at Harbor Freight. Usually they are orange, guess I got the rare silver one lol.
Not sure if it's motivation or a crippling obsession, but either way, thanks!
cfamilyfix - once the snow is gone come on out!
Not sure if it's motivation or a crippling obsession, but either way, thanks!
cfamilyfix - once the snow is gone come on out!
Thread Starter
Joined: Feb 2002
Posts: 8,389
Likes: 120
From: North Jersey
Got brakes bled last night, took a while since the system was bone dry but went well. The master cylinder, hoses, and some of the hardlines are new, and the calipers are rebuilt units, should be nice and solid.
Question for the S3 guys, do 84/85's typically not have the one way valve in the hose going to brake booster? This one doesn't, but both my 83's do have one.
Was hoping to get the oil cooler finished up last night since the hoses from Corksport came in, but apparently I don't have as many spare banjo bolts as I thought. I only had 2, and you need 3 for an FC oil cooler setup. bummer.
Dave has a spare and said he'd send it to me today, hopefully it comes in quick cause this car is ready to rock otherwise
Thread Starter
Joined: Feb 2002
Posts: 8,389
Likes: 120
From: North Jersey
The oil cooler seems to be the bane of my existence on this one. Every project always seems to have one or two things that just don't want to cooperate. The oil cooler lines I ordered from corksport took close to a month to get here, and now that they are, it doesn't look like they'll work anyway.
Both of my other FB's have FC oil coolers using the corksport lines, however, on both of those cars I have the battery in the bin, and thus not battery tray which gives the upper line all the room you need. On this car though, I'm keeping the battery up in the engine bay. Combined with that absurdly oversized radiator I'm using (to be honest I don't even like this radiator at all, and specifically removed it from my T2 FB months ago - was gonna scrap it, but then this project came along and I figured what the hell, might as well get a bit more use out of it) and there's basically no room for the upper line to fit correctly.
I've been driving myself nuts the past two nights trying to get a solution together, but so far no luck. I have a few more ideas to try tonight. Hopefully something works since I was planning to register this tomorrow and put some miles on it this weekend.
I haven't taken any pics, but basically the upper line is a bit too long, and too stiff to just flex around everything. It's my fault for being cheap - I should have just gotton the AN style lines from Mazdatrix and gone that route. At least then I could take them apart and shorten the one if needed. I would also like to point out that I had corksport lines on my FC and they didn't fit very well on that either. I am an idiot for buying these again... ugh
*rant over, resume normal thread

Thread Starter
Joined: Feb 2002
Posts: 8,389
Likes: 120
From: North Jersey
Yeah, this car has been off the road since the late 90's and she's definitely a bit grumpy with being brought back to life...
Pictures will be coming, but I managed to get something to work for the oil lines, at least for now. Basically I used the corksport bottom line (which isn't even 100% correct, the two fittings aren't clocked to each other correctly... lame) and used an FB bottom line for my upper (it's a stainless mazdatrix line from many years ago that's been sitting around) Neither fits the way I want it to and I was forced to mount the oil cooler lower than I wanted but it'll do for now.
As mentioned in my rant above, the radiator I'm using also kinda sucks so later in the year once my wallet recovers from this build I'll go back and redo all this. For now though it's holding up pretty well.
Dave was nice enough to send me the banjo bolt I was missing - should be here in a day or two. I got impatient though and borrowed one from my blue FB. I'm not driving it right now so I figured what the hell.
Which brings me to the big news of the weekend - I registered this on Saturday and put about 50 miles on it. The first few drives with a new project car are always bitter sweet to me. It's a relief to be at that stage, but then you start finding all the stuff that still needs fixing/tweaking/redoing etc. Overall I'm pretty happy with the result, and once I spend some more time this week on it I'll be mostly "done"
Biggest to-do's at this point:
- Theres a pretty loud whirring/rubbing sound from the rear end. Pretty sure it's going to be the driveshaft rubbing on the heat shield, at least I'm hoping that's what it is...
-Theres a grinding coming from the front left around turns. 99% sure it's the caliper bolts rubbing on the rotor, they were real close visually. i'll just space them with some washers or something.
-Its got an inconsistently lumpy idle, especially with a load on it (fan, lights etc). When I was first tweaking the engine last week it wouldn't idle below 1500, I adjusted the thermal wax and idle speed screw to about 800 but I might have gone too far, especially on the thermalwax. The rough idle seems to come on more apparently once it's warmed up. TPS setting looks good (according to the test light method, haven't checked resistance yet) and the timing looks good too. The fact that sometimes it idles smoothly and others not though has me a bit baffled. Almost wondering if it's a vacuum leak.. Will need to investigate
-Last major issue is the brakes in general. The stop the car very well but the pedal is very stiff. Most likely culprit is the brake booster - which could very well be causing the vacuum leak I suspect above. Can't say I'm looking forward to changing that if it is bad... ugh.
There are, of course, other things that need to be done, but those are the major things. I ordered new KYB shocks (Amazon, $122 shipped for all 4, woo) which should come tomorrow. I'll take care of the front brake grinding, and the rear end whirring when I install them since I'll have it apart anyway.
The good points (to offset the above list of bad things) is that it starts very easily and consistently and for having nothing but a very quick tape measure alignment and garbage shocks actually handles very well. Obviously haven't pushed it hard yet, but so far so good. Transmission shifts very smooth, and the engine has good mid range power delivery. Besides that noise from the back, the drivetrain as a whole is very balanced and quiet while driving.
Anyway, that's where I'm at.
Last edited by 82transam; Feb 24, 2014 at 11:09 AM.
Thread Starter
Joined: Feb 2002
Posts: 8,389
Likes: 120
From: North Jersey
Big update - lots of good news, still some bad.. -
Good news first
Fixed most of the issues above. Scrapping up front was indeed the caliper bolts rubbing the rotor - easily fixed.
The whirring in the back was the driveshaft rubbing the heat shield - also easily fixed.
Super hard brakes was a leaky booster. Thankfully I had a spare. Cleaned it up, painted it and installed it. Not the most fun job in the world, but overall didn't go too bad. Was a good excuse to rebleed the brakes and check everything over again for leaks (none!) Brakes feel much better now.
Got my new KYB shocks in, and installed them. Easy job since everything has just been apart. Also good excuse to look over everything and double check all bolts are still tight etc. Took it for a test drive and damn! Where have KYB shocks and Racing Beat springs been all my life. Still nice and stiff, handles great, but soaks up all the bumps and pot holes much much better than the Tokico shocks/eibach springs I have on the other FB's. Must more street friendly combo in my opinion but maybe I'm just getting old...
Got a huge box from www.yourcarpart.com (search by part number, not by make/model if you're gonna order there) including window regulators, window tracks, window seals (go at the base of the door glass, inside and out), door seals, hatch seal, new throttle cable, and shifter boots (the rubber ones that seal it to the body) So nice to have functioning windows and no (or less at least) wind noise when driving
Now the bad (and very confusing) news -
It still has a very inconsistent/weak idle. I have had the intake back off several times, sealed everything with RTV (I know opinions of doing this are divided, but I've had good luck in the past), took a spare throttle body and stripped it down to remove the possibility of the thermal wax and associated parts being the culprit but still no luck. I have gotton it to idle a bit "smoother" (that's a relative term) but it still isn't great, and once there is an electrical load on it (lights, fan etc) it starts hunting. I guess I made some progress in that adjusting the TPS further got rid of the hunting at 2500rpm (with no load on it, ie, free reving in neutral) but still no luck with the idle.
I'll have to continue fiddling around with it, given how smooth the thing drives I am confident teh engine itself is very solid, and the problem is in the sensors/controls somewhere. It breaks up a bit around 7500 rpm on wot, wondering if maybe all this is an ignition issue. I checked fuel pressure and it's 40psi with the jumper bridged, and around 30psi with the engine running. It holds pressure for easily 15 mins once the pump is off. It's been so long since I did diagnostics like this on my T2's I can't remember if 30 psi is enough or not. Again though, it drives so well I don't think it's a fuel issue, but who knows.
Anyway, here's the confusing part. You get 2 weeks from time of registration to take the car to get smogged, and since this week will be crazy at work I went Friday afternoon. I figured the worst it can do is fail and then you get 45 days to fix it and reinspect. This was before I adjusted the TPS, and the idle was even worse. aaaaand, it passed lol. With flying colors no less. The HC's were under 50 (limit is 220) for both idle and high idle (~2500 rpm) and the CO was 0.00 at idle (lol!) and like 0.05 at high idle. The tech said the numbers indicate it running lean, and that would explain the hunting.
Not sure what direction to go at this point..... Took it on a 80 mile drive to no where yesterday with the wife and it's a blast to drive until you have to sit at a traffic light and it starts hunting lol.
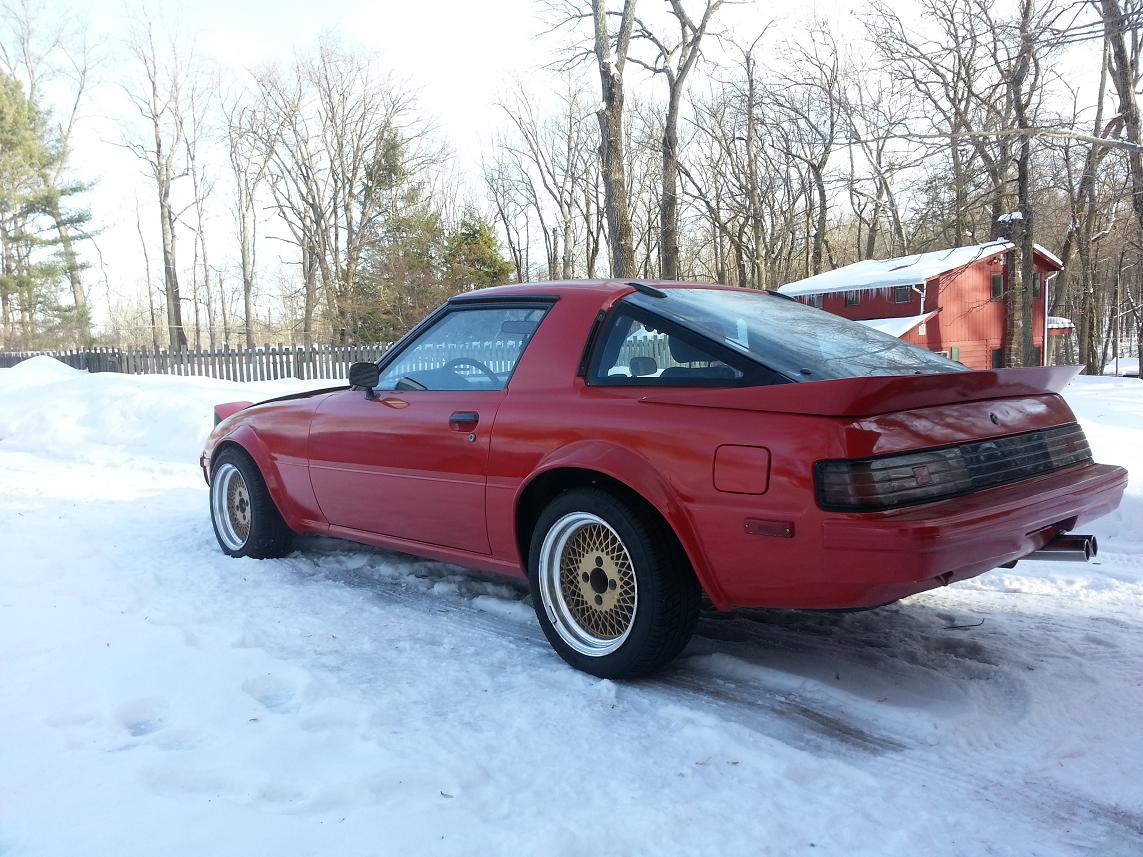
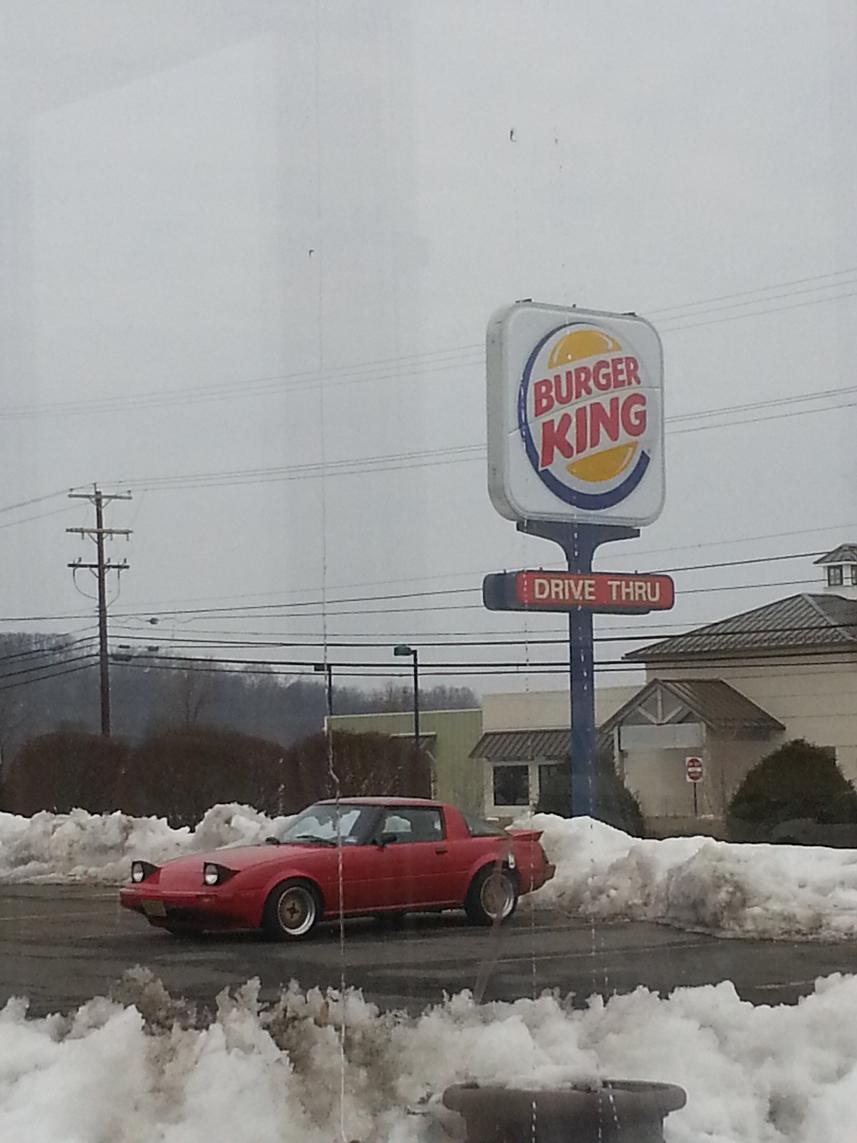
And for no reason, a picture of it sitting at the local fine dining establishment we frequent (through a wet window. Kinda a crappy shot, and kinda artsy at the same time...). I'll get some interior shots soon. It's all in good shape except the driver side door panel. Anyone got one??
Good news first
Fixed most of the issues above. Scrapping up front was indeed the caliper bolts rubbing the rotor - easily fixed.
The whirring in the back was the driveshaft rubbing the heat shield - also easily fixed.
Super hard brakes was a leaky booster. Thankfully I had a spare. Cleaned it up, painted it and installed it. Not the most fun job in the world, but overall didn't go too bad. Was a good excuse to rebleed the brakes and check everything over again for leaks (none!) Brakes feel much better now.
Got my new KYB shocks in, and installed them. Easy job since everything has just been apart. Also good excuse to look over everything and double check all bolts are still tight etc. Took it for a test drive and damn! Where have KYB shocks and Racing Beat springs been all my life. Still nice and stiff, handles great, but soaks up all the bumps and pot holes much much better than the Tokico shocks/eibach springs I have on the other FB's. Must more street friendly combo in my opinion but maybe I'm just getting old...
Got a huge box from www.yourcarpart.com (search by part number, not by make/model if you're gonna order there) including window regulators, window tracks, window seals (go at the base of the door glass, inside and out), door seals, hatch seal, new throttle cable, and shifter boots (the rubber ones that seal it to the body) So nice to have functioning windows and no (or less at least) wind noise when driving
Now the bad (and very confusing) news -
It still has a very inconsistent/weak idle. I have had the intake back off several times, sealed everything with RTV (I know opinions of doing this are divided, but I've had good luck in the past), took a spare throttle body and stripped it down to remove the possibility of the thermal wax and associated parts being the culprit but still no luck. I have gotton it to idle a bit "smoother" (that's a relative term) but it still isn't great, and once there is an electrical load on it (lights, fan etc) it starts hunting. I guess I made some progress in that adjusting the TPS further got rid of the hunting at 2500rpm (with no load on it, ie, free reving in neutral) but still no luck with the idle.
I'll have to continue fiddling around with it, given how smooth the thing drives I am confident teh engine itself is very solid, and the problem is in the sensors/controls somewhere. It breaks up a bit around 7500 rpm on wot, wondering if maybe all this is an ignition issue. I checked fuel pressure and it's 40psi with the jumper bridged, and around 30psi with the engine running. It holds pressure for easily 15 mins once the pump is off. It's been so long since I did diagnostics like this on my T2's I can't remember if 30 psi is enough or not. Again though, it drives so well I don't think it's a fuel issue, but who knows.
Anyway, here's the confusing part. You get 2 weeks from time of registration to take the car to get smogged, and since this week will be crazy at work I went Friday afternoon. I figured the worst it can do is fail and then you get 45 days to fix it and reinspect. This was before I adjusted the TPS, and the idle was even worse. aaaaand, it passed lol. With flying colors no less. The HC's were under 50 (limit is 220) for both idle and high idle (~2500 rpm) and the CO was 0.00 at idle (lol!) and like 0.05 at high idle. The tech said the numbers indicate it running lean, and that would explain the hunting.
Not sure what direction to go at this point..... Took it on a 80 mile drive to no where yesterday with the wife and it's a blast to drive until you have to sit at a traffic light and it starts hunting lol.
And for no reason, a picture of it sitting at the local fine dining establishment we frequent (through a wet window. Kinda a crappy shot, and kinda artsy at the same time...). I'll get some interior shots soon. It's all in good shape except the driver side door panel. Anyone got one??
Thread Starter
Joined: Feb 2002
Posts: 8,389
Likes: 120
From: North Jersey
Read the FSM from foxed.ca and fuel pressure looks to be ok. Guess I'll have to continue down the vacuum leak path. Might be a good idea to throw new plugs in it too just to be sure (the ones in there now came with the engine...)
Any other ideas are welcome.
Any other ideas are welcome.