
My 1985 RX7 GS Rebuild Thread!

Thread Starter
Joined: Jun 2014
Posts: 223
Likes: 26
From: Montreal, Canada
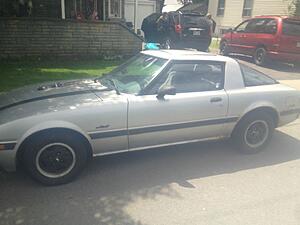
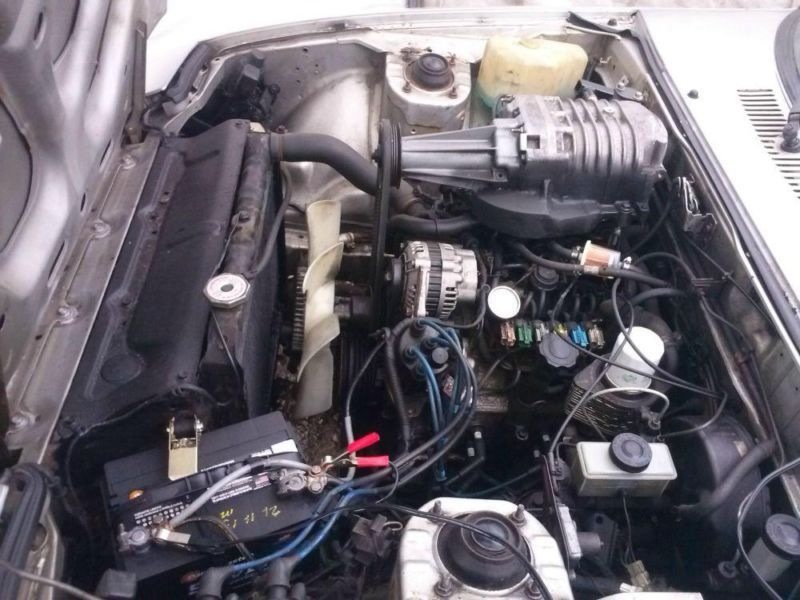
Here it is! First of all, theses are the pictures the seller posted in his ads :
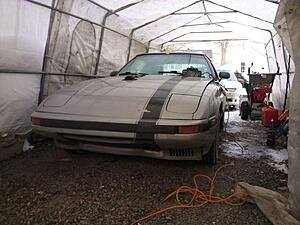

Appart from the crappy supercharger installation, the car seemed in descent shape. When i spoke to the seller, he told me the floor was bad, rear suspension was unwelded from the body, the exhaust had a leak, the car was not running, and on and on and on. Since i own a dolley, it was no problem. Last saturday morning, i went and got the car and brought it back home.
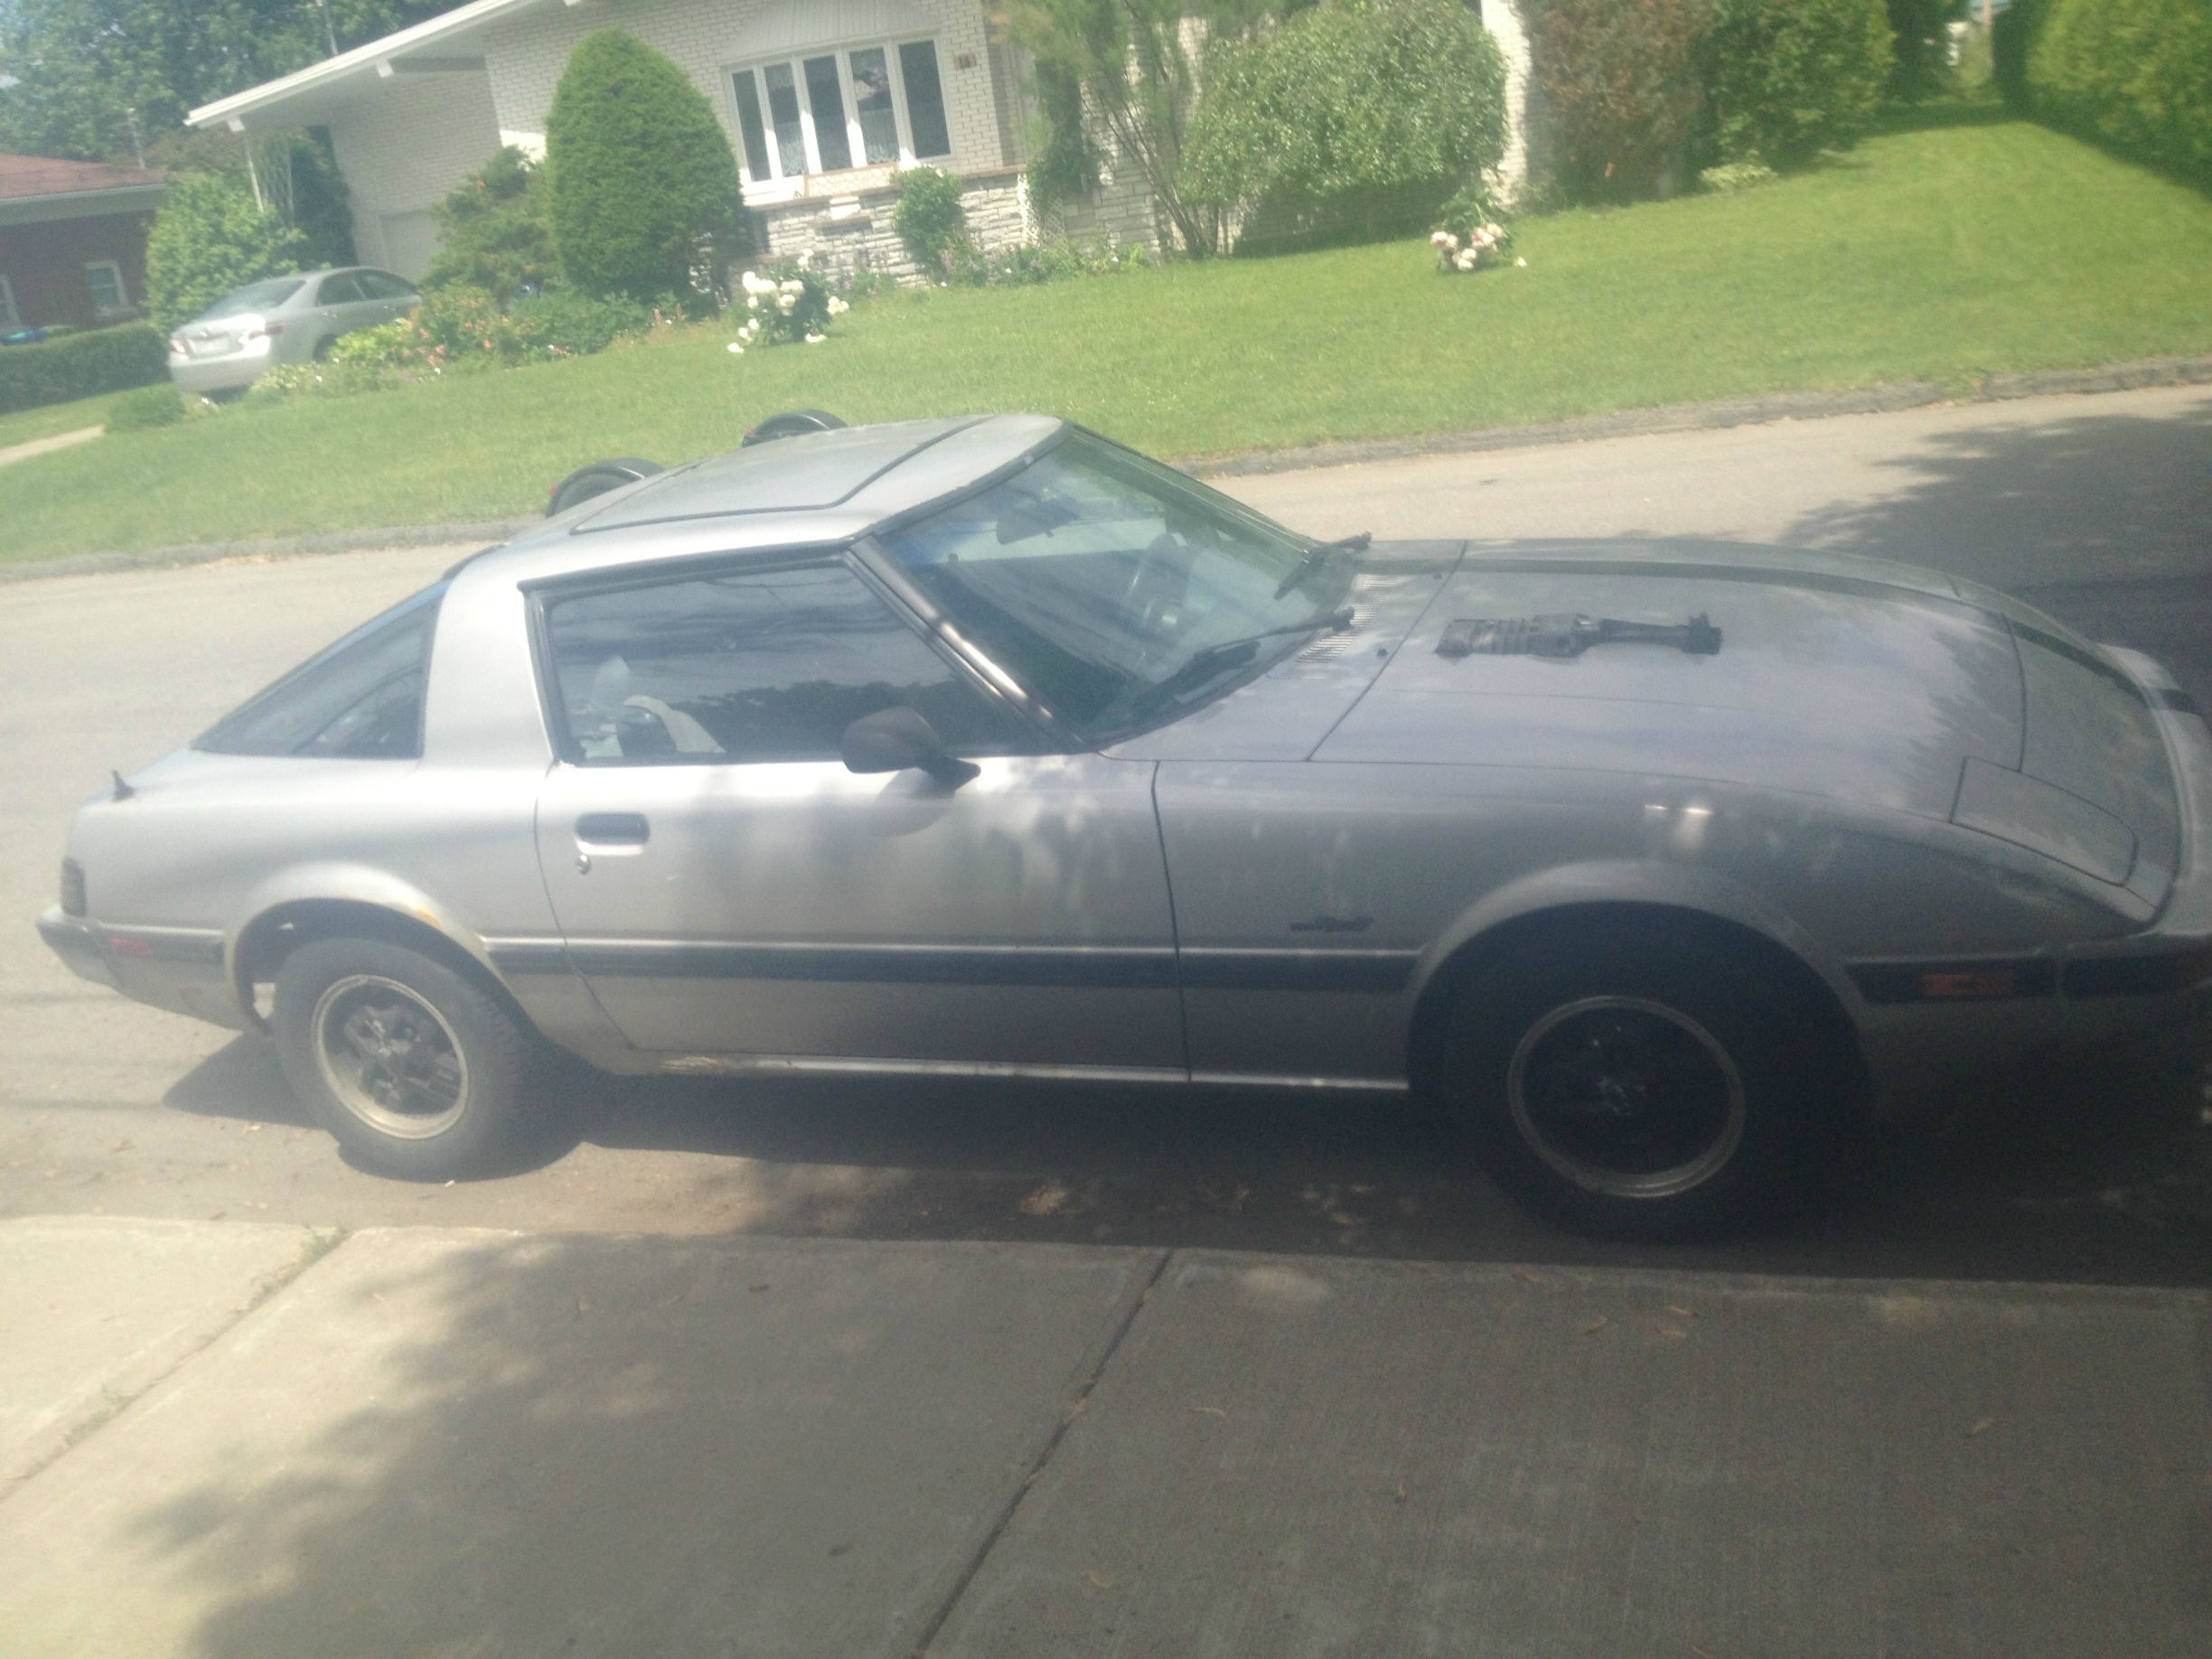
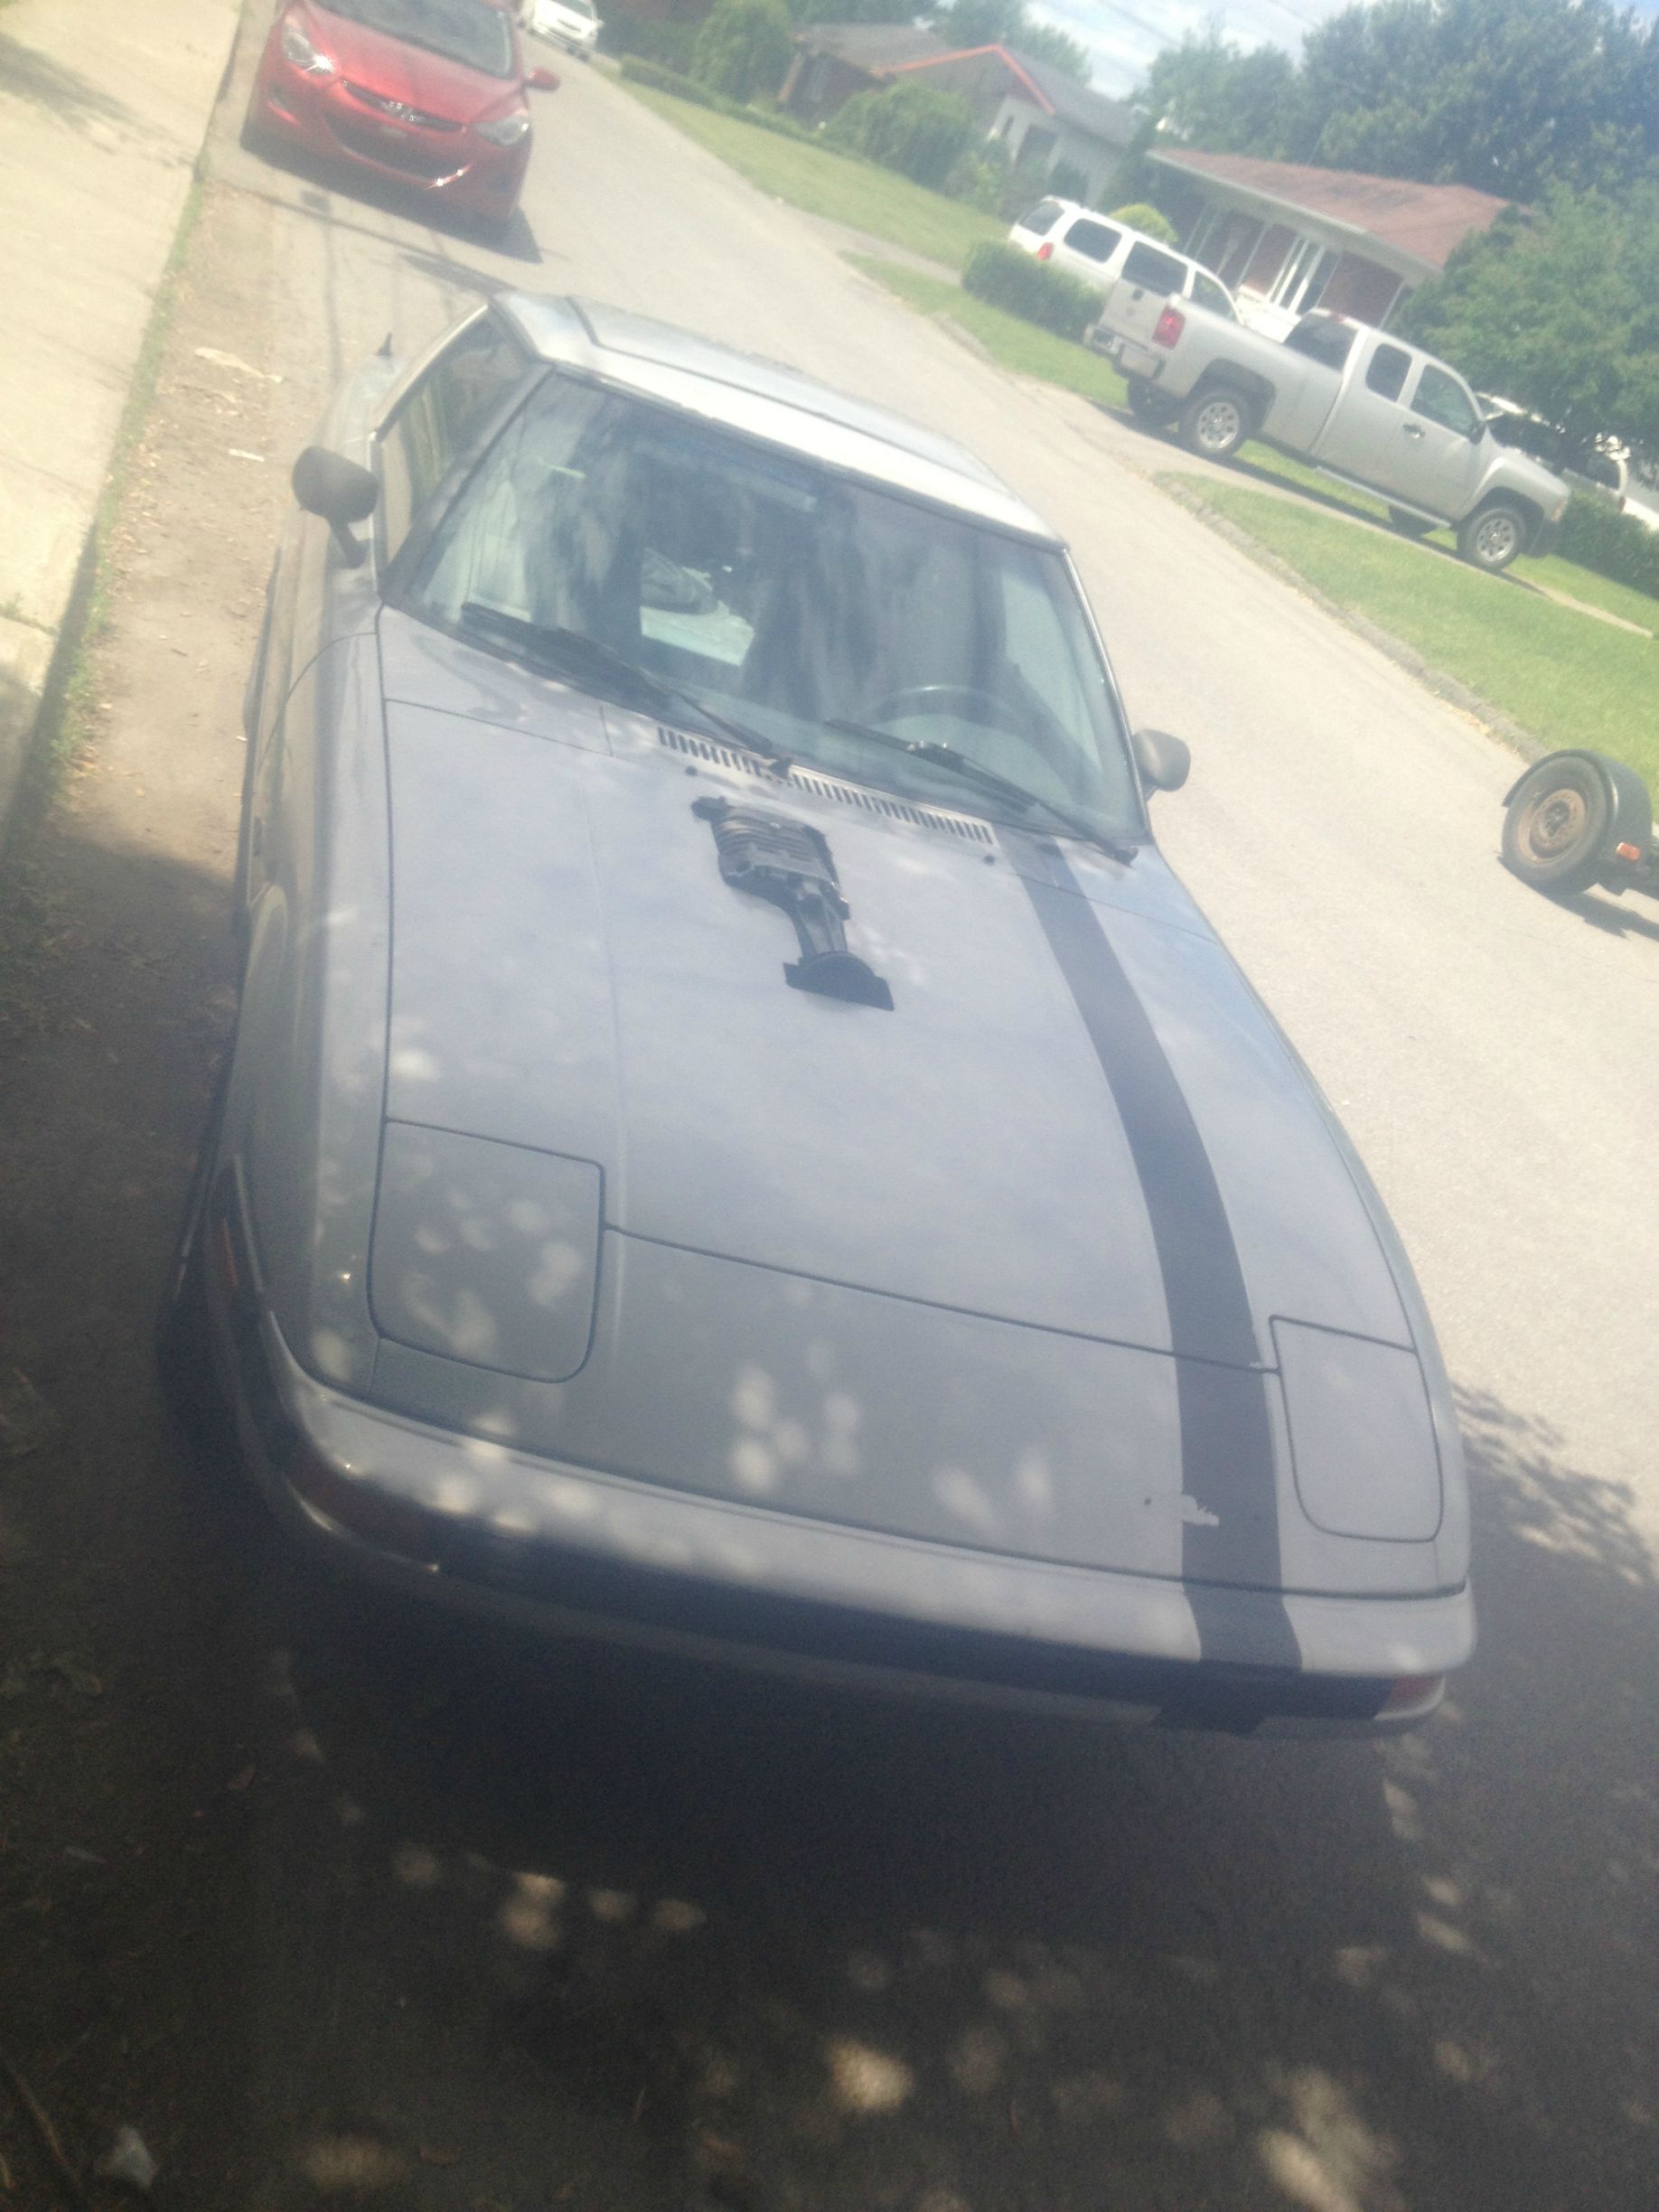
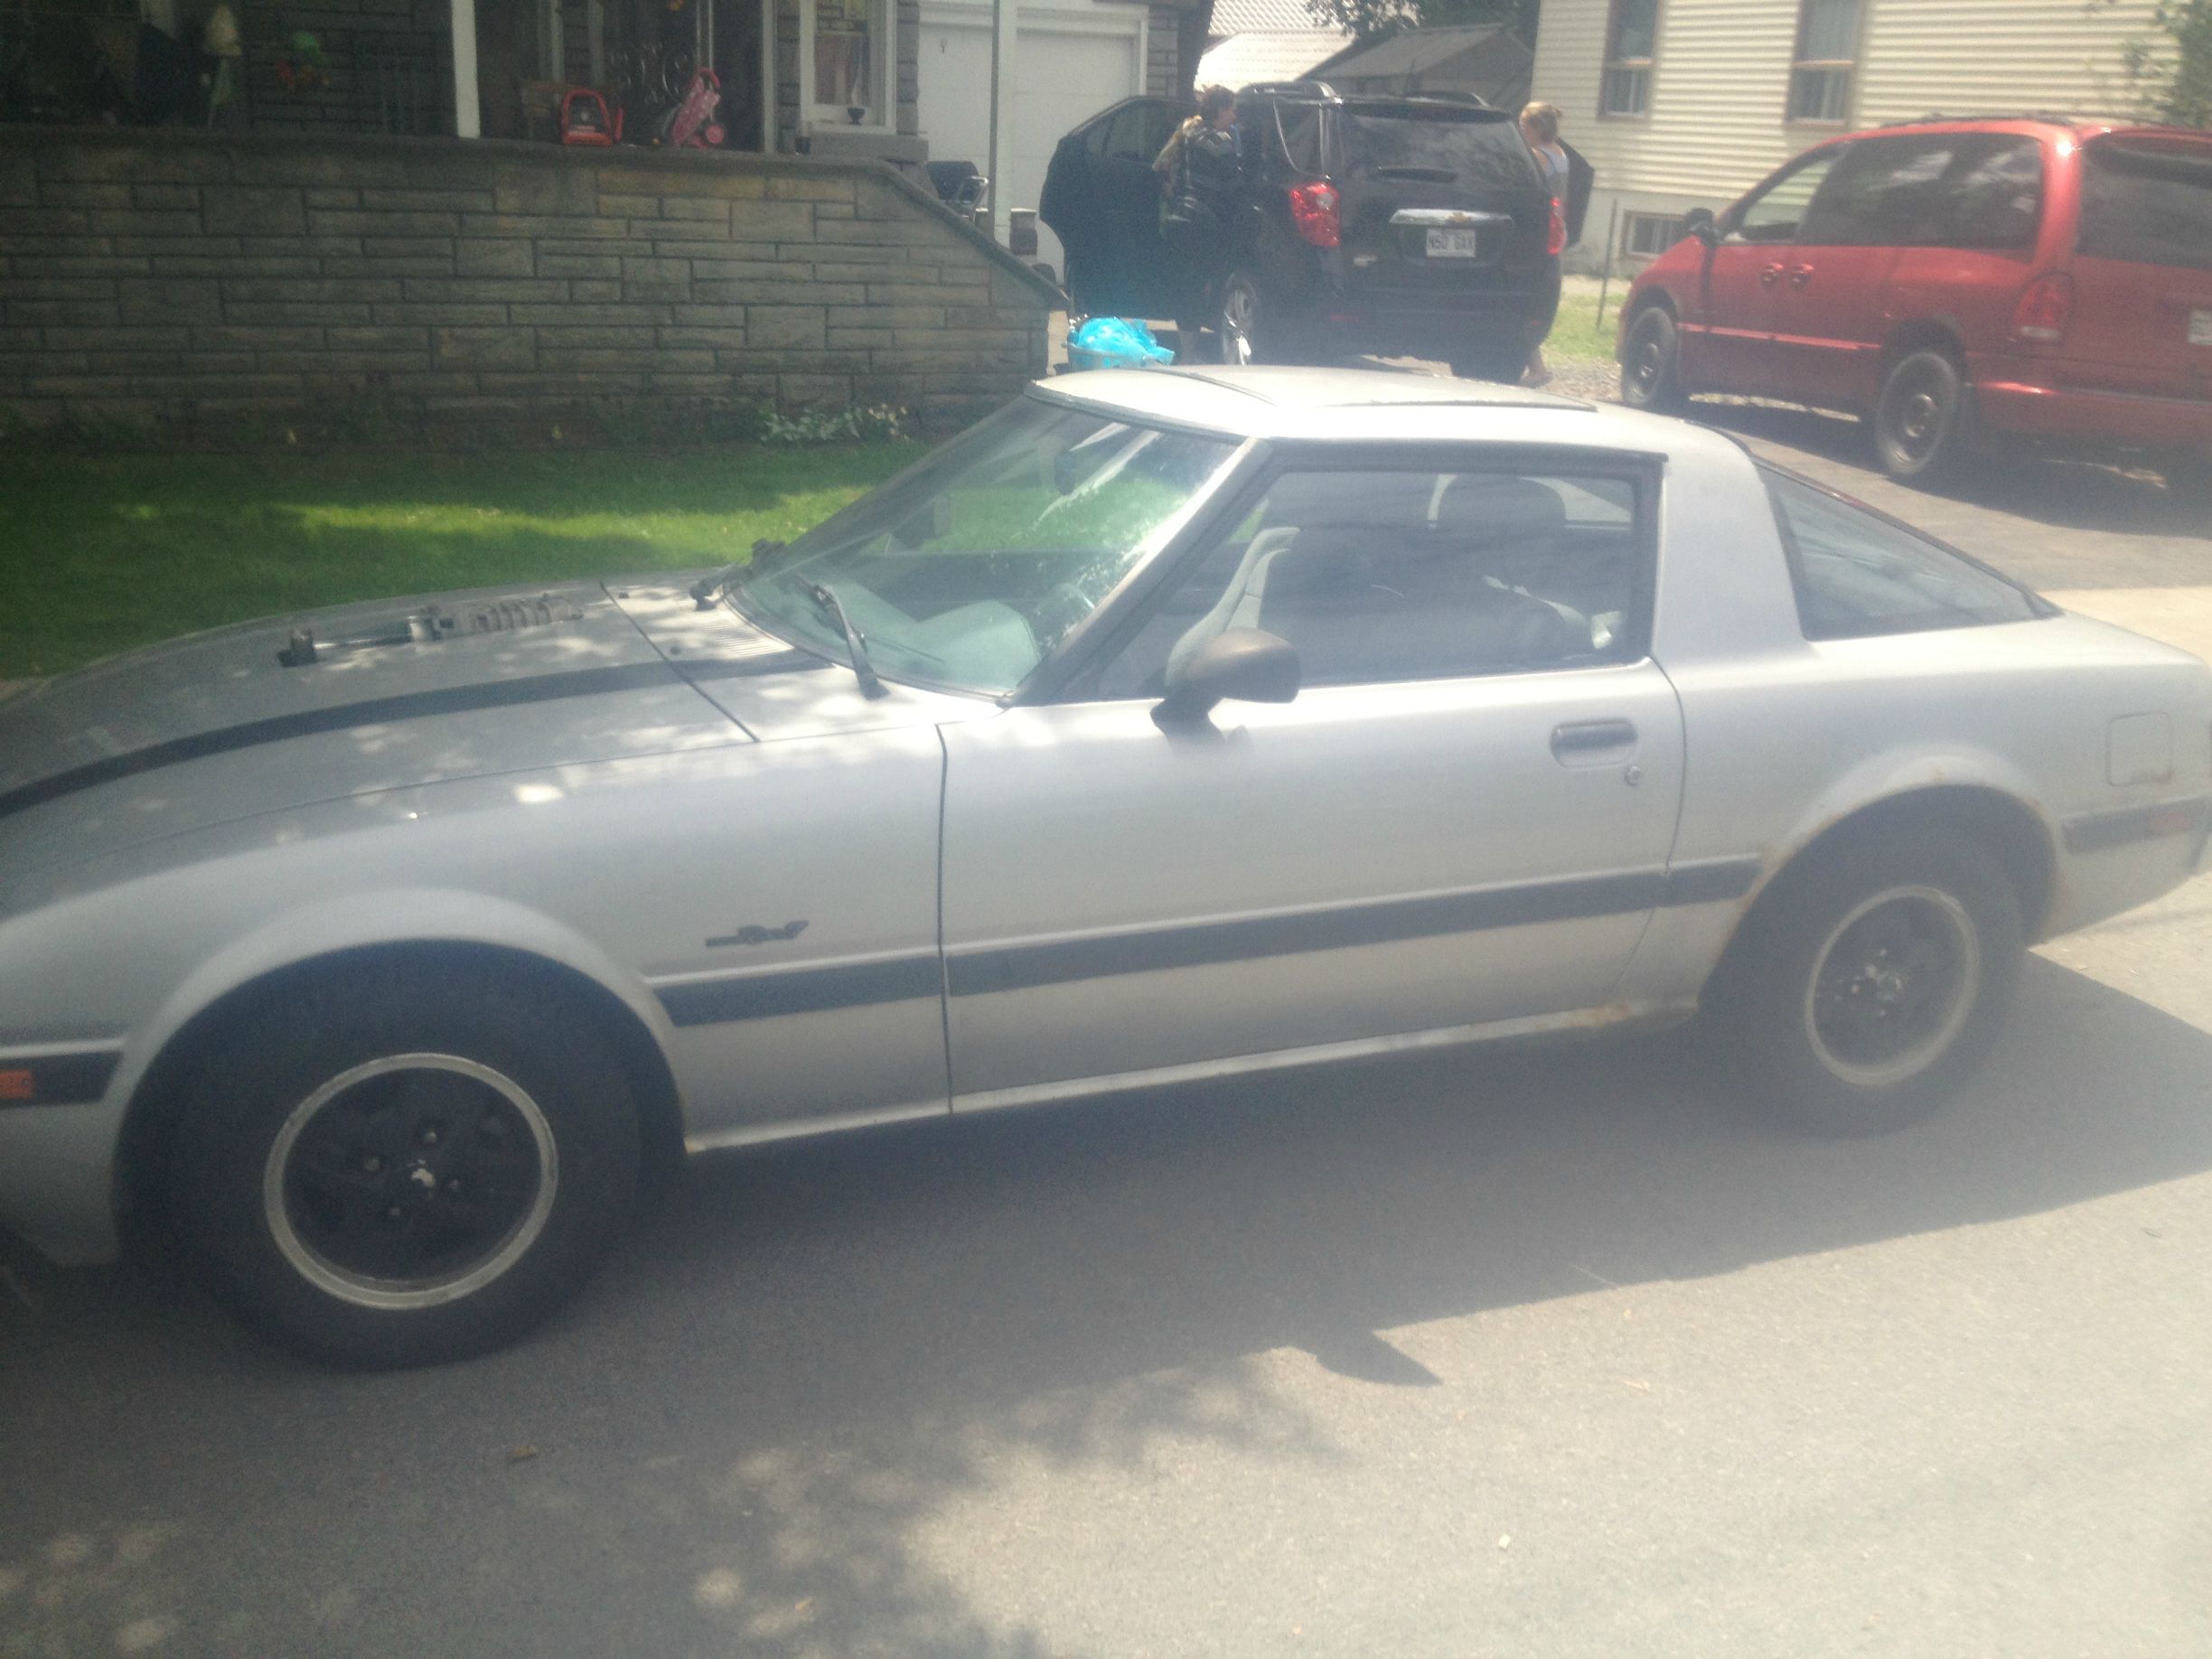
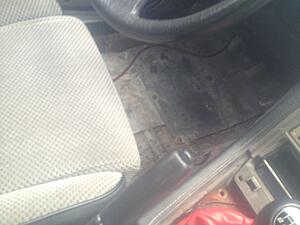
Here are some pictures of the car in front of my house :

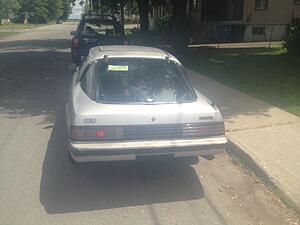


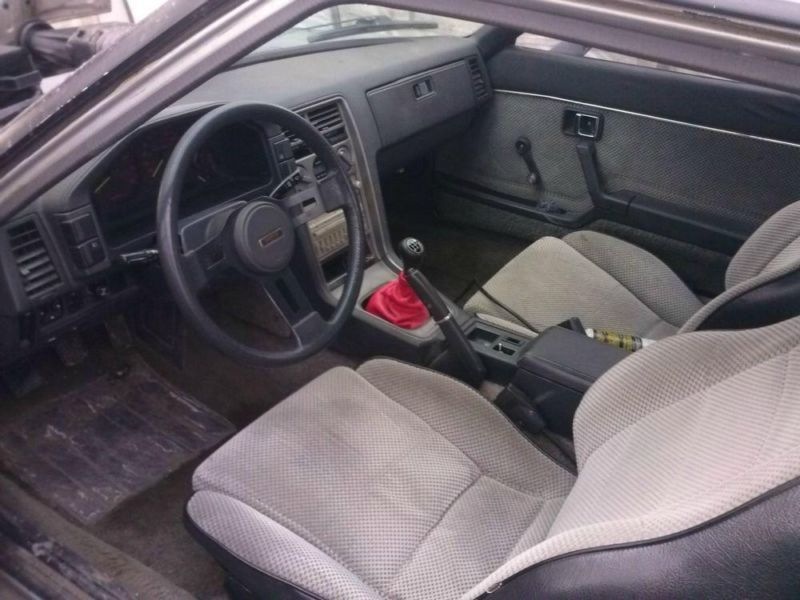

Appart from the crappy supercharger installation, the car seemed in descent shape. When i spoke to the seller, he told me the floor was bad, rear suspension was unwelded from the body, the exhaust had a leak, the car was not running, and on and on and on. Since i own a dolley, it was no problem. Last saturday morning, i went and got the car and brought it back home.
Here are some pictures of the car in front of my house :


Thread Starter
Joined: Jun 2014
Posts: 223
Likes: 26
From: Montreal, Canada
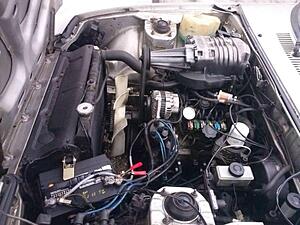
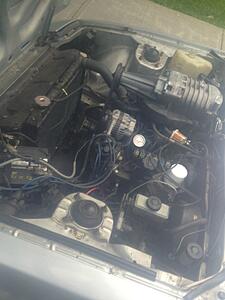
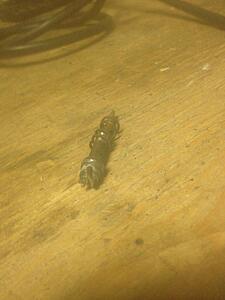
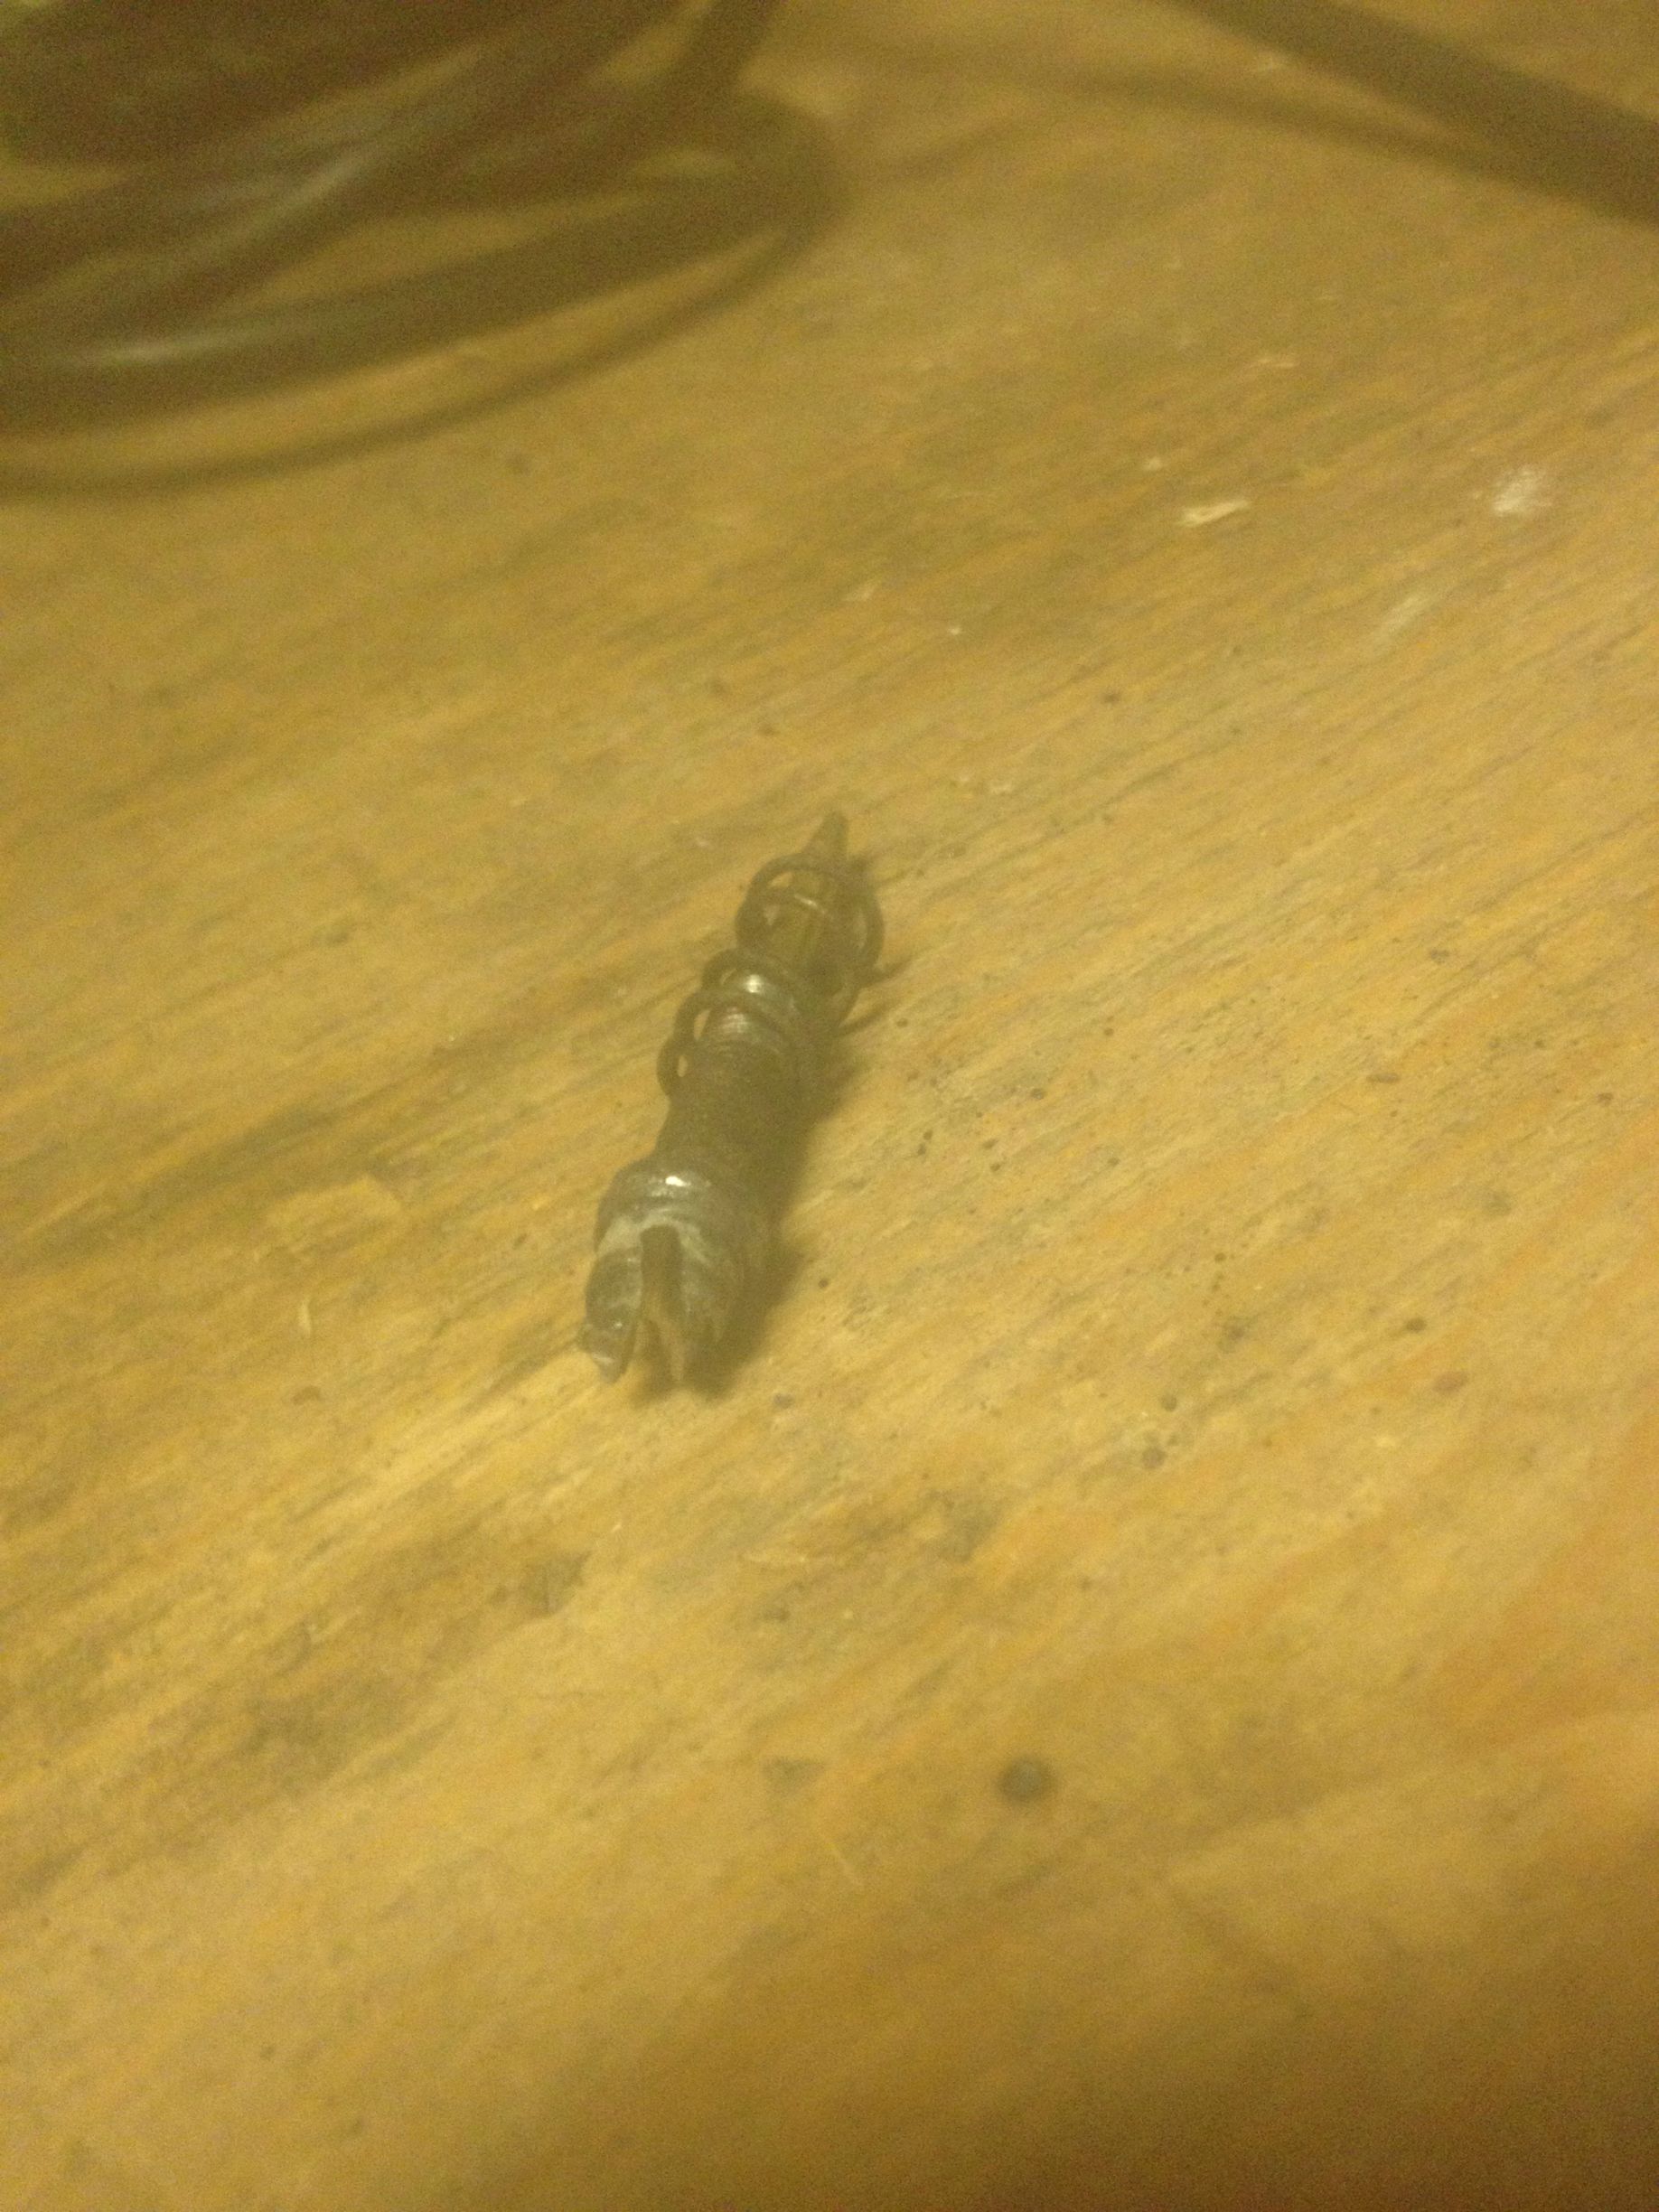
First thing i did was removing that supercharger. The guy pried the carburetor blue plate to try and make an adapter plate, taped it with aluminium tape and put body putty all around as a �seal�. He also plugged a propane tank with a hose directly in the carburetor so it would be �easier to start�, but the car never worked this way and that's why he was selling it. Anyway, once i removed all that crap, it would still not start so i did a compression check, all good on both 3 rotation and on both rotors. I had to bypass the fuel pump since the crappy connection that the guy made didn't worked. I checked ignition and spark was good, tried to start it some more, but no luck. I then proceeded to adjust the carburetor, just to find out the previous owner broke down the mixture screw. I took a 12 point socket a bit smaller than the screw, tapped it in so it grabs and got it removed. I then made a notch in the screw's head so i would be able to adjust the carb. Here are some pics of before and after of the screw :
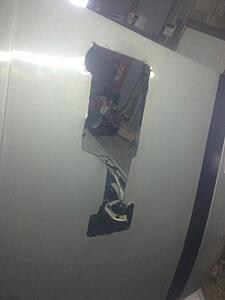
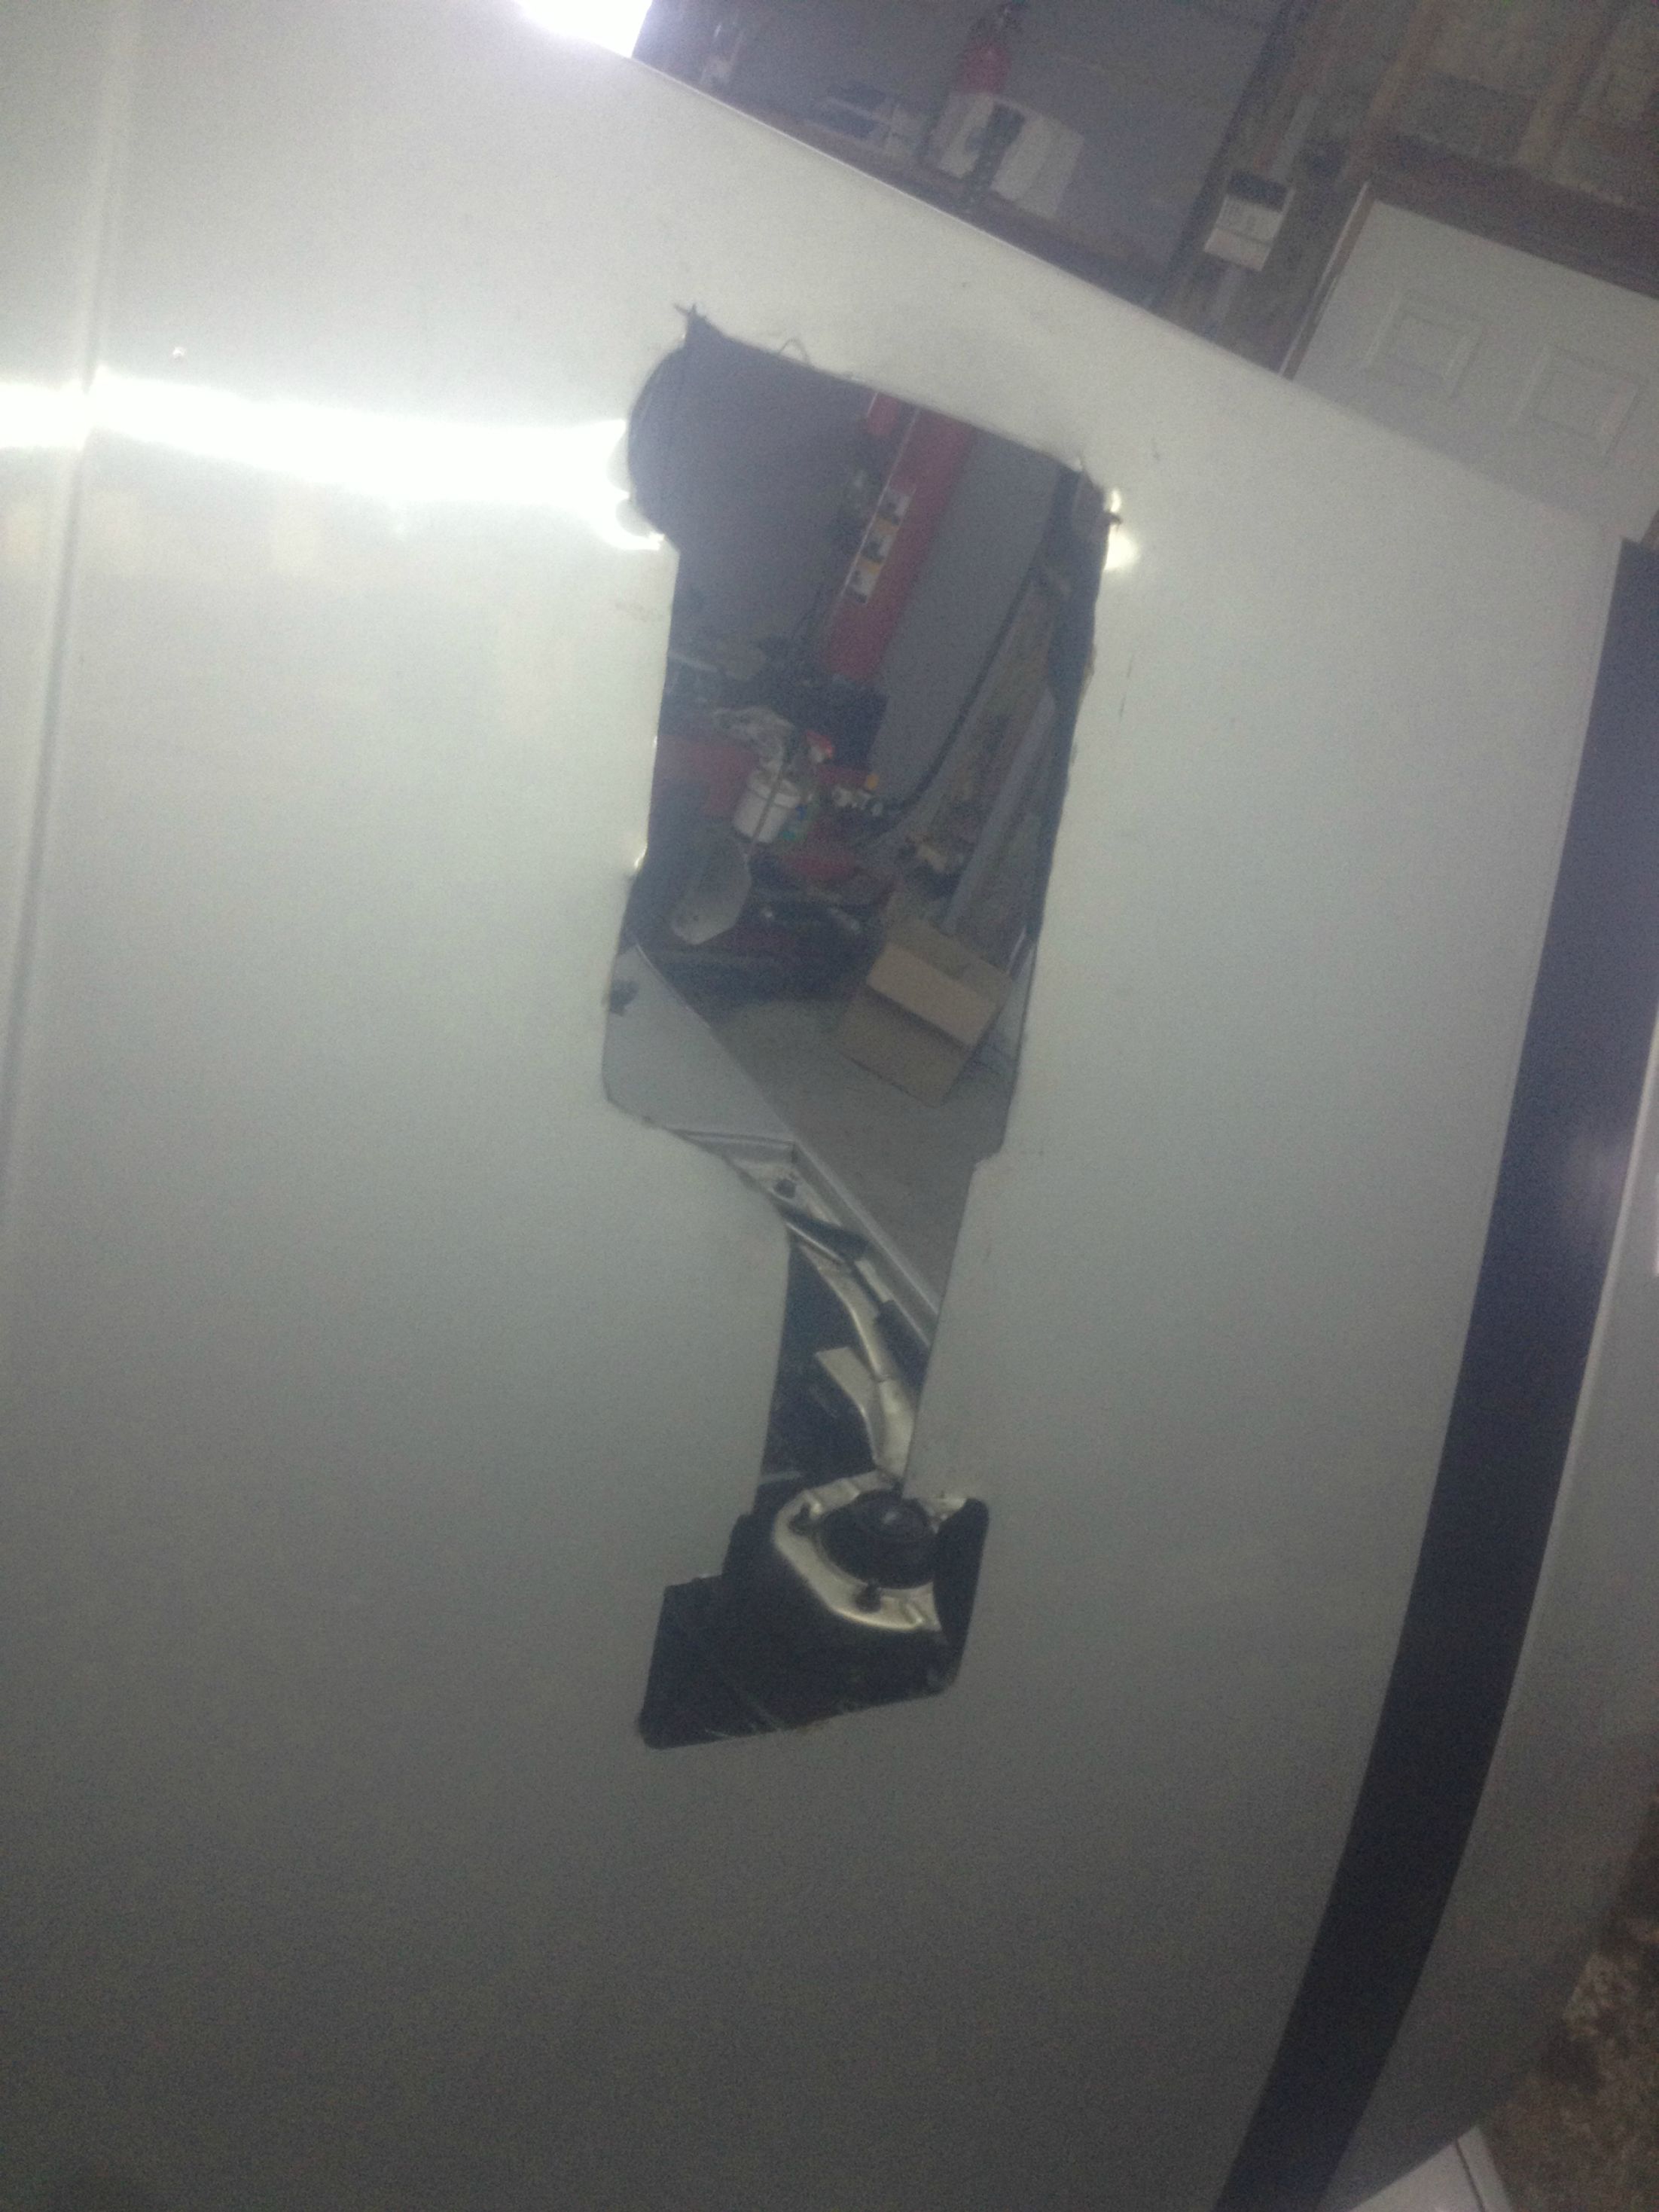
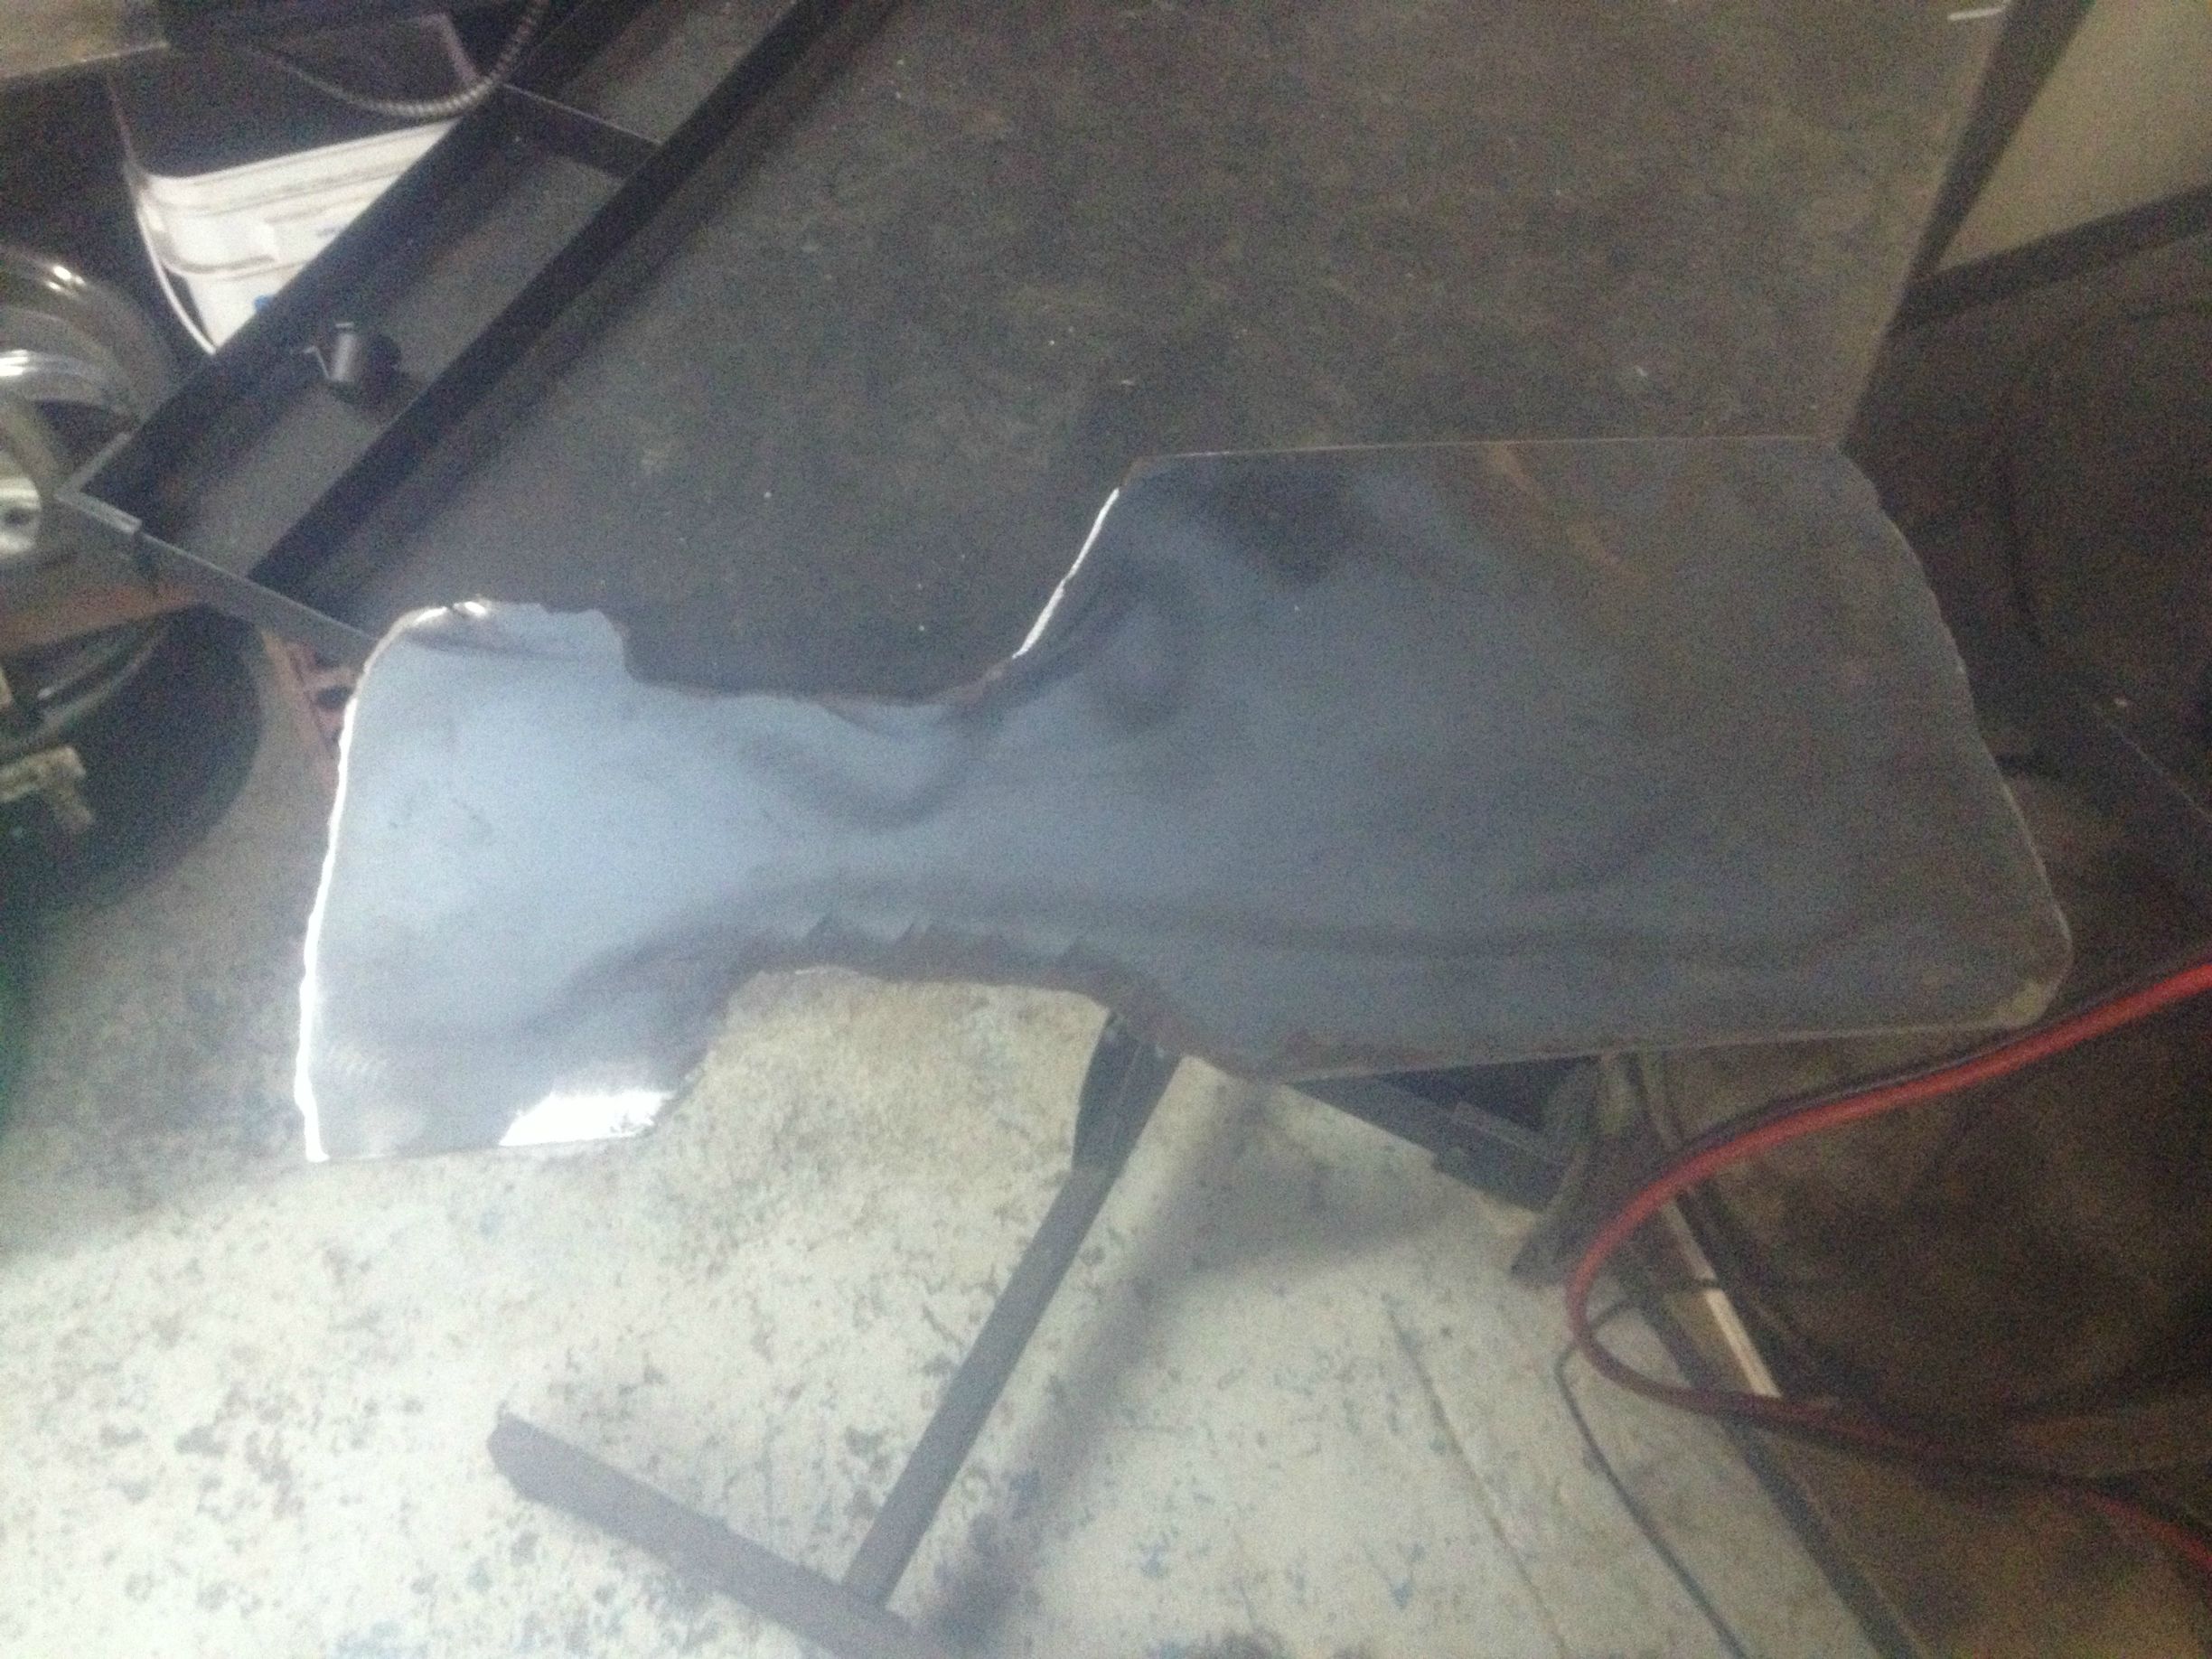
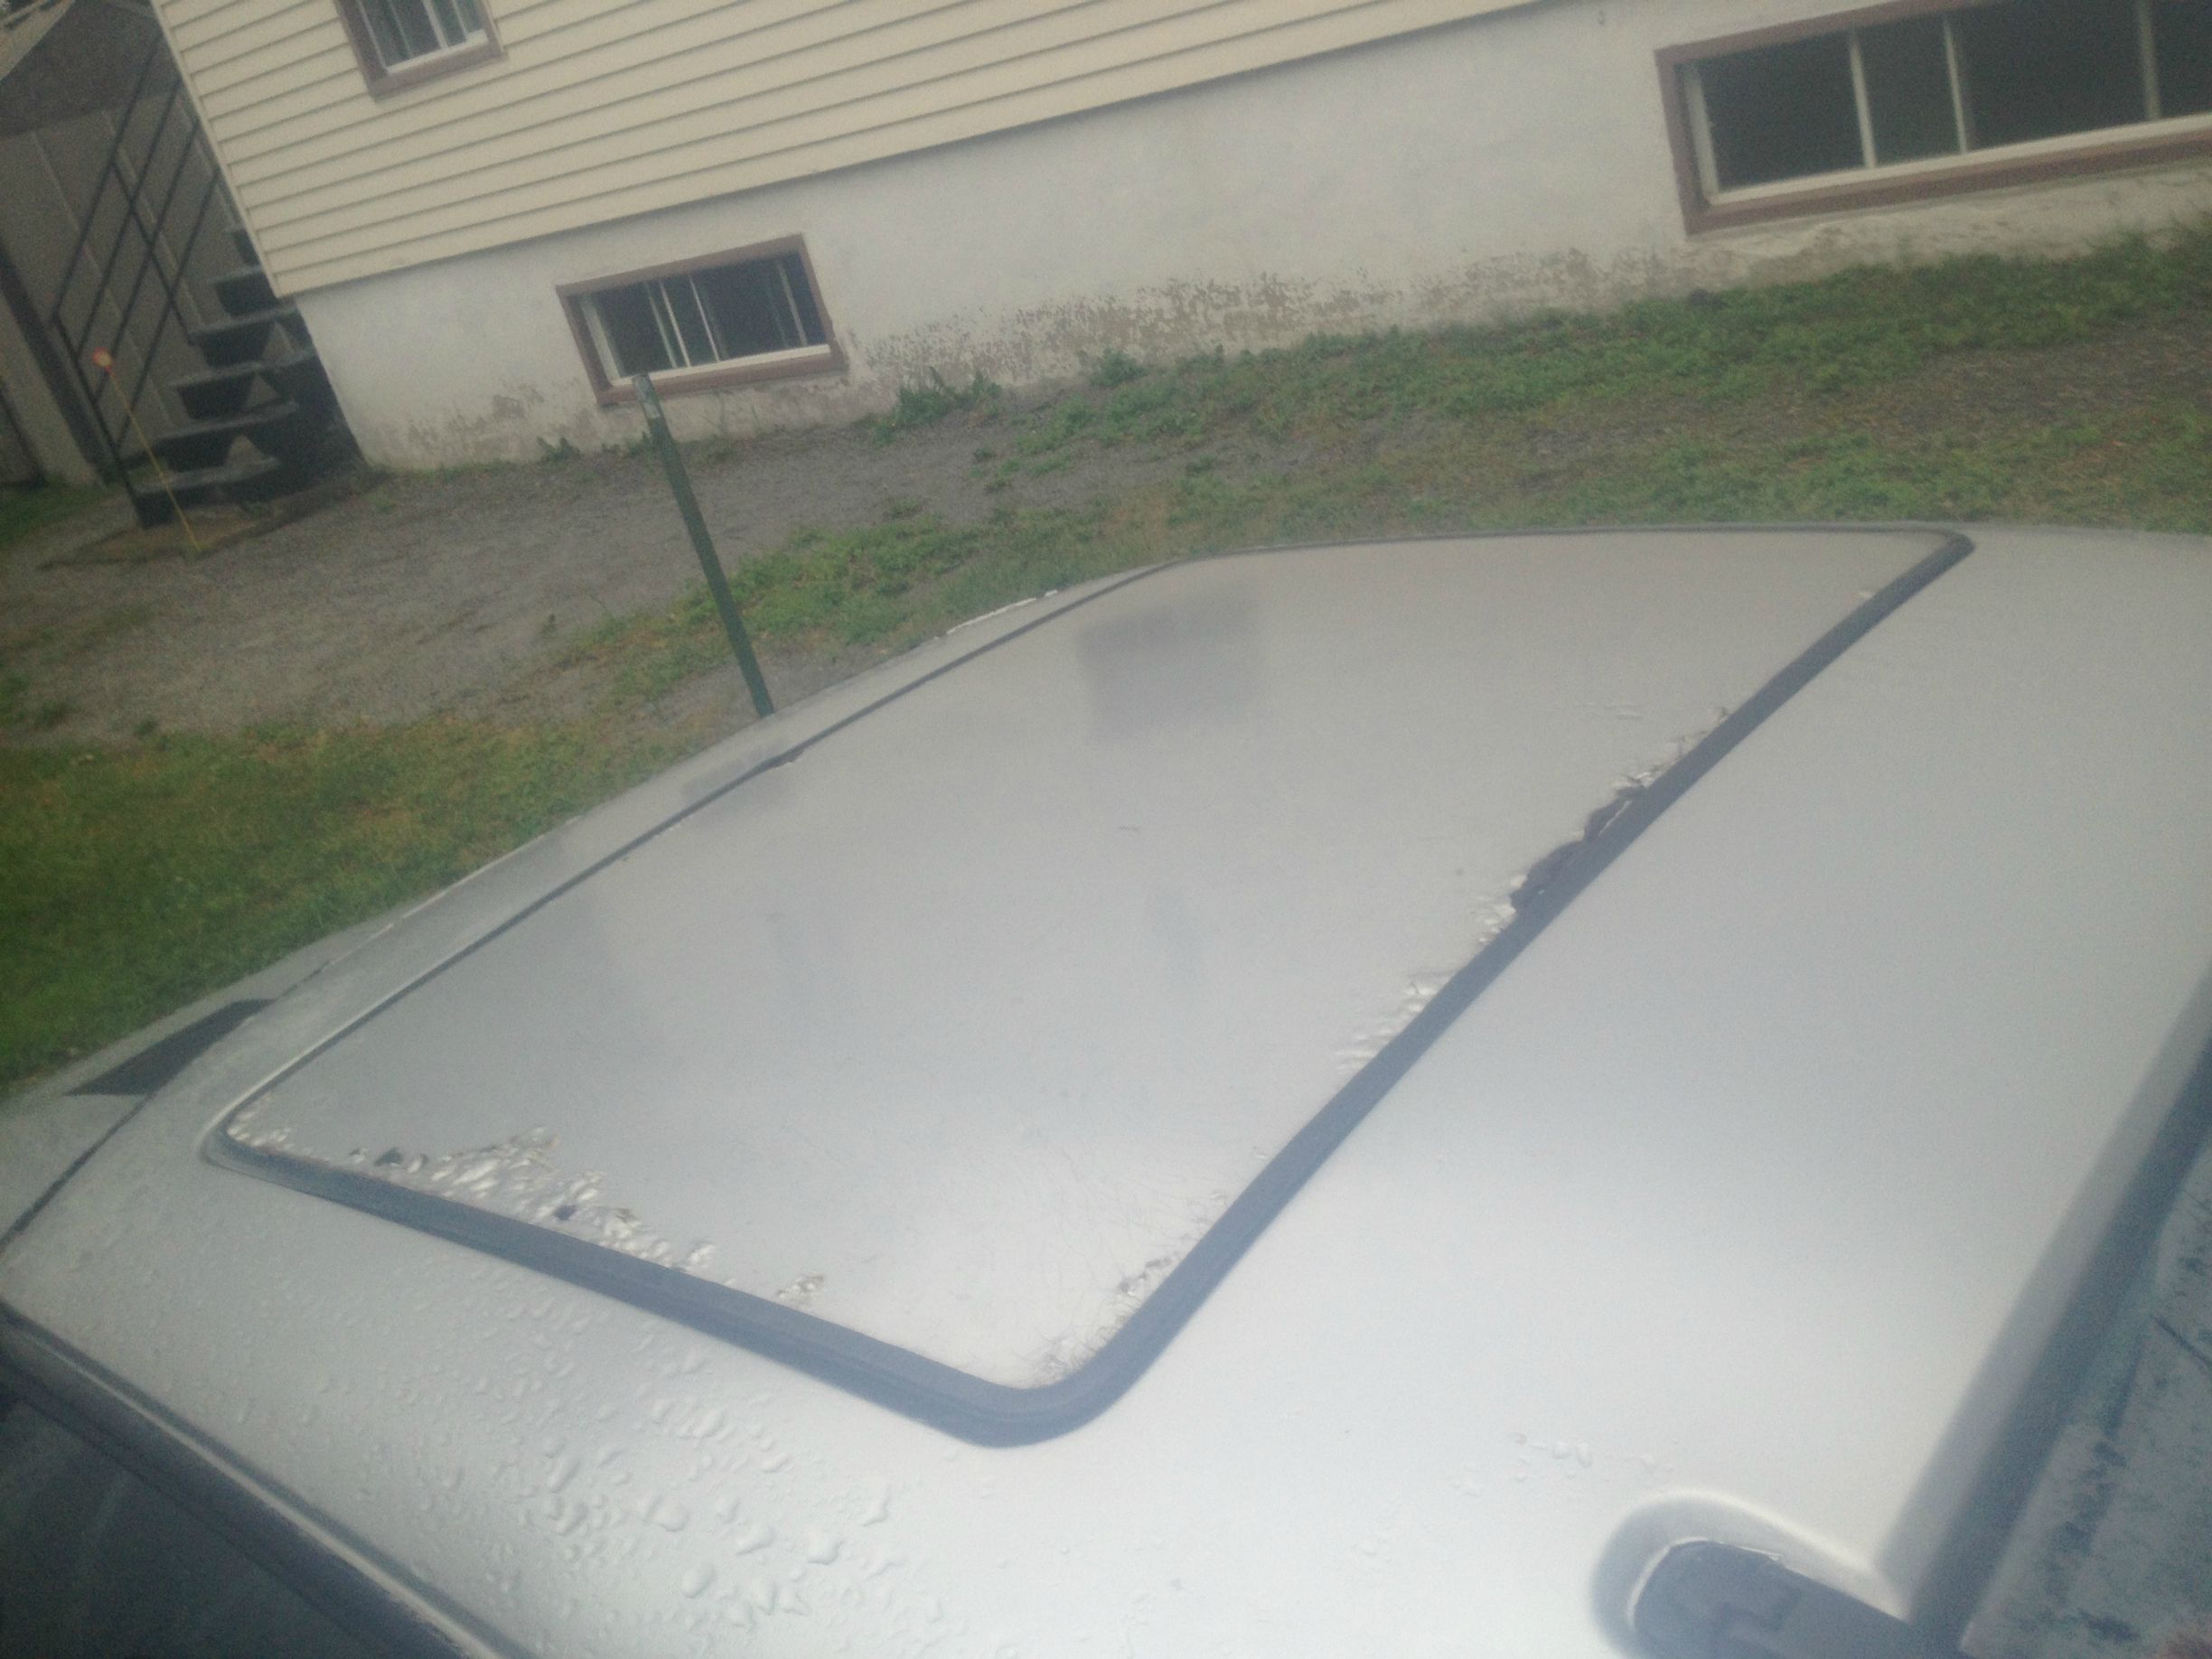
After adjusting the carburetor, the car finally started and was running so-so but still it was running! The choke was not working, so i had to tack the two brackets together for it to close and open. Since the car is sitting outside, and they called for rain, i had to to a quick fix for the big hole in the hood left by the now removed supercharger. I cut a piece of 16ga sheet metal with a plasma cutter, welded it in place, used some right stuff gasket maker around the hole so it would seal, and painted part of it in black. I did not do a big job, since i plan on doing a body job on the car in the winter after i'm done with fixing the floor and everything else. The point was for the water not to get in. Here are some pics of before/after the job :


For now, the car is in running condition, i figure it's not too bad considering i got it 3 days ago! I'm gonna have to fix the floors and make a better fix for the suspension in the back soon, and i also need to find myself new seats since the brackets of both original ones are rust welded and no good. I'm still using the driver side one for now but it won't stay here long.
Here are some general pictures of all the repairs to be done :
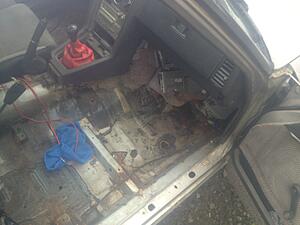
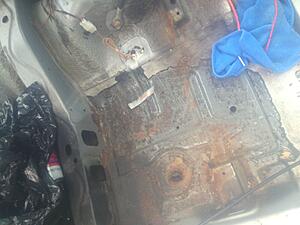

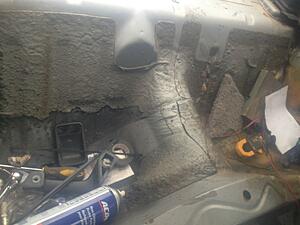
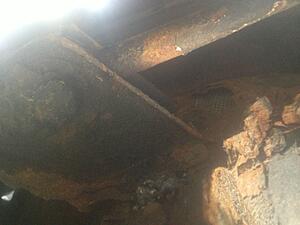

I have to remove all the fibergass covering the rust in the back, and all the �repairs� the previous owner did, then i'll sandblast the whole interior and rebuild floors with 14ga sheet metal. I then need to remove the differential to have a better access to fix the whole rear end, and i'll probably sandblast the differential and paint it at the same time.
As i said, alot of work is gonna go on that little car, but i've wanted one since i'm little and we've got all the equipment needed at shop to do so (MIG, TIG, Plasma torch, brake to bend, sheer to cut, ironworker, a car lift, sandblast etc). I'll post pictures all along the project advance! Alot of people would tell me to just find another body, but they are almost non-existant here in Quebec, there's no scrapyard with RX7 anywhere, and peoples with parts know they are rare so they charge stupid prices (like 500$ for a hood), so i'm really better off rebuilding everything myself. And the satisfaction when everything will be done will just be better!
Any advices/suggestions/comments are welcome!

After adjusting the carburetor, the car finally started and was running so-so but still it was running! The choke was not working, so i had to tack the two brackets together for it to close and open. Since the car is sitting outside, and they called for rain, i had to to a quick fix for the big hole in the hood left by the now removed supercharger. I cut a piece of 16ga sheet metal with a plasma cutter, welded it in place, used some right stuff gasket maker around the hole so it would seal, and painted part of it in black. I did not do a big job, since i plan on doing a body job on the car in the winter after i'm done with fixing the floor and everything else. The point was for the water not to get in. Here are some pics of before/after the job :

For now, the car is in running condition, i figure it's not too bad considering i got it 3 days ago! I'm gonna have to fix the floors and make a better fix for the suspension in the back soon, and i also need to find myself new seats since the brackets of both original ones are rust welded and no good. I'm still using the driver side one for now but it won't stay here long.
Here are some general pictures of all the repairs to be done :

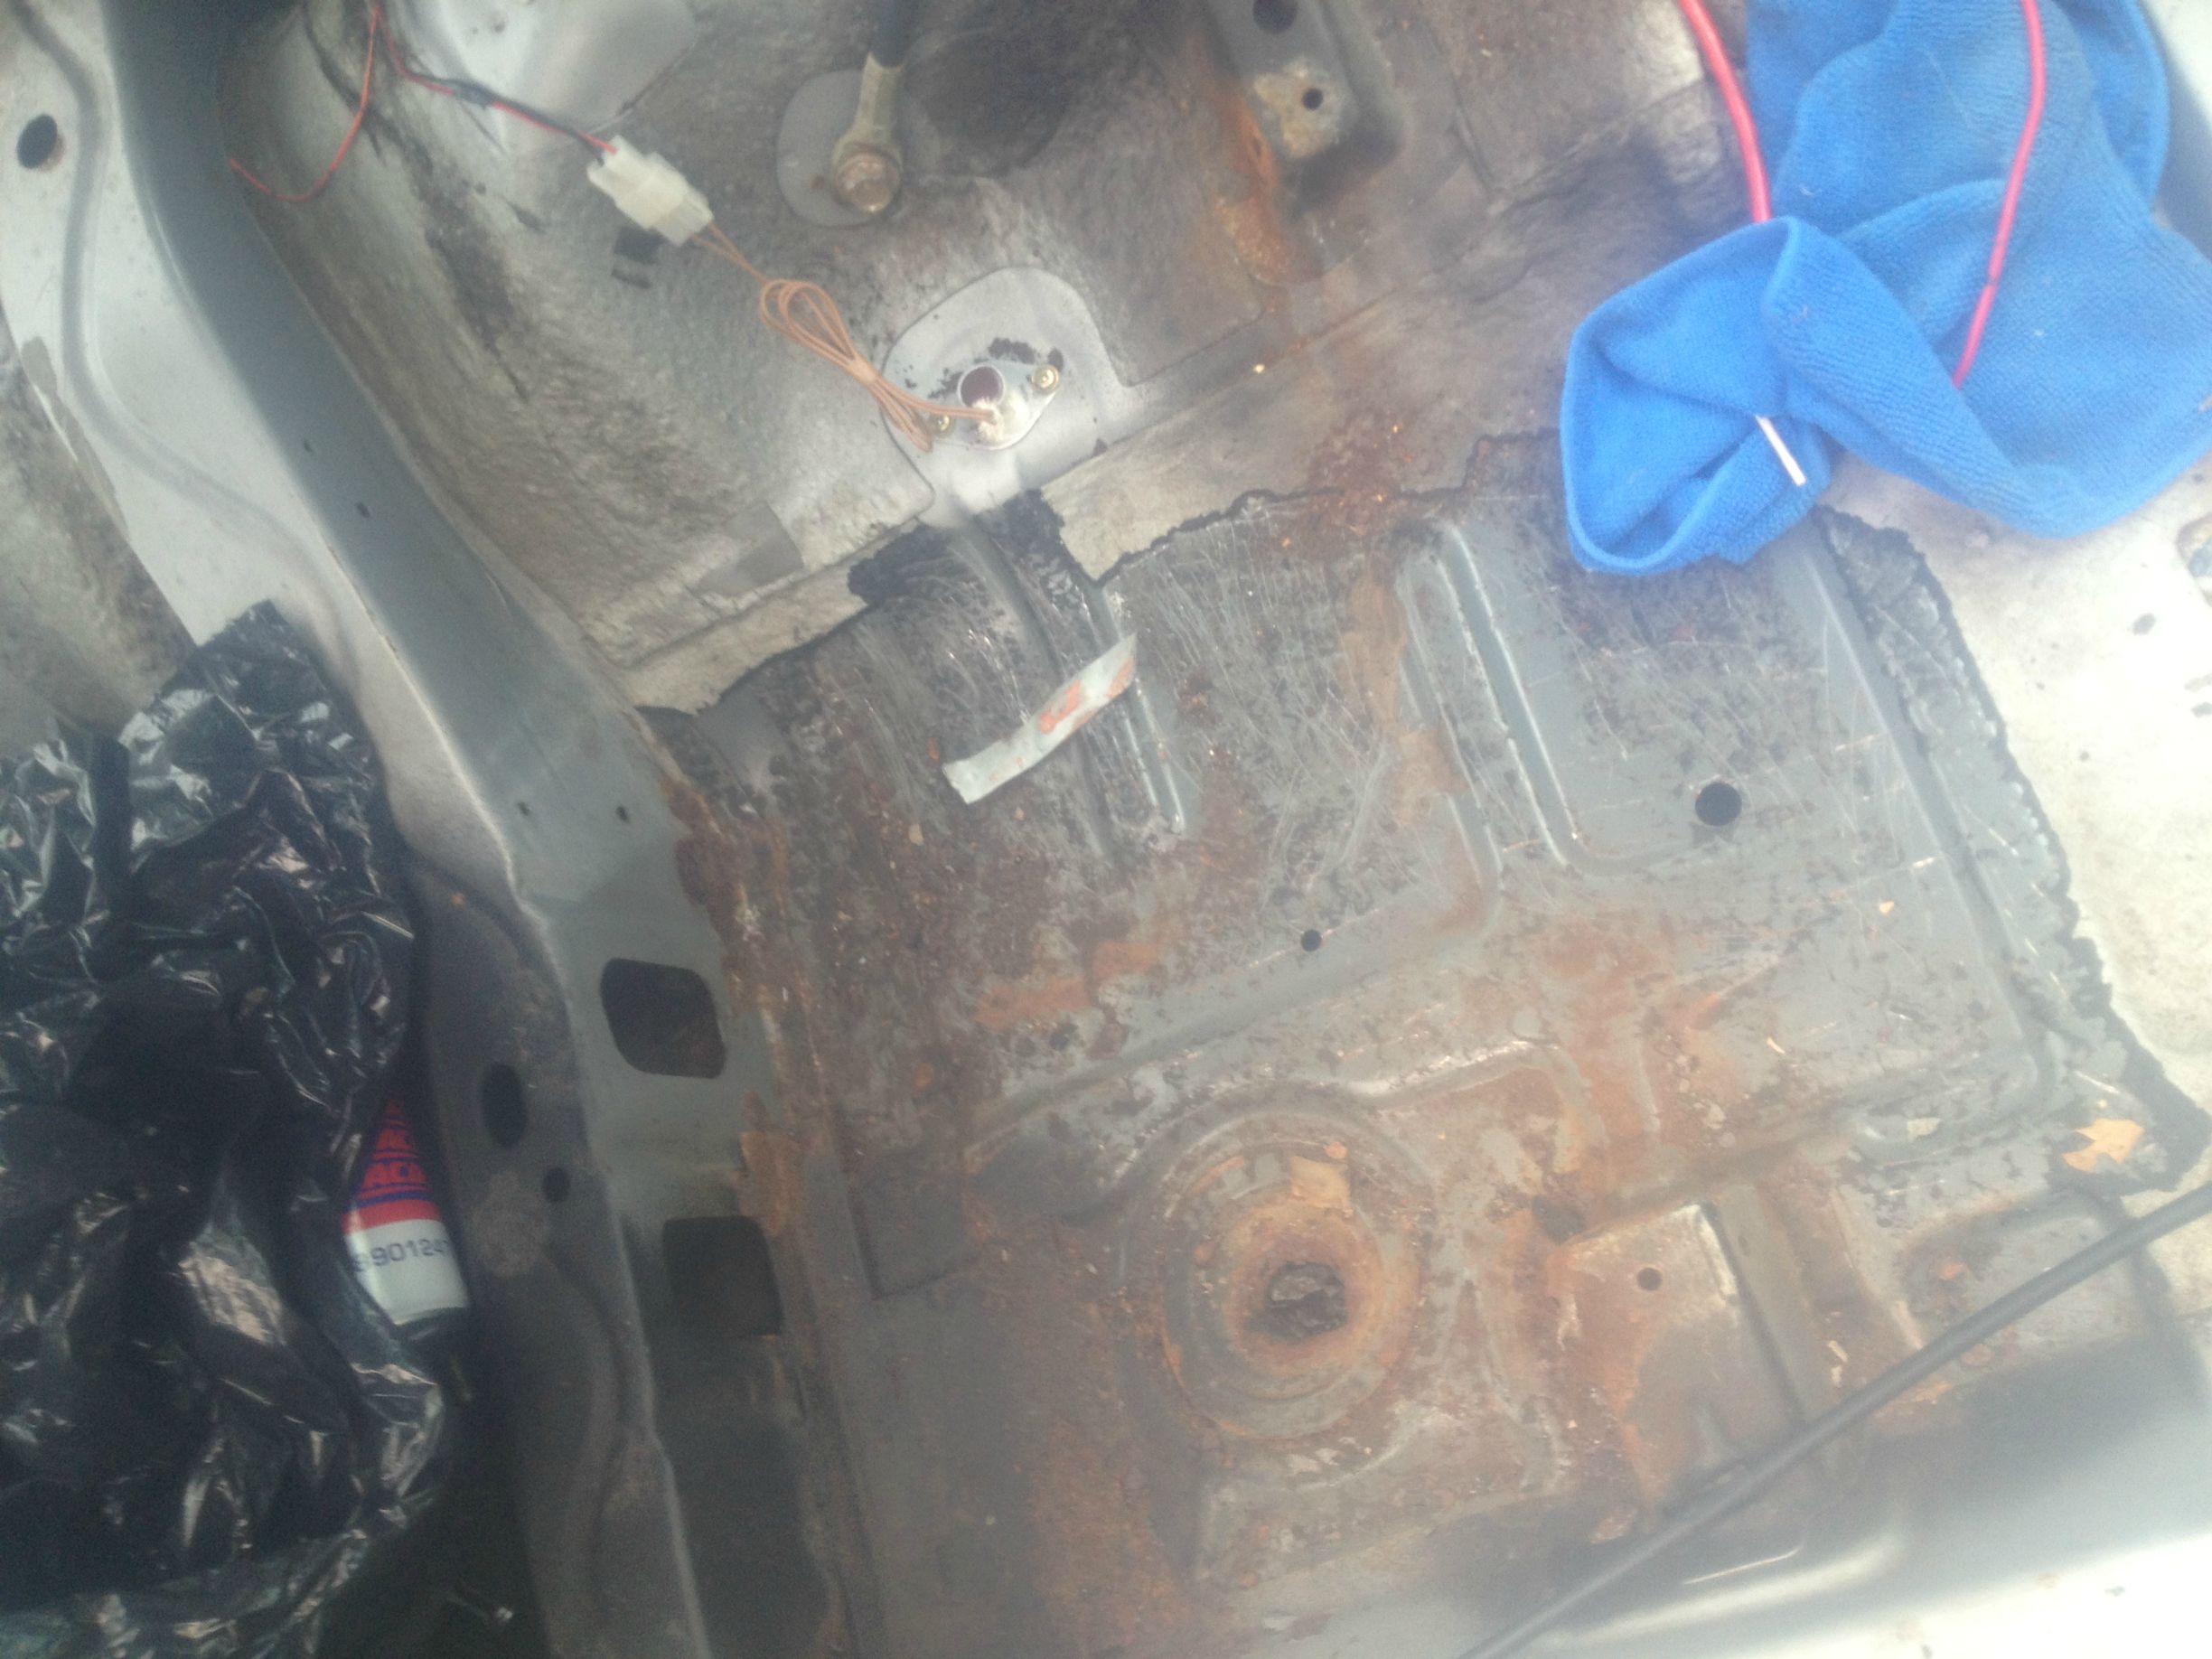
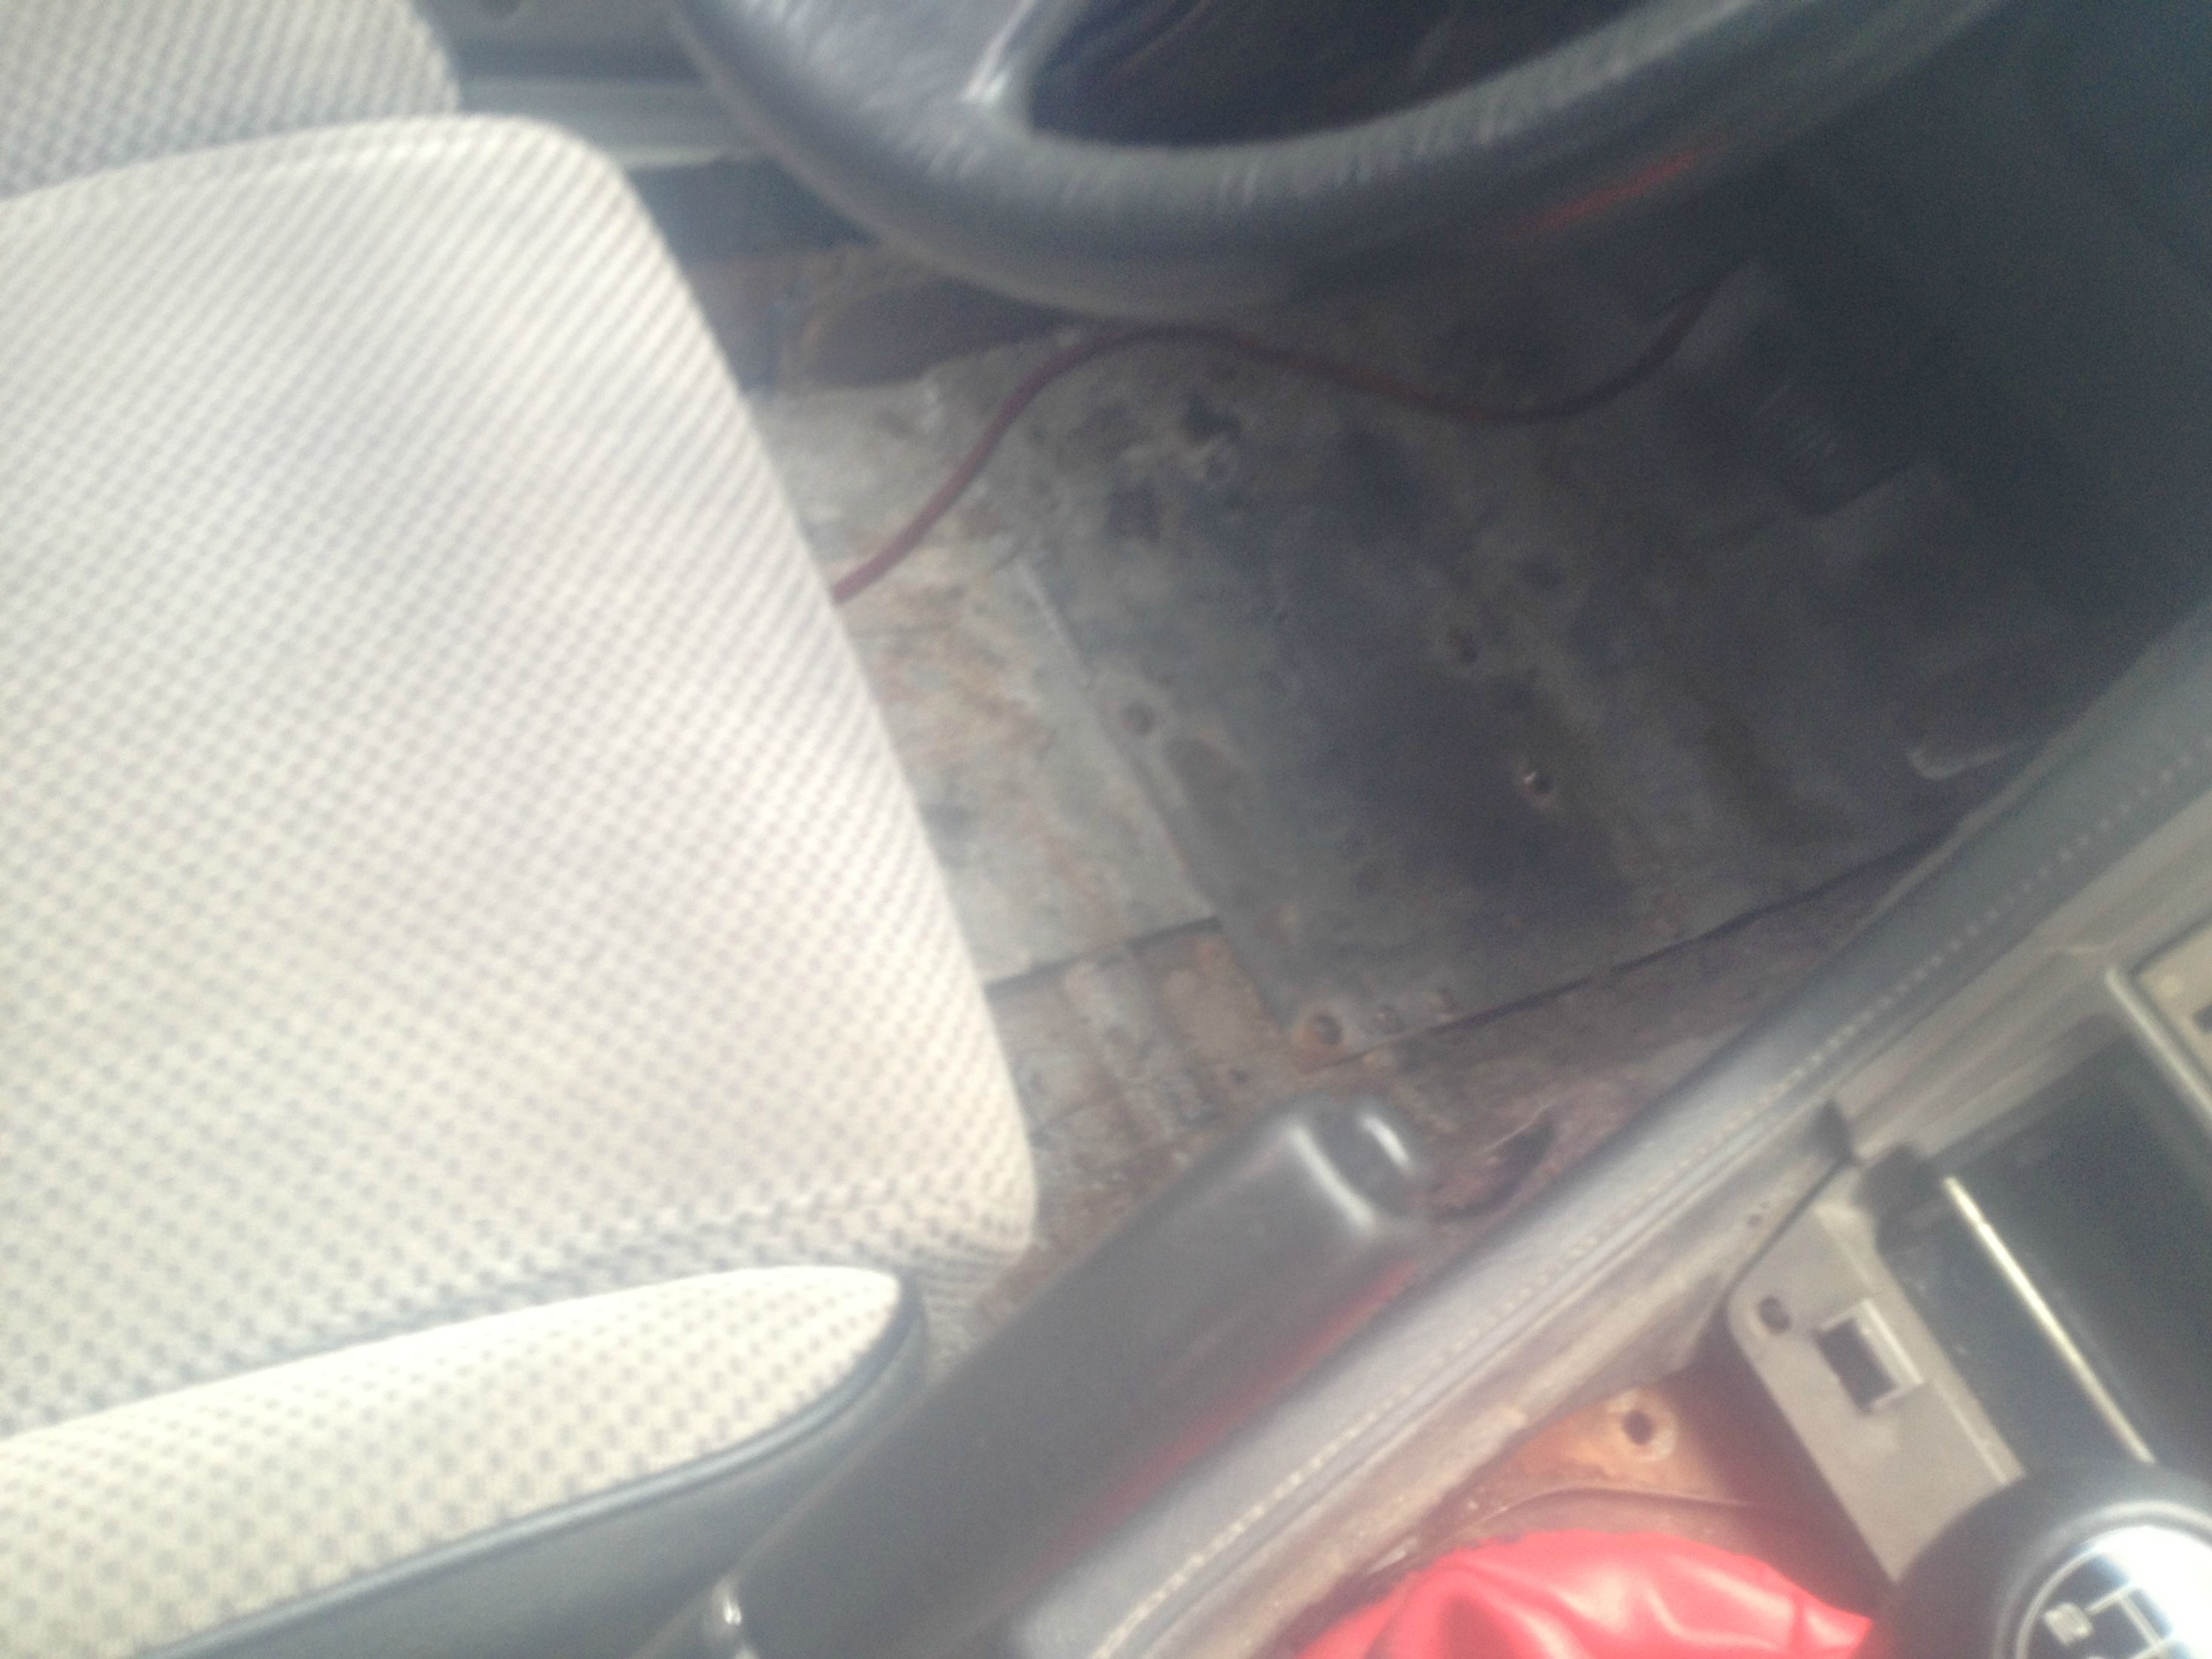

I have to remove all the fibergass covering the rust in the back, and all the �repairs� the previous owner did, then i'll sandblast the whole interior and rebuild floors with 14ga sheet metal. I then need to remove the differential to have a better access to fix the whole rear end, and i'll probably sandblast the differential and paint it at the same time.
As i said, alot of work is gonna go on that little car, but i've wanted one since i'm little and we've got all the equipment needed at shop to do so (MIG, TIG, Plasma torch, brake to bend, sheer to cut, ironworker, a car lift, sandblast etc). I'll post pictures all along the project advance! Alot of people would tell me to just find another body, but they are almost non-existant here in Quebec, there's no scrapyard with RX7 anywhere, and peoples with parts know they are rare so they charge stupid prices (like 500$ for a hood), so i'm really better off rebuilding everything myself. And the satisfaction when everything will be done will just be better!
Any advices/suggestions/comments are welcome!
Wow! Super beau projet! Mon premier amour �tais un Fb 1984 GSL-SE! J'ai maintenant une FD
Si jamais tu te tanne de ce projet, envoie moi un message car j'aimerais bien poursuivre ton projet
Si jamais tu te tanne de ce projet, envoie moi un message car j'aimerais bien poursuivre ton projet
Thread Starter
Joined: Jun 2014
Posts: 223
Likes: 26
From: Montreal, Canada
Merci beaucoup, mais je ne crois pas me tanner du projet :P A toute les fois que je travaille sur le char c'est un plaisir! Je viens d'aller brancher ma switch pour la pompe a gas, pis m�me si il mouille dehors, j'�tais content de pouvoir gosser sur mon char!
P.S. Are we allowed to speak another language than english on the forum? I know that some forums have a strict policy on language, i checked the rules and nothing is specified, so i just want to make sure it's ok...
P.S. Are we allowed to speak another language than english on the forum? I know that some forums have a strict policy on language, i checked the rules and nothing is specified, so i just want to make sure it's ok...
Thread Starter
Joined: Jun 2014
Posts: 223
Likes: 26
From: Montreal, Canada
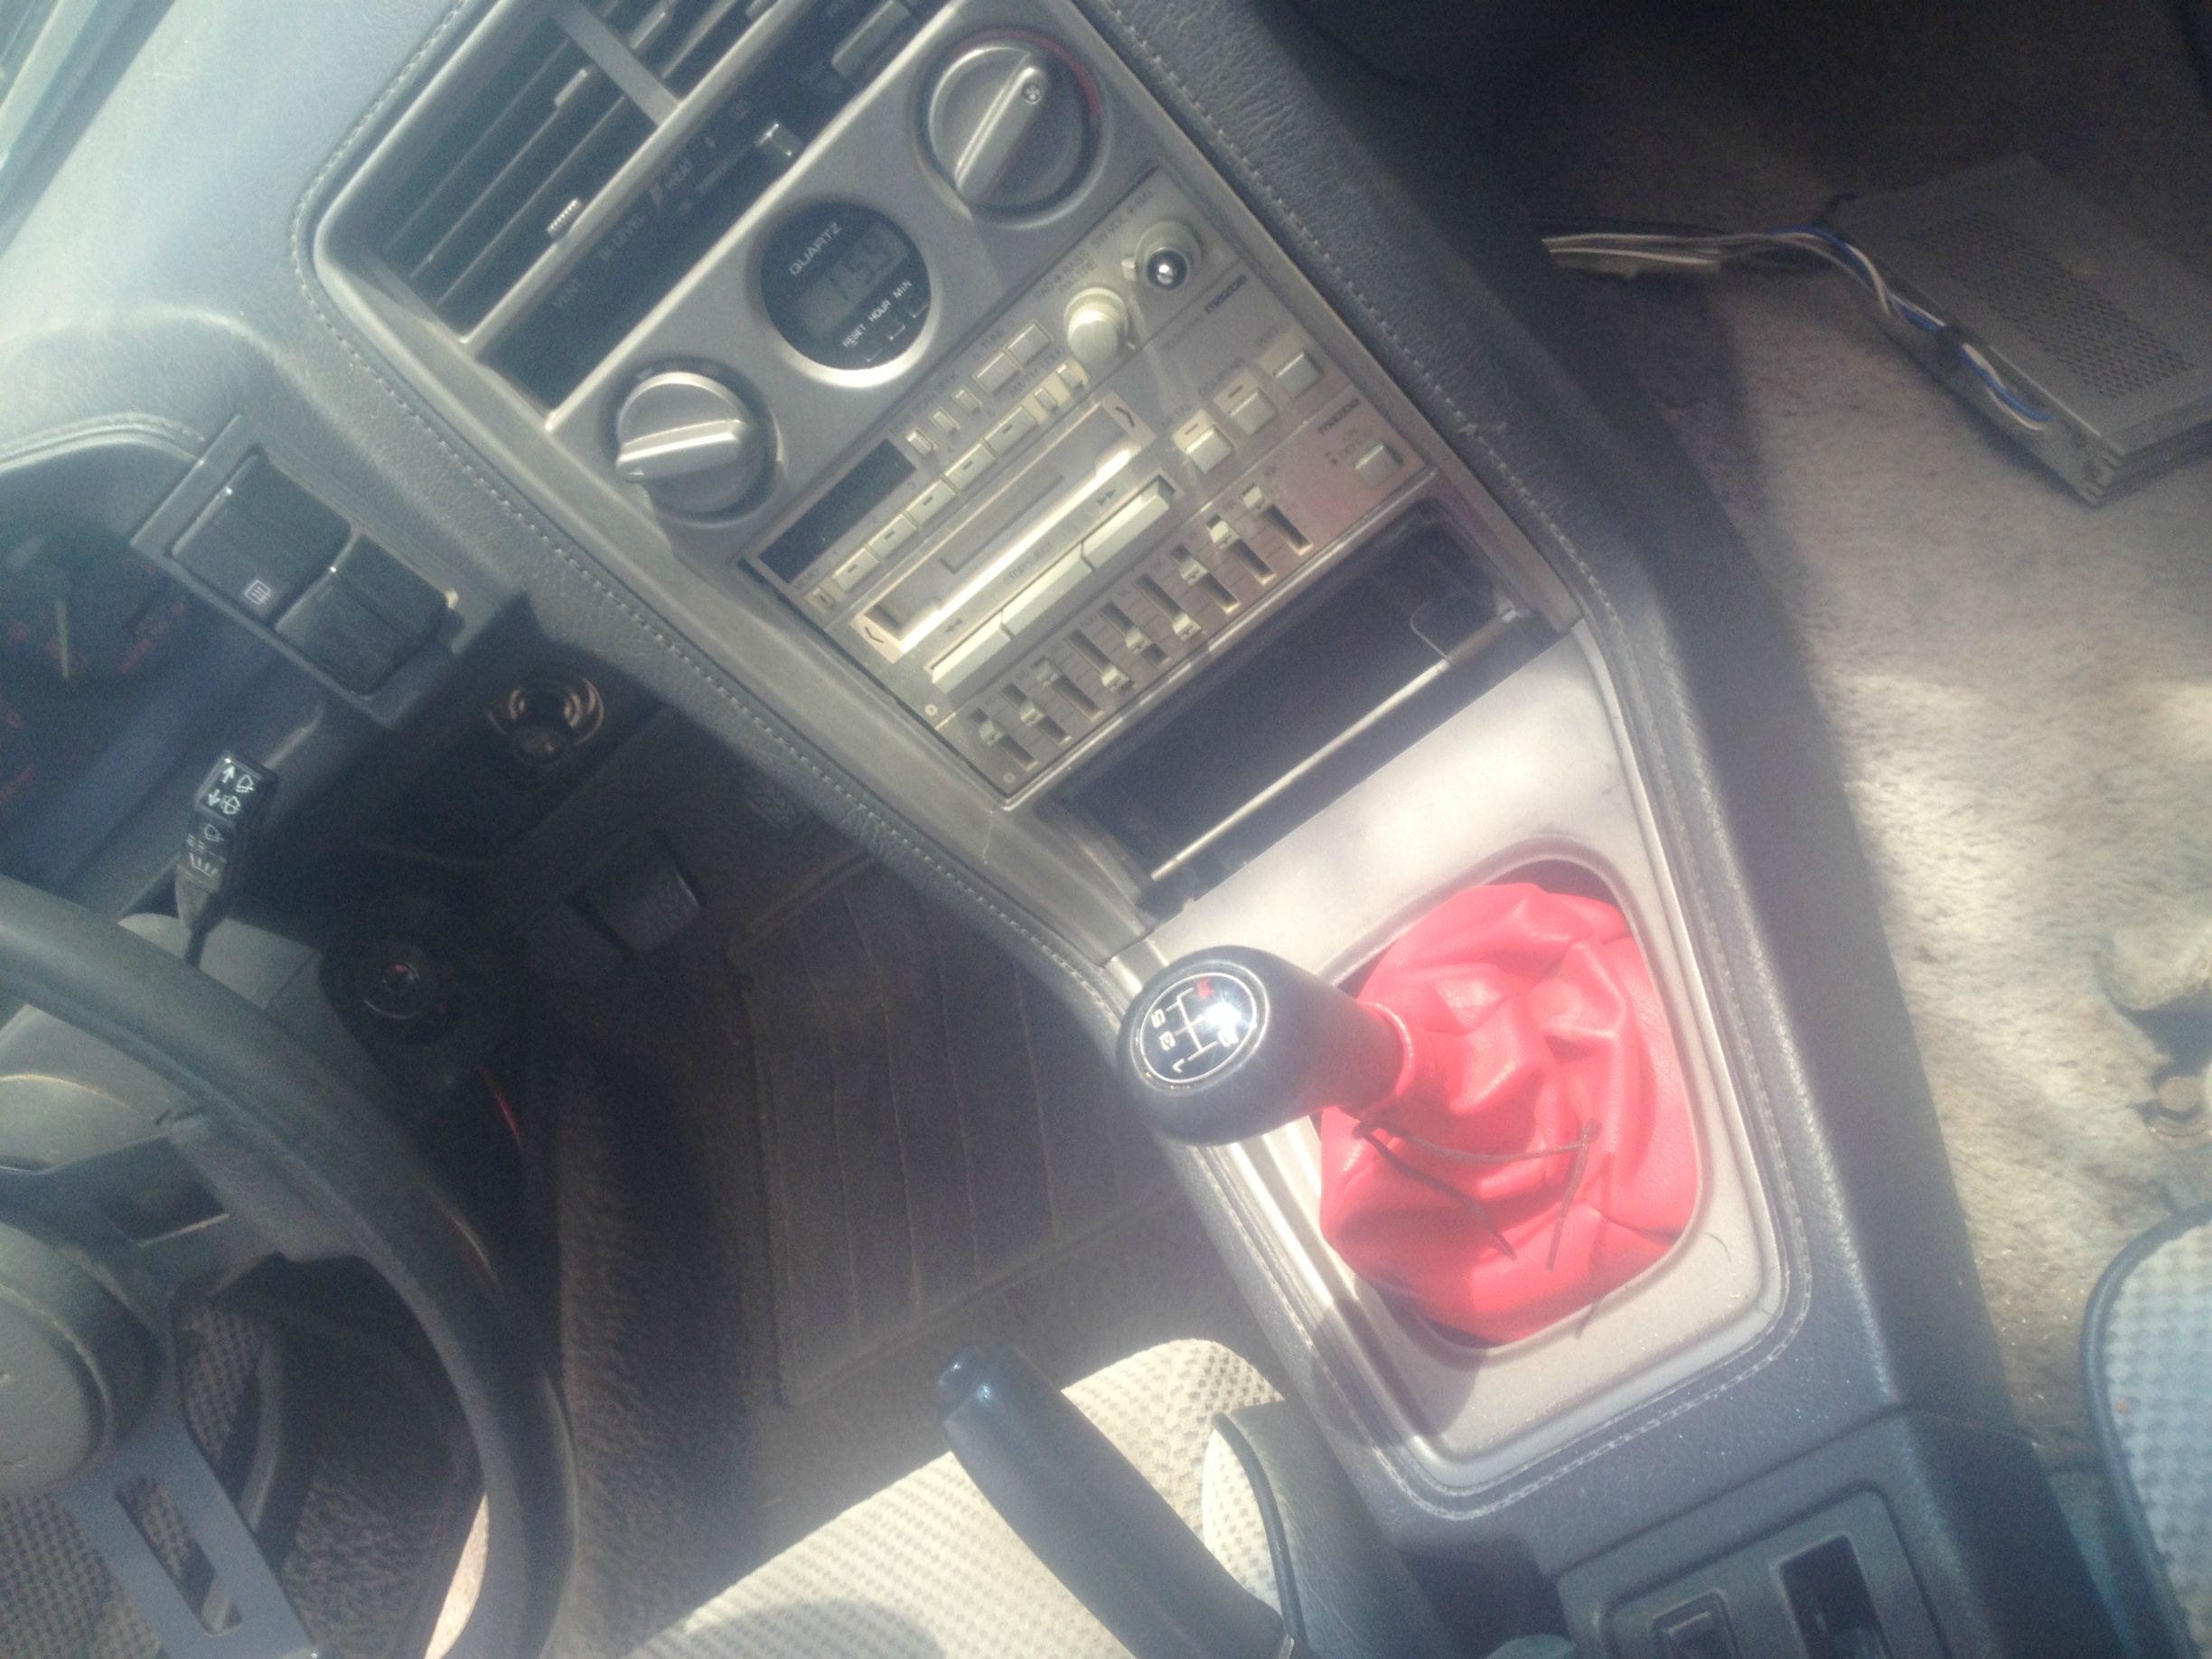
I just finished installing my fuel pump switch on the car, much better than having to twist wires everytime i wanted to run the car :p
I decided to install it so it looks like to be part of the car, not something added. I was planning on installing a black switch to match my dash, but the one i had turned out to be defective, so for now i installed a red one. For those who would be interested in doing the same thing, this is what i did :
First i removed the black plastic tab on the dash next to the key ignition and i traced the switch over it, trying to center it as much as possible

This is the switch i was planning on using, but it turned out to be defective... You can get one at any scrapyard, thoses are the generic ones to deactivate remote starters

I then took a drill with a small bit (1/16) and starting drilling around where i traced, until the holes were close enough. Then i just drilled from one hole to another until the hole was made, and i fitted the switch in


And this is the final result (too bad the back switch was defective)

I used a piece of wire with terminals to connect directly to the harness that usually connect to the fuel pump relay, that was defective in my car. This way, if i ever decide to change the relay and make the pump work like supposed to, i won't have to cut any wires!
P.S. i switched from big images to small thumbnail ones since the post was getting long already, even if there was only 3 posts. I can't seems to edit my first 2 posts, but for now on i'll use this format, much easier to read!
I decided to install it so it looks like to be part of the car, not something added. I was planning on installing a black switch to match my dash, but the one i had turned out to be defective, so for now i installed a red one. For those who would be interested in doing the same thing, this is what i did :
First i removed the black plastic tab on the dash next to the key ignition and i traced the switch over it, trying to center it as much as possible
This is the switch i was planning on using, but it turned out to be defective... You can get one at any scrapyard, thoses are the generic ones to deactivate remote starters
I then took a drill with a small bit (1/16) and starting drilling around where i traced, until the holes were close enough. Then i just drilled from one hole to another until the hole was made, and i fitted the switch in
And this is the final result (too bad the back switch was defective)
I used a piece of wire with terminals to connect directly to the harness that usually connect to the fuel pump relay, that was defective in my car. This way, if i ever decide to change the relay and make the pump work like supposed to, i won't have to cut any wires!
P.S. i switched from big images to small thumbnail ones since the post was getting long already, even if there was only 3 posts. I can't seems to edit my first 2 posts, but for now on i'll use this format, much easier to read!


Thread Starter
Joined: Jun 2014
Posts: 223
Likes: 26
From: Montreal, Canada
Thanks! I think the rust is worst here in Quebec with our god damn winter and all the salt they put on the road! I'm pretty sure the last owner was riding it all year long, but i don't plan on using it at all during the winter... After all, that's why my RAV4 is made for! Great in the winter, but soooo boring in the summer...
Trending Topics
Joined: Sep 2005
Posts: 25,581
Likes: 136
From: Smiths Falls.(near Ottawa!.Mapquest IT!)
Check the CDN FS section.
there is a guy named RTRY PWR that has a cheap FB with good parts on it.It actually looks your color.
By the way my last name is French,although I do not really speak the language.
My dog is more French than me..( well looks like a French Poodle...chuckle!) and I have been trying to get him to be Bilingual.
He just can't say MEOW though..hahha!
Welcome to the Forum.You missed a great Ottawa meet!
Last edited by misterstyx69; Jun 24, 2014 at 10:37 PM.
Thread Starter
Joined: Jun 2014
Posts: 223
Likes: 26
From: Montreal, Canada
Some more work done! Yesterday, i cutted the old air filter housing and made plate to adapt a new one. This was hell! Even if i'm an experiented welder, the metal on the old housing is just too thin! Even with the Millermatic set to 15.0v and 88 wire, it was still to hot! Anyway after 40 minutes, everything was done and ready for paint. I'll post pictures later of the whole thing, including once installed.
I then proceeded to remove the rats nest. Most of it was done yesterday, looks alot cleaner! Today i made some block plates out of 1/8 aluminum plates, that i plasma cutted. I'm going to install them tonight, and post all the pictures at the same time!
Next step after that will be to flush and change all liquids. I'm also waiting for a new master cylinder to arrive, since mine is loosing pressure, so brakes are really bad...
Thread Starter
Joined: Jun 2014
Posts: 223
Likes: 26
From: Montreal, Canada
Sorry for the delay in posting pictures, i've had a crazy weekend so far! Helped a friend doing his roofing yesterday, i now look like a boiling lobster! 
So here are the pictures of the carburetor housing before i cutted it (thanks to the last owner for making such a mess out of it!)

I then proceeded to cut the part i needed with the plasma cutter

Once cutted, i checked with the new filter housing, and made an adaptive plate with some 16ga plate we had laying around at the shop. Again, i cutted everything with the plasma cutter


Welding was a bitch! The material used on the original housing is so thin, even the lowest setting on the millermatic would burn thru it in an instant. As you can see in the pictures, the welds are not perfect, but it'll have to do for now.
I then took the original holding bold and welded a rod on it so it would allow me to screw the new filter housing on


And here is the final result, installed on the car, after i painted the new housing in flat black paint

I still have to cut the rod a little smaller, since it sticks out too much for my liking, and i want to change the bolt with a butterfly one so it's quicker to remove the filter and work on things
So here are the pictures of the carburetor housing before i cutted it (thanks to the last owner for making such a mess out of it!)
I then proceeded to cut the part i needed with the plasma cutter
Once cutted, i checked with the new filter housing, and made an adaptive plate with some 16ga plate we had laying around at the shop. Again, i cutted everything with the plasma cutter
Welding was a bitch! The material used on the original housing is so thin, even the lowest setting on the millermatic would burn thru it in an instant. As you can see in the pictures, the welds are not perfect, but it'll have to do for now.
I then took the original holding bold and welded a rod on it so it would allow me to screw the new filter housing on
And here is the final result, installed on the car, after i painted the new housing in flat black paint
I still have to cut the rod a little smaller, since it sticks out too much for my liking, and i want to change the bolt with a butterfly one so it's quicker to remove the filter and work on things
Thread Starter
Joined: Jun 2014
Posts: 223
Likes: 26
From: Montreal, Canada
Here are the pictures of the block plates i mades since i removed the rats nest


They are not as smooth as i would've loved to, but i had little time left to make them (i had to cut them, drill and clean in my 15min afternoon break since i took all my lunch time doing the air filter housing). They do fit perfectly, and works great! I made them out of some 1/8 aluminium plate we had laying around at shop. I'm still happy with the end result, for 15min of time and not a penny spent!
They are not as smooth as i would've loved to, but i had little time left to make them (i had to cut them, drill and clean in my 15min afternoon break since i took all my lunch time doing the air filter housing). They do fit perfectly, and works great! I made them out of some 1/8 aluminium plate we had laying around at shop. I'm still happy with the end result, for 15min of time and not a penny spent!
Thread Starter
Joined: Jun 2014
Posts: 223
Likes: 26
From: Montreal, Canada
Some more work done today! Finished removing all the emission crap that was left, now i have a nice clean carburetor! I'm pretty sure i still have some vac leak, since i can't get the thing to idle under 900rpm, and even at 900 i have a throttle lag. I'm going to plate the car tomorrow (last day on transit), and once it's on the lift at shop, i'll order a new kit of gasket, since my leak seems to be coming from the carb to intake joint.

Thread Starter
Joined: Jun 2014
Posts: 223
Likes: 26
From: Montreal, Canada
Thread Starter
Joined: Jun 2014
Posts: 223
Likes: 26
From: Montreal, Canada
Found some descent RX8 seats, leather black and red, spoke to the seller and i'm having a real good price! Might just pick them up in the weekend! Anyone interested in some rear seat for RX8? The seller don't want to sell only front ones, so i'll be stuck with thoses too...
Thread Starter
Joined: Jun 2014
Posts: 223
Likes: 26
From: Montreal, Canada
No news from the seller for the RX8 seats... That sucks but who knows, maybe he'll answer later!
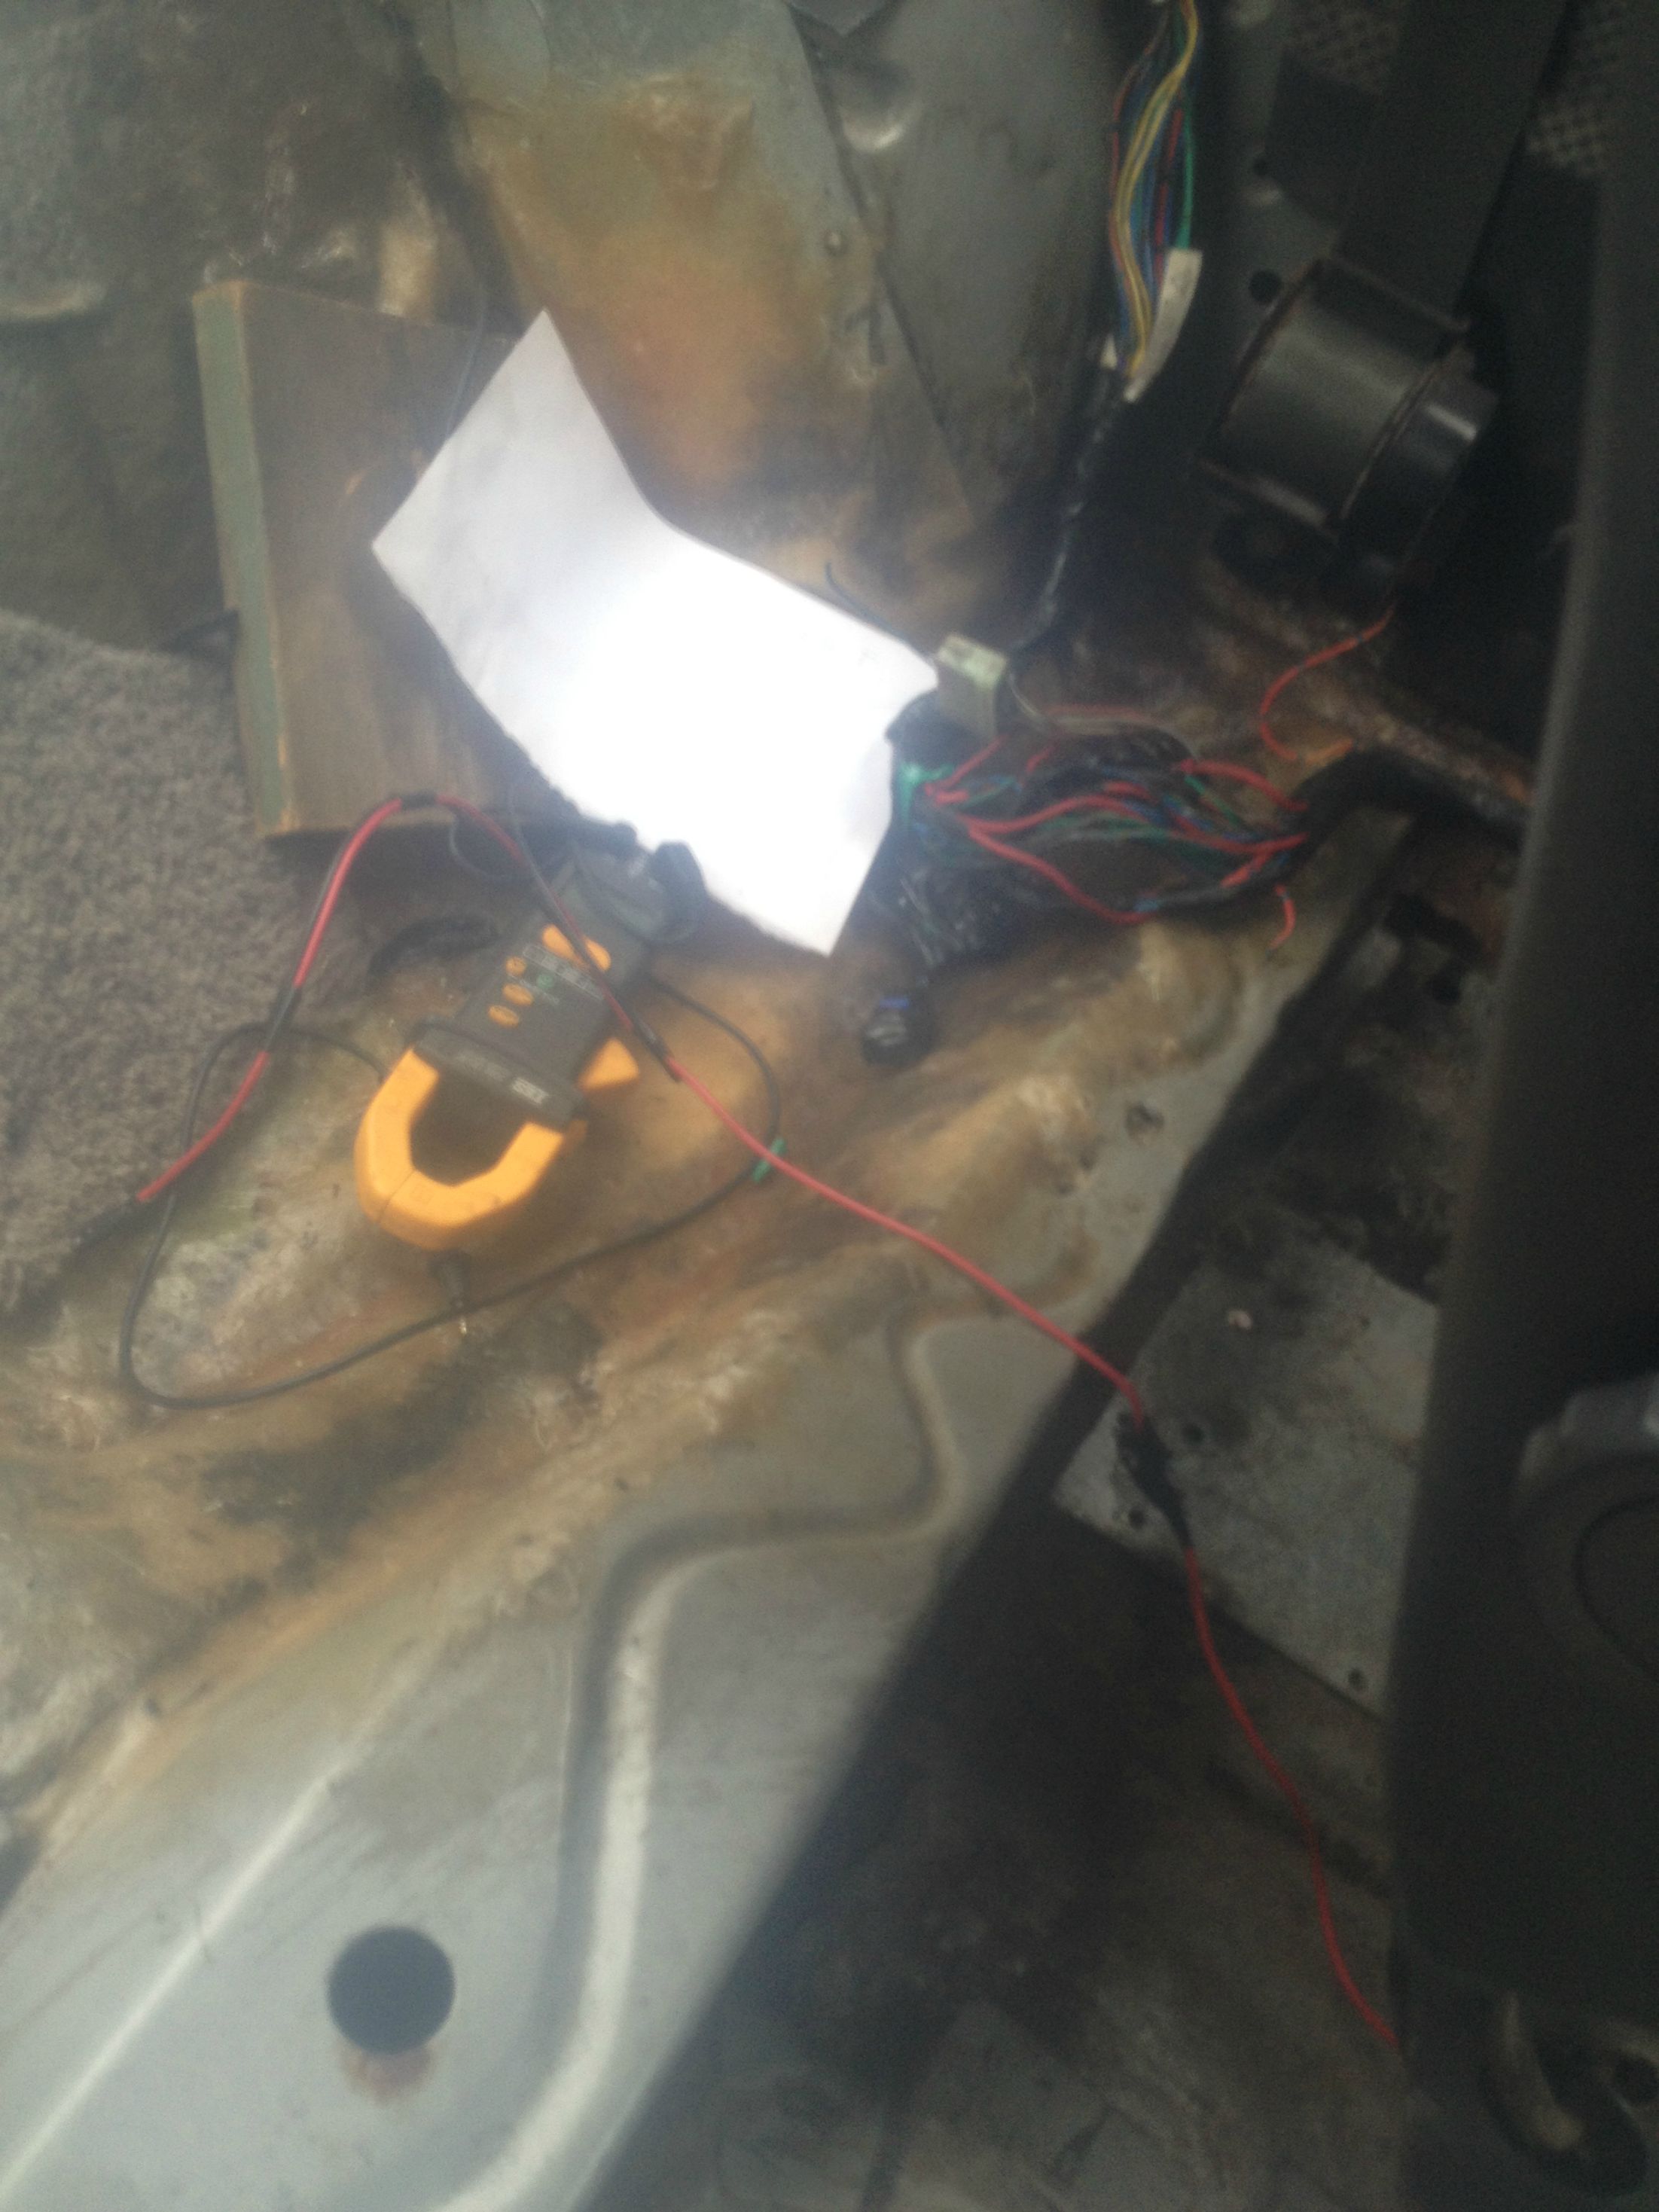
I ended up receiving my brake master cylinder on friday, and just finished installing it. But now my starter only does a clicking sound, and the battery is good. I read that the oem cables are prone to corrosion and does that alot, so i'll remove the starter to test it on the bench, if it works i'll just replace the wiring with some 1/0ga i have laying around.
On a positive note, i picked up a radiator from a Kia Sportage at the scrap yard, with dimensions similar to the RX7 one, the only downside is that the bottom hose is not on the correct side, so i'll have to install a longer hose to fit it. It's a 2 row, aluminum radiator, and should provide more than enough cooling. I traded it for a civic one i had laying around, so total cost was 0$. I also grabbed a windshield washer bottle with pump from the Sportage, that i will fit in place of the cracked one that came with the car, and i only paid 10$ with the pump, float and wiring.
I know that most of you must be thinking : why the hell won't he just put RX7 parts?!?! Well like i said in my first post, there is absolutely NO RX7 at any scrapyards around here, and if you try to buy parts from JDM dealers in Montreal, they will make sure you pay top $$$$. The cheapest radiator i found was 200$ used, and the cheapest windshield washer bottle i found was 100$. It's alot easier and satisfying for me to just retrofit parts that are readily available (lots of sportage at the scrap yards), and the 2 core aluminum radiator will be way better than the oem one anyway!
Pics to follow soon!
Thread Starter
Joined: Jun 2014
Posts: 223
Likes: 26
From: Montreal, Canada
So today, i removed the starter to test it on the bench, and sure enough it was good. Solenoid looked like it was almost brand new, so i guess one of the previous owners changed it.
The wiring was corroded everywhere! I had about 300ohm resistance from battery negative to engine bloc, and about 120ohm resistance from battery positive to starter!! No wonders the starter didn't wanted to start! After changing OEM wiring with copper 1/0ga wires, the car started right up, crinked like never before, and now starts faster than ever! There was a wire going from the starter positive to some random wire on the OEM harness, was pretty corroded too so i made a new one with some 12ga wire
Here are some pics of the OEM cables VS the new ones i made :


I recommend this mod to everybody!
The wiring was corroded everywhere! I had about 300ohm resistance from battery negative to engine bloc, and about 120ohm resistance from battery positive to starter!! No wonders the starter didn't wanted to start! After changing OEM wiring with copper 1/0ga wires, the car started right up, crinked like never before, and now starts faster than ever! There was a wire going from the starter positive to some random wire on the OEM harness, was pretty corroded too so i made a new one with some 12ga wire
Here are some pics of the OEM cables VS the new ones i made :
I recommend this mod to everybody!

Thread Starter
Joined: Jun 2014
Posts: 223
Likes: 26
From: Montreal, Canada
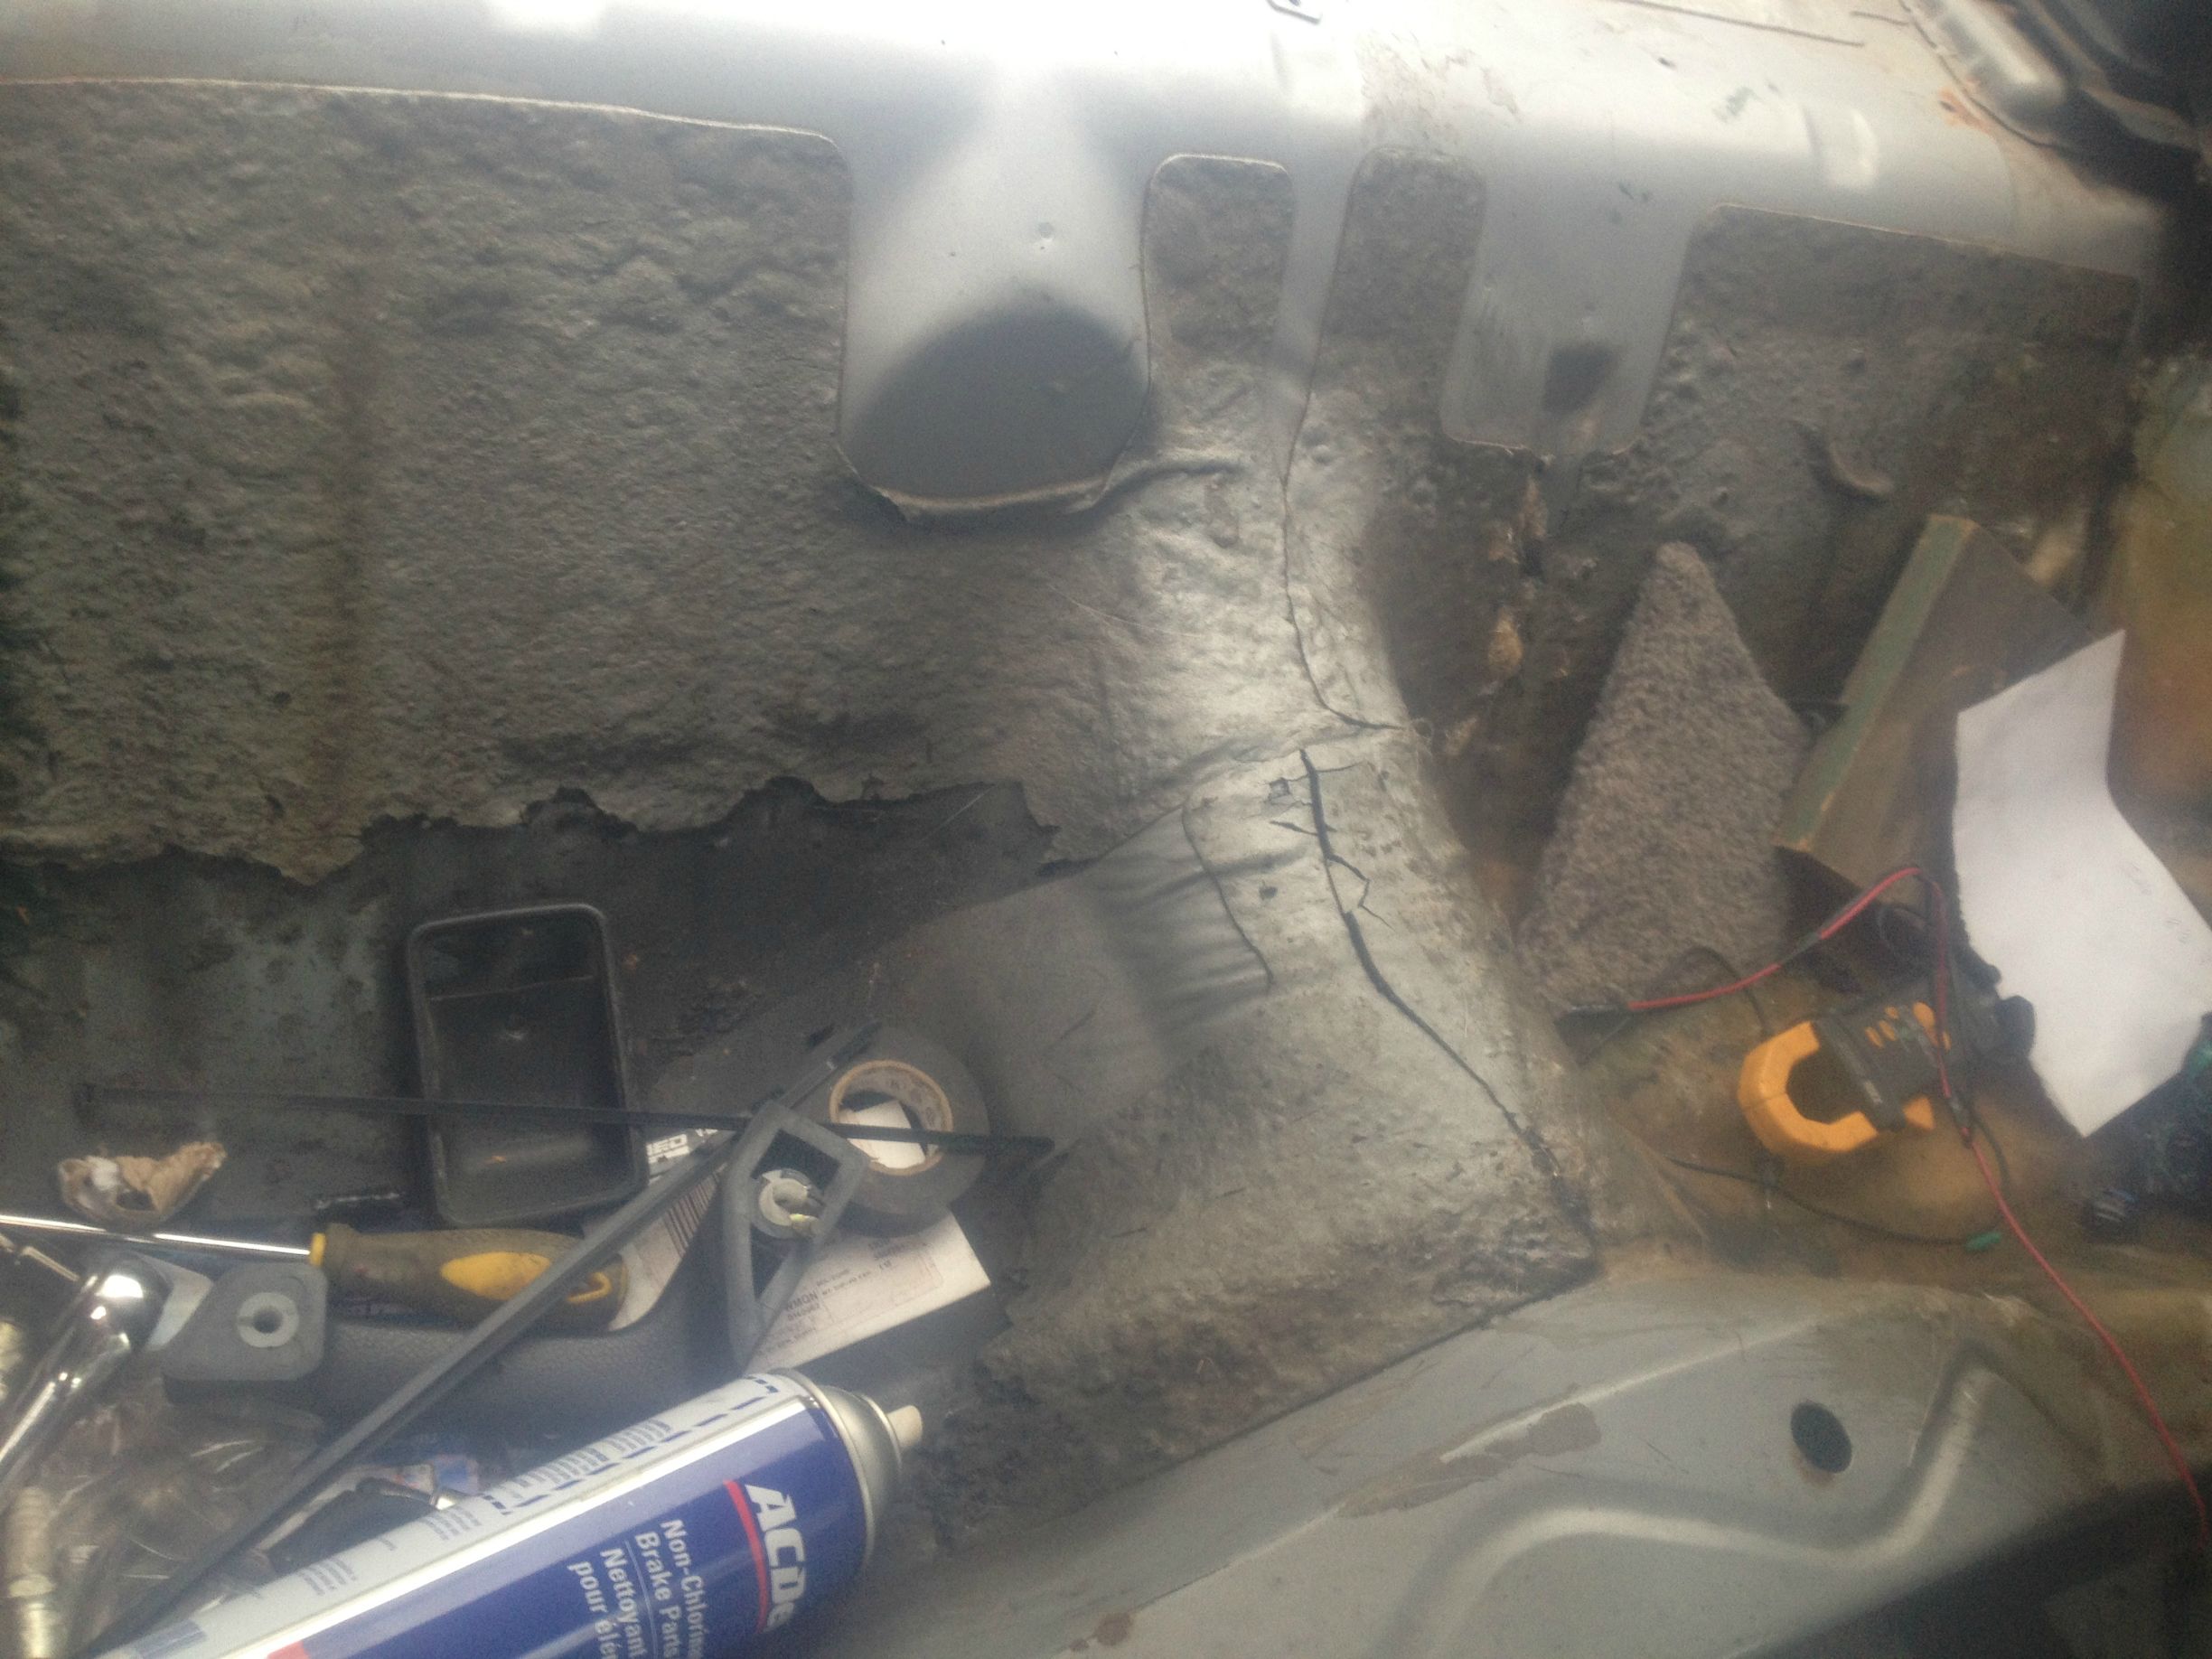
Today, i brought the car to the shop where i work to start working more seriously on it. Let me tell you, the trip there was hell! Thanks god i was prepared for anything and i decided to leave an hour early! First of all, not even 10 minutes after i left home, the car started overheating... Nothing big but i decided to stop on the side of the road for a few minutes to let everything cool down... Then after 5 more minutes it overheated again.... I decided to remove the thermostat since my upper hose had alot of pression in it. Sure enough, after removing the two 12mm bolts and letting all the prestone leak and boil everywhere, i see the thermostat, stuck closed, and i proceed to remove it. Since i was prepared for everything, i brought a gallon of pure prestone that i put back in the radiator. Overheating problem solved, there comes another problem just before i hit the highway : The car just stalls on its own. I listen, and can't hear my fuel pump no more. I checked where i hooked my fuel pump switch, and sure enough, one of the connector fell off. Once i fixed this, the rest of the ride went well, and here she is, now in the shop!

The first project i wanted to get done was the radiator, but since i'm missing my new lower hose, i decided to wait until tomorrow. So i made some modification to the original windshield washer bottle bracket to accomodate the new one.


Testing and fine tuning before painting

Painting in flat black

The bracket painted and installed


Tomorrow i'm gonna wire everything up and do a test to see if everything is working good, then i'm attacking the new radiator installation, since the original one is in more than bad shape... I still have to find a place to buy some dry ice to remove all the sound deadener material on the floors to really be able to start fixing all the rust and bad spots
The first project i wanted to get done was the radiator, but since i'm missing my new lower hose, i decided to wait until tomorrow. So i made some modification to the original windshield washer bottle bracket to accomodate the new one.
Testing and fine tuning before painting
Painting in flat black
The bracket painted and installed
Tomorrow i'm gonna wire everything up and do a test to see if everything is working good, then i'm attacking the new radiator installation, since the original one is in more than bad shape... I still have to find a place to buy some dry ice to remove all the sound deadener material on the floors to really be able to start fixing all the rust and bad spots
Thread Starter
Joined: Jun 2014
Posts: 223
Likes: 26
From: Montreal, Canada
Sorry for the lack of updates, my daily driver's fuel filler neck broke this week, so i had to fix it before working on the RX...
I finally removed the old radiator. It was even worst than what i could see... No wonders the poor engine was overheating... The radiator steel mount will need some work, as it is rusted from lots of spots

Here is a shot of the old radiator (sorry, i don't know why but my cell is taking such bad pictures when it's dark)

The new one

Only problem is, the new one's lower connection is on the other side, and there is no places to connect the heater/oil cooler line. I got a Dayco spring loaded hose to fix the side problem, but i still had to do something about the other line. The original nipple on the radiator is brass, so no way to reuse it. Instead, i took one from an old F150 power steering pump, that was steel, and i modified the original water pump housing to accomodate it.

I asked my friend and coworker Matthew to TIG weld everything in place, since he's an expert in TIG, and i honestly sucks at it!

Final result after welding is pretty good!

Just to make sure, i then applied some JB Weld High Heat over the weld

I was getting ready to reinstall everything, just to realise there was no more Right Stuff gasket maker at shop... Oh well, i'll just reinstall everything monday morning! Once the new radiator is in, i'll have to really clean the engine bay and the actual engine, i don't know what the last owner did in this but there is a mix of old oil/prestone/sludge everywhere, and i really don't like it!
I finally removed the old radiator. It was even worst than what i could see... No wonders the poor engine was overheating... The radiator steel mount will need some work, as it is rusted from lots of spots
Here is a shot of the old radiator (sorry, i don't know why but my cell is taking such bad pictures when it's dark)
The new one
Only problem is, the new one's lower connection is on the other side, and there is no places to connect the heater/oil cooler line. I got a Dayco spring loaded hose to fix the side problem, but i still had to do something about the other line. The original nipple on the radiator is brass, so no way to reuse it. Instead, i took one from an old F150 power steering pump, that was steel, and i modified the original water pump housing to accomodate it.
I asked my friend and coworker Matthew to TIG weld everything in place, since he's an expert in TIG, and i honestly sucks at it!
Final result after welding is pretty good!
Just to make sure, i then applied some JB Weld High Heat over the weld
I was getting ready to reinstall everything, just to realise there was no more Right Stuff gasket maker at shop...
Oh well, i'll just reinstall everything monday morning! Once the new radiator is in, i'll have to really clean the engine bay and the actual engine, i don't know what the last owner did in this but there is a mix of old oil/prestone/sludge everywhere, and i really don't like it!
Thread Starter
Joined: Jun 2014
Posts: 223
Likes: 26
From: Montreal, Canada
Just wanted to let everybody know, the Sportage radiator is making an amazing difference! My fan clutch was slipping like crazy, so i welded it and it's working all the time, but even before welding it, temps didn't went higher than 1/3 of the gauge. Fitting wasn't fun, had to weld custom mounts and a custom valve for heater/oil cooler passage, but overall i'm just super happy with it!
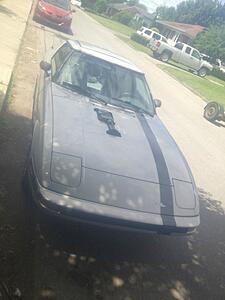
And here in Quebec, it's the 2 week construction vacancy, so i'll be riding the RX alot! I'll post pictures soon, for now i'm going back to enjoying driving the RX
And here in Quebec, it's the 2 week construction vacancy, so i'll be riding the RX alot! I'll post pictures soon, for now i'm going back to enjoying driving the RX
Thread Starter
Joined: Jun 2014
Posts: 223
Likes: 26
From: Montreal, Canada
Today i did an oil change, and damn the old one was nasty! I'm going to do a engine shampoo, then i'll post pictures of all the changes! Since i welded the fan, i'm getting crazy slipping on the belt, and the alternator can't keep up when the lights are on, so i'm now looking for a double pulley, and i'm gonna install a CS130 alternator + electric fan during the week!
Thread Starter
Joined: Jun 2014
Posts: 223
Likes: 26
From: Montreal, Canada
Decided to take 2 minutes and finally post thoses pics :p And i stole the wife's cellphone, much better pics quality :p

The Sportage radiator installed

My new lower hose setup, 25inch Dayco spring loaded hose

The bypass from the water pump housing to the oil/heater circuit

A cleaner view of the new windshield washer bottle installed

After my first engine shampoo (i only had 1/4 can left, so i'll have to do it again soon) but it did some real good!
I'll post more pics as soon as i get my double pulley for the alt and the electric fan hooked up!
The Sportage radiator installed
My new lower hose setup, 25inch Dayco spring loaded hose
The bypass from the water pump housing to the oil/heater circuit
A cleaner view of the new windshield washer bottle installed
After my first engine shampoo (i only had 1/4 can left, so i'll have to do it again soon) but it did some real good!
I'll post more pics as soon as i get my double pulley for the alt and the electric fan hooked up!